> ## Documentation Index
> Fetch the complete documentation index at: https://notes.kodekloud.com/llms.txt
> Use this file to discover all available pages before exploring further.
# Demo Adding Users in Dex
> Guide to add local static users to Dex for Kubeflow by editing the Dex ConfigMap staticPasswords, generating bcrypt password hashes, and restarting Dex for testing authentication.
In this guide we'll show how to add test users to Dex (the OpenID Connect provider deployed with Kubeflow) so you can verify profiles and permissions in Kubeflow. Kubeflow itself does not manage user accounts; authentication is handled by an external identity provider (IDP). For this demo we use the Dex instance already deployed with Kubeflow to create a few static users. This keeps the example self-contained and avoids configuring Google, GitHub, or other third-party providers.
Do not use static passwords or static password configuration in production. This approach is for local testing and demos only.
Prerequisites:
* Kubectl configured for the cluster that hosts Kubeflow (RBAC permissions to view/edit resources in the `auth` namespace).
* A local editor configured for `kubectl edit` or an ability to export and reapply a ConfigMap.
* `htpasswd` (from Apache tools) for generating bcrypt hashes, or another bcrypt tool.
## Overview
High-level steps:
1. Inspect the cluster and locate Dex resources in the `auth` namespace.
2. Export or edit the Dex ConfigMap (`dex`) and find `data.config.yaml`.
3. Generate unique `userID` values and bcrypt password hashes.
4. Add entries under `staticPasswords` and save the ConfigMap.
5. Restart the Dex deployment to pick up changes.
6. Log in via the Kubeflow / Dex page and verify authentication; mapping to Kubeflow profiles (namespaces) is a separate step.
## Inspect the cluster
Use these commands to confirm Dex is running in the `auth` namespace and to export the ConfigMap for editing:
```bash theme={null}
# list namespaces
kubectl get ns
# list all resources in the auth namespace
kubectl get all -n auth
# list config maps in the auth namespace
kubectl get cm -n auth
# export the Dex ConfigMap to a file
kubectl get cm dex -n auth -o yaml > dex.yaml
```
Useful kubectl commands (quick reference):
| Command | Purpose |
| -: | - |
| `kubectl get all -n auth` | Show pods, services, deployments in the `auth` namespace |
| `kubectl get cm dex -n auth -o yaml` | Export the Dex ConfigMap as YAML |
| `kubectl edit cm dex -n auth` | Edit the Dex ConfigMap in your default editor |
| `kubectl rollout restart deployment/dex -n auth` | Restart Dex to pick up ConfigMap changes |
| `kubectl rollout status deployment/dex -n auth` | Watch restart progress |
A trimmed example of `kubectl get all -n auth` (illustrative):
```bash theme={null}
NAME READY STATUS RESTARTS AGE
pod/dex-645bd8ffb-xf8vw 1/1 Running 1 6m
NAME TYPE CLUSTER-IP PORT(S) AGE
service/dex ClusterIP 10.96.246.61 5556/TCP 6m
NAME READY UP-TO-DATE AVAILABLE AGE
deployment.apps/dex 1/1 1 1 6m
```
## Locate the Dex configuration
Open the exported `dex.yaml` or view the `data.config.yaml` field from the ConfigMap. The Dex configuration is embedded at `data.config.yaml`. Dex supports a `staticPasswords` section you can populate with local users. Example excerpt:
```yaml theme={null}
# inside dex ConfigMap -> data.config.yaml
issuer: http://dex.auth.svc.cluster.local:5556/dex
storage:
type: kubernetes
config:
inCluster: true
web:
http: 0.0.0.0:5556
logger:
level: "debug"
format: text
oauth2:
skipApprovalScreen: true
enablePasswordDB: true
staticPasswords:
- email: user@example.com
hashFromEnv: DEX_USER_PASSWORD
username: user
userID: "15841185641784"
staticClients:
# https://github.com/dexidp/dex/pull/1664
- idEnv: OIDC_CLIENT_ID
redirectURIs: ["/oauth2/callback"]
name: 'Dex Login Application'
secretEnv: OIDC_CLIENT_SECRET
```
## Add static users
Each entry under `staticPasswords` should include the following required fields:
| Field | Description |
| - | - |
| `email` | User email address (used during login) |
| `username` | A short username for display/identification |
| `userID` | A unique string identifying the user (wrap in quotes) |
| `hash` or `hashFromEnv` | A bcrypt hash of the user's password, or an env var reference |
Generate a unique `userID` (you can use a timestamp or UUID). Example (timestamp):
```bash theme={null}
# generate a high-resolution timestamp to use as a userID
date +%s%N
# example output:
# 1769061201674451000
```
Generate a bcrypt password hash. On Debian/Ubuntu install the Apache utilities (provides `htpasswd`):
```bash theme={null}
sudo apt-get update
sudo apt-get install -y apache2-utils
```
On macOS with Homebrew install the Apache httpd package:
```bash theme={null}
brew install httpd
```
Create a bcrypt hash for the password (replace `password123` with your desired password):
```bash theme={null}
# generate bcrypt hash for password 'password123'
htpasswd -bnBC 10 "" 'password123' | tr -d ':\n'
# example output (bcrypt hash):
# $2y$10$U3vIjksn8VwcPqW7k0wFfuLr0TijDRfvNCXAAPy2wk.VNXuCqwLWa
```
Note: The `htpasswd` command prints a leading colon; `tr -d ':\n'` removes that and the newline so you get only the hash.
### Edit the Dex ConfigMap
You can edit the ConfigMap directly:
```bash theme={null}
kubectl edit cm dex -n auth
```
Under `data.config.yaml` → `staticPasswords`, add your entries using the bcrypt hashes and userIDs generated above. Example:
```yaml theme={null}
staticPasswords:
- email: user@example.com
hashFromEnv: DEX_USER_PASSWORD
username: user
userID: "15841185641784"
- email: john@example.com
hash: $2y$10$U3vIjksn8VwcPqW7k0wFfuLr0TijDRfvNCXAAPy2wk.VNXuCqwLWa
username: john
userID: "1769061047101563000"
- email: mark@example.com
hash: $2y$10$U3vIjksn8VwcPqW7k0wFfuLr0TijDRfvNCXAAPy2wk.VNXuCqwLWa
username: mark
userID: "1769061201674451000"
```
Save and exit your editor.
## Apply changes: restart Dex
After editing the ConfigMap, restart the Dex deployment so the running pod will mount the new configuration:
```bash theme={null}
kubectl rollout restart deployment/dex -n auth
# optionally watch rollout status
kubectl rollout status deployment/dex -n auth
```
## Log in via Kubeflow / Dex
After Dex restarts, open the Kubeflow login page (the cluster's Kubeflow address) and sign in using one of the new accounts. Example credentials used in this demo:
* Email: `john@example.com`
* Password: `password123`
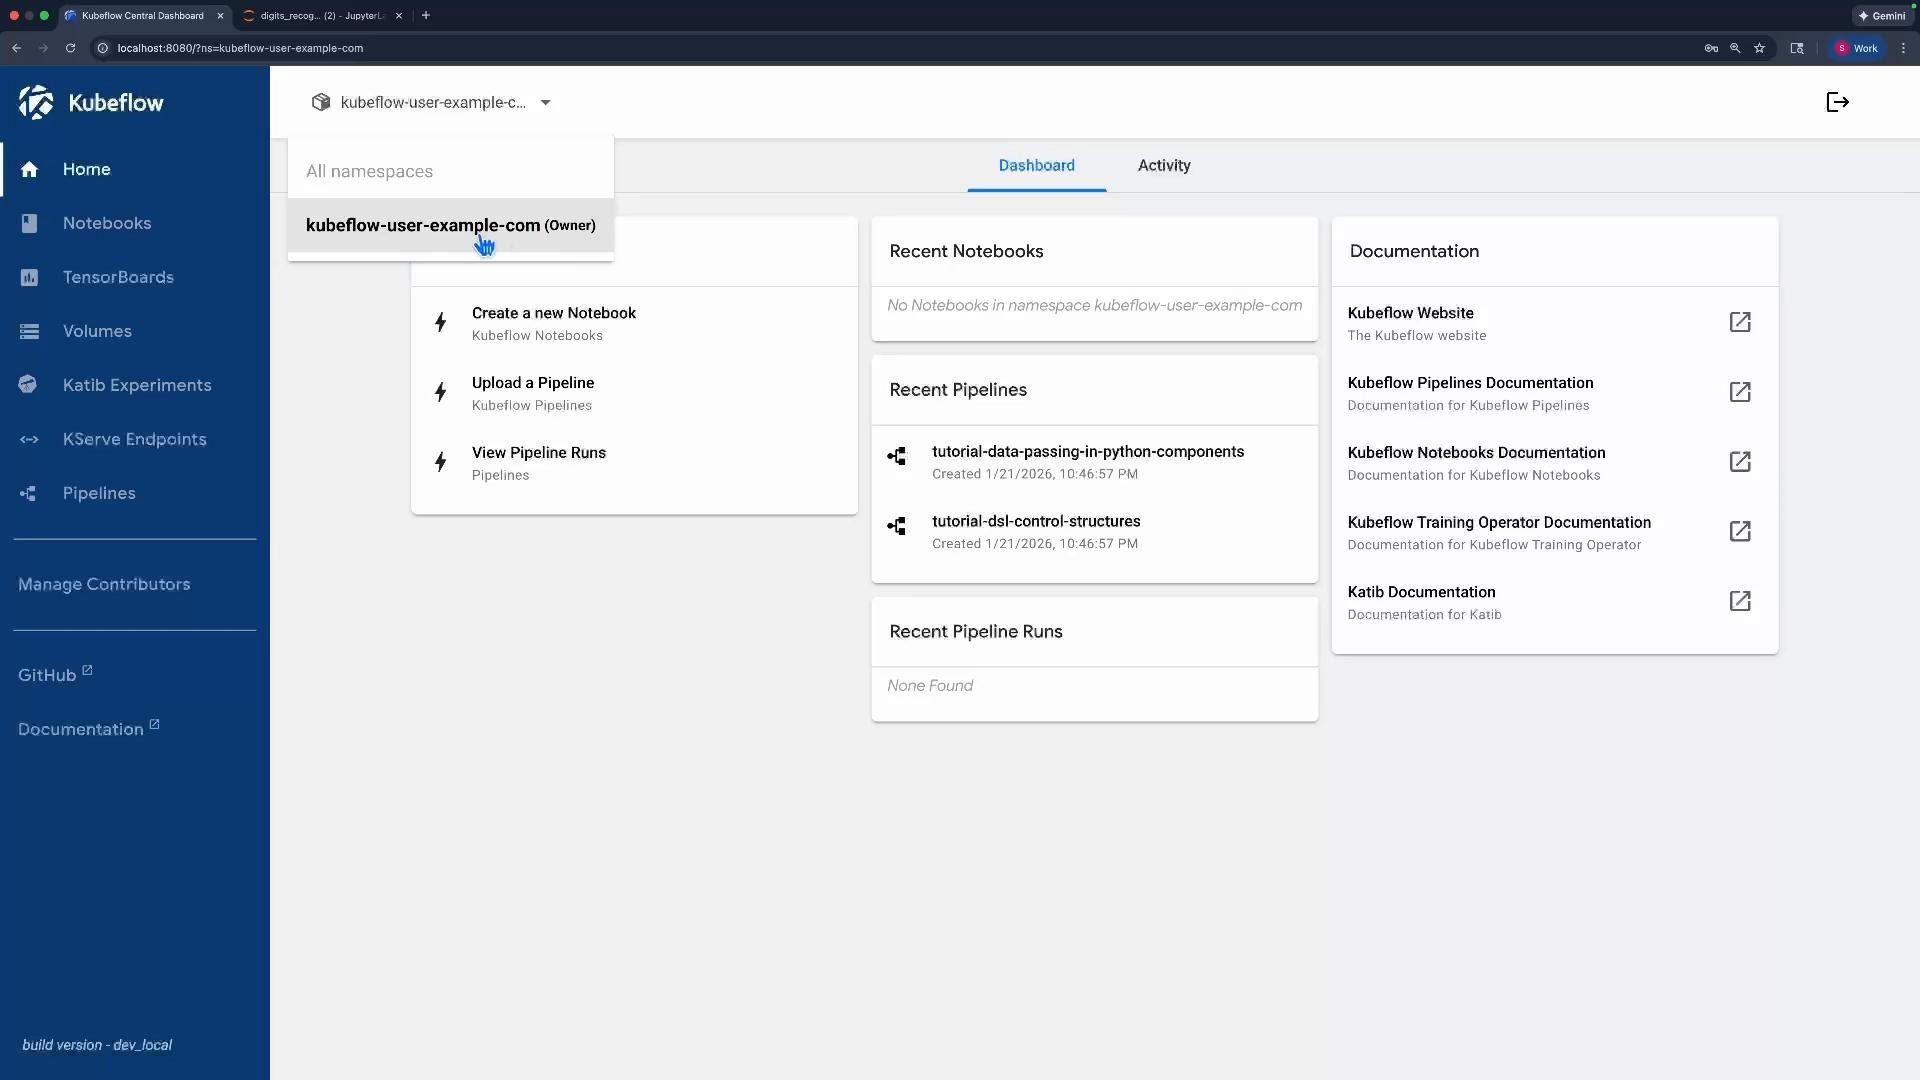
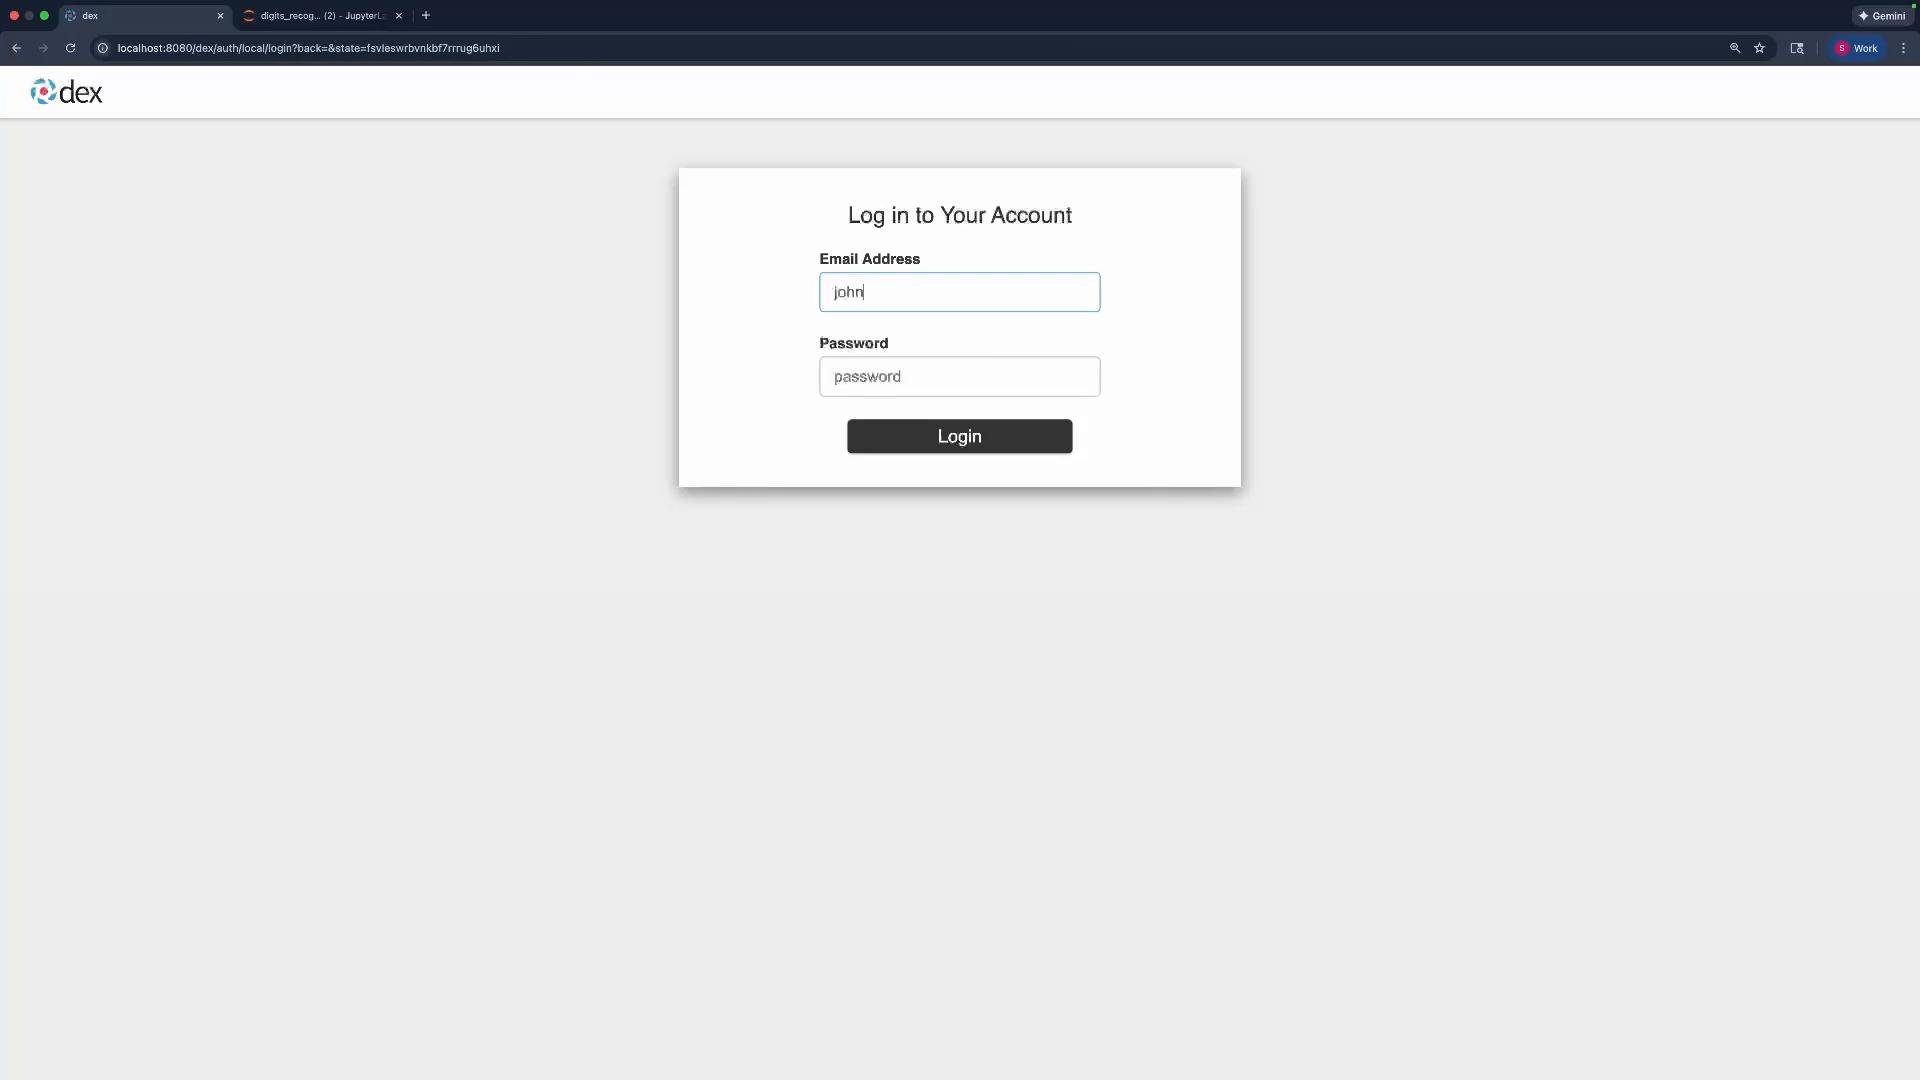 If you sign in as `john@example.com` (or `mark@example.com`), authentication will succeed, but you will not see any selectable Kubeflow profiles (namespaces) because those accounts are not yet mapped to Kubeflow profiles. The default example user (`user@example.com`) was created when Kubeflow deployed a demo profile and is mapped to the `kubeflow-user-example-com` profile/namespace; that user can select and operate in that namespace:
 ## Next steps
* To give a user access to a Kubeflow profile, map their identity (`email` / `userID`) to a Kubeflow Profile (which corresponds to a Kubernetes namespace). See Kubeflow Profiles and Multi-Tenancy documentation for details.
* Consider integrating a managed IDP (OIDC/LDAP/GitHub/Google) for production authentication rather than using static passwords.
Summary
* Dex can act as a simple, local authentication provider for creating test users when evaluating Kubeflow.
* Add users by editing the Dex ConfigMap at `data.config.yaml.staticPasswords` with `email`, `username`, quoted `userID`, and a bcrypt `hash` (or `hashFromEnv`).
* Restart the Dex deployment to apply changes.
* Mapping users to Kubeflow profiles (namespaces) is a separate configuration step inside Kubeflow.
Links and references
* [Kubeflow](https://learn.kodekloud.com/user/courses/kubeflow)
* Dex documentation: [https://dexidp.io/](https://dexidp.io/)
* Kubernetes documentation: [https://kubernetes.io/docs/](https://kubernetes.io/docs/)
* htpasswd (Apache utils) info: [https://httpd.apache.org/docs/current/programs/htpasswd.html](https://httpd.apache.org/docs/current/programs/htpasswd.html)
This documentation is built and hosted on [Mintlify](https://mintlify.com), a developer documentation platform.
## Next steps
* To give a user access to a Kubeflow profile, map their identity (`email` / `userID`) to a Kubeflow Profile (which corresponds to a Kubernetes namespace). See Kubeflow Profiles and Multi-Tenancy documentation for details.
* Consider integrating a managed IDP (OIDC/LDAP/GitHub/Google) for production authentication rather than using static passwords.
Summary
* Dex can act as a simple, local authentication provider for creating test users when evaluating Kubeflow.
* Add users by editing the Dex ConfigMap at `data.config.yaml.staticPasswords` with `email`, `username`, quoted `userID`, and a bcrypt `hash` (or `hashFromEnv`).
* Restart the Dex deployment to apply changes.
* Mapping users to Kubeflow profiles (namespaces) is a separate configuration step inside Kubeflow.
Links and references
* [Kubeflow](https://learn.kodekloud.com/user/courses/kubeflow)
* Dex documentation: [https://dexidp.io/](https://dexidp.io/)
* Kubernetes documentation: [https://kubernetes.io/docs/](https://kubernetes.io/docs/)
* htpasswd (Apache utils) info: [https://httpd.apache.org/docs/current/programs/htpasswd.html](https://httpd.apache.org/docs/current/programs/htpasswd.html)
This documentation is built and hosted on [Mintlify](https://mintlify.com), a developer documentation platform.