> ## Documentation Index
> Fetch the complete documentation index at: https://notes.kodekloud.com/llms.txt
> Use this file to discover all available pages before exploring further.
# TLS in Kubernetes Certificate Creation
> This guide demonstrates generating certificates for a Kubernetes cluster using OpenSSL, focusing on simplicity and ease of use.
This guide demonstrates how to generate certificates for a Kubernetes cluster using OpenSSL. While various tools such as EasyRSA and CFSSL can perform these tasks, our focus here is on OpenSSL for its simplicity and ease of use.
## Creating the CA Certificate
First, create the Certificate Authority (CA) that will sign all other certificates. Follow these steps:
1. Generate the private key for the CA:
```bash theme={null}
openssl genrsa -out ca.key 2048
```
2. Create a certificate signing request (CSR) using the generated key. In this example, the common name (CN) is set to "KUBERNETES-CA":
```bash theme={null}
openssl req -new -key ca.key -subj "/CN=KUBERNETES-CA" -out ca.csr
```
3. Sign the CSR with the CA’s private key to create the CA certificate:
```bash theme={null}
openssl x509 -req -in ca.csr -signkey ca.key -out ca.crt
```
After these steps, the CA is ready with its private key and root certificate (ca.crt), which will be used to sign all other certificates in the cluster.
## Generating Client Certificates
### Admin User Certificate
To set up a certificate for the admin user:
1. Generate a private key:
```bash theme={null}
openssl genrsa -out admin.key 2048
```
2. Create a CSR for the admin user. Although the common name (CN) is "kube-admin", you can choose a different name as needed:
```bash theme={null}
openssl req -new -key admin.key -subj "/CN=kube-admin" -out admin.csr
```
3. Sign the admin CSR using the CA’s certificate and key:
```bash theme={null}
openssl x509 -req -in admin.csr -CA ca.crt -CAkey ca.key -out admin.crt
```
This certificate allows the admin user to authenticate with the Kubernetes API Server. For enhanced security and administrative privileges, include group details by specifying an Organizational Unit (OU) parameter. For example:
```bash theme={null}
openssl req -new -key admin.key -subj "/CN=kube-admin/O=system:masters" -out admin.csr
openssl x509 -req -in admin.csr -CA ca.crt -CAkey ca.key -out admin.crt
```
### Other Client Certificates
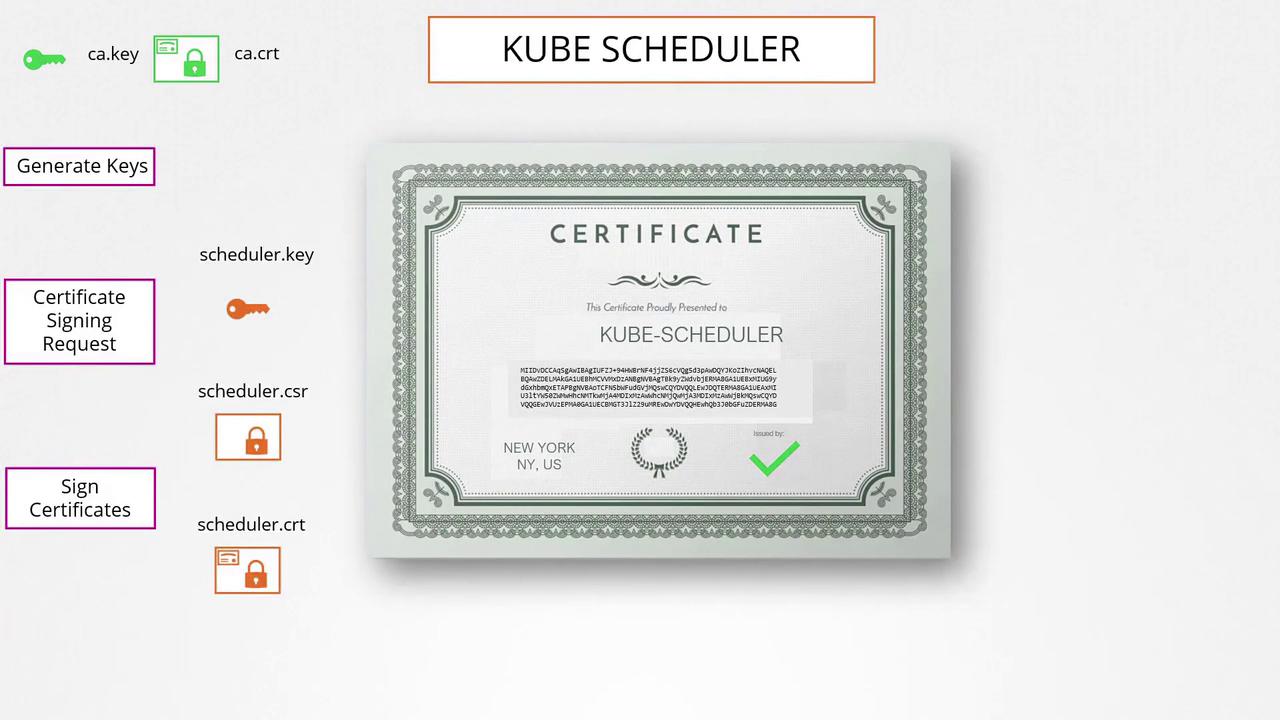
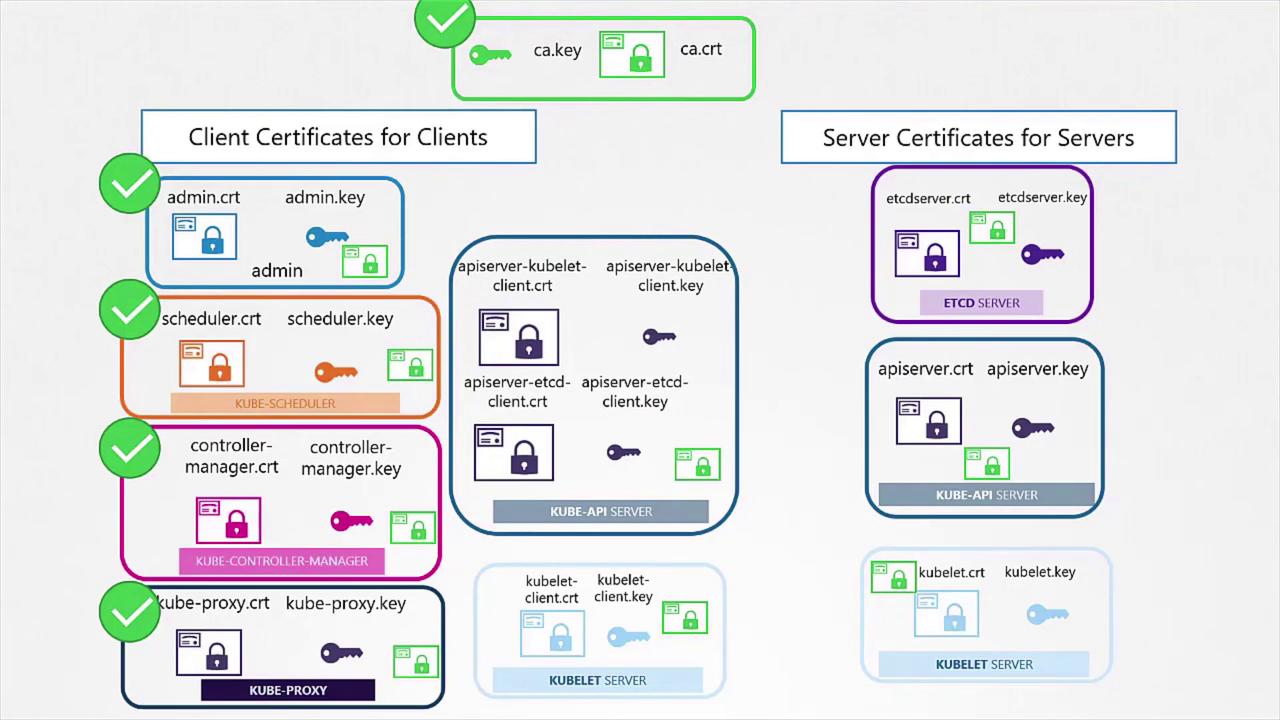
The same procedure applies to other components within Kubernetes (e.g., Kube Scheduler, Controller Manager, and Kube Proxy). These system components typically have names prefixed with "system-" and follow the same signing process using the CA credentials.
## Using Certificates for Cluster Communication
Once you generate the certificates, you can use them in multiple ways. To make a REST API call to the Kubernetes API Server with the admin certificate, you can run:
```bash theme={null}
curl https://kube-apiserver:6443/api/v1/pods \
--key admin.key --cert admin.crt \
--cacert ca.crt
```
Alternatively, consolidate these parameters into a kubeconfig file that specifies the API server endpoint and certificate details:
```yaml theme={null}
apiVersion: v1
clusters:
- cluster:
certificate-authority: ca.crt
server: https://kube-apiserver:6443
name: kubernetes
kind: Config
users:
- name: kubernetes-admin
user:
client-certificate: admin.crt
client-key: admin.key
```
## Generating Server-Side Certificates
For mutual TLS authentication in Kubernetes, both the client and the server require a copy of the CA’s public certificate. This certificate is essential for verifying the authenticity of certificates presented by clients and servers.
### etcd Server Certificate
To secure the etcd server, generate a certificate (e.g., "etcd-server") and, if using a cluster, also generate peer certificates. These generated certificates are then referenced in the etcd server startup options. For example:
```yaml theme={null}
- etcd
- --advertise-client-urls=https://127.0.0.1:2379
- --key-file=/path-to-certs/etcdserver.key
- --cert-file=/path-to-certs/etcdserver.crt
- --client-cert-auth=true
- --data-dir=/var/lib/etcd
- --initial-advertise-peer-urls=https://127.0.0.1:2380
- --initial-cluster=master=https://127.0.0.1:2380
- --listen-client-urls=https://127.0.0.1:2379
- --listen-peer-urls=https://127.0.0.1:2380
- --name=master
- --peer-cert-file=/path-to-certs/etcdpeer1.crt
- --peer-client-cert-auth=true
- --peer-key-file=/etc/kubernetes/pki/etcd/peer.key
- --peer-trusted-ca-file=/etc/kubernetes/pki/etcd/ca.crt
- --snapshot-count=10000
- --trusted-ca-file=/etc/kubernetes/pki/etcd/ca.crt
```
In this configuration, the CA certificate is used to validate any connecting clients.
### Kube API Server Certificate
The Kube API Server requires a certificate to manage multiple alternate names such as:
* kubernetes
* kubernetes.default
* kubernetes.default.svc
* kubernetes.default.svc.cluster.local
* Its IP address (e.g., the host or pod IP)
To create this certificate:
1. Generate a key and CSR for the API Server:
```bash theme={null}
openssl genrsa -out apiserver.key 2048
openssl req -new -key apiserver.key -subj "/CN=kube-apiserver" -out apiserver.csr
```
2. Create an OpenSSL configuration file (e.g., openssl.cnf) with alternate names:
```plaintext theme={null}
[req]
req_extensions = v3_req
distinguished_name = req_distinguished_name
[ v3_req ]
basicConstraints = CA:FALSE
keyUsage = nonRepudiation, digitalSignature, keyEncipherment
subjectAltName = @alt_names
[alt_names]
DNS.1 = kubernetes
DNS.2 = kubernetes.default
DNS.3 = kubernetes.default.svc
DNS.4 = kubernetes.default.svc.cluster.local
IP.1 = 10.96.0.1
IP.2 = 172.17.0.87
```
3. Sign the CSR using the CA credentials:
```bash theme={null}
openssl x509 -req -in apiserver.csr -CA ca.crt -CAkey ca.key -out apiserver.crt -extensions v3_req -extfile openssl.cnf
```
After generating the API Server certificate, include its location along with the client certificates when configuring the kube-apiserver. For example:
```bash theme={null}
ExecStart=/usr/local/bin/kube-apiserver \\
--advertise-address=${INTERNAL_IP} \\
--allow-privileged=true \\
--apiserver-count=3 \\
--authorization-mode=Node,RBAC \\
--bind-address=0.0.0.0 \\
--enable-swagger-ui=true \\
--etcd-cafile=/var/lib/kubernetes/ca.pem \\
--etcd-certfile=/var/lib/kubernetes/apiserver-etcd-client.crt \\
--etcd-keyfile=/var/lib/kubernetes/apiserver-etcd-client.key \\
--etcd-servers=https://127.0.0.1:2379 \\
--event-ttl=1h \\
--kubelet-certificate-authority=/var/lib/kubernetes/ca.pem \\
--kubelet-client-certificate=/var/lib/kubernetes/apiserver-kubelet-client.crt \\
--kubelet-client-key=/var/lib/kubernetes/apiserver-kubelet-client.key \\
--kubelet-https=true \\
--runtime-config=api/all \\
--service-account-key-file=/var/lib/kubernetes/service-account.pem \\
--service-cluster-ip-range=10.32.0.0/24 \\
--service-node-port-range=30000-32767 \\
--client-ca-file=/var/lib/kubernetes/ca.pem \\
--tls-cert-file=/var/lib/kubernetes/apiserver.crt \\
--tls-private-key-file=/var/lib/kubernetes/apiserver.key \\
--v=2
```
Each Kubernetes component uses the CA certificate to verify its clients, ensuring a completely secure communication channel.
### Kubelet Certificates
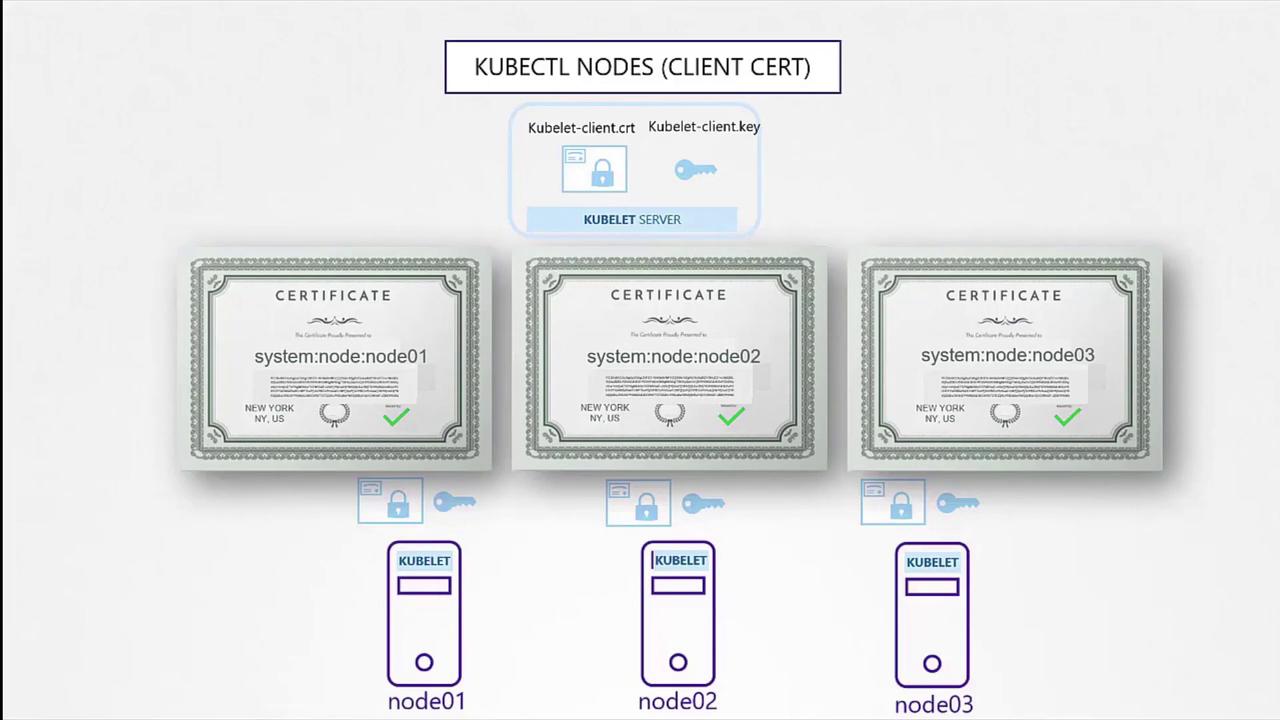
The Kubelet, the node-level component responsible for managing pods, needs its own key and certificate pair. Moreover, when communicating with the API Server, the certificates should follow a naming convention such as "system:node\." This identification is used by the API Server to assign node-specific permissions.
After generating these certificates, include them in the kubeconfig files for the respective nodes.
## Summary
In this guide, we covered the process of generating TLS certificates for both clients and servers within a Kubernetes cluster. We began with the CA certificates, moved on to creating client certificates for admin users and system components, and finally addressed server-side certificates for etcd and the Kube API Server. Key points included:
* Signing certificate requests using the CA credentials.
* Configuring alternate names for API Server certificates.
* Ensuring mutual TLS for secure communication.
In our next article, we will explore how to view certificate details and how tools like kubeadm handle certificate configuration.