> ## Documentation Index
> Fetch the complete documentation index at: https://notes.kodekloud.com/llms.txt
> Use this file to discover all available pages before exploring further.
# Persistent Volume Claims
> This article provides a guide on creating and managing Persistent Volume Claims in Kubernetes, including their relationship with Persistent Volumes and reclaim policies.
Welcome to this comprehensive guide on Persistent Volume Claims (PVCs) in Kubernetes. In this article, you'll learn how to create PVCs, understand their relationship with Persistent Volumes (PVs), and explore how reclaim policies affect your storage resources.
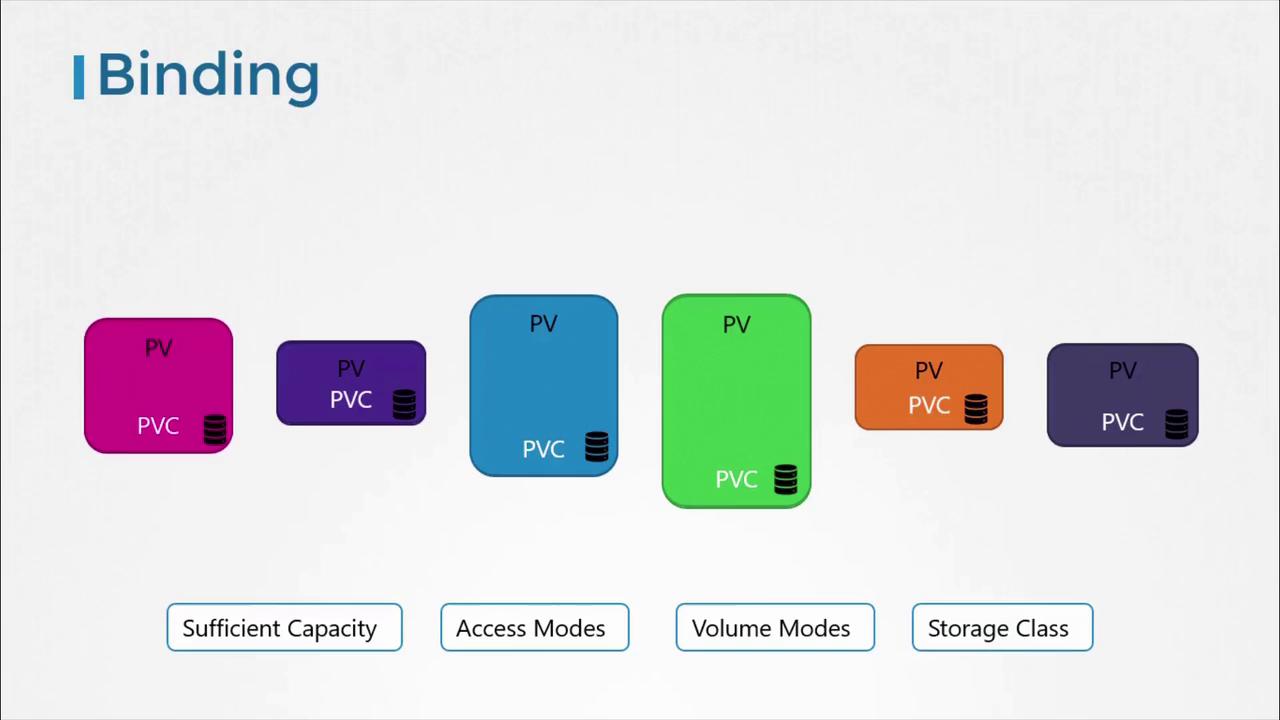
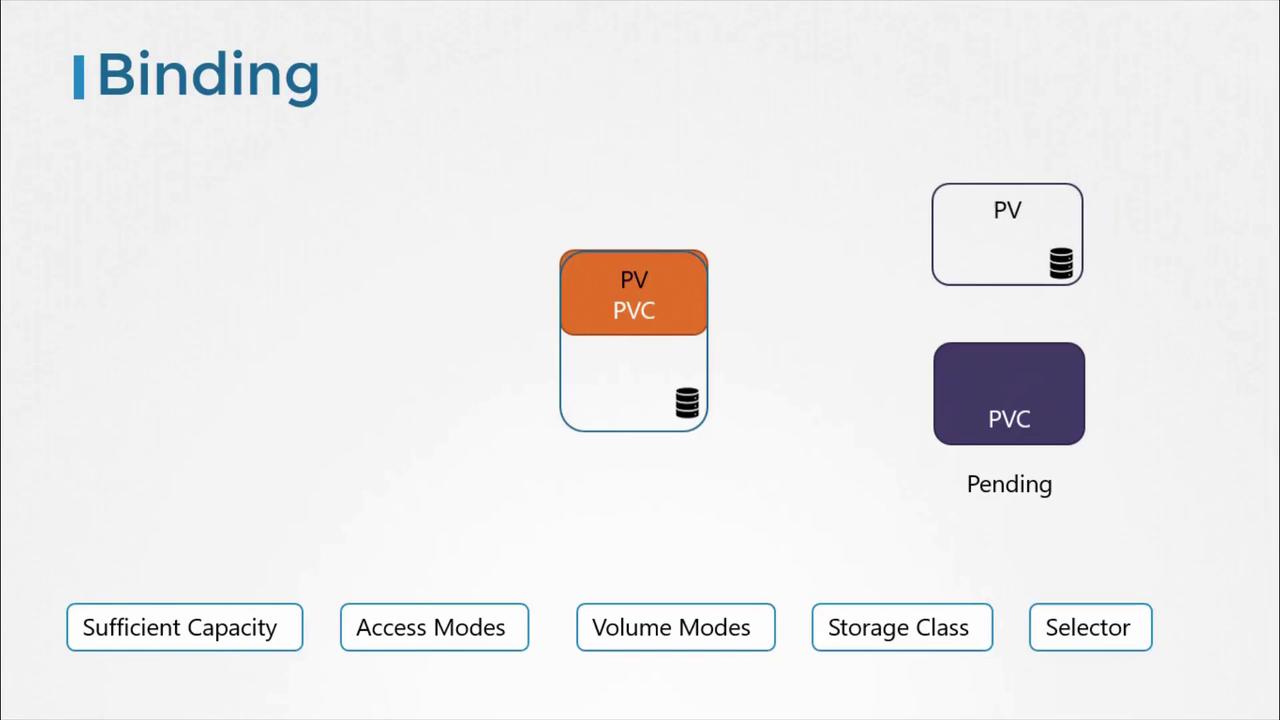
Kubernetes administrators are responsible for creating PVs, while users create PVCs to request and utilize that storage. Once a PVC is defined, Kubernetes automatically binds it to an available PV that meets specific criteria such as capacity, access modes, volume modes, storage class, and additional parameters. Each PVC is exclusively bound to a single PV. If no matching volume exists at the time of creation, the PVC remains in a pending state until a compatible PV becomes available.
When multiple PVs meet the claim criteria, you can leverage labels and selectors to ensure that the correct volume is bound. Even if the claim is smaller than the available PV, any surplus capacity will not be allocated to other claims.
When a new volume that satisfies the requirements of a pending PVC becomes available, Kubernetes seamlessly binds the PVC to this volume. This binding process is depicted in the following diagram:
## Creating a Persistent Volume Claim
To get started with creating a PVC, you will need to define a YAML configuration. In the example below, the API version is set to v1, the resource kind is PersistentVolumeClaim, and the PVC is named "myclaim". This claim requests 500Mi of storage with an access mode of ReadWriteOnce.
Save the contents below in a file named `pvc-definition.yaml`:
```yaml theme={null}
apiVersion: v1
kind: PersistentVolumeClaim
metadata:
name: myclaim
spec:
accessModes:
- ReadWriteOnce
resources:
requests:
storage: 500Mi
```
Once the file is created, deploy the PVC using the following command:
```bash theme={null}
kubectl create -f pvc-definition.yaml
```
You can verify the status of your PVC by running:
```bash theme={null}
kubectl get persistentvolumeclaim
```
The initial output might resemble:
```bash theme={null}
NAME STATUS VOLUME CAPACITY ACCESS MODES
myclaim Pending
```
Even if a PVC requests only a portion of the storage available in a PV (e.g., 500Mi out of 1Gi), Kubernetes will bind it to that PV if the access mode and other conditions match.
Here is an example of a PV configuration that could satisfy the above PVC:
```yaml theme={null}
apiVersion: v1
kind: PersistentVolume
metadata:
name: pv-vol
spec:
accessModes:
- ReadWriteOnce
capacity:
storage: 1Gi
awsElasticBlockStore:
volumeID:
fsType: ext4
```
If no matching PV is available when the PVC is created, it will remain in the pending state until a suitable PV is provisioned.
## Deleting a Persistent Volume Claim and Understanding Reclaim Policies
To delete the PVC, use the following command:
```bash theme={null}
kubectl delete persistentvolumeclaim myclaim
```
By default, deleting a PVC does not automatically remove the associated PV. The behavior of the PV is dictated by its reclaim policy. Kubernetes supports three common reclaim policies:
| Reclaim Policy | Description | YAML Example |
| -------------- | ------------------------------------------------------------------------------------------------------------- | -------------------------------------- |
| Retain | The PV is preserved even after the associated PVC is deleted. Manual cleanup by an administrator is required. | persistentVolumeReclaimPolicy: Retain |
| Delete | The PV is automatically deleted when the PVC is removed, freeing up the underlying storage. | persistentVolumeReclaimPolicy: Delete |
| Recycle | The PV is cleared of data (scrubbed) and made available for reuse by other PVCs. | persistentVolumeReclaimPolicy: Recycle |
For instance, executing the deletion command:
```bash theme={null}
kubectl delete persistentvolumeclaim myclaim
```
will produce an output similar to:
```bash theme={null}
persistentvolumeclaim "myclaim" deleted
```
Choosing the correct reclaim policy is essential for managing your Kubernetes storage lifecycle effectively. It allows you to determine whether the storage resource should persist after the PVC's deletion or if it should be removed automatically.
That concludes our guide on Persistent Volume Claims in Kubernetes. For further insights and detailed documentation on Kubernetes storage practices, please refer to the [Kubernetes Documentation](https://kubernetes.io/docs/).