> ## Documentation Index
> Fetch the complete documentation index at: https://notes.kodekloud.com/llms.txt
> Use this file to discover all available pages before exploring further.
# Demo Deployments Rolling Updates and Rollbacks
> Learn to update and roll back deployments in Kubernetes using YAML files and various kubectl commands.
In this lesson, you'll learn how to update and roll back deployments in Kubernetes. We'll start with a deployment definition file located in the "deployment" directory. The deployment, named "myapp-deployment", runs six replicas using the NGINX image.
Below is the deployment YAML definition:
```yaml theme={null}
apiVersion: apps/v1
kind: Deployment
metadata:
name: myapp-deployment
labels:
tier: frontend
spec:
selector:
matchLabels:
app: myapp
replicas: 6
template:
metadata:
name: nginx-2
labels:
app: myapp
spec:
containers:
- name: nginx
image: nginx
```
Before creating the deployment, verify that no similar objects exist in your cluster.
## Creating the Deployment
First, check that there are no existing objects:
```bash theme={null}
admin@ubuntu-server deployments # vi deployment.yaml
admin@ubuntu-server deployments # kubectl
```
Once confirmed, create the deployment using:
```bash theme={null}
kubectl create -f deployment.yaml
```
After creating the deployment, check its rollout status:
```bash theme={null}
kubectl rollout status deployment.apps/myapp-deployment
```
You should see an output like:
```bash theme={null}
deployment "myapp-deployment" successfully rolled out
```
Keep in mind that if you check the rollout status immediately after creation, you might witness an intermediate state as Kubernetes updates each pod sequentially.
## Demonstrating Rollout Status with Immediate Deletion
To better illustrate how the rollout process works, follow these steps:
1. Delete the current deployment:
```bash theme={null}
kubectl delete deployment myapp-deployment
```
2. Re-create the deployment:
```bash theme={null}
kubectl create -f deployment.yaml
```
3. Immediately check the rollout status:
```bash theme={null}
kubectl rollout status deployment.apps/myapp-deployment
```
You may encounter messages such as "0 of 6 updated replicas", "1 of 6 updated replicas", etc. Kubernetes waits until all six pods are running before marking the rollout as successful.
## Checking Rollout History
Once the deployment is live, view its revision history with:
```bash theme={null}
kubectl rollout history deployment.apps/myapp-deployment
```
Example output:
```bash theme={null}
REVISION CHANGE-CAUSE
1
```
Since the change cause was not recorded initially, the change cause column is empty.
## Recording the Change Cause
To capture the reason behind changes, delete the existing deployment and re-create it using the `--record` option:
1. Delete the deployment and wait until all pods terminate:
```bash theme={null}
kubectl delete deployment myapp-deployment
```
2. Confirm deletion by checking the pods:
```bash theme={null}
kubectl get pods
```
3. Re-create the deployment with the record flag:
```bash theme={null}
kubectl create -f deployment.yaml --record
```
4. Monitor the rollout status:
```bash theme={null}
kubectl rollout status deployment.apps/myapp-deployment
```
After completion, verify the revision history:
```bash theme={null}
kubectl rollout history deployment.apps/myapp-deployment
```
The output should now show an entry with a recorded change cause:
```bash theme={null}
REVISION CHANGE-CAUSE
1 kubectl create --filename=deployment.yaml --record=true
```
## Updating the Deployment with kubectl edit
To update the deployment, start by viewing its details:
```bash theme={null}
kubectl describe deployment myapp-deployment
```
Notice in the annotations section that the create command is recorded and the deployment is running six replicas of the NGINX image.
Now, update the container image interactively and record the change:
```bash theme={null}
kubectl edit deployment myapp-deployment --record
```
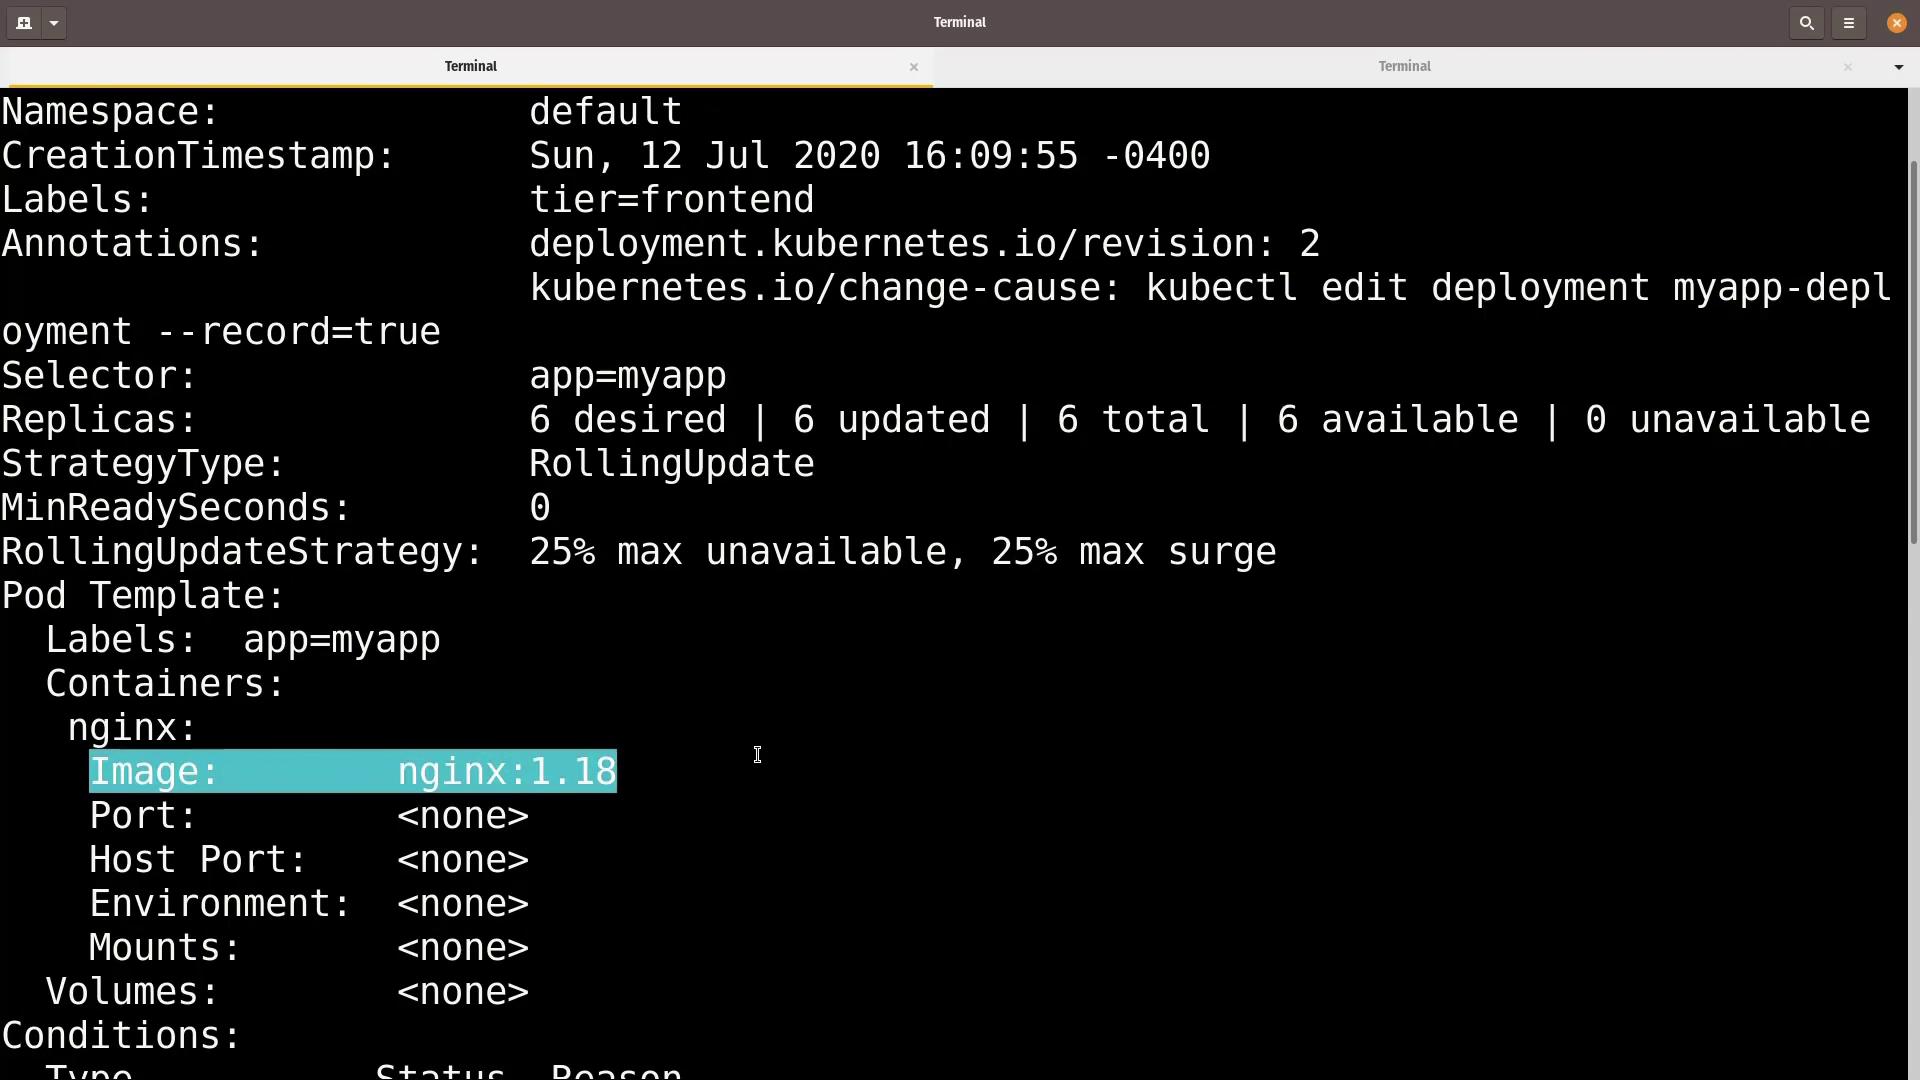
In the editor, change the container’s image from `nginx` to `nginx:1.18` (a lower version). An example edit might look like this:
```yaml theme={null}
maxUnavailable: 25%
type: RollingUpdate
template:
metadata:
creationTimestamp: null
labels:
app: myapp
name: nginx-2
spec:
containers:
- image: nginx:1.18
imagePullPolicy: Always
name: nginx
resources: {}
terminationMessagePath: /dev/termination-log
terminationMessagePolicy: File
dnsPolicy: ClusterFirst
restartPolicy: Always
schedulerName: default-scheduler
securityContext: {}
terminationGracePeriodSeconds: 30
```
Save and exit the editor. Kubernetes will begin rolling out the update by gradually replacing the old pods with new ones that have the updated image. Monitor the progress with:
```bash theme={null}
kubectl rollout status deployment.apps/myapp-deployment
```
Finally, check the rollout history to confirm the change:
```bash theme={null}
kubectl rollout history deployment.apps/myapp-deployment
```
You should now see a new entry corresponding to the `kubectl edit` action.
## Using kubectl set image for a Different Update Method
Another approach to update the container image is by using the `kubectl set image` command. For instance, to update the container image to `nginx:1.18-perl`, execute:
```bash theme={null}
kubectl set image deployment myapp-deployment nginx=nginx:1.18-perl --record
```
Then, verify the rollout status:
```bash theme={null}
kubectl rollout status deployment/myapp-deployment
```
The status messages will indicate that the old replicas for version 1.18 are being replaced by new replicas running version 1.18-perl. Confirm the updated revision history with:
```bash theme={null}
kubectl rollout history deployment/myapp-deployment
```
Expected revision history:
```bash theme={null}
REVISION CHANGE-CAUSE
1 kubectl create --filename=deployment.yaml --record=true
2 kubectl edit deployment myapp-deployment --record=true
3 kubectl set image deployment myapp-deployment nginx=nginx:1.18-perl --record=true
```
## Rolling Back to a Previous Revision
If the new image (version 1.18-perl) causes issues, you can easily roll back to a previous version. To revert from revision 3 to revision 2 (running NGINX 1.18), execute:
```bash theme={null}
kubectl rollout undo deployment/myapp-deployment
```
Monitor the rollback process:
```bash theme={null}
kubectl rollout status deployment/myapp-deployment
```
Once complete, confirm the current deployment configuration:
```bash theme={null}
kubectl describe deployment myapp-deployment
```
Note that while the rollout history might show an updated revision number, the state will match the previous, stable revision.
## Simulating a Failed Rollout
To demonstrate how Kubernetes handles a failed rollout, modify the deployment to use a non-existent image. Start by editing the deployment:
```bash theme={null}
kubectl edit deployment myapp-deployment --record
```
Change the container image to an invalid name, such as `nginx:1.18-does-n`, as shown below:
```yaml theme={null}
maxUnavailable: 25%
type: RollingUpdate
template:
metadata:
creationTimestamp: null
labels:
app: myapp
name: nginx-2
spec:
containers:
- image: nginx:1.18-does-n
imagePullPolicy: Always
name: nginx
resources: {}
terminationMessagePath: /dev/termination-log
terminationMessagePolicy: File
dnsPolicy: ClusterFirst
restartPolicy: Always
schedulerName: default-scheduler
securityContext: {}
terminationGracePeriodSeconds: 30
```
Save and exit the editor. At this point, check the rollout status:
```bash theme={null}
kubectl rollout status deployment/myapp-deployment
```
In a separate terminal, you can inspect the deployment and pod statuses:
```bash theme={null}
kubectl get deployments myapp-deployment
kubectl get pods
```
You will observe that while five pods continue running with the previous configuration, the new pods trying to run the invalid image show an "ErrImagePull" error.
Even with some pods failing, the application remains accessible via the running pods.
## Rolling Back the Failed Deployment
The rollout history now includes a new revision (for example, revision 5) that reflects the failed update. To restore stability (rolling back to revision 4), run:
```bash theme={null}
kubectl rollout undo deployment/myapp-deployment
```
Then, monitor the rollback progress:
```bash theme={null}
kubectl rollout status deployment/myapp-deployment
```
Finally, verify that all pods are running the correct image version (NGINX 1.18) by checking the pods:
```bash theme={null}
kubectl get pods
```
The pod status should look similar to:
```bash theme={null}
NAME READY STATUS RESTARTS AGE
myapp-deployment-789c649f95-8s9gk 1/1 Running 0 12s
myapp-deployment-789c649f95-9xs8q 1/1 Running 0 9m5s
myapp-deployment-789c649f95-dkfm4 1/1 Running 0 9m7s
myapp-deployment-789c649f95-qtngw 1/1 Running 0 9m8s
myapp-deployment-789c649f95-rktrd 1/1 Running 0 9m8s
myapp-deployment-789c649f95-x9jf5 1/1 Running 0 9m4s
```
Review the complete rollout history to verify all revisions and their change causes:
```bash theme={null}
kubectl rollout history deployment/myapp-deployment
```
## Conclusion
In this lesson, you have learned to:
* Create a Kubernetes deployment using a YAML file.
* Monitor rollout progress using `kubectl rollout status`.
* Record change causes with the `--record` flag.
* Update the deployment interactively using `kubectl edit` and via the `kubectl set image` command.
* Simulate a failed rollout scenario with an invalid image.
* Roll back to a previous revision using `kubectl rollout undo`.
This approach ensures that your updates are applied smoothly and, if issues arise, can be quickly reverted to maintain application availability.
For further reading, consider exploring the [Kubernetes Documentation](https://kubernetes.io/docs/) and additional [Kubernetes Basics](https://kubernetes.io/docs/concepts/overview/what-is-kubernetes/).