This article explores ReplicaSets in Kubernetes, focusing on their role in managing pod replicas for high availability and scalability.
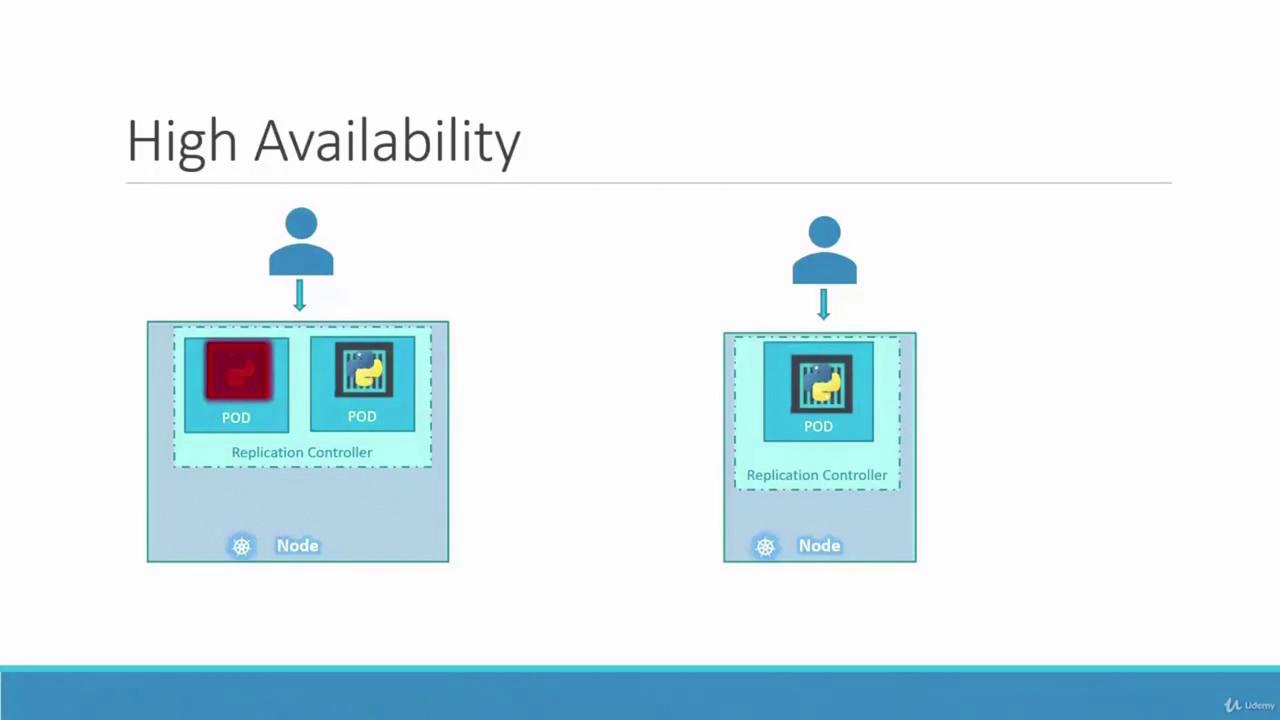
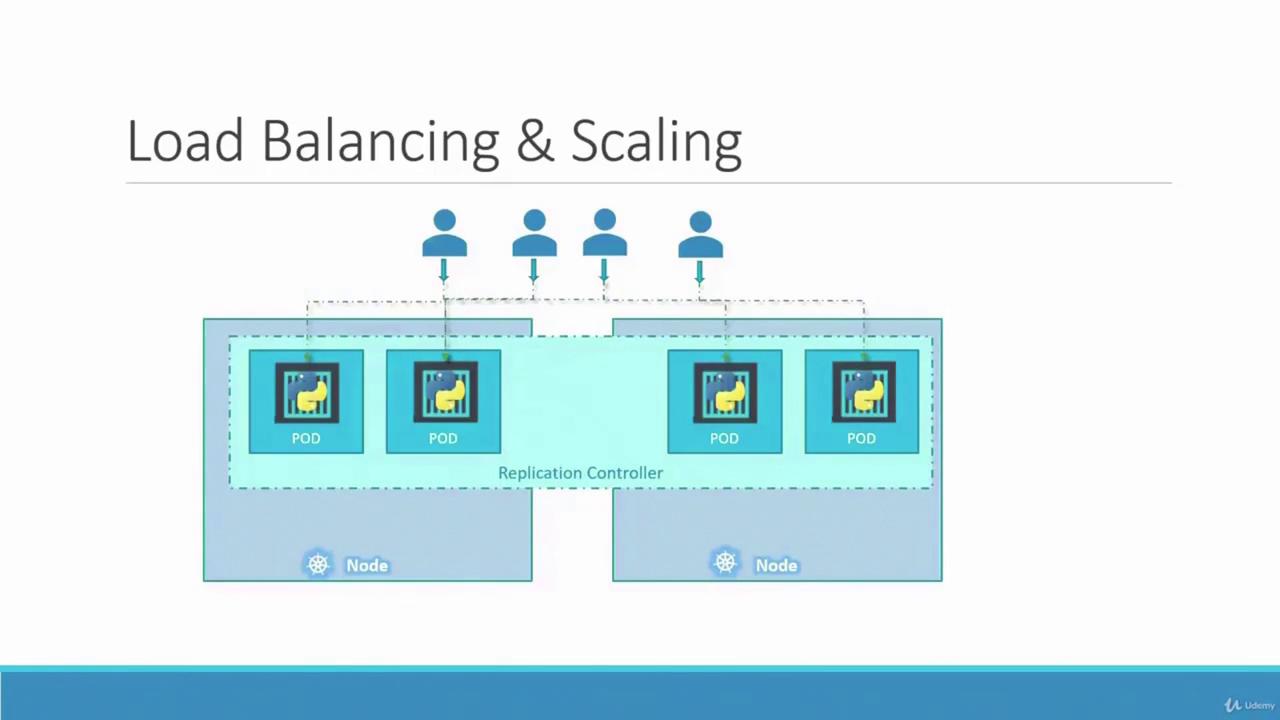
In this lesson, we explore the concept of replicas in Kubernetes and the importance of replication controllers for ensuring high availability. Imagine a scenario where your application runs only one pod. If that pod crashes, users lose access to your application. To avoid downtime, it’s critical to run multiple instances (or pods) simultaneously. A replication controller guarantees that the desired number of pods are always running in your cluster, delivering both high availability and load balancing.Even if you intend to run a single pod, the replication controller automatically initiates a new pod if the existing one fails. Whether you need one pod or a hundred, the replication controller maintains that number, distributing load across multiple instances. For example, if your user base grows, additional pods can be deployed. In cases where one node runs out of resources, new pods can automatically be scheduled on other nodes.
As illustrated above, the replication controller spans multiple nodes, ensuring efficient load balancing and the ability to scale your application as demand increases.Another important aspect is understanding the difference between a replication controller and a ReplicaSet. Both manage pod replicas, but the replication controller is an older technology, gradually being replaced by the more advanced ReplicaSet. Despite minor differences in implementation, their core functionality is similar. In all demos and implementations moving forward, we will focus on using ReplicaSets.
To create a ReplicationController, start by defining a configuration file named rc-definition.yaml. Like any Kubernetes definition file, it includes the following sections: API version, kind, metadata, and spec.
API Version: For a ReplicationController, use v1.
Kind: Set it as ReplicationController.
Metadata: Provide a unique name (for example, myapp-rc) along with labels that categorize your application (such as app and type).
Spec: Define the desired state of the object:
Specify the number of replicas.
Include a template section for the pod definition. (Note: do not include the API version and kind from the original pod file; include only the pod’s metadata, labels, and spec, indented as a child of the template.)
Below is an example ReplicationController definition:
Once the file is ready, create the replication controller with:
kubectl create -f rc-definition.yaml
After creation, verify the replication controller details using:
kubectl get replicationcontroller
This command displays the desired number of replicas, the current number, and the count of ready pods. To list the pods created by the replication controller, run:
kubectl get pods
You will notice that the pod names begin with the replication controller’s name (e.g., myapp-rc-xxxx), indicating their automatic creation.
A ReplicaSet functions similarly to a ReplicationController but comes with key differences:
API Version and Kind:
For a ReplicaSet, set the API version to apps/v1 (instead of v1).
The kind should be ReplicaSet.
Selector Requirement:
A ReplicaSet demands an explicit selector in its configuration. Typically defined under matchLabels, the selector identifies which pods the ReplicaSet will manage. This feature also enables the ReplicaSet to adopt existing pods that match the specified labels, even if they were not created by it.
Below is an example of a ReplicaSet definition file named replicaset-definition.yml:
The ReplicaSet monitors pods with matching labels. If pods already exist with these labels, the ReplicaSet will adopt them rather than immediately creating new ones. Nevertheless, the template remains essential for creating new pods if any managed pod fails.
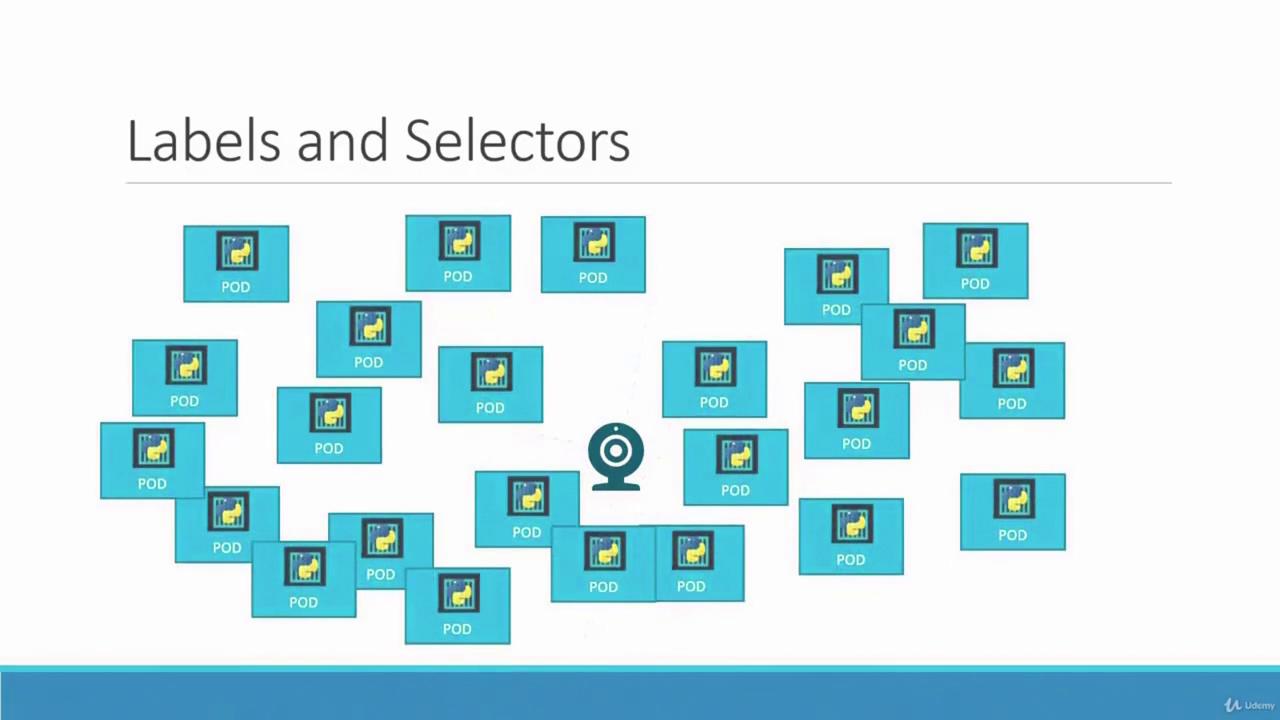
Labels are vital for organizing and selecting subsets of objects in Kubernetes. When deploying multiple instances (for instance, three pods for a front-end application), a ReplicaSet uses labels and selectors to manage these pods effectively. Consider the following sample configuration that highlights the relationship between pod labels and the ReplicaSet selector:
The ReplicaSet uses its selector to monitor and manage pods with the label tier: front-end. This concept of labels and selectors is widely used throughout Kubernetes to maintain order and efficiency.
Scaling ReplicaSets allows your application to adapt to changing demand. Suppose you started with three replicas and later need to scale up to six. There are multiple approaches:
Edit the Definition File:
Update the replicas field in your ReplicaSet definition file to six, then run:
kubectl replace -f replicaset-definition.yml
Use the Scale Command:
Alternatively, use the kubectl scale command:
Remember, if you use the scale command, the changes are updated only in the cluster state. The original definition file will continue to show the previous replica count until it is modified.
There are also advanced options for automatically scaling ReplicaSets based on load; however, that topic is outside the scope of this lesson.
kubectl create -f replicaset-definition.yml # Create a ReplicaSetkubectl get replicaset # List all ReplicaSetskubectl get pods # List pods, including those managed by ReplicaSetskubectl delete replicaset myapp-replicaset # Delete a specific ReplicaSetkubectl replace -f replicaset-definition.yml # Update a ReplicaSet using a filekubectl scale --replicas=6 -f replicaset-definition.yml # Scale a ReplicaSet to 6 replicas using a file
Understanding how labels, selectors, and ReplicaSets interact is crucial to maintain high availability and scalable deployments in your Kubernetes environment. This lesson has covered the fundamentals of replication controllers and ReplicaSets, along with their creation, updating, and scaling procedures.
This concludes our discussion on ReplicaSets. Apply these concepts to ensure robust and scalable deployments in your Kubernetes cluster.