This guide explains DaemonSets in Kubernetes, their use cases, and how to create one for managing Pods on every node.
Welcome to this guide on DaemonSets in Kubernetes. In this tutorial, you’ll learn how DaemonSets work, their common use cases, and how to create one.DaemonSets enable you to run exactly one instance of a Pod on every node within your cluster. As your cluster scales—by adding or removing nodes—the DaemonSet automatically ensures that each node has the designated Pod running. This approach is particularly useful for deploying essential services like monitoring agents, log collectors, and networking components (for example, kube-proxy) consistently across all nodes.
While ReplicaSets ensure that a set number of Pod replicas are running across the cluster, DaemonSets guarantee that one copy of the Pod is present on every node.
DaemonSets are primarily used in the following scenarios:
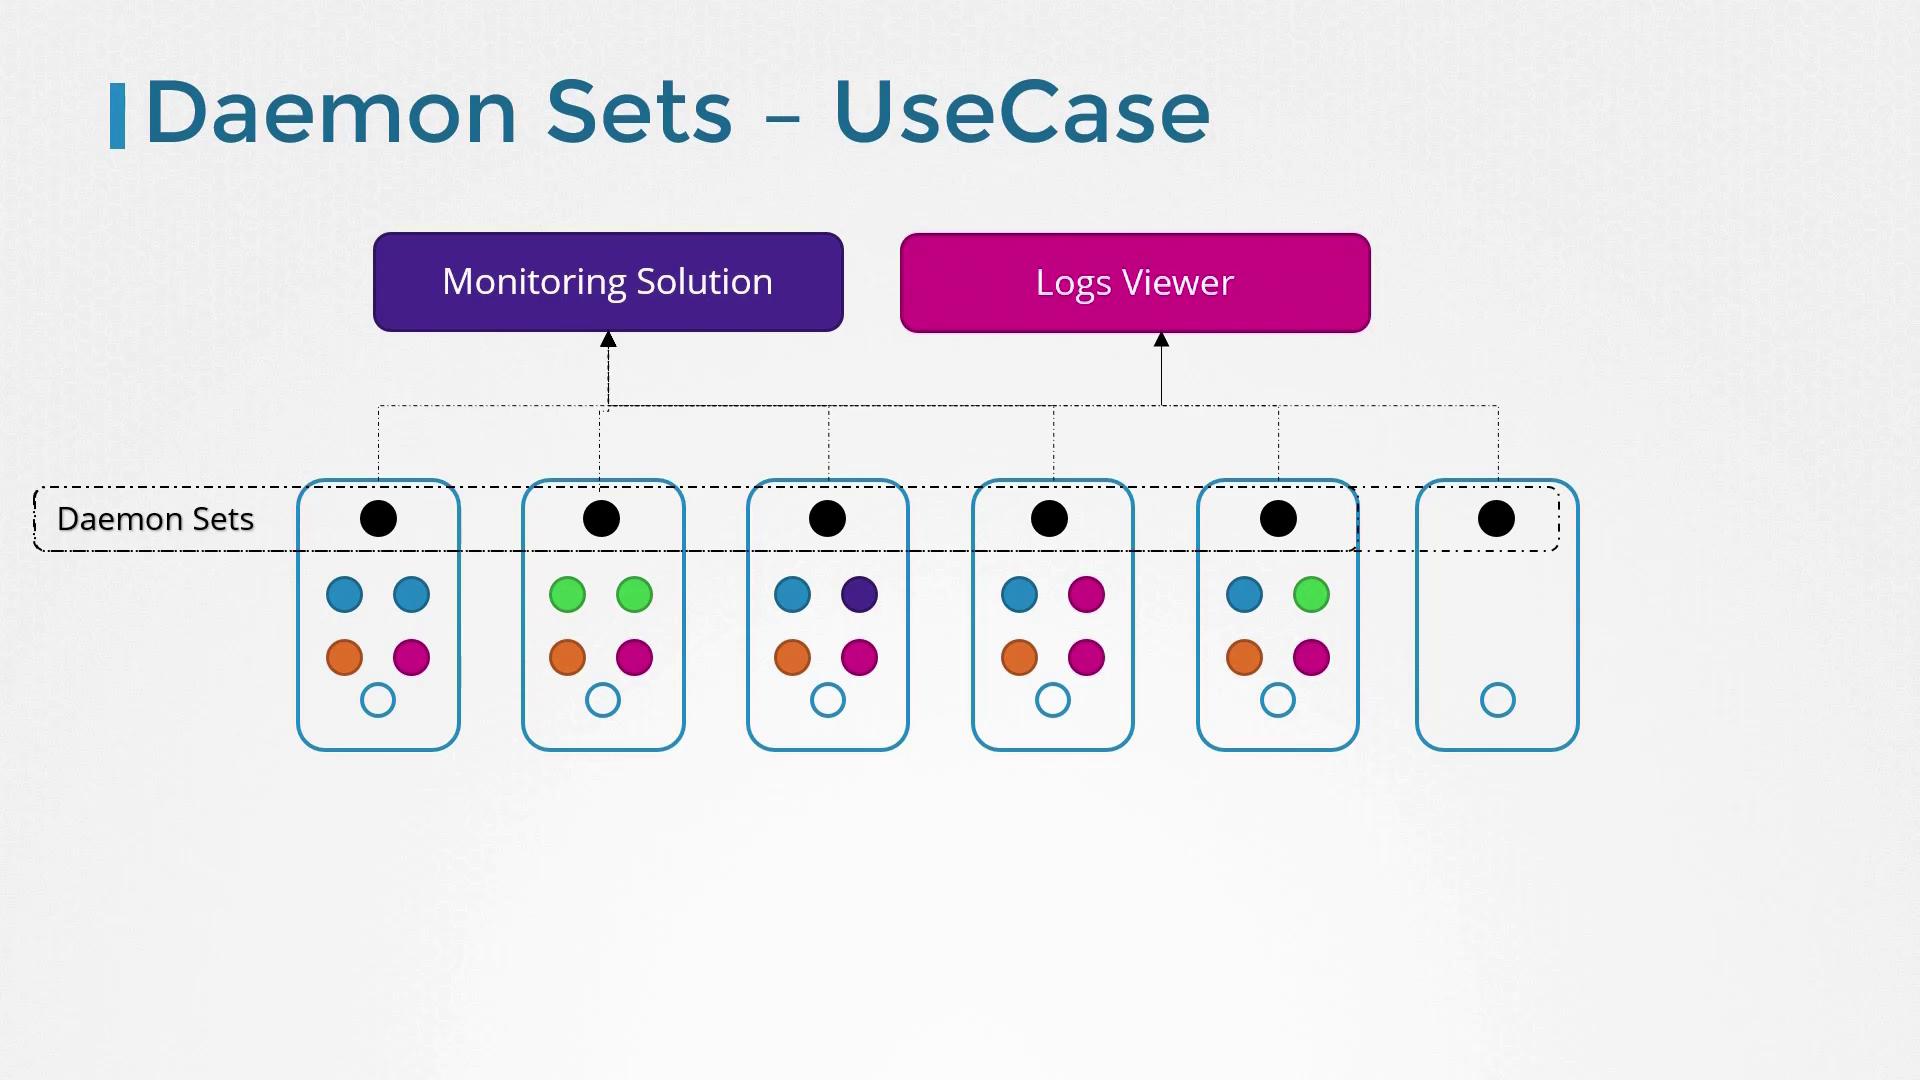
Monitoring and Logging: Deploy agents responsible for system monitoring and log collection across all nodes.
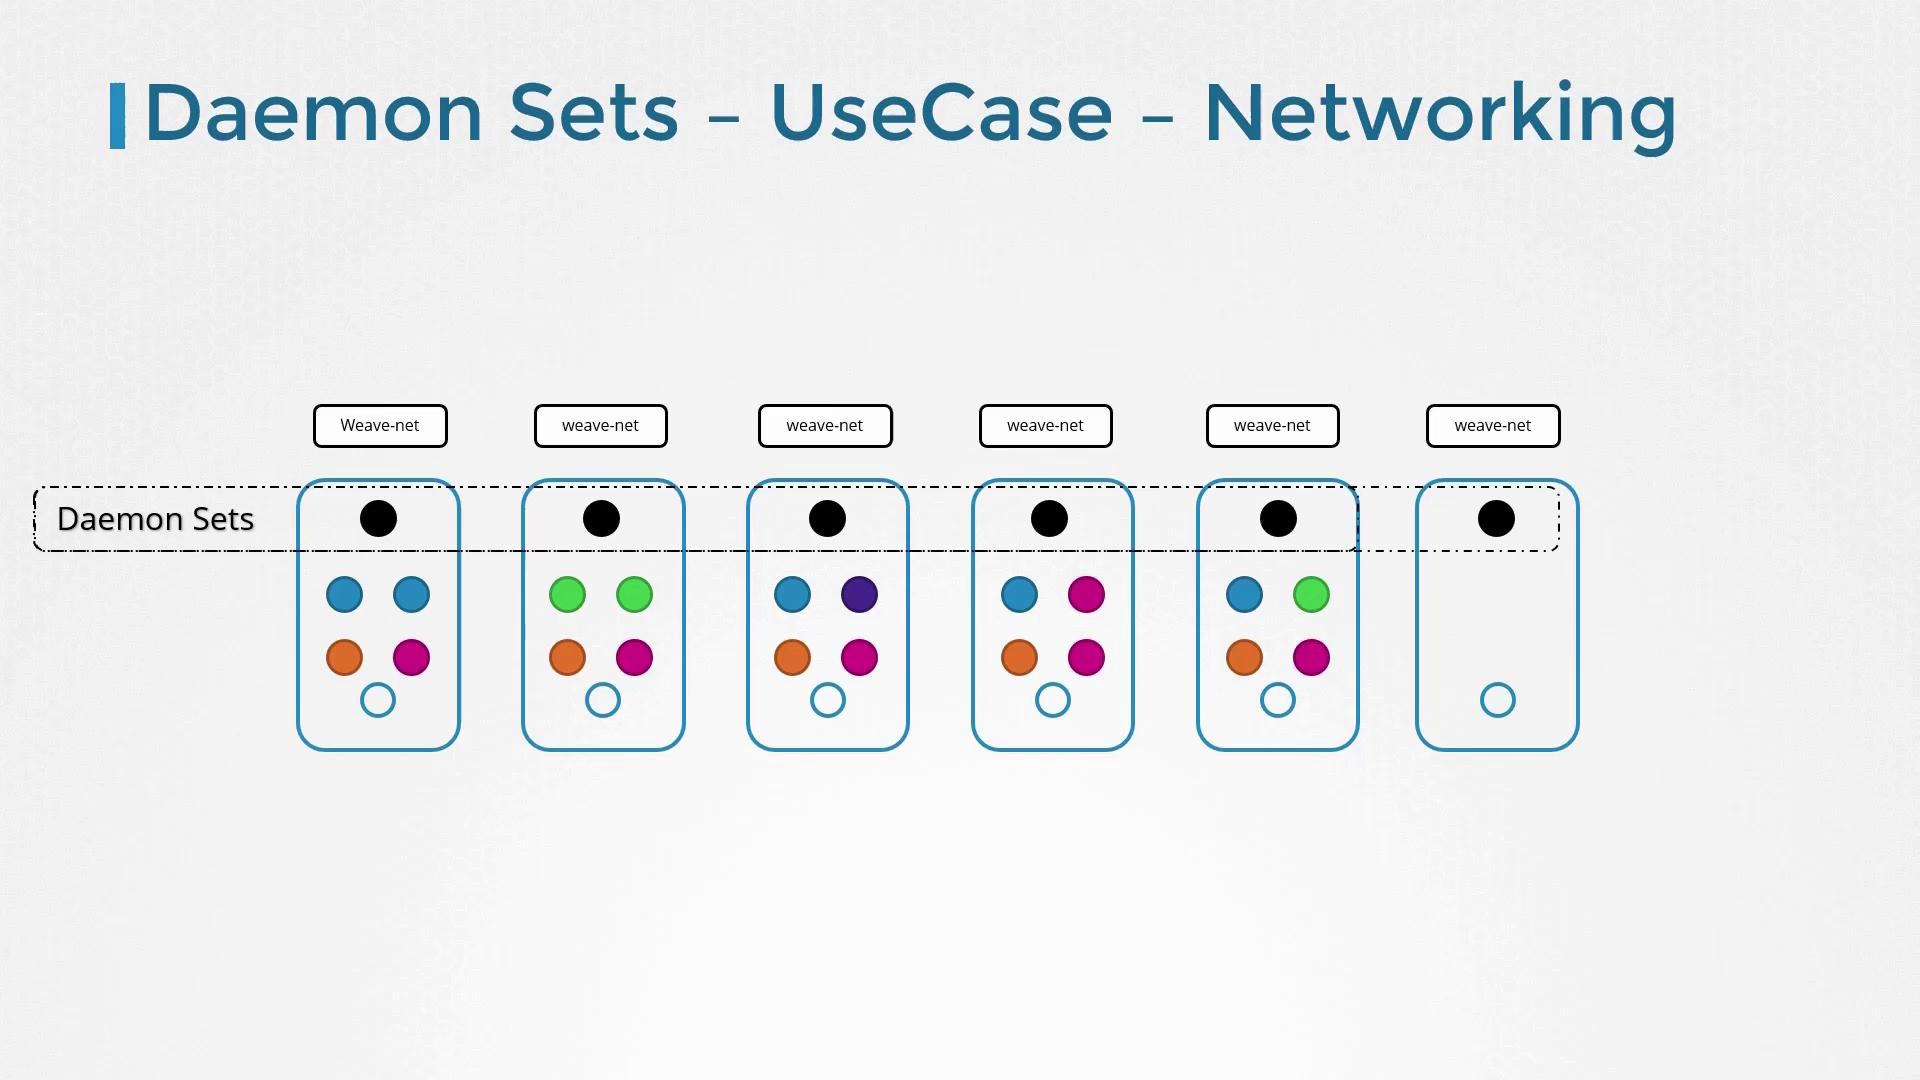
Networking: Ensure a networking solution agent (e.g., VNet components or weave-net) is deployed on every node.
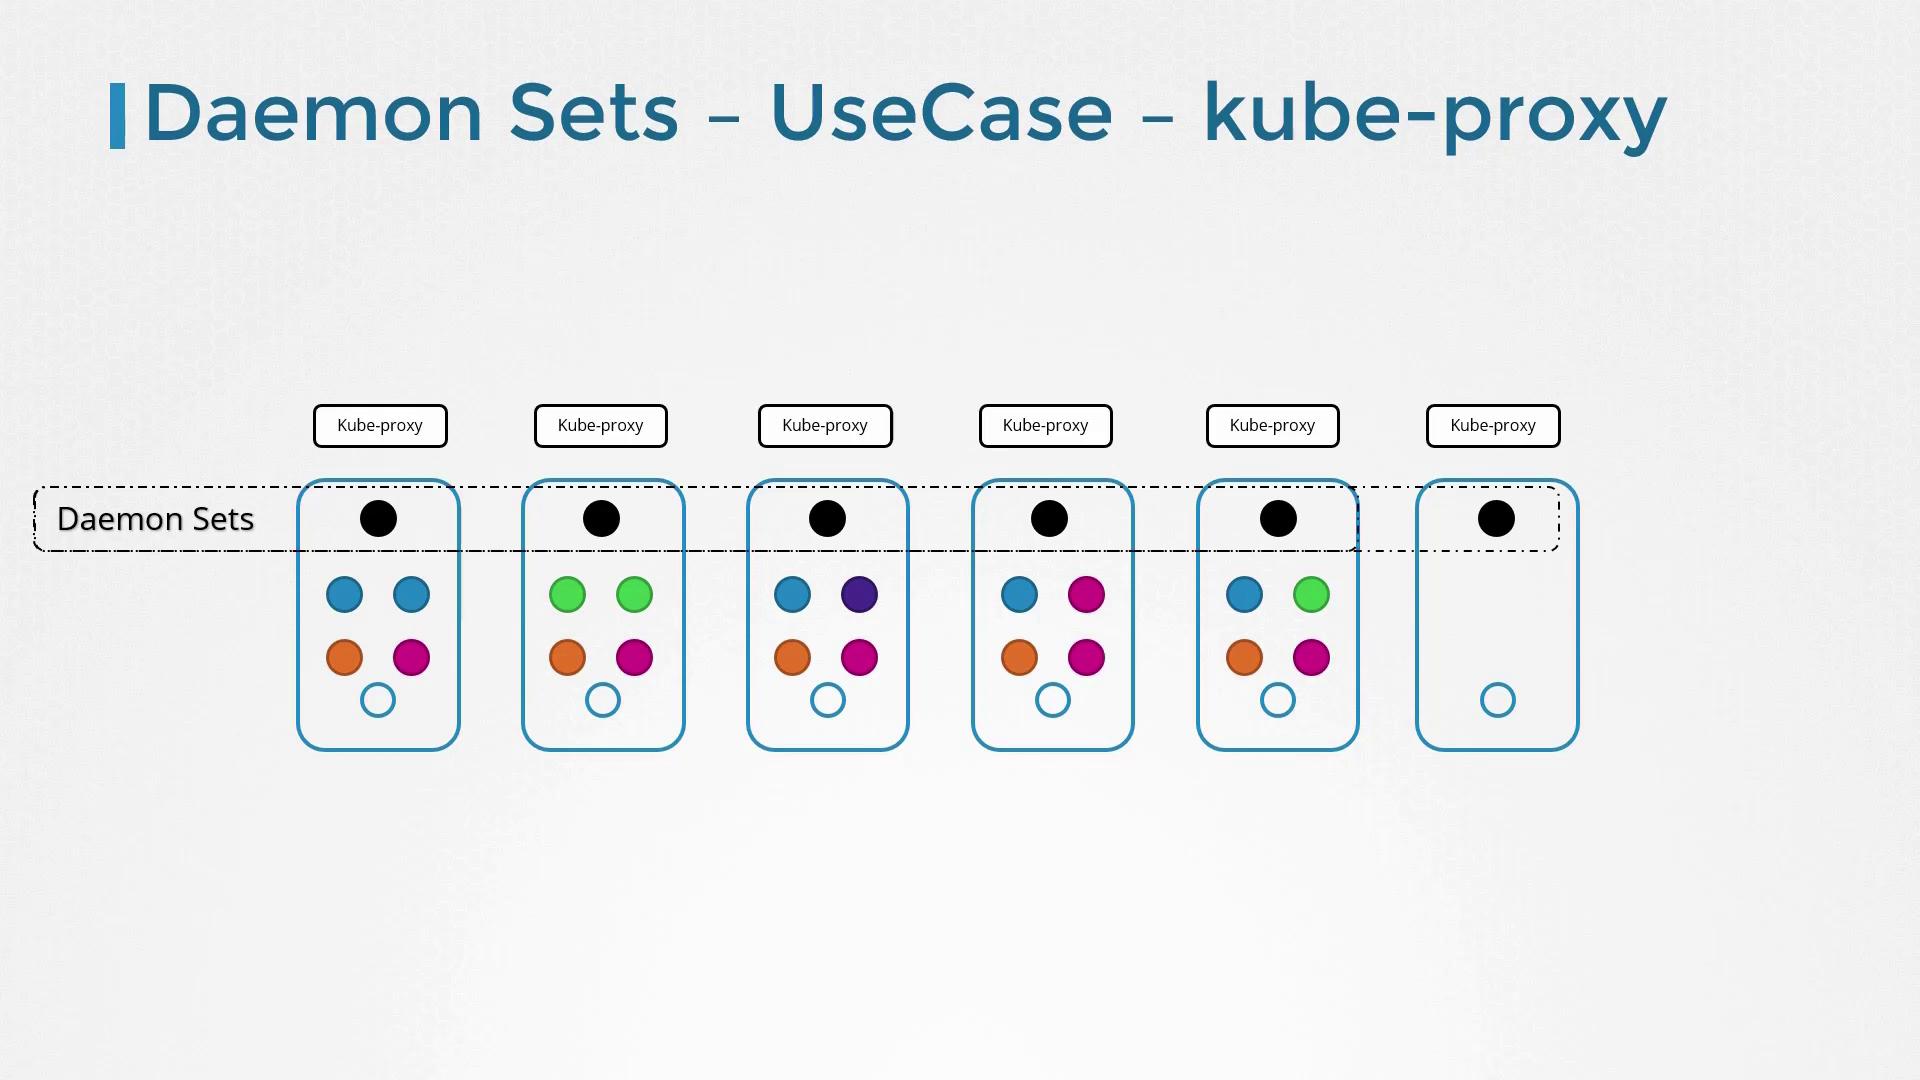
Critical Infrastructure Components: Deploy essential components like kube-proxy that need to reside on every node.
Below is an image that illustrates the use case for DaemonSets, highlighting the connection between a monitoring solution, a logs viewer, and multiple nodes:
Another common scenario involves networking. As mentioned, some networking solutions require an agent on every node. Understanding this use case is vital before diving deeper into networking concepts later in the course:
Creating a DaemonSet is quite similar to creating a ReplicaSet. The YAML definition file begins with apiVersion, kind, metadata, and spec sections. The primary difference is that the kind is set to DaemonSet, and it manages a Pod on every node rather than a specified number of replicas.Below is an example DaemonSet definition file:
For reference, here’s a similar ReplicaSet definition that deploys the same monitoring agent. Notice that the structure is nearly identical except for the value of kind:
Ensure that the labels in the selector match those in the Pod template to guarantee proper functioning. Once your DaemonSet definition is ready, create it using the following kubectl command:
Copy
kubectl apply -f daemon-set-definition.yaml
After applying the YAML file, verify your DaemonSet with:
Copy
kubectl get daemonsets
The console output might look similar to this:
Copy
NAME DESIRED CURRENT READY UP-TO-DATE AVAILABLE AGEmonitoring-daemon 1 1 1 1 1 41
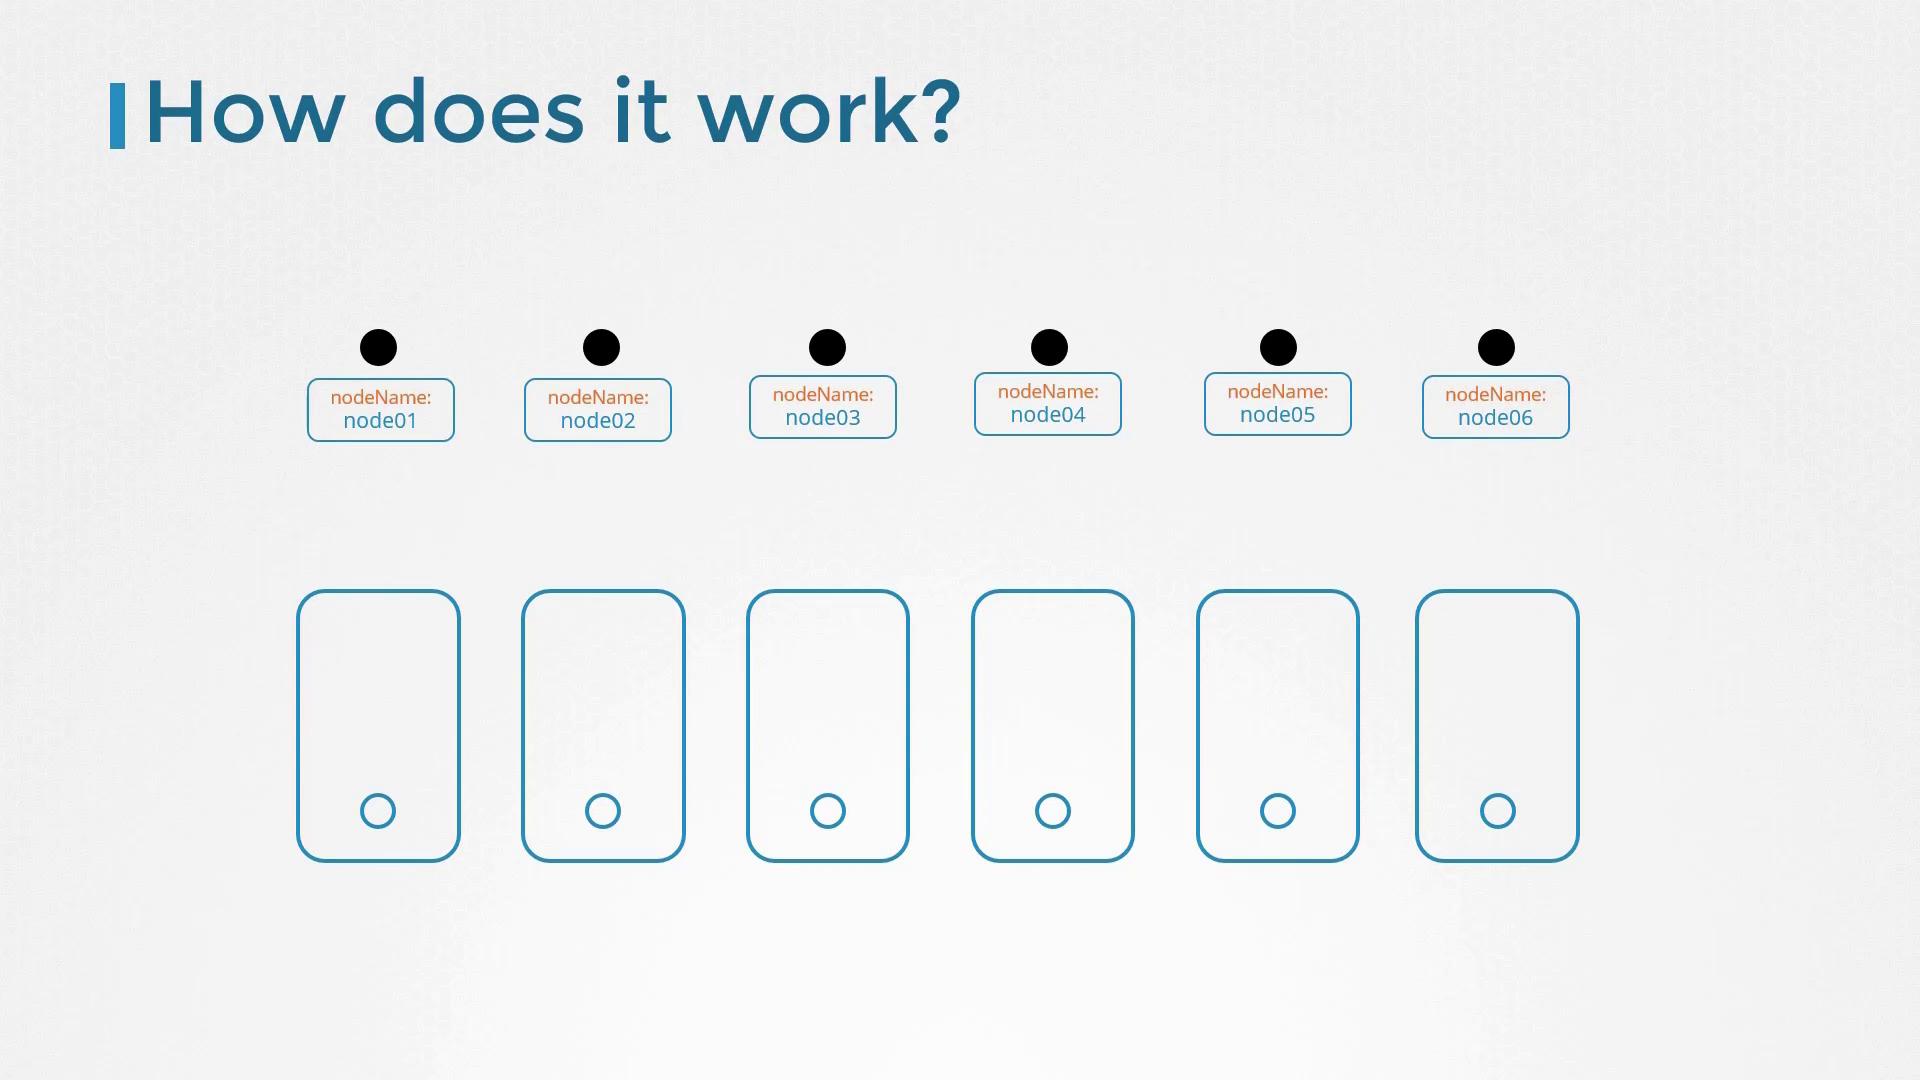
DaemonSets automatically schedule Pods on every node in your cluster. In earlier Kubernetes versions, the nodeName property was used to assign Pods directly to nodes, bypassing the scheduler. However, since version 1.12, DaemonSets leverage the default scheduler and node affinity rules to manage Pod placement.
To summarize, a DaemonSet ensures that a specific Pod is running on all nodes in your cluster—making it ideal for running services such as: