> ## Documentation Index
> Fetch the complete documentation index at: https://notes.kodekloud.com/llms.txt
> Use this file to discover all available pages before exploring further.
# Demo Setting Up Virtual Machines on Windows
> Guide to create and configure VirtualBox Vagrant virtual machines on Windows to run a three node Kubernetes cluster for kubeadm demos.
Before installing a Kubernetes cluster with kubeadm, you need a few Linux nodes that will become the cluster machines. For a basic kubeadm demo we typically use three nodes: one control-plane and two workers. Instead of buying extra hardware, this guide shows how to create those nodes as virtual machines on a Windows laptop using a hypervisor and an automation tool.
This tutorial uses:
* VirtualBox as the hypervisor (free, cross-platform).
* Vagrant to automate creating multiple VMs from a single Vagrantfile.
Note: On Apple Silicon (M1/M2/M3/M4) VirtualBox may not work reliably. If you are on macOS with Apple Silicon, consider using Multipass or follow macOS-specific instructions.
Prerequisites:
* Windows laptop with administrative rights
* VirtualBox installed (see below)
* Vagrant installed (see below)
* Git (optional, to clone the example repository)
* Internet access so Vagrant can download box images
## Install VirtualBox (Windows)
Download and install VirtualBox from the official site:
* VirtualBox: [https://www.virtualbox.org](https://www.virtualbox.org)
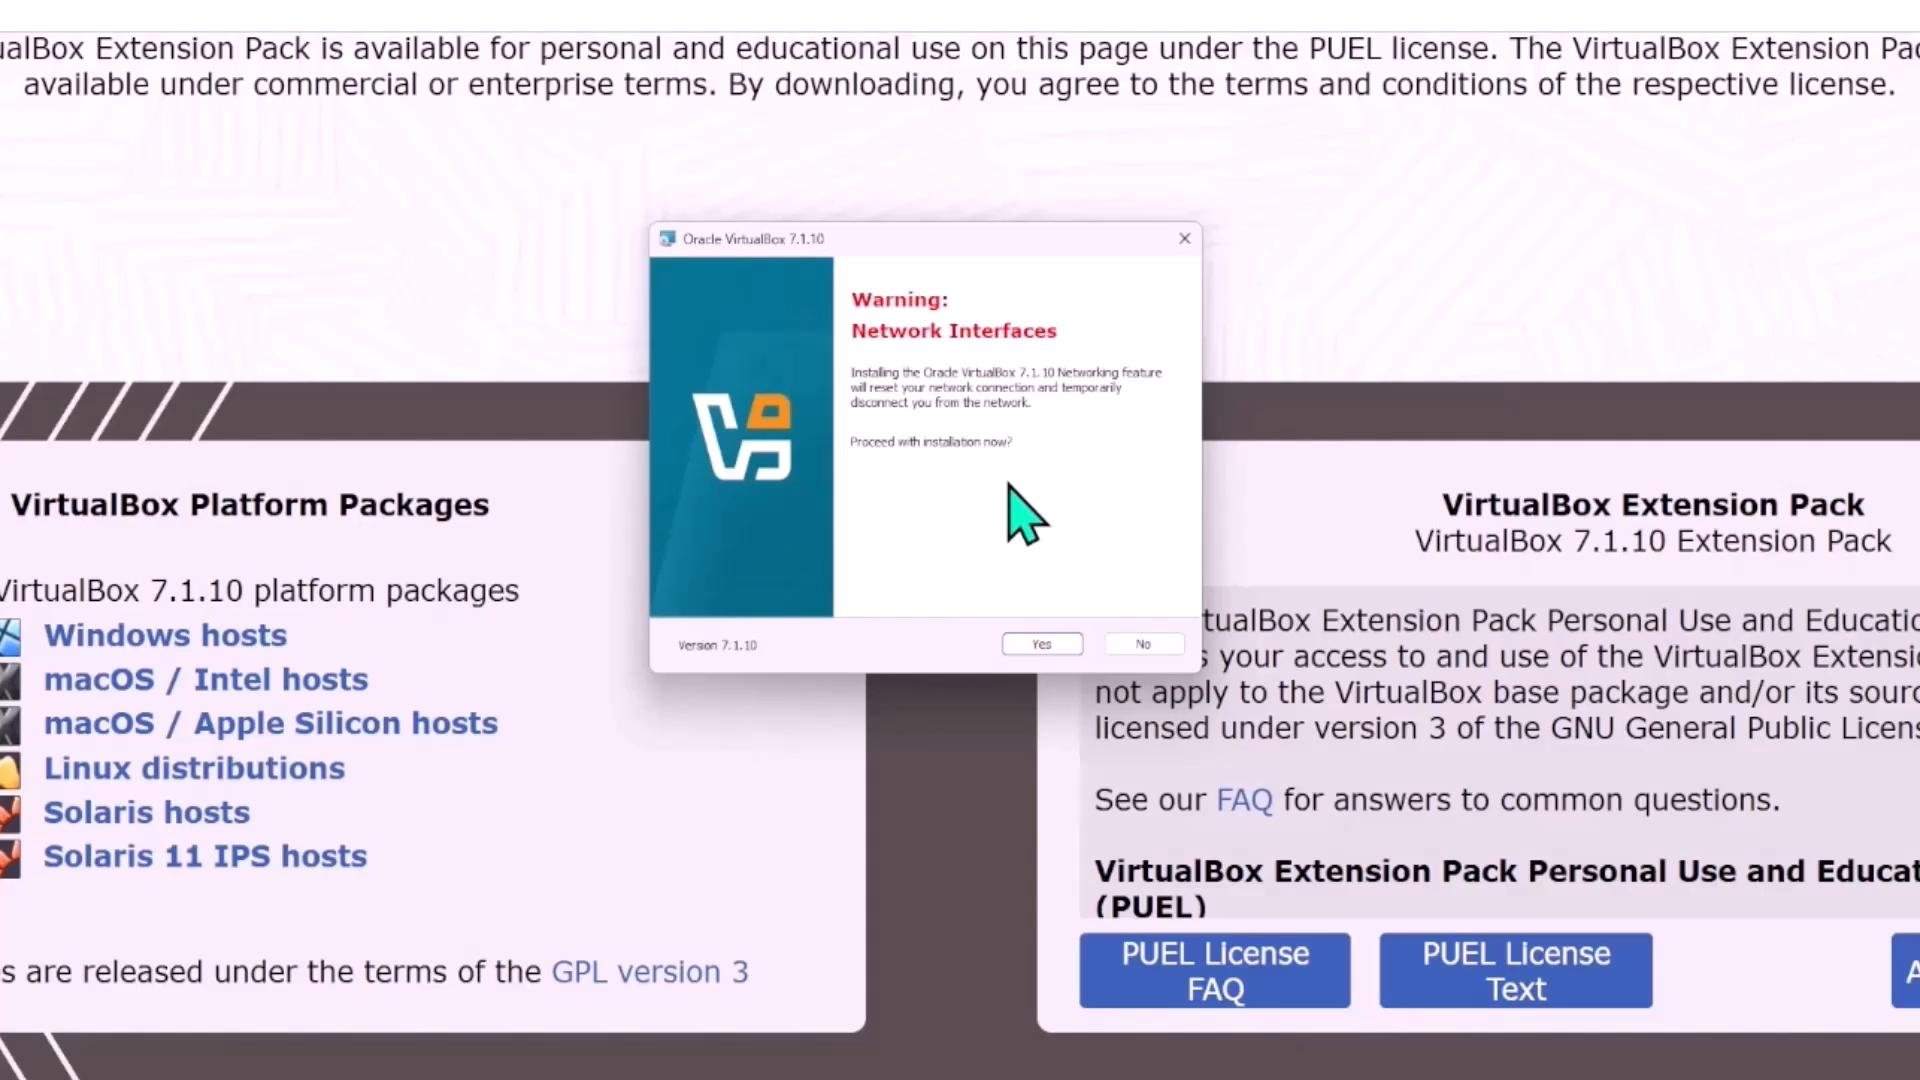
Select the Windows hosts installer for this demo, run the installer, and follow the prompts. During installation, you may see a network-related warning that VirtualBox will make temporary network changes — accept it so the installer can create the required virtual network interfaces.
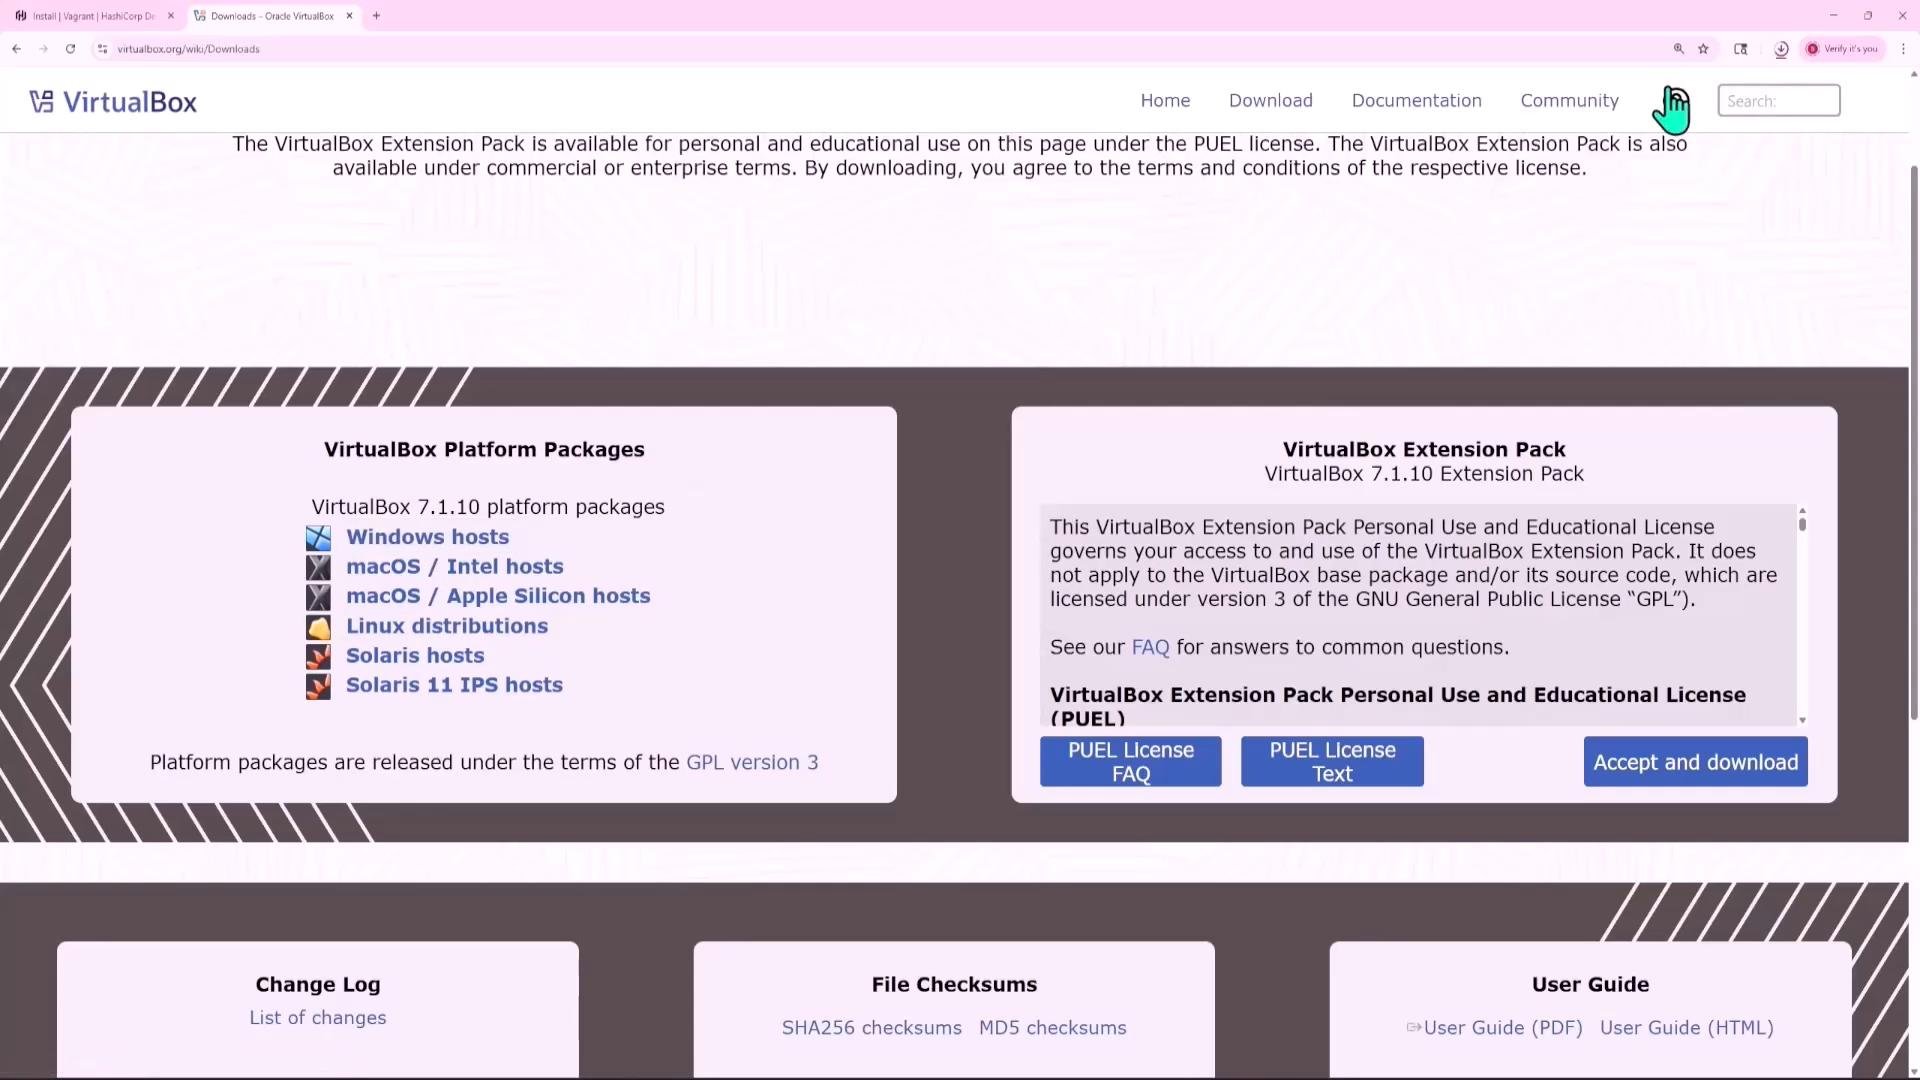 Run the installer and accept the network changes when prompted.
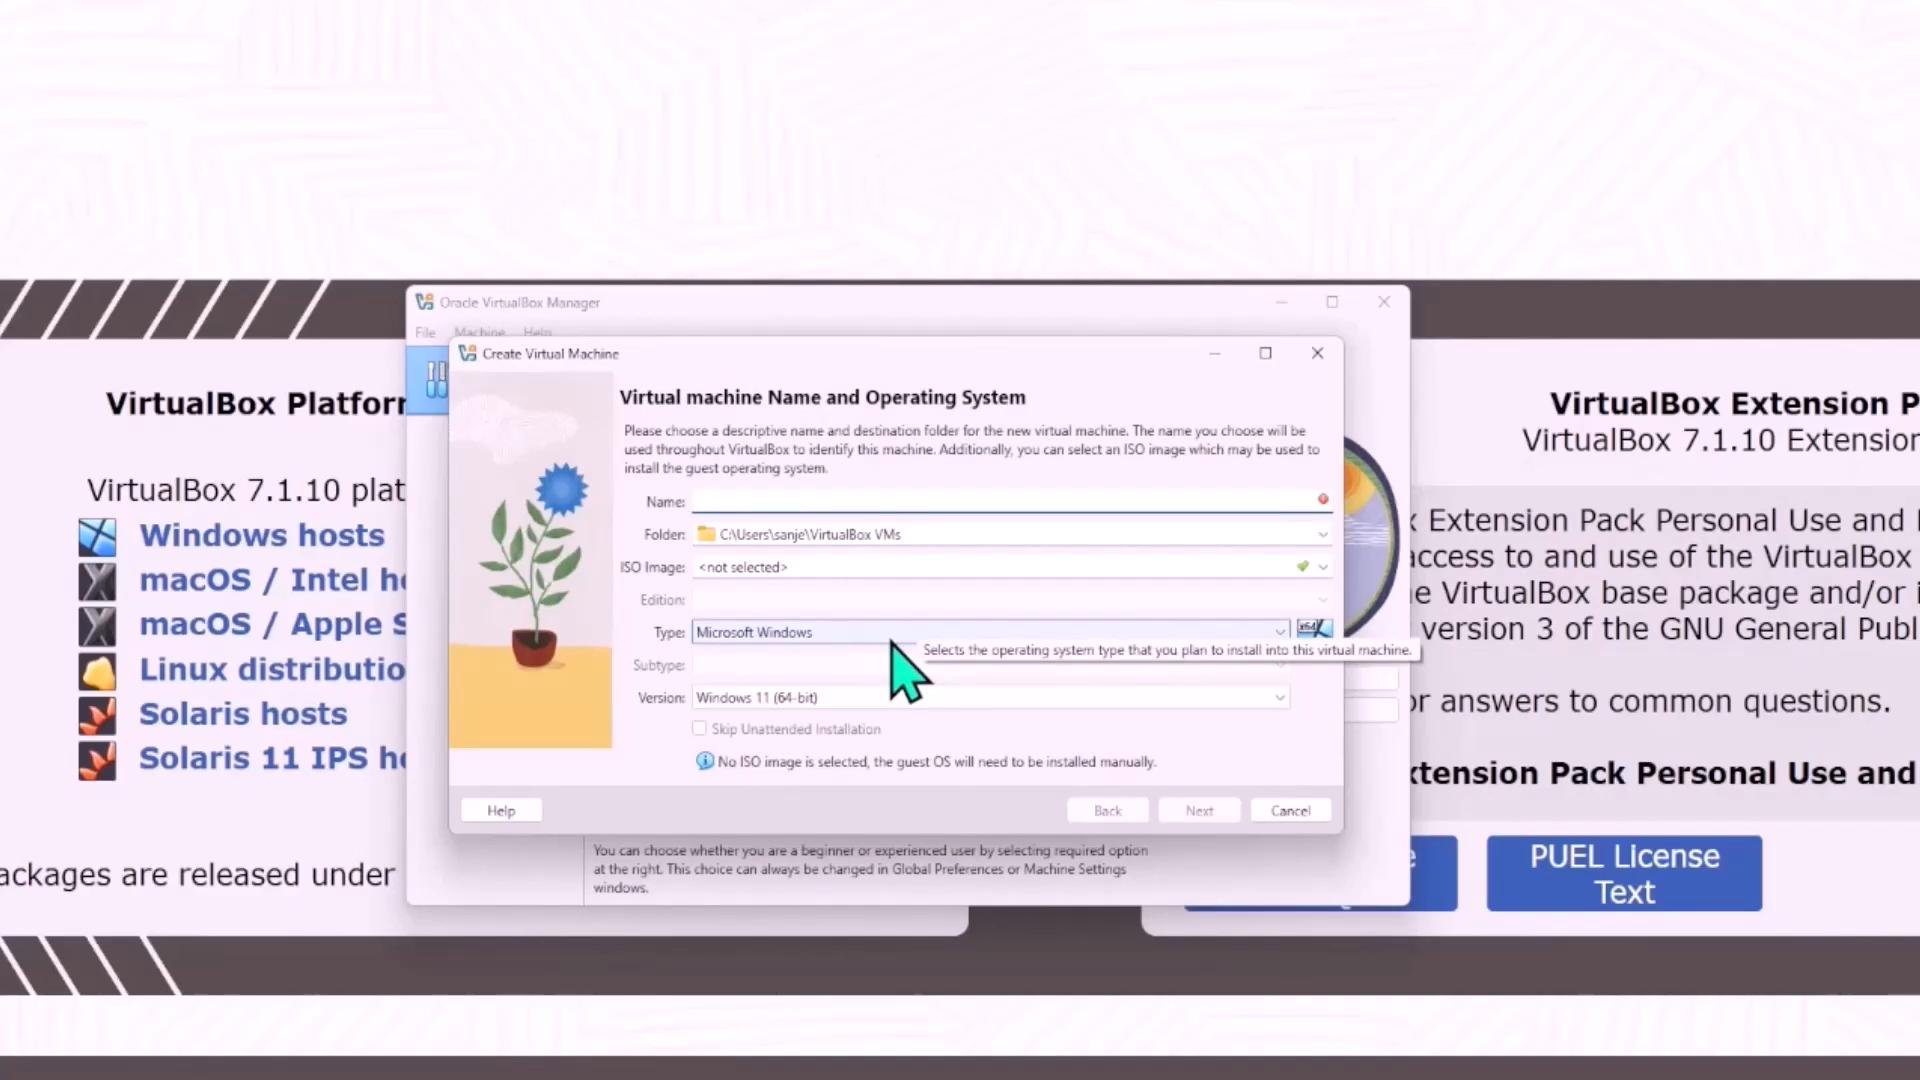
 After installation you can open VirtualBox and manually create VMs (New → select an ISO, OS type, etc.). Creating three VMs manually is time consuming, so we’ll automate this with Vagrant.
 If you are on macOS with Apple Silicon, use Multipass or macOS-specific instructions instead of VirtualBox to avoid compatibility issues.
## Install Vagrant (Windows)
Download the Vagrant installer for Windows from the official site and run the MSI:
* Vagrant: [https://developer.hashicorp.com/vagrant](https://developer.hashicorp.com/vagrant)
After installation, restart your machine if prompted. Verify the installation:
```bash theme={null}
vagrant --version
```
Expected output (example):
```text theme={null}
Vagrant 2.4.6
```
Vagrant uses a Vagrantfile to automate VM creation. This guide uses a pre-built Vagrantfile (in the example repo below) that creates one control-plane VM and two worker VMs with fixed IPs for the cluster.
If you are on macOS with Apple Silicon, use Multipass or macOS-specific instructions instead of VirtualBox to avoid compatibility issues.
## Install Vagrant (Windows)
Download the Vagrant installer for Windows from the official site and run the MSI:
* Vagrant: [https://developer.hashicorp.com/vagrant](https://developer.hashicorp.com/vagrant)
After installation, restart your machine if prompted. Verify the installation:
```bash theme={null}
vagrant --version
```
Expected output (example):
```text theme={null}
Vagrant 2.4.6
```
Vagrant uses a Vagrantfile to automate VM creation. This guide uses a pre-built Vagrantfile (in the example repo below) that creates one control-plane VM and two worker VMs with fixed IPs for the cluster.
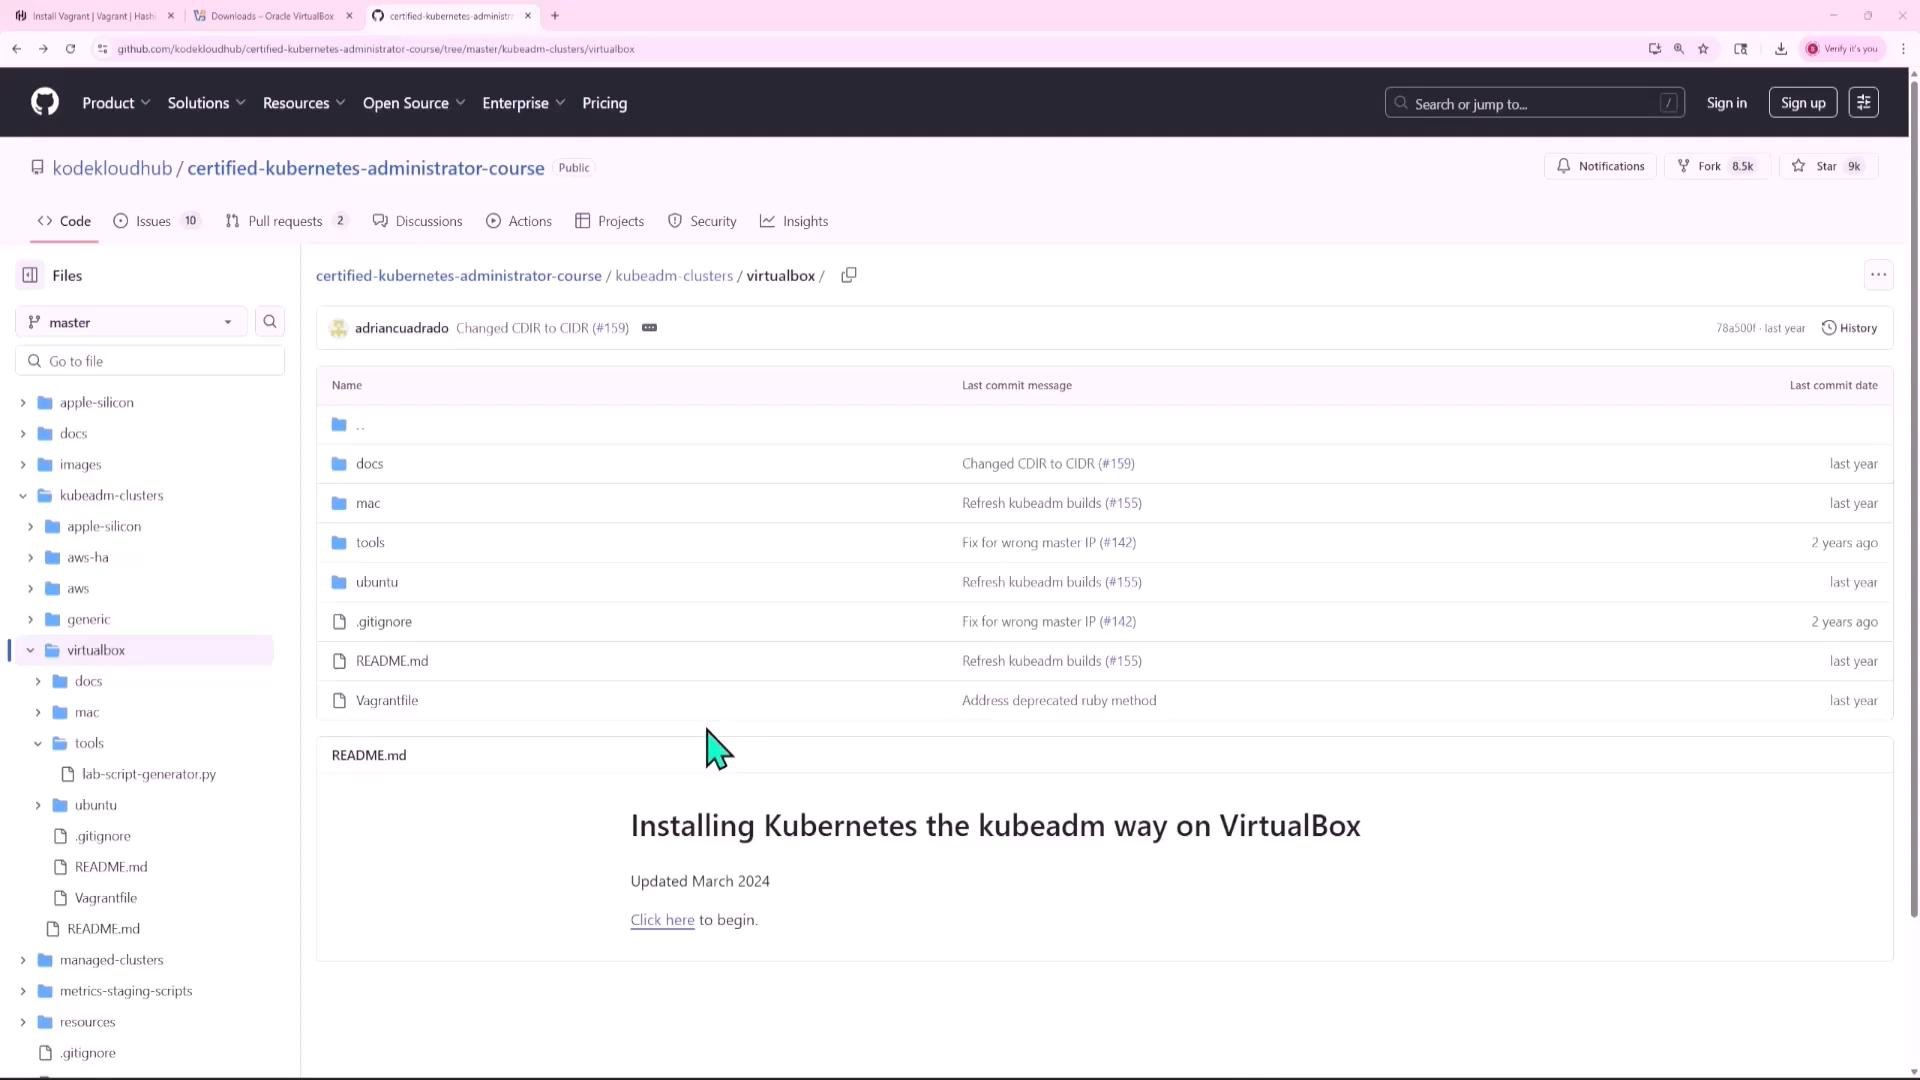 ## Clone the repository and use the VirtualBox Vagrant configuration
Clone the example repository (replace with your desired repo URL if different):
```bash theme={null}
git clone https://github.com/kodekloudhub/certified-kubernetes-administrator-course.git
```
Change into the VirtualBox Vagrant configuration directory:
```bash theme={null}
cd certified-kubernetes-administrator-course/kubeadm-clusters/virtualbox
```
Make sure VirtualBox is available before starting Vagrant (not strictly required, but helpful).
Start up the VMs:
```bash theme={null}
vagrant up
```
Vagrant will provision three VMs automatically (controlplane, node01, node02) using the VirtualBox provider. Typical output lines include:
```text theme={null}
Bringing machine 'controlplane' up with 'virtualbox' provider...
Bringing machine 'node01' up with 'virtualbox' provider...
Bringing machine 'node02' up with 'virtualbox' provider...
```
A successful build finishes with a message such as:
```text theme={null}
VM build complete!
Use either of the following to access any NodePort services you create from your browser
replacing "port_number" with the number of your NodePort.
http://192.168.86.33:port_number
http://192.168.86.34:port_number
```
If provisioning fails or you need to start over:
```bash theme={null}
vagrant destroy -f
vagrant up
```
To check VM status:
```bash theme={null}
vagrant status
```
Example output:
```text theme={null}
Current machine states:
controlplane running (virtualbox)
node01 running (virtualbox)
node02 running (virtualbox)
This environment represents multiple VMs. The VMs are all listed
above with their current state. For more information about a specific
VM, run `vagrant status NAME`.
```
## Connect to the VMs
SSH into any VM created by Vagrant. Example — control-plane:
```bash theme={null}
vagrant ssh controlplane
```
You should see the Linux welcome message:
```text theme={null}
Welcome to Ubuntu 22.04.3 LTS (GNU/Linux 5.15.0-92-generic x86_64)
...
vagrant@controlplane:~$
```
Open extra terminal tabs and connect to the worker nodes:
```bash theme={null}
vagrant ssh node01
vagrant ssh node02
```
Rename terminal tabs or label them so you know which session corresponds to which VM.
## Verify network interfaces and IP addresses
On each VM, list network interfaces and IPs:
```bash theme={null}
ip addr
```
Example (controlplane):
```text theme={null}
vagrant@controlplane:~$ ip addr
1: lo: mtu 65536 qdisc noqueue state UNKNOWN group default qlen 1000
link/loopback 00:00:00:00:00:00 brd 00:00:00:00:00:00
inet 127.0.0.1/8 scope host lo
...
2: enp0s3: mtu 1500 qdisc fq_codel state UP group default qlen 1000
inet 10.0.2.15/24 brd 10.0.2.255 scope global dynamic enp0s3
3: enp0s8: mtu 1500 qdisc fq_codel state UP group default qlen 1000
inet 192.168.86.32/24 brd 192.168.86.255 scope global dynamic enp0s8
```
In this Vagrant configuration the VMs use a second interface (enp0s8) with addresses in the `192.168.86.0/24` network. The typical mapping is:
| VM name | Role | IP address |
| - | - | - |
| controlplane | control-plane | `192.168.86.32` |
| node01 | worker | `192.168.86.33` |
| node02 | worker | `192.168.86.34` |
You will also see `enp0s3` with `10.0.2.15` on each VM — a NAT interface VirtualBox creates for internet access. For cluster communications and NodePort access we rely on the bridged/enp0s8 network, not the NAT interface.
## Helpful Vagrantfile excerpts
The Vagrantfile configures BUILD\_MODE, number of worker nodes, and helper functions. The following excerpts illustrate key configuration and helper logic.
Network and build-mode configuration (Ruby):
```ruby theme={null}
# -*- mode: ruby -*-
# Set the build mode
# "BRIDGE" - Places VMs on your local network so cluster can be accessed from
# browser. (You must have enough spare IPs on your network)
# "NAT" - Places VMs in a private virtual network.
BUILD_MODE = "BRIDGE"
# Define the number of worker nodes
NUM_WORKER_NODES = 2
# Network parameters for NAT mode
IP_NW = "192.168.56"
MASTER_IP_START = 11
NODE_IP_START = 20
```
OS detection and bridge adapter selection helpers:
```ruby theme={null}
module OS
def OS.windows?
(/cygwin|mswin|mingw|bccwin|wince|emx/ =~ RUBY_PLATFORM) != nil
end
def OS.mac?
(/darwin/ =~ RUBY_PLATFORM) != nil
end
def OS.unix?
!OS.windows?
end
def OS.linux?
OS.unix? and not OS.mac?
end
def OS.jruby?
RUBY_ENGINE == "jruby"
end
end
def get_bridge_adapter()
if OS.windows?
return %x{powershell -Command "Get-NetRoute -DestinationPrefix 0.0.0.0/0 | Get-NetAdapter | Select-Object -ExpandProperty InterfaceDescription"}.chomp
elsif OS.linux?
return %x{ip route | grep default | awk '{ print $5 }'}.chomp
elsif OS.mac?
return %x{mac/mac-bridge.sh}.chomp
end
end
```
Small helpers to detect VM state:
```ruby theme={null}
def get_machine_id(vm_name)
machine_id_filepath = ".vagrant/machines/#{vm_name}/virtualbox/id"
if not File.exist? machine_id_filepath
return nil
else
return File.read(machine_id_filepath)
end
end
def all_nodes_up?
if get_machine_id("controlplane").nil?
return false
end
(1..NUM_WORKER_NODES).each do |i|
if get_machine_id("node#{i}").nil?
return false
end
end
return true
end
```
(You do not need to edit these excerpts — they illustrate how the Vagrantfile determines network adapters and node counts.)
## Tear down the environment
When you are done and want to free resources, destroy the VMs created by Vagrant in the current directory:
```bash theme={null}
vagrant destroy -f
```
This will stop and delete all VMs created by the Vagrantfile.
## Next steps: kubeadm and Kubernetes bootstrap
With the three VMs provisioned and reachable via SSH, you can proceed to:
1. Install Docker or containerd on all nodes.
2. Install kubeadm, kubelet, and kubectl.
3. Initialize the control-plane with `kubeadm init`.
4. Join worker nodes with `kubeadm join ...`.
Use the VM IP addresses listed above (`192.168.86.32`, `192.168.86.33`, `192.168.86.34`) for the cluster control-plane and worker node communications, and to access NodePort services from your host browser.
## Troubleshooting tips
* If `vagrant up` fails, inspect the Vagrant logs and provider output, then run `vagrant destroy -f` and try again.
* If network bridged mode fails because your network does not provide free IPs, set `BUILD_MODE = "NAT"` in the Vagrantfile and adjust NAT IP ranges.
* For VirtualBox networking issues on Windows, ensure Hyper-V is disabled (Hyper-V can conflict with VirtualBox networking).
* If SSH is unavailable, verify the VM boot logs in VirtualBox and that the Vagrant box image download completed successfully.
## Links and references
* VirtualBox: [https://www.virtualbox.org](https://www.virtualbox.org)
* Vagrant: [https://developer.hashicorp.com/vagrant](https://developer.hashicorp.com/vagrant)
* Kubernetes kubeadm docs: [https://kubernetes.io/docs/setup/production-environment/tools/kubeadm/](https://kubernetes.io/docs/setup/production-environment/tools/kubeadm/)
* GitHub repo used in examples: `https://github.com/kodekloudhub/certified-kubernetes-administrator-course`
With these VMs created and reachable, you’re ready to install and bootstrap Kubernetes using kubeadm.
This documentation is built and hosted on [Mintlify](https://mintlify.com), a developer documentation platform.
## Clone the repository and use the VirtualBox Vagrant configuration
Clone the example repository (replace with your desired repo URL if different):
```bash theme={null}
git clone https://github.com/kodekloudhub/certified-kubernetes-administrator-course.git
```
Change into the VirtualBox Vagrant configuration directory:
```bash theme={null}
cd certified-kubernetes-administrator-course/kubeadm-clusters/virtualbox
```
Make sure VirtualBox is available before starting Vagrant (not strictly required, but helpful).
Start up the VMs:
```bash theme={null}
vagrant up
```
Vagrant will provision three VMs automatically (controlplane, node01, node02) using the VirtualBox provider. Typical output lines include:
```text theme={null}
Bringing machine 'controlplane' up with 'virtualbox' provider...
Bringing machine 'node01' up with 'virtualbox' provider...
Bringing machine 'node02' up with 'virtualbox' provider...
```
A successful build finishes with a message such as:
```text theme={null}
VM build complete!
Use either of the following to access any NodePort services you create from your browser
replacing "port_number" with the number of your NodePort.
http://192.168.86.33:port_number
http://192.168.86.34:port_number
```
If provisioning fails or you need to start over:
```bash theme={null}
vagrant destroy -f
vagrant up
```
To check VM status:
```bash theme={null}
vagrant status
```
Example output:
```text theme={null}
Current machine states:
controlplane running (virtualbox)
node01 running (virtualbox)
node02 running (virtualbox)
This environment represents multiple VMs. The VMs are all listed
above with their current state. For more information about a specific
VM, run `vagrant status NAME`.
```
## Connect to the VMs
SSH into any VM created by Vagrant. Example — control-plane:
```bash theme={null}
vagrant ssh controlplane
```
You should see the Linux welcome message:
```text theme={null}
Welcome to Ubuntu 22.04.3 LTS (GNU/Linux 5.15.0-92-generic x86_64)
...
vagrant@controlplane:~$
```
Open extra terminal tabs and connect to the worker nodes:
```bash theme={null}
vagrant ssh node01
vagrant ssh node02
```
Rename terminal tabs or label them so you know which session corresponds to which VM.
## Verify network interfaces and IP addresses
On each VM, list network interfaces and IPs:
```bash theme={null}
ip addr
```
Example (controlplane):
```text theme={null}
vagrant@controlplane:~$ ip addr
1: lo: mtu 65536 qdisc noqueue state UNKNOWN group default qlen 1000
link/loopback 00:00:00:00:00:00 brd 00:00:00:00:00:00
inet 127.0.0.1/8 scope host lo
...
2: enp0s3: mtu 1500 qdisc fq_codel state UP group default qlen 1000
inet 10.0.2.15/24 brd 10.0.2.255 scope global dynamic enp0s3
3: enp0s8: mtu 1500 qdisc fq_codel state UP group default qlen 1000
inet 192.168.86.32/24 brd 192.168.86.255 scope global dynamic enp0s8
```
In this Vagrant configuration the VMs use a second interface (enp0s8) with addresses in the `192.168.86.0/24` network. The typical mapping is:
| VM name | Role | IP address |
| - | - | - |
| controlplane | control-plane | `192.168.86.32` |
| node01 | worker | `192.168.86.33` |
| node02 | worker | `192.168.86.34` |
You will also see `enp0s3` with `10.0.2.15` on each VM — a NAT interface VirtualBox creates for internet access. For cluster communications and NodePort access we rely on the bridged/enp0s8 network, not the NAT interface.
## Helpful Vagrantfile excerpts
The Vagrantfile configures BUILD\_MODE, number of worker nodes, and helper functions. The following excerpts illustrate key configuration and helper logic.
Network and build-mode configuration (Ruby):
```ruby theme={null}
# -*- mode: ruby -*-
# Set the build mode
# "BRIDGE" - Places VMs on your local network so cluster can be accessed from
# browser. (You must have enough spare IPs on your network)
# "NAT" - Places VMs in a private virtual network.
BUILD_MODE = "BRIDGE"
# Define the number of worker nodes
NUM_WORKER_NODES = 2
# Network parameters for NAT mode
IP_NW = "192.168.56"
MASTER_IP_START = 11
NODE_IP_START = 20
```
OS detection and bridge adapter selection helpers:
```ruby theme={null}
module OS
def OS.windows?
(/cygwin|mswin|mingw|bccwin|wince|emx/ =~ RUBY_PLATFORM) != nil
end
def OS.mac?
(/darwin/ =~ RUBY_PLATFORM) != nil
end
def OS.unix?
!OS.windows?
end
def OS.linux?
OS.unix? and not OS.mac?
end
def OS.jruby?
RUBY_ENGINE == "jruby"
end
end
def get_bridge_adapter()
if OS.windows?
return %x{powershell -Command "Get-NetRoute -DestinationPrefix 0.0.0.0/0 | Get-NetAdapter | Select-Object -ExpandProperty InterfaceDescription"}.chomp
elsif OS.linux?
return %x{ip route | grep default | awk '{ print $5 }'}.chomp
elsif OS.mac?
return %x{mac/mac-bridge.sh}.chomp
end
end
```
Small helpers to detect VM state:
```ruby theme={null}
def get_machine_id(vm_name)
machine_id_filepath = ".vagrant/machines/#{vm_name}/virtualbox/id"
if not File.exist? machine_id_filepath
return nil
else
return File.read(machine_id_filepath)
end
end
def all_nodes_up?
if get_machine_id("controlplane").nil?
return false
end
(1..NUM_WORKER_NODES).each do |i|
if get_machine_id("node#{i}").nil?
return false
end
end
return true
end
```
(You do not need to edit these excerpts — they illustrate how the Vagrantfile determines network adapters and node counts.)
## Tear down the environment
When you are done and want to free resources, destroy the VMs created by Vagrant in the current directory:
```bash theme={null}
vagrant destroy -f
```
This will stop and delete all VMs created by the Vagrantfile.
## Next steps: kubeadm and Kubernetes bootstrap
With the three VMs provisioned and reachable via SSH, you can proceed to:
1. Install Docker or containerd on all nodes.
2. Install kubeadm, kubelet, and kubectl.
3. Initialize the control-plane with `kubeadm init`.
4. Join worker nodes with `kubeadm join ...`.
Use the VM IP addresses listed above (`192.168.86.32`, `192.168.86.33`, `192.168.86.34`) for the cluster control-plane and worker node communications, and to access NodePort services from your host browser.
## Troubleshooting tips
* If `vagrant up` fails, inspect the Vagrant logs and provider output, then run `vagrant destroy -f` and try again.
* If network bridged mode fails because your network does not provide free IPs, set `BUILD_MODE = "NAT"` in the Vagrantfile and adjust NAT IP ranges.
* For VirtualBox networking issues on Windows, ensure Hyper-V is disabled (Hyper-V can conflict with VirtualBox networking).
* If SSH is unavailable, verify the VM boot logs in VirtualBox and that the Vagrant box image download completed successfully.
## Links and references
* VirtualBox: [https://www.virtualbox.org](https://www.virtualbox.org)
* Vagrant: [https://developer.hashicorp.com/vagrant](https://developer.hashicorp.com/vagrant)
* Kubernetes kubeadm docs: [https://kubernetes.io/docs/setup/production-environment/tools/kubeadm/](https://kubernetes.io/docs/setup/production-environment/tools/kubeadm/)
* GitHub repo used in examples: `https://github.com/kodekloudhub/certified-kubernetes-administrator-course`
With these VMs created and reachable, you’re ready to install and bootstrap Kubernetes using kubeadm.
This documentation is built and hosted on [Mintlify](https://mintlify.com), a developer documentation platform.