> ## Documentation Index
> Fetch the complete documentation index at: https://notes.kodekloud.com/llms.txt
> Use this file to discover all available pages before exploring further.
# Replication Controllers and ReplicaSets
> This article explores Replication Controllers and ReplicaSets in
Kubernetes controllers are the brains behind orchestrating your application's containers. In this article, we dive into two important controllers: the classic Replication Controller and its modern successor, the ReplicaSet. Both ensure high availability and load balancing, but they differ in their API versions and configuration nuances.
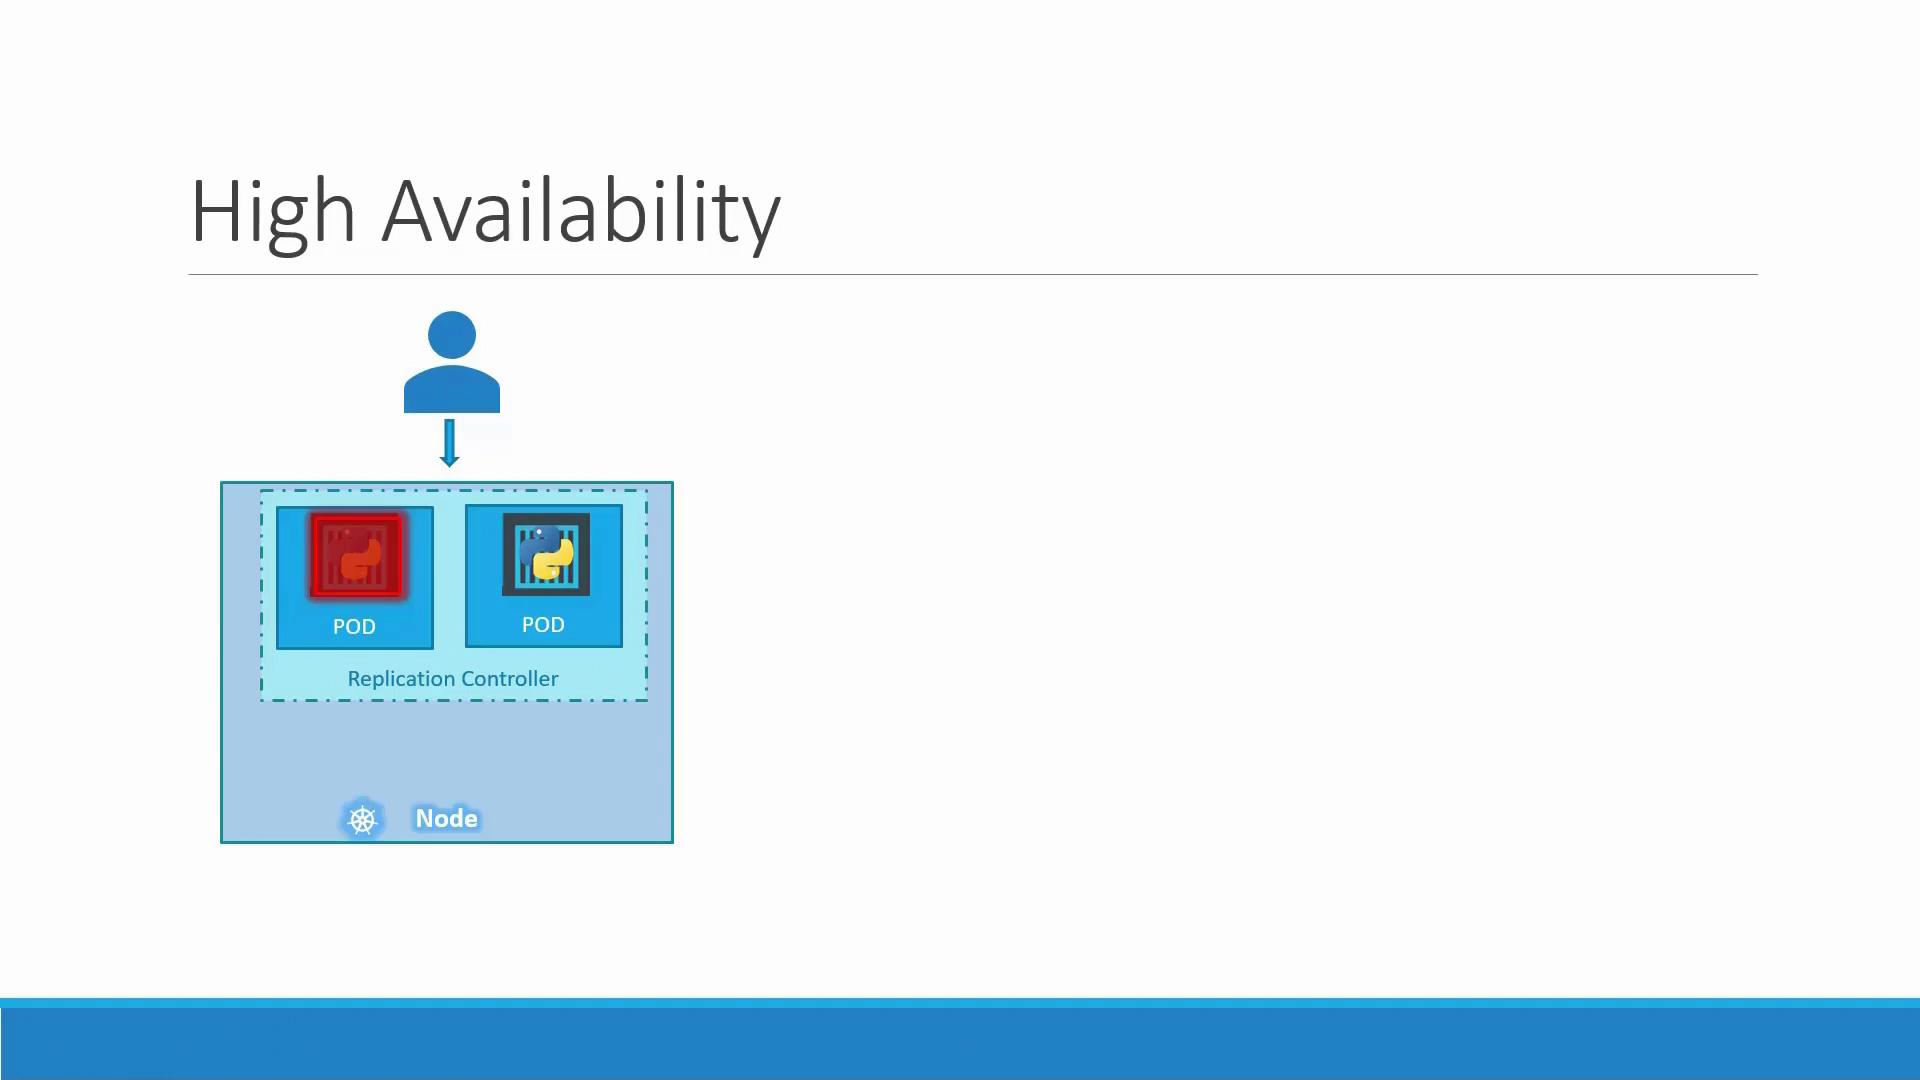
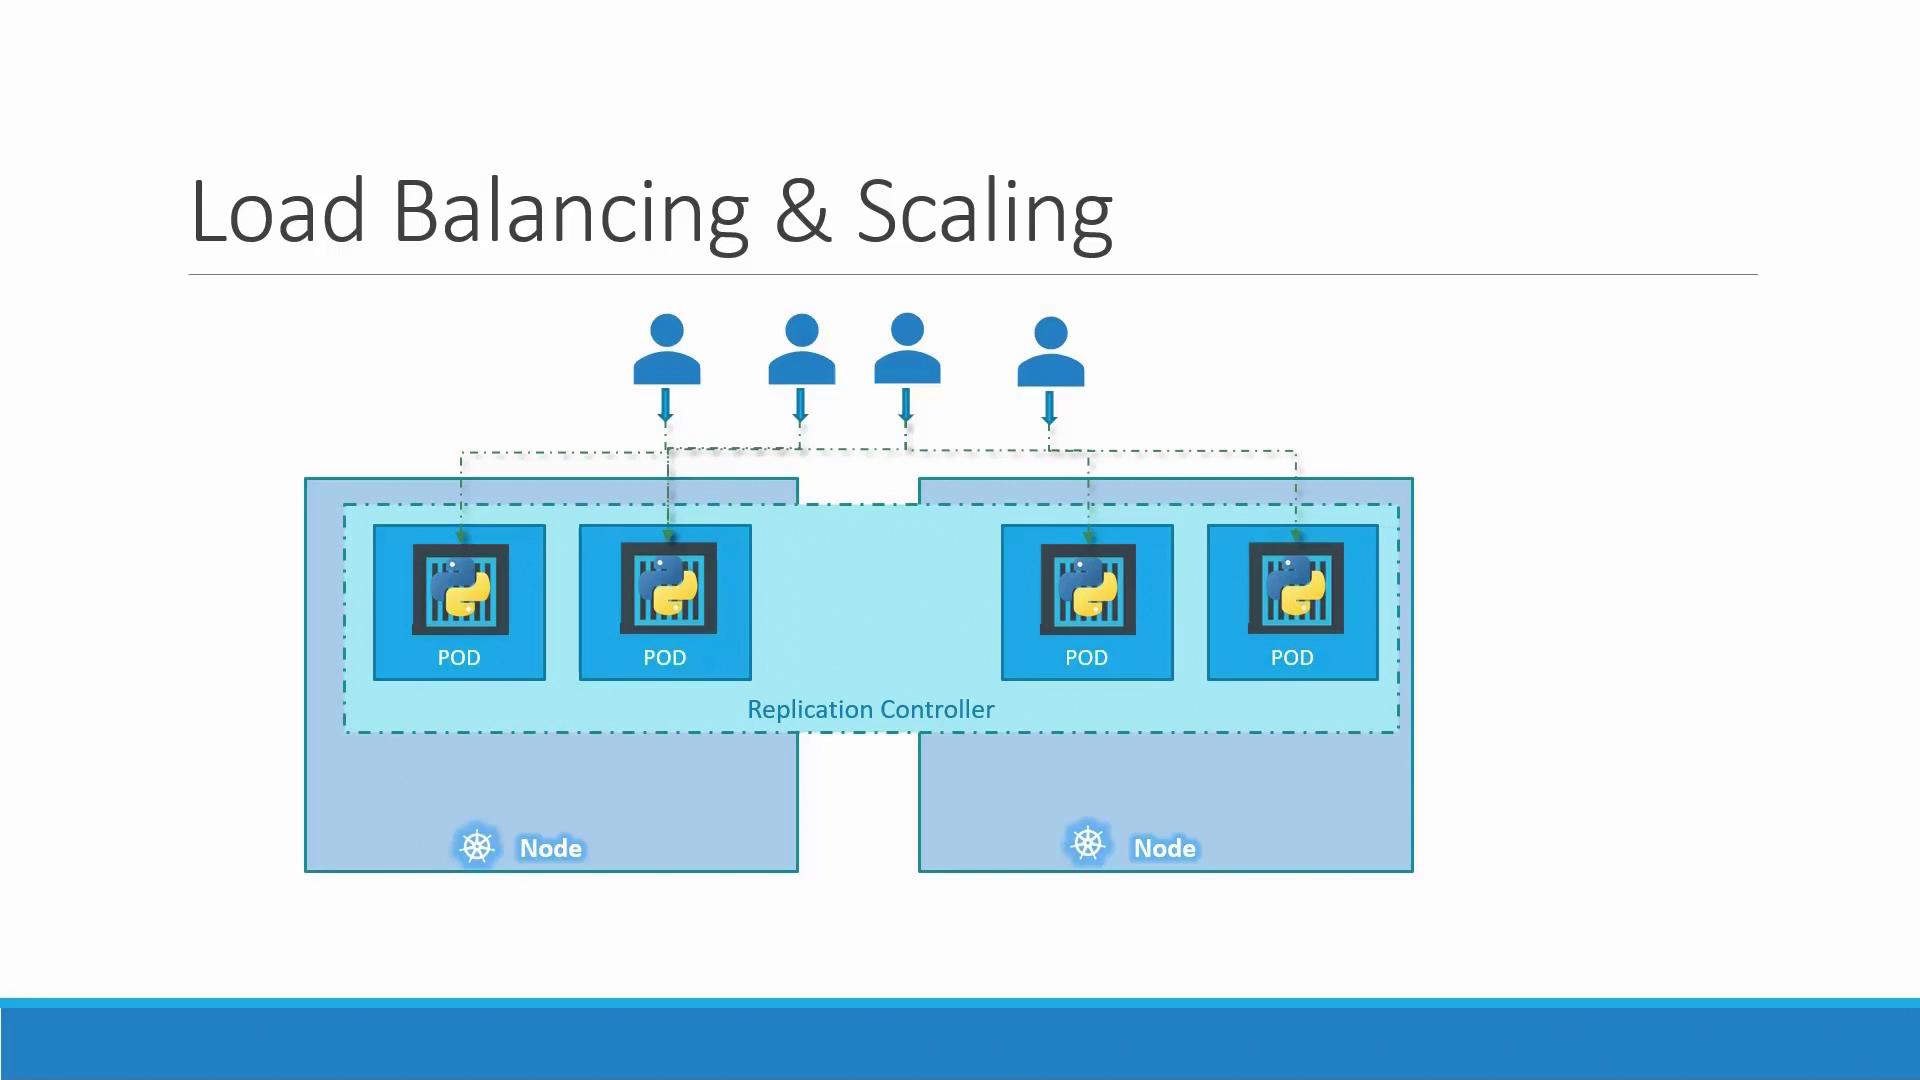
Imagine an application running on a single pod. If that pod fails, your application becomes unavailable. The Replication Controller prevents this by maintaining multiple instances of a pod. It automatically replaces any pod that fails, ensuring continuous availability whether you need one or one hundred pods.
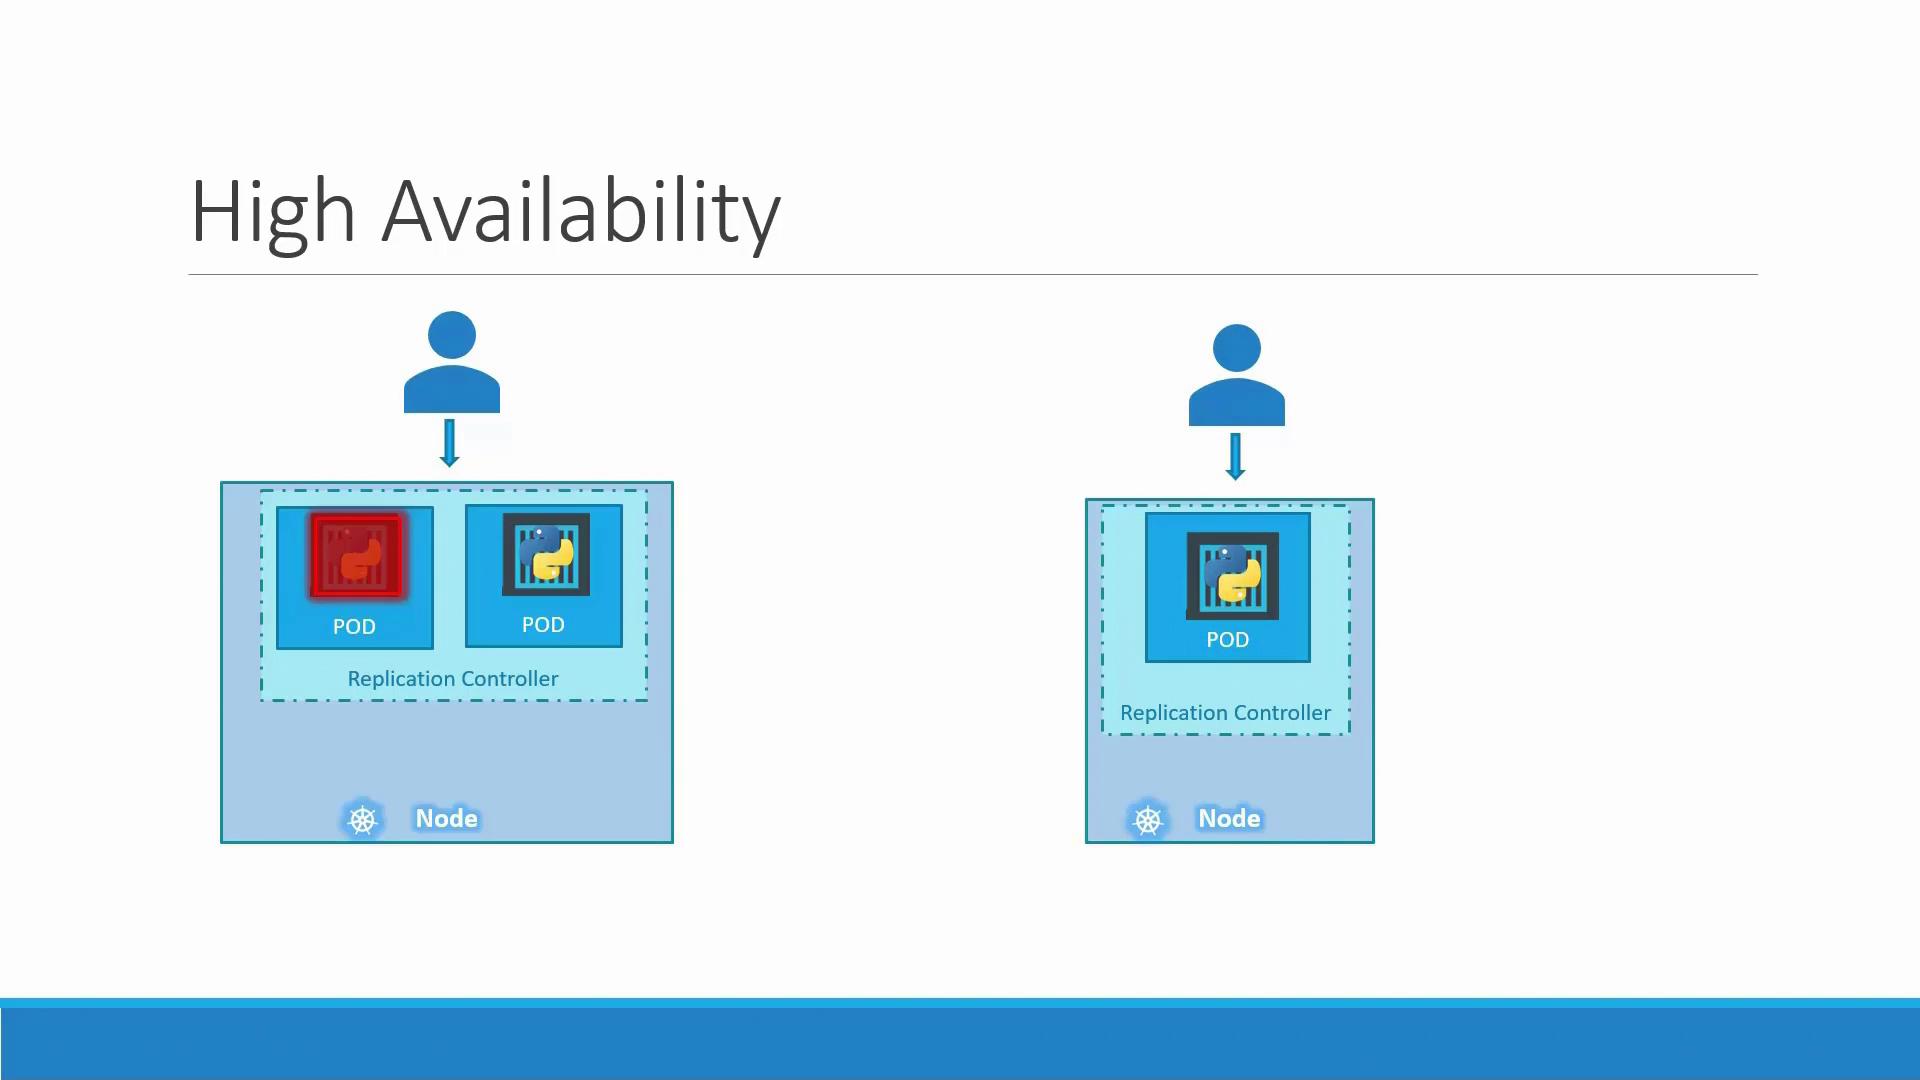
Even if you choose to run only one pod, the Replication Controller immediately replaces a failed pod, guaranteeing that the desired number of pods remains active.
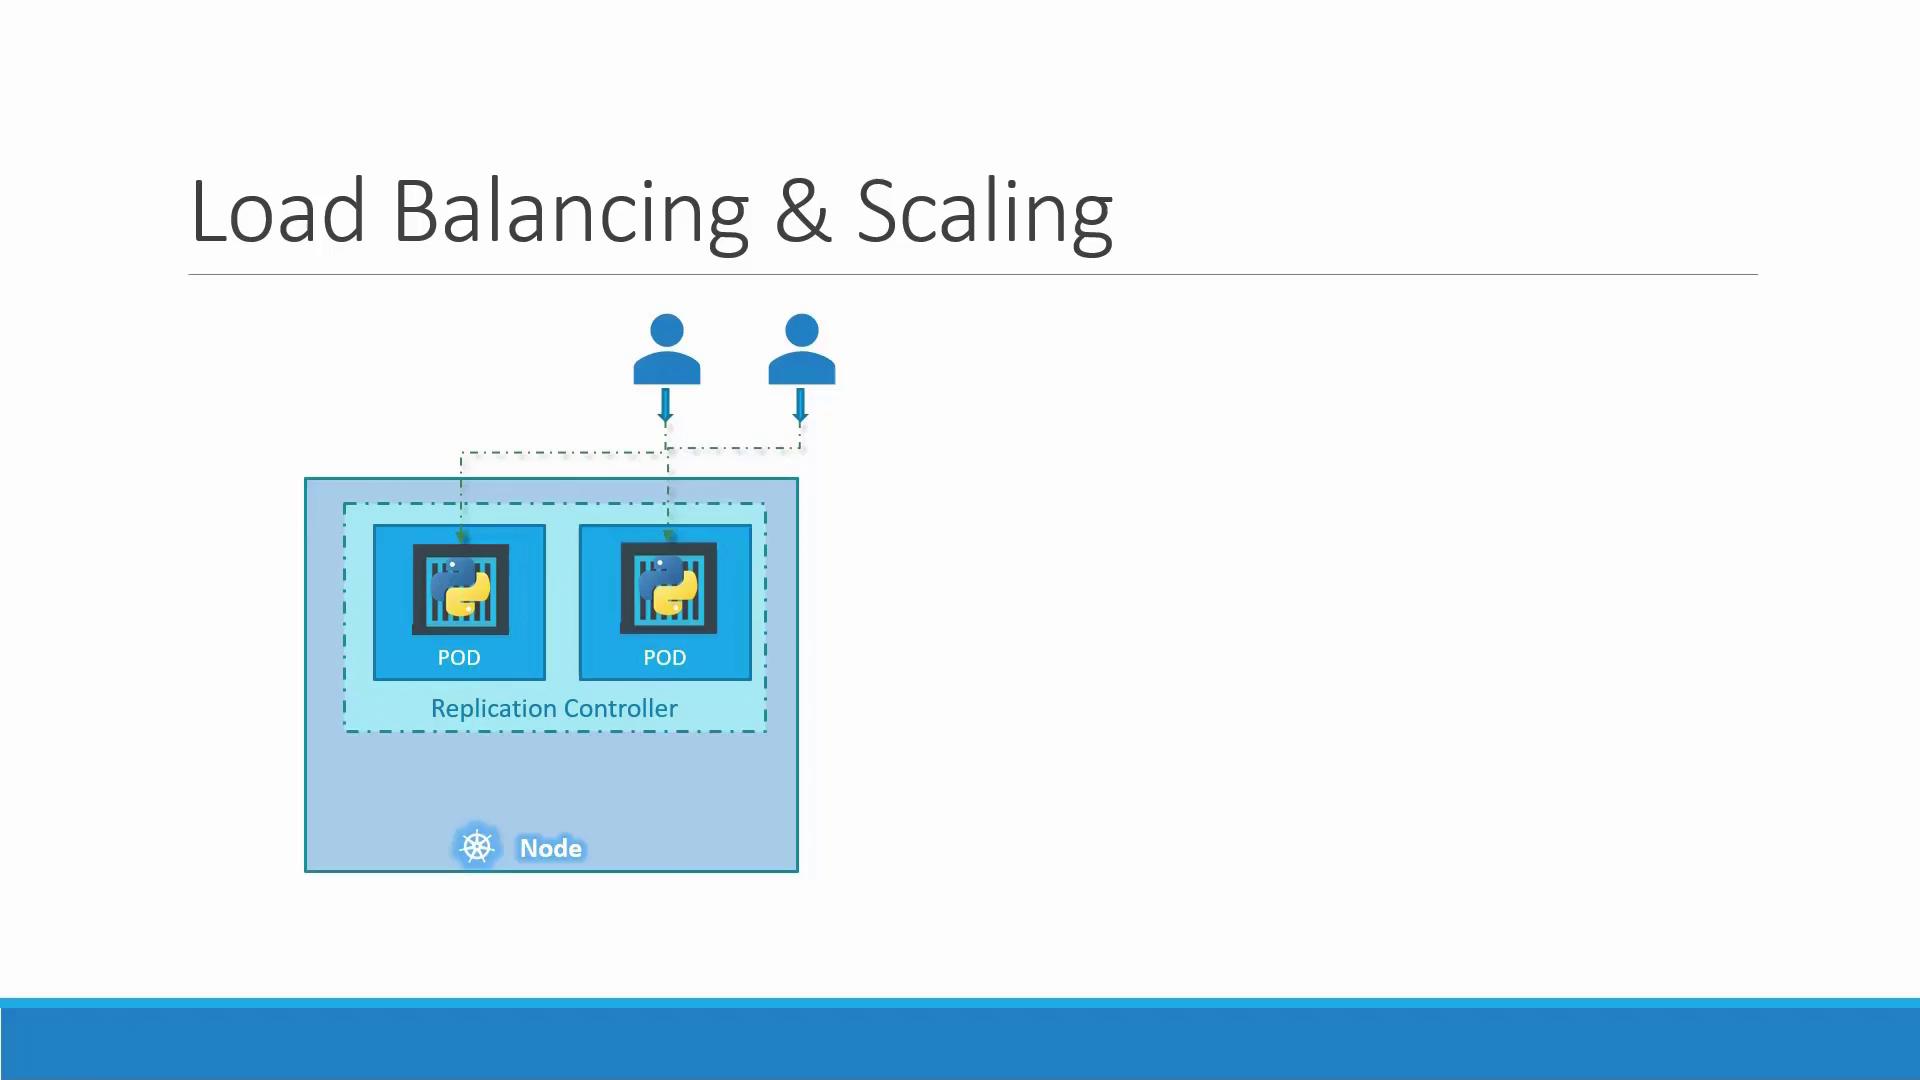
In addition to providing high availability, the Replication Controller helps distribute the load. When user demand increases, additional pods can be deployed, balancing the load across nodes and enhancing performance.
The controller can even span multiple nodes, ensuring that pods are distributed to maintain optimal performance and scalability.
Both Replication Controllers and ReplicaSets serve the same fundamental purpose: they ensure that your desired number of pod replicas are running. However, the ReplicaSet, which is part of the `apps/v1` API, introduces improvements such as the mandatory selector field.
The ReplicaSet replaces the older Replication Controller. Although they share core functionality, ReplicaSets offer a more explicit configuration, particularly with required label selectors. In our examples below, we will illustrate both methods, though future implementations will favor ReplicaSets.
***
## Creating a Replication Controller
Begin by creating a Replication Controller definition file named `rc-definition.yml`. This file is structured in four sections: API version, kind, metadata, and spec. The API version for a Replication Controller is `v1`, and the kind must be set as `ReplicationController`. Under metadata, assign a name (for instance, `myapp-rc`) and labels such as `app` and `type`. In the spec section, detail the pod template and specify the number of desired replicas.
Below is an example of a Replication Controller definition:
```yaml theme={null}
# rc-definition.yml
apiVersion: v1
kind: ReplicationController
metadata:
name: myapp-rc
labels:
app: myapp
type: front-end
spec:
replicas: 3
template:
metadata:
name: myapp-pod
labels:
app: myapp
type: front-end
spec:
containers:
- name: nginx-container
image: nginx
```
After saving the file, create the Replication Controller by executing:
```bash theme={null}
kubectl create -f rc-definition.yml
```
You should see a confirmation that the replication controller "myapp-rc" has been created. To verify, use:
```bash theme={null}
kubectl get replicationcontroller
```
This command displays the desired number of replicas, the number currently running, and the number ready. To view the individual pods managed by the replication controller, run:
```bash theme={null}
kubectl get pods
```
Pods created by the controller will typically begin with the name "myapp-rc," indicating they are managed automatically.
***
## Creating a ReplicaSet
ReplicaSets are similar to Replication Controllers but use the `apps/v1` API version and require an explicit selector. The `selector` field determines which pods the ReplicaSet should manage by matching labels.
Below is an example of a ReplicaSet definition file named `replicaset-definition.yml`:
```yaml theme={null}
# replicaset-definition.yml
apiVersion: apps/v1
kind: ReplicaSet
metadata:
name: myapp-replicaset
labels:
app: myapp
type: front-end
spec:
replicas: 3
selector:
matchLabels:
type: front-end
template:
metadata:
name: myapp-pod
labels:
app: myapp
type: front-end
spec:
containers:
- name: nginx-container
image: nginx
```
Notice that even if there are already three pods matching the selector, the template must be provided. The template ensures that any new pod created after a failure adheres to the desired configuration.
To create the ReplicaSet, run:
```bash theme={null}
kubectl create -f replicaset-definition.yml
```
Verify the creation of your ReplicaSet with:
```bash theme={null}
kubectl get replicaset
```
And check the pods by executing:
```bash theme={null}
kubectl get pods
```
***
## Scaling a ReplicaSet
Scaling a ReplicaSet allows you to adjust the number of pod replicas based on demand. Suppose you start with three replicas and later need to scale to six. You have two options:
1. Update the `replicas` number in your definition file (change from `3` to `6`) and apply the change:
```bash theme={null}
kubectl replace -f replicaset-definition.yml
```
2. Use the `kubectl scale` command directly. You can specify the new replica count using either the file or the ReplicaSet name:
```bash theme={null}
kubectl scale --replicas=6 -f replicaset-definition.yml
```
or
```bash theme={null}
kubectl scale --replicas=6 replicaset myapp-replicaset
```
Scaling a ReplicaSet using `kubectl scale` does not update the replica count in your definition file. The file will still display the original number, so remember to update your file manually if you want consistency between configuration and actual state.
Automated scaling based on load is also possible, but it is beyond the scope of this article.
***
## Essential Kubernetes Commands
Below is a summary of common commands to manage Replication Controllers and ReplicaSets:
| Operation | Command | Example |
| -------------------- | --------------- | -------------------------------------------------------- |
| Create objects | kubectl create | `kubectl create -f rc-definition.yml` |
| View objects | kubectl get | `kubectl get replicaset`
`kubectl get pods` |
| Delete ReplicaSet | kubectl delete | `kubectl delete replicaset myapp-replicaset` |
| Update configuration | kubectl replace | `kubectl replace -f replicaset-definition.yml` |
| Scale ReplicaSet | kubectl scale | `kubectl scale --replicas=6 replicaset myapp-replicaset` |
***
By understanding how labels, selectors, and pod templates interact, you can ensure high availability and efficient scaling of your Kubernetes applications. Whether you choose to work with the classic Replication Controller or the more robust ReplicaSet, these controllers are fundamental to managing your containerized applications effectively.
For further details, explore the official [Kubernetes Documentation](https://kubernetes.io/docs/).