> ## Documentation Index
> Fetch the complete documentation index at: https://notes.kodekloud.com/llms.txt
> Use this file to discover all available pages before exploring further.
# Services NodePort
> This lesson explores Kubernetes NodePort Services for enabling communication
Welcome to this lesson on Kubernetes Services, where we explore how these services enable seamless communication between various components of your application—both internally among Pods and externally to end users.
Kubernetes Services facilitate interaction among different parts of an application. For instance, an application might include separate groups of Pods for front-end user interactions, back-end processing, and external data connections. With Services abstracting the intricacies of Pod networking, these groups communicate without the need to hard-code Pod IP addresses. Additionally, a Service can expose front-end servers to users while ensuring smooth internal communication with back-end processes. This decoupled architecture enhances deployment flexibility and simplifies scaling.
## External vs. Internal Communication
Consider external communication first. Suppose you deploy a Pod running a web application. The Kubernetes node might have an IP address like `192.168.1.2`, and a laptop on the same network might use `192.168.1.10`. However, the Pod's IP (e.g., `10.244.0.2`) belongs to a different network range, making it directly inaccessible from the laptop.
If you SSH into the Kubernetes node using its IP (`192.168.1.2`), you can fetch the web page hosted by the Pod with:
```bash theme={null}
curl http://10.244.0.2
Hello World!
```
This command succeeds because it runs within the node's network. Ideally, though, you want to access the application directly from your laptop using the node’s IP address, bypassing the need to SSH. This is where a Kubernetes Service configured as a NodePort comes into play.
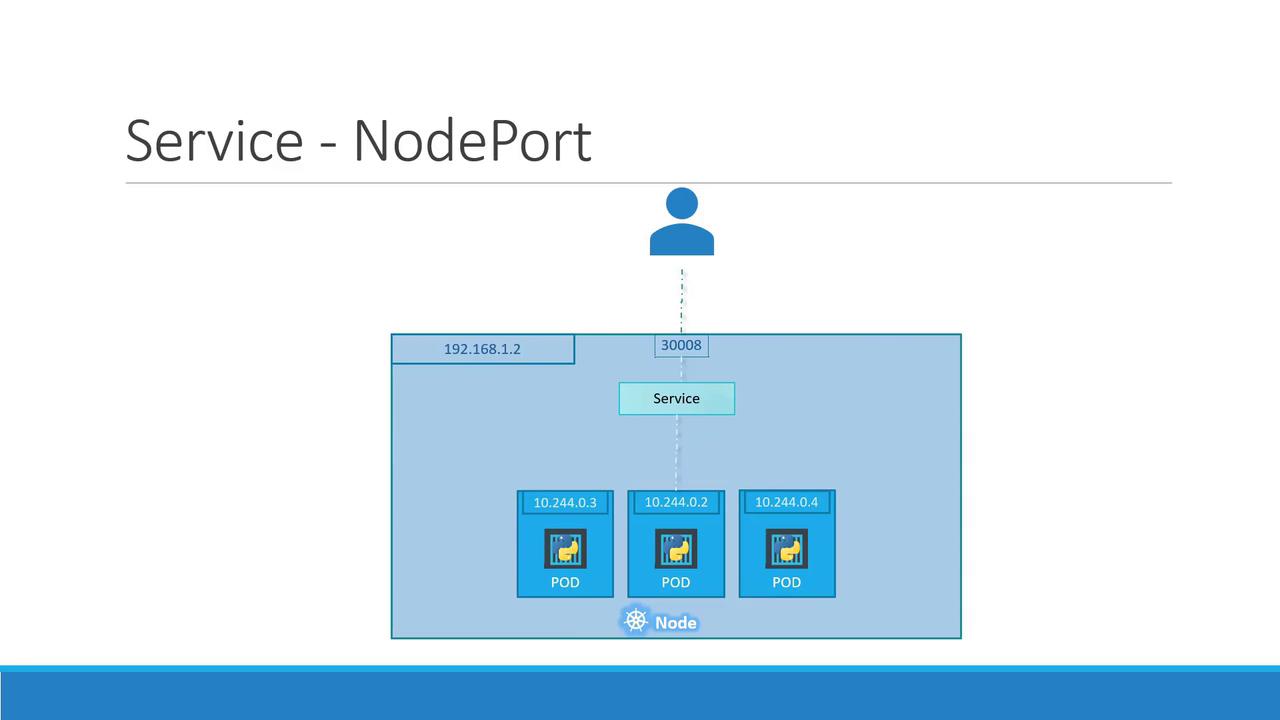
A NodePort Service listens on a specific port on each node and forwards incoming external traffic to a designated port on the Pod. Essentially, it maps a port on the node (e.g., `30008`) to the Pod’s target port (typically `80` for web servers). For example, from the node itself:
```bash theme={null}
curl http://192.168.1.2:30008
Hello World!
```
This demonstrates that the NodePort Service is routing traffic from the node's IP at port `30008` to the Pod's web server.
## Kubernetes Service Types
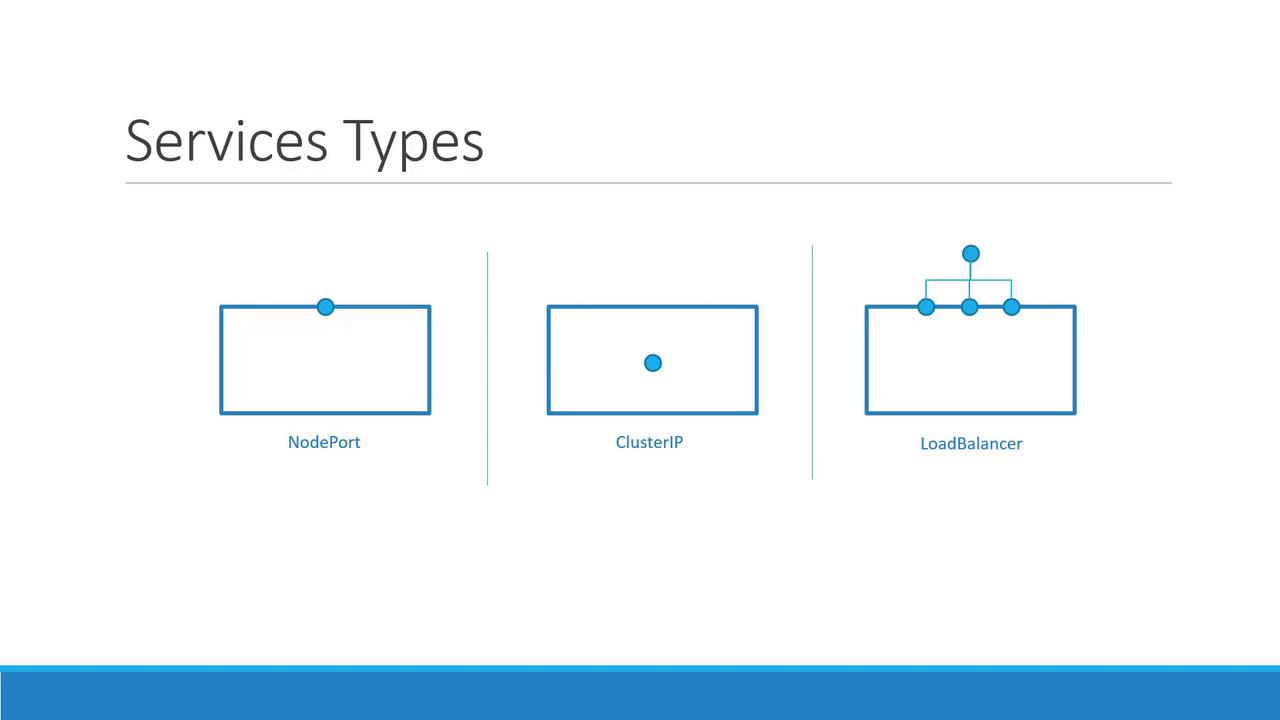
Kubernetes supports three primary types of Services:
| Service Type | Description | Use Case Example |
| ------------ | ------------------------------------------------------------------------------ | -------------------------------------------------------- |
| NodePort | Exposes a service on a static port on each node’s IP. | External access to a single or multiple pods |
| ClusterIP | Creates a virtual IP for internal cluster communication. | Service connectivity between front-end and back-end pods |
| LoadBalancer | Provisions a load balancer (in supported cloud environments) for distribution. | Balancing traffic across multiple pods |
In this lesson, our focus is on the **NodePort** service type.
## How NodePort Works
A NodePort Service involves three key ports:
1. **Target Port:** The port on the Pod where the web server is running (e.g., `80`).
2. **Service Port:** A port on the Service object itself. Within the cluster, the Service also has a ClusterIP.
3. **Node Port:** An externally exposed port on each node. This must be within the range `30000–32767` (in our example, `30008`).
Let's create a NodePort Service using a YAML configuration file. The structure is standard for Kubernetes objects—comprising API version, kind, metadata, and spec.
Below is an example configuration for a NodePort Service:
```yaml theme={null}
apiVersion: v1
kind: Service
metadata:
name: myapp-service
spec:
type: NodePort
ports:
- targetPort: 80
port: 80
nodePort: 30008
```
In this YAML file:
* The `type` is set to `NodePort`, which means the service will be exposed on a specific port on every node.
* The `ports` section includes:
* `targetPort` to indicate where the web server runs inside the Pod.
* `port` which defines the Service's port within the cluster.
* `nodePort` representing the port accessible externally on each node.
The only mandatory field in the ports configuration is `port`. If you omit `targetPort`, it defaults to the same value as `port`. Likewise, if you don't specify `nodePort`, Kubernetes will allocate one automatically from the valid range.
This configuration only creates the Service. To bind it to the appropriate Pods, you must use labels and selectors. For example, if your Pod is labeled with `app: myapp`, update your Service definition to include a matching selector:
```yaml theme={null}
apiVersion: v1
kind: Service
metadata:
name: myapp-service
spec:
type: NodePort
ports:
- targetPort: 80
port: 80
nodePort: 30008
selector:
app: myapp
type: front-end
```
For clarity, here is a corresponding Pod definition:
```yaml theme={null}
apiVersion: v1
kind: Pod
metadata:
name: myapp-pod
labels:
app: myapp
type: front-end
spec:
containers:
- name: nginx-container
image: nginx
```
The `selector` field in the Service ensures that traffic is forwarded to the correct Pods based on matching labels.
After defining the Service, deploy it with:
```bash theme={null}
kubectl create -f service-definition.yml
```
Then, you can verify its details by listing all Services:
```bash theme={null}
kubectl get services
```
The output should display the ClusterIP, NodePort mapping (e.g., `80:30008/TCP`), and confirm that the Service type is NodePort:
```bash theme={null}
NAME TYPE CLUSTER-IP EXTERNAL-IP PORT(S) AGE
kubernetes ClusterIP 10.96.0.1 443/TCP 16d
myapp-service NodePort 10.106.127.123 80:30008/TCP 5m
```
You can now access the web service externally by using the node’s IP (`192.168.1.2`) with port `30008`.
## Load Balancing Across Multiple Pods and Nodes
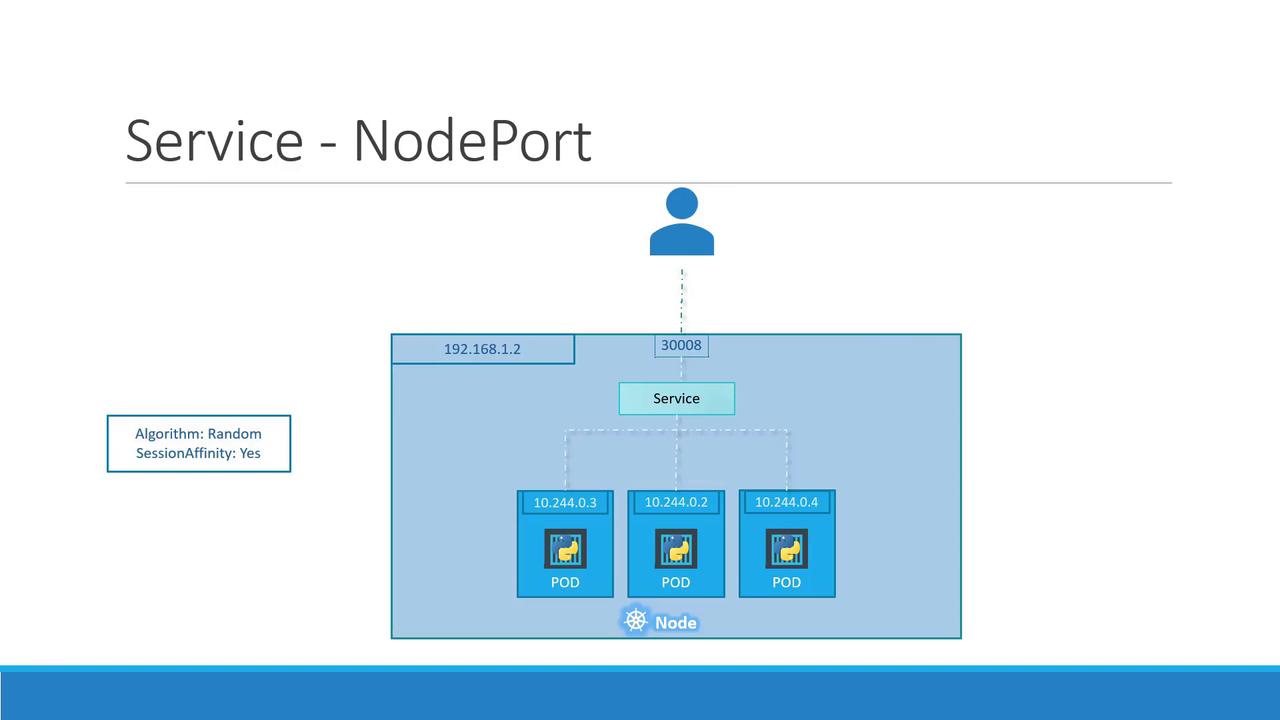
In production environments, you often run multiple instances of your web application to ensure high availability and load balancing. When Pods share the same labels, Kubernetes automatically registers all matching Pods as endpoints for the Service.
For example, if there are three Pods with the label `app: myapp`, the NodePort Service will distribute incoming requests among all three. The load balancing algorithm employed is simple and effective—it distributes the requests randomly across the available Pods.
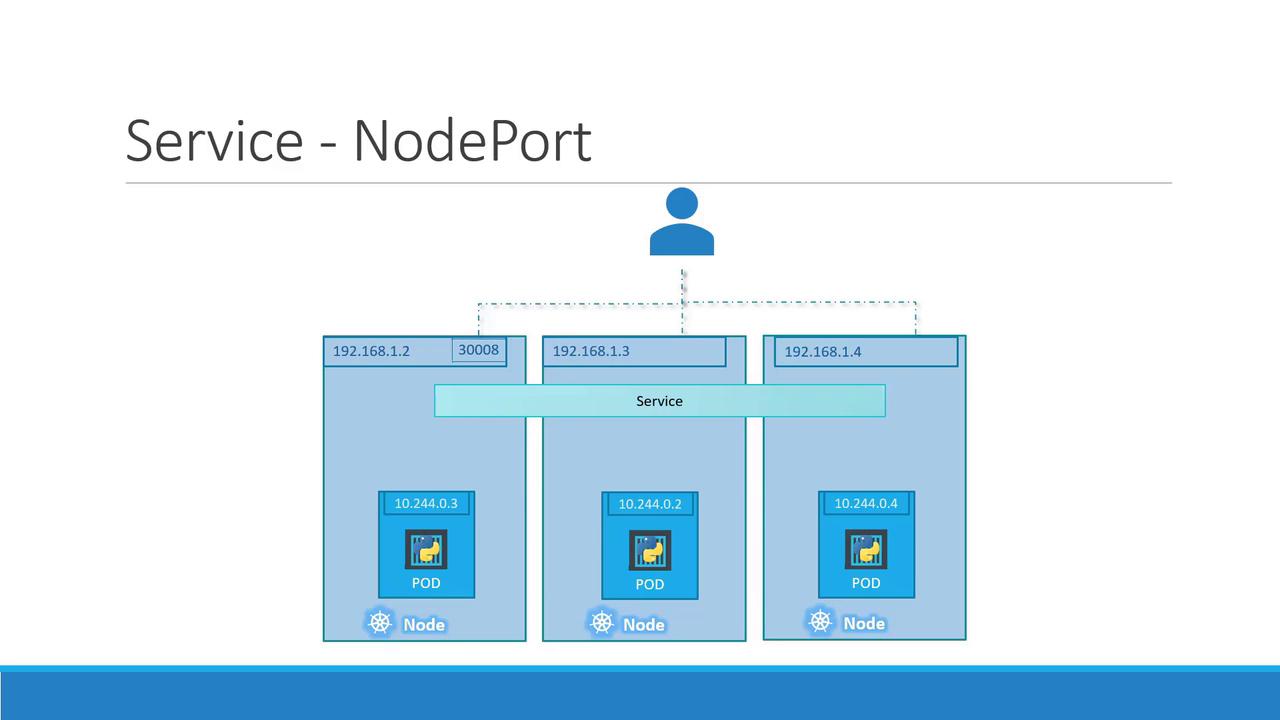
When your Pods are spread across multiple nodes, the Service spans the entire cluster. Kubernetes consistently maps the target port across all nodes. This ensures that you can use any node IP with the designated NodePort (in our case, `30008`) to access your application without any disruption.
## Summary
In summary, whether you have a single Pod on one node, multiple Pods on a single node, or Pods distributed across several nodes, a NodePort Service is configured in the same manner. Kubernetes automatically updates the Service endpoints as Pods are added or removed, making this approach a robust solution for providing external access to your application.
For a hands-on demonstration, proceed to the demo section where you'll see NodePort Services in action. Continue exploring Kubernetes by reviewing the official [Kubernetes Documentation](https://kubernetes.io/docs/).
That concludes this lesson. Enjoy the demo and see you in the next lesson!