> ## Documentation Index
> Fetch the complete documentation index at: https://notes.kodekloud.com/llms.txt
> Use this file to discover all available pages before exploring further.
# Demo Install Ansible
> Learn to clone VMs, set up an Ansible controller and targets, and test connectivity using Ansible in this comprehensive lesson.
In this lesson, you will learn how to clone virtual machines, set up an Ansible controller and target machines, and test connectivity using Ansible. The process includes powering off the original VM, creating linked clones, renaming hosts, installing Ansible, and verifying communication between nodes.
***
## 1. Cloning the Virtual Machines
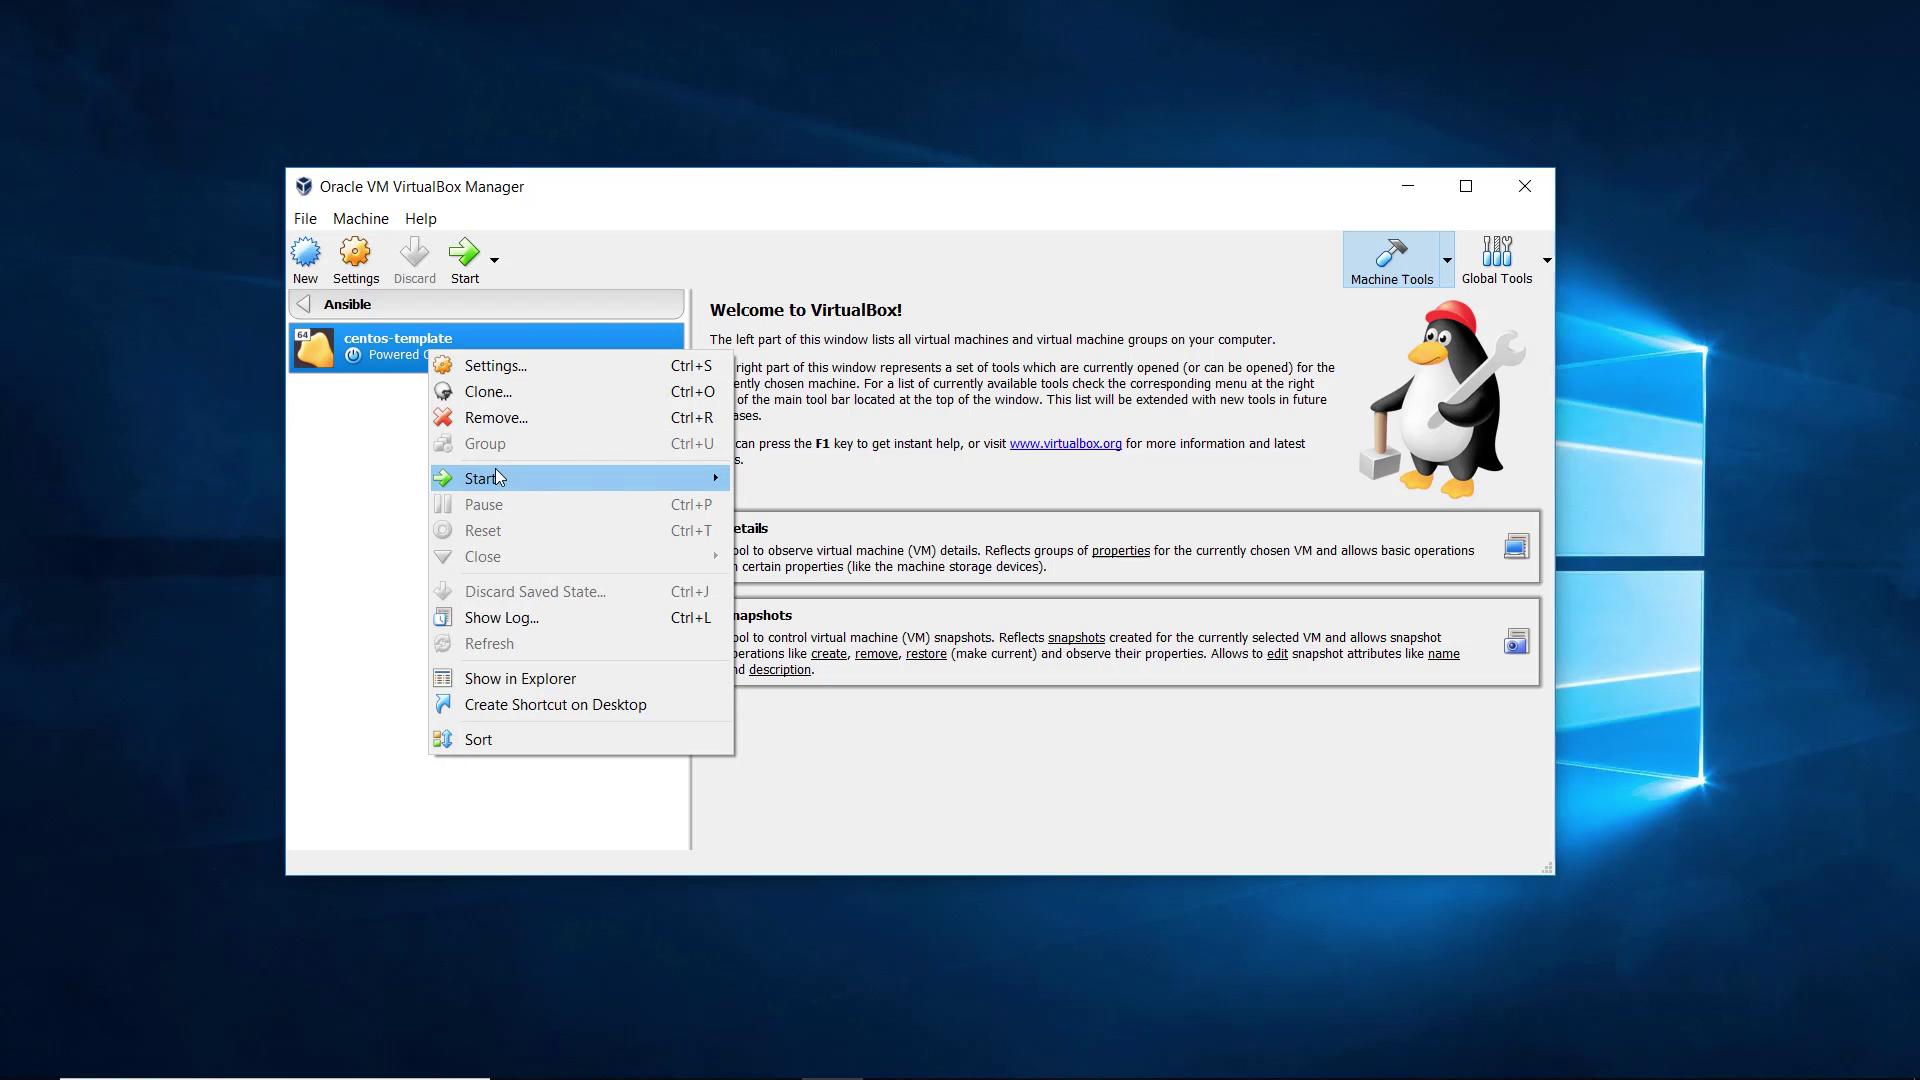
First, power off your virtual machine. Right-click on the VM (in this example, a "centos-template") and select *Clone*.
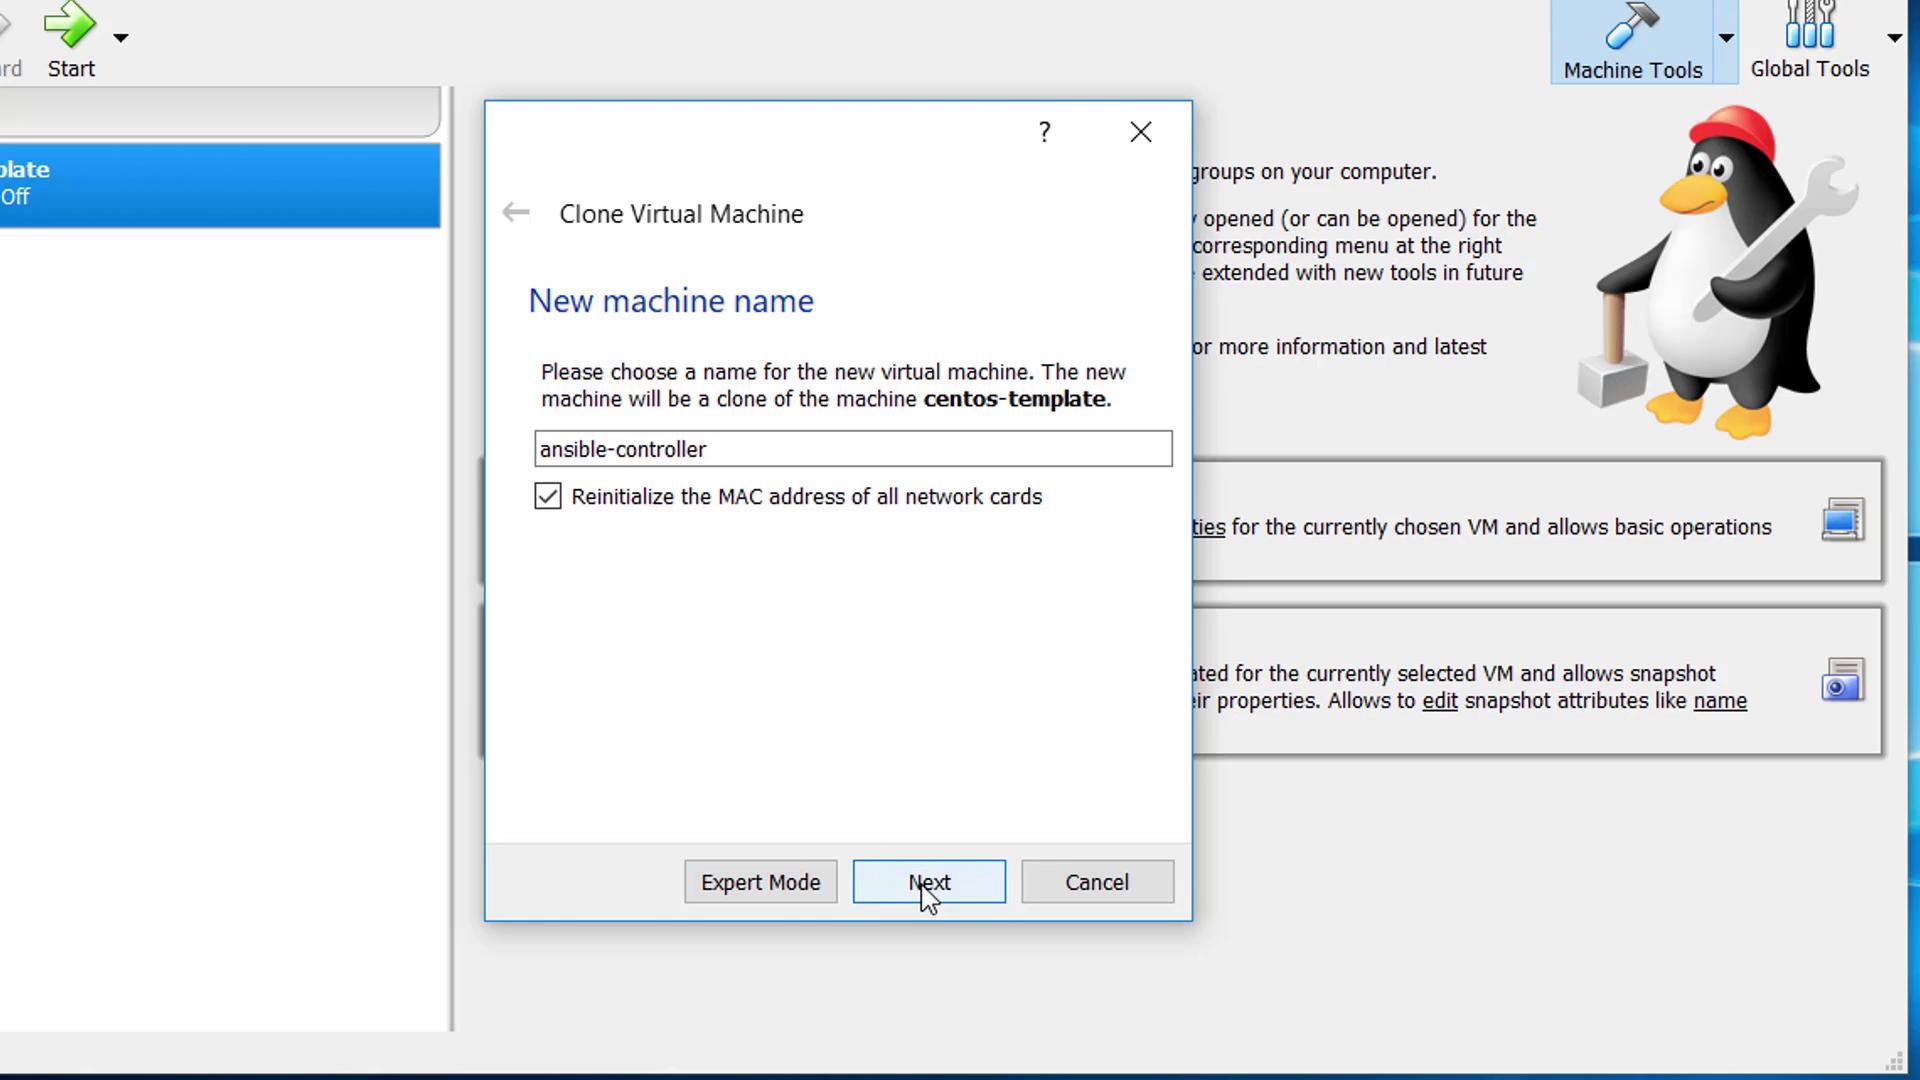
In the clone creation wizard, you will be prompted to provide a name for the new VM. Name the first clone **Ansible controller**. Ensure you check the *reset MAC address* option so that each virtual machine receives a unique MAC address.
In the next step, select the *linked clone* option. A linked clone conserves disk space by referencing the original disk image instead of duplicating it entirely.
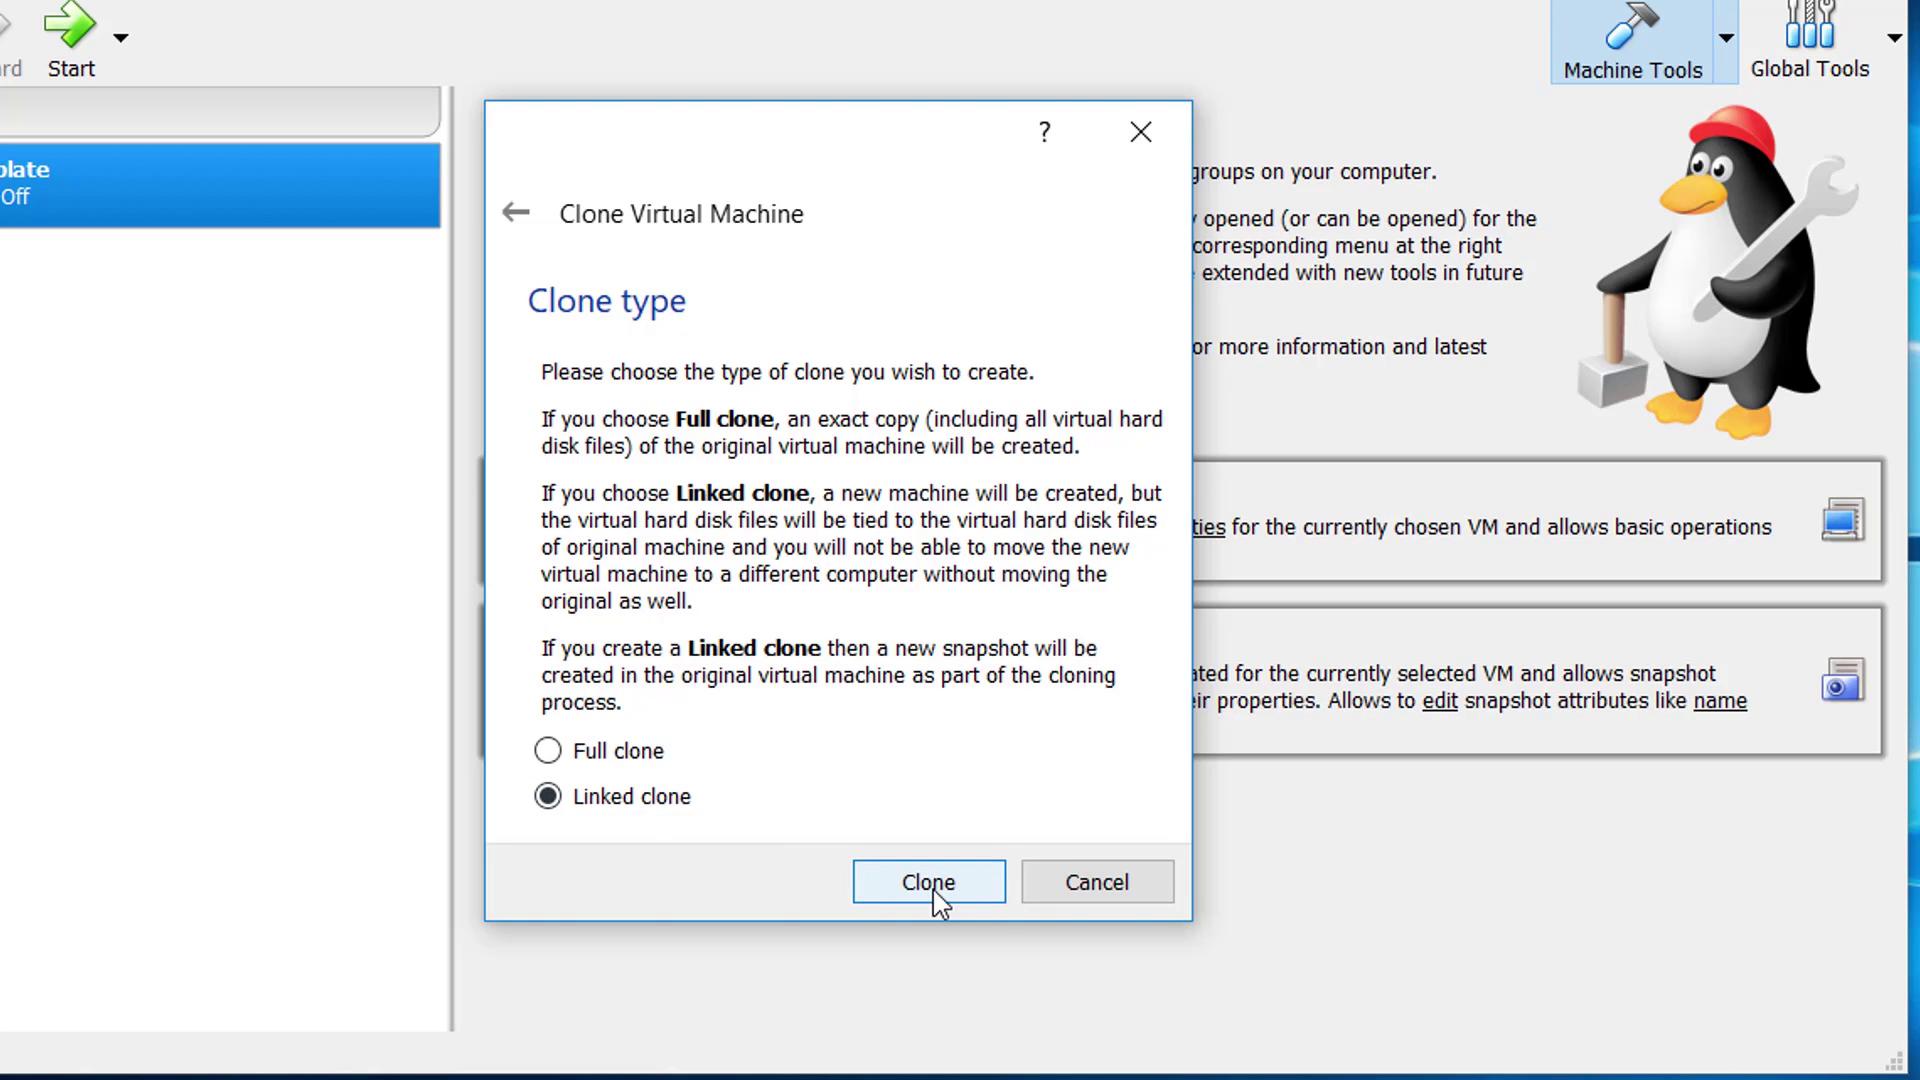
Click *Clone* to create the Ansible controller. Repeat the same steps to clone another machine for the Ansible target, naming it **Ansible-target1**, checking the reset MAC address option, and opting for a *linked clone*.
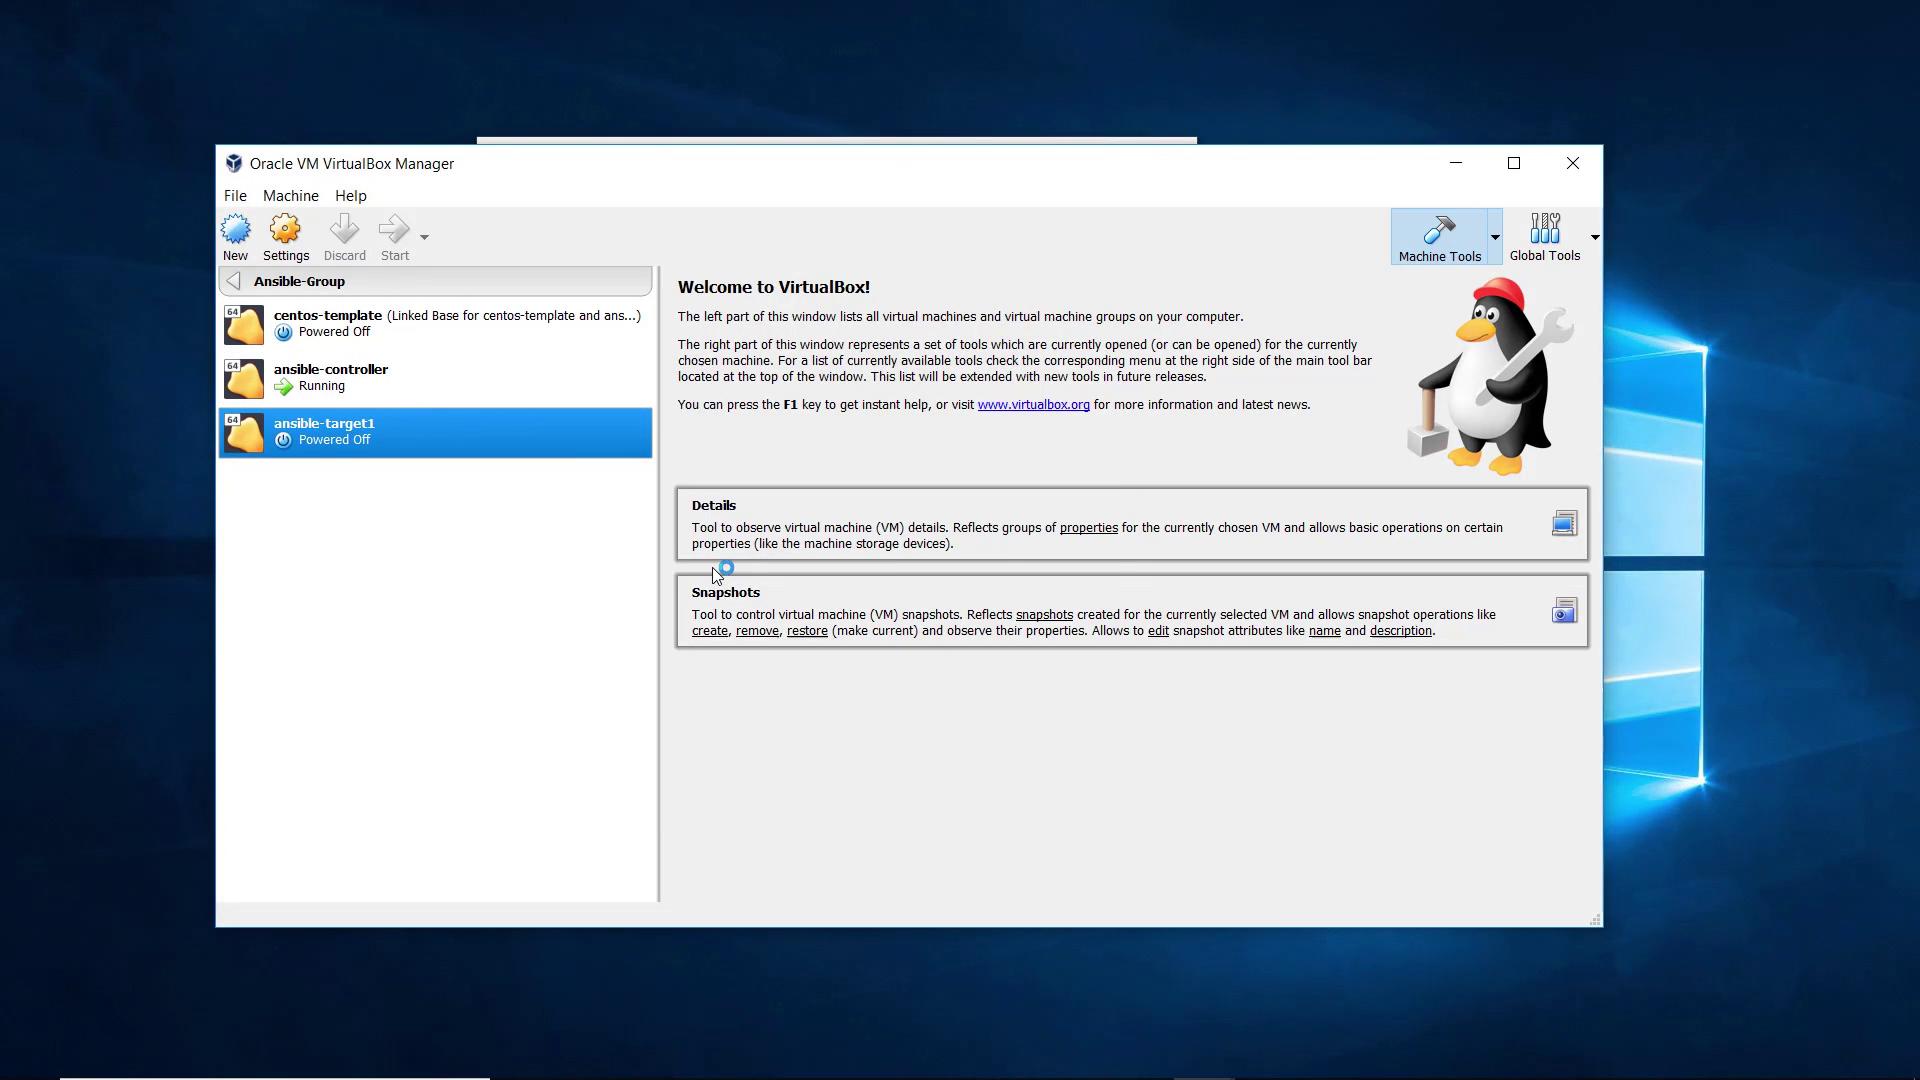
After cloning, you will have three VMs:
* A template (centos-template)
* Ansible controller
* Ansible-target1
Power on both the Ansible controller and the Ansible target.
***
## 2. Establishing SSH Sessions and Checking IP Addresses
Once the virtual machines are powered on, log into the operating system using the OSBox password. Open a terminal and run the following command to check the IP address:
```bash theme={null}
osboxes@osboxes:~$ ifconfig
enp0s3: flags=4163 mtu 1500
inet 192.168.1.114 netmask 255.255.255.0 broadcast 192.168.1.255
inet6 fe80::a1dc:152c:1a82:7211 prefixlen 64 scopeid 0x20
ether 00:0c:29:6c:df:d0 txqueuelen 1000 (Ethernet)
RX packets 2079 bytes 156295 (152.2 KiB)
RX errors 0 dropped 0 overruns 0 frame 0
TX packets 79 bytes 9467 (9.3 KiB)
TX errors 0 dropped 0 overruns 0 carrier 0 collisions 0
lo: flags=73 mtu 65536
inet 127.0.0.1 netmask 255.0.0.0
inet6 ::1 prefixlen 128 scopeid 0x10
loop txqueuelen 1 (Local Loopback)
RX packets 0 bytes 0 (0.0 B)
RX errors 0 dropped 0 overruns 0 frame 0
TX packets 0 bytes 0 (0.0 B)
TX errors 0 dropped 0 overruns 0 carrier 0 collisions 0
virbr0: flags=4099 mtu 1500
inet 192.168.122.1 netmask 255.255.255.0 broadcast 192.168.122.255
inet6 52:54:00:ed:da:3f txqueuelen 1000 (Ethernet)
RX packets 0 bytes 0 (0.0 B)
RX errors 0 dropped 0 overruns 0 frame 0
TX packets 0 bytes 0 (0.0 B)
TX errors 0 dropped 0 overruns 0 carrier 0 collisions 0
```
For easier management, establish an SSH session to the Ansible controller using its IP address (for example, 192.168.1.113) with the username **osboxes**. Name this session *Ansible-controller*.
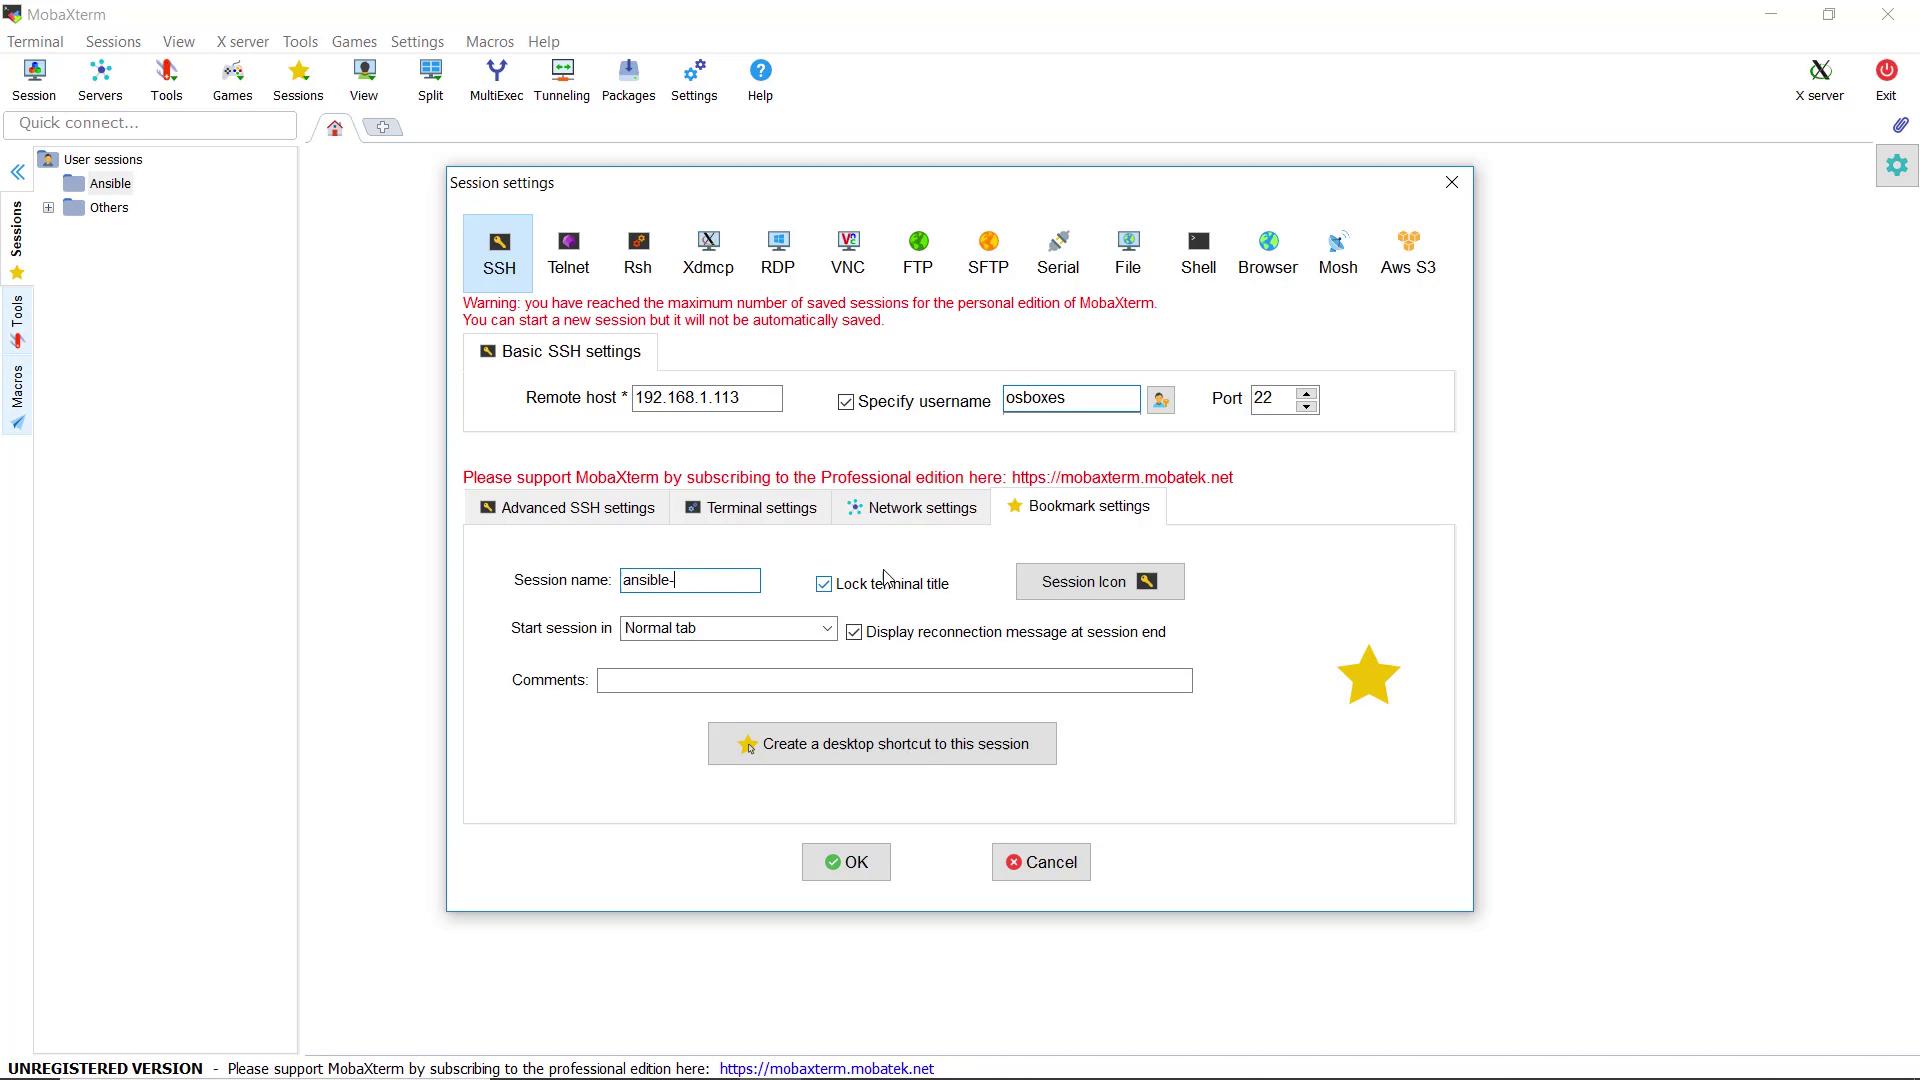
Similarly, set up an SSH session for the Ansible target (e.g., at IP 192.168.1.114) and name it *Ansible-target1*. Upon logging in, you might see:
```bash theme={null}
Last login: Sat May 26 04:13:56 2018
[osboxes@osboxes ~]$
```
***
## 3. Renaming the Hosts
By default, both the controller and target machines are named **OSBoxes**. Update the hostnames to clearly define their roles. For the controller, modify the `/etc/hostname` file by replacing “OSBoxes” with **Ansible-controller**:
```bash theme={null}
[osboxes@osboxes ~]$ sudo vi /etc/hostname
[sudo] password for osboxes:
[osboxes@osboxes ~]$
```
Next, update the `/etc/hosts` file to reflect the new hostname. Replace the default entries:
```text theme={null}
127.0.0.1 localhost localhost.localdomain localhost4 localhost4.localdomain4
::1 localhost localhost.localdomain localhost6 localhost6.localdomain6
```
with your desired hostname information while keeping the localhost entries intact.
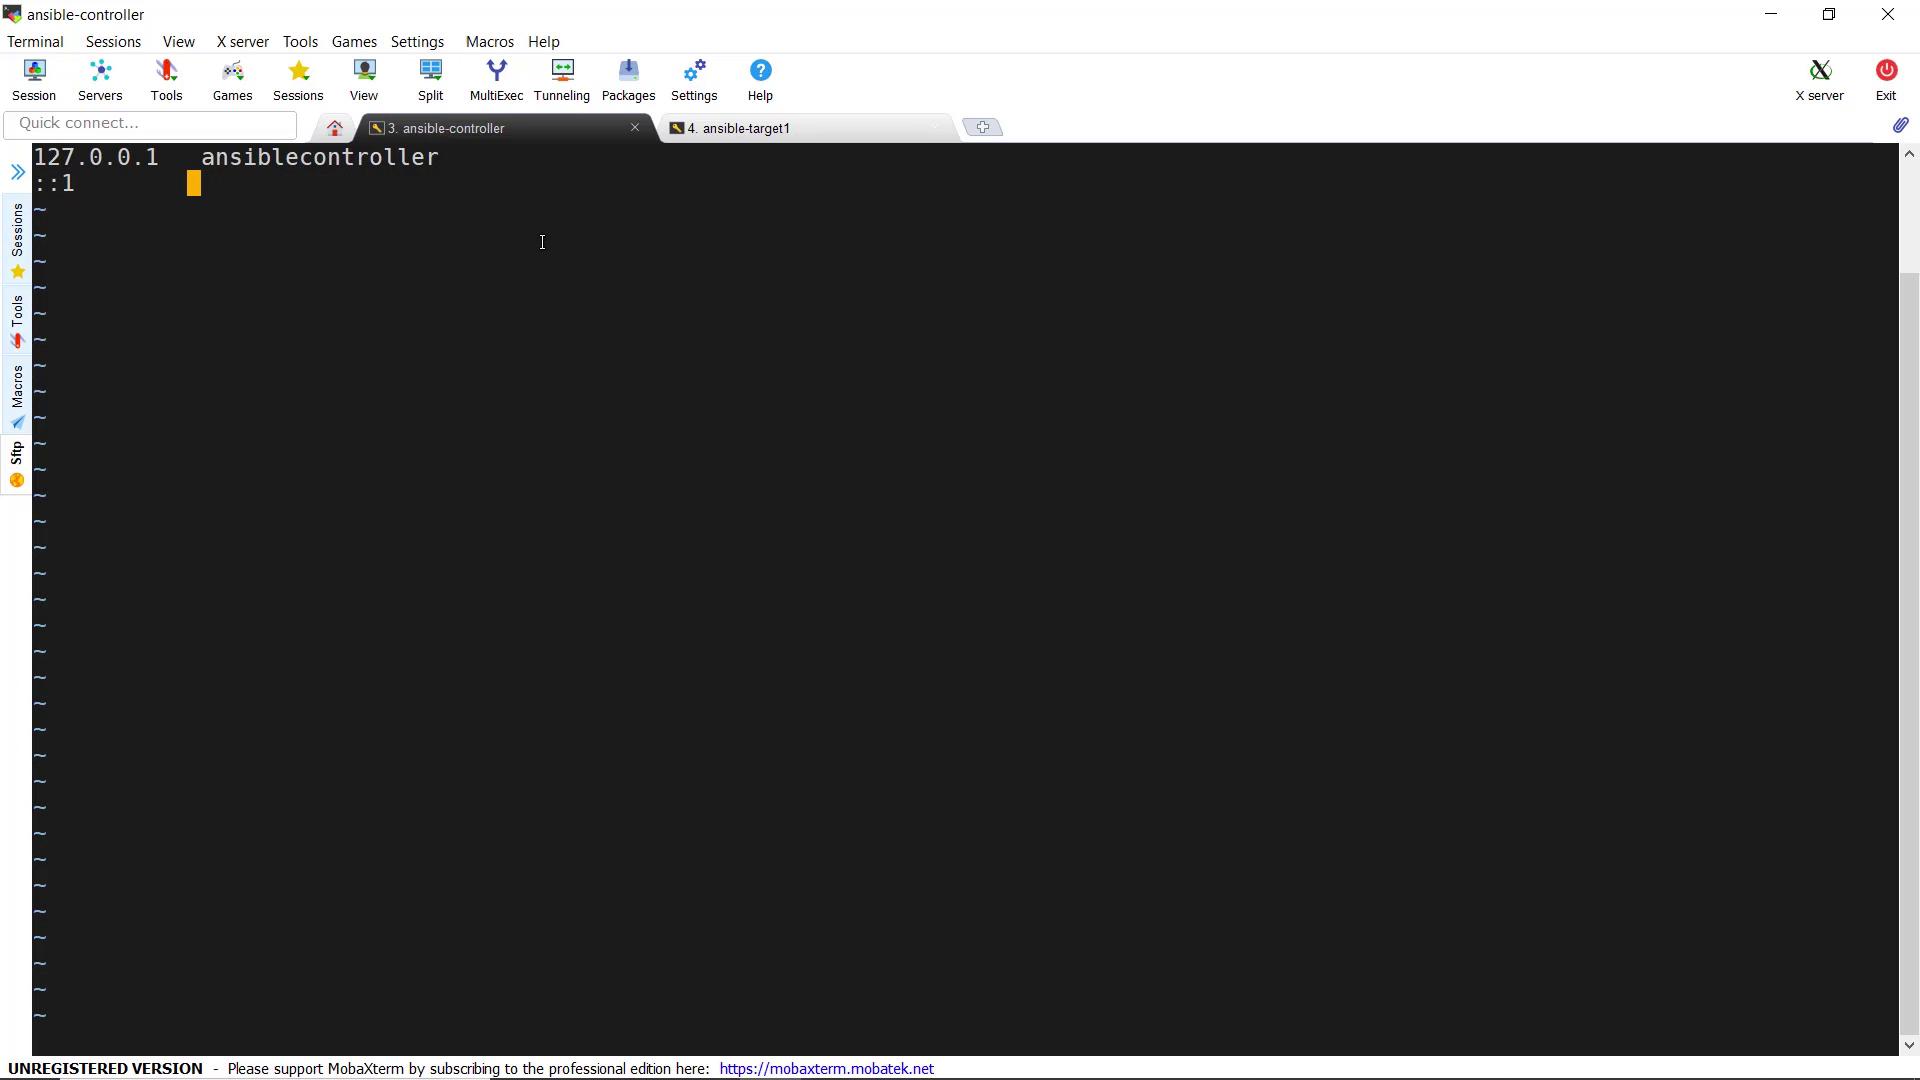
After saving the changes, restart the system to apply the new hostname. Repeat these steps on the target machine (for example, renaming it to **target**) and verify the changes in your SSH sessions.
***
## 4. Installing Ansible on the Controller
With the hostnames correctly set, install Ansible on the Ansible controller. Follow the official Ansible installation instructions for CentOS using `yum`. Execute the command in your terminal. During installation, you may be prompted to confirm the import of the GPG key and other related messages. A sample output is shown below:
```text theme={null}
Total
Retrieving key from file:/etc/pki/rpm-gpg/RPM-GPG-KEY-CentOS-7
Importing GPG key 0xFA480EB5:
Userid : "CentOS-7 Key (CentOS 7 Official Signing Key) "
Fingerprint: 6341 ab27 53d7 8a7c 7bb1 24c6 a8a7 f4a8 0eb5
Package : centos-release-7-4.1708.el7.centos.x86_64 (@anaconda)
From : /etc/pki/rpm-gpg/RPM-GPG-KEY-CentOS-7
Is this ok [y/N]: y
Running transaction check
Transaction test succeeded
Running transaction
Installing : python-paramiko-2.1.1.el7.noarch 1/11
Installing : python-httpd2-0.9.2-1.el7.noarch 2/11
Installing : python-markupsafe-0.11-10.el7.x86_64 3/11
Installing : python-babel-0.9.6-8.el7.noarch 4/11
Installing : python-jinja2-2.10-1.el7.noarch 5/11
Installing : python-pytz-2015.7-1.el7.noarch 6/11
Installing : python-passlib-1.6.5-2.el7.x86_64 7/11
Installing : sshpass-1.06-2.el7.x86_64 8/11
Installing : python2-jmespath-0.9.0-3.el7.noarch 9/11
Installing : ansible-2.4.2.0-2.el7.noarch 10/11
Verifying : python-babel-0.9.6-8.el7.noarch 1/11
Verifying : python-passlib-1.6.5-2.el7.x86_64 2/11
Verifying : python-jinja2-2.10-1.el7.noarch 3/11
Verifying : python-markupsafe-0.11-10.el7.x86_64 4/11
Verifying : python-paramiko-2.1.1.el7.noarch 5/11
Verifying : python-httpd2-0.9.2-1.el7.noarch 6/11
Verifying : sshpass-1.06-2.el7.x86_64 7/11
Verifying : python2-jmespath-0.9.0-3.el7.noarch 8/11
Verifying : ansible-2.4.2.0-2.el7.noarch 9/11
Verifying : python-pytz-2015.7-1.el7.noarch 10/11
Verifying : python2-pyYAML-3.10-11.el7.x86_64 11/11
Installed:
python-paramiko.noarch 0:2.1.1-1.el7
python-httpd2.noarch 0:0.9.2-1.el7
python-markupsafe.x86_64 0:0.11-10.el7
python-babel.noarch 0:0.9.6-8.el7
python-jinja2.noarch 0:2.10-1.el7
python-pytz.noarch 0:2015.7-1.el7
python-passlib.x86_64 0:1.6.5-2.el7
sshpass.x86_64 0:1.06-2.el7
python2-jmespath.noarch 0:0.9.0-3.el7
ansible.noarch 0:2.4.2.0-2.el7
python2-pyYAML.x86_64 0:3.10-11.el7
```
After the installation completes, verify the Ansible version:
```bash theme={null}
[osboxes@ansiblecontroller ~]$ ansible --version
ansible 2.4.2.0
config file = /etc/ansible/ansible.cfg
configured module search path = ['/home/osboxes/.ansible/plugins/modules', '/usr/share/ansible/plugins/modules']
ansible python module location = /usr/lib/python2.7/site-packages/ansible
executable location = /usr/bin/ansible
python version = 2.7.5 (default, Aug 4 2017, 00:39:18) [GCC 4.8.5 20150623 (Red Hat 4.8.5-16)]
[osboxes@ansiblecontroller ~]$
```
***
## 5. Testing Connectivity Between Controller and Target
First, manually verify SSH connectivity from the Ansible controller to the target machine. For example, SSH into the target server at 192.168.1.114:
```bash theme={null}
[osboxes@ansiblecontroller ~]$ ssh 192.168.1.114
The authenticity of host '192.168.1.114 (192.168.1.114)' can't be established.
ECDSA key fingerprint is SHA256:7s4hRBL0E0qffgA/2J/p2QH0mJTY/qHInXJ802LE.
ECDSA key fingerprint is MD5:84:26:6d:a0:87:34:cf:17:f8:8f:1b:6b:7e:ba.
Are you sure you want to continue connecting (yes/no)?
```
Type **yes**, provide the password, and then exit.
Next, create a test project to use Ansible’s ping module. Inside the Ansible controller, create a folder named **test-project** and an inventory file for your target:
```bash theme={null}
[osboxes@ansiblecontroller ~]$ mkdir test-project
[osboxes@ansiblecontroller ~]$ cd test-project/
[osboxes@ansiblecontroller test-project]$ cat > inventory.txt
target1 ansible_host=192.168.1.114 ansible_ssh_pass=osboxes.org
```
Verify the inventory file contents:
```bash theme={null}
[osboxes@ansiblecontroller test-project]$ cat inventory.txt
target1 ansible_host=192.168.1.114 ansible_ssh_pass=osboxes.org
```
Now, run the Ansible ping test:
```bash theme={null}
[osboxes@ansiblecontroller test-project]$ ansible target1 -m ping -i inventory.txt
target1 | SUCCESS => {
"changed": false,
"ping": "pong"
}
```
A successful ping (with output "pong") confirms that the controller can communicate with the target.
***
## 6. Adding a Second Target (Target Two)
To further validate the setup, create another clone from the template for a second target machine.
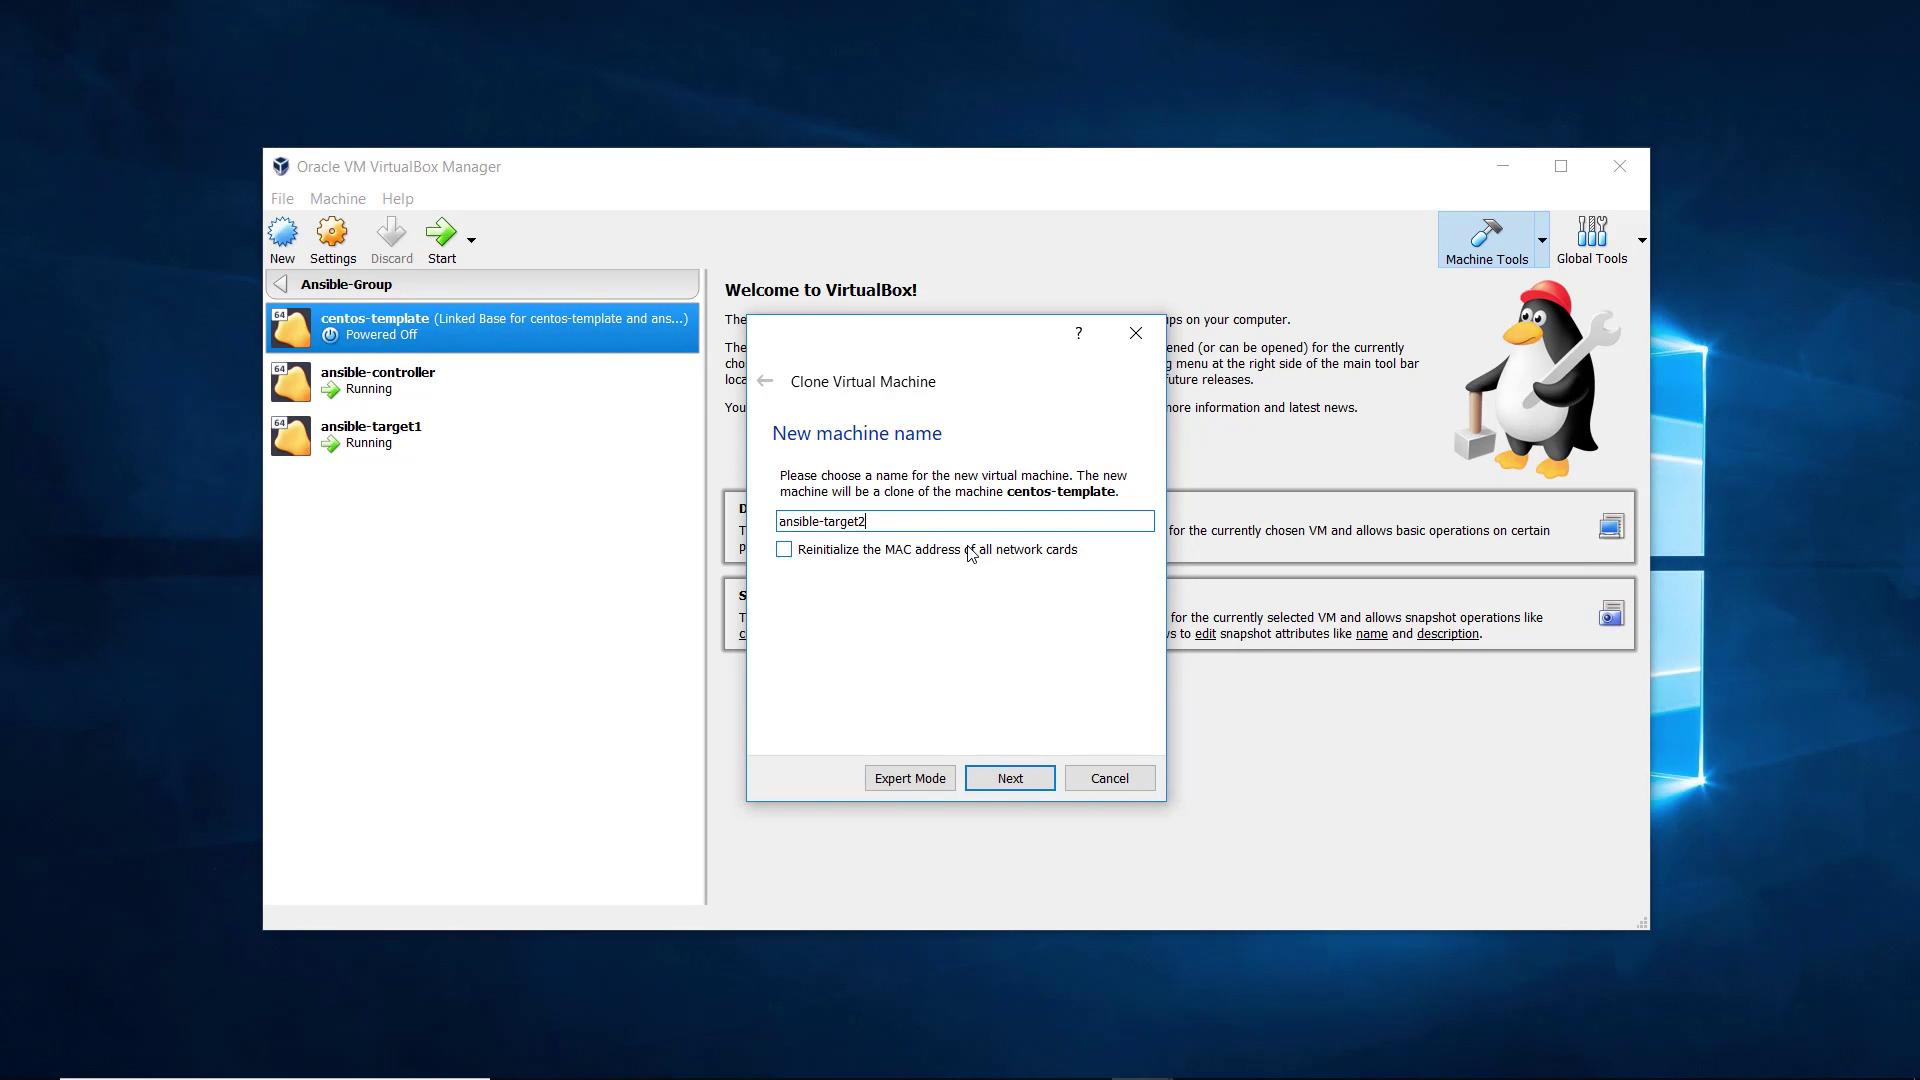
After cloning, power on the new target and check its IP address. For example, if the new IP is 192.168.1.115, your output from `ifconfig` might look like:
```bash theme={null}
osboxes@osboxes:~$ ifconfig
enp03: flags=4163 mtu 1500
inet 192.168.1.115 netmask 255.255.255.0 broadcast 192.168.1.255
inet6 fe80::f00d:27:ac:a1:6 prefixlen 64 scopeid 0x20
ether 08:00:27:ac:a1:06 txqueuelen 1000 (Ethernet)
RX packets 165 bytes 13069 (12.7 KiB)
RX errors 0 dropped 0 overruns 0 frame 0
TX packets 72 bytes 8976 (8.7 KiB)
TX errors 0 dropped 0 overruns 0 carrier 0 collisions 0
lo: flags=73 mtu 65536
inet 127.0.0.1 netmask 255.0.0.0
inet6 ::1 prefixlen 128 scopeid 0x10
loop txqueuelen 1 (Local Loopback)
RX packets 0 bytes 0 (0.0 B)
RX errors 0 dropped 0 overruns 0 frame 0
TX packets 0 bytes 0 (0.0 B)
TX errors 0 dropped 0 overruns 0 carrier 0 collisions 0
virbr0: flags=4099 mtu 1500
inet 192.168.122.1 netmask 255.255.255.0 broadcast 192.168.122.255
inet6 fe80::a00:27ff:fe64:a16 prefixlen 64 scopeid 0x20
ether 52:54:00:12:34:56 txqueuelen 1000 (Ethernet)
RX packets 0 bytes 0 (0.0 B)
RX errors 0 dropped 0 overruns 0 frame 0
TX packets 0 bytes 0 (0.0 B)
TX errors 0 dropped 0 overruns 0 carrier 0 collisions 0
```
Establish an SSH session to this new target (naming it *Ansible-target2*) and update its hostname similarly to the previous steps. Then, update your inventory file in the **test-project** directory to include both targets:
```bash theme={null}
[osboxes@ansiblecontroller test-project]$ vi inventory.txt
```
Change the inventory file to include both targets:
```text theme={null}
target1 ansible_host=192.168.1.114 ansible_ssh_pass=osboxes.org
target2 ansible_host=192.168.1.115 ansible_ssh_pass=osboxes.org
```
Now, test connectivity with Ansible:
```bash theme={null}
[osboxes@ansiblecontroller test-project]$ ansible target1 -m ping -i inventory.txt
target1 | SUCCESS => {
"changed": false,
"ping": "pong"
}
[osboxes@ansiblecontroller test-project]$ ansible target2 -m ping -i inventory.txt
target2 | FAILED! => {
"msg": "Using a SSH password instead of a key is not possible because Host Key checking is enabled and sshpass does not support this. Please add this host's fingerprint to your known_hosts file to manage this host."
}
```
To resolve the error for target two, you can either manually SSH into target two to accept its fingerprint or disable host key checking in the Ansible configuration by setting `host_key_checking = False` in `/etc/ansible/ansible.cfg`. (Note: Disabling host key checking is not recommended for production environments.)
After resolving the host key issue, run the ping test again:
```bash theme={null}
[osboxes@ansiblecontroller test-project]$ ansible target2 -m ping -i inventory.txt
target2 | SUCCESS => {
"changed": false,
"ping": "pong"
}
```
This confirms that the Ansible controller can now successfully communicate with both target machines.
***
## 7. Conclusion
Ansible has been successfully installed and configured on the Ansible controller, and communication has been established with both target machines. This lesson covered the entire process—from cloning VMs and renaming hosts to installing Ansible and performing connectivity tests using the ping module.
In production environments, it is highly recommended to use SSH key-based authentication instead of passwords for better security.
Thank you, and that concludes this demo.