> ## Documentation Index
> Fetch the complete documentation index at: https://notes.kodekloud.com/llms.txt
> Use this file to discover all available pages before exploring further.
# Using Extensions
> Enhance your Kubernetes IDE experience by leveraging Lens extensions to add functionality and streamline your cloud-native workflow.
Enhance your Kubernetes IDE experience by leveraging Lens extensions. With over 100 available—15 of which are publicly released—you can add functionality such as vulnerability scanning, cloud integrations, visualizations, and more to streamline your cloud-native workflow.
Browse and install vetted extensions from the Lens marketplace to keep your environment secure and up to date.
## Browsing Available Extensions
1. Open Lens and click **Lens** in the top-left corner.
2. Select **Extensions**.
3. Under **Available Extensions**, explore the publicly vetted list by Team Lens.
### Notable Public Extensions
| Extension | Provider | Description |
| ------------------------ | ------------- | -------------------------------------------------------------------------- |
| Mirantis Container Cloud | Mirantis | Add an MCC cluster directly to Lens for multi-cloud management. |
| Starboard | Aqua Security | View detailed vulnerability and compliance reports on Kubernetes clusters. |
| Resource Map | Team Lens | Visualize relationships between pods, services, deployments, and more. |
## Installing an Extension Manually
To install **Resource Map** (or any other extension) from GitHub:
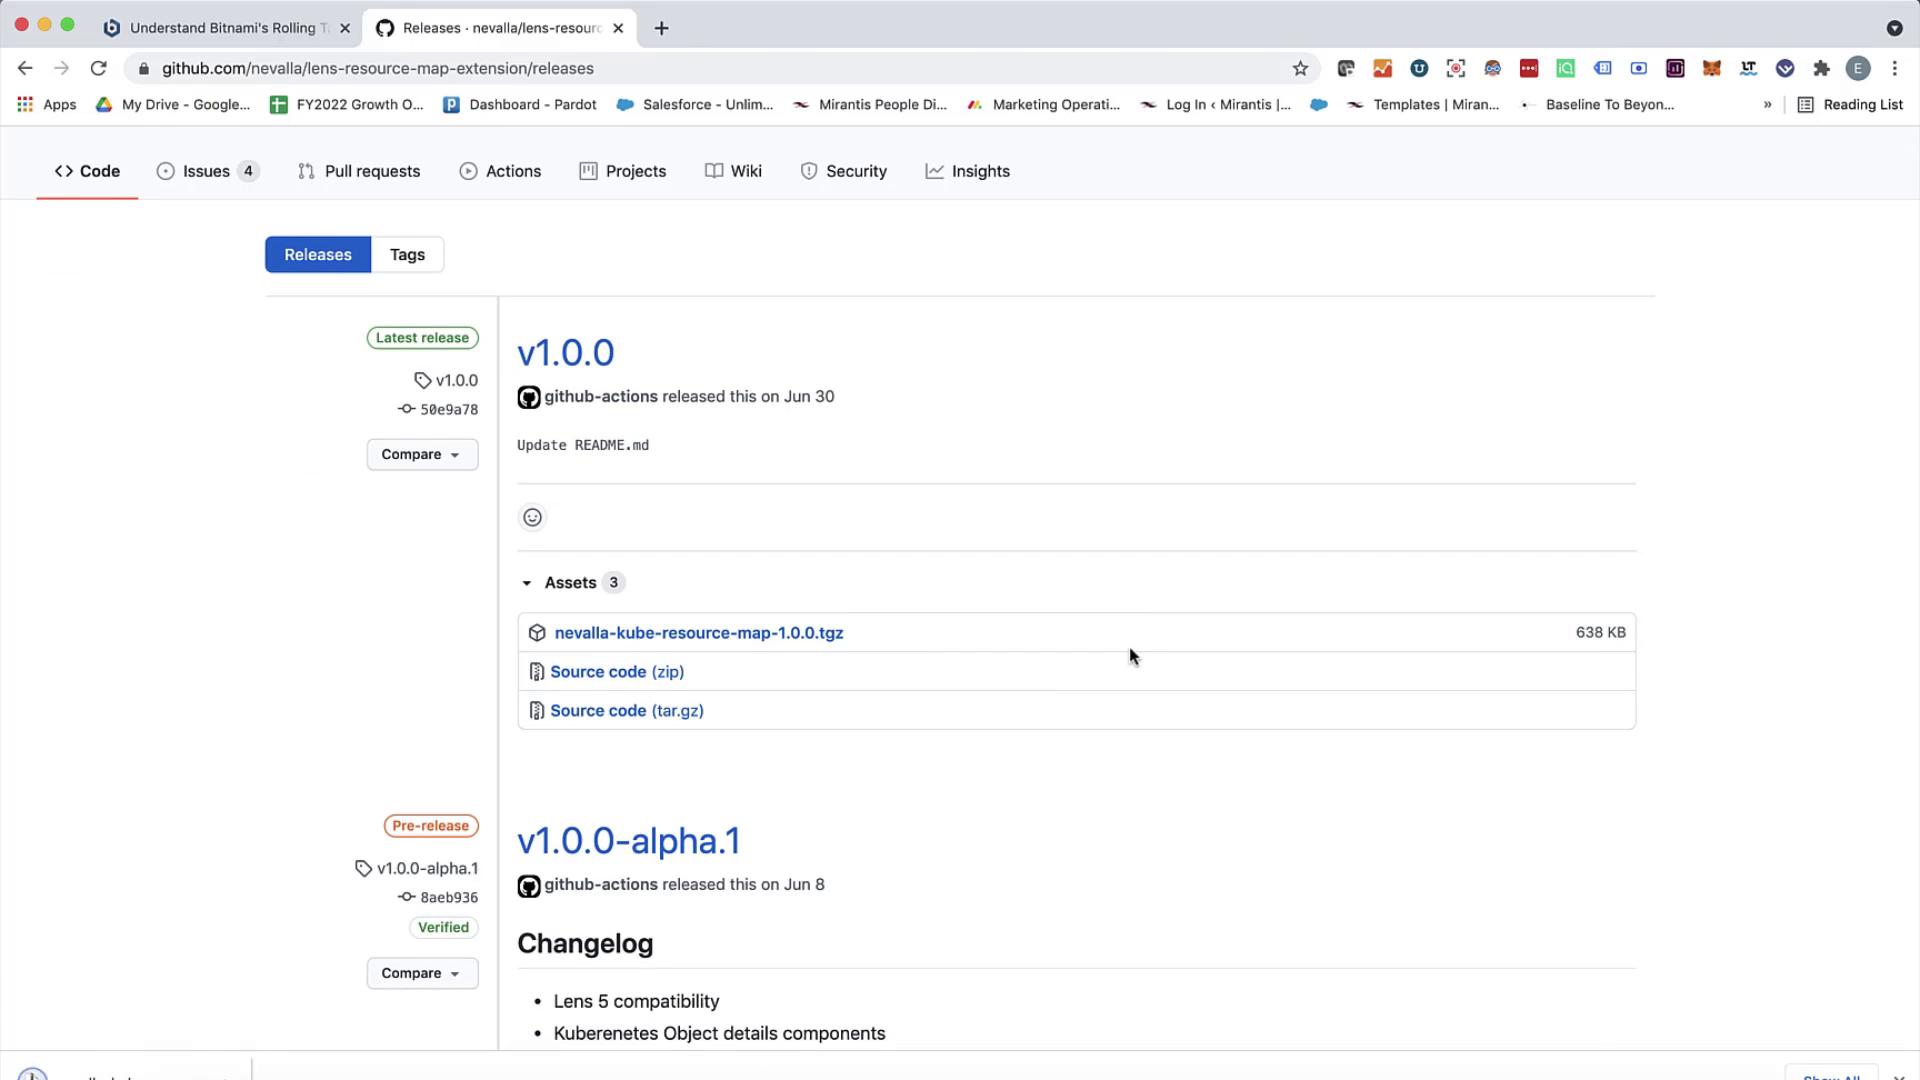
1. Navigate to the extension’s GitHub repository and click **Releases**.
2. Download the asset matching your operating system.
3. Run the installer package.
4. Return to Lens and open **Extensions**.
5. Search for **Resource Map** in the list.
6. Click **Install** (or **Reinstall** to upgrade).
Only install extensions from trusted sources. Verify the repository and release signatures before installing manually.
## Using the Resource Map Extension
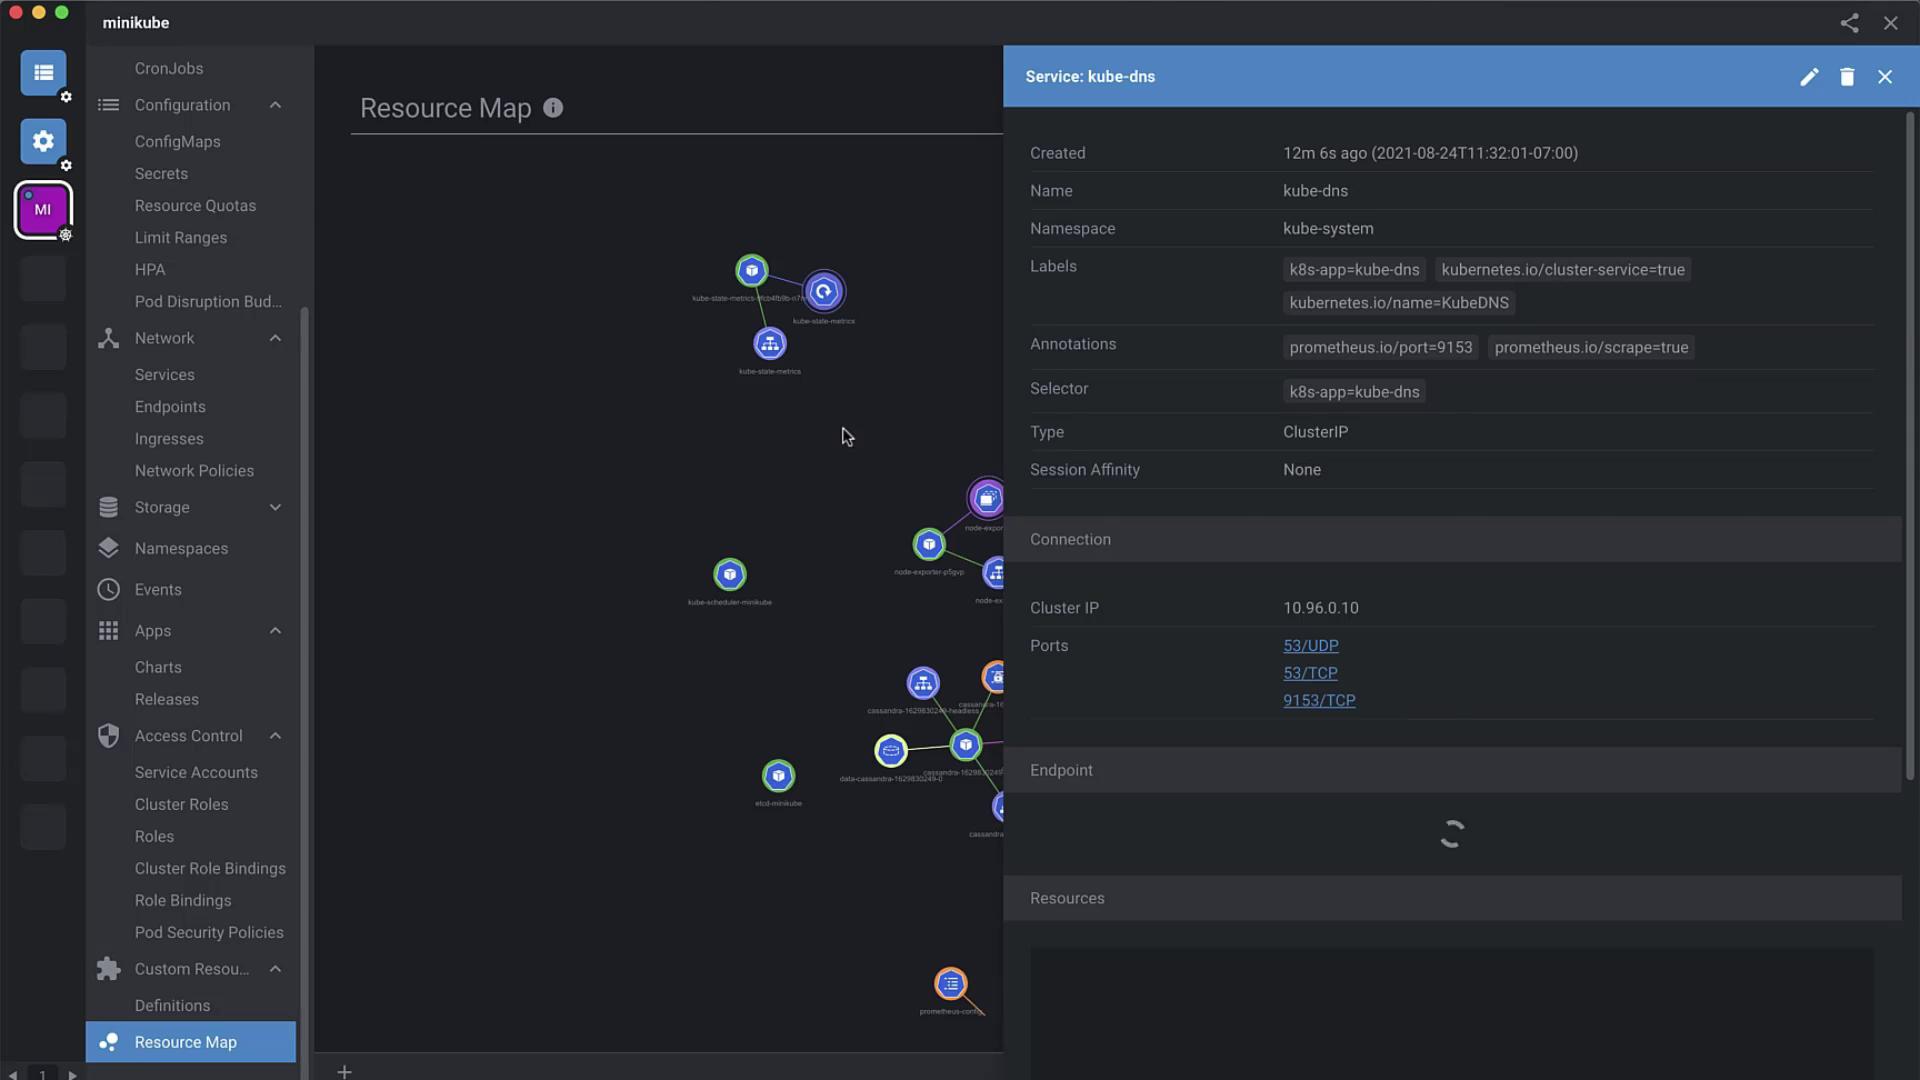
Once installed, **Resource Map** is available at the bottom of Lens’s sidebar:
1. Close the **Extensions** panel.
2. Scroll down and click **Resource Map**.
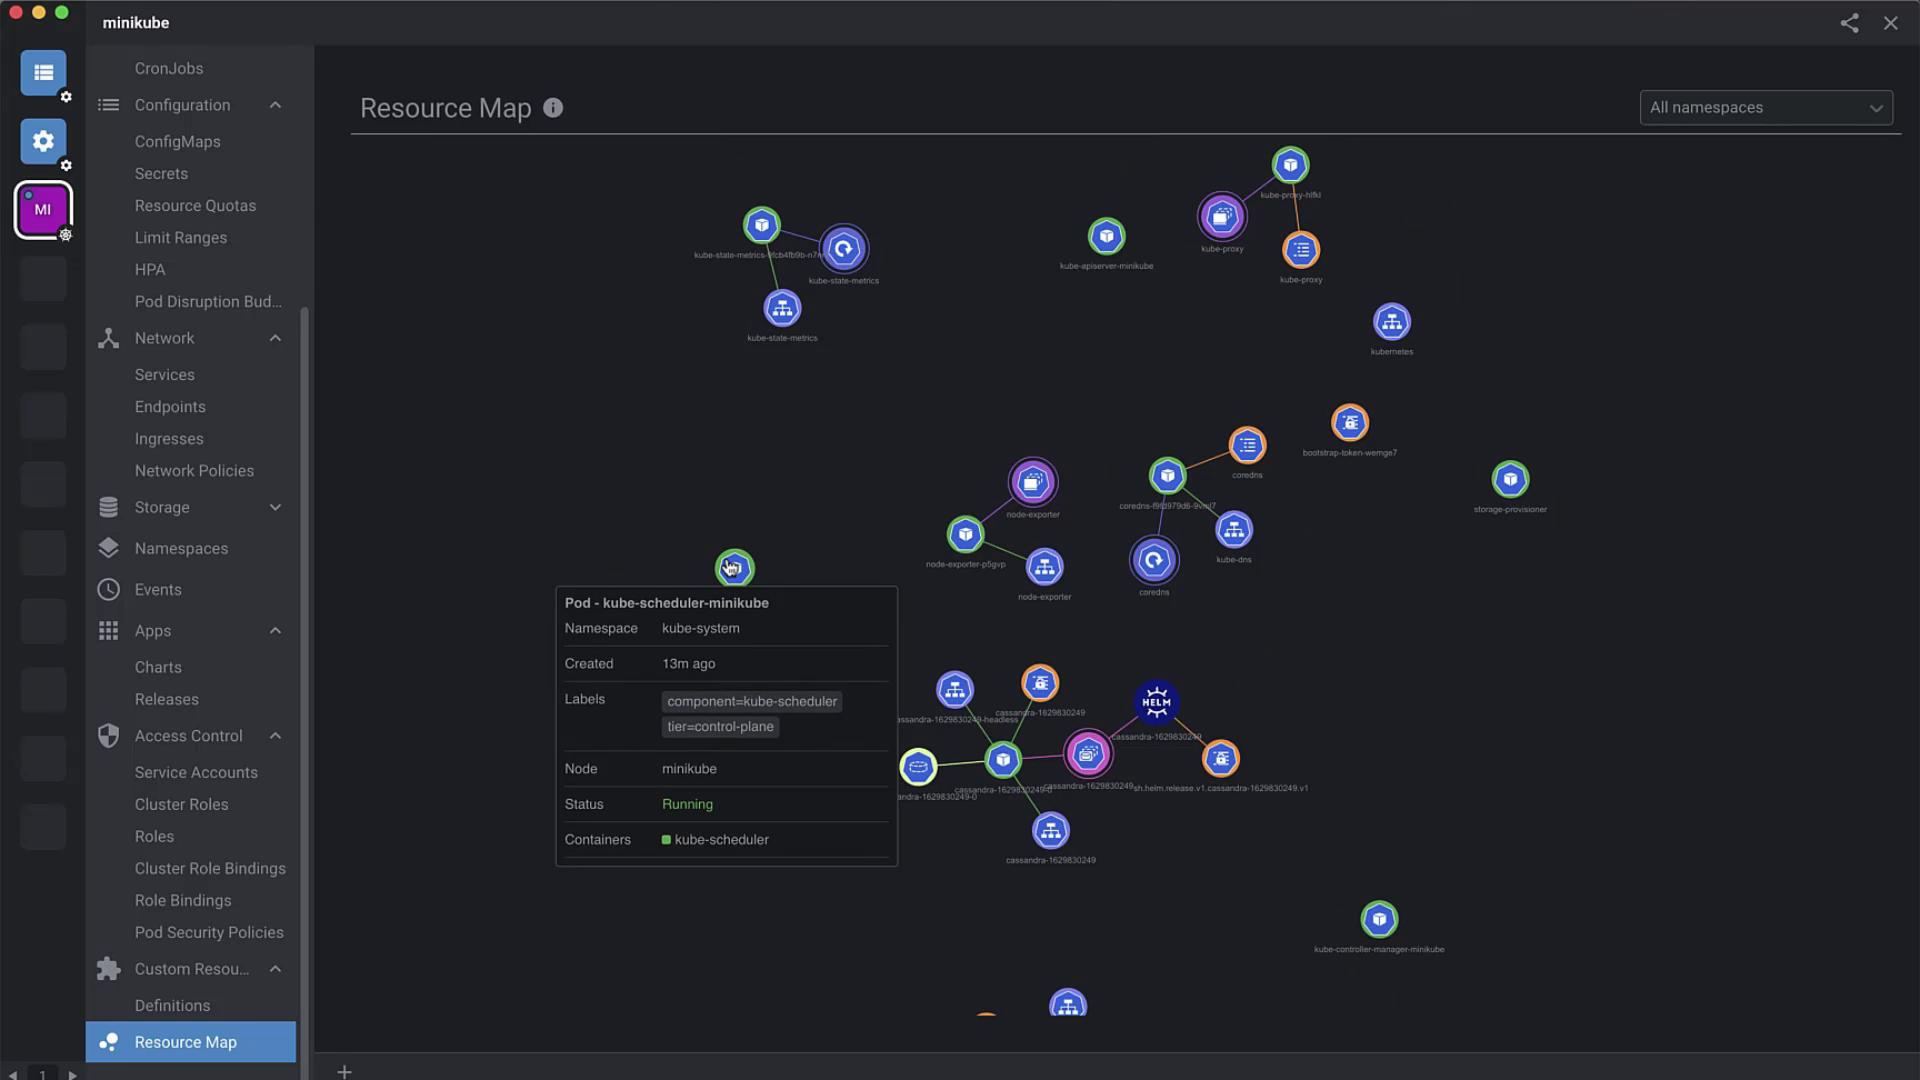
You’ll see an interactive map displaying all Kubernetes objects and their dependencies. Hover over a node to view metadata; click it to open a detailed Lens-style view.
Here’s an expanded view illustrating nodes and connections:
## Exploring Extension Development
Create your own Lens extension in a few steps:
1. In Lens, go to **Extensions**.
2. Click [**Checkout Docs**](https://docs.k8slens.dev/latest/extensions/writing-an-extension/) to open the official guide.
3. Follow the tutorials to scaffold, build, test, and publish your extension—all within Lens.
## Example: Running Helm Commands
If your cluster disconnects, reconnect and run Helm commands directly in your terminal:
```shell theme={null}
$ helm repo update
Hang tight while we grab the latest from your chart repositories...
...Successfully got an update from the "stable" chart repository
...Successfully got an update from the "ingress-nginx" chart repository
...Successfully got an update from the "bitnami" chart repository
Update Complete.
$ helm install my-release stable/mysql --namespace my-namespace
```
Wait a few moments for the chart to deploy, then return to Lens to explore your new resources.
## Conclusion
Lens extensions live at the bottom of the sidebar and install in just a few clicks. With hundreds of public and private options, you can tailor Lens to your exact cloud-native needs—whether it’s advanced security scanning, custom visualizations, or seamless cluster integrations.
***
## Links and References
* [Lens Extension Docs](https://docs.k8slens.dev/latest/extensions/)
* [Kubernetes Documentation](https://kubernetes.io/docs/)
* [Docker Hub](https://hub.docker.com/)
* [Helm Documentation](https://helm.sh/docs/)