> ## Documentation Index
> Fetch the complete documentation index at: https://notes.kodekloud.com/llms.txt
> Use this file to discover all available pages before exploring further.
# Using Helm Charts
> This guide explains how to use Helm charts in Lens for deploying applications to Kubernetes.
Deploying applications to Kubernetes is seamless with Helm charts and Lens. In this guide, you’ll learn how to add Helm repositories, browse and install charts, customize values, inspect deployed resources, and connect to your application—all within Lens.
## Prerequisites
* Lens installed and connected to your Kubernetes cluster
* [Helm][helm-docs] CLI installed and configured
* Access to the internet (for public Helm repositories)
***
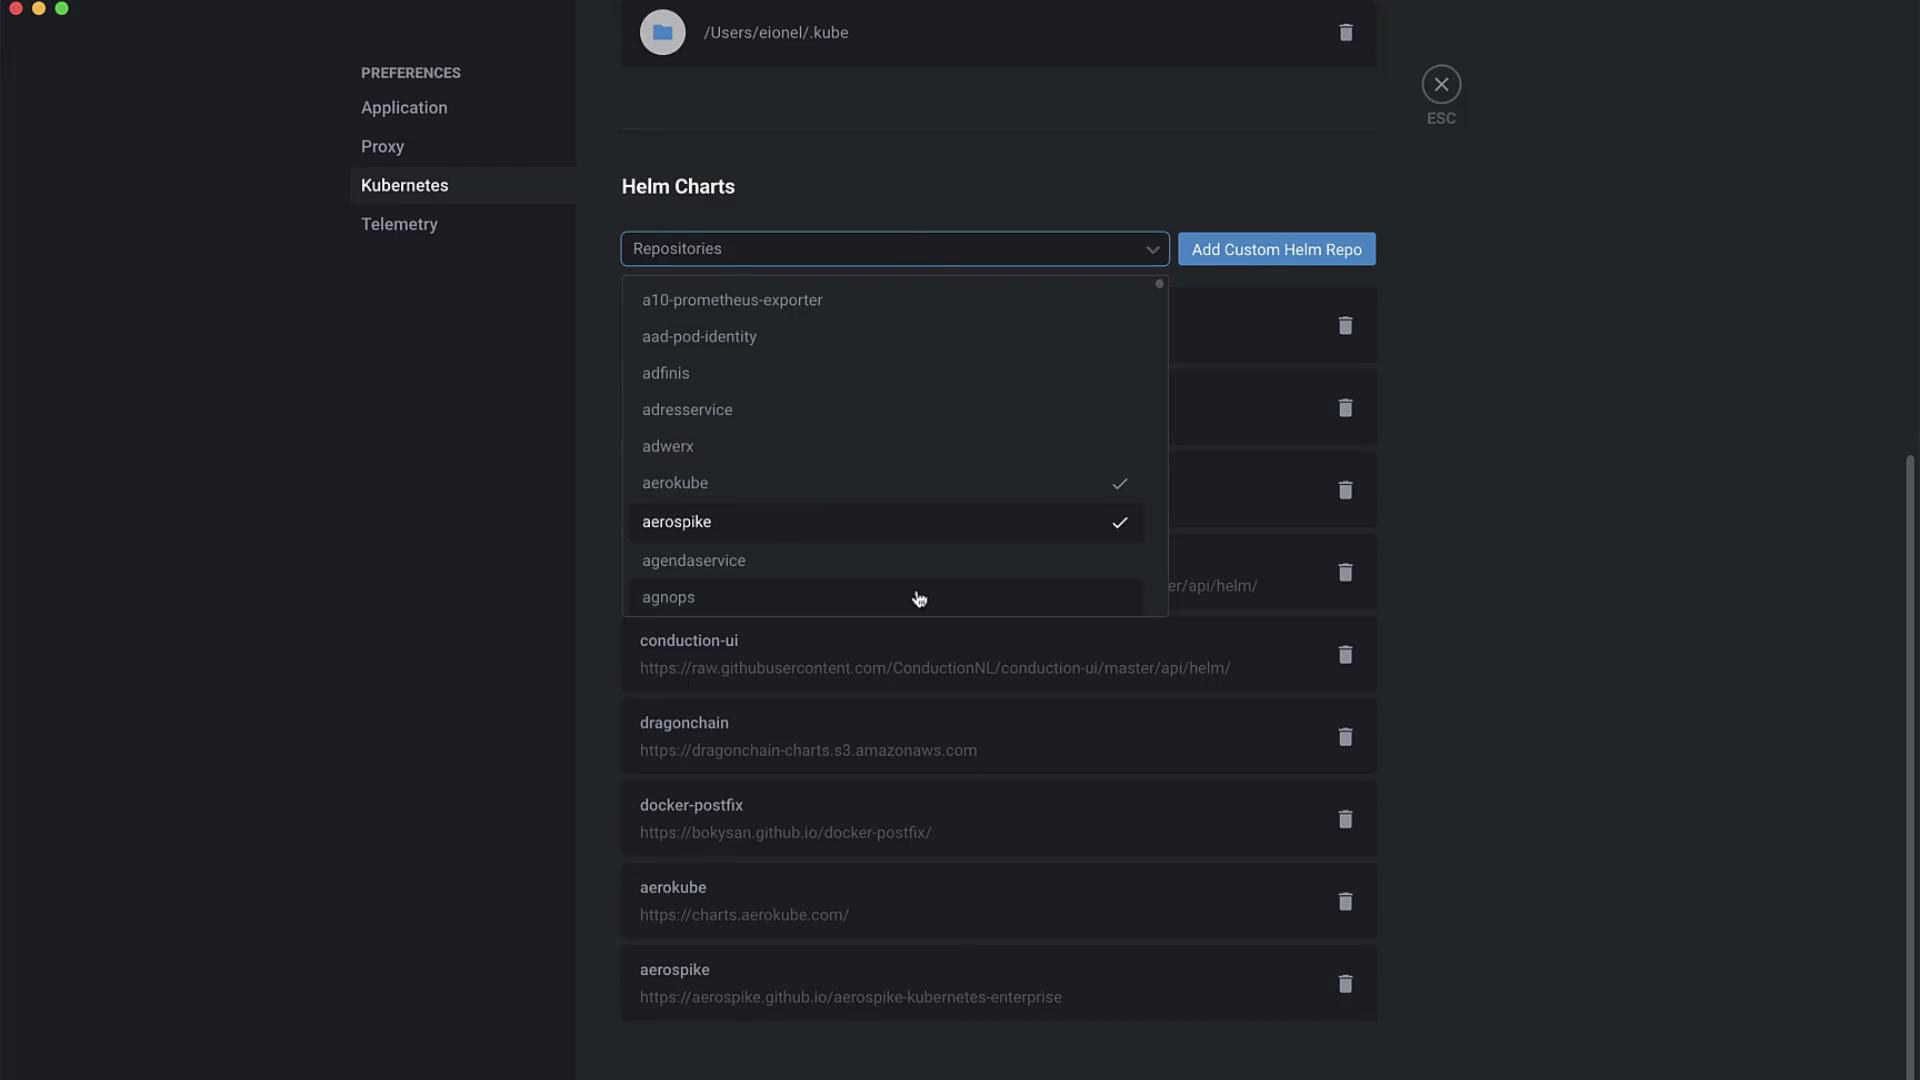
## 1. Add Helm Repositories in Lens
1. Open Lens and select **Clusters → *your-cluster***.
2. Go to **Lens → Preferences → Kubernetes → Helm**.
3. Click **Add** to include community and custom repositories (e.g., Aerokube, Armory, Bitnami).
***
## 2. Browse and Search Charts
1. Press **Esc** to close Preferences.
2. Navigate to **Apps → Charts** in the sidebar.
3. Filter by repository or search for **cassandra**.
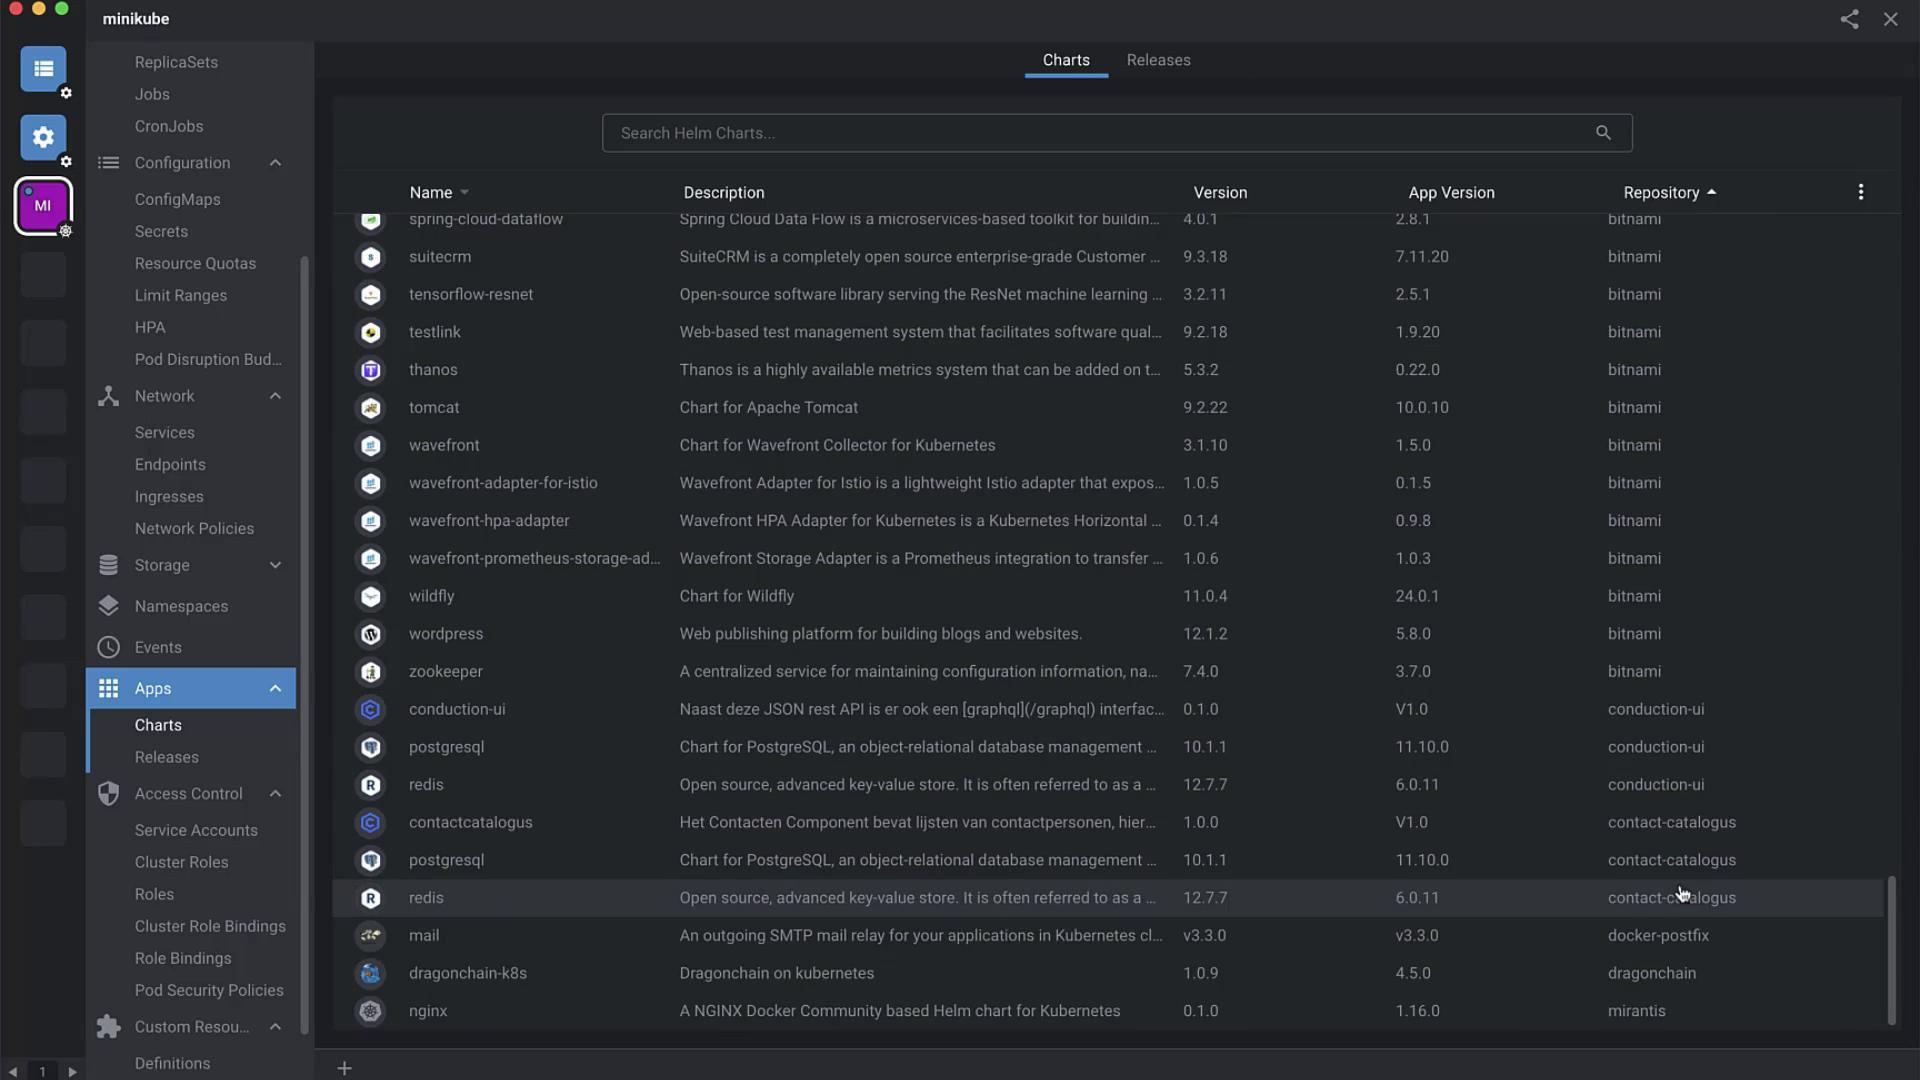
Click **Details** on the Cassandra chart to view installation steps and default values.
***
## 3. Install the Cassandra Chart
You can install directly in Lens or via the CLI:
```bash theme={null}
# Add Bitnami repository (if not already added)
helm repo add bitnami https://charts.bitnami.com/bitnami
# Install Cassandra with default settings
helm install my-release bitnami/cassandra
# Install Cassandra with custom values
helm install my-release -f values.yaml bitnami/cassandra
```
Back in Lens, click **Install**, review the form, then click **Install** again. Lens will deploy the chart to your cluster.
***
## 4. Review and Customize Default Values
Before finalizing, Lens displays the `values.yaml`. Tweak global settings, storage, and more:
```yaml theme={null}
## Global Docker image parameters
global:
imageRegistry: ""
imagePullSecrets: []
storageClass: ""
## Common parameters
nameOverride: ""
fullnameOverride: ""
commonLabels: {}
commonAnnotations: {}
clusterDomain: cluster.local
extraDeploy: []
## Diagnostic mode
diagnosticMode:
enabled: false
command:
- sleep
```
Customize `storageClass` and `imagePullSecrets` to match your Kubernetes environment.
***
## 5. Inspect Deployed Resources
After installation, click **View Helm Release** in Lens to explore all resources:
| Resource Type | Description |
| -------------- | ------------------------------------- |
| ServiceAccount | Identity for Cassandra pods |
| Secret | Stores credentials (`cassandra` user) |
| Service | Exposes port 9042 |
| StatefulSet | Manages Cassandra pods with storage |
| ConfigMap | Configuration for Cassandra |
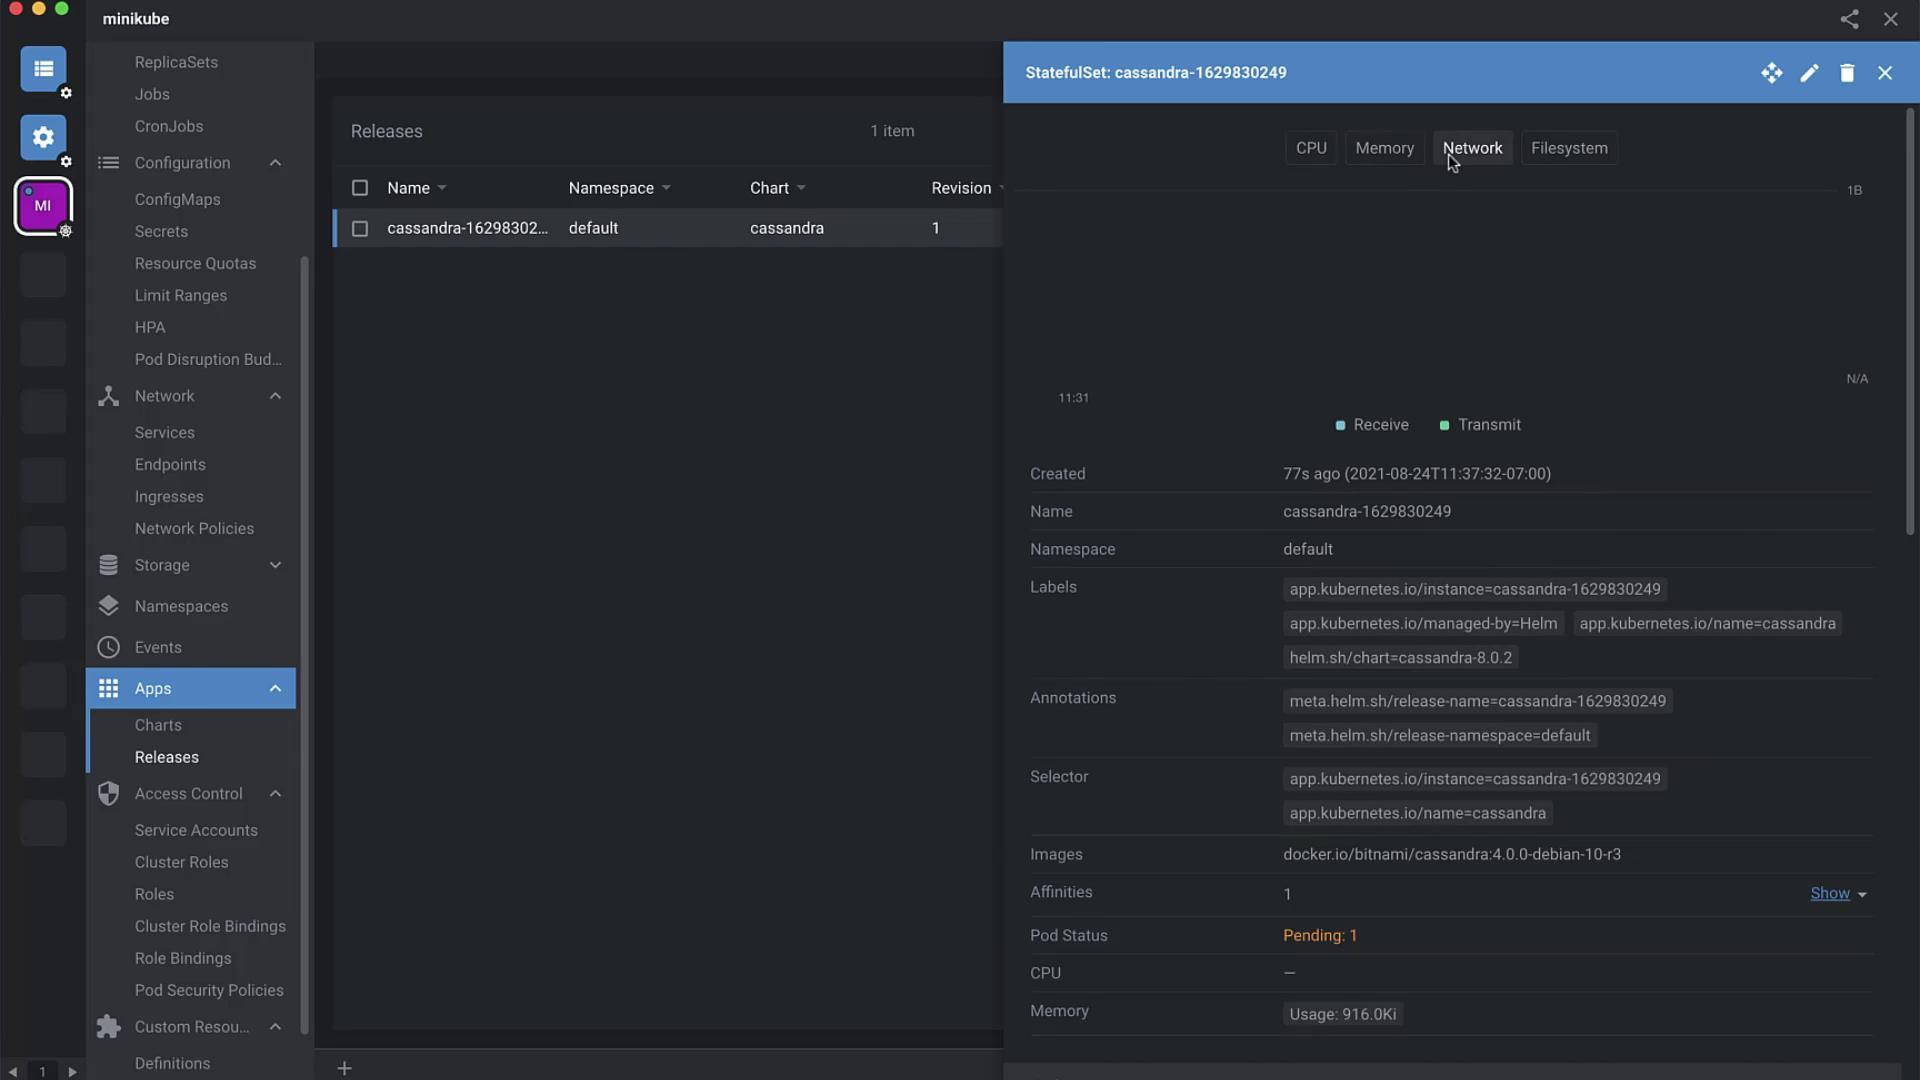
Lens lets you edit metadata (labels, annotations) on the fly and view logs, metrics, and YAML definitions.
***
## 6. Connect to Cassandra
### A. Using a Temporary Pod
```bash theme={null}
kubectl run cassandra-client --rm -i --tty --restart=Never \
--namespace default \
--env CASSANDRA_PASSWORD=$CASSANDRA_PASSWORD \
--image docker.io/bitnami/cassandra:4.0.0-debian-10-r3 -- bash
```
Inside the pod:
```bash theme={null}
cqlsh -u cassandra -p $CASSANDRA_PASSWORD cassandra
```
### B. Port-Forward from Local Host
```bash theme={null}
kubectl port-forward --namespace default svc/my-release-cassandra 9042:9042 &
cqlsh -u cassandra -p $CASSANDRA_PASSWORD 127.0.0.1 9042
```
***
## Links and References
* [Helm Documentation][helm-docs]
* [Kubernetes Documentation][k8s-docs]
* [Lens Documentation][lens-docs]
* [Bitnami Cassandra Helm Chart][cassandra-helm]
[helm-docs]: https://helm.sh/docs/
[k8s-docs]: https://kubernetes.io/docs/
[lens-docs]: https://docs.k8slens.dev/
[cassandra-helm]: https://github.com/bitnami/charts/tree/master/bitnami/cassandra