> ## Documentation Index
> Fetch the complete documentation index at: https://notes.kodekloud.com/llms.txt
> Use this file to discover all available pages before exploring further.
# Creating and deleting clusters
> Learn to create and delete a Kubernetes cluster using Linode Cloud Manager and explore automation with Terraform for provisioning.
In this guide, you’ll learn how to spin up a Kubernetes cluster using the Linode Cloud Manager UI and how to tear it down when you’re done. Later, you can automate provisioning with Terraform or another infrastructure-as-code tool.
For repeatable workflows, consider using [Terraform](https://www.terraform.io) and the [Linode Terraform provider](https://registry.terraform.io/providers/linode/linode/latest).
## Prerequisites
* A Linode account with Kubernetes Engine enabled
* Familiarity with basic Kubernetes concepts
* Access to the Linode Cloud Manager (cloud.linode.com)
## Navigate to the Kubernetes Dashboard
1. Log in to the Linode Cloud Manager.
2. In the left sidebar, click **Kubernetes**.
3. You’ll see options to **Create Cluster** or browse documentation for deployments, ingress, CI/CD, monitoring, and observability.
## 1. Create a New Cluster
Click **Create Cluster** and configure these options:
1. **Cluster Name**\
Enter a unique identifier, for example:\
`kodekloud01`
2. **Region**\
Select the data center nearest your users (e.g., **Newark, NJ**).
3. **Kubernetes Version**\
Choose the latest supported release (e.g., **v1.23**).
4. **High-Availability Control Plane**\
Enable to provision three control-plane nodes instead of one. This setup eliminates a single point of failure for etcd and the Kubernetes API.
Enabling High Availability adds approximately \$60/month to your bill. Ensure this aligns with your budget.
### 1.1 Define Your Worker Node Pools
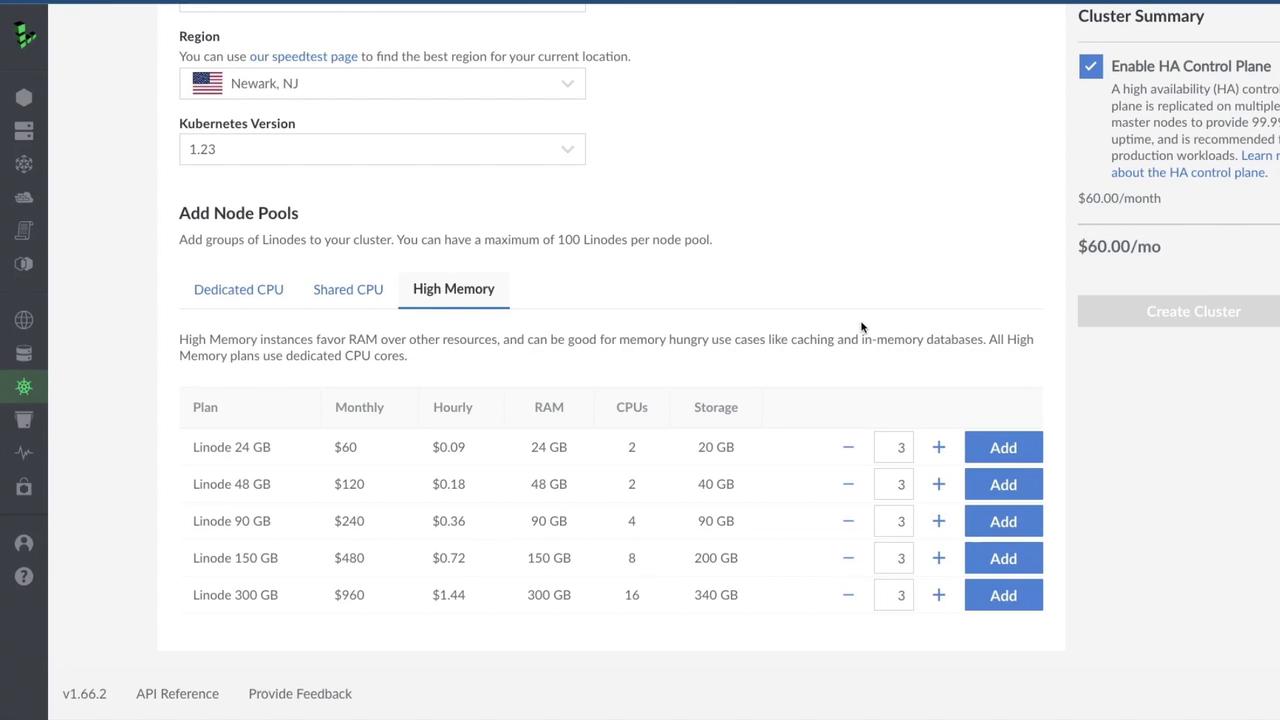
Choose a node pool based on your workload:
| Node Pool Type | Use Case | Example Plan |
| -------------- | --------------------------------- | ------------ |
| Dedicated CPU | CPU-bound builds and CI workloads | Linode 4 GB |
| Shared CPU | General development or testing | Linode 2 GB |
| High Memory | Memory-intensive applications | Linode 16 GB |
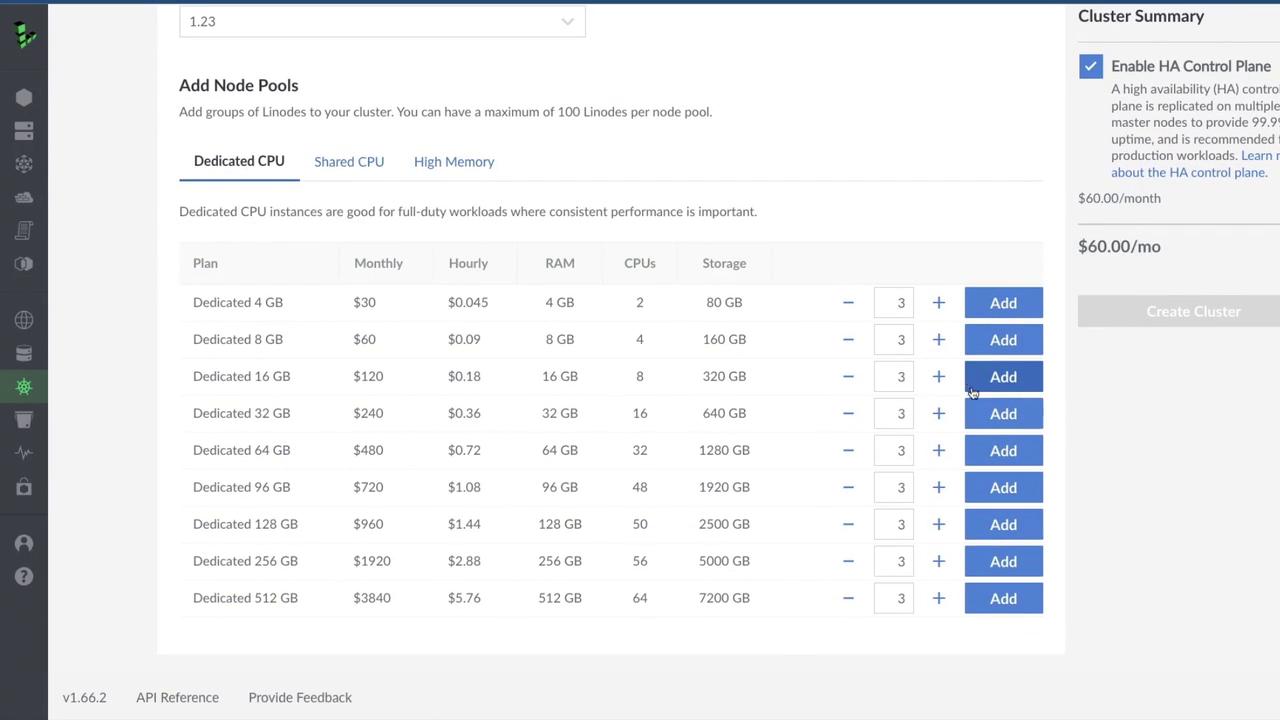
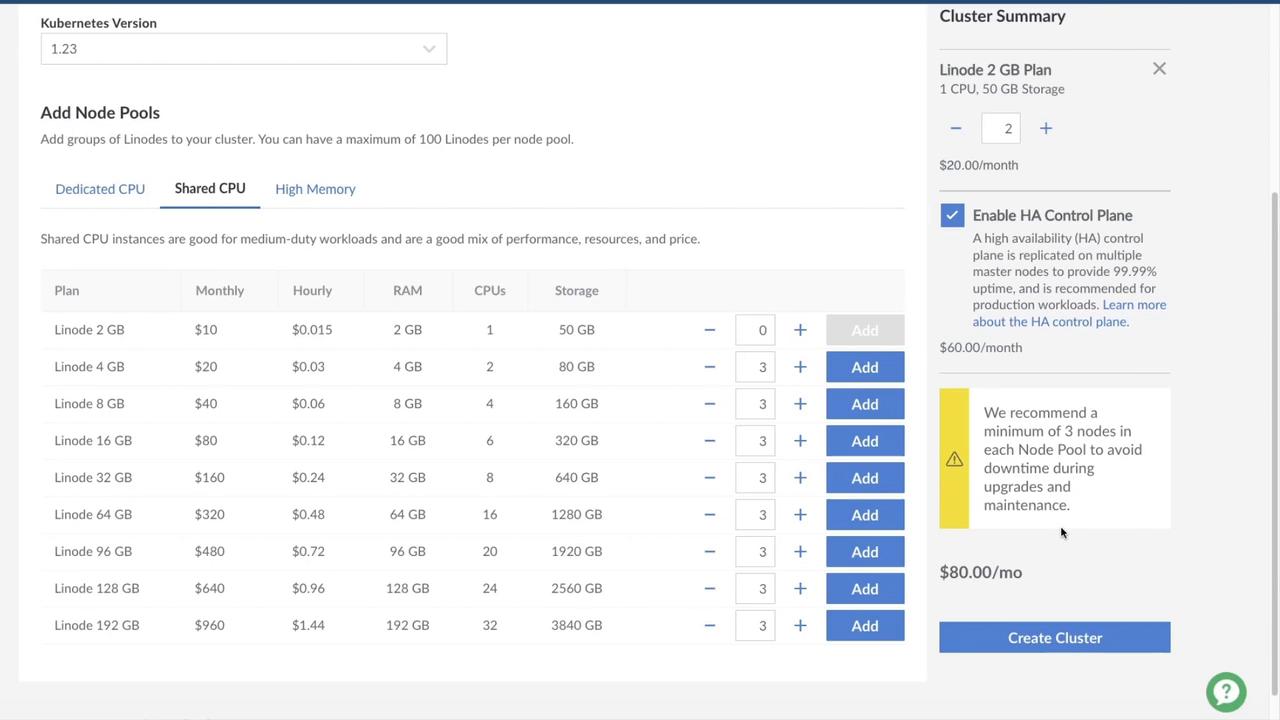
For a dev environment, select **Shared CPU** → **Linode 2 GB**, then set node count:
* Development: 1–2 nodes
* Production: 3–4 nodes for redundancy and scaling
Add two nodes:
4. **Review & Create**\
Confirm your settings and review the estimated monthly cost (\~\$80).
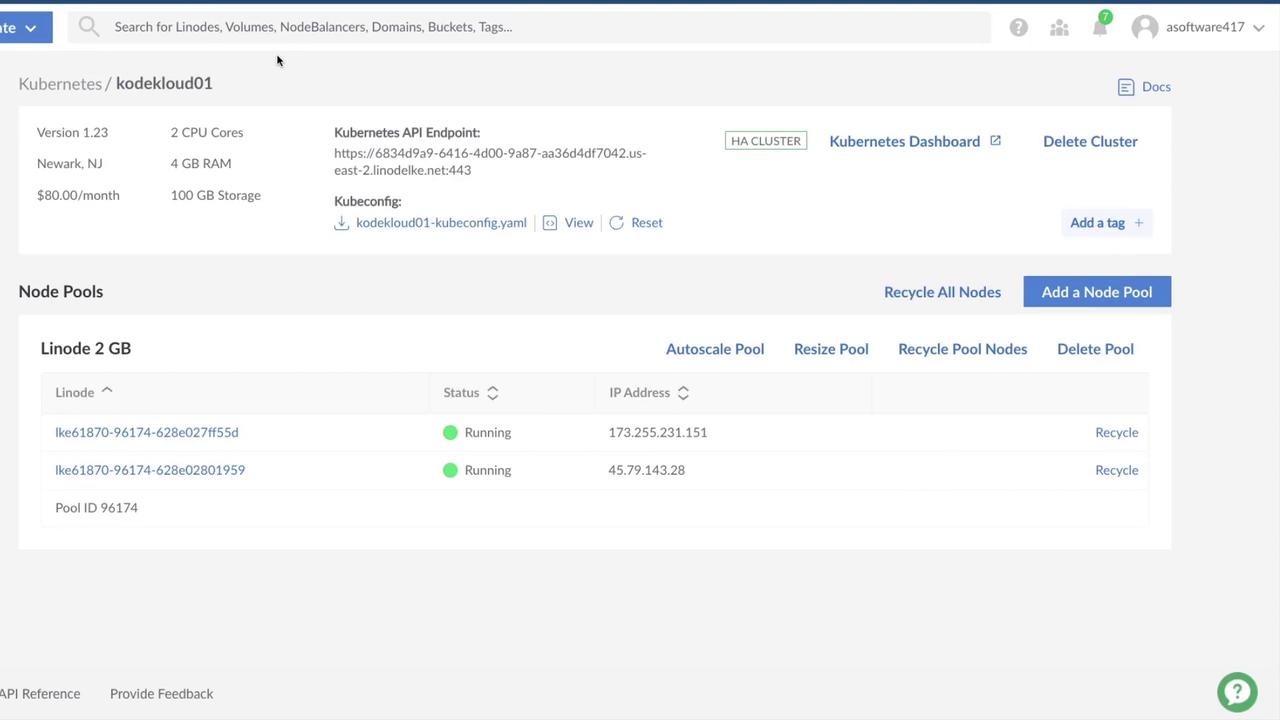
Click **Create Cluster**. Provisioning takes 3–5 minutes as Linode sets up control-plane nodes, worker nodes, networking, and storage. When ready, your cluster appears in the dashboard:
## 2. Delete a Cluster
When you no longer need the cluster, delete it to stop billing:
1. In the **Kubernetes** dashboard, locate your cluster.
2. Click **Delete Cluster**, then confirm.
Deleting the cluster will remove all associated resources.
## Links and References
* [Linode Kubernetes Engine Documentation](https://www.linode.com/docs/kubernetes/)
* [Terraform Registry: Linode Provider](https://registry.terraform.io/providers/linode/linode)
* [Kubernetes Official Documentation](https://kubernetes.io/docs/)