Key Features of Azure Defender for SQL
-
Threat Detection
Azure Defender for SQL uses machine learning to analyze database activities, quickly identifying unusual or potentially malicious behavior and alerting you to potential security breaches. -
Vulnerability Assessment
Routine assessments help identify potential weaknesses in your databases. Detailed remediation steps and recommendations are then provided to help secure your environment. -
Security Alerts
Receive real-time notifications for any suspicious activities or vulnerabilities detected within your SQL databases. -
Secure Score
Improve your overall security posture with a quantifiable measure. By applying recommendations, your secure score increases, helping you track and enhance database security over time. -
Compliance Dashboard
Easily monitor your compliance status against various industry standards (such as ISO and PCI) with a dedicated dashboard, ensuring your databases meet required security regulations. -
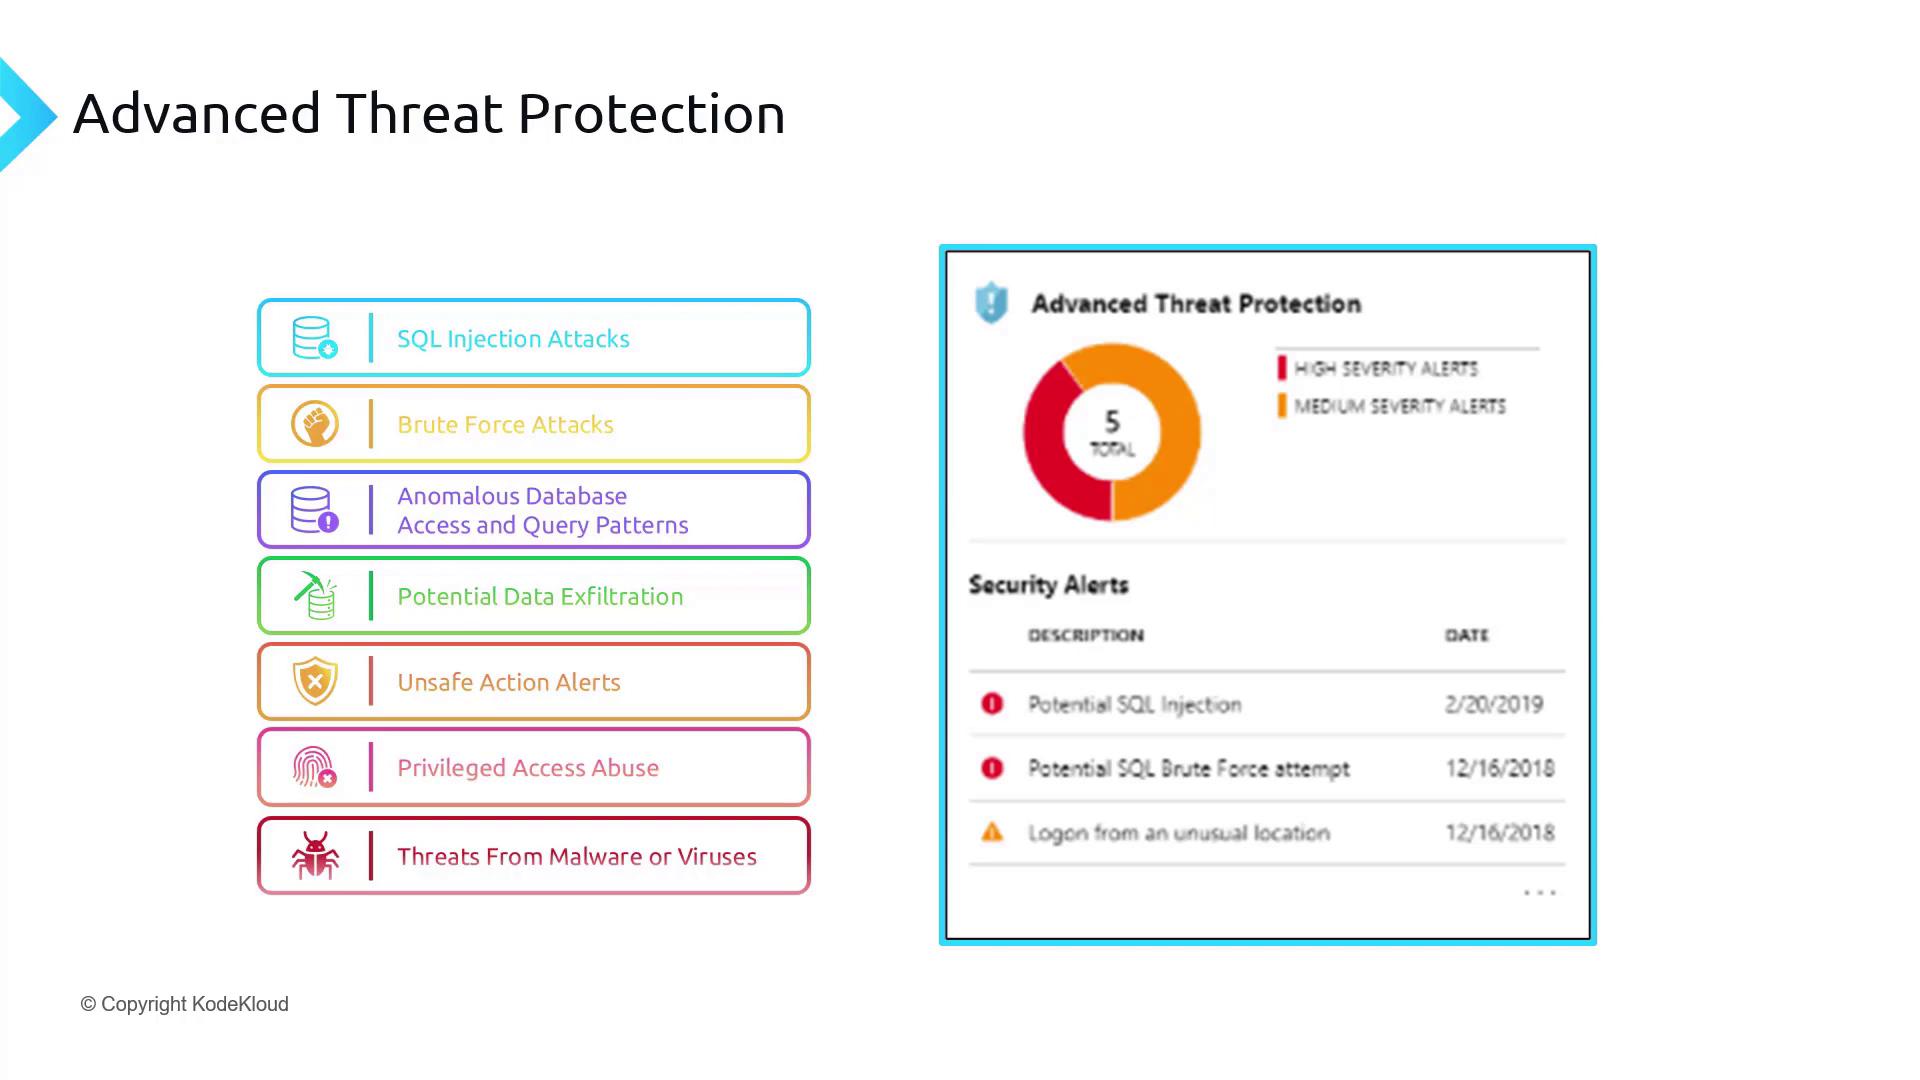
Advanced Threat Protection (ATP)
ATP is designed to detect and mitigate a range of security threats, including:- SQL Injection Attacks: Recognizes patterns that indicate SQL injection attempts.
- Brute Force Attacks: Detects repeated unauthorized login attempts from unknown locations.
- Anomalous Database Access and Query Patterns: Profiles normal behavior to spot irregular or unauthorized activities.
- Potential Data Exfiltration: Monitors unusual data transfer or export patterns that could indicate data theft.
- Unsafe Action Alerts: Warns of potentially unsafe operations, such as suspicious modifications or the addition of harmful links.
- Privileged Access Abuse: Identifies misuse of database privileges, including unauthorized activities by insiders.
- Threats from Malware or Viruses: Complements existing antivirus solutions by detecting activity patterns that resemble malware behavior.
Before enabling these features, ensure that you have the necessary permissions on the Azure portal and have reviewed your current security configurations.
Enabling Defender for SQL in the Azure Portal
1. Accessing Defender for SQL
Open the Azure portal and navigate to the SQL Databases section where you can find the Microsoft Defender for Cloud option. If the SQL Vulnerability Assessment is not yet configured, you can enable it from this area.2. Configuring Defender for Cloud
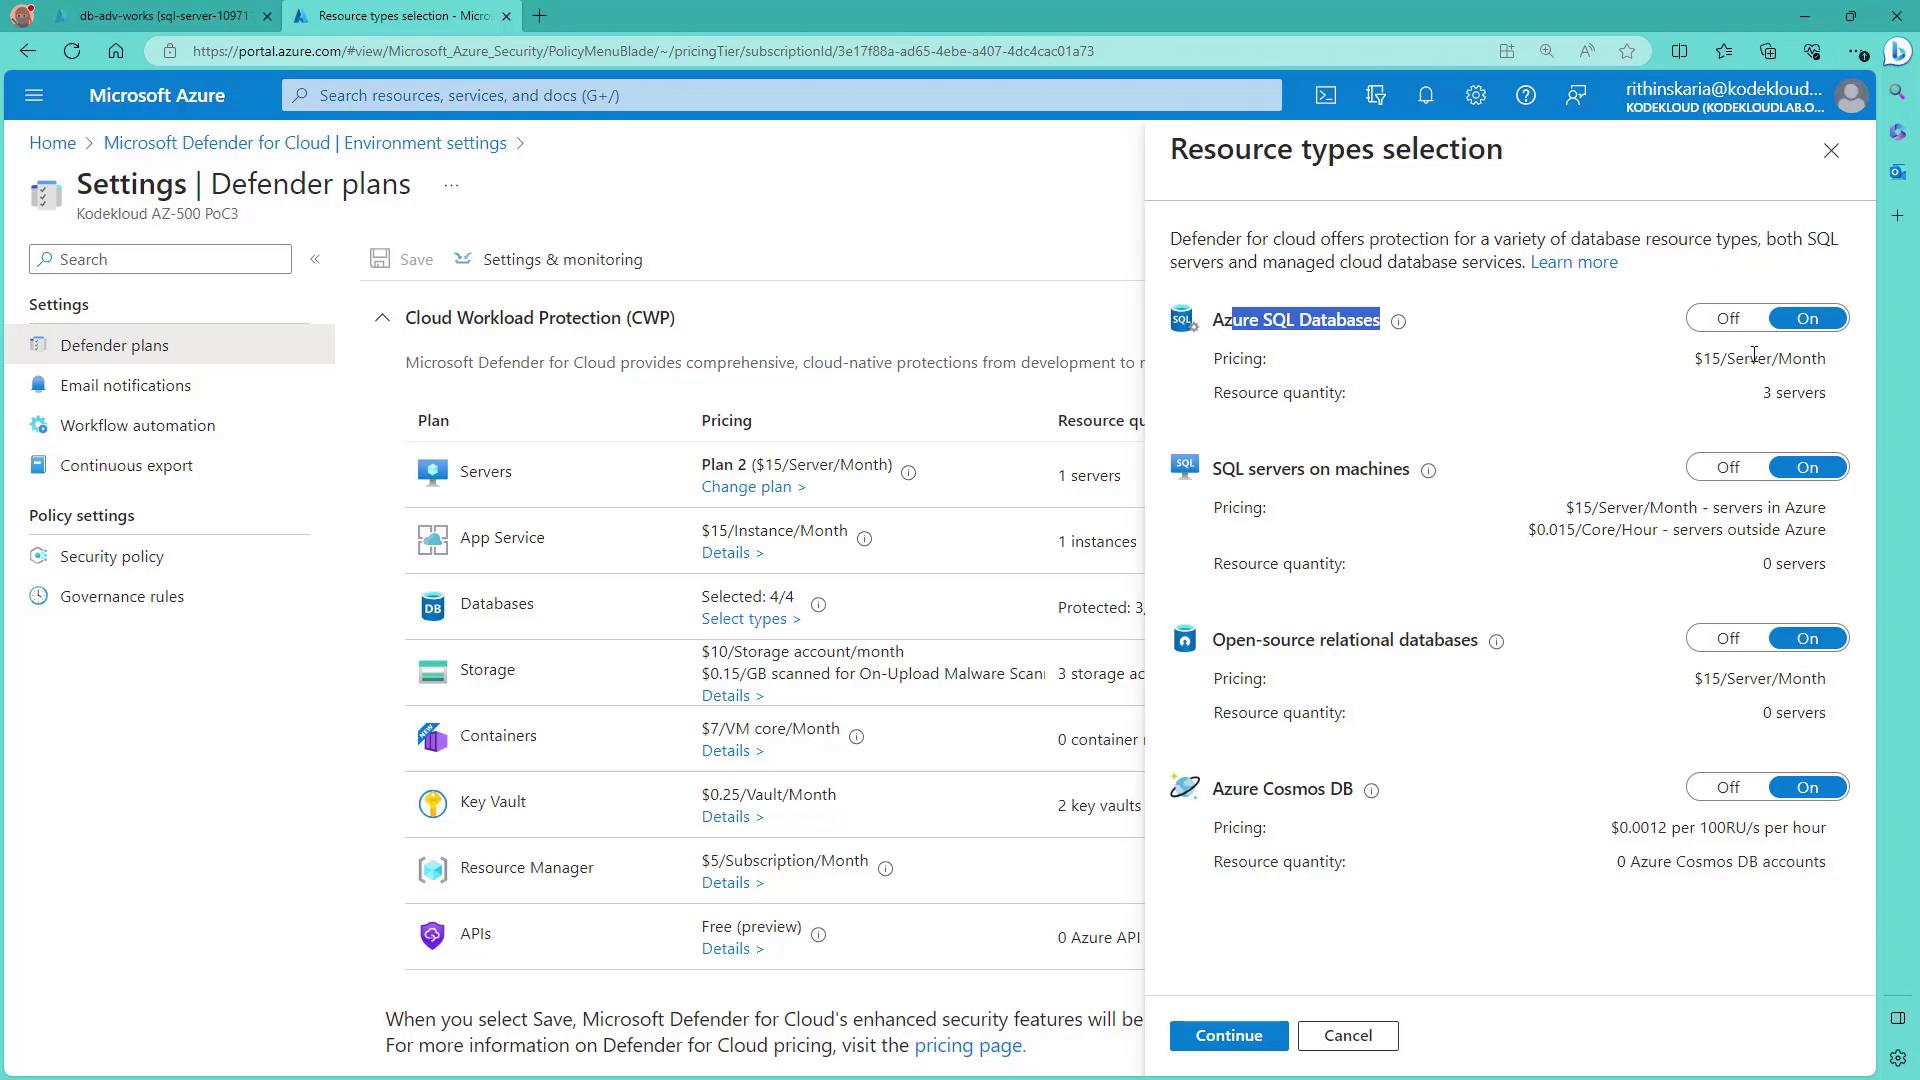
Search for “Defender for Cloud” within the portal and select your subscription under environment settings. Click on “Edit settings” to access the Defender plans. From here, enable Defender for various services, including SQL databases. Options for other database types, such as Cosmos DB, are also available.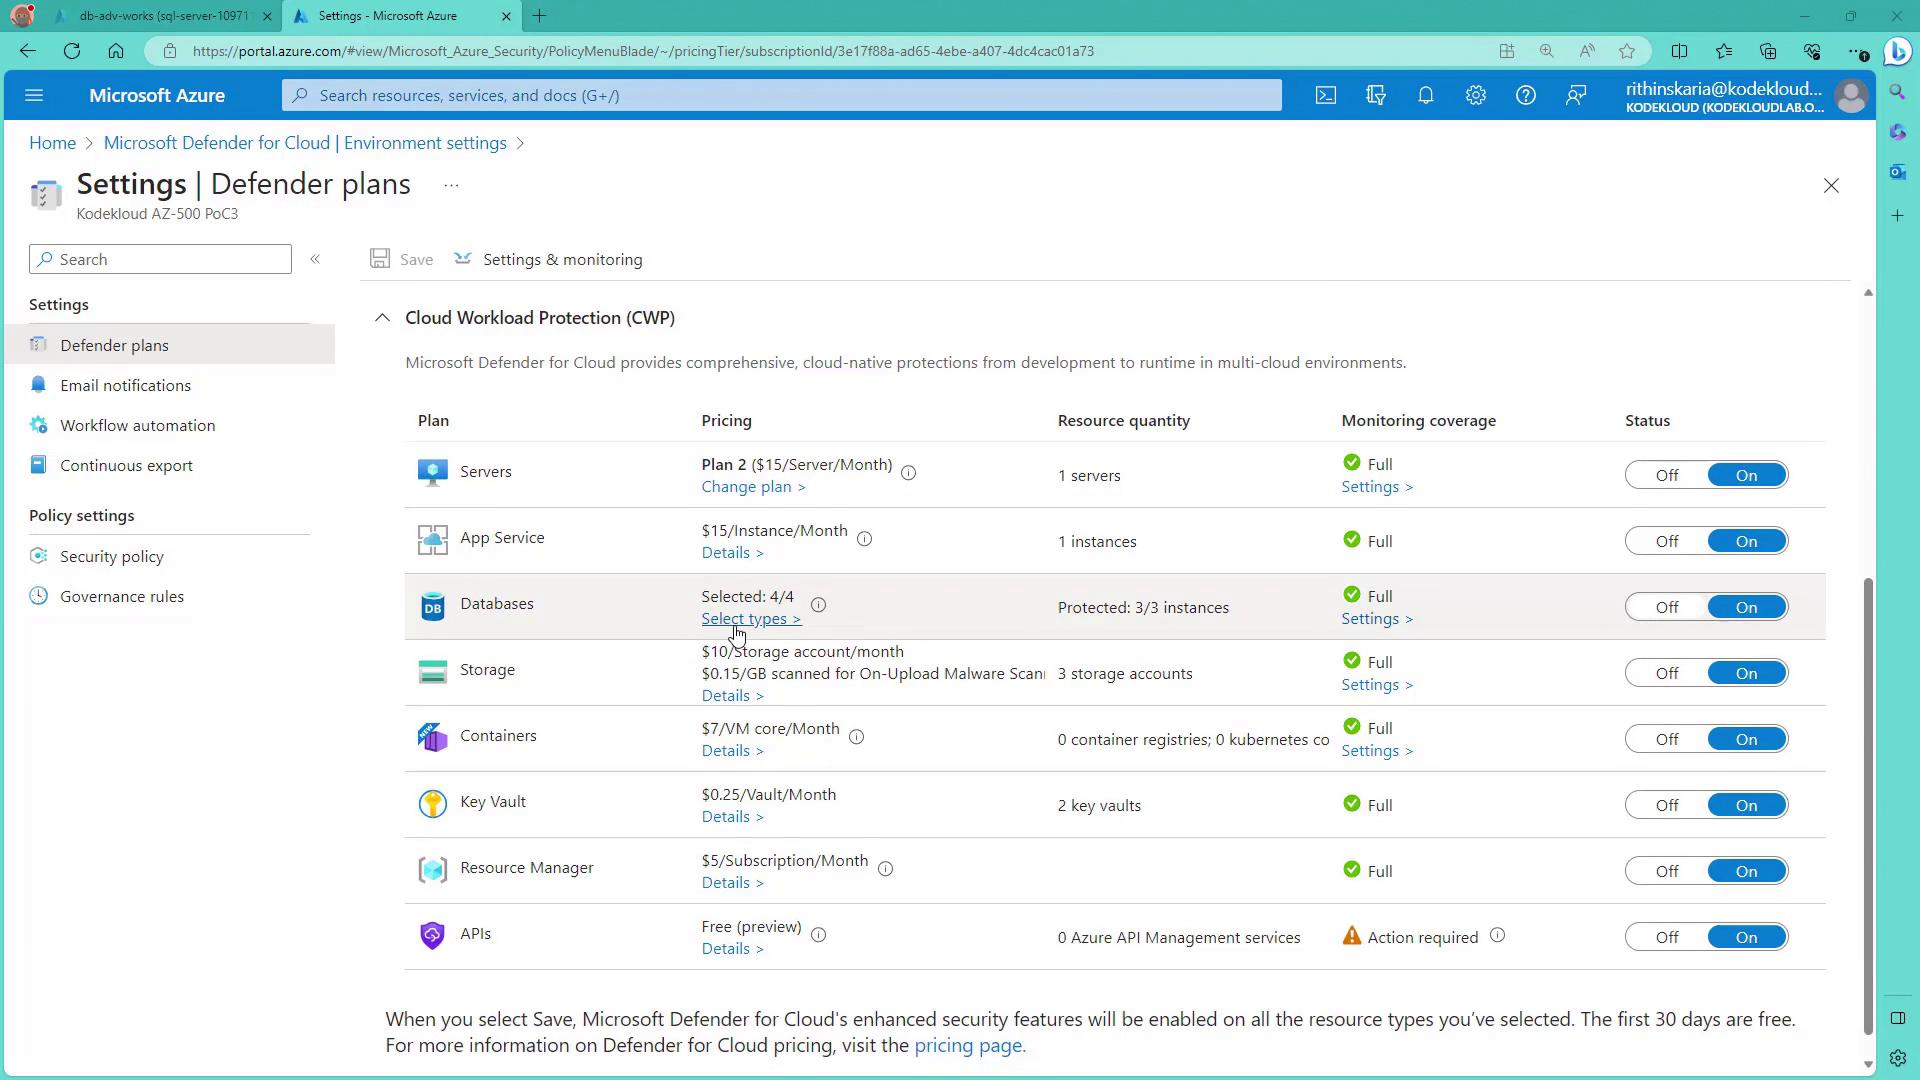
3. Reviewing Server Cost and Settings
Be aware that the Defender for SQL plan is priced at $15 per server per month. Once the correct plan is enabled, return to your SQL database and activate the SQL Vulnerability Assessment by clicking “Enable.”4. Advanced Threat Protection Settings
Click on “Configure” to view and modify the Defender for SQL settings, including advanced threat protection configurations. Here you can specify the email addresses that should receive notifications for any detected alerts.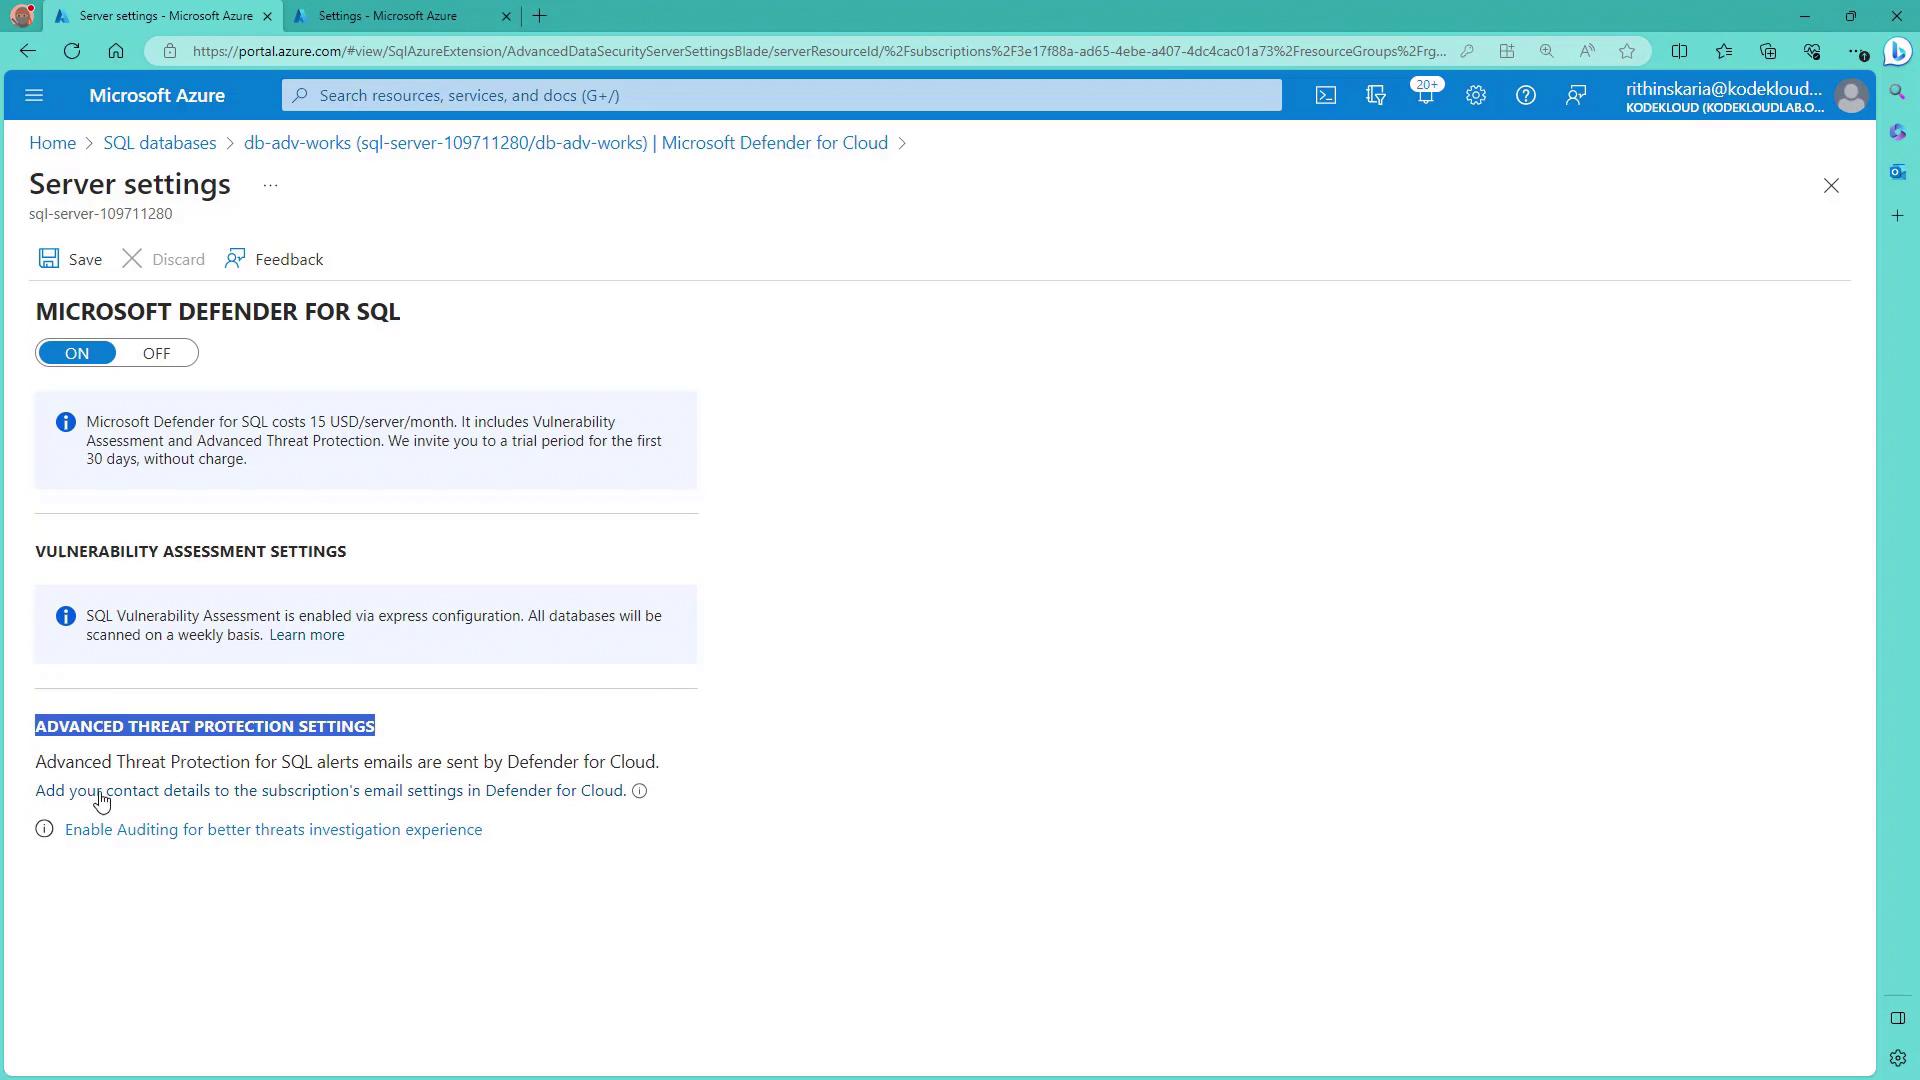
5. Setting Up Email Notifications
Within the email notification settings, add the desired email addresses to ensure that advanced threat alerts are received promptly and appropriately.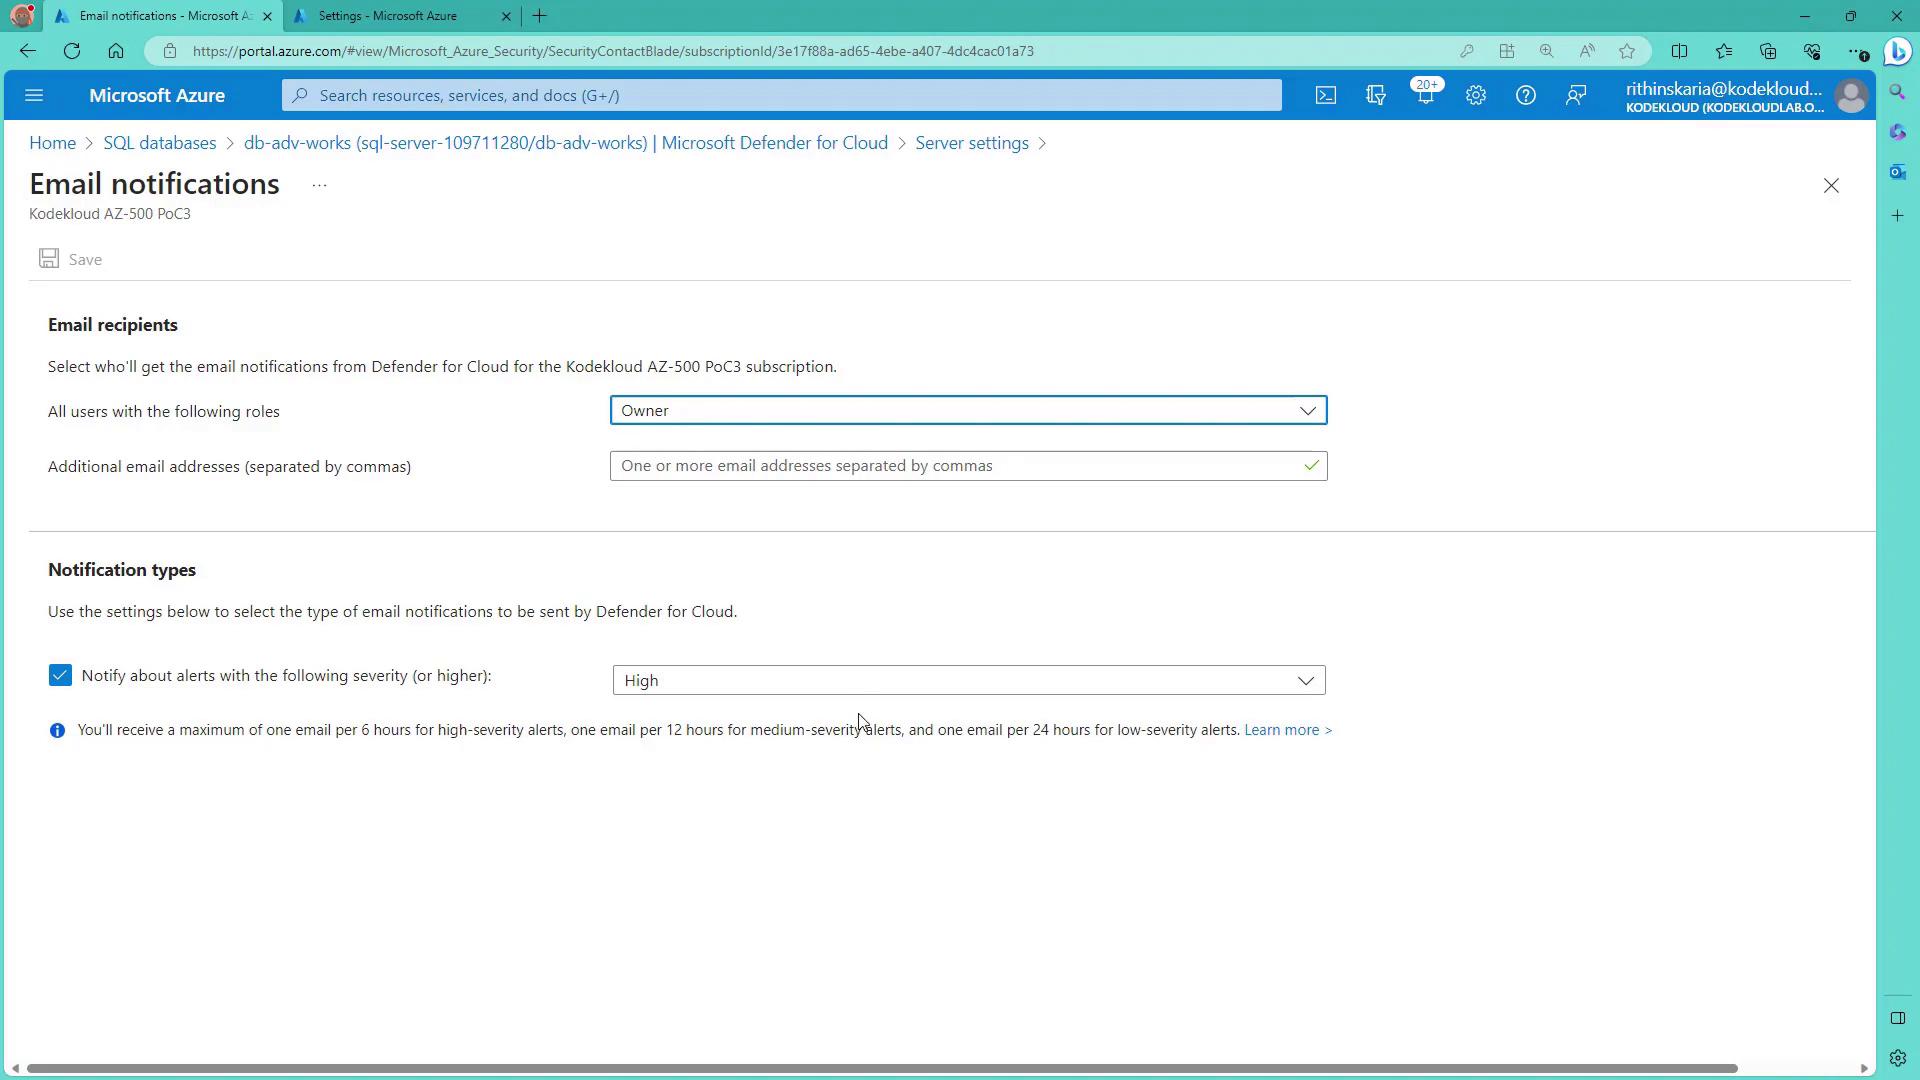
For more detailed guidance on managing your database security with Azure Defender for Cloud, refer to the Microsoft Azure Defender Documentation.