Using SAS allows you to grant temporary and limited access to Azure Storage resources without exposing your account keys. It serves as a tailor-made access card that improves security and control.
• Define the exact type of resources
• Grant specific permissions (read, write, delete, list, add, create, update)
• Set explicit time frames for access
• Specify allowed IP address ranges and enforce secure protocols (e.g., HTTPS) Not all SAS tokens are created equal. There are three primary types:
Types of SAS Tokens
-
User Delegation SAS
This type leverages Azure Active Directory (Azure AD) credentials and is specific to blob storage. For instance, if an employee like Jane needs to update documents, you can generate a User Delegation SAS that grants her access only to certain blobs during a specified period. - Service SAS
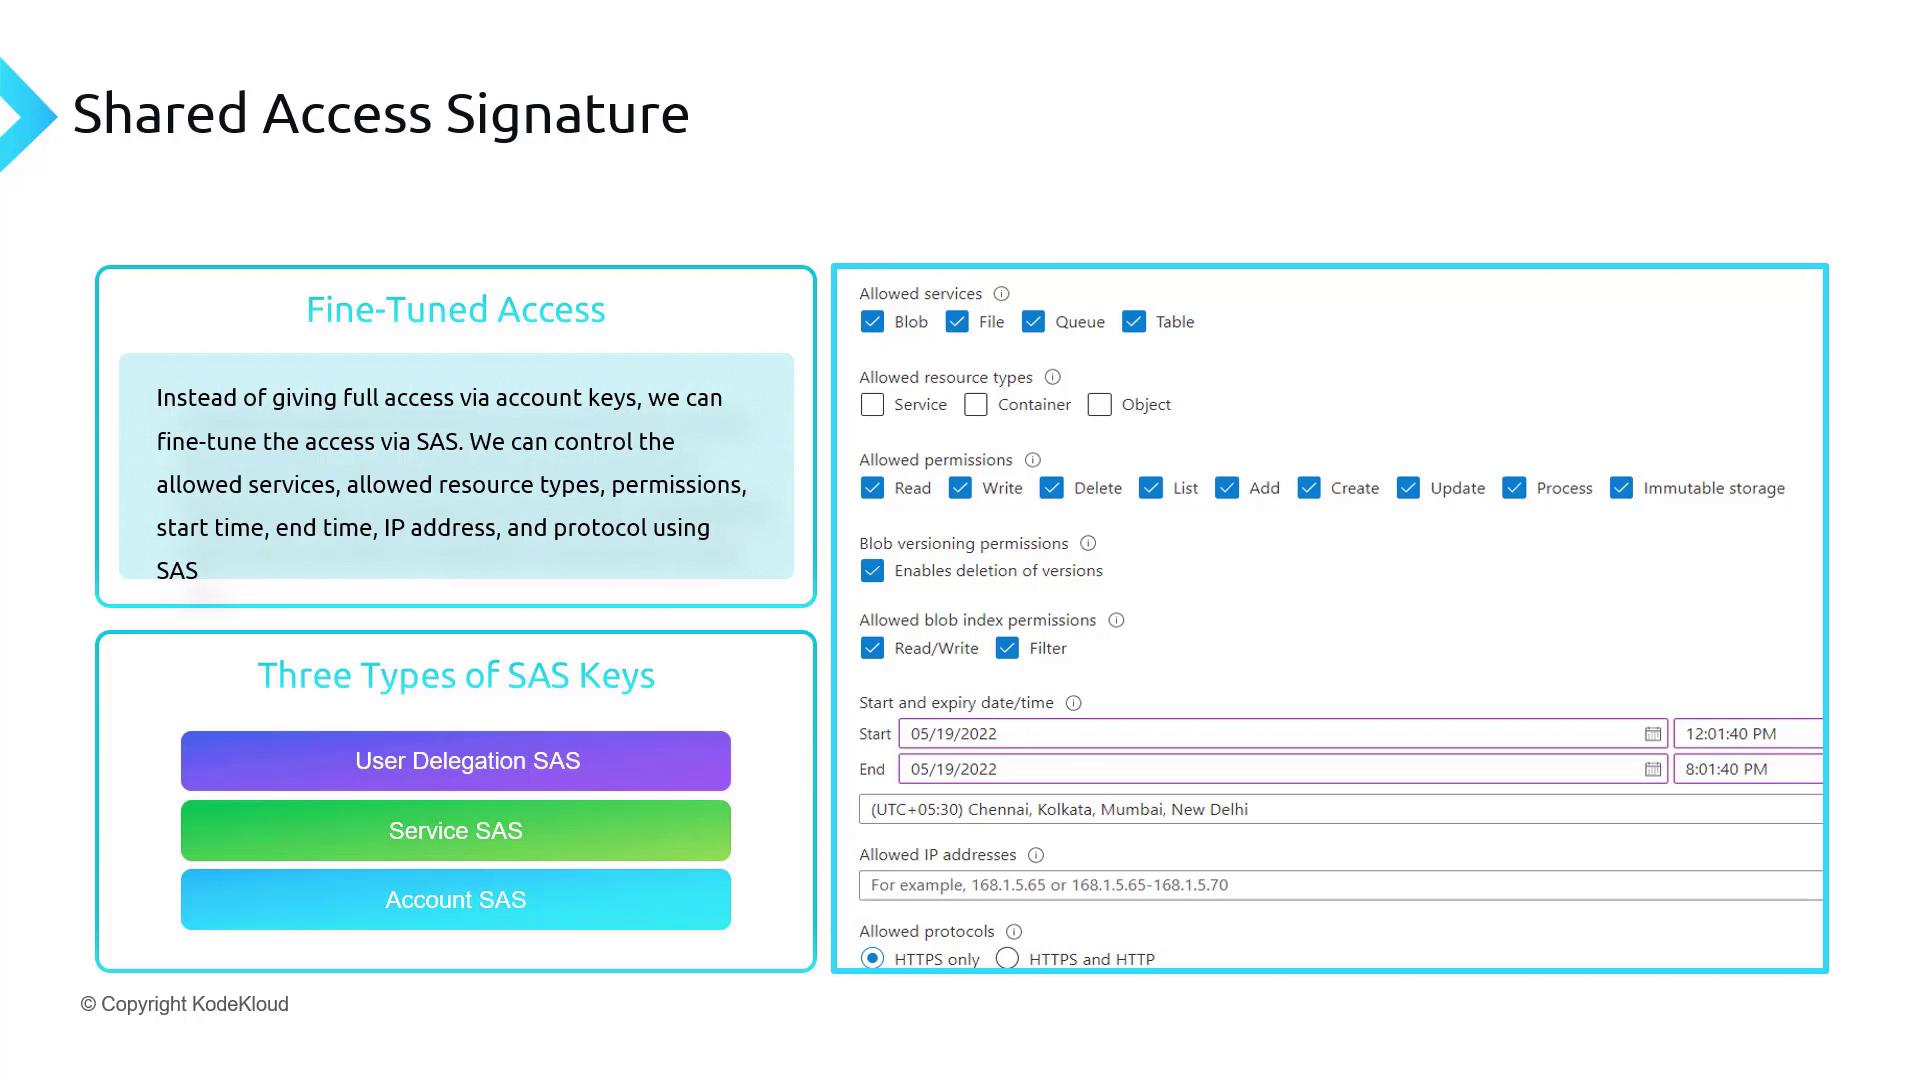
- Account SAS
This SAS token grants access to multiple services (blobs, files, tables, and queues) within the storage account. It is ideal for applications like dashboards that monitor various aspects of storage usage across the account.
Anatomy of a SAS URL
When you create a SAS token, the URL comprises two main components: • The resource endpoint (e.g., blob, queue, file, or table endpoint). For example, a URL might begin with blob.core.windows.net and embed the storage account name (e.g., KodeKloud or xyc) within the domain.• The SAS token parameters, which detail allowed services, permissions, start and expiry times, permitted IP ranges, protocol restrictions, and include a unique signature (often generated using SHA-256 and Base64). For instance, a SAS URL may look like this:
- Resource URI: Represents the storage endpoint (e.g., Blob).
- Query Parameters:
sv=2020-08-04: The storage service version.ss=bfqt: Allowed services: b (blobs), f (files), q (queues), and t (tables).srt=sc: Resource types (service and container-level operations).sp=rwdlacup: Permissions granted (read, write, delete, list, add, create, update) which can be customized.st=andse=: Start and end times (UTC) defining token validity.sip=: Designates allowed IP address ranges.spr=https: Enforces HTTPS for access.sig=: The signature that validates the token’s integrity using encryption methods like SHA-256 combined with Base64.
Working with SAS in the Azure Portal
Follow these steps to create and configure SAS tokens within the Azure portal:1. Create a Storage Account
- In the Azure portal, navigate to Storage and create a new storage account.
- Choose a unique name (since the storage account name is exposed via its endpoint), select a region (e.g., East US), and choose a performance tier (typically, standard; premium for specific requirements).
- For test environments, Locally Redundant Storage (LRS) is often sufficient.
2. Access Keys and SAS Token Configuration
- Once your storage account is created, view the access keys (each account has two keys). These keys grant full access and are periodically rotated for security.
- For fine-grained control, navigate to the Shared Access Signature settings to generate a SAS token.
3. Configure a Container for Blob Storage
Before creating a container, decide whether to enable anonymous access for blobs as per your testing scenario.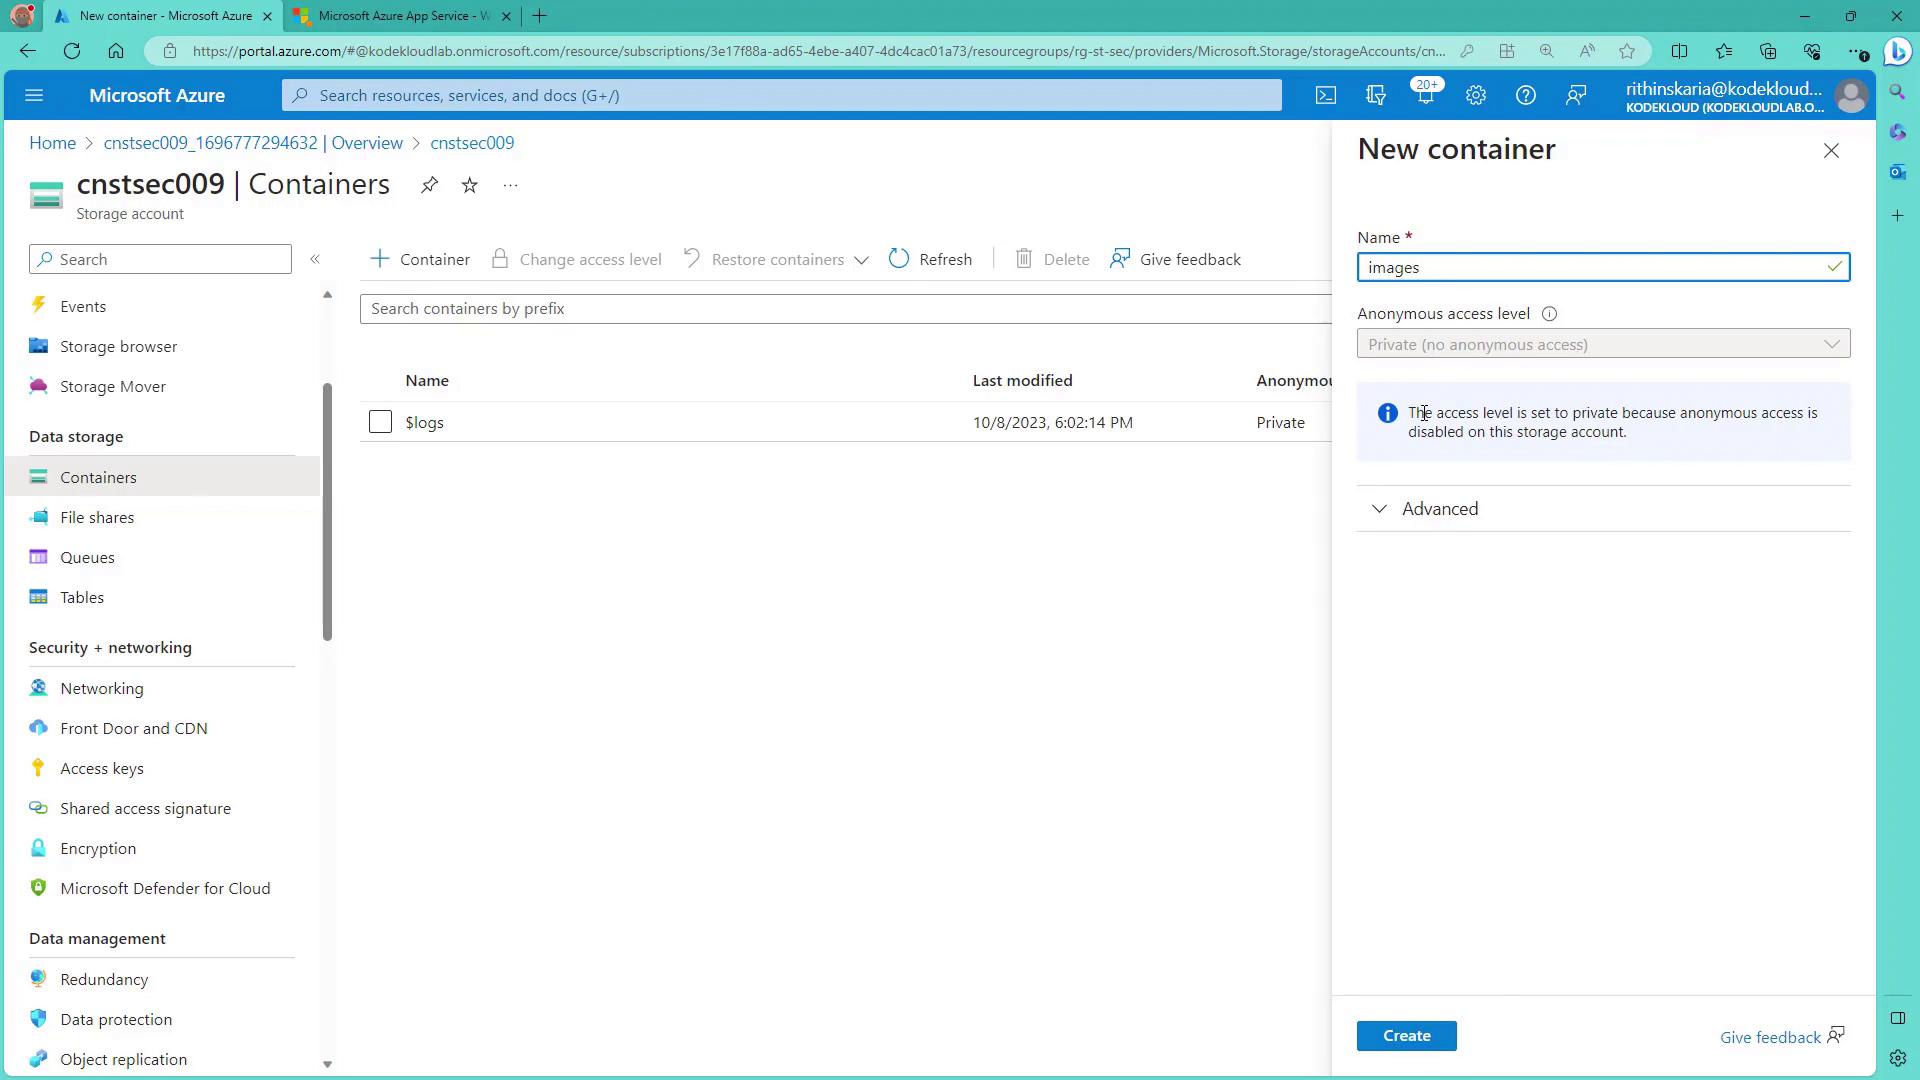
- Visit the storage account configuration page.
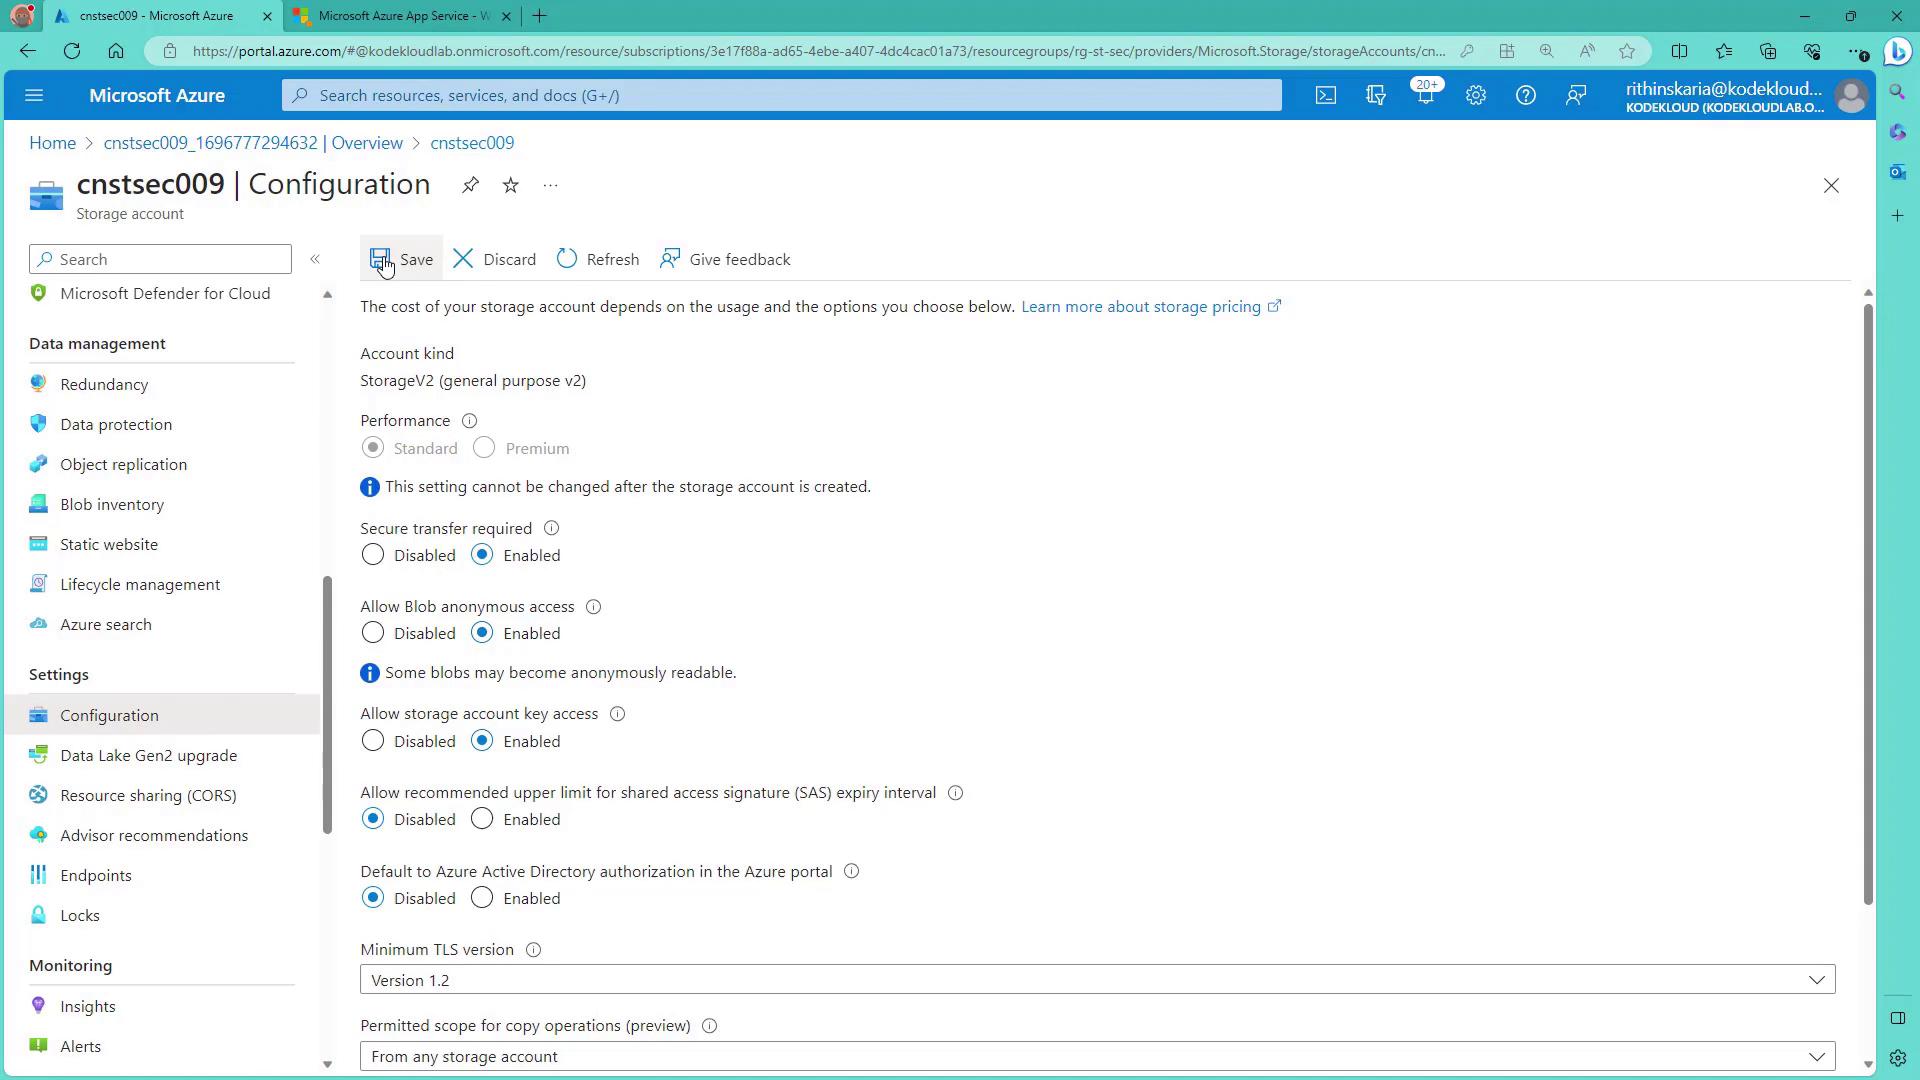
- Enable “allow anonymous blob access” if needed, then create the container (for example, named “images”) with blob-level access. Note: Selecting container-level access permits anonymous users to list all blobs in the container.
4. Upload Files to the Container
- Open the new container and click “Upload” to add files (e.g., images).
- Use the file explorer to drag and drop files, such as images of mountains or cityscapes.
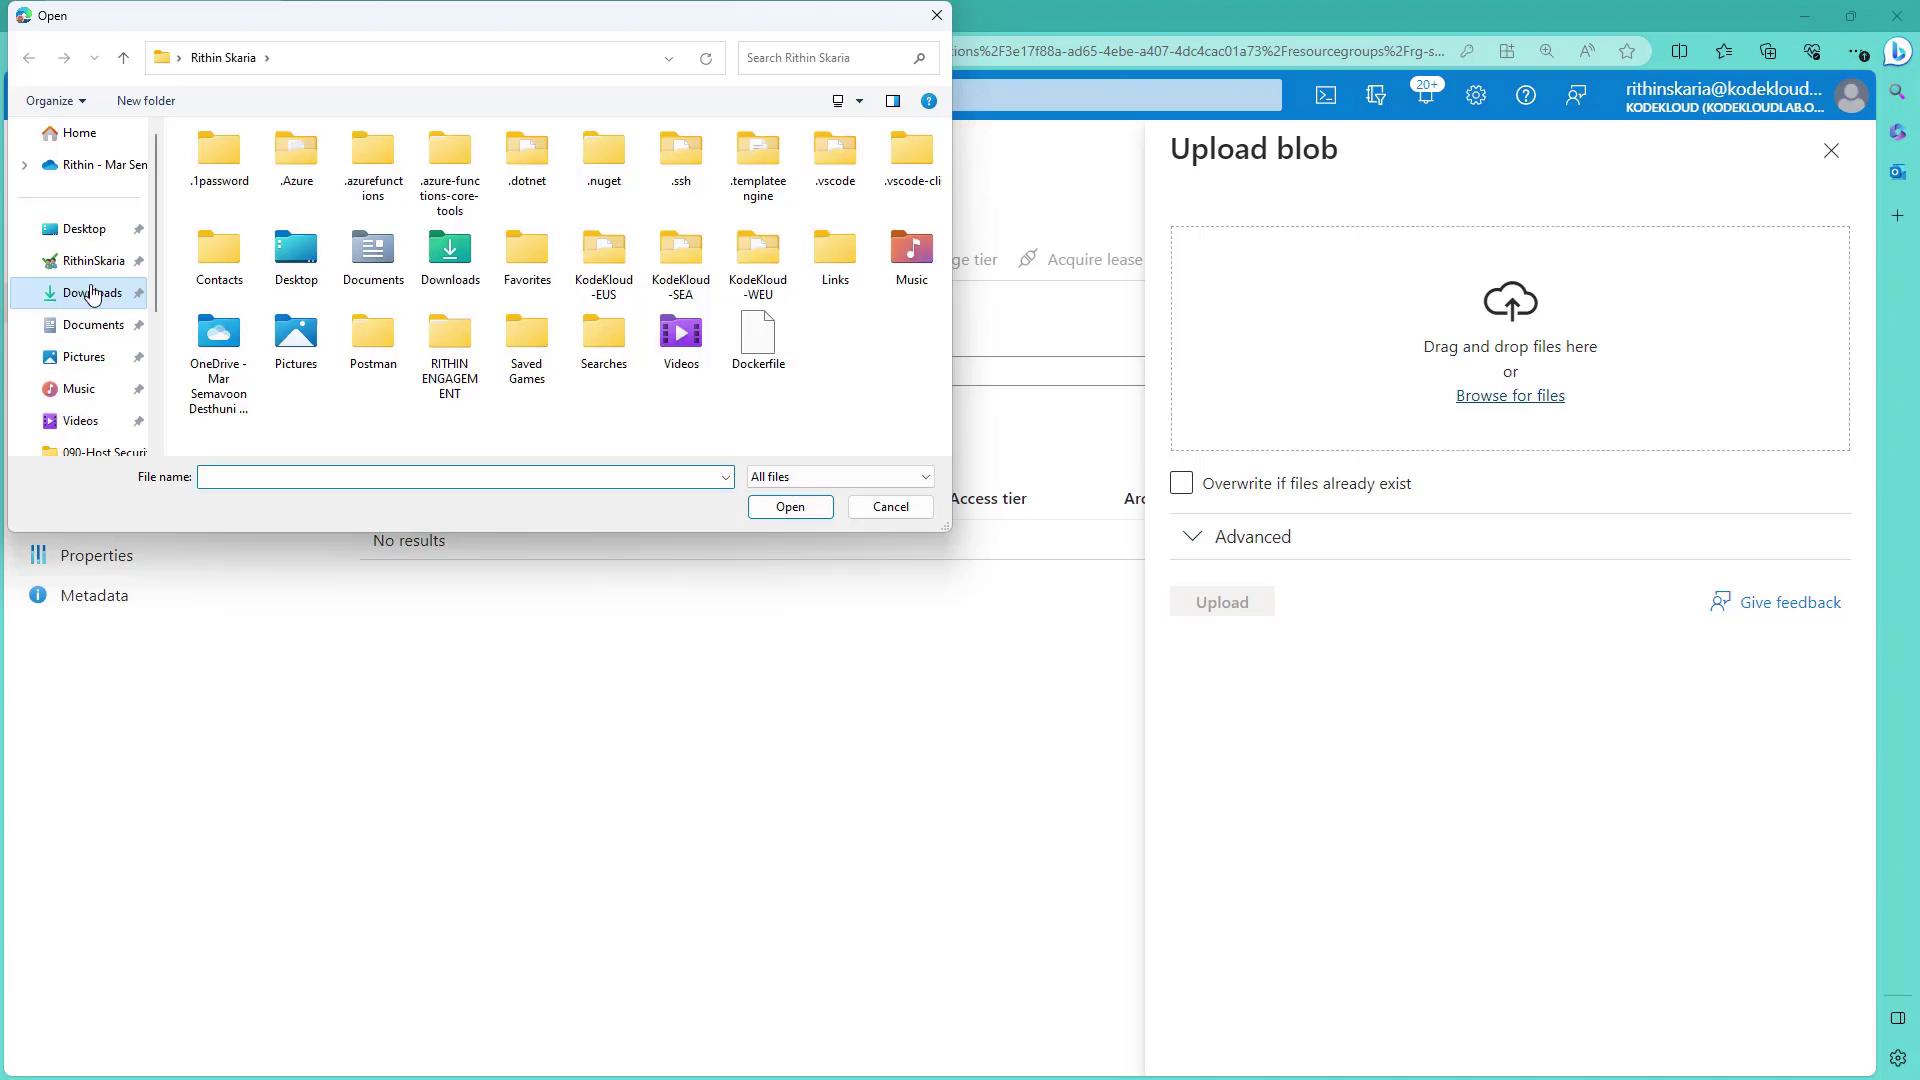
- Monitor the upload progress:
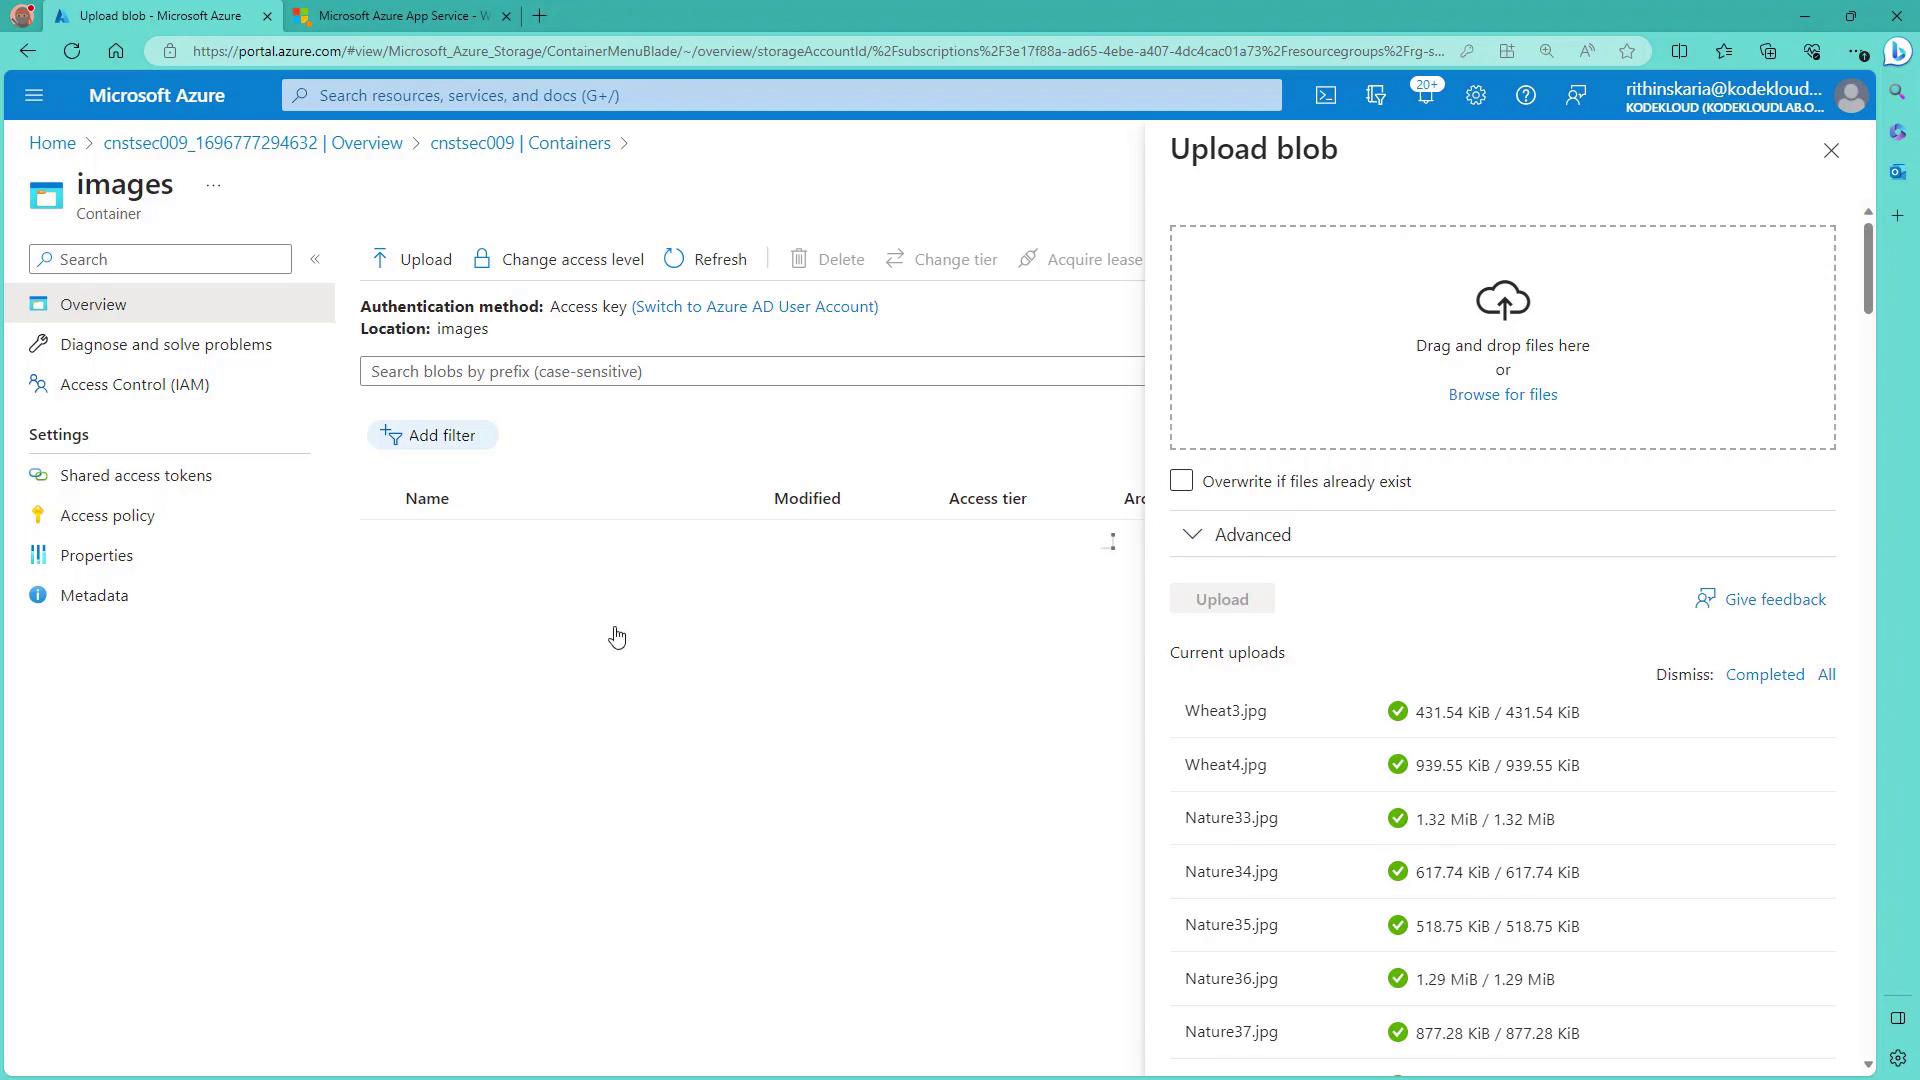
- Once the files are uploaded, you can select an image and copy its URL to view it in your browser. This demonstrates how anonymous access works. If you require restricted access for authorized users only, set the container’s access level to private.
5. Generate and Apply a SAS Token
To provide temporary access (for instance, for developers to view images for a day):- Navigate back to the storage account and open the Shared Access Signature configuration.
-
Configure the SAS token by selecting:
- Services: Set to Blob (for this example).
- Resource Types: Include service, container, and object.
- Permissions: Define as needed (for view-only access, remove write permissions).
- Time Frame: Set the start (UTC) and expiry times (e.g., valid until tomorrow).
- Options: Optionally restrict allowed IP addresses and enforce HTTPS via
spr=https.
- Click “Generate SAS connection string” to receive the SAS token. Keep in mind that rotating the storage account keys (e.g., Key One) will invalidate previously generated SAS tokens. Save the SAS token securely, as you might not be able to view it again later.
- After generating the SAS token, update the container’s access level to private. If attempting to refresh the container results in a “ResourceNotFound” error, it confirms that anonymous access is disabled. You can now access the container’s resources by appending the SAS token to the URL.
• The resource types include service, container, and object.
• The permissions parameter is tailored to read-only in this scenario.
• The start and expiry times determine the validity period.
• Protocol restrictions and the signature ensure secure access.
Always safeguard your SAS tokens. Use them only as needed, and avoid exposing them publicly. Rotating account keys invalidates previously issued SAS tokens, adding an extra layer of security.
Next, learn how to authenticate requests using Azure Active Directory for enhanced security and streamlined access management.