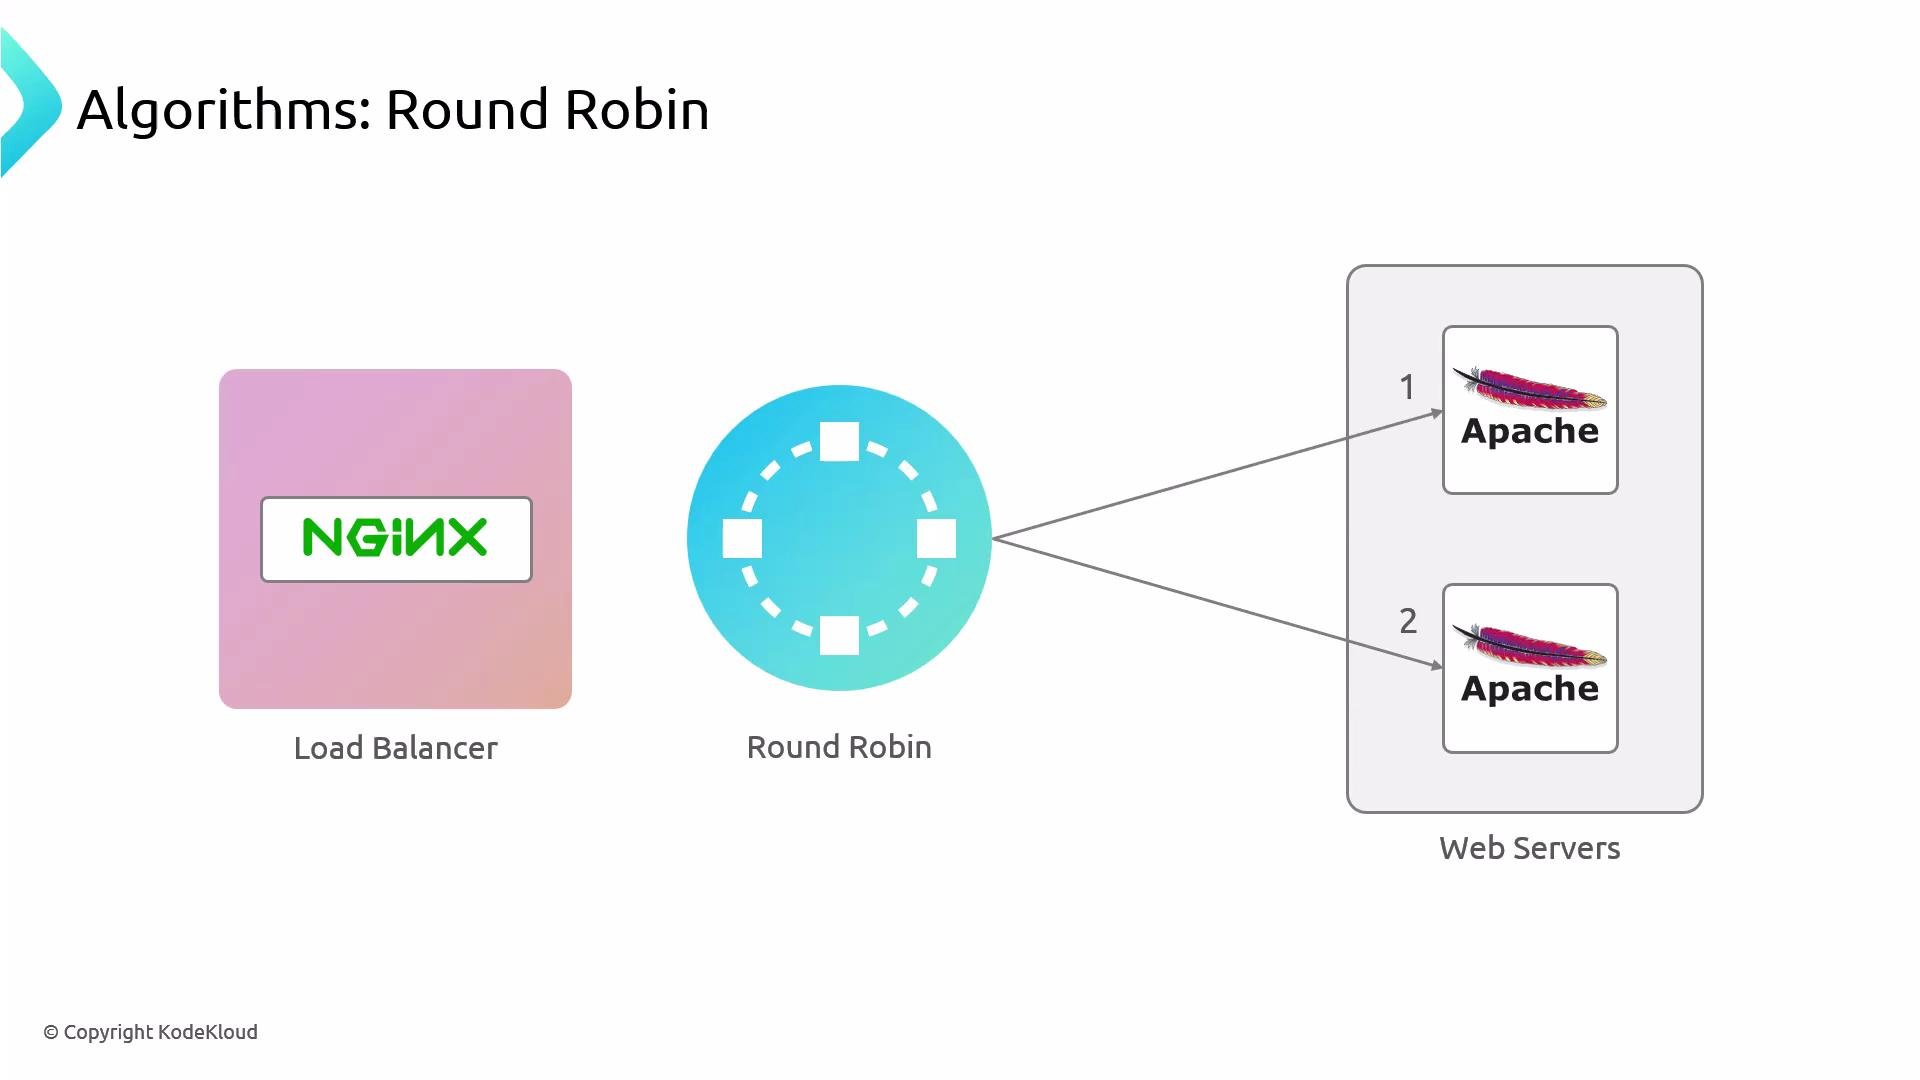
 Round-robin cycles requests evenly across the available backends (request 1 → backend A, request 2 → backend B, request 3 → backend A, and so on).
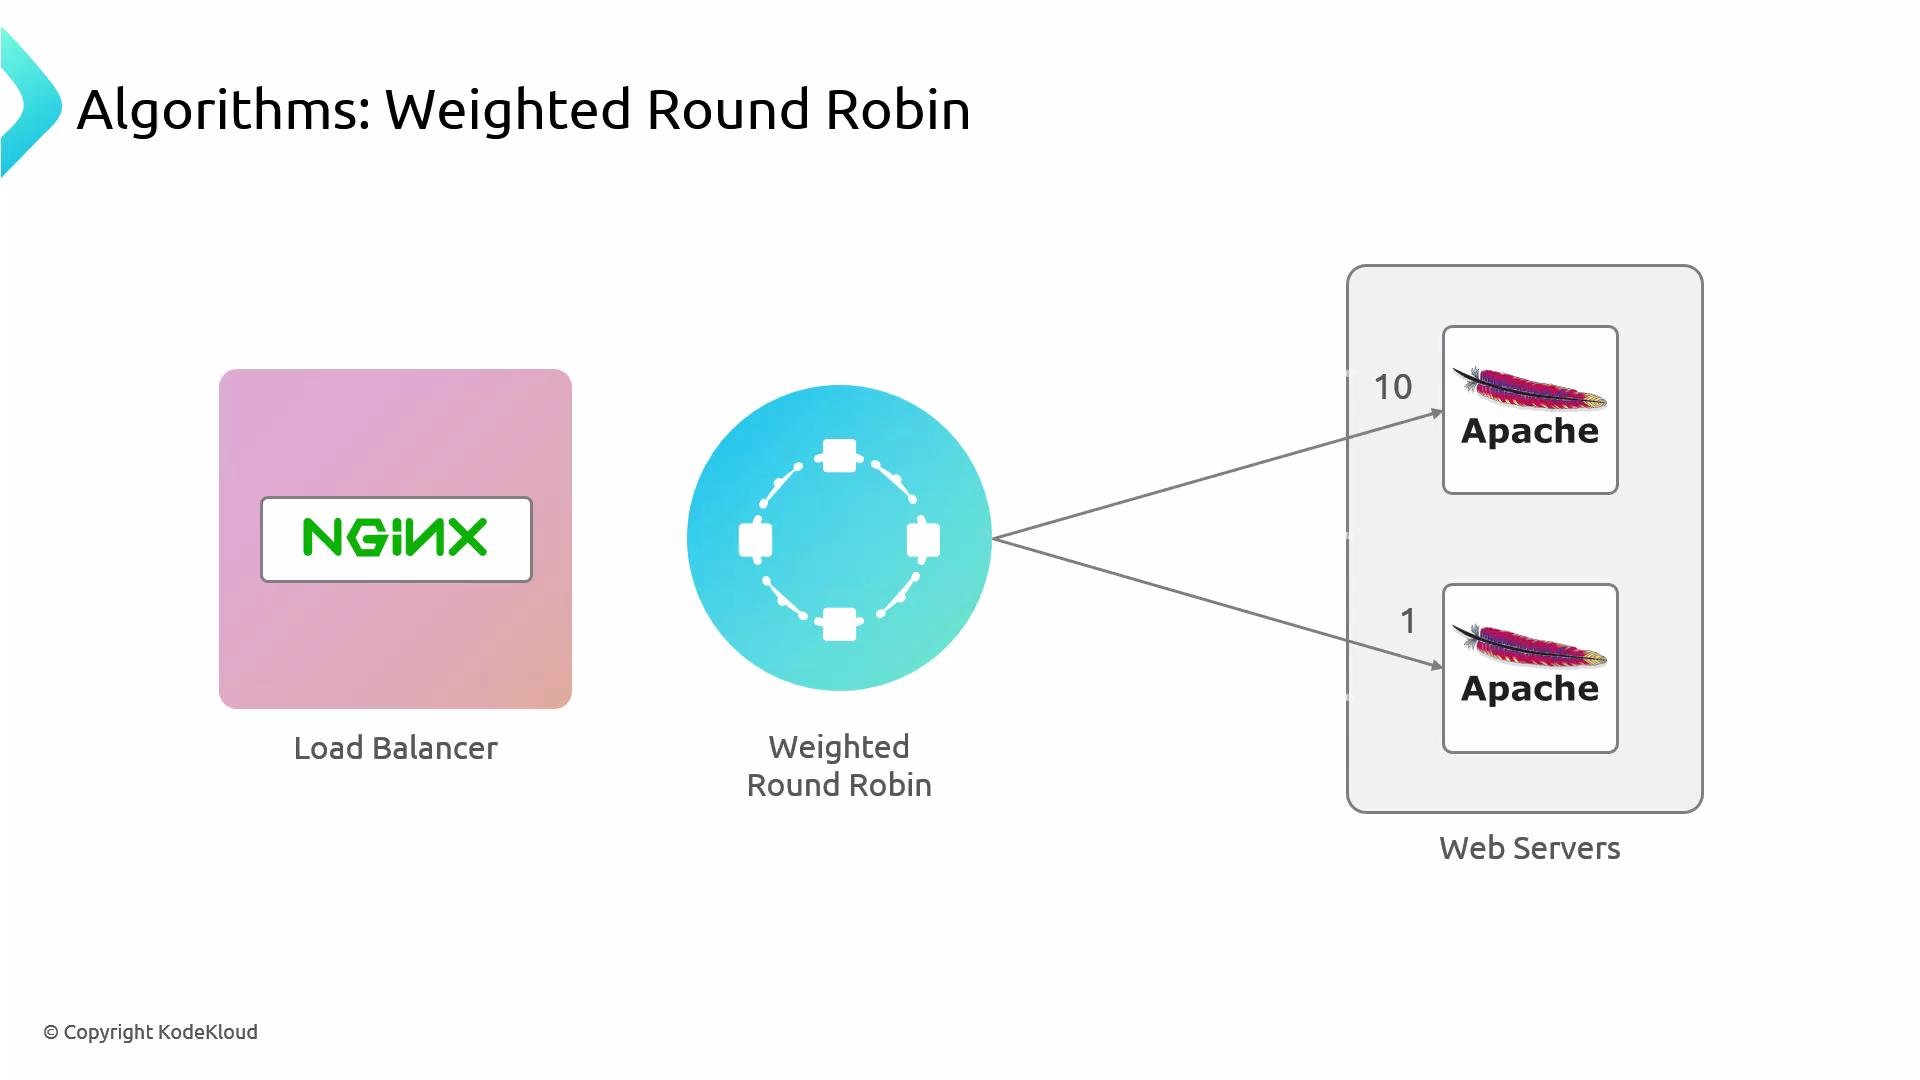
For weighted round-robin you assign weights to each backend so one receives proportionally more requests than the other.
Round-robin cycles requests evenly across the available backends (request 1 → backend A, request 2 → backend B, request 3 → backend A, and so on).
For weighted round-robin you assign weights to each backend so one receives proportionally more requests than the other.
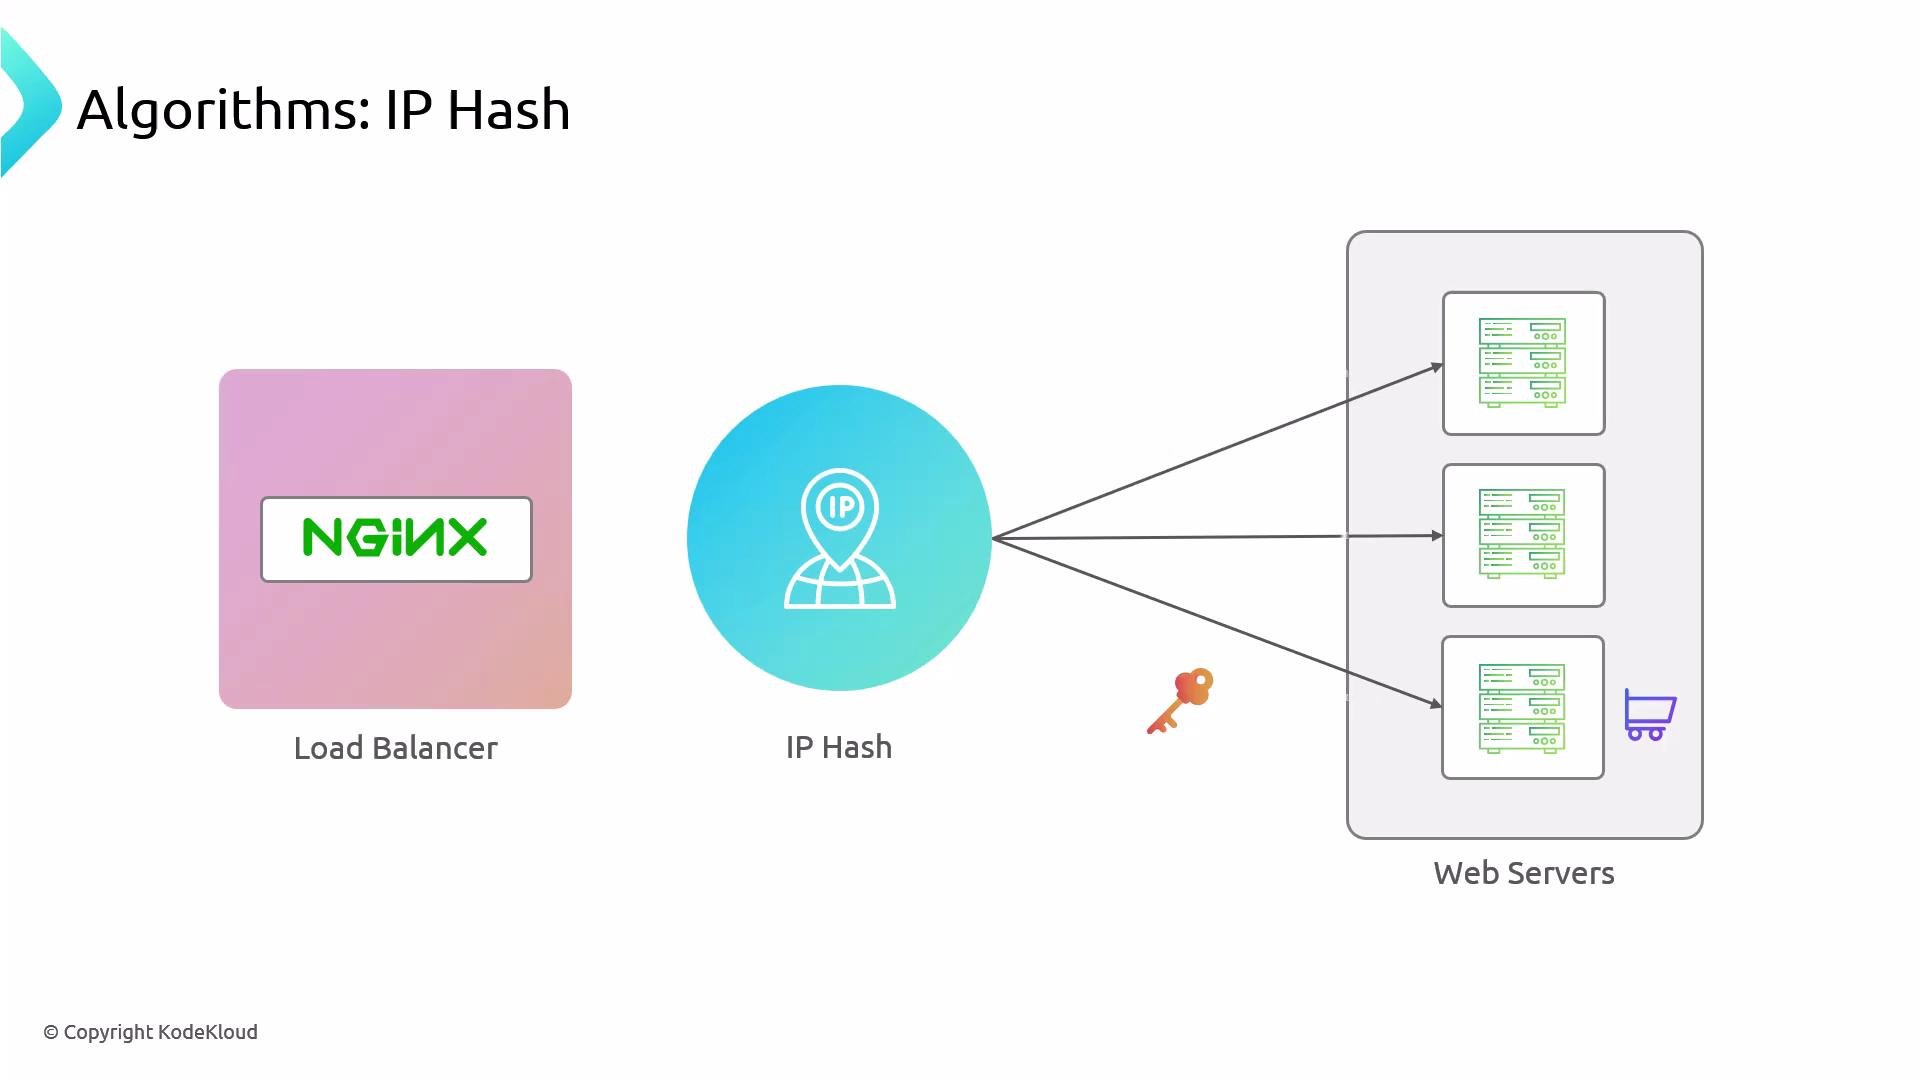
 The `ip_hash` method pins clients to a backend based on a hash of the client IP — useful for simple session stickiness (for example, shopping carts) when no shared session store is available.
 ## Environment overview
* One node serves as the Nginx load balancer (`nginx`).
* Two nodes run Apache and serve a simple HTML page (`node01` and `node02`).
Validate a backend’s site (example on `node01`):
```bash theme={null}
root@node01 ~ ➜ curl http://localhost
# (returns the page HTML; output shortened for clarity)
...
## Environment overview
* One node serves as the Nginx load balancer (`nginx`).
* Two nodes run Apache and serve a simple HTML page (`node01` and `node02`).
Validate a backend’s site (example on `node01`):
```bash theme={null}
root@node01 ~ ➜ curl http://localhost
# (returns the page HTML; output shortened for clarity)
...
Served by node01
``` Check service status examples: ```bash theme={null} # On a web backend: root@node01 ~ ➜ systemctl status apache2 # On the load balancer (to verify nginx presence or absence): root@nginx ~ ➜ systemctl status nginx # If nginx is not installed you will see: "Unit nginx.service could not be found." ``` ## Restrict direct access to backends (UFW) Best practice: only allow the load balancer to reach backend HTTP ports. First, discover the load balancer IP (example from `ip a` on `nginx`): ```bash theme={null} root@nginx ~ ➜ ip a ... inet 192.230.202.10/24 brd 192.230.202.255 scope global eth0 ... ``` On each backend (`node01`, `node02`) allow HTTP access only from the load balancer IP: ```bash theme={null} # On node01 and node02: root@node01 ~ ➜ ufw allow from 192.230.202.10 proto tcp to any port 80 # Example response: # Rule added ``` Confirm UFW rules: ```bash theme={null} root@node01 ~ ➜ ufw status Status: active To Action From -- ------ ---- 22/tcp ALLOW Anywhere 80/tcp ALLOW 192.230.202.10 ``` Useful references: * UFW documentation: [https://help.ubuntu.com/community/UFW](https://help.ubuntu.com/community/UFW) * Nginx docs (load balancing): [https://nginx.org/en/docs/http/load\_balancing.html](https://nginx.org/en/docs/http/load_balancing.html) ## Configure Nginx as a reverse proxy with upstreams On the load balancer, edit the Nginx site config (example: `/etc/nginx/sites-available/apache-app`). Confirm the file exists: ```bash theme={null} root@nginx /etc/nginx/sites-available ➜ ll total 12 -rw-r--r-- 1 root root 443 Feb 10 20:53 apache-app ``` Start with an `upstream` block (the pool of backends) and a `server` block that proxies requests to it. Example default (round-robin) configuration: ```nginx theme={null} # Upstream configuration upstream apache_example { server 192.230.202.12:80; server 192.230.202.3:80; } # Default server configuration server { listen 80; root /var/www/html; # Add index.php to the list if you are using PHP index index.html index.htm index.nginx-debian.html; server_name apache.example.com; location / { proxy_pass http://apache_example; } } ``` Notes: * The example uses IP addresses for the backends (`192.230.202.12` for `node01` and `192.230.202.3` for `node02`). You may use DNS names instead. * The `upstream` block above uses Nginx’s default round-robin algorithm. Test configuration, enable the site and reload Nginx: ```bash theme={null} root@nginx /etc/nginx/sites-available ➜ nginx -t # nginx: the configuration file /etc/nginx/nginx.conf syntax is ok # Enable site (create symlink if needed) root@nginx /etc/nginx/sites-available ➜ ln -s /etc/nginx/sites-available/apache-app /etc/nginx/sites-enabled/ # Reload nginx root@nginx /etc/nginx/sites-available ➜ nginx -s reload ``` Test from the load balancer: ```bash theme={null} root@nginx ~ ➜ curl http://localhost # Returns the proxied HTML page. Refreshing the page shows alternating "Served by node01" / "Served by node02" indicating round-robin behavior. ``` ## Load balancing methods — quick reference | Algorithm | Description | When to use | | -------------------: | ------------------------------------------------------ | ------------------------------------------------------------------------------------------------- | | round-robin | Default. Cycles requests evenly across servers. | Simple, stateless backends with similar capacity. | | weighted round-robin | Assign weights to servers (`weight=`) to bias traffic. | Backends have different capacity or you want preferential routing. | | `ip_hash` | Maps client IP to a backend (simple sticky sessions). | Simple session persistence without a shared session store; not ideal when many clients share IPs. | ## Weighted round-robin To bias traffic toward one backend, add `weight=` to the server entries in the `upstream` block: ```nginx theme={null} upstream apache_example { server 192.230.202.12:80 weight=10; server 192.230.202.3:80 weight=1; } server { listen 80; root /var/www/html; index index.html index.htm index.nginx-debian.html; server_name apache.example.com; location / { proxy_pass http://apache_example; } } ``` * With the above weights, roughly 10 requests will go to `node01` for every 1 request to `node02`. * Reload Nginx after changes: ```bash theme={null} root@nginx /etc/nginx/sites-available ➜ nginx -s reload ``` Observe behavior in a browser or with repeated `curl` — the higher-weight backend should serve the majority of requests. ## ip\_hash (sticky sessions) Enable basic session stickiness by adding `ip_hash` to the `upstream` block. This maps the client IP to a backend and keeps subsequent requests from that IP directed to the same server: ```nginx theme={null} upstream apache_example { ip_hash; server 192.230.202.12:80; server 192.230.202.3:80; } server { listen 80; root /var/www/html; index index.html index.htm index.nginx-debian.html; server_name apache.example.com; location / { proxy_pass http://apache_example; } } ``` * Reload Nginx: ```bash theme={null} root@nginx /etc/nginx/sites-available ➜ nginx -s reload ``` * After enabling `ip_hash`, the same client IP should consistently be mapped to the same backend. Refreshing from the same client should repeatedly show the same backend serving the request.