> ## Documentation Index
> Fetch the complete documentation index at: https://notes.kodekloud.com/llms.txt
> Use this file to discover all available pages before exploring further.
# Demo Management Intefaces Project
> Guide to using the OpenShift web console and oc CLI with Minishift to deploy apps, manage projects, and access the REST API.
Hello, and welcome to this lesson.
In this lesson we'll explore the OpenShift web console and the `oc` CLI. You'll learn how to use the console Catalog to deploy applications (for example, a Python app) and how to use the `oc` command-line tool bundled with Minishift to inspect and interact with a local OpenShift cluster.
The OpenShift web console provides a catalog of pre-configured builder images and templates that make application deployment straightforward. To deploy a Python application, select the Python catalog item and follow the deployment wizard—enter the application repository or source, choose resource limits and environment variables, and finish the deployment.
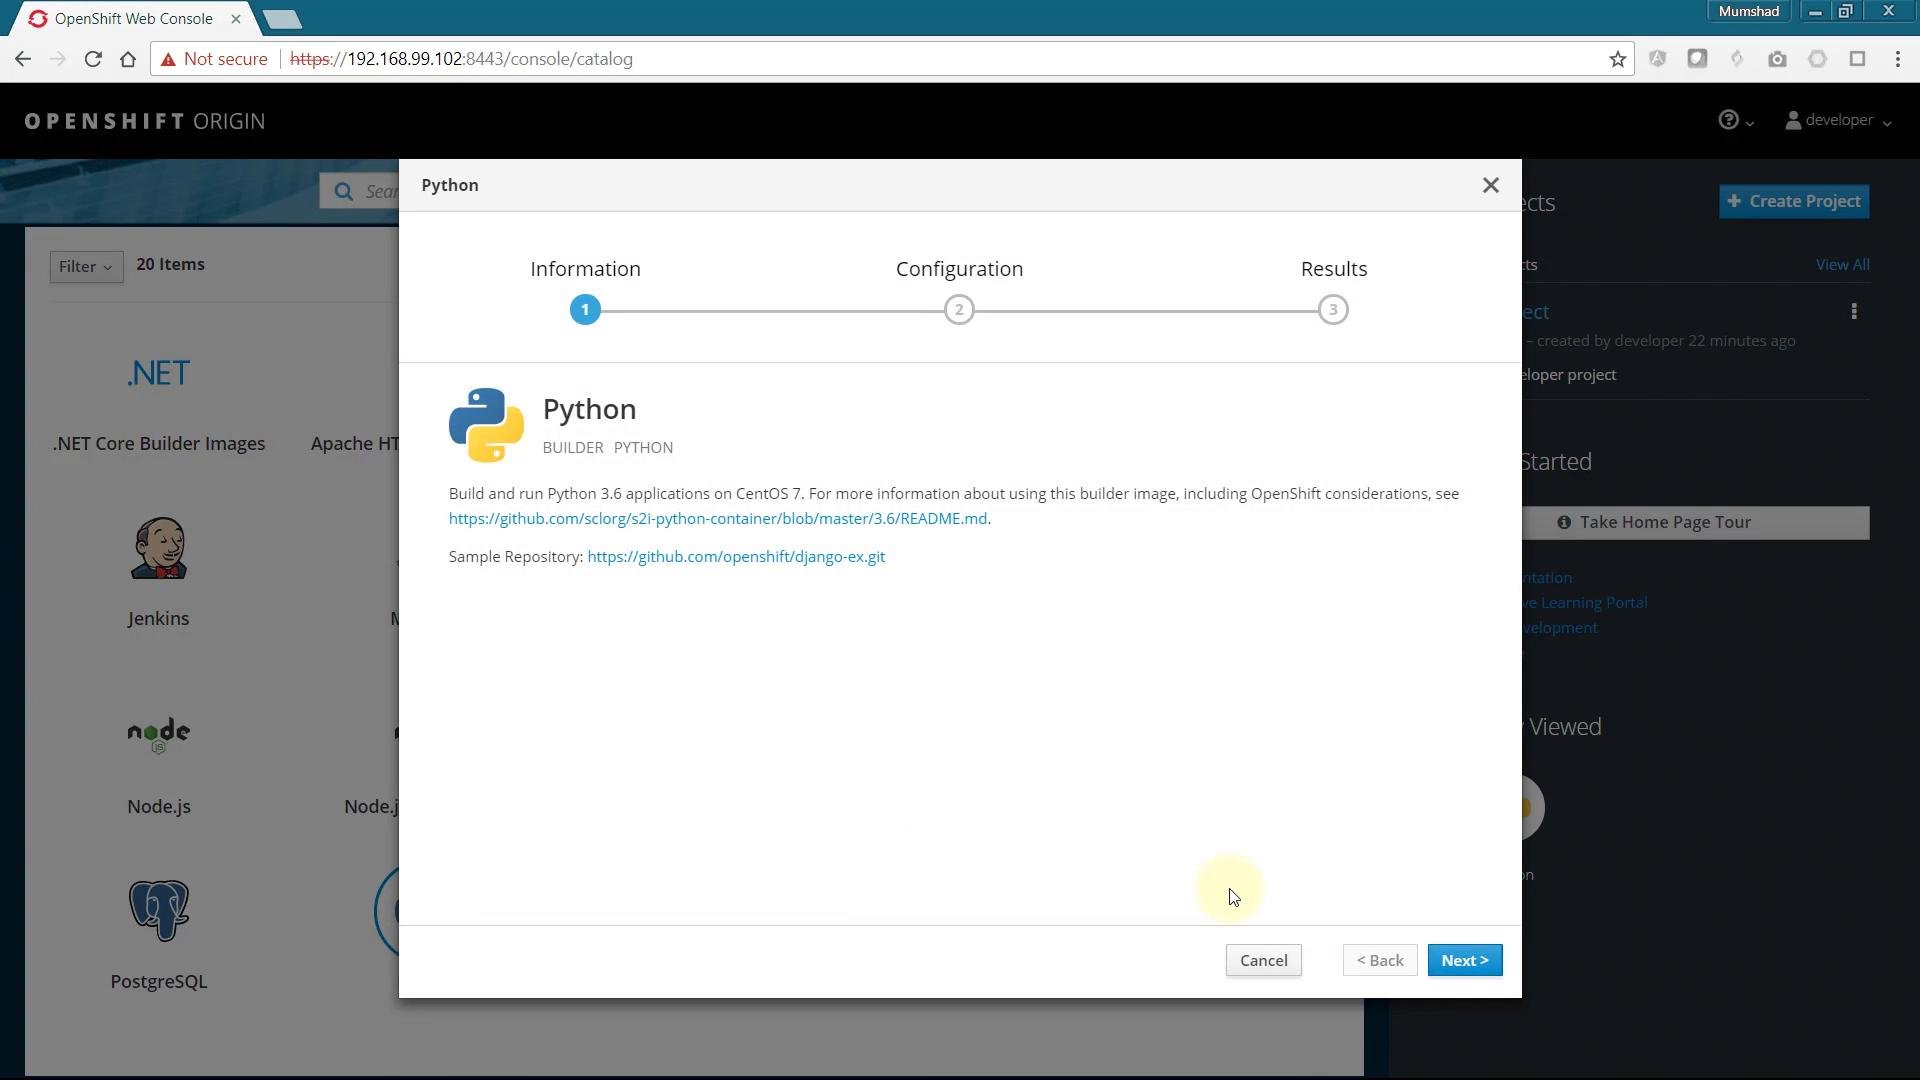 You can deploy many other services the same way—databases, CI/CD tools, message brokers, etc. Creating custom catalog items and templates is a more advanced topic and is outside the scope of this lesson.
## Projects and the Add to Project workflow
On the console's right-hand side you will see a list of Projects. By default, OpenShift creates a project named "My Project" (`myproject`) for the logged-in developer user. Use the "Create Project" button to add additional, named projects. Clicking a project opens the Project Overview, which shows:
* Applications and their current status
* BuildConfigs and DeploymentConfigs (build and deploy workflows)
* Routes and Services for network exposure
* Persistent storage and monitoring information
Use the "Add to Project" button (top-right) to add applications or resources to the selected project—this launches the same catalog-based deployment flow shown above.
## Getting the oc CLI
The `oc` command-line tool is the primary CLI for interacting with OpenShift from your terminal. If you're using Minishift, it includes a compatible `oc` client. If you are not using Minishift, you can download the OpenShift CLI from the web console Help menu:
* In the web console, open the Help menu (top-right) and choose **Command Line Tools** to find `oc` downloads and instructions.
You can deploy many other services the same way—databases, CI/CD tools, message brokers, etc. Creating custom catalog items and templates is a more advanced topic and is outside the scope of this lesson.
## Projects and the Add to Project workflow
On the console's right-hand side you will see a list of Projects. By default, OpenShift creates a project named "My Project" (`myproject`) for the logged-in developer user. Use the "Create Project" button to add additional, named projects. Clicking a project opens the Project Overview, which shows:
* Applications and their current status
* BuildConfigs and DeploymentConfigs (build and deploy workflows)
* Routes and Services for network exposure
* Persistent storage and monitoring information
Use the "Add to Project" button (top-right) to add applications or resources to the selected project—this launches the same catalog-based deployment flow shown above.
## Getting the oc CLI
The `oc` command-line tool is the primary CLI for interacting with OpenShift from your terminal. If you're using Minishift, it includes a compatible `oc` client. If you are not using Minishift, you can download the OpenShift CLI from the web console Help menu:
* In the web console, open the Help menu (top-right) and choose **Command Line Tools** to find `oc` downloads and instructions.
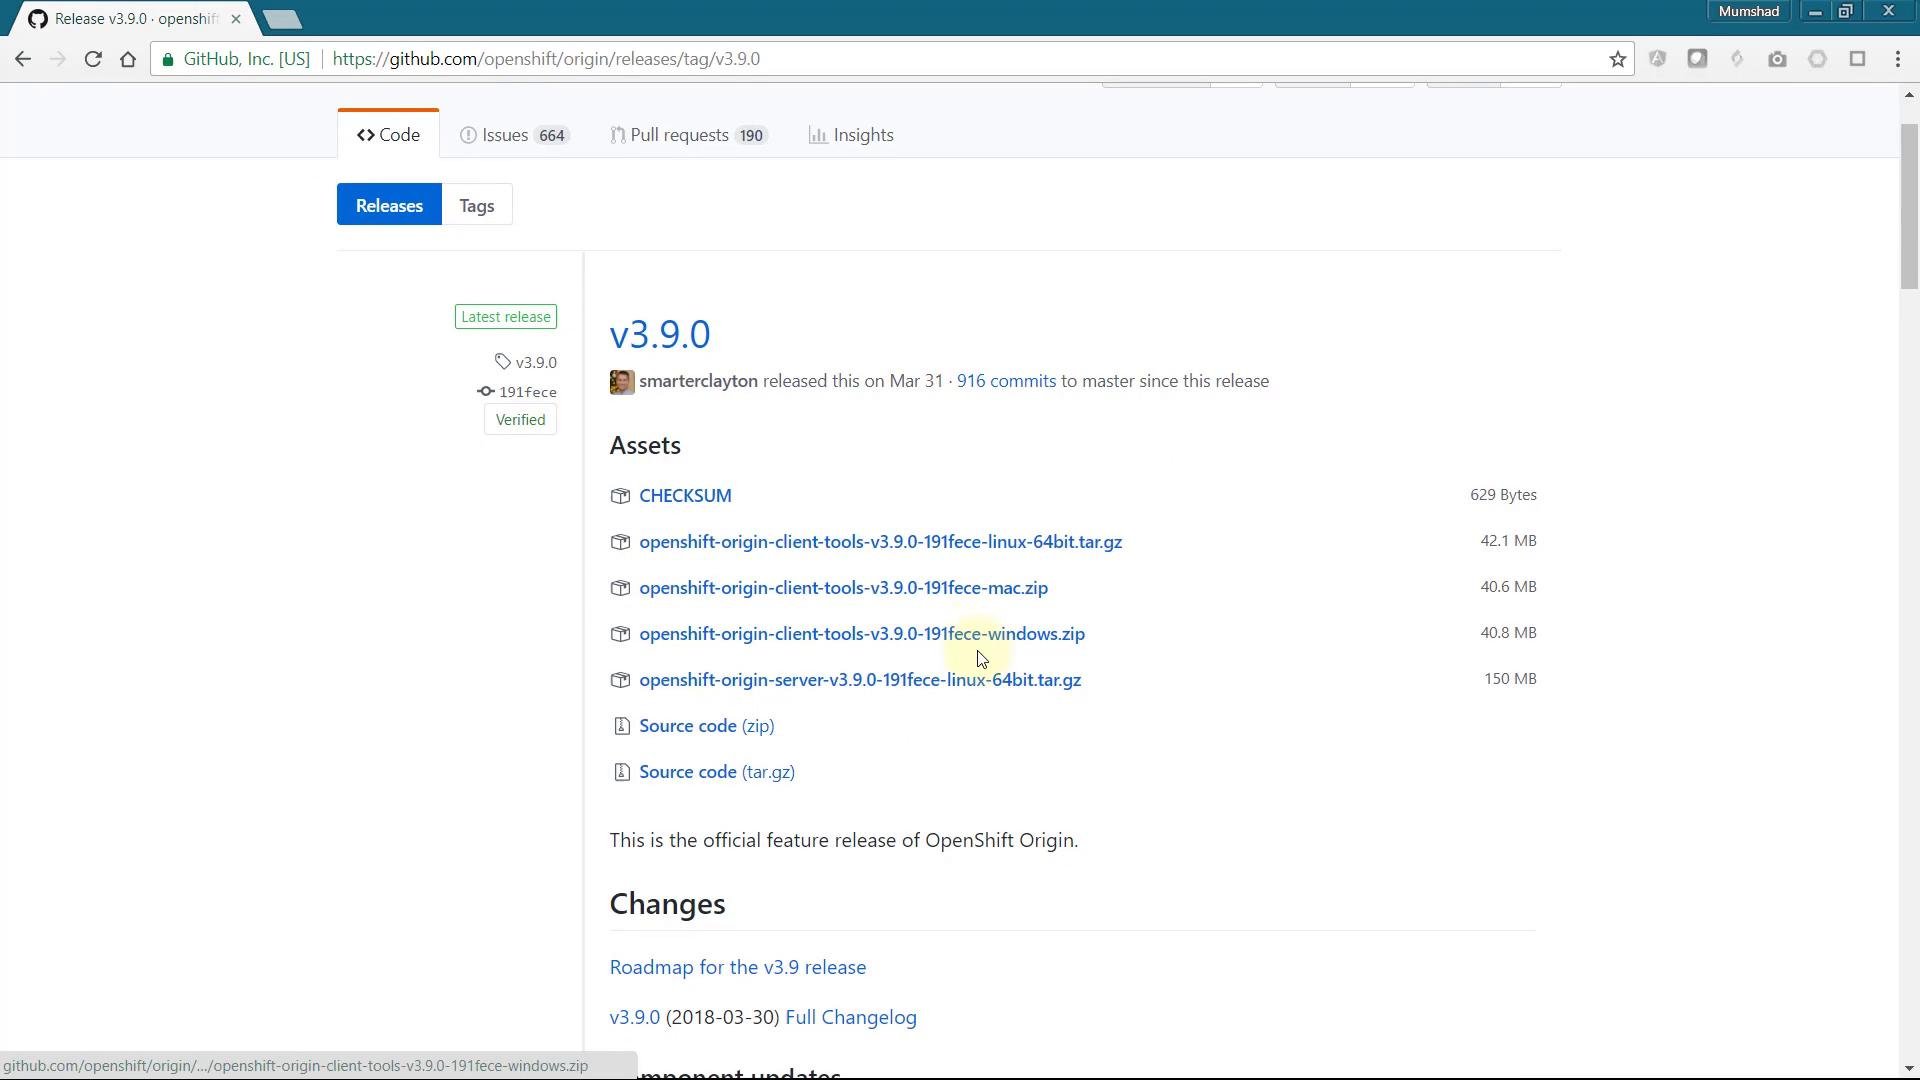 Minishift caches the `oc` binary locally and also prints the commands needed to configure your shell to use it. The following sections show a typical Windows CMD workflow when using Minishift.
## Using the oc client bundled with Minishift
When Minishift starts it prints essential information including the web console URL and how to log in. Example (trimmed) Minishift start output:
```console theme={null}
-- OpenShift cluster will be configured with ...
Version: v3.9.0
Using Docker shared volumes for OpenShift volumes
Using 192.168.99.102 as the server IP
Starting OpenShift using openshift/origin:v3.9.0 ...
OpenShift server started.
The server is accessible via web console at:
https://192.168.99.102:8443
You are logged in as:
User: developer
Password:
To login as administrator:
oc login -u system:admin
```
If `oc` is not on your `PATH`, attempting to run `oc` from a shell that doesn't have it configured will produce an error like this on Windows:
```console theme={null}
c:\minishift-1.16.1-windows-amd64>oc login -u system:admin
'oc' is not recognized as an internal or external command,
operable program or batch file.
```
To add the `oc` binary to your `PATH`, run `minishift oc-env` and evaluate the printed command in your shell. Example Minishift output on Windows CMD:
```console theme={null}
c:\minishift-1.16.1-windows-amd64>minishift oc-env
SET PATH=C:\Users\mmums\.minishift\cache\oc\v3.9.0\windows;%PATH%
REM Run this command to configure your shell:
REM @FOR /f "tokens=*" %i IN ('minishift oc-env') DO @call %i
```
Run the `SET` command printed by `minishift oc-env` to update `PATH` for the current session:
```console theme={null}
c:\minishift-1.16.1-windows-amd64>SET PATH=C:\Users\mmums\.minishift\cache\oc\v3.9.0\windows;%PATH%
```
After updating `PATH` you can log in as the cluster administrator:
```console theme={null}
c:\minishift-1.16.1-windows-amd64>oc login -u system:admin
Logged into "https://192.168.99.102:8443" as "system:admin" using existing credentials.
You have access to the following projects and can switch between them with 'oc project ':
default
kube-public
kube-system
* myproject
openshift
openshift-infra
openshift-node
openshift-web-console
Using project "myproject".
```
The `system:admin` user has cluster-wide privileges and can access all system projects.
## Using the REST API with curl
OpenShift exposes a REST API that you can call directly. In OpenShift 3.x, older resources live under `/oapi`; newer APIs use `/api` or `/apis`. To list projects via the API you need:
1. TLS handling (skip verification for local Minishift clusters with `-k`, or provide the CA certificate with `--cacert`).
2. An Authorization header containing a valid Bearer token.
Obtain a token using `oc`. Log in as the developer user and then get the token:
```console theme={null}
c:\minishift-1.16.1-windows-amd64>oc login -u developer -p developer
Login successful.
```
Retrieve the token for the current user:
```console theme={null}
c:\minishift-1.16.1-windows-amd64>oc whoami -t
4uBPKdbevVgSU1nWfQjYqXP5WJOYRKZjhBFSpIuwR7k
```
Use that token in a `curl` request to the Projects endpoint. For local clusters you'll commonly use `-k` to skip TLS verification:
```bash theme={null}
C:\Users\mmums>curl -k https://192.168.99.102:8443/oapi/v1/projects -H "Authorization: Bearer 4uBPKdbevVgSU1nWfQjYqXP5WJOYRKZjhBFSpIuwR7k"
```
A successful response returns JSON listing the projects you can access. Example (trimmed) response:
```json theme={null}
{
"metadata": {
"selfLink": "/oapi/v1/projects"
},
"items": [
{
"metadata": {
"name": "myproject",
"selfLink": "/oapi/v1/projects/myproject",
"uid": "75a50eef-4c3b-11e8-8098-e2e0de05d311",
"resourceVersion": "1411",
"creationTimestamp": "2018-04-30T05:58:09Z",
"annotations": {
"openshift.io/description": "Initial developer project",
"openshift.io/display-name": "My Project",
"openshift.io/requester": "developer",
"openshift.io/sa.scc.mcs": "s0:c8,c7",
"openshift.io/sa.scc.supplemental-groups": "1000070000/10000",
"openshift.io/sa.scc.uid-range": "1000070000/10000"
}
},
"spec": {
"finalizers": [
"openshift.io/origin",
"kubernetes"
]
},
"status": {
"phase": "Active"
}
}
]
}
```
If you prefer not to use `-k` with `curl`, retrieve the OpenShift CA certificate from the cluster and use `curl --cacert ` instead.
## Common commands and quick reference
| Purpose | Command example |
| - | - |
| Log in as developer | `oc login -u developer -p developer` |
| Get current user token | `oc whoami -t` |
| List projects via `oc` | `oc get projects` |
| Switch project | `oc project myproject` |
| Configure `oc` from Minishift (Windows CMD example) | `@FOR /f "tokens=*" %i IN ('minishift oc-env') DO @call %i` |
| Call Projects API with curl (skip TLS) | `curl -k https://:8443/oapi/v1/projects -H "Authorization: Bearer "` |
## Summary
* The OpenShift web console is a user-friendly way to browse builder images/templates and manage Projects and application resources.
* The `oc` CLI (bundled with Minishift) enables scripting and automation for builds, deployments, and cluster administration.
* Use `minishift oc-env` to print the commands needed to configure your shell to use the `oc` binary shipped with Minishift.
* Use `oc whoami -t` to obtain a token that can be used with `curl` when calling the OpenShift REST API.
## Links and references
* OpenShift documentation: [https://docs.openshift.com/](https://docs.openshift.com/)
* Minishift project: [https://github.com/minishift/minishift](https://github.com/minishift/minishift)
* OpenShift CLI (oc) downloads and instructions: access via the web console Help → Command Line Tools
That's it for this lesson.
This documentation is built and hosted on [Mintlify](https://mintlify.com), a developer documentation platform.
Minishift caches the `oc` binary locally and also prints the commands needed to configure your shell to use it. The following sections show a typical Windows CMD workflow when using Minishift.
## Using the oc client bundled with Minishift
When Minishift starts it prints essential information including the web console URL and how to log in. Example (trimmed) Minishift start output:
```console theme={null}
-- OpenShift cluster will be configured with ...
Version: v3.9.0
Using Docker shared volumes for OpenShift volumes
Using 192.168.99.102 as the server IP
Starting OpenShift using openshift/origin:v3.9.0 ...
OpenShift server started.
The server is accessible via web console at:
https://192.168.99.102:8443
You are logged in as:
User: developer
Password:
To login as administrator:
oc login -u system:admin
```
If `oc` is not on your `PATH`, attempting to run `oc` from a shell that doesn't have it configured will produce an error like this on Windows:
```console theme={null}
c:\minishift-1.16.1-windows-amd64>oc login -u system:admin
'oc' is not recognized as an internal or external command,
operable program or batch file.
```
To add the `oc` binary to your `PATH`, run `minishift oc-env` and evaluate the printed command in your shell. Example Minishift output on Windows CMD:
```console theme={null}
c:\minishift-1.16.1-windows-amd64>minishift oc-env
SET PATH=C:\Users\mmums\.minishift\cache\oc\v3.9.0\windows;%PATH%
REM Run this command to configure your shell:
REM @FOR /f "tokens=*" %i IN ('minishift oc-env') DO @call %i
```
Run the `SET` command printed by `minishift oc-env` to update `PATH` for the current session:
```console theme={null}
c:\minishift-1.16.1-windows-amd64>SET PATH=C:\Users\mmums\.minishift\cache\oc\v3.9.0\windows;%PATH%
```
After updating `PATH` you can log in as the cluster administrator:
```console theme={null}
c:\minishift-1.16.1-windows-amd64>oc login -u system:admin
Logged into "https://192.168.99.102:8443" as "system:admin" using existing credentials.
You have access to the following projects and can switch between them with 'oc project ':
default
kube-public
kube-system
* myproject
openshift
openshift-infra
openshift-node
openshift-web-console
Using project "myproject".
```
The `system:admin` user has cluster-wide privileges and can access all system projects.
## Using the REST API with curl
OpenShift exposes a REST API that you can call directly. In OpenShift 3.x, older resources live under `/oapi`; newer APIs use `/api` or `/apis`. To list projects via the API you need:
1. TLS handling (skip verification for local Minishift clusters with `-k`, or provide the CA certificate with `--cacert`).
2. An Authorization header containing a valid Bearer token.
Obtain a token using `oc`. Log in as the developer user and then get the token:
```console theme={null}
c:\minishift-1.16.1-windows-amd64>oc login -u developer -p developer
Login successful.
```
Retrieve the token for the current user:
```console theme={null}
c:\minishift-1.16.1-windows-amd64>oc whoami -t
4uBPKdbevVgSU1nWfQjYqXP5WJOYRKZjhBFSpIuwR7k
```
Use that token in a `curl` request to the Projects endpoint. For local clusters you'll commonly use `-k` to skip TLS verification:
```bash theme={null}
C:\Users\mmums>curl -k https://192.168.99.102:8443/oapi/v1/projects -H "Authorization: Bearer 4uBPKdbevVgSU1nWfQjYqXP5WJOYRKZjhBFSpIuwR7k"
```
A successful response returns JSON listing the projects you can access. Example (trimmed) response:
```json theme={null}
{
"metadata": {
"selfLink": "/oapi/v1/projects"
},
"items": [
{
"metadata": {
"name": "myproject",
"selfLink": "/oapi/v1/projects/myproject",
"uid": "75a50eef-4c3b-11e8-8098-e2e0de05d311",
"resourceVersion": "1411",
"creationTimestamp": "2018-04-30T05:58:09Z",
"annotations": {
"openshift.io/description": "Initial developer project",
"openshift.io/display-name": "My Project",
"openshift.io/requester": "developer",
"openshift.io/sa.scc.mcs": "s0:c8,c7",
"openshift.io/sa.scc.supplemental-groups": "1000070000/10000",
"openshift.io/sa.scc.uid-range": "1000070000/10000"
}
},
"spec": {
"finalizers": [
"openshift.io/origin",
"kubernetes"
]
},
"status": {
"phase": "Active"
}
}
]
}
```
If you prefer not to use `-k` with `curl`, retrieve the OpenShift CA certificate from the cluster and use `curl --cacert ` instead.
## Common commands and quick reference
| Purpose | Command example |
| - | - |
| Log in as developer | `oc login -u developer -p developer` |
| Get current user token | `oc whoami -t` |
| List projects via `oc` | `oc get projects` |
| Switch project | `oc project myproject` |
| Configure `oc` from Minishift (Windows CMD example) | `@FOR /f "tokens=*" %i IN ('minishift oc-env') DO @call %i` |
| Call Projects API with curl (skip TLS) | `curl -k https://:8443/oapi/v1/projects -H "Authorization: Bearer "` |
## Summary
* The OpenShift web console is a user-friendly way to browse builder images/templates and manage Projects and application resources.
* The `oc` CLI (bundled with Minishift) enables scripting and automation for builds, deployments, and cluster administration.
* Use `minishift oc-env` to print the commands needed to configure your shell to use the `oc` binary shipped with Minishift.
* Use `oc whoami -t` to obtain a token that can be used with `curl` when calling the OpenShift REST API.
## Links and references
* OpenShift documentation: [https://docs.openshift.com/](https://docs.openshift.com/)
* Minishift project: [https://github.com/minishift/minishift](https://github.com/minishift/minishift)
* OpenShift CLI (oc) downloads and instructions: access via the web console Help → Command Line Tools
That's it for this lesson.
This documentation is built and hosted on [Mintlify](https://mintlify.com), a developer documentation platform.