OpenShift 4

Networks Services Routes and Scaling

Demo Services and Routes

Welcome to this comprehensive guide on services and routes in OpenShift. In this article, we will explore how to configure and expose your application within OpenShift, both for internal engagement and external access.

Creating a Service for Internal Access

After setting up the build and deployment of your application, the next step is to allow internal communication within the OpenShift cluster. Begin by creating a service configuration file.

First, obtain a service configuration template from the Learn More link. Create a new file called service-config.yml and add the following YAML configuration. Notice that this configuration updates the service name and sets a selector to associate the service with the Pods running your application.

apiVersion: v1
kind: Service
metadata:
  name: simple-webapp-docker
spec:
  selector:
    docker-registry: default
  clusterIP: 172.30.136.123
  ports:
    - nodePort: 0
      port: 5000
      protocol: TCP
      targetPort: 5000

Based on the existing configuration and the deployment-config label in use, update your selector accordingly. Since the clusterIP is assigned automatically when the service is created, you can remove its static value. Your updated configuration should look like the following:

apiVersion: v1
kind: Service
metadata:
  name: simple-webapp-docker
spec:
  selector:
    deploymentconfig: simple-webapp-docker
  ports:
    - nodePort: 0
      port: 5000
      protocol: TCP
      targetPort: 5000

Next, modify the port configuration to match your application’s listening port. If your application listens on port 8080, update the configuration as shown:

apiVersion: v1
kind: Service
metadata:
  name: simple-webapp-docker
spec:
  selector:
    deploymentconfig: simple-webapp-docker
  ports:
    - name: 8080-tcp
      port: 8080
      protocol: TCP
      targetPort: 8080

Once the file is ready, use the Import YAML/JSON option in the OpenShift console to paste its contents and click Create to establish your service.

After the service is created, click on it to view its details.

The image shows the OpenShift Origin web console displaying a list of services for a project named "My WebApplication." It includes details like service names, cluster IPs, ports, selectors, and age.

An IP address (for example, 172.30.163.74) is now automatically assigned to your service. This IP address allows internal traffic to reach your application, although it is not exposed for external access.

The image shows an OpenShift Origin web console displaying details of a service named "simple-webapp-docker," including its IP, hostname, and pod status. The console provides information about traffic routes and pod readiness.

To verify internal connectivity, log into the OpenShift cluster console (e.g., using the Minishift VM) and run a curl command against the assigned IP address and port.

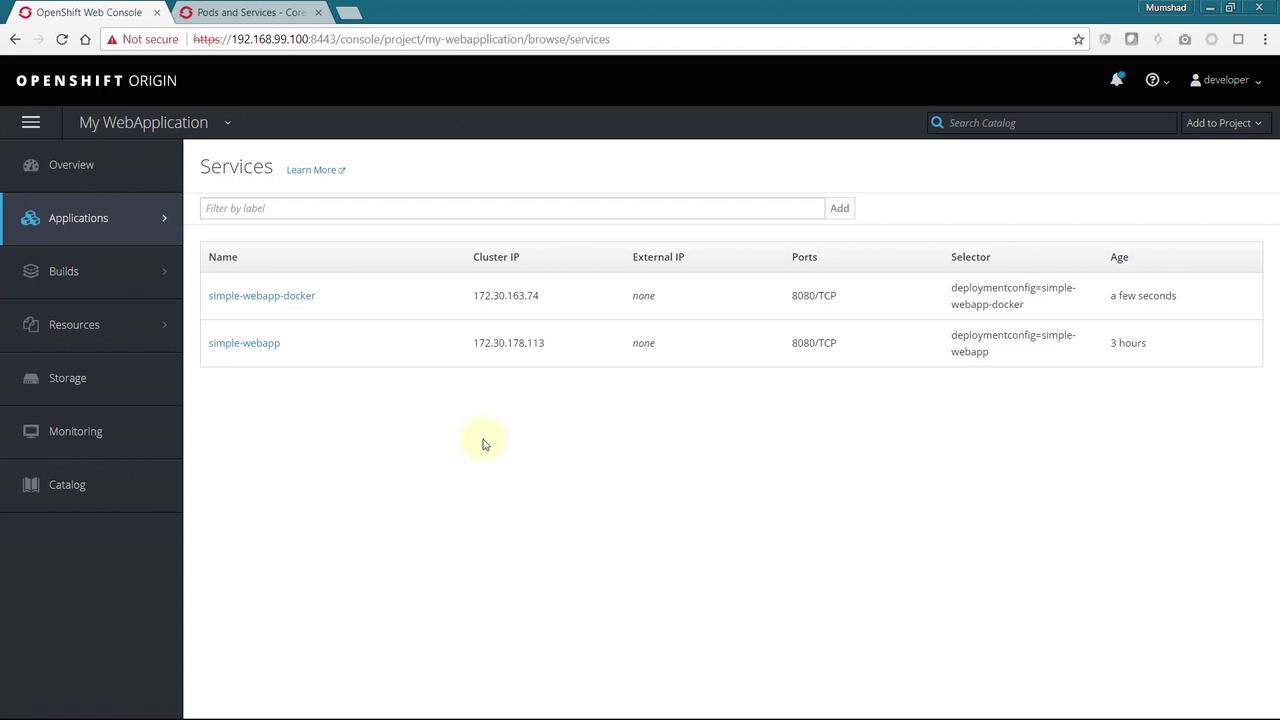
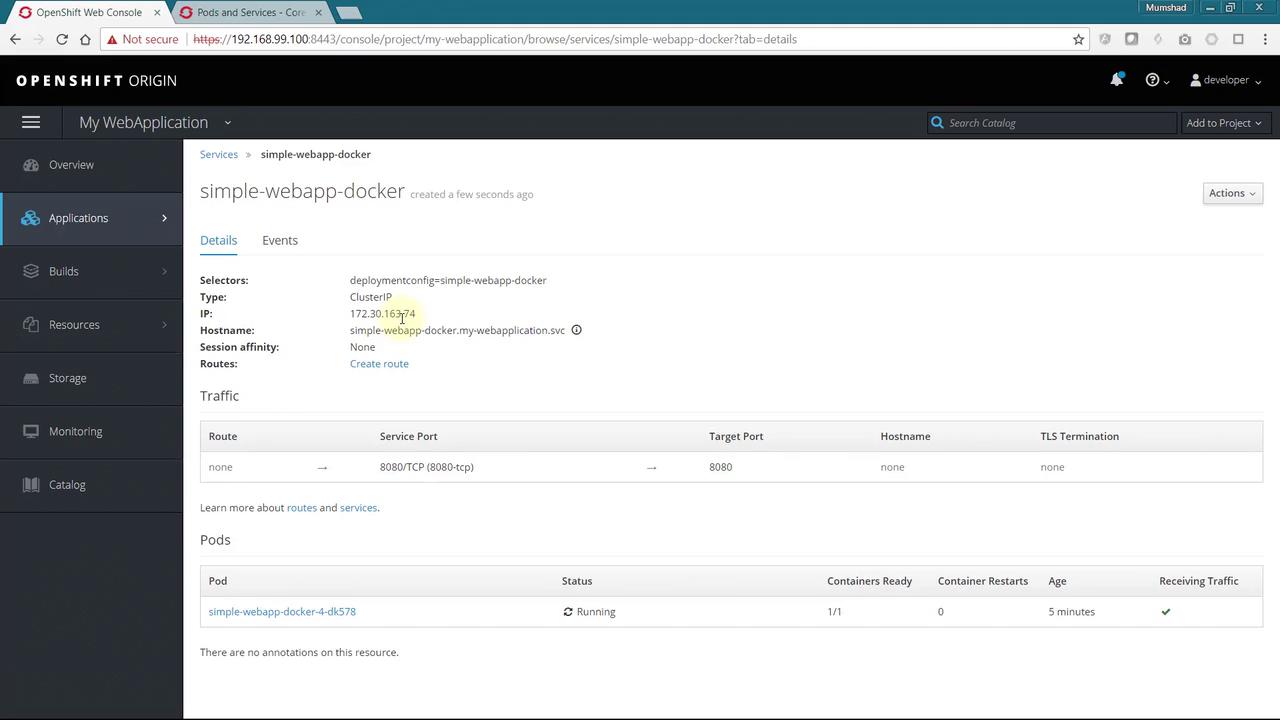
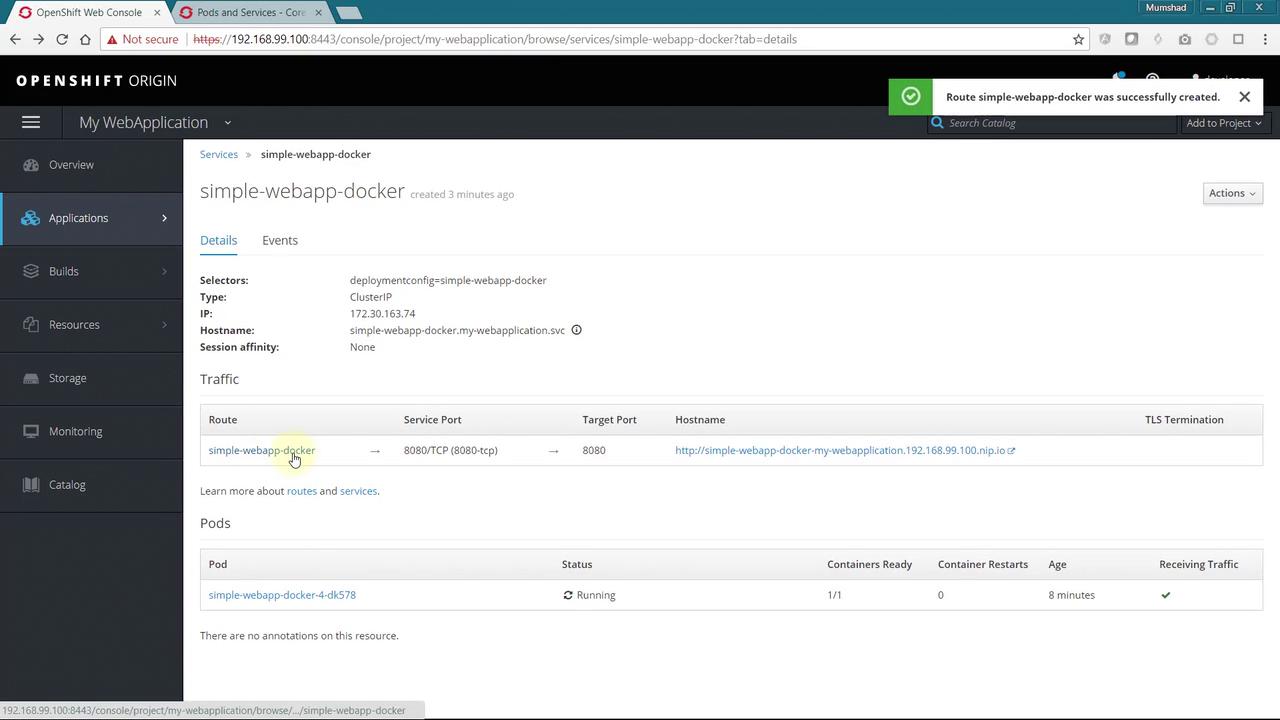
Creating a Route for External Access

To expose your application to external users, you need to create a route. You can achieve this via a YAML-based approach or through the OpenShift web console. To use the UI, click on the Create Route link and fill in details such as name and hostname. If you leave the hostname blank, OpenShift generates one based on your application name.

The image shows the OpenShift Web Console interface, specifically the "Create Route" page for setting up a route for an application. It includes fields for name, hostname, path, service, and target port.

Custom Hostnames

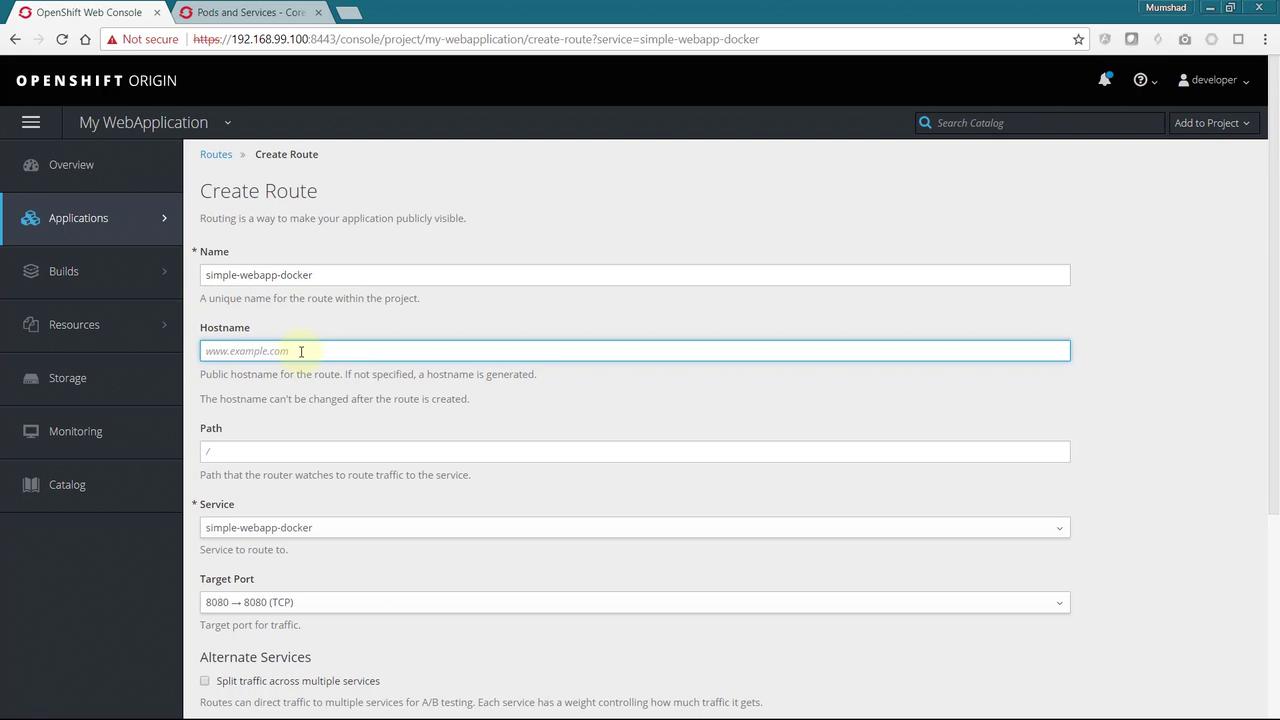
If you opt for a custom hostname (e.g., www.example.com), ensure your external DNS settings correctly route traffic to your OpenShift cluster. Routes within the cluster will then direct requests to the appropriate application based on the hostname.

After configuring the route with your desired settings (or simply accepting the default configuration), create the route. Once complete, the generated hostname will appear in the service details.

The image shows the OpenShift web console displaying details of a service named "simple-webapp-docker," including its route, service port, and pod status. The console indicates that the route was successfully created.

Clicking the generated link will take you directly to your application.

End-to-End Testing

To demonstrate an end-to-end test, update your application code. For instance, change the welcome message from "Update 4" to "Update 5." This change will trigger a new build and deployment. Below is an example of the updated code snippet:

@app.route("/")
def main():
    return "Welcome! Update 5"
    
@app.route("/how are you")
def hello():
    return "I am good, how about you?"

if __name__ == "__main__":
    app.run(host='0.0.0.0', port=8080)

Once the build and deployment processes are complete, refresh your browser to verify that the updates are reflected in your application.

Conclusion

This guide has walked you through the process of setting up services and routes in OpenShift to enable internal and external access for your application. With these configurations, you can efficiently manage how your applications are exposed and accessed. Stay tuned for more in-depth topics in our upcoming sections!

Watch Video

Watch video content

Previous
Services and Routes