> ## Documentation Index
> Fetch the complete documentation index at: https://notes.kodekloud.com/llms.txt
> Use this file to discover all available pages before exploring further.
# Demo Create Custom Catalog
> This guide explains how to create a custom template for a voting application on an OpenShift cluster.
Welcome to this lesson. In this guide, we will create a custom template for the example voting application deployed on an OpenShift cluster. The objective is to package all the components—BuildConfigs, DeploymentConfigs, Services, Routes, ImageStreams, and Secrets—into a single template, making it easy for developers and users to deploy the complete voting application with just a few clicks.
We will first identify and extract the YAML configurations for all the components into a dedicated template file. Then, we will create the template using either the OpenShift UI or CLI.
## Creating the Template File
Begin by creating a file named `example-voting-app-template.yml`. Initialize this file with the API version and kind set to `v1` and `Template`, respectively. Specify the template name in the metadata section.
```yaml theme={null}
apiVersion: v1
kind: Template
metadata:
creationTimestamp: null
name: voting-app-template
```
This name will be displayed in the UI once the template is created. Next, add the `objects` array where each configuration item will be defined.
```yaml theme={null}
apiVersion: v1
kind: Template
metadata:
creationTimestamp: null
name: example-voting-app-template
objects:
```
As noted, ensure that the template contains all the necessary components including BuildConfigs, DeploymentConfigs, Services, Routes, ImageStreams, and Secrets.
## Adding Secrets
Start by adding the Secrets. Navigate to the Secrets section in your OpenShift resources. You will find two relevant secrets: the DB secret and the Redis secret.
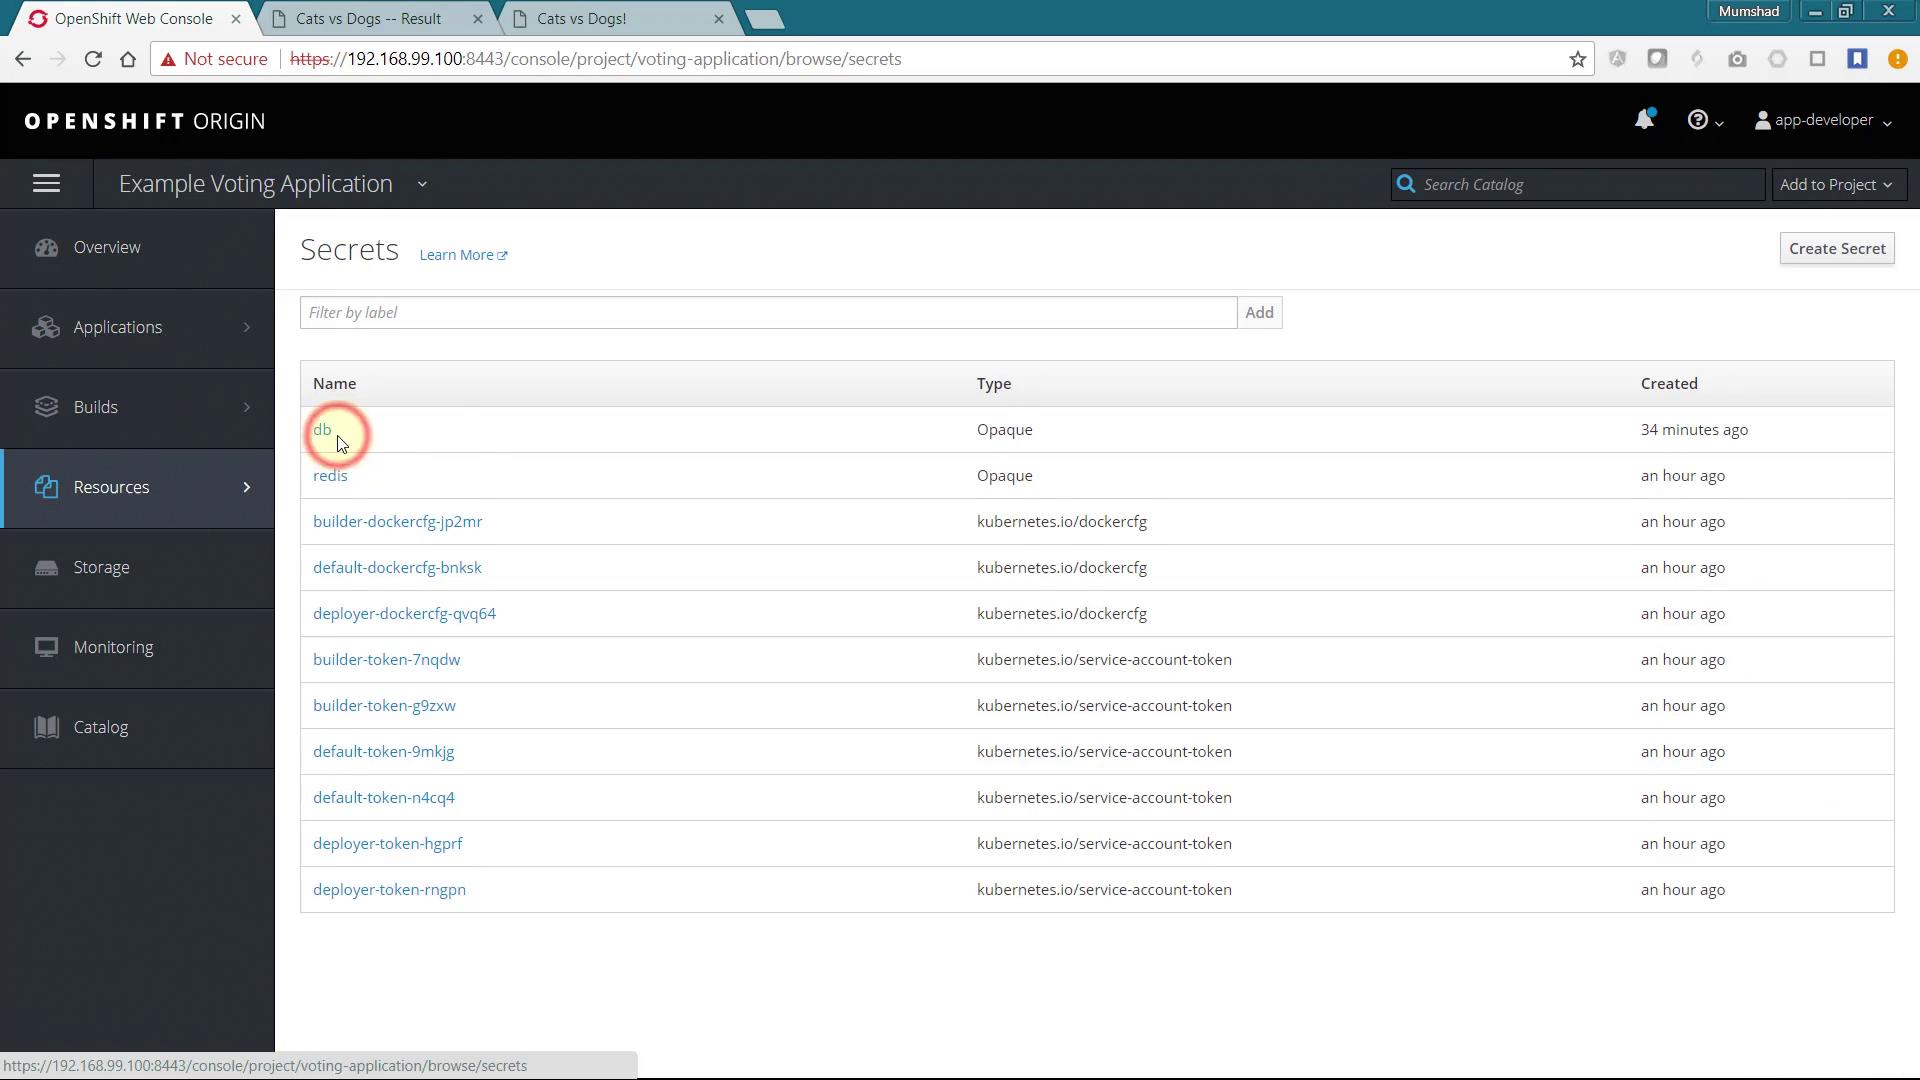
To add the DB Secret, select it, click "Actions," and then "Edit YAML." Copy the content and paste it into your template file. Modify the secret by replacing the encrypted passwords with clear text and removing extraneous annotations and metadata, while retaining the essential information.
Original snippet:
```yaml theme={null}
apiVersion: v1
kind: Template
metadata:
creationTimestamp: null
name: example-voting-app-template
objects:
- apiVersion: v1
data:
database-name: cG9zdGdyZXM=
database-password: cG9zdGdyZXNfcGFzc3dvcHM=
database-user: cG9zdGdyZXNfdXNlcg==
kind: Secret
metadata:
annotations:
template.openshift.io/expose-database_name: '{.data["database-name"]}'
template.openshift.io/expose-password: '{.data["database-password"]}'
template.openshift.io/expose-username: '{.data["database-user"]}'
creationTimestamp: '2018-05-03T17:51:39Z'
labels:
app: postgresql-persistent
template: postgresql-persistent-template
name: db
namespace: voting-application
resourceVersion: '300645'
selfLink: /api/v1/namespaces/voting-application/secrets/db
uid: a18b7ec2-4efa-11e8-aaf2-8e9d9a82dla9
type: Opaque
```
Modified snippet:
```yaml theme={null}
apiVersion: v1
kind: Template
metadata:
creationTimestamp: null
name: example-voting-app-template
objects:
- apiVersion: v1
data:
database-name: db
database-password: postgres_password
database-user: postgres_user
kind: Secret
metadata:
annotations:
template.openshift.io/expose-database_name: '{.data["database-name"]}'
template.openshift.io/expose-password: '{.data["database-password"]}'
template.openshift.io/expose-username: '{.data["database-user"]}'
creationTimestamp: '2018-05-03T17:51:39Z'
labels:
app: postgresql-persistent
template: postgresql-persistent-template
name: db
namespace: voting-application
resourceVersion: '300645'
selfLink: /api/v1/namespaces/voting-application/secrets/db
uid: a1b7ec2-4efa-11e8-9d9a82dla9
type: Opaque
```
Repeat these steps for the Redis Secret by copying its YAML content, removing unnecessary details, and retaining only the critical data (e.g., `redis_password` and its name).
## Adding Build Configurations
Next, add the BuildConfigs. Begin by selecting the YAML configuration for the existing BuildConfig for the "result" component and adding it to the `objects` array. Remove any unneeded details while preserving all crucial specifications.
```yaml theme={null}
- apiVersion: v1
data:
database-name: db
database-password: postgres_password
database-user: postgres_user
kind: Secret
metadata:
name: db
- apiVersion: v1
data:
database-password: redis_password
kind: Secret
metadata:
name: redis
- apiVersion: build.openshift.io/v1
kind: BuildConfig
metadata:
annotations:
openshift.io/generated-by: OpenShiftWebConsole
creationTimestamp: '2018-05-03T17:54:05Z'
labels:
app: result
name: result
namespace: voting-application
resourceVersion: '300913'
selfLink: >-
/apis/build.openshift.io/v1/namespaces/voting-application/buildconfigs/result
uid: f8e91145-4efa-11e8-aaf2-8e9d9a82d1a9
spec:
nodeSelector: null
```
Leave the content under the `spec` section as-is. Note that the GitHub URL embedded in the template can later be parameterized to prompt user input during deployment. Be sure to remove any `status` sections if they exist. Follow similar procedures for the BuildConfigs of the vote and worker applications.
If possible, parameterize the GitHub URLs and other hard-coded values in your BuildConfig to enhance reusability.
Below is an additional snippet showcasing an ImageStreamTag configuration:
```yaml theme={null}
- apiVersion: v1
kind: ImageStreamTag
name: result:latest
postCommit: {}
resources: {}
runPolicy: Serial
source:
contextDir: /result
git:
ref: master
uri: 'https://github.com/mmumshad/example-voting-app.git'
type: Git
strategy:
sourceStrategy:
env:
- name: PORT
value: '8080'
from:
kind: ImageStreamTag
name: 'nodejs:8'
namespace: openshift
type: Source
triggers:
- generic:
secret: 5a7aeOble2c90cbc
type: Generic
- github:
secret: 7832f312c9c2e71f
type: GitHub
- imageChange:
lastTriggeredImageID: >-
docker.io/centos/nodejs-8-centos7@sha256:8d144d0e2a7d57b537e83ff68a6a4aef495850788c6dd5173d1c75fbd45e5ca0b
```
## Adding ImageStreams
Add the ImageStreams for each application next. For instance, the worker application's BuildConfig snippet might appear as follows:
```yaml theme={null}
- apiVersion: build.openshift.io/v1
kind: BuildConfig
metadata:
name: worker
spec:
nodeSelector: null
output:
to:
kind: ImageStreamTag
name: 'worker:latest'
postCommit: {}
resources: {}
runPolicy: Serial
source:
contextDir: /worker
git:
```
There are three ImageStreams configured—one for each application. Copy the YAML for each ImageStream and add it to the `objects` array. For example, to tag and push an image from Docker, you might use:
```bash theme={null}
$ sudo docker tag myimage registry/voting-application/worker:tag
$ sudo docker push registry/voting-application/worker:tag
```
Then duplicate the configuration for the other two ImageStreams:
```yaml theme={null}
- apiVersion: image.openshift.io/v1
kind: ImageStream
metadata:
name: worker
spec:
lookupPolicy:
local: false
- apiVersion: image.openshift.io/v1
kind: ImageStream
metadata:
name: result
spec:
lookupPolicy:
local: false
```
## Adding Deployments
Next, add the DeploymentConfigs. There are five DeploymentConfigs for the application components. In the OpenShift Origin web console, you can see the list of deployments, as shown in the image below:
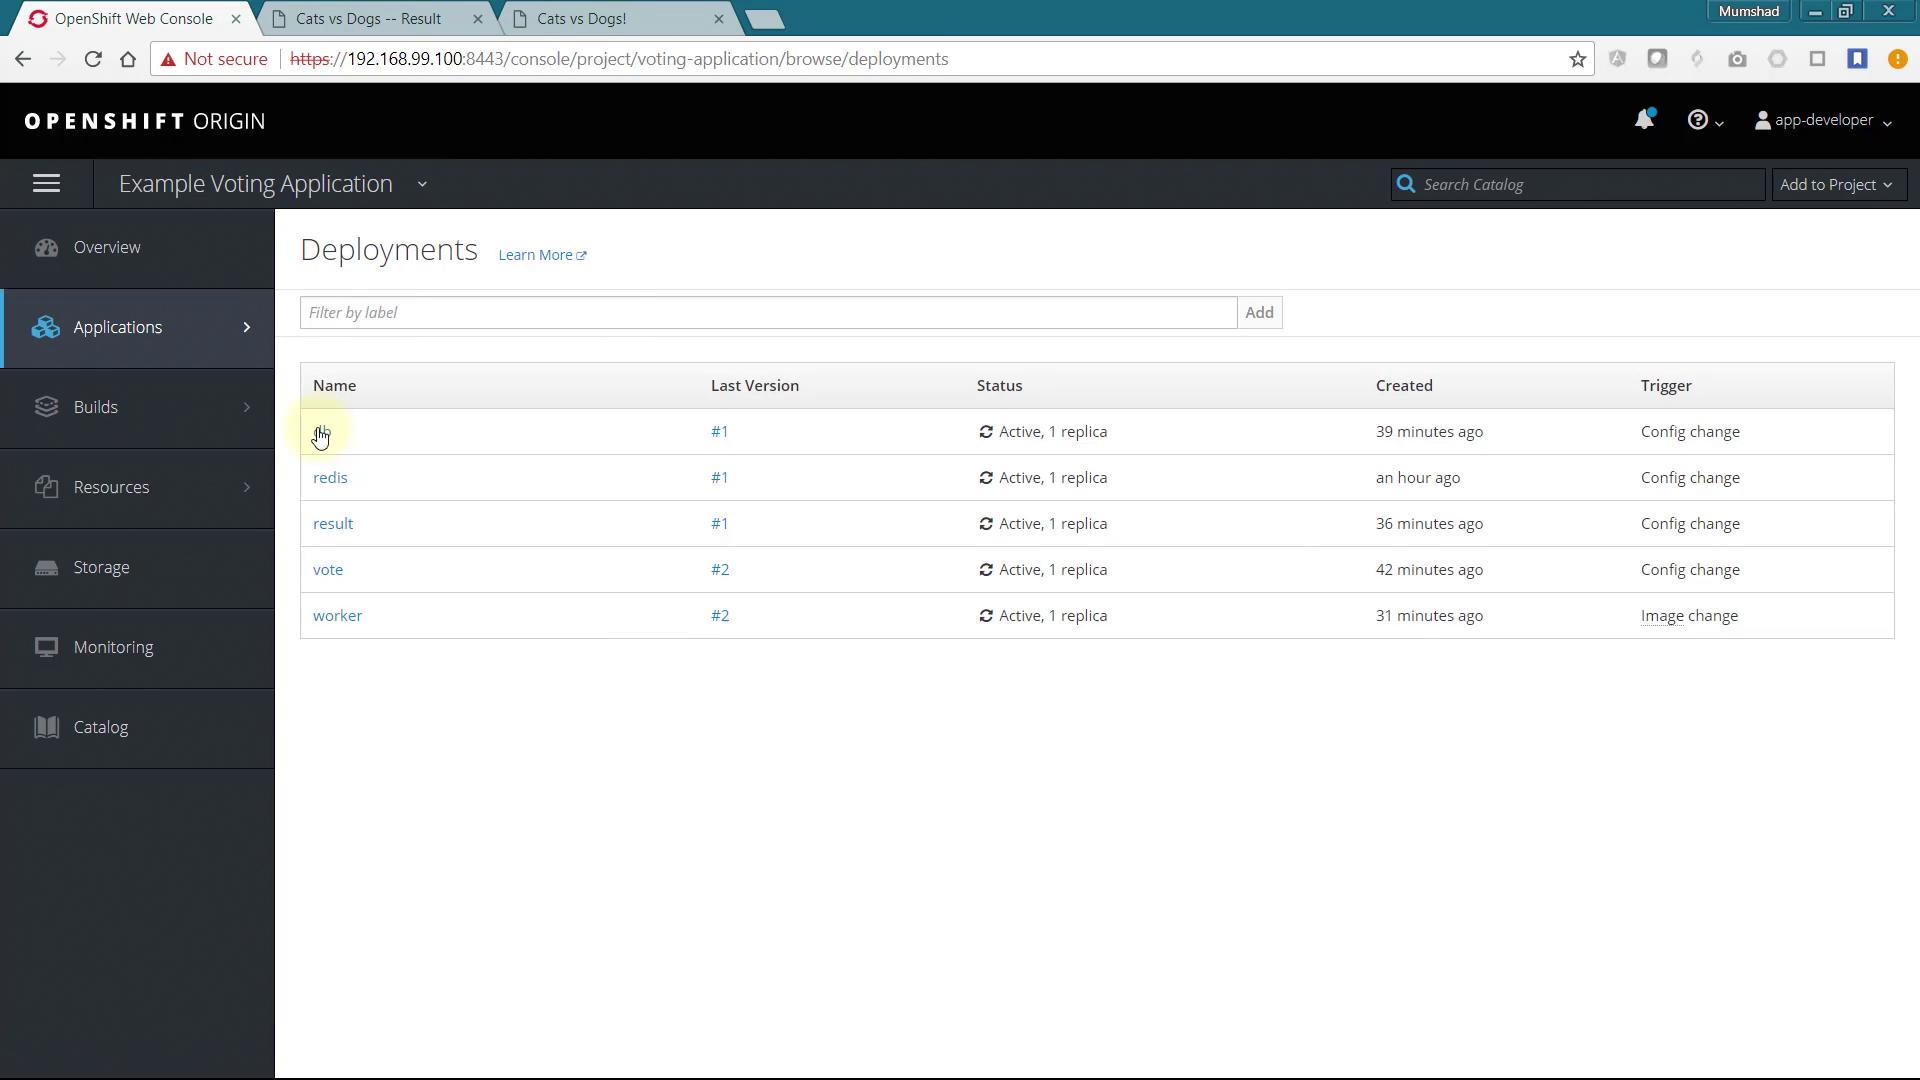
For every DeploymentConfig, select the YAML configuration, copy it into your template file, and remove any unnecessary details. Consider simplifying blocks such as the `livenessProbe` as shown below:
```yaml theme={null}
livenessProbe:
exec:
command:
- /bin/sh
- '-i'
- '-c'
- pg_isready -h 127.0.0.1 -p 5432
failureThreshold: 3
initialDelaySeconds: 30
periodSeconds: 10
successThreshold: 1
timeoutSeconds: 1
```
Repeat these clean-up steps for each DeploymentConfig associated with the application.
## Adding Services and Routes
Finally, add the configurations for Services and Routes.
For Services, here is an example configuration for the worker application:
```yaml theme={null}
- apiVersion: v1
kind: Service
metadata:
name: worker
spec:
containers:
- image: 172.30.1.1:5000/voting-application/worker@sha256:0417be4bd34d5414d378e1751d2b52b66e8bff3f83e2bd7dc68f11e893da04f7
imagePullPolicy: Always
name: worker
ports:
- containerPort: 8080
protocol: TCP
- containerPort: 8443
protocol: TCP
resources: {}
terminationMessagePath: /dev/termination-log
terminationMessagePolicy: File
dnsPolicy: ClusterFirst
restartPolicy: Always
schedulerName: default-scheduler
securityContext: {}
terminationGracePeriodSeconds: 30
test: false
triggers:
- imageChangeParams:
automatic: true
containerNames:
- worker
from:
kind: ImageStreamTag
name: 'worker:latest'
namespace: voting-application
lastTriggeredImage: ''
```
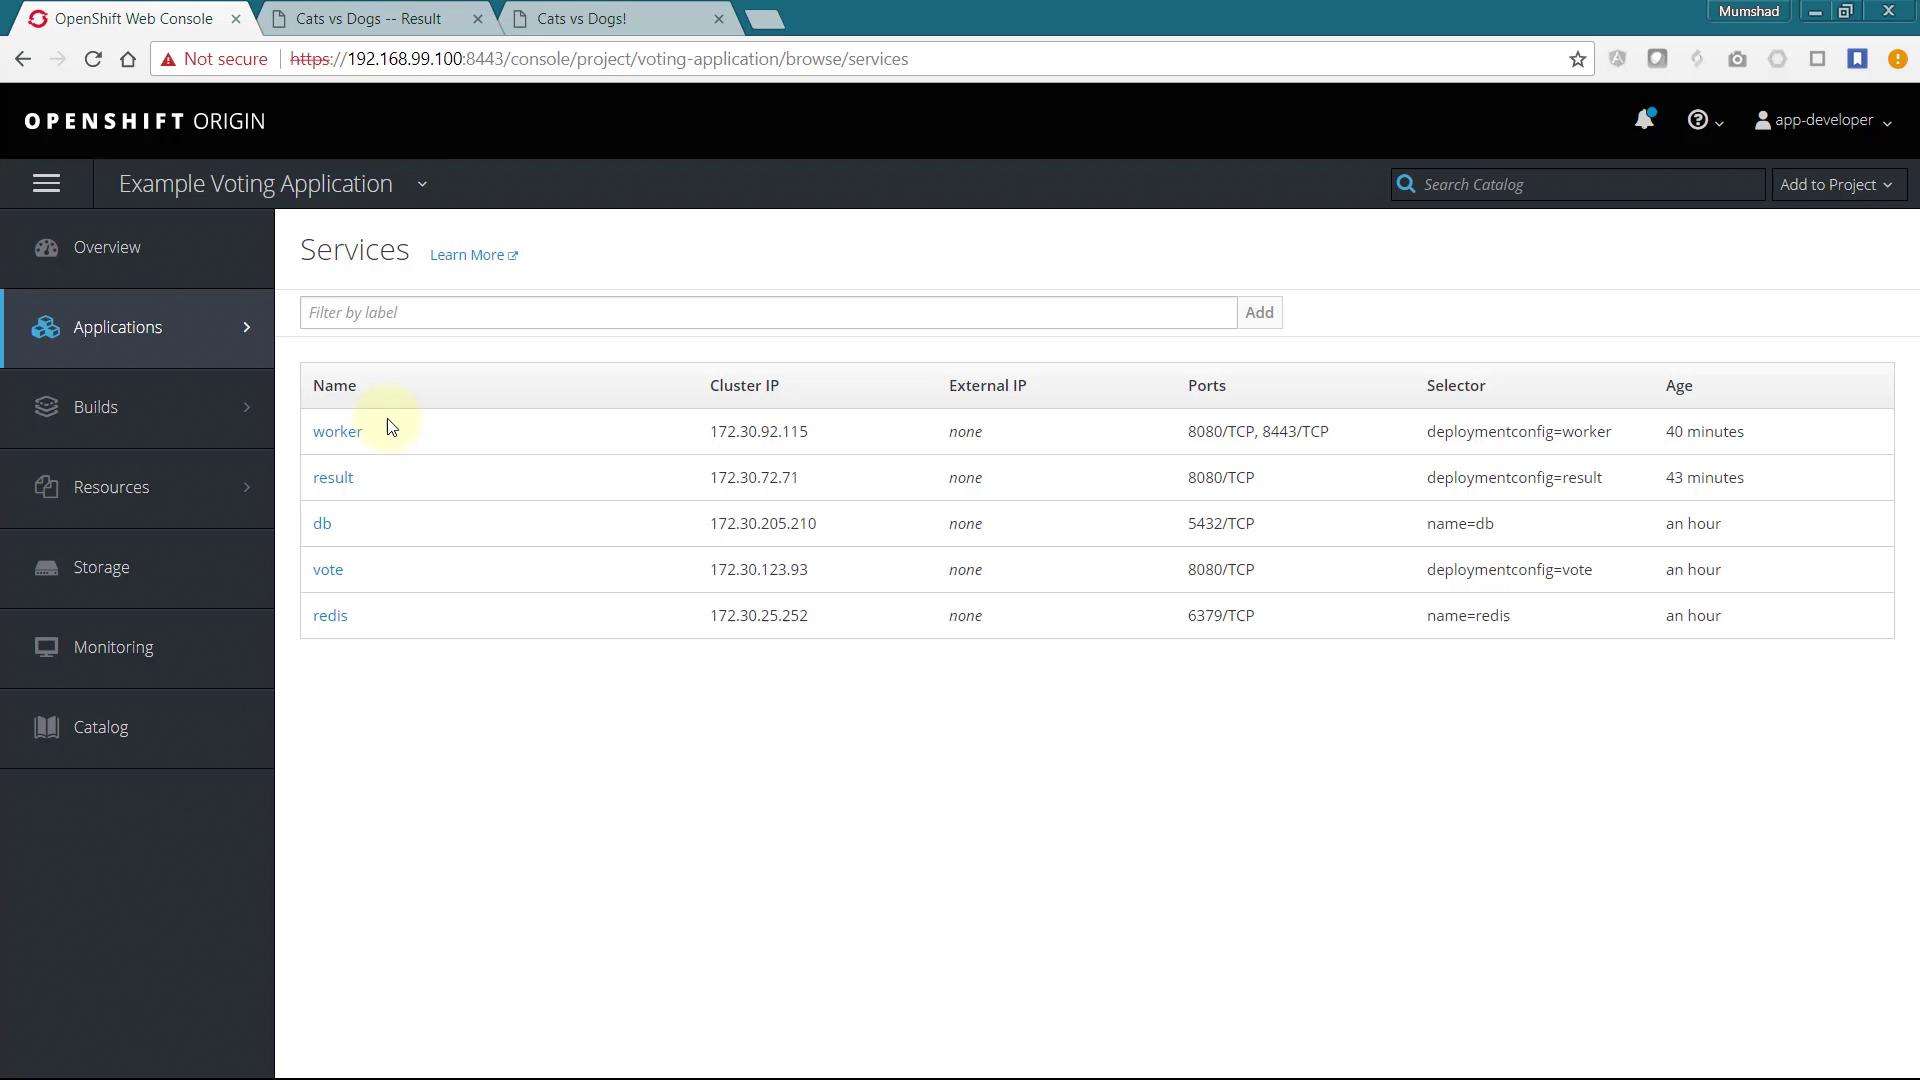
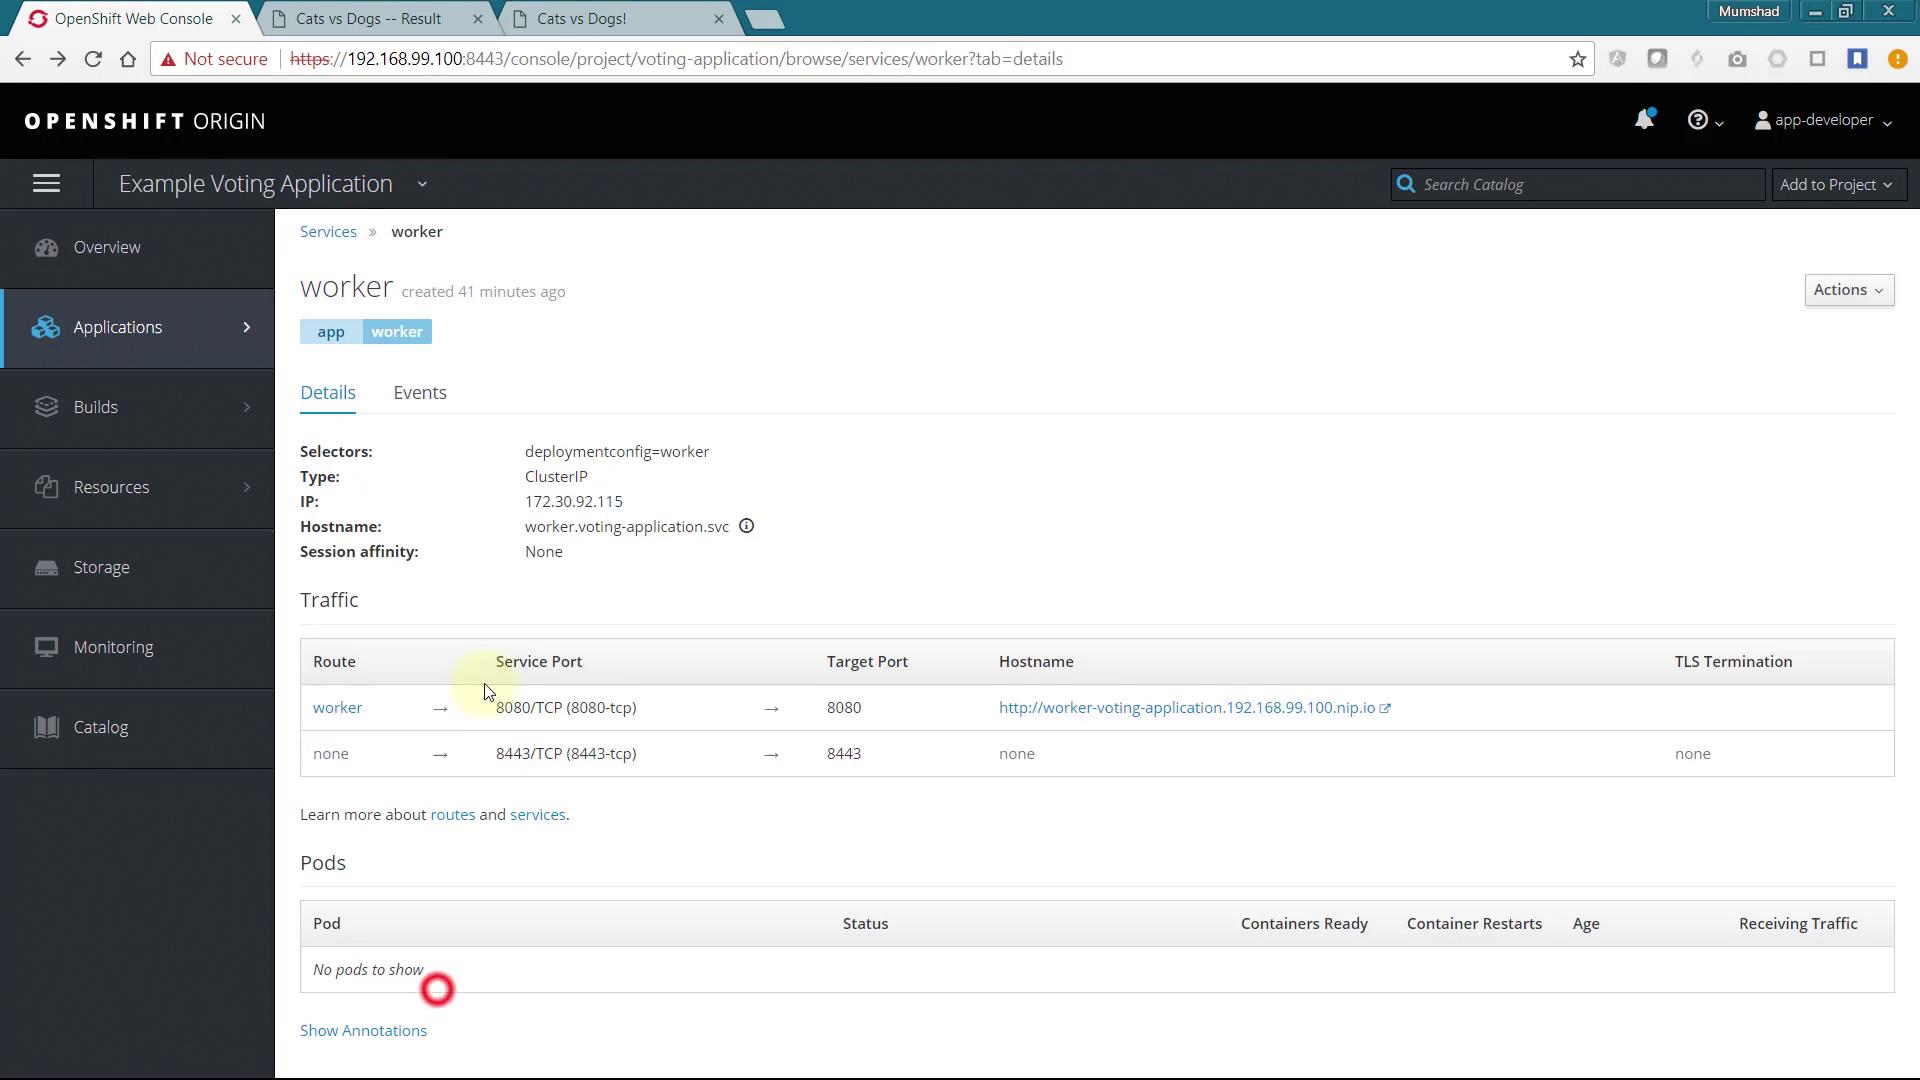
Although the worker application does not strictly require its own Service because it interacts indirectly with Redis and PostgreSQL, include the Service (and Route) configurations for consistency with the wizard-generated template.
View the list of services in the OpenShift Origin web console as shown below:
For additional service details (e.g., for the worker application), refer to the image below:
For Routes, here’s an example configuration for the "result" application:
```yaml theme={null}
- apiVersion: v1
kind: Service
metadata:
name: result
spec:
ports:
- name: 8080-tcp
port: 8080
protocol: TCP
targetPort: 8080
selector:
deploymentconfig: result
sessionAffinity: None
type: ClusterIP
status:
loadBalancer: {}
```
Similarly, additional Route configurations for, for instance, the vote service can be specified as follows:
```yaml theme={null}
- apiVersion: v1
kind: Service
metadata:
annotations:
openshift.io/generated-by: OpenShiftWebConsole
creationTimestamp: '2018-05-03T17:41:57Z'
labels:
app: vote
name: vote
namespace: voting-application
resourceVersion: '299709'
selflink: /api/v1/namespaces/voting-application/services/vote
uid: 466b7d16-4ef9-11e8-aaf2-8ed9a82d1a9
spec:
clusterIP: 172.30.123.93
ports:
- name: 8080-tcp
port: 8080
protocol: TCP
targetPort: 8080
selector:
deploymentconfig: vote
sessionAffinity: None
type: ClusterIP
status:
loadBalancer: {}
```
Create a Route for each application as needed.
## Creating the Template in OpenShift
Once the file is complete, you can create a template from the CLI. First, configure your OC environment variable. In this example, the template is intended to be available for a new user (for example, AppDeveloper2).
Switch to the directory containing the file and execute the `oc create -f` command:
```bash theme={null}
c:\Users\mmums>cd c:\
c:\>cd minishift-1.16.1-windows-amd64
c:\minishift-1.16.1-windows-amd64>minishift.exe oc-env
SET PATH=C:\Users\mmums\.minishift\cache\oc\v3.9.0\windows;%PATH%
REM Run this command to configure your shell:
REM @FOR /f "tokens=*" %i IN ('minishift oc-env') DO @call %i
c:\minishift-1.16.1-windows-amd64>SET PATH=C:\Users\mmums\.minishift\cache\oc\v3.9.0\windows;%PATH%
```
Log in through both the UI and CLI using your credentials, navigate to the directory with `example-voting-app-template.yml`, and create the template using:
```bash theme={null}
d:\Mumshad Files\Google Drive\Udemy\OpenShift\code>oc create -f example-voting-app-template.yml
Error from server (Forbidden): error when creating "example-voting-app-template.yml": templates is forbidden: User "app-developer-2" cannot create templates in the namespace "default": User "app-developer-2" cannot create templates in project "default"
d:\Mumshad Files\Google Drive\Udemy\OpenShift\code>
```
Since regular users cannot create a template in the default namespace, create a new project and specify its namespace:
```bash theme={null}
d:\Mumshad Files\Google Drive\Udemy\OpenShift\code>oc create -f example-voting-app-template.yml -n voting-application-3
```
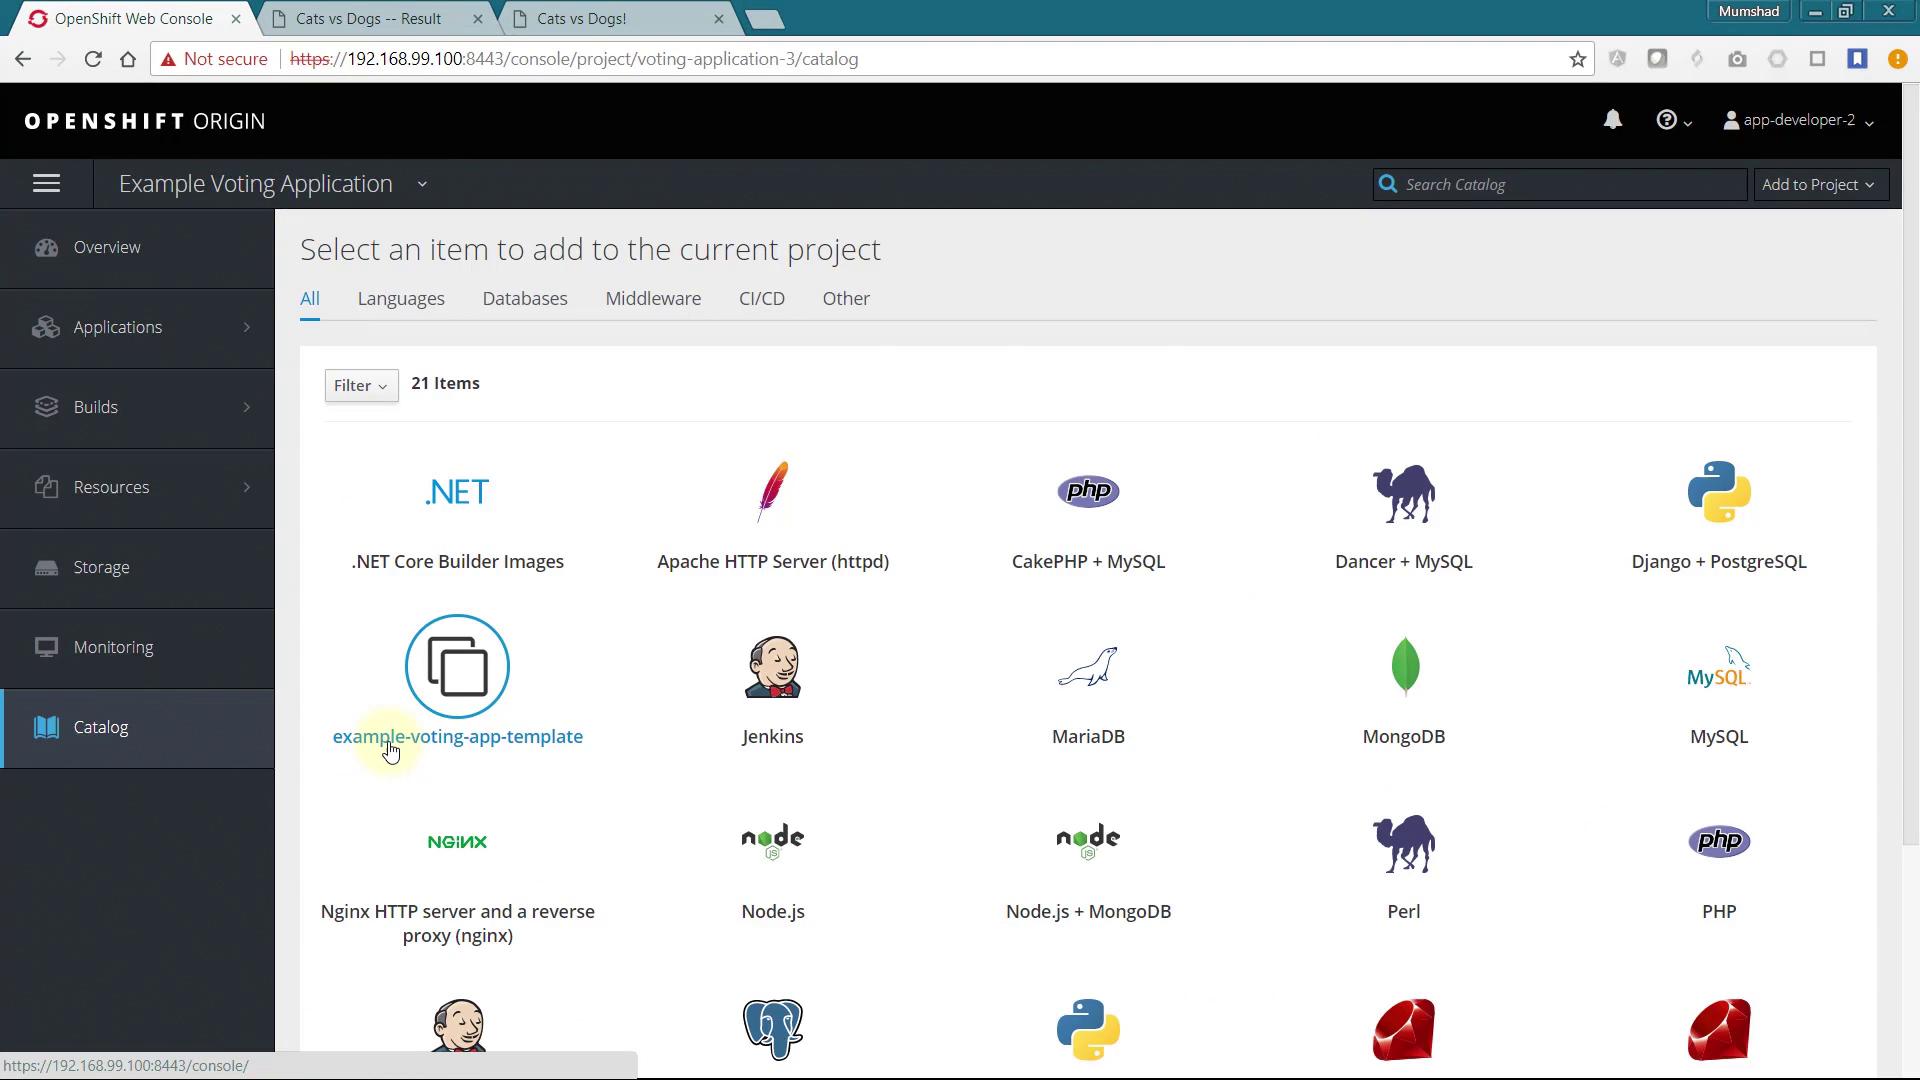
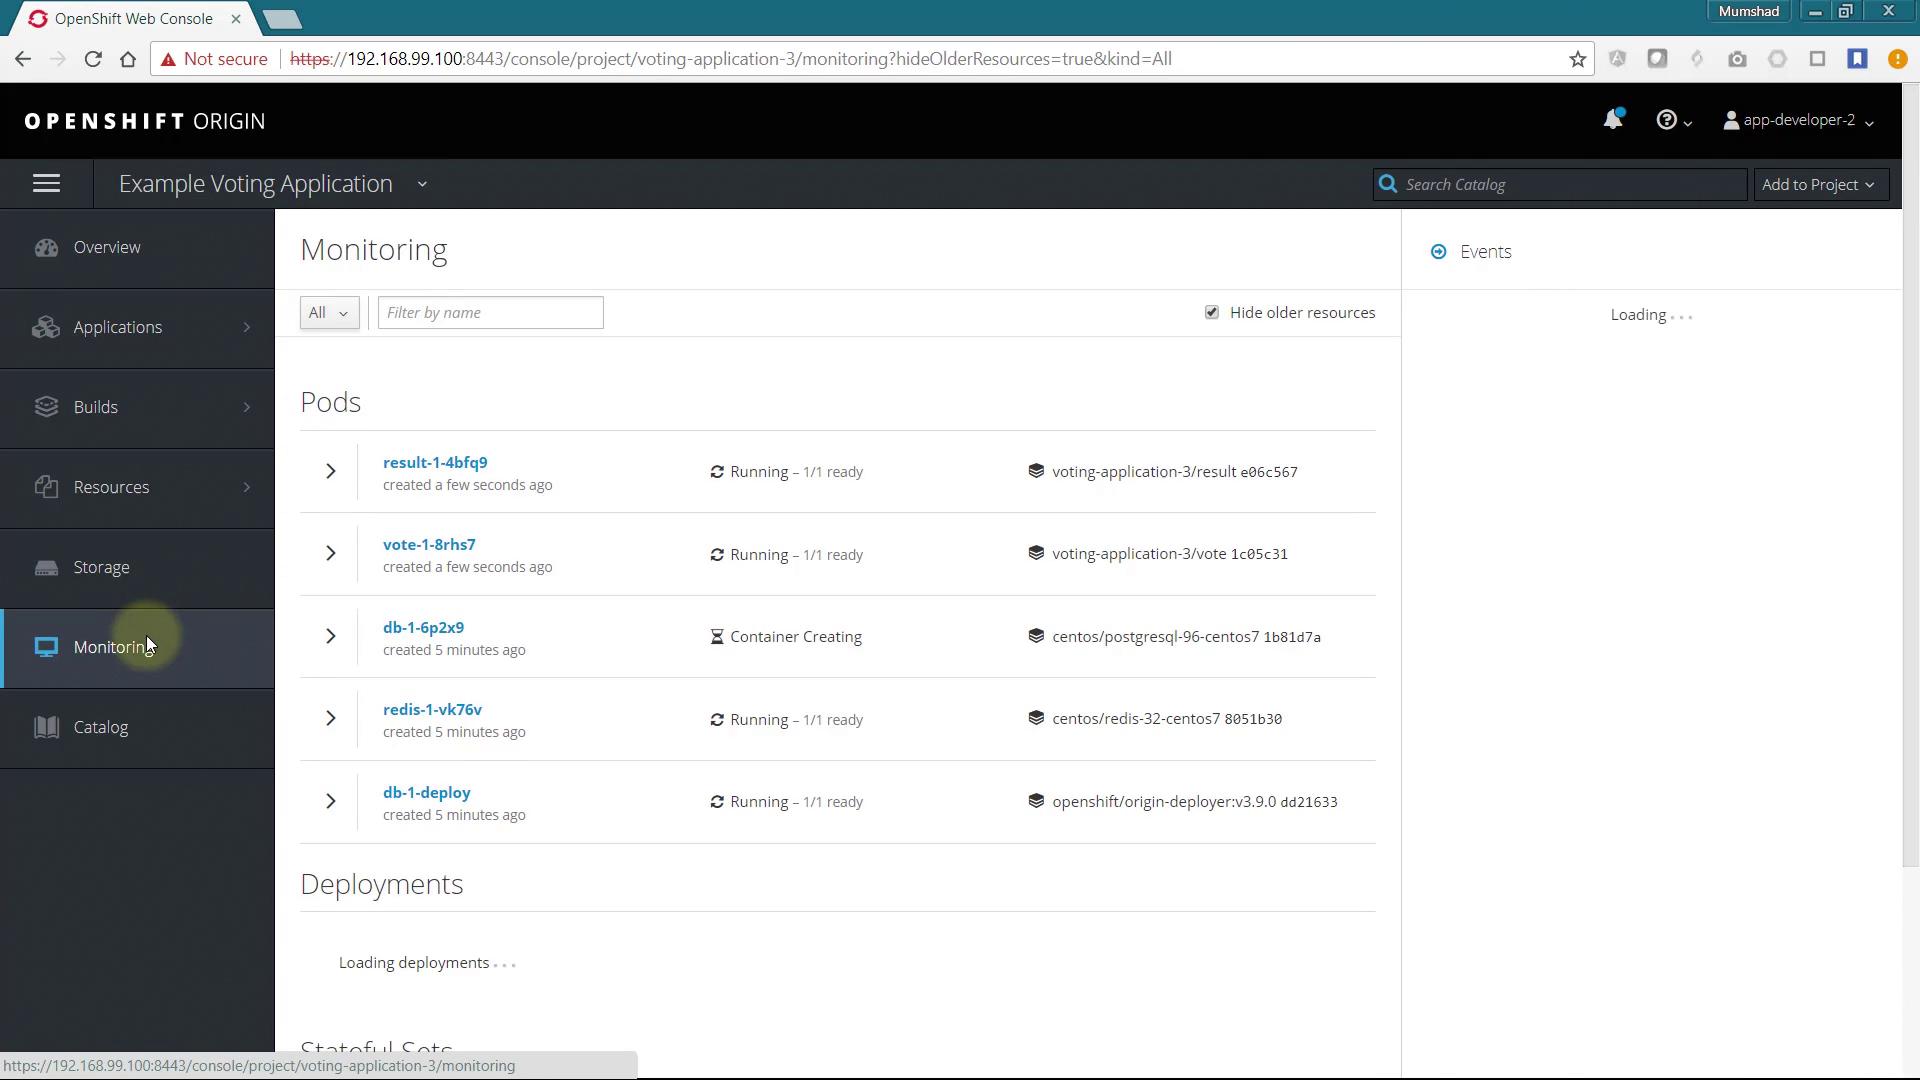
After running this command, refresh the UI. You should see the new catalog item named `example-voting-app-template` displayed. Click on it and follow the deployment wizard to launch the application stack. Monitor the progress of builds and deployments on the monitoring page.
After deployment, click on the Routes to access the voting and result pages.
## Conclusion and Next Steps
You have successfully created a custom catalog item for the example voting application, enabling quick deployment for anyone. As a next step, consider parameterizing the template to allow user input via the wizard. For additional ideas, review the source code of existing templates.
Thank you for your time, and we hope this lesson helps you get started with creating custom templates in OpenShift.