OpenShift 4

Storage Templates and Catalog

Demo Example Voting Application

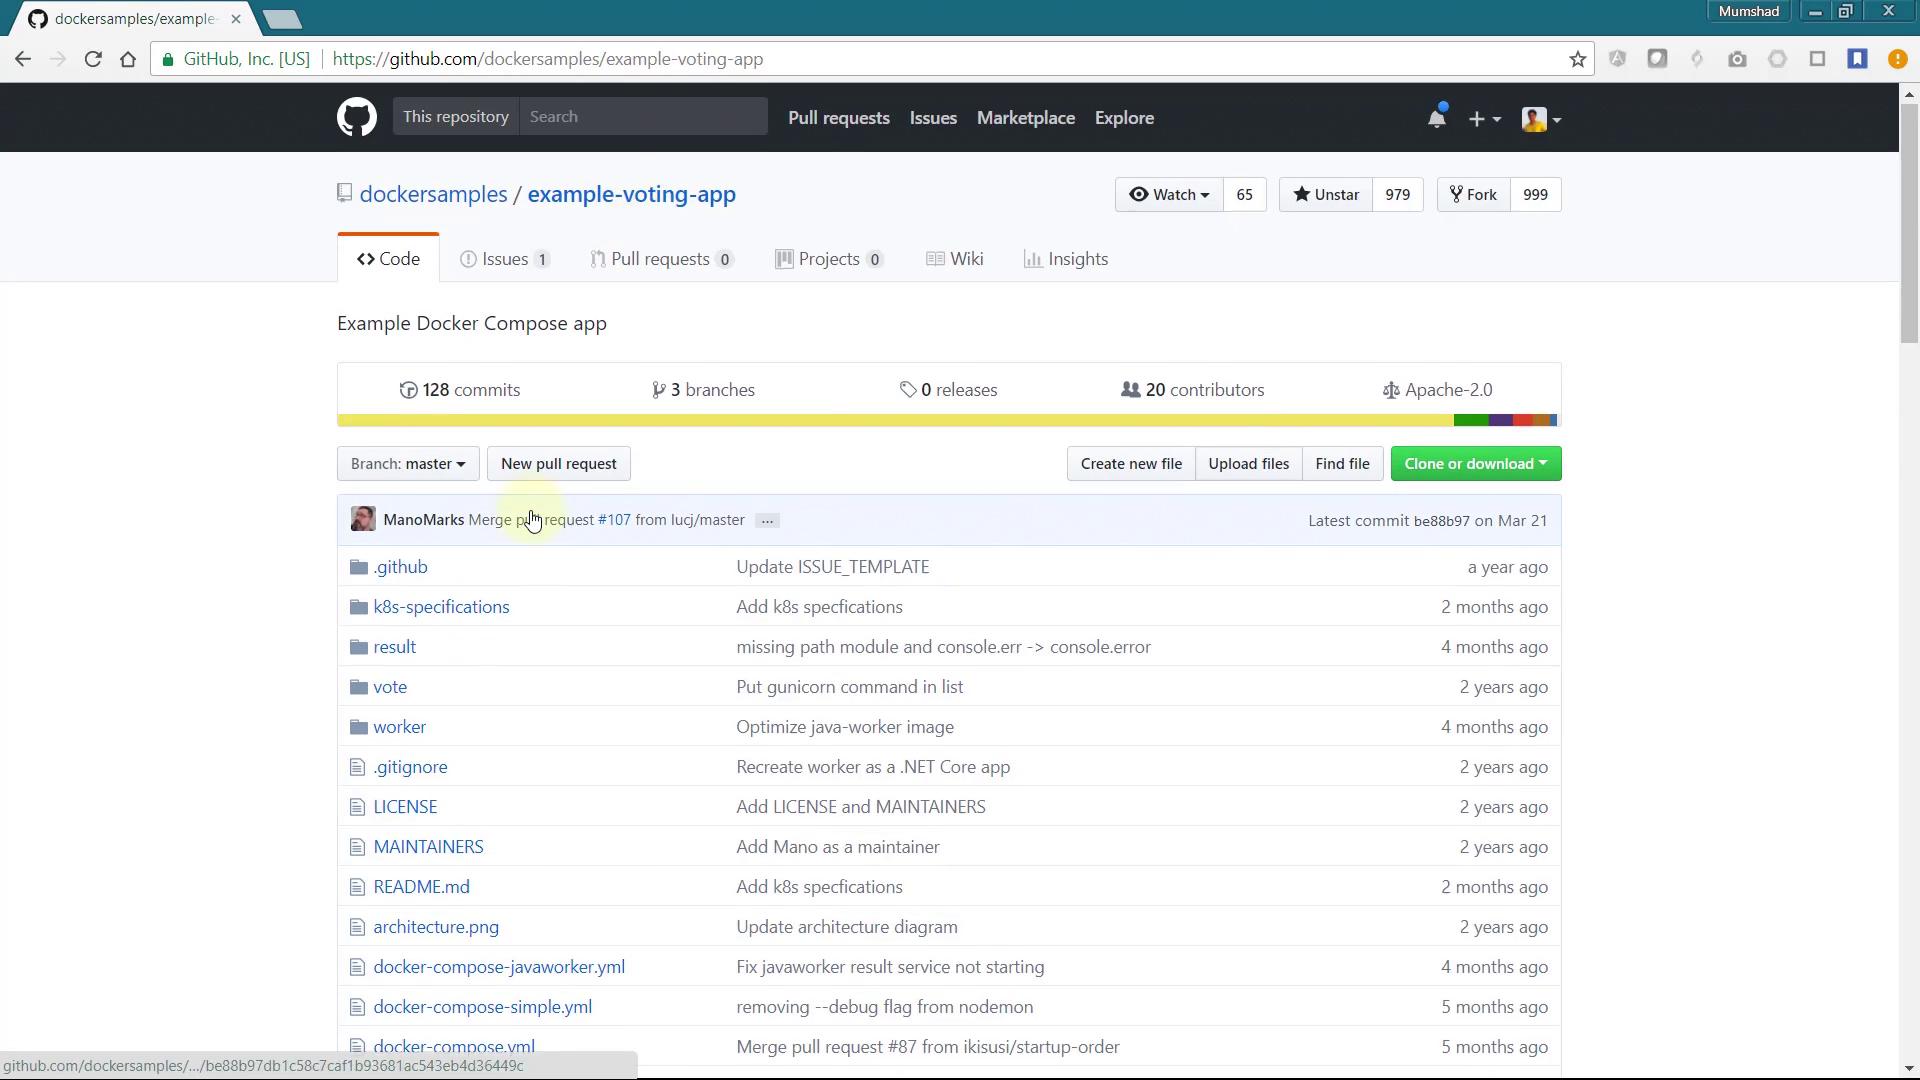
Welcome to this comprehensive guide on deploying a multi-tier voting application in an OpenShift cluster. In this lesson, you will learn how to deploy and configure various components—including Redis, a Python-based voting app, a Node.js result app, and a worker application—using OpenShift's robust platform. The application code is hosted in a GitHub repository forked from the main example-voting-app, with minor modifications to include basic authentication between services.

The image shows a GitHub repository page for "example-voting-app" by "dockersamples," displaying files and folders along with commit history and repository details.


Creating a New OpenShift Project

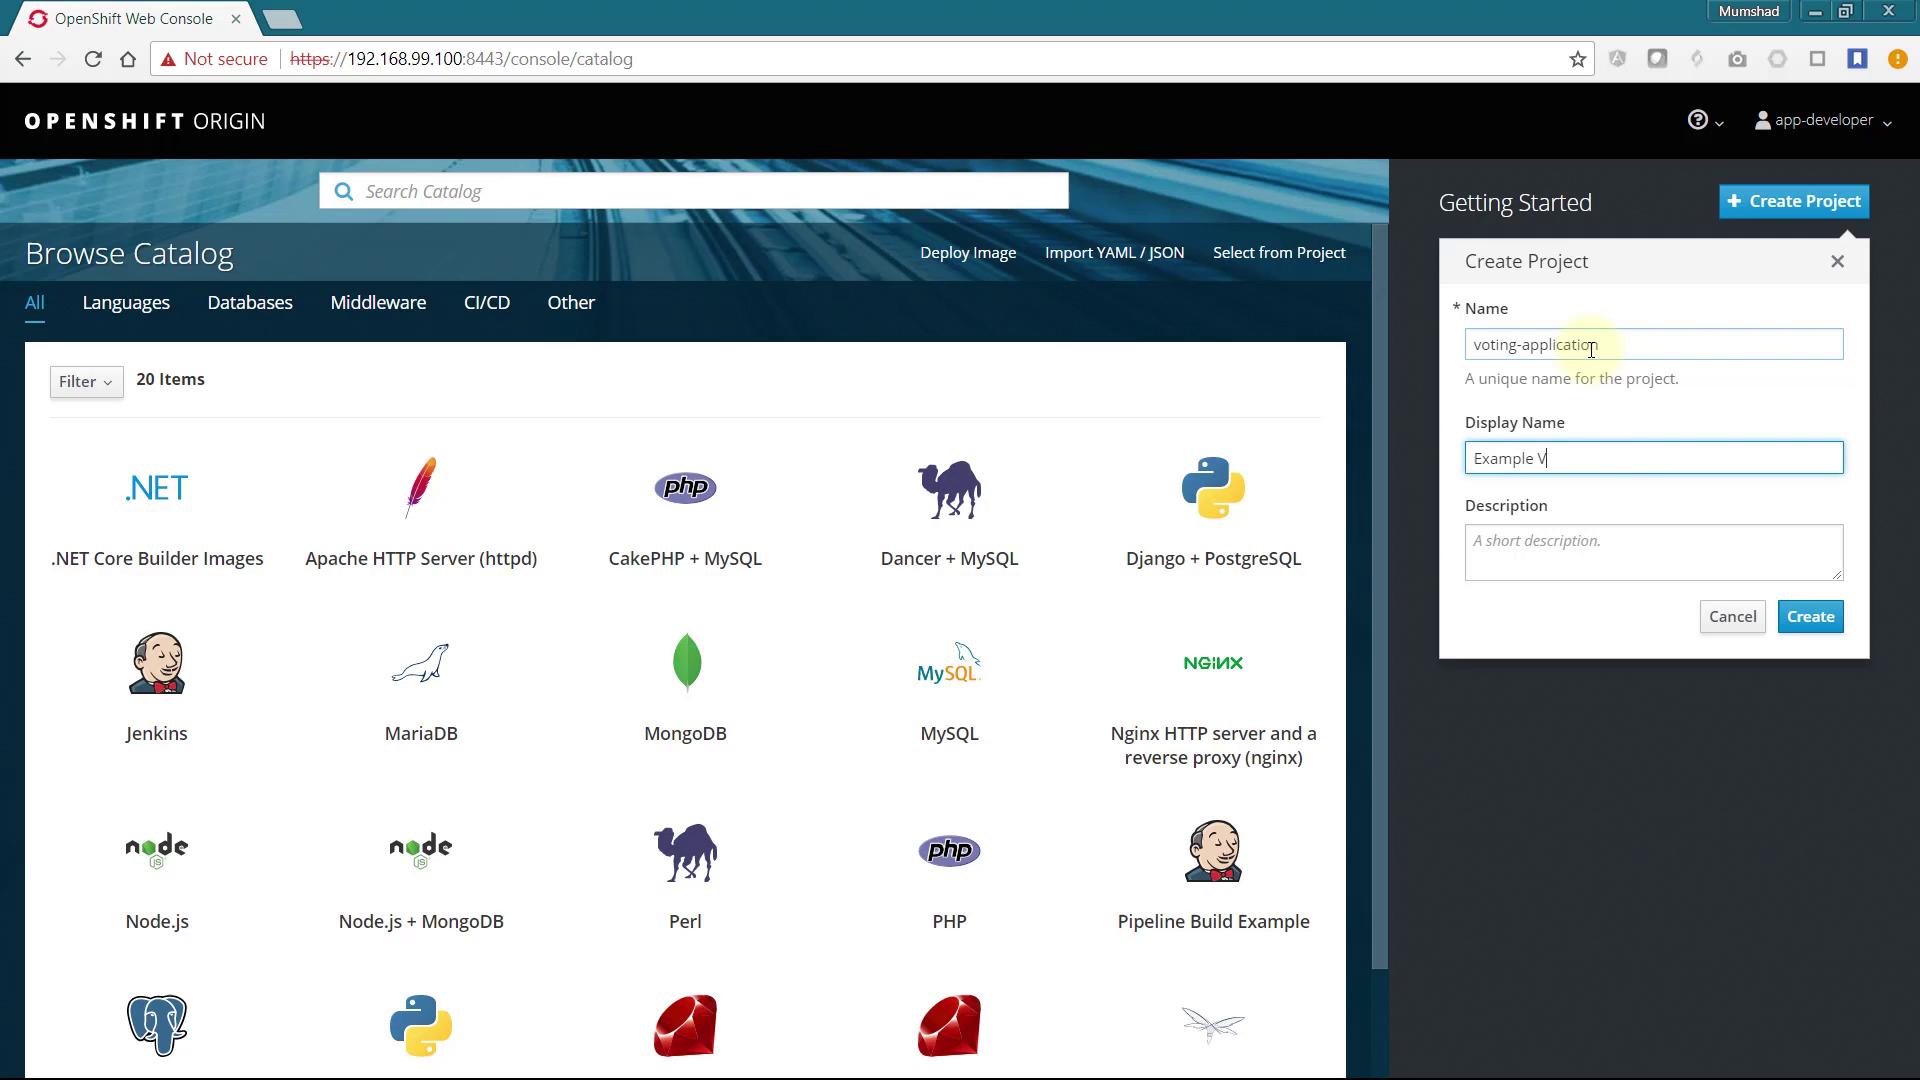
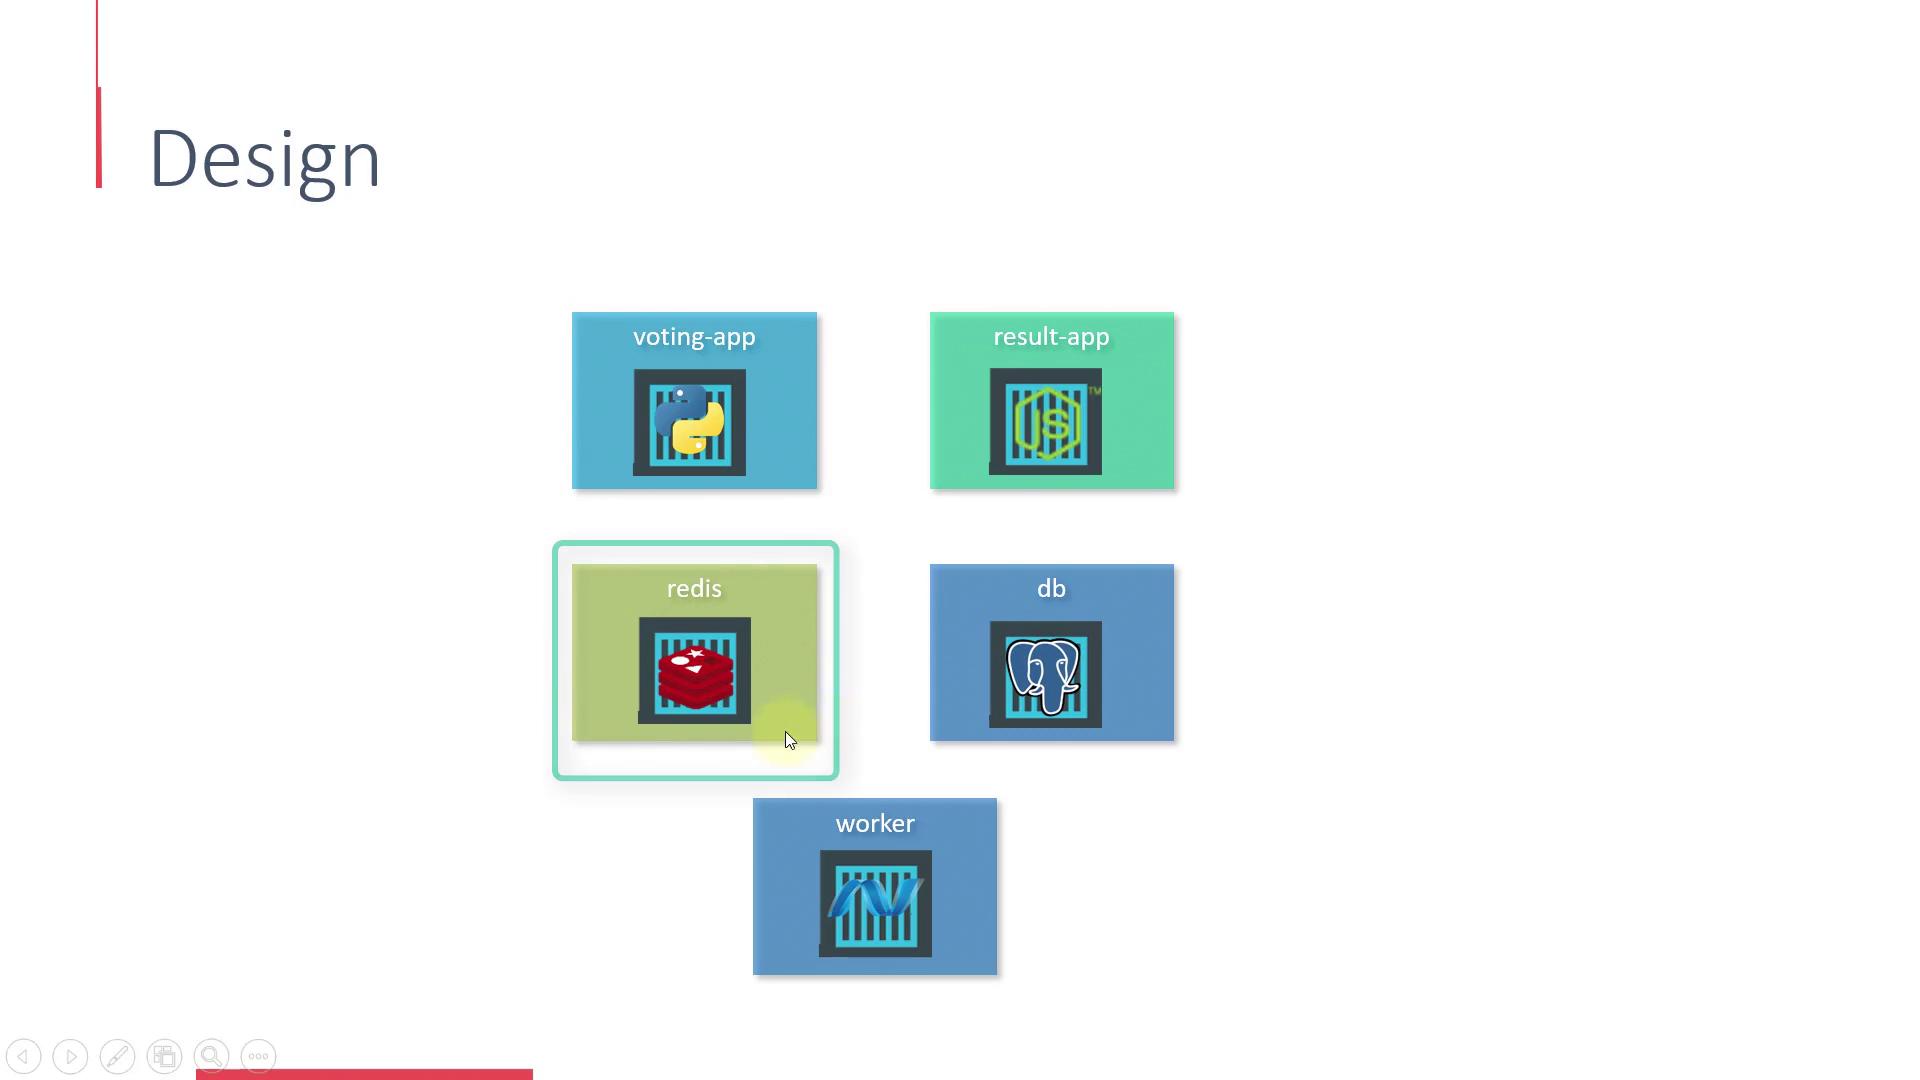
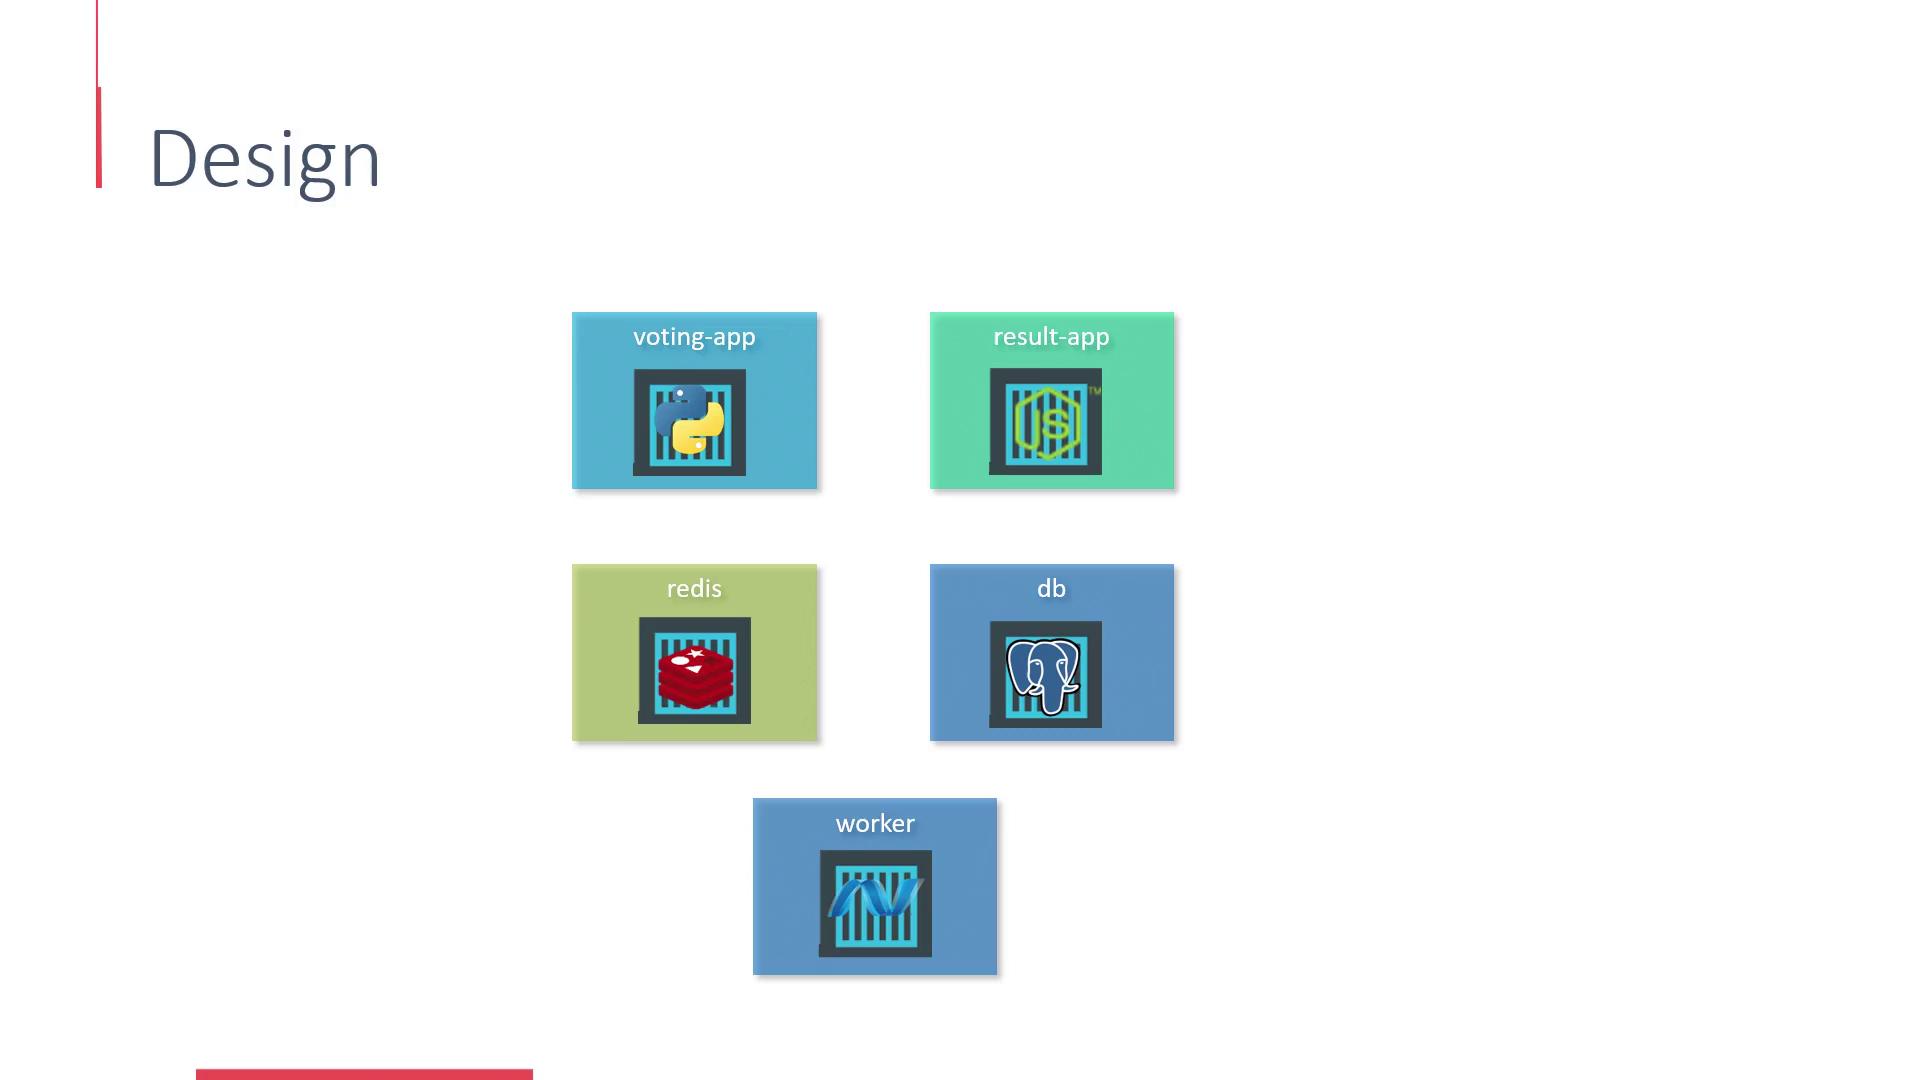
Start by creating a new project in your OpenShift cluster. Name the project voting-application.

In the initial design, the application is divided into multiple microservices:

The image shows the OpenShift Origin web console with a catalog of software options like .NET, Apache HTTP Server, and Jenkins. A "Create Project" dialog is open on the right, with fields for project name, display name, and description.


Deploying the Redis Service

Since the front-end voting application depends on Redis, deploy the Redis service first.

The image shows a design layout with five components labeled as "voting-app," "result-app," "redis," "db," and "worker," each represented by icons.

If you don’t see Redis in the service catalog, you can add it manually using one of the available OpenShift templates. Search GitHub for the OpenShift and Redis template.

The image shows a GitHub repository page for OpenShift database examples, listing various JSON template files for different databases like MariaDB, MongoDB, MySQL, PostgreSQL, and Redis.

Locate the Redis template under the Examples section in the OpenShift Origin Repository. Follow these steps:

  1. Select the Redis-Ephemeral-Template.
  2. Copy its contents.
  3. Use the "Import YAML/JSON" option in the UI.
  4. Click on Create.
  5. Finally, choose "Save Template" to add the new template to your catalog items.

Below is a snippet from the Redis template that defines configuration parameters:

{
    "description": "Password for the Redis connection user.",
    "displayName": "Redis Connection Password",
    "from": ["a-zA-Z0-9]{16}"],
    "generate": "expression",
    "name": "REDIS_PASSWORD",
    "required": true
},
{
    "description": "Version of Redis image to be used (3.2 or latest).",
    "displayName": "Version of Redis Image",
    "name": "REDIS_VERSION",
    "required": true,
    "value": "3.2"
}

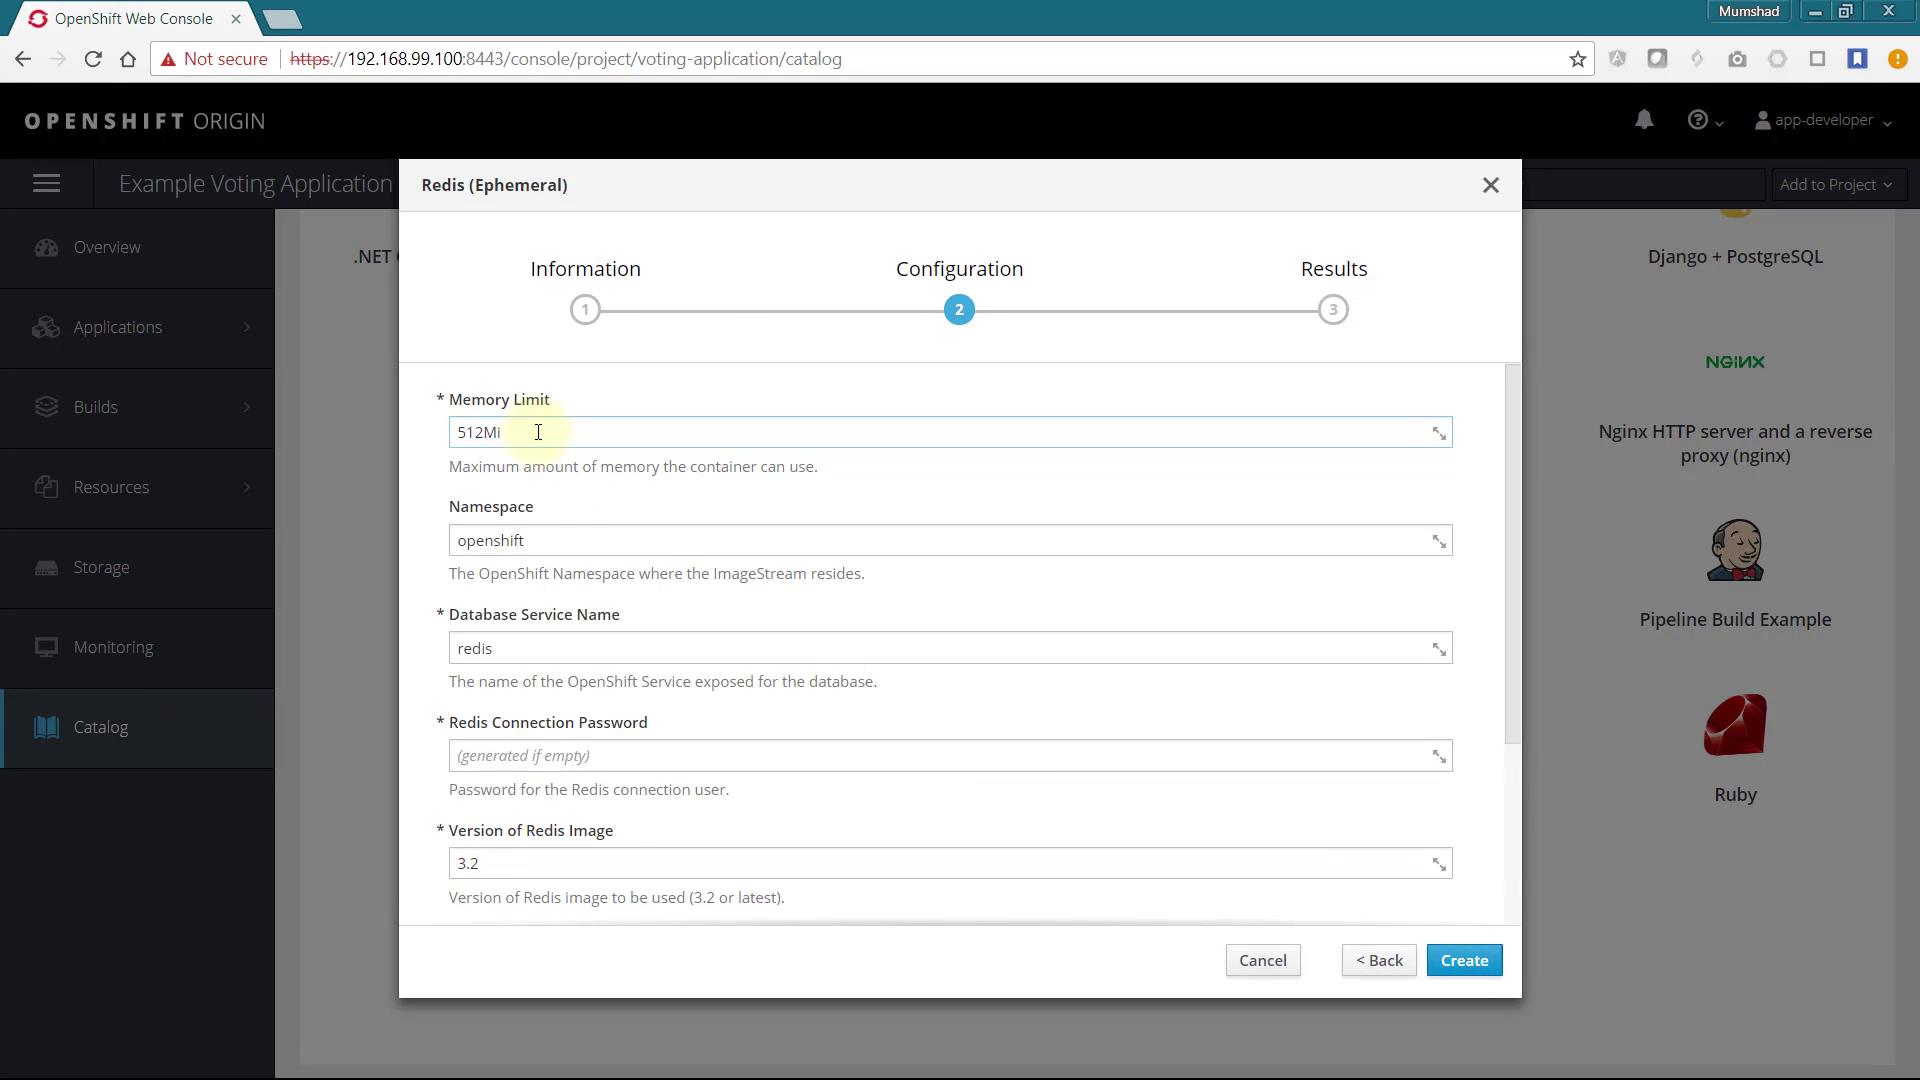
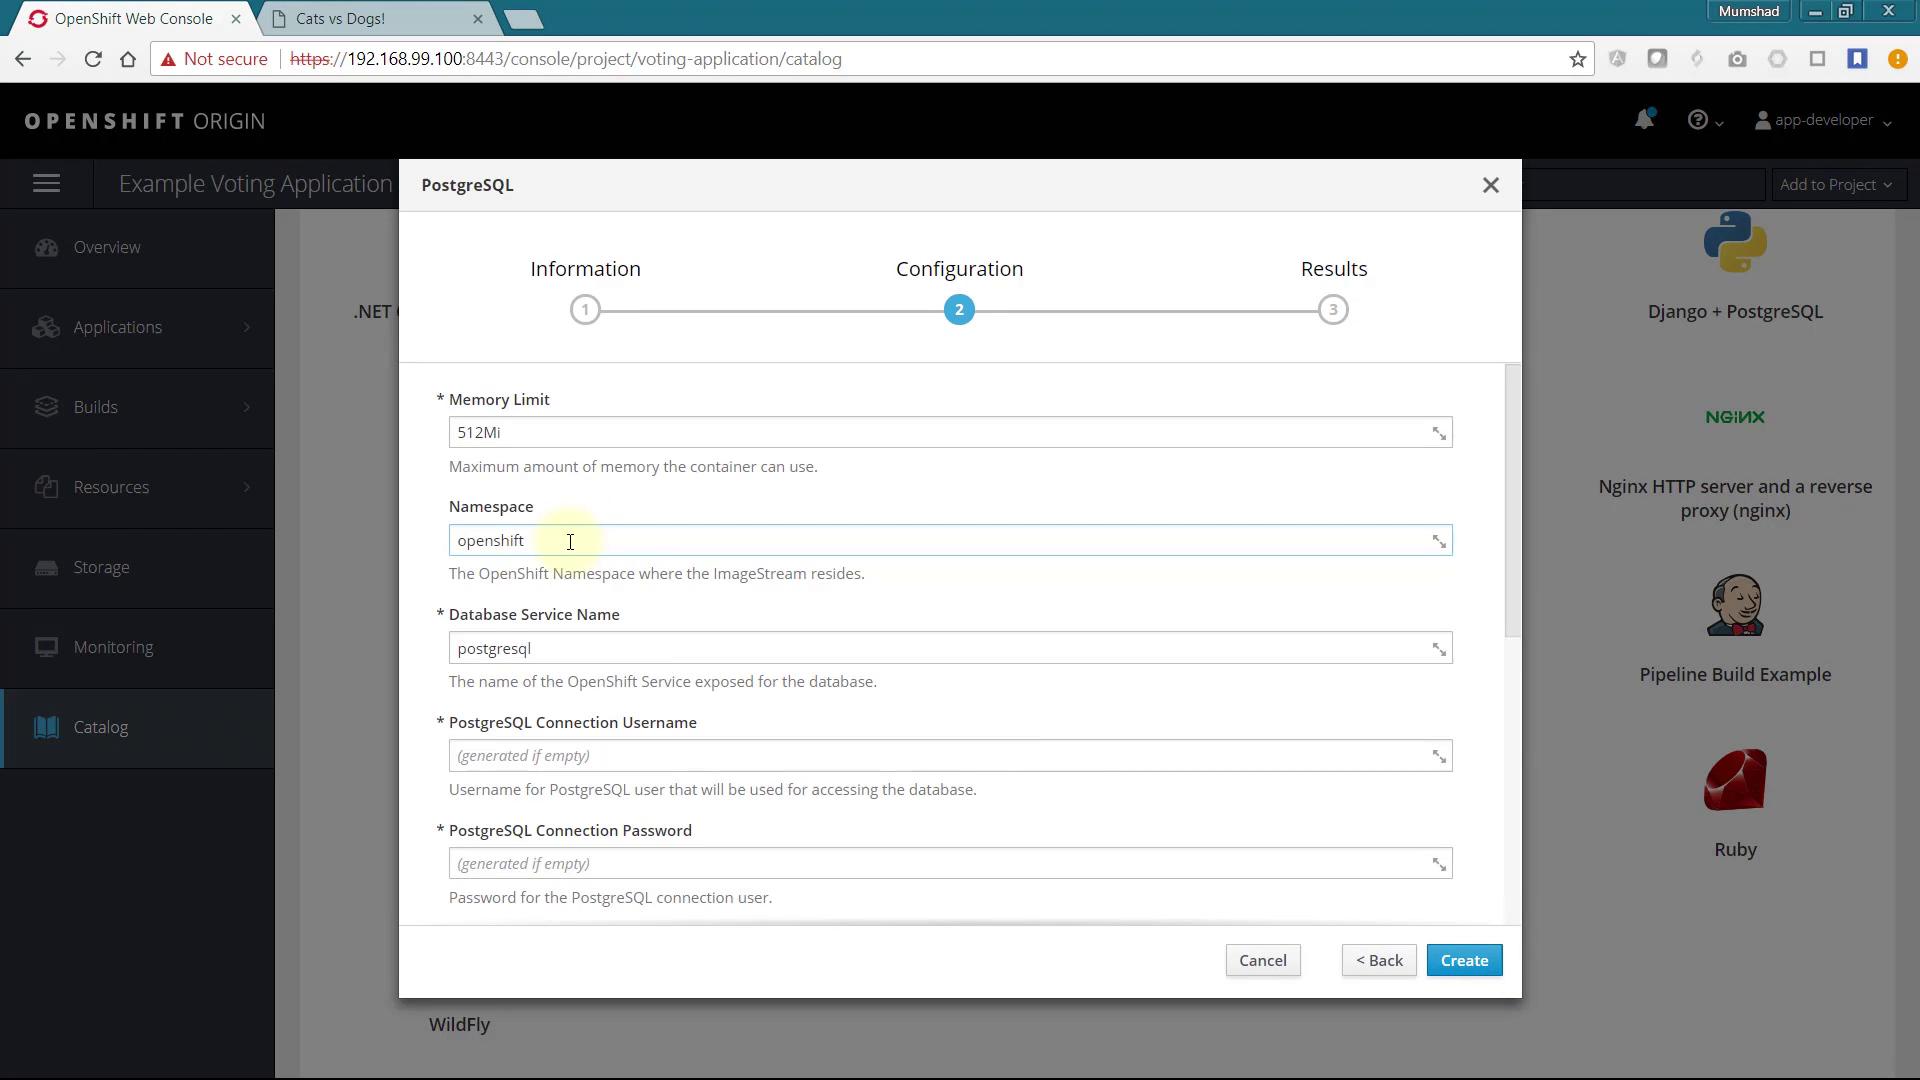
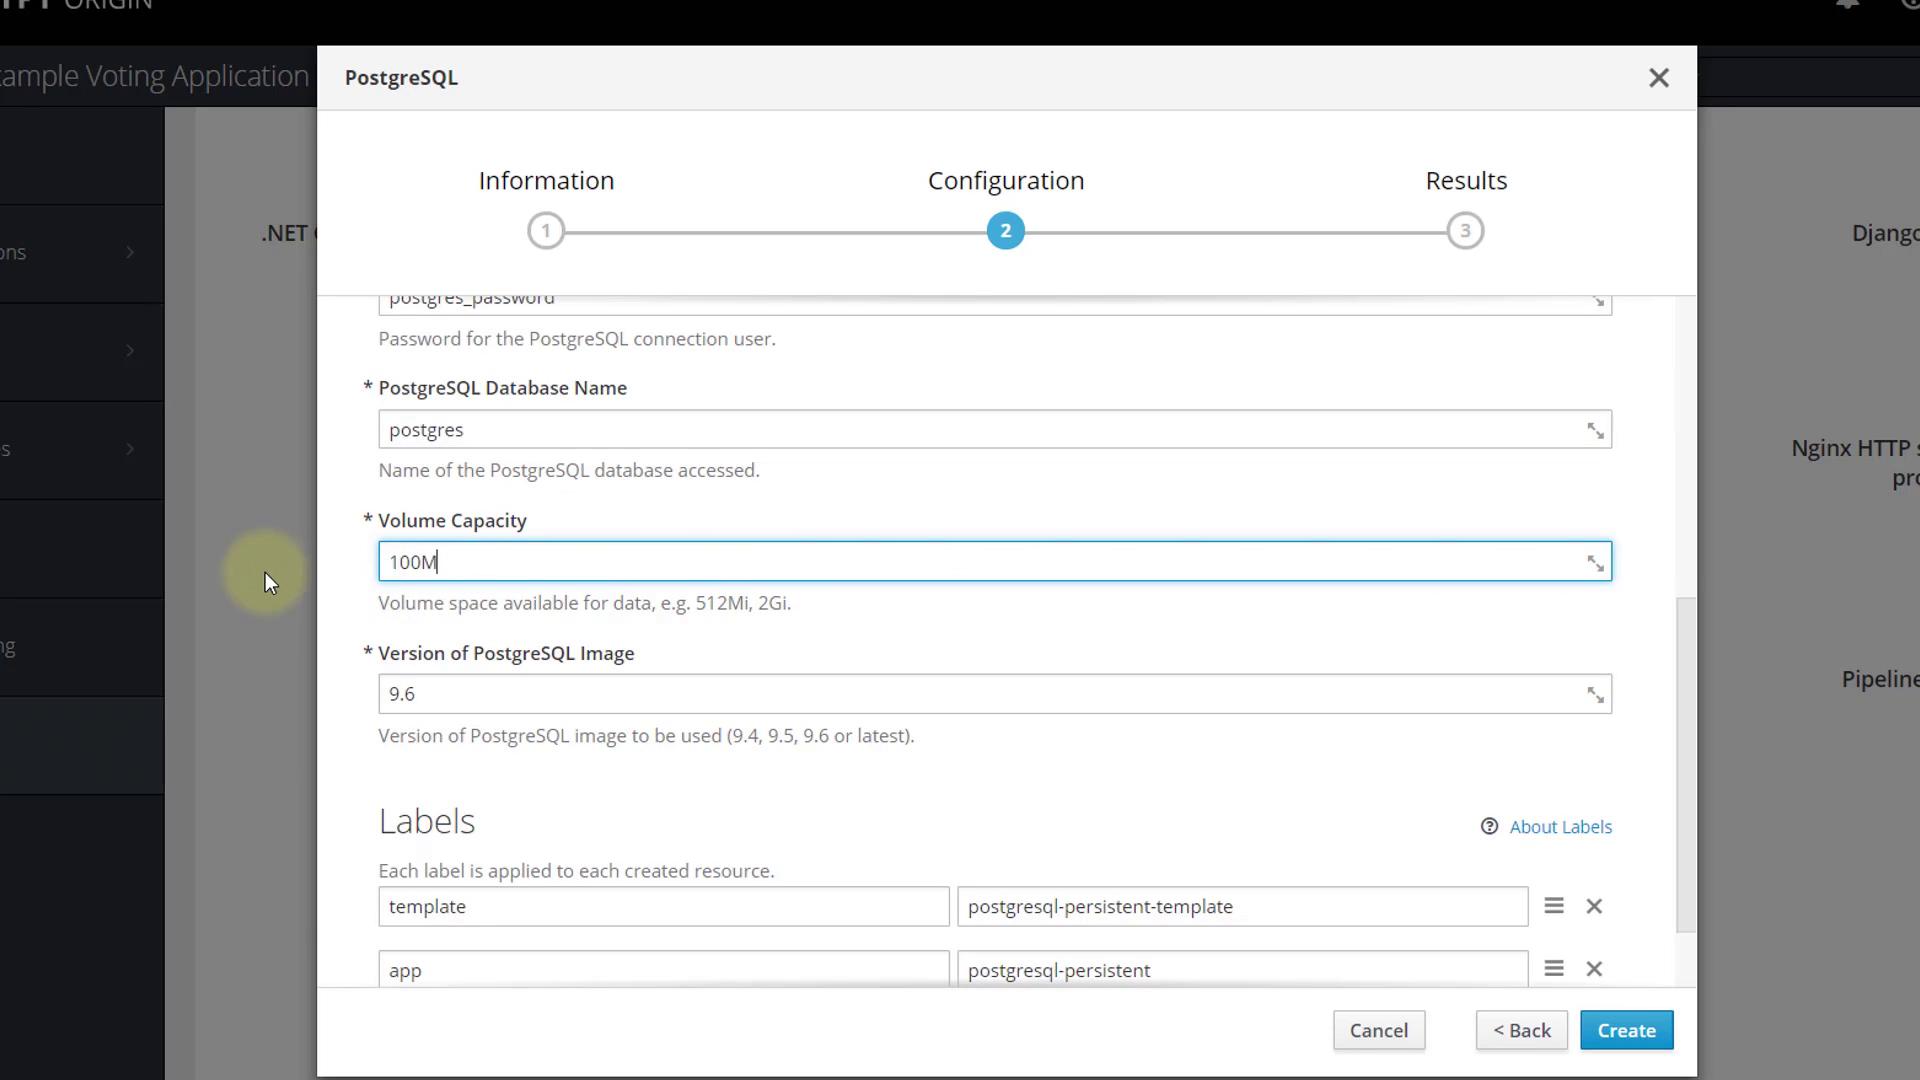
After refreshing your browser, the Redis service will be available for on-demand deployment. Now, select the catalog item to deploy a new Redis service:

The image shows the OpenShift Web Console with a configuration window for setting up a Redis (Ephemeral) application, including fields for memory limit, namespace, database service name, and Redis image version.

Use the default values, specify a password for Redis (this same password will be used by the web application), and click Create. Note down the connection information. By default, the service is available under the name redis.

Password: redis_password
Connection URL: redis://redis:6379/

Tip

Ensure that the Redis password set here matches the one used by your front-end application to avoid connectivity issues.


Deploying the Front-End Voting Application

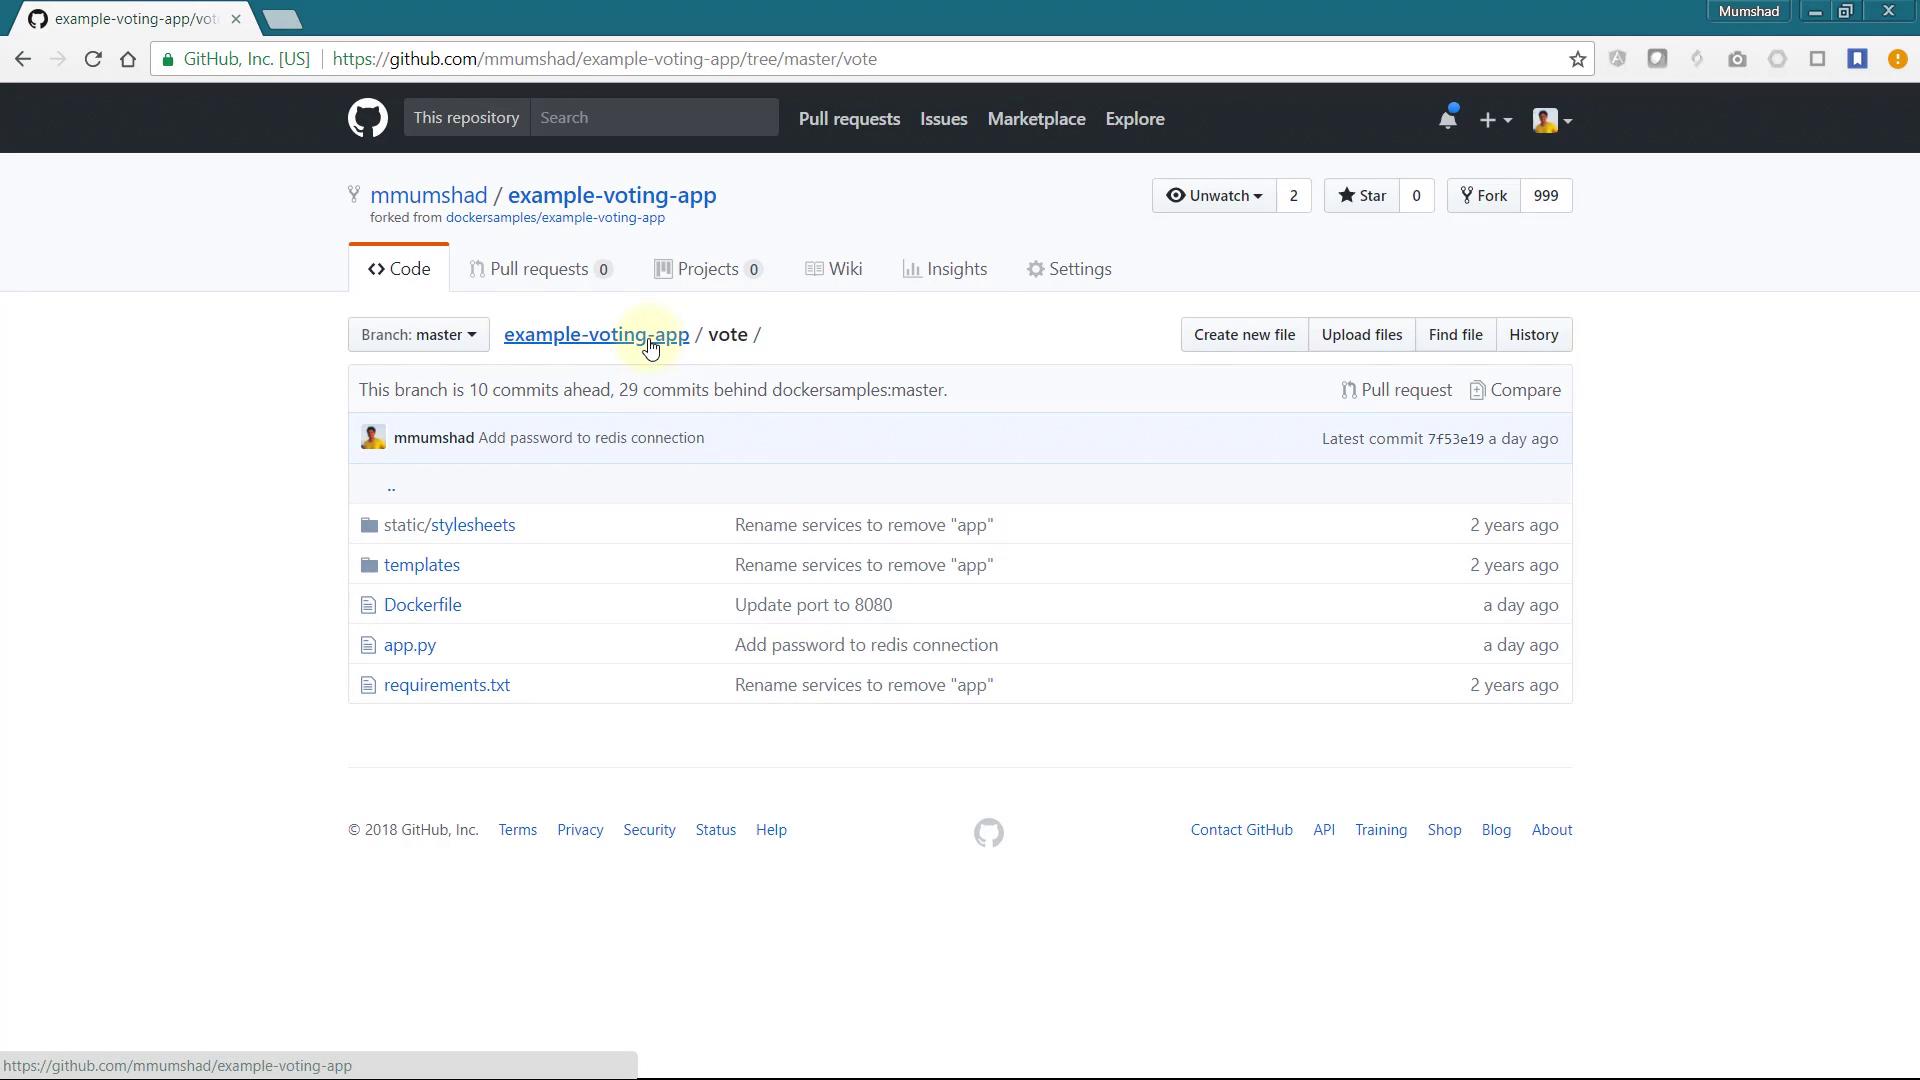
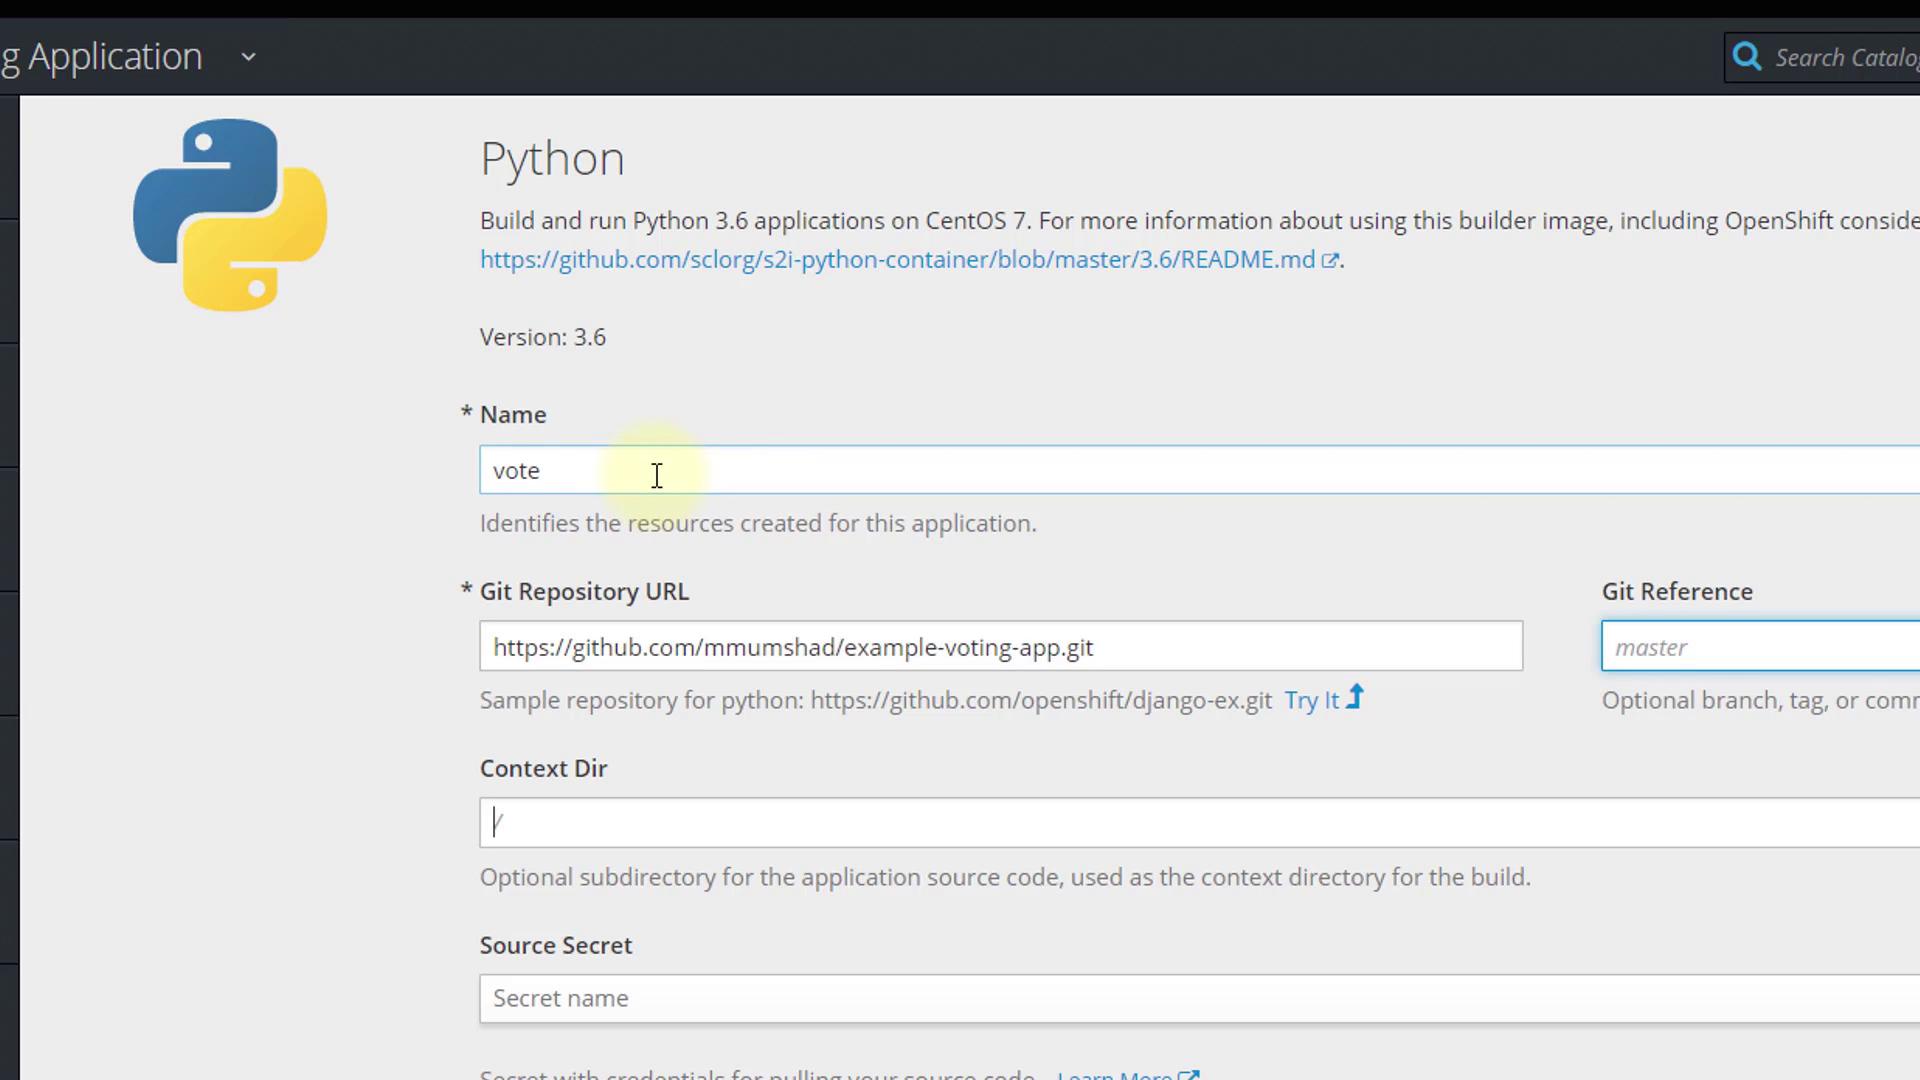
The front-end web application, which enables users to cast votes, is housed in the vote folder and is written in Python. To deploy this application:

  1. Add a new Python application to the project.
  2. Since the application does not reside at the repository root, click on Advanced Options and specify /vote as the context directory.

The image shows a GitHub repository page for "example-voting-app" with a list of files and directories, including "Dockerfile" and "app.py". The branch is 10 commits ahead and 29 commits behind the master branch of the original repository.

The image shows the OpenShift Web Console with a dialog box for creating a Python application, prompting for version, application name, and Git repository details.

The image shows a setup screen for building a Python 3.6 application on CentOS 7, with fields for the application name, Git repository URL, and other configuration options.

Leave all other configurations as default and create the application. OpenShift will automatically generate the build and deployment configuration. Monitor the progress on the Overview page:

Pushing image 172.30.1.1:5000/voting-application/vote:latest ...
Pushed 0/10 layers, 1% complete
Pushed 1/10 layers, 14% complete
Pushed 2/10 layers, 22% complete
Pushed 3/10 layers, 31% complete
Pushed 4/10 layers, 41% complete
Pushed 5/10 layers, 51% complete

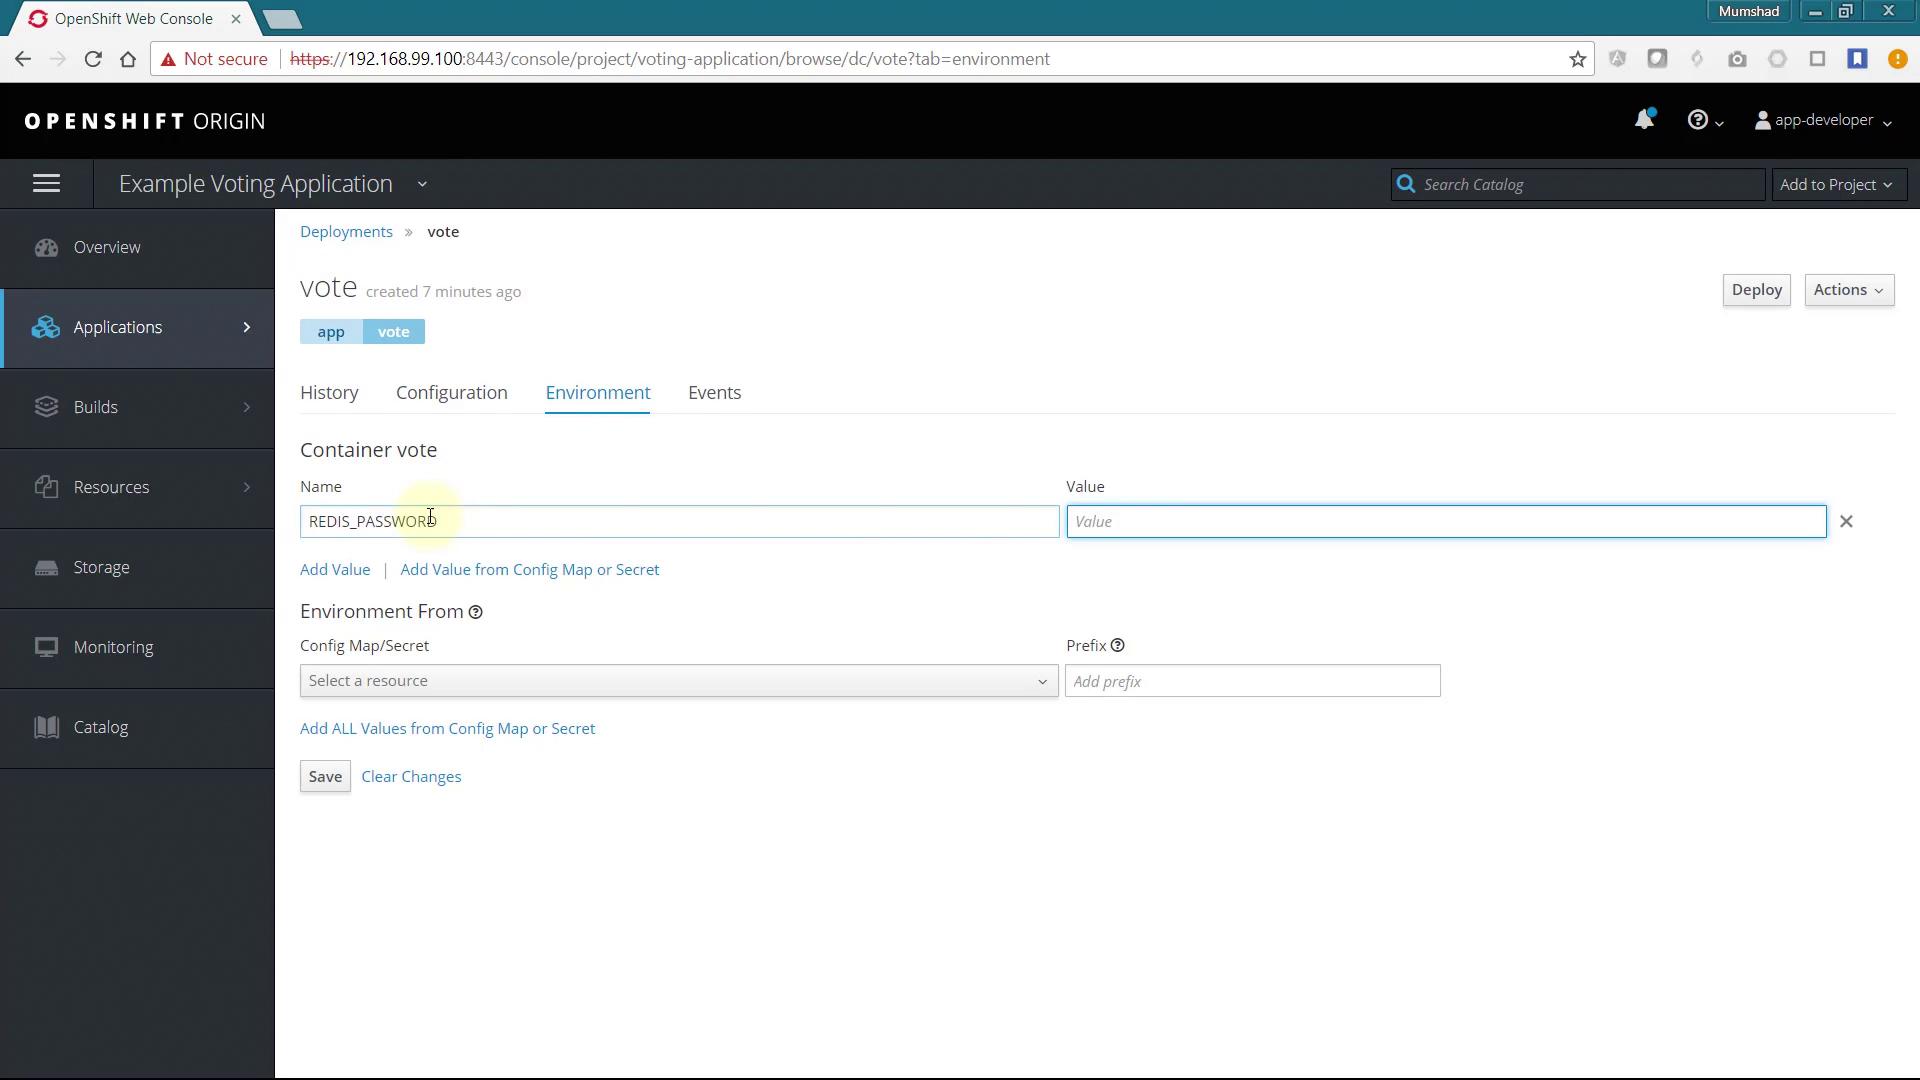
Once the build finishes and the application is deployed, click the provided link to access the Voting page.

At this stage, if you attempt to cast a vote, an error regarding an invalid password will occur. This error arises because the application expects the Redis connection password to be supplied via an environment variable named REDIS_PASSWORD.

To resolve this, update the deployment configuration to include the correct environment variable:

from flask import Flask, render_template, request, make_response, g
from redis import Redis
import os
import socket
import random
import json

option_a = os.getenv('OPTION_A', "Cats")
option_b = os.getenv('OPTION_B', "Dogs")
redis_password = os.getenv('REDIS_PASSWORD', "Dogs")
hostname = socket.gethostname()

app = Flask(__name__)

def get_redis():
    if not hasattr(g, 'redis'):
        g.redis = Redis(host="redis", db=0, password=redis_password, socket_timeout=5)
    return g.redis

@app.route("/", methods=['POST', 'GET'])
def hello():
    voter_id = request.cookies.get('voter_id')
    # Additional application logic follows...

Then, add a new environment variable named REDIS_PASSWORD for the Voting application and set it to the password used during Redis deployment.

The image shows the OpenShift web console displaying the environment configuration for a container named "vote" in an example voting application. It includes fields for setting environment variables, such as "REDIS_PASSWORD."

Once you update the environment variable, casting a vote will be successful. The first part of the application stack is now functioning as expected.


Deploying the Result Application

The result application, which displays voting outcomes, relies on PostgreSQL for its backend storage. Follow these steps:

  1. Deploy the PostgreSQL service (available by default in the catalog). Use db as the database service name.
  2. Configure the username and password. While secrets offer greater security, this guide uses a simpler approach.

The image shows a configuration screen for setting up a PostgreSQL database in OpenShift Origin, with fields for memory limit, namespace, and database service name.

The image shows a configuration screen for setting up a PostgreSQL database, including fields for database name, volume capacity, and version selection. It also includes options for labeling the created resource.

After ensuring PostgreSQL is up and running, deploy the result application which is built using Node.js.

The image shows a design layout with five components: voting-app, result-app, redis, db, and worker, each represented by icons.

Like the Python application, create a Node.js application via Advanced Options:

  • Provide the application name and Git repository URL.
  • Set the context directory to /result.

By default, the application listens on port 4000. To change the accessible port, override it by setting an environment variable named PORT to 8080:

var express = require('express'),
    async = require('async'),
    pg = require('pg'),
    cookieParser = require('cookie-parser'),
    bodyParser = require('body-parser'),
    methodOverride = require('method-override'),
    app = express(),
    server = require('http').Server(app),
    io = require('socket.io')(server);

io.set('transports', ['polling']);

var port = process.env.PORT || 4000;

io.sockets.on('connection', function(socket) {
    socket.emit('message', { text: 'Welcome!' });
    
    socket.on('subscribe', function(data) {
        socket.join(data.channel);
    });
});

After setting the environment variable, create the Node.js application and monitor the build progress. Upon successful deployment, access the application through the provided route URL. Note that while the results page will display vote counts, it will continue to show a 50-50 split because the worker application is not yet active.


Deploying the Worker Application

The worker application processes votes and uses a Docker build strategy, unlike the previous applications which used Source-to-Image (S2I). To deploy the worker:

  1. Add a new application via Advanced Options, pointing to your Git repository with the context directory /worker.
  2. Once added, ignore the automatically triggered build.
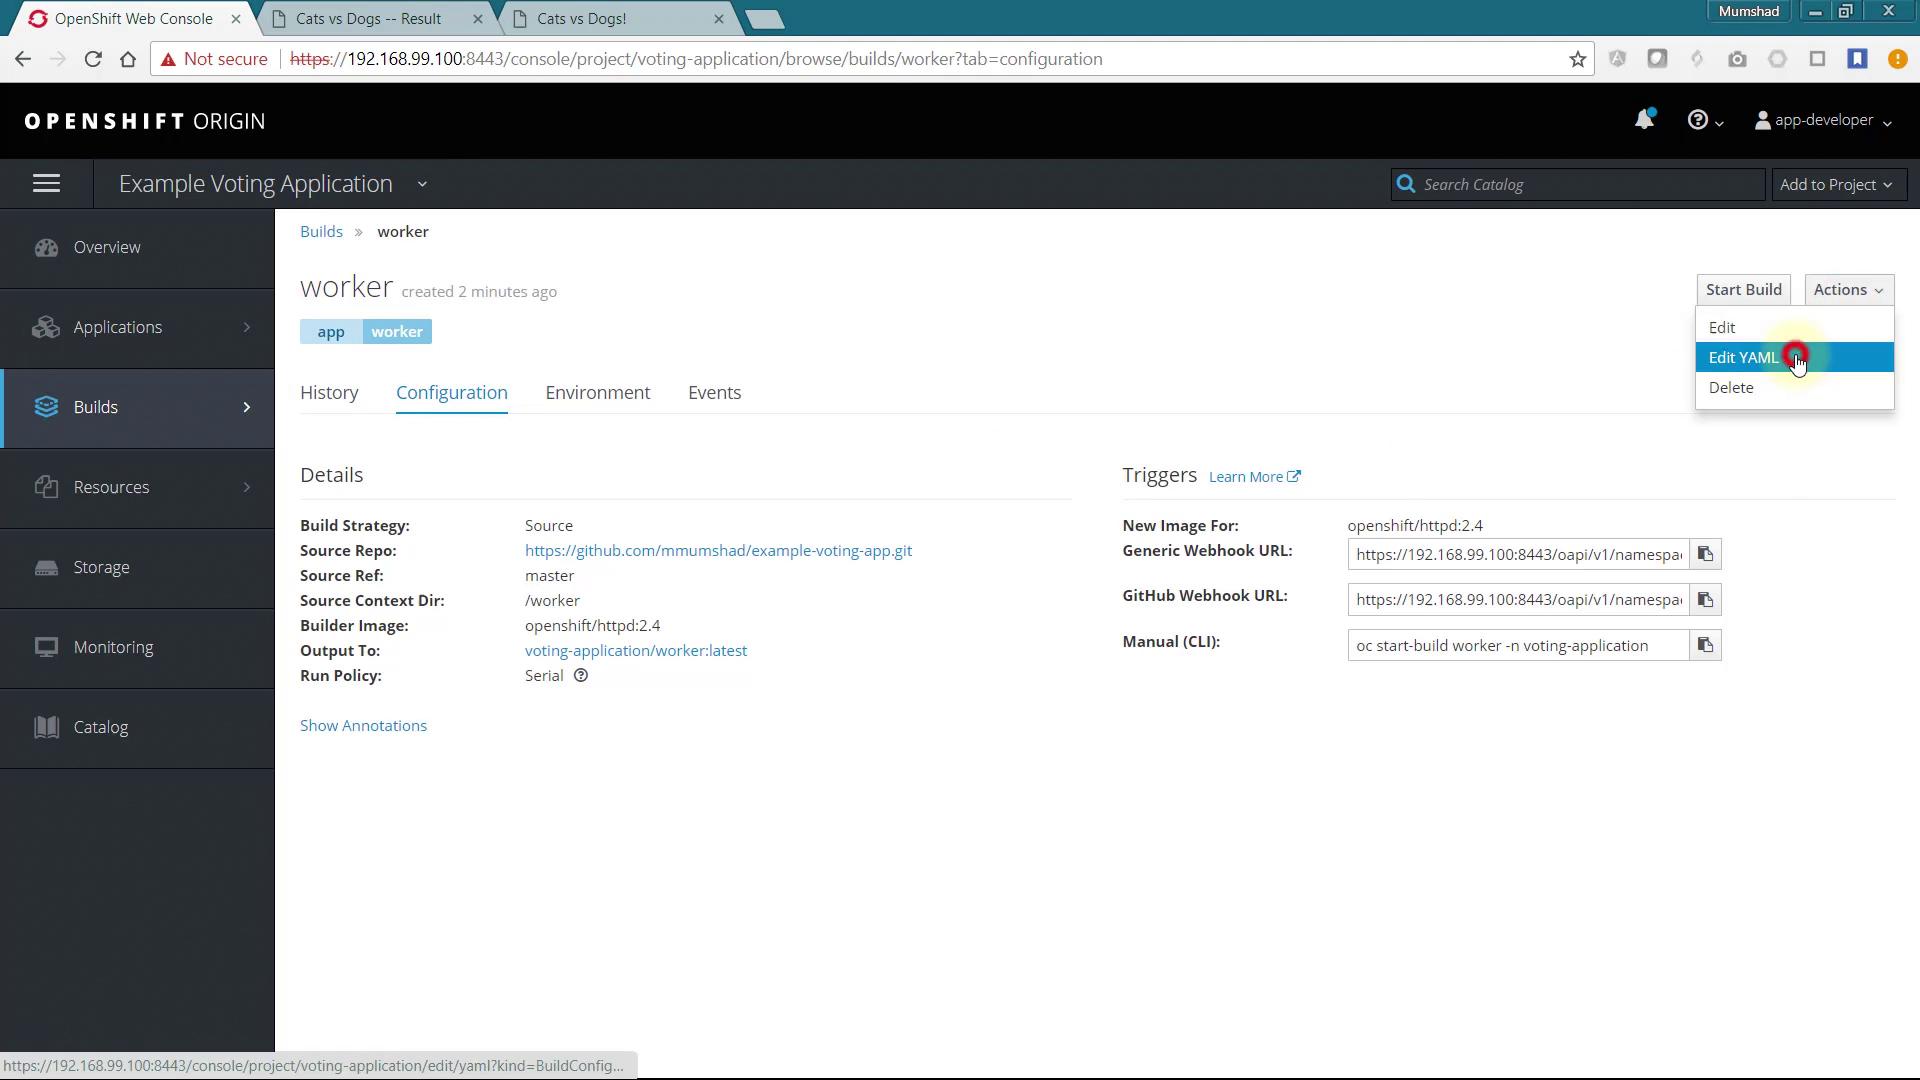
  3. Navigate to the build configuration, select "Edit YAML" and make the following changes:
    • Change the build strategy from Source to Docker.
    • Remove the "from" section.
  4. Save the changes and start the build.

The image shows the OpenShift web console displaying the configuration details for a build named "worker" in an example voting application project. It includes information about the build strategy, source repository, and triggers, with options to edit or delete the configuration.

Here is an example of the updated build configuration:

name: 'worker:latest'
postCommit: {}
resources: {}
runPolicy: Serial
source:
  contextDir: /worker
  git:
    ref: master
    uri: 'https://github.com/mmushad/example-voting-app.git'
    type: Git
strategy:
  dockerStrategy:
    type: Docker
triggers:
  - generic:
      secret: 5ac5afba8e981c19
      type: Generic
  - github:
      secret: f65dcaaa35825fb0
      type: GitHub
  - imageChange:
      lastTriggeredImageID: >
        docker.io/centos/httpd-24-centos7@sha256:d47bd682139adc7af6fcf684163abb8f8fc53196e4ec285357989a837b300abf62
      type: ImageChange
status:
  lastVersion: 1

Once the build completes, a new Docker image is pushed and deployed. Review the build logs to confirm votes are being processed:

Pushing image 172.30.1.1:5000/voting-application/worker:latest ...
Pushed 0/10 layers, 0% complete
Pushed 1/10 layers, 9% complete
Pushed 2/10 layers, 11% complete
Pushed 3/10 layers, 45% complete
Pushed 4/10 layers, 56% complete
Pushed 5/10 layers, 61% complete
Pushed 6/10 layers, 65% complete
Pushed 7/10 layers, 83% complete
Pushed 8/10 layers, 91% complete
Pushed 9/10 layers, 91% complete

After deployment, accessing the result page should display updated vote counts along with log output similar to:

Connected to redis
Connected to db
Watching vote queue
Processing vote for 'a' by 'a44ff79cd088d2'
Processing vote for 'b' by 'a44ff79cd088d2'

Changes in votes are applied immediately, verifying that the worker application is processing the votes correctly.


Conclusion

This guide demonstrated the deployment of a multi-tier voting application on an OpenShift cluster. By following the steps to deploy the Redis service, front-end voting application, Node.js-based result application, and the Docker-built worker, you now have a fully functional voting system with proper inter-service communication.

Happy deploying, and see you in the next lesson!


For further details on OpenShift deployments and troubleshooting tips, be sure to check out OpenShift Documentation.

Watch Video

Watch video content

Previous
Example Voting Application