OpenTofu: A Beginners Guide to a Terraform Fork Including Migration From Terraform
OpenTofu Import Tainting Resources and Deubugging
Demo Tofu Import
Welcome to this step-by-step guide on importing existing AWS resources into OpenTofu. By the end of this tutorial, you'll know how to discover unmanaged resources, import an EC2 instance, and manage it alongside your Terraform code.
Prerequisites
- OpenTofu CLI installed
- AWS CLI configured for LocalStack (or your AWS account)
- A project directory named
project-jade
1. Initialize the Project Directory
Open your terminal and navigate to the project-jade
folder:
cd flashroot/opentofu-projects/project-jade/
2. Review the Existing Terraform Configuration
Below is the current HCL setup. It defines an AWS provider, global variables, and a set of EC2 instances:
terraform {
required_providers {
aws = {
source = "hashicorp/aws"
version = "4.15.0"
}
}
}
provider "aws" {
region = "us-east-1"
skip_credentials_validation = true
skip_requesting_account_id = true
endpoints {
ec2 = "http://aws:4566"
}
}
variable "name" {
type = set(string)
default = ["jade-webserver", "jade-lbr", "jade-app1", "jade-app2"]
}
variable "ami" {
default = "ami-0c9bfc21ac5bf10eb"
}
variable "instance_type" {
default = "t2.nano"
}
variable "key_name" {
default = "jade"
}
resource "aws_instance" "ruby" {
for_each = var.name
ami = var.ami
instance_type = var.instance_type
key_name = var.key_name
tags = {
Name = each.value
}
}
output "instances" {
value = aws_instance.ruby
}
Variable | Description | Example Default |
---|---|---|
var.name | Set of EC2 instance names | ["jade-webserver","jade-lbr","..."] |
var.ami | AMI ID for all instances | "ami-0c9bfc21ac5bf10eb" |
var.instance_type | EC2 instance type | "t2.nano" |
var.key_name | SSH key pair name | "jade" |
3. Identify Unmanaged Resources
To list all resources tracked in state versus your code, run:
tofu show
Compare this output with your HCL.
Question: Which resource appears in the state but not in the configuration?
Answer: An EC2 instance (e.g., jade-agent
) that wasn’t defined in code.
4. Provision the SSH Key Pair
OpenTofu did not create the jade
key pair—it was generated via AWS CLI:
aws ec2 create-key-pair \
--endpoint http://aws:4566 \
--key-name jade \
--query 'KeyMaterial' \
--output text > jade.pem
This command writes the private key to jade.pem
.
Warning
Keep your private keys out of version control. Add jade.pem
to .gitignore
.
5. Locate the External EC2 Instance ID
Another EC2 instance named Jade-MW was created manually. Retrieve its Instance ID:
aws ec2 describe-instances --endpoint http://aws:4566
Sample JSON excerpt:
{
"Reservations": [
{
"Instances": [
{
"ImageId": "ami-0b32bca746b12849",
"InstanceId": "i-1bd18cac05184c14",
"InstanceType": "t2.large",
"KeyName": "jade",
...
}
]
}
]
}
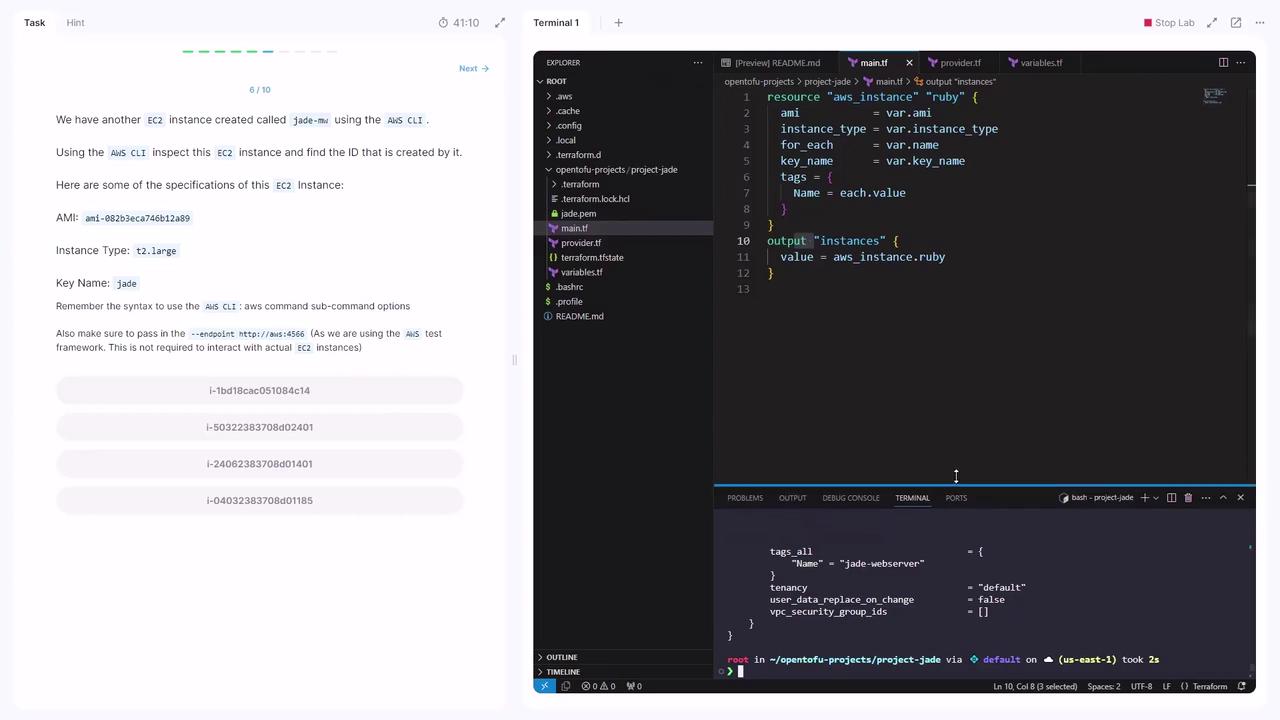
Instance ID:
i-1bd18cac05184c14
6. Import the EC2 Instance into OpenTofu
Create an empty resource block in main.tf:
resource "aws_instance" "jade-mw" { }
Import the existing EC2 resource:
tofu import aws_instance.jade-mw i-1bd18cac05184c14
7. Complete the Imported Resource Definition
After import, running tofu apply
will show missing arguments. Inspect the imported state:
tofu show
Then update main.tf with the required properties:
resource "aws_instance" "jade-mw" {
ami = "ami-0b32bca746b12849"
instance_type = "t2.large"
key_name = "jade"
tags = {
Name = "jade-mw"
}
}
Note
You can always re-run tofu show
to confirm attribute names and values for any imported resource.
8. Validate the Configuration
Run a plan to ensure no changes are pending:
tofu plan
You should see 0 to add, 0 to change, 0 to destroy.
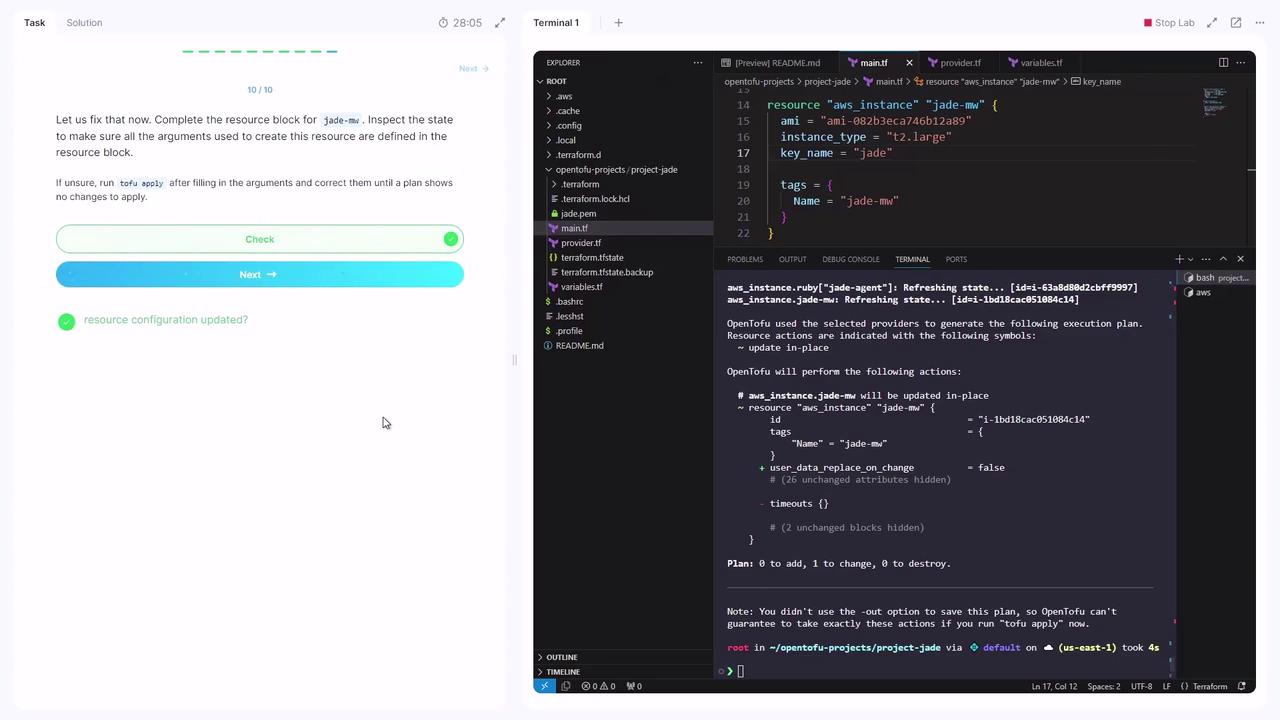
Congratulations! You’ve successfully imported and now manage an existing AWS EC2 instance with OpenTofu.
References
Watch Video
Watch video content
Practice Lab
Practice lab