> ## Documentation Index
> Fetch the complete documentation index at: https://notes.kodekloud.com/llms.txt
> Use this file to discover all available pages before exploring further.
# Demo AWS EC2 and Provisioners
> This tutorial covers provisioning an AWS EC2 instance using OpenTofu, including configuration, SSH key management, user data scripts, and automation with provisioners.
Welcome to this hands-on tutorial on provisioning an AWS EC2 instance using OpenTofu (a community-driven fork of Terraform). You’ll learn how to:
* Create and configure an EC2 instance
* Manage SSH keys
* Apply user data scripts
* Use provisioners for automation
* Allocate and associate an Elastic IP
* Understand Terraform’s dependency graph
This guide assumes you have AWS credentials configured and the OpenTofu CLI installed.
## Prerequisites
* OpenTofu CLI installed (`tofu version`)
* AWS CLI configured (`aws configure`)
* An SSH key pair (we’ll generate one in step 2)
***
## 1. Provision a Simple EC2 Instance
1. Change to your project directory and open `main.tf`:
```bash theme={null}
cd /root/OpenTofu/projects/project-cerberus/
touch main.tf
```
2. Define the EC2 resource and variables:
```hcl theme={null}
resource "aws_instance" "cerberus" {
ami = var.ami
instance_type = var.instance_type
}
variable "ami" {
default = "ami-06178c7f087598769c"
}
variable "region" {
default = "eu-west-2"
}
variable "instance_type" {
default = "m5.large"
}
```
3. Initialize and apply:
```bash theme={null}
tofu init
tofu apply
```
Example output:
```plaintext theme={null}
Plan: 1 to add, 0 to change, 0 to destroy.
aws_instance.cerberus: Creating...
aws_instance.cerberus: Creation complete after 12s [id=i-3f85199c9711d152f]
Apply complete! Resources: 1 added, 0 changed, 0 destroyed.
```
Inspect your instance attributes:
```bash theme={null}
tofu show
```
***
## 2. Create an SSH Key Pair
Generate an SSH key pair on your local machine:
```bash theme={null}
ssh-keygen -t rsa -b 4096 -f ~/.ssh/cerberus -N ""
```
Then add this to `main.tf`:
```hcl theme={null}
resource "aws_key_pair" "cerberus_key" {
key_name = "cerberus"
public_key = file("~/.ssh/cerberus.pub")
}
```
Apply the change:
```bash theme={null}
tofu init
tofu apply
```
You should see:
```plaintext theme={null}
aws_key_pair.cerberus_key: Creating...
aws_key_pair.cerberus_key: Creation complete after 0s [id=cerberus]
Apply complete! Resources: 1 added, 0 changed, 0 destroyed.
```
***
## 3. Attach the Key to the EC2 Instance
Update the `aws_instance` block to reference the key:
```hcl theme={null}
resource "aws_instance" "cerberus" {
ami = var.ami
instance_type = var.instance_type
key_name = "cerberus"
}
```
Re-apply:
```bash theme={null}
tofu apply
```
```plaintext theme={null}
aws_instance.cerberus: Modifying... [id=i-3f85199c9711d152f]
aws_instance.cerberus: Destruction complete after 10s
aws_instance.cerberus: Creation complete after 11s [id=i-2386285c5705afa5071]
Apply complete! Resources: 1 added, 0 changed, 1 destroyed.
```
***
## 4. Install Nginx via User Data
Provision your instance to install Nginx at launch:
1. Create `install-nginx.sh`:
```bash theme={null}
#!/bin/bash
apt-get update
apt-get install -y nginx
```
2. Reference it in your EC2 resource:
```hcl theme={null}
resource "aws_instance" "cerberus" {
ami = var.ami
instance_type = var.instance_type
key_name = "cerberus"
user_data = file("./install-nginx.sh")
}
```
User data scripts run only on the first instance launch. Future `tofu apply` runs will not re-execute `user_data`.
Attempt to apply:
```bash theme={null}
tofu apply
```
You’ll see no changes if the instance already exists.
***
## 5. Provisioners and Connection Blocks
Terraform supports three built-in provisioners. Only **local-exec** does **not** require a `connection` block.
| Provisioner | Connection Required? | Use Case |
| ----------- | -------------------- | ---------------------------------------------- |
| local-exec | No | Run commands on the machine executing OpenTofu |
| remote-exec | Yes | Execute SSH/WinRM commands on the remote host |
| file | Yes | Upload/download files to/from the resource |
Remember: provisioners must be nested inside the resource block they target.
***
## 6. Retrieve the Public IPv4 Address
After creating your EC2 instance, run:
```bash theme={null}
tofu show aws_instance.cerberus
```
Look for the `public_ip` attribute (for example, `54.214.169.15`).
***
## 7. Reserve and Associate an Elastic IP
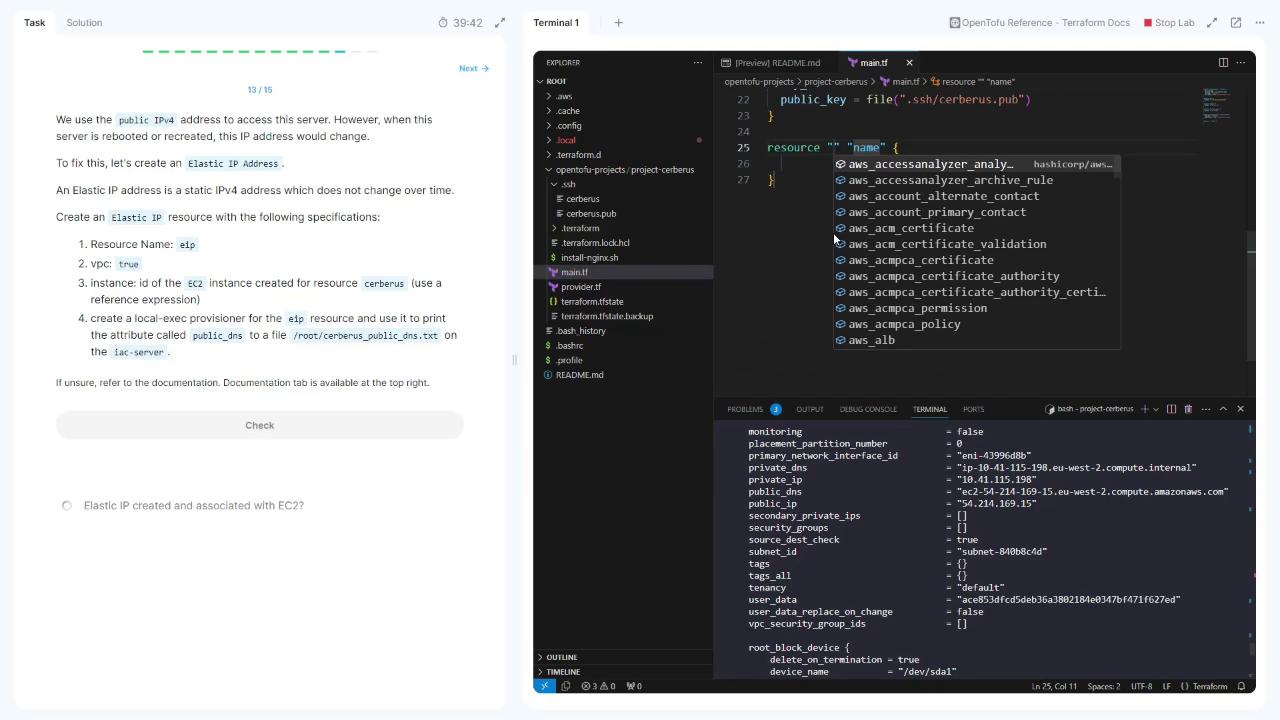
An Elastic IP (EIP) is a static public IPv4 address. Add this resource:
```hcl theme={null}
resource "aws_eip" "eip" {
vpc = true
instance = aws_instance.cerberus.id
}
```
To save the public DNS to a file, use a `local-exec` provisioner:
```hcl theme={null}
resource "aws_eip" "eip" {
vpc = true
instance = aws_instance.cerberus.id
provisioner "local-exec" {
command = < /root/serverless_publicDNS.txt
EOT
}
}
```
This block allocates and associates an Elastic IP, then writes the instance’s public DNS to `/root/serverless_publicDNS.txt`.
Apply your changes:
```bash theme={null}
tofu apply
```
Inspect the EIP:
```bash theme={null}
tofu show aws_eip.eip
```
Note the `public_ip` (e.g., `52.47.169.195`).
***
## 8. Understanding Dependency Direction
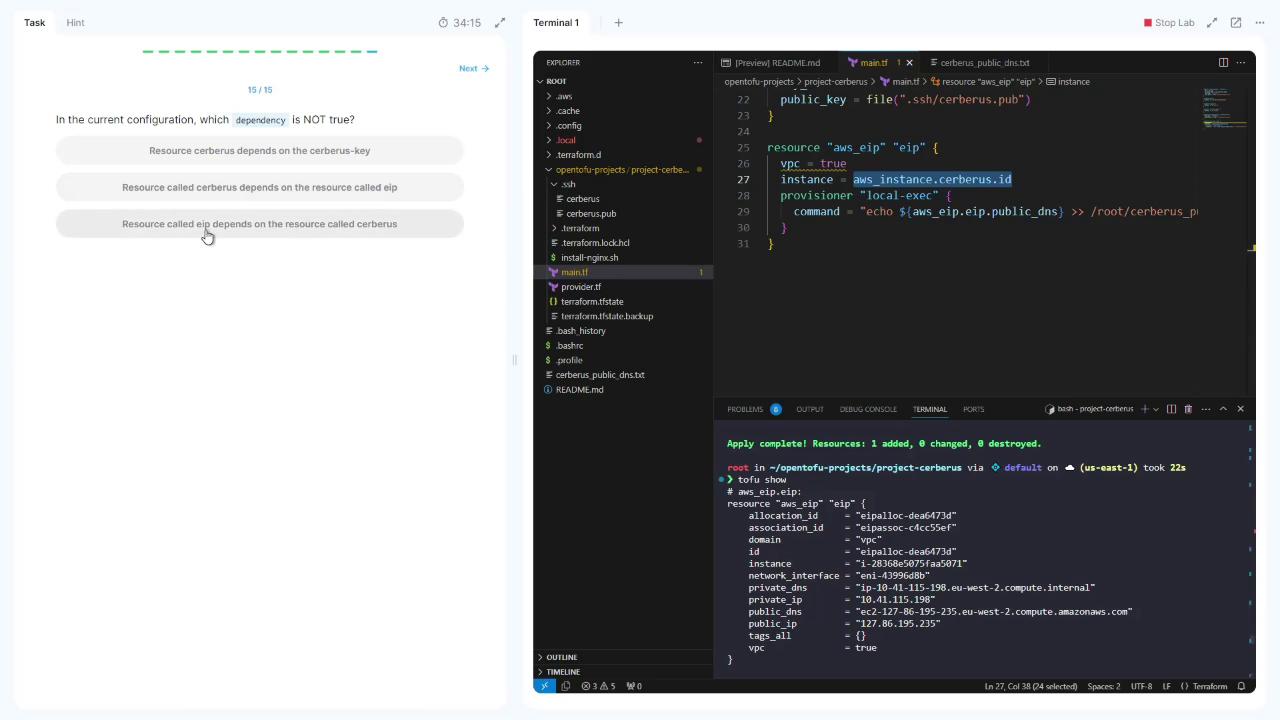
Because `aws_eip.eip` references `aws_instance.cerberus.id`, Terraform automatically creates the EC2 instance before allocating the EIP. There’s no reverse dependency.
Terraform’s graph engine infers resource creation order by scanning references. No explicit `depends_on` is needed here.
***
That completes this lab. Thank you for following along!
## Links and References
* [OpenTofu CLI Repository](https://github.com/opentofu/opentofu)
* [AWS EC2 Documentation](https://docs.aws.amazon.com/ec2/index.html)
* [Terraform Provisioners](https://www.terraform.io/docs/language/resources/provisioners/syntax.html)
* [SSH Key Management](https://docs.aws.amazon.com/AWSEC2/latest/UserGuide/ec2-key-pairs.html)