> ## Documentation Index
> Fetch the complete documentation index at: https://notes.kodekloud.com/llms.txt
> Use this file to discover all available pages before exploring further.
# Creating Backstage Instance
> Guide to install, configure, and run a Backstage instance on a remote server, covering prerequisites, scaffolding, troubleshooting, configuration, and remote access tips
This guide walks through creating a Backstage instance on a remote server. It preserves the original sequence of steps and examples while improving flow, troubleshooting guidance, and configuration notes for running Backstage in a remote environment.
> Note: terminal prompts like
>
> ```
> user1 in 🌐 kodekloud in ~
> ❯
> ```
>
> indicate a shell connected to a remote server (not your local workstation). When running Backstage on a remote server you may need to update host/IP/base URLs so the UI is reachable from your workstation.
Before you begin, ensure you have shell access to the target server and permission to install Node.js, Yarn, and other developer tools. You can scaffold a Backstage app on your server and then expose it to your workstation via SSH tunneling, a reverse proxy, or by binding services to 0.0.0.0 and opening firewall ports.
## Prerequisites
| Requirement | Purpose | Example / Notes |
| ----------- | --------------------------------------------- | -------------------------------- |
| Node.js | Runtime for Backstage (>= 18.12 recommended) | Use `nvm` to manage versions |
| Yarn | Backstage uses Yarn for dependency management | `npm install -g yarn` if missing |
| npx | Runs the Backstage scaffolder CLI | Comes with Node/npm |
## Install Node.js (recommended via nvm)
Using nvm (Node Version Manager) is recommended because it makes switching Node versions simple and avoids system-wide package issues.
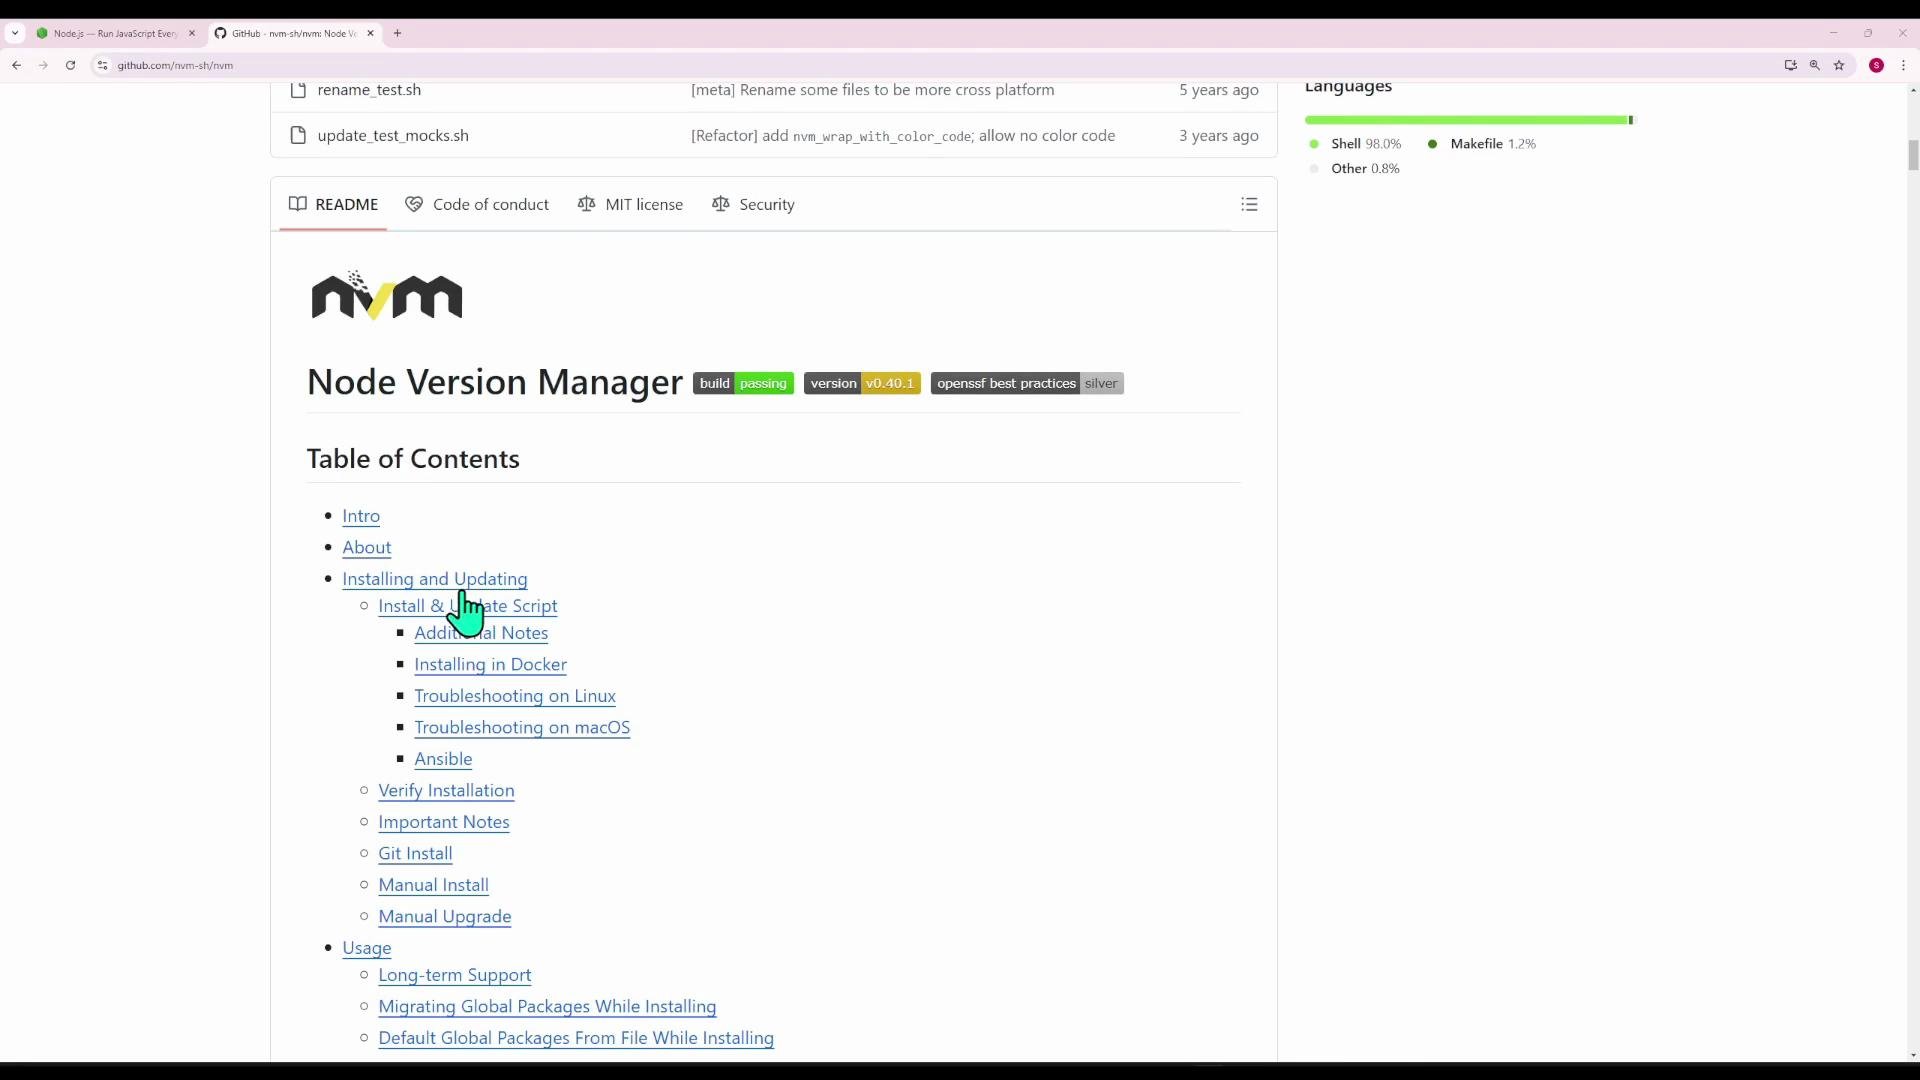
Follow the nvm install directions from the project README and run the install script. For reference, the README "Install & Update Script" section looks like this:
After installing nvm, install Node 18 (or a later 18.x/20.x release). Example:
```bash theme={null}
# Install the latest 18.x and verify
nvm install 18
node --version
# Example output: v18.20.0
```
You can switch between versions easily:
```bash theme={null}
nvm use 18 # switch to installed v18.x
nvm install 20
nvm use 20
node --version # verify v20.x when needed
```
A minimal Node.js example (for quick verification):
```javascript theme={null}
// server.mjs
import { createServer } from 'node:http';
const server = createServer((req, res) => {
res.writeHead(200, { 'Content-Type': 'text/plain' });
res.end('Hello World!\n');
});
server.listen(3000, '127.0.0.1', () => {
console.log('Listening on 127.0.0.1:3000');
});
// run with `node server.mjs`
```
## Create your Backstage app
Follow the official Backstage documentation for details on creating an app:
* Creating your Backstage App: [https://backstage.io/docs/getting-started/create-an-app](https://backstage.io/docs/getting-started/create-an-app)
The scaffolder can be run with npx:
```bash theme={null}
npx @backstage/create-app@latest
```
Example CLI interaction:
```bash theme={null}
➜ npx @backstage/create-app@latest
Need to install the following packages:
@backstage/create-app@0.5.x
Ok to proceed? (y) y
? Enter a name for the app [required] (backstage)
```
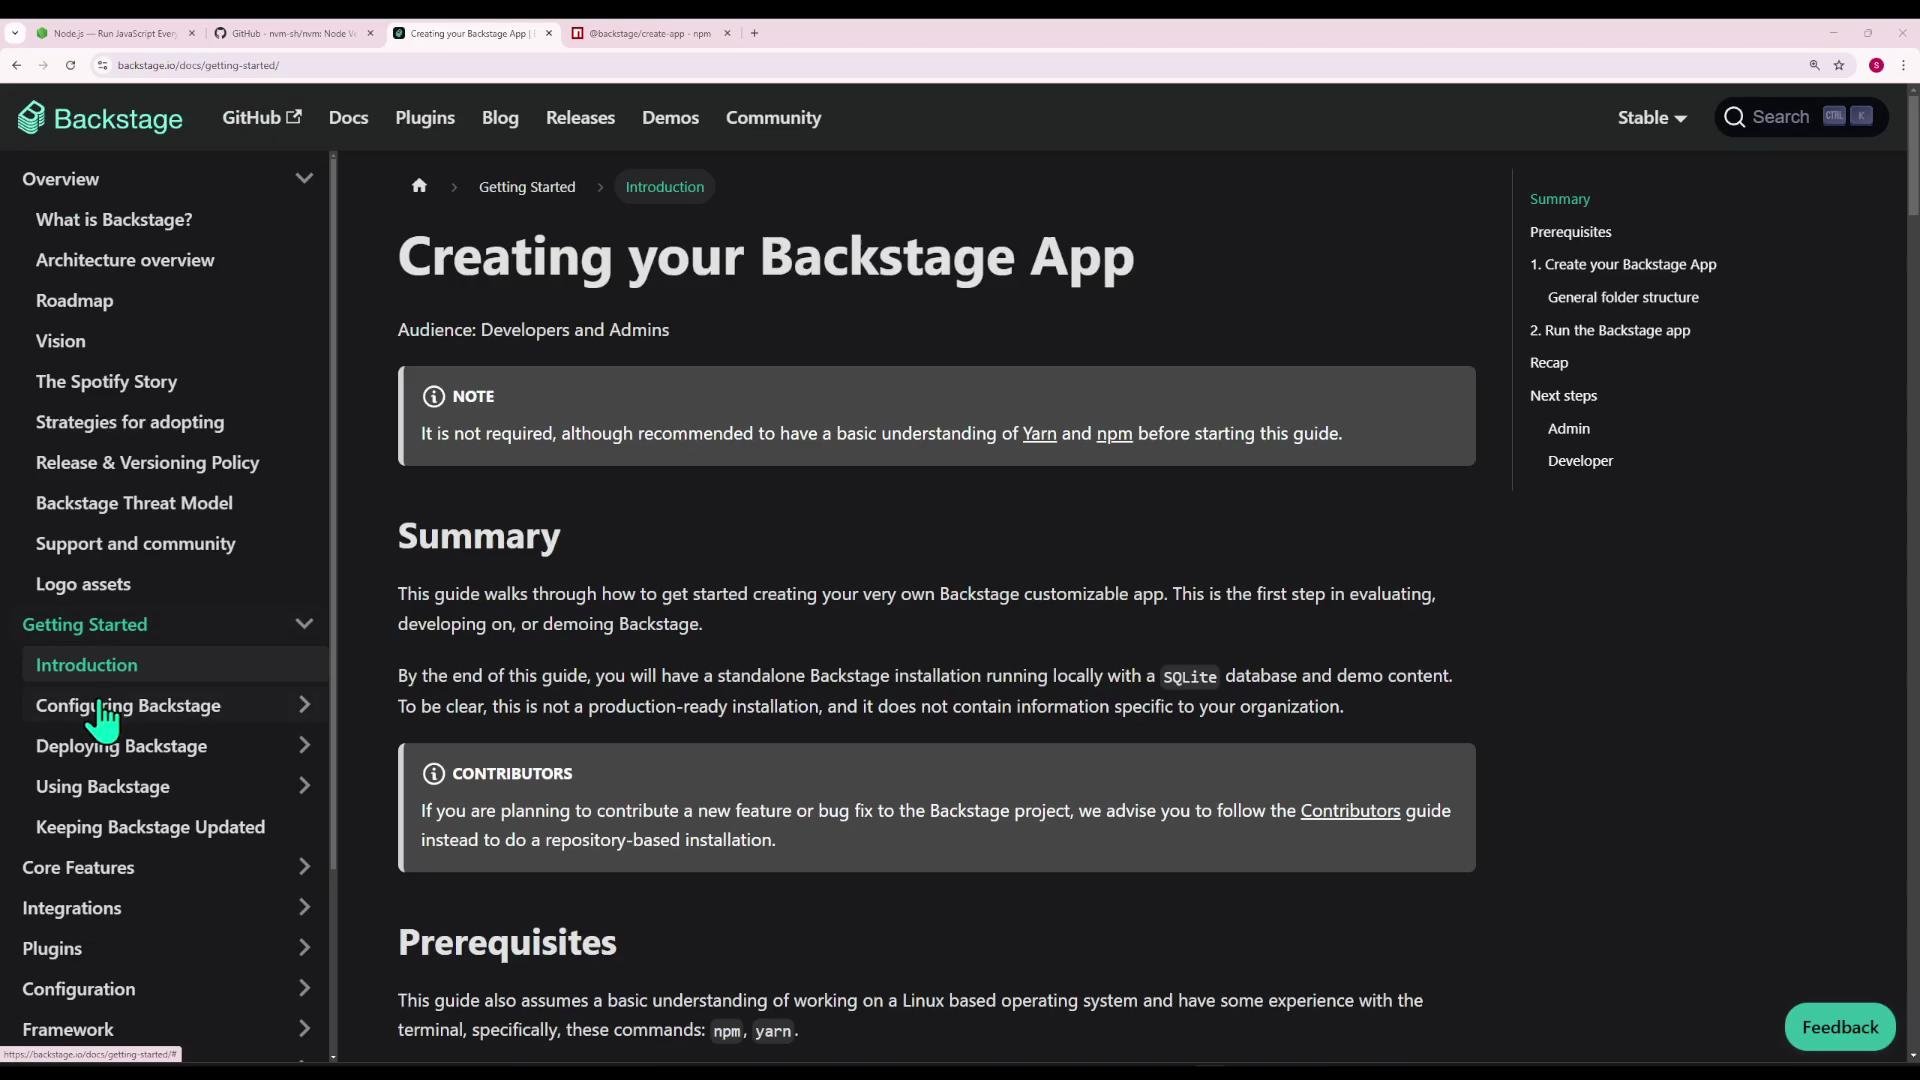
Reference screenshot from the Backstage docs:
### After scaffolding
If the scaffold completes, the CLI runs `yarn install` and TypeScript checks. A successful run ends with messages like:
```text theme={null}
executing yarn install ✓
executing yarn tsc ✓
🏅 Successfully created backstage
All set! Now you might want to:
Run the app: cd backstage && yarn dev
Set up the software catalog: https://backstage.io/docs/features/software-catalog/configuration
Add authentication: https://backstage.io/docs/auth/
```
If you need to retry after a failed run, remove the partially-created directory:
```bash theme={null}
rm -rf backstage/
npx @backstage/create-app@latest
```
## Common errors and how to fix them
### 1) Yarn not found
During scaffolding the CLI executes `yarn install`. If Yarn is missing you'll see an error like:
```text theme={null}
executing yarn install
/bin/sh: 1: yarn: not found
Error: Could not execute command yarn install
🔥 Failed to create app!
```
Fix: install Yarn globally (for the Node version currently active under nvm):
```bash theme={null}
npm install -g yarn
yarn --version
# Example output: 1.22.22
```
### 2) Node version too old
Backstage requires Node >= 18.12 in the toolchain. If you run the scaffolder with an older Node, you may see:
```text theme={null}
Usage Error: This tool requires a Node version compatible with >=18.12.0 (got 16.20.2). Upgrade Node, or set `YARN_IGNORE_NODE=1` in your environment.
```
Fix with nvm:
```bash theme={null}
nvm install 18
nvm use 18
node --version
# v18.x.y
```
Note: global npm packages are per-Node installation when using nvm. If Yarn was installed under a different Node version, (re)install it for the currently active Node:
```bash theme={null}
npm install -g yarn
```
## Inspect the generated repository
Change into the created repo:
```bash theme={null}
cd backstage
ls
# app-config.local.yaml app-config.yaml packages plugins package.json yarn.lock ...
```
The repo is a Yarn workspaces monorepo. The root `package.json` includes workspace config and dev scripts. Example (excerpt):
```json theme={null}
{
"name": "root",
"version": "1.0.0",
"private": true,
"engines": { "node": ">=18.12" },
"scripts": {
"dev": "yarn workspaces foreach -A --include backend --include app --parallel --jobs unlimited -v -i run start",
"start": "yarn workspace app start",
"start-backend": "yarn workspace backend start",
"build:backend": "yarn workspace backend build",
"tsc": "tsc",
"clean": "backstage-cli repo clean",
"test": "backstage-cli repo test"
},
"workspaces": {
"packages": [
"packages/*",
"plugins/*"
]
},
"devDependencies": {
"@backstage/cli": "^0.29.5",
"typescript": "~5.4.0"
}
}
```
Monorepo layout:
* `packages/*` — contains the main `app` (frontend) and `backend`.
* `plugins/*` — individual Backstage plugins as separate packages.
Frontend (`packages/app`) is a React app with its own `package.json`, `src/`, and `public/`. Backend (`packages/backend`) includes server code, Dockerfile, and dependencies such as `@backstage/config`, `pg`, etc.
Frontend entrypoint example (`packages/app/src/index.tsx`):
```tsx theme={null}
import '@backstage/cli/asset-types';
import React from 'react';
import ReactDOM from 'react-dom/client';
import App from './App';
ReactDOM.createRoot(document.getElementById('root')!).render();
```
`public/index.html` contains the `div` where the React app mounts:
```html theme={null}
Backstage
```
## Configuration files
Backstage uses YAML configuration files:
* `app-config.yaml`
* `app-config.local.yaml`
* `app-config.production.yaml`
These configure backend `baseUrl`, listen `port`, CORS, proxy endpoints, and external integrations (GitHub, GitLab, etc.). Example backend config excerpt:
```yaml theme={null}
backend:
baseUrl: http://localhost:7007
listen:
port: 7007
# host: 127.0.0.1
csp:
connect-src: ["'self'", "http:", "https:"]
cors:
# CORS configuration
```
Adjust these files for remote deployments—particularly `baseUrl`—so the frontend can reach the backend when accessed from another machine.
## Run the app in development mode
From the repository root:
```bash theme={null}
yarn dev
```
This runs frontend and backend in parallel with hot reloading. Example output:
```text theme={null}
[app]: Loaded config from app-config.yaml
[app]: NOTE: Did not compute git version or commit hash (not a git repo)
[app]: [webpack-dev-server] Project is running at:
[app]: Loopback: http://localhost:3000/
[backend]: Loading config from app-config.yaml, app-config.local.yaml
[backend]: Listening on :7007
[backend]: Plugin initialization started: 'app', 'proxy', 'scaffolder', 'techdocs', 'auth', 'catalog', 'search'...
[app]: webpack compiled successfully
[backend]: executing yarn tsc ✓
```
Quick test from the server:
```bash theme={null}
curl localhost:3000
```
This should return the frontend HTML (index page) when the dev server is running.
When running Backstage on a remote server, the webpack dev server commonly binds to `localhost` (loopback) by default. To access the frontend from your workstation you must either bind the dev server to `0.0.0.0`, configure an SSH tunnel, or put a reverse proxy (e.g., Nginx) in front of the app. Also ensure firewall and security group rules allow required ports.
## Accessing Backstage from your workstation (remote tips)
To access Backstage running on a remote server:
* Webpack dev server: change its host from `localhost` to `0.0.0.0` or use an SSH tunnel (recommended for development).
* Backend `baseUrl`: update `app-config.yaml` or `app-config.local.yaml` to use the server's IP or domain so the frontend can reach the backend.
* Ports: open firewall ports (e.g., 3000 frontend, 7007 backend) or expose services with a reverse proxy and TLS.
* For production: prefer building the app and serving behind a proper reverse proxy with TLS rather than exposing dev servers directly.
The exact configuration changes (binding hosts, setting `baseUrl`, and reverse proxy examples) can be found in separate deployment and production-hardening guides on the Backstage docs.
## Links and References
* Backstage: Creating your Backstage App — [https://backstage.io/docs/getting-started/create-an-app](https://backstage.io/docs/getting-started/create-an-app)
* nvm README: [https://github.com/nvm-sh/nvm#install--update-script](https://github.com/nvm-sh/nvm#install--update-script)
* Backstage docs: [https://backstage.io/docs/](https://backstage.io/docs/)
 After installing nvm, install Node 18 (or a later 18.x/20.x release). Example:
```bash theme={null}
# Install the latest 18.x and verify
nvm install 18
node --version
# Example output: v18.20.0
```
You can switch between versions easily:
```bash theme={null}
nvm use 18 # switch to installed v18.x
nvm install 20
nvm use 20
node --version # verify v20.x when needed
```
A minimal Node.js example (for quick verification):
```javascript theme={null}
// server.mjs
import { createServer } from 'node:http';
const server = createServer((req, res) => {
res.writeHead(200, { 'Content-Type': 'text/plain' });
res.end('Hello World!\n');
});
server.listen(3000, '127.0.0.1', () => {
console.log('Listening on 127.0.0.1:3000');
});
// run with `node server.mjs`
```
## Create your Backstage app
Follow the official Backstage documentation for details on creating an app:
* Creating your Backstage App: [https://backstage.io/docs/getting-started/create-an-app](https://backstage.io/docs/getting-started/create-an-app)
The scaffolder can be run with npx:
```bash theme={null}
npx @backstage/create-app@latest
```
Example CLI interaction:
```bash theme={null}
➜ npx @backstage/create-app@latest
Need to install the following packages:
@backstage/create-app@0.5.x
Ok to proceed? (y) y
? Enter a name for the app [required] (backstage)
```
Reference screenshot from the Backstage docs:
After installing nvm, install Node 18 (or a later 18.x/20.x release). Example:
```bash theme={null}
# Install the latest 18.x and verify
nvm install 18
node --version
# Example output: v18.20.0
```
You can switch between versions easily:
```bash theme={null}
nvm use 18 # switch to installed v18.x
nvm install 20
nvm use 20
node --version # verify v20.x when needed
```
A minimal Node.js example (for quick verification):
```javascript theme={null}
// server.mjs
import { createServer } from 'node:http';
const server = createServer((req, res) => {
res.writeHead(200, { 'Content-Type': 'text/plain' });
res.end('Hello World!\n');
});
server.listen(3000, '127.0.0.1', () => {
console.log('Listening on 127.0.0.1:3000');
});
// run with `node server.mjs`
```
## Create your Backstage app
Follow the official Backstage documentation for details on creating an app:
* Creating your Backstage App: [https://backstage.io/docs/getting-started/create-an-app](https://backstage.io/docs/getting-started/create-an-app)
The scaffolder can be run with npx:
```bash theme={null}
npx @backstage/create-app@latest
```
Example CLI interaction:
```bash theme={null}
➜ npx @backstage/create-app@latest
Need to install the following packages:
@backstage/create-app@0.5.x
Ok to proceed? (y) y
? Enter a name for the app [required] (backstage)
```
Reference screenshot from the Backstage docs:
 ### After scaffolding
If the scaffold completes, the CLI runs `yarn install` and TypeScript checks. A successful run ends with messages like:
```text theme={null}
executing yarn install ✓
executing yarn tsc ✓
🏅 Successfully created backstage
All set! Now you might want to:
Run the app: cd backstage && yarn dev
Set up the software catalog: https://backstage.io/docs/features/software-catalog/configuration
Add authentication: https://backstage.io/docs/auth/
```
If you need to retry after a failed run, remove the partially-created directory:
```bash theme={null}
rm -rf backstage/
npx @backstage/create-app@latest
```
## Common errors and how to fix them
### 1) Yarn not found
During scaffolding the CLI executes `yarn install`. If Yarn is missing you'll see an error like:
```text theme={null}
executing yarn install
/bin/sh: 1: yarn: not found
Error: Could not execute command yarn install
🔥 Failed to create app!
```
Fix: install Yarn globally (for the Node version currently active under nvm):
```bash theme={null}
npm install -g yarn
yarn --version
# Example output: 1.22.22
```
### 2) Node version too old
Backstage requires Node >= 18.12 in the toolchain. If you run the scaffolder with an older Node, you may see:
```text theme={null}
Usage Error: This tool requires a Node version compatible with >=18.12.0 (got 16.20.2). Upgrade Node, or set `YARN_IGNORE_NODE=1` in your environment.
```
Fix with nvm:
```bash theme={null}
nvm install 18
nvm use 18
node --version
# v18.x.y
```
Note: global npm packages are per-Node installation when using nvm. If Yarn was installed under a different Node version, (re)install it for the currently active Node:
```bash theme={null}
npm install -g yarn
```
## Inspect the generated repository
Change into the created repo:
```bash theme={null}
cd backstage
ls
# app-config.local.yaml app-config.yaml packages plugins package.json yarn.lock ...
```
The repo is a Yarn workspaces monorepo. The root `package.json` includes workspace config and dev scripts. Example (excerpt):
```json theme={null}
{
"name": "root",
"version": "1.0.0",
"private": true,
"engines": { "node": ">=18.12" },
"scripts": {
"dev": "yarn workspaces foreach -A --include backend --include app --parallel --jobs unlimited -v -i run start",
"start": "yarn workspace app start",
"start-backend": "yarn workspace backend start",
"build:backend": "yarn workspace backend build",
"tsc": "tsc",
"clean": "backstage-cli repo clean",
"test": "backstage-cli repo test"
},
"workspaces": {
"packages": [
"packages/*",
"plugins/*"
]
},
"devDependencies": {
"@backstage/cli": "^0.29.5",
"typescript": "~5.4.0"
}
}
```
Monorepo layout:
* `packages/*` — contains the main `app` (frontend) and `backend`.
* `plugins/*` — individual Backstage plugins as separate packages.
Frontend (`packages/app`) is a React app with its own `package.json`, `src/`, and `public/`. Backend (`packages/backend`) includes server code, Dockerfile, and dependencies such as `@backstage/config`, `pg`, etc.
Frontend entrypoint example (`packages/app/src/index.tsx`):
```tsx theme={null}
import '@backstage/cli/asset-types';
import React from 'react';
import ReactDOM from 'react-dom/client';
import App from './App';
ReactDOM.createRoot(document.getElementById('root')!).render(
### After scaffolding
If the scaffold completes, the CLI runs `yarn install` and TypeScript checks. A successful run ends with messages like:
```text theme={null}
executing yarn install ✓
executing yarn tsc ✓
🏅 Successfully created backstage
All set! Now you might want to:
Run the app: cd backstage && yarn dev
Set up the software catalog: https://backstage.io/docs/features/software-catalog/configuration
Add authentication: https://backstage.io/docs/auth/
```
If you need to retry after a failed run, remove the partially-created directory:
```bash theme={null}
rm -rf backstage/
npx @backstage/create-app@latest
```
## Common errors and how to fix them
### 1) Yarn not found
During scaffolding the CLI executes `yarn install`. If Yarn is missing you'll see an error like:
```text theme={null}
executing yarn install
/bin/sh: 1: yarn: not found
Error: Could not execute command yarn install
🔥 Failed to create app!
```
Fix: install Yarn globally (for the Node version currently active under nvm):
```bash theme={null}
npm install -g yarn
yarn --version
# Example output: 1.22.22
```
### 2) Node version too old
Backstage requires Node >= 18.12 in the toolchain. If you run the scaffolder with an older Node, you may see:
```text theme={null}
Usage Error: This tool requires a Node version compatible with >=18.12.0 (got 16.20.2). Upgrade Node, or set `YARN_IGNORE_NODE=1` in your environment.
```
Fix with nvm:
```bash theme={null}
nvm install 18
nvm use 18
node --version
# v18.x.y
```
Note: global npm packages are per-Node installation when using nvm. If Yarn was installed under a different Node version, (re)install it for the currently active Node:
```bash theme={null}
npm install -g yarn
```
## Inspect the generated repository
Change into the created repo:
```bash theme={null}
cd backstage
ls
# app-config.local.yaml app-config.yaml packages plugins package.json yarn.lock ...
```
The repo is a Yarn workspaces monorepo. The root `package.json` includes workspace config and dev scripts. Example (excerpt):
```json theme={null}
{
"name": "root",
"version": "1.0.0",
"private": true,
"engines": { "node": ">=18.12" },
"scripts": {
"dev": "yarn workspaces foreach -A --include backend --include app --parallel --jobs unlimited -v -i run start",
"start": "yarn workspace app start",
"start-backend": "yarn workspace backend start",
"build:backend": "yarn workspace backend build",
"tsc": "tsc",
"clean": "backstage-cli repo clean",
"test": "backstage-cli repo test"
},
"workspaces": {
"packages": [
"packages/*",
"plugins/*"
]
},
"devDependencies": {
"@backstage/cli": "^0.29.5",
"typescript": "~5.4.0"
}
}
```
Monorepo layout:
* `packages/*` — contains the main `app` (frontend) and `backend`.
* `plugins/*` — individual Backstage plugins as separate packages.
Frontend (`packages/app`) is a React app with its own `package.json`, `src/`, and `public/`. Backend (`packages/backend`) includes server code, Dockerfile, and dependencies such as `@backstage/config`, `pg`, etc.
Frontend entrypoint example (`packages/app/src/index.tsx`):
```tsx theme={null}
import '@backstage/cli/asset-types';
import React from 'react';
import ReactDOM from 'react-dom/client';
import App from './App';
ReactDOM.createRoot(document.getElementById('root')!).render(