> ## Documentation Index
> Fetch the complete documentation index at: https://notes.kodekloud.com/llms.txt
> Use this file to discover all available pages before exploring further.
# Create and Manage Containers
> This article covers creating, managing, and running Docker containers, including practical examples with Nginx and building custom images.
Docker containers have become immensely popular due to their portability and ease of management. To illustrate their usefulness, let’s compare a traditional MariaDB database setup with one running inside a Docker container.
Traditionally, to install MariaDB on a Linux system, you would run:
```bash theme={null}
$ sudo apt install mariadb-server
```
After the installation, you would need to adjust configurations in the `/etc/mysql` directory, create databases, configure users, assign privileges, and manage log files. When it comes time to migrate this multi-component setup to a cloud server, the scattered pieces across various directories can make the process cumbersome.
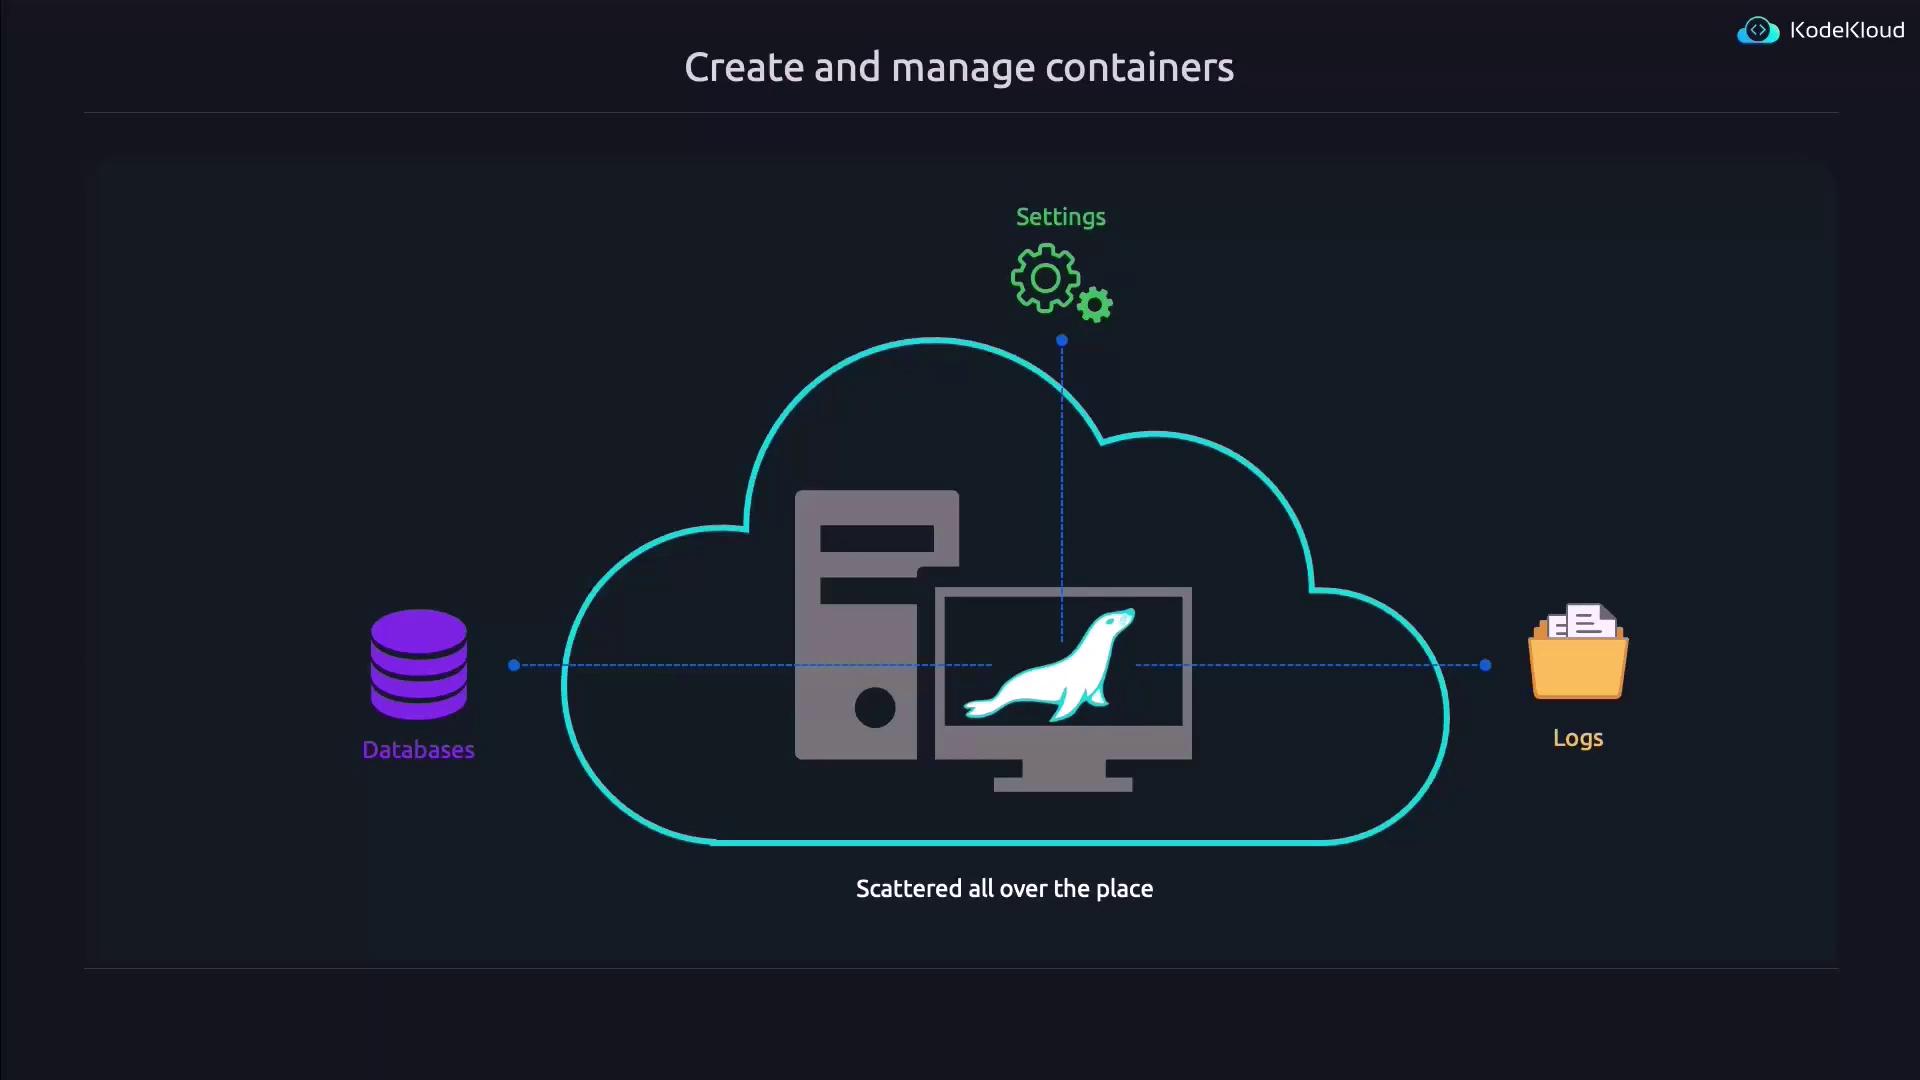
By containerizing your application, such as setting up your MariaDB inside a Docker container, every component—including the daemon, configuration files, logs, and databases—resides within a single container. This makes migration as simple as copying one file.
Imagine moving your entire database within a single container to a cloud server or scaling it across multiple servers effortlessly.

Containers are designed to encapsulate applications, making them highly portable and scalable. Essentially, they are like copying and pasting an entire application setup in one go.
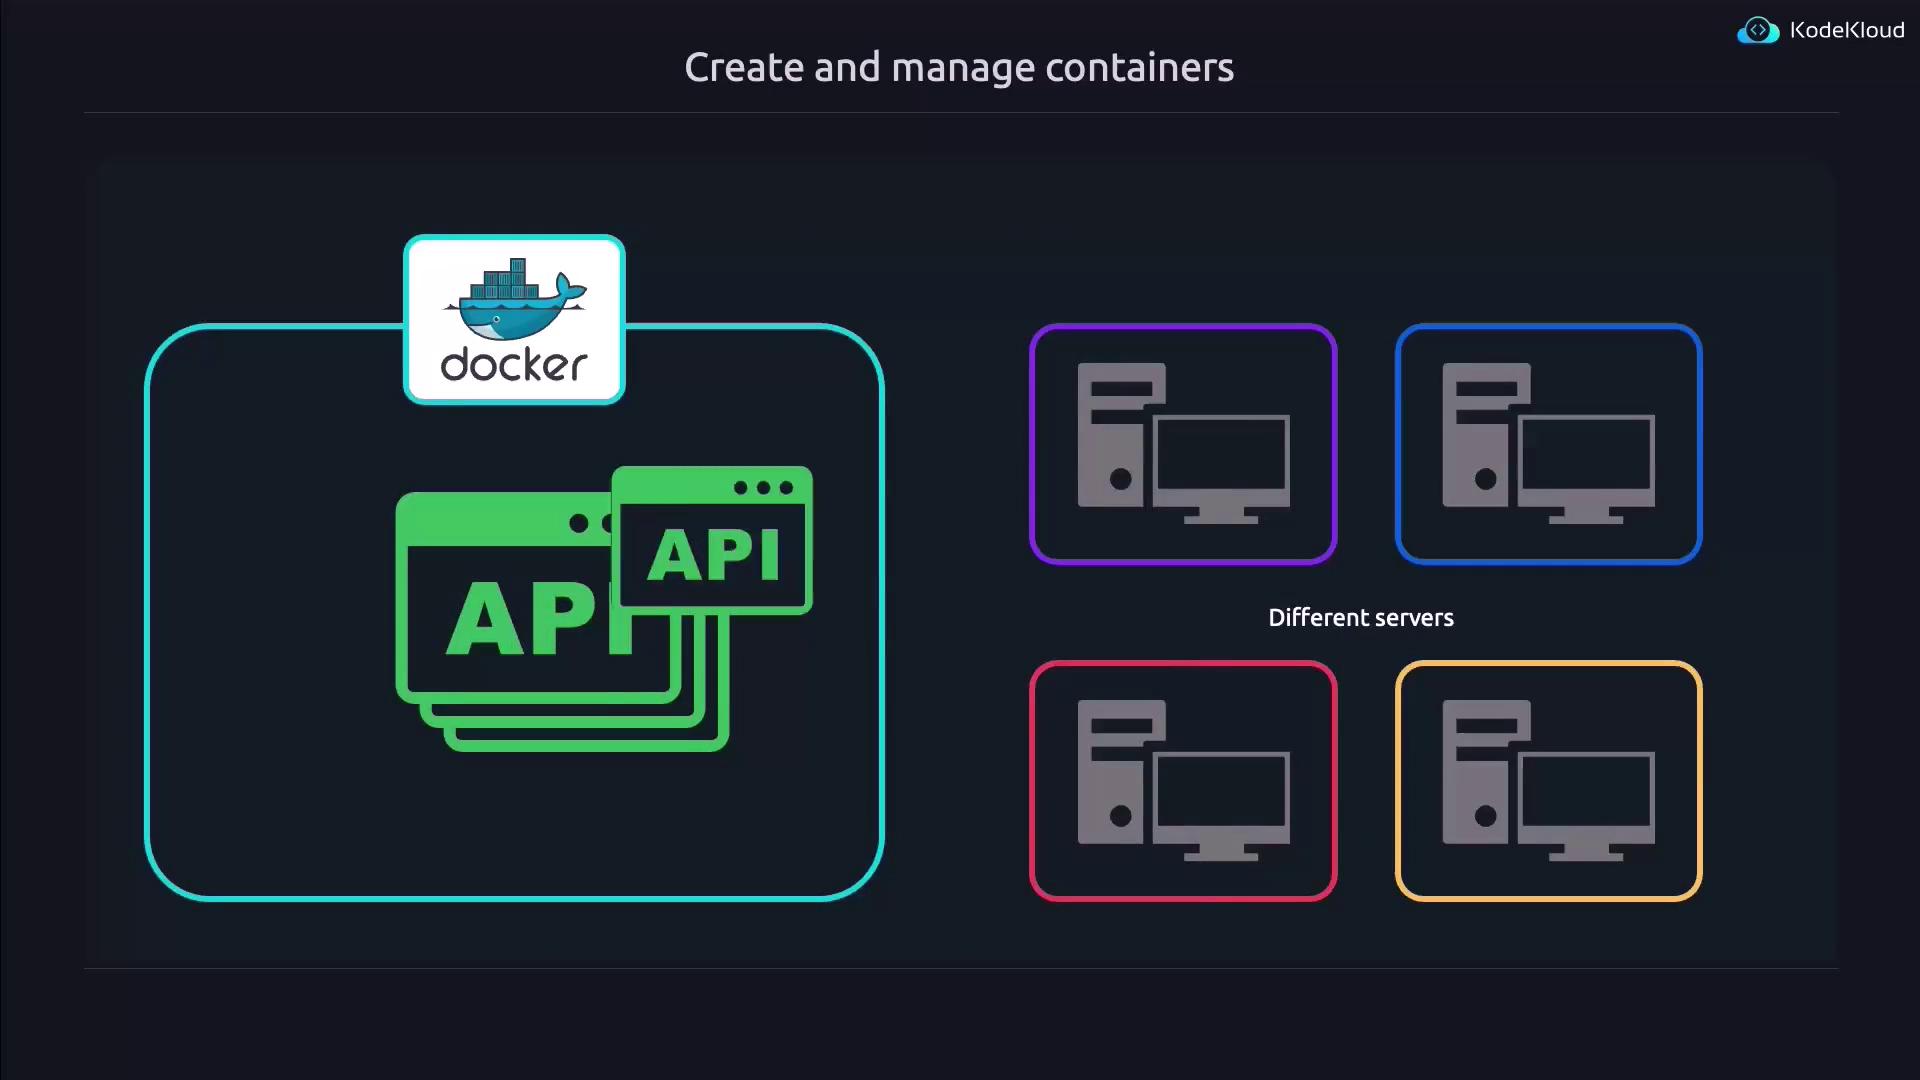
In this article, we will explore practical examples of how to work with Docker by running an Nginx web server within a container.
***
## Using Docker Commands
Before diving into running containers, note that you can often execute Docker commands without `sudo` if your Linux user is added to the `docker` group. If you encounter permission errors, you can either prepend `sudo` to your commands or add your user to the Docker group and then log out and back in.
For example, you might see an error like this:
```bash theme={null}
aaron@kodekloud:~$ docker images
Got permission denied while trying to connect to the Docker daemon socket at unix:///var/run/docker.sock: Get "http://%2Fvar%2Frun%2Fdocker.sock/1.24/images/json": dial unix /var/run/docker.sock: connect: permission denied
```
By using `sudo`, the command runs successfully:
```bash theme={null}
aaron@kodekloud:~$ sudo docker images
[sudo] password for aaron:
REPOSITORY TAG IMAGE ID CREATED SIZE
john/custom nginx 1.0 ed97200c0c18 3 hours ago 187MB
customnginx 1.0 ed97200c0c18 3 hours ago 187MB
nginx latest 021283c8eb95 3 weeks ago 187MB
```
***
## Exploring Docker Commands
If you're new to Docker, you can display all available commands by running:
```bash theme={null}
$ docker --help
```
This command provides the following overview:
```text theme={null}
Usage: docker [OPTIONS] COMMAND
A self-sufficient runtime for containers
Common Commands:
run Create and run a new container from an image
exec Execute a command in a running container
ps List containers
build Build an image from a Dockerfile
pull Download an image from a registry
push Upload an image to a registry
images List images
login Log in to a registry
logout Log out from a registry
search Search Docker Hub for images
version Show the Docker version information
info Display system-wide information
Management Commands:
builder Manage builds
container Manage containers
context Manage contexts
image Manage images
manifest Manage Docker image manifests and manifest lists
network Manage networks
plugin Manage plugins
system Manage Docker
```
One useful subcommand is `search` which allows you to find images like Nginx:
```bash theme={null}
$ docker search nginx
```
The output lists available images, and the top result is usually the official image:
```text theme={null}
NAME DESCRIPTION STARS
nginx Official build of Nginx. 19922
unit Official build of NGINX Unit: Universal Web … 31
nginx/nginx-ingress NGINX and NGINX Plus Ingress Controllers fo… 92
nginxinc/nginx-unprivileged Unprivileged NGINX Dockerfiles 152
nginxinc/nginx-prometheus-exporter NGINX Prometheus Exporter for NGINX and NGIN… 41
... (additional entries)
```
You can pull the official Nginx image by running:
```bash theme={null}
$ docker pull nginx
Using default tag: latest
latest: Pulling from library/nginx
2cc3ae149d28: Pull complete
a97d90a43bc9: Pull complete
9571e65a55a3: Pull complete
0b432cb2d95e: Pull complete
24436767f2de: Pull complete
928c92caef0: Pull complete
ca6f48c6db4: Pull complete
Digest: sha256:0acab7c2237e052dc5adf1694ebce0b374063a62b2a1b7f2b3bc9cd3fb8c1ff
Status: Downloaded newer image for nginx:latest
docker.io/library/nginx:latest
```
The term `latest` at the end of the image name is known as the image tag—it functions similarly to a version label. For instance, `latest` corresponds to the newest version, while a tag like `1.24.0` indicates a specific version. To pull an older version, run:
```bash theme={null}
$ docker pull nginx:1.22.1
1.22.1: Pulling from library/nginx
f1f26f570256: Pull complete
fd03b214774: Pull complete
ef2f2c869944: Pull complete
ac713a9ef2cc: Pull complete
fd071922d543: Pull complete
2a9f38700bb5: Pull complete
Status: Downloaded newer image for nginx:1.22.1
docker.io/library/nginx:1.22.1
```
***
## Managing Docker Images
After pulling images, it’s a good practice to remove any that are no longer needed. To list available images, run:
```bash theme={null}
$ docker images
REPOSITORY TAG IMAGE ID CREATED SIZE
ubuntu/nginx latest cd238b5026e 3 days ago 128MB
nginx latest dde0cca083bc 2 weeks ago 188MB
nginx 1.22.1 0f8498f13f3a 14 months ago 142MB
```
To delete a specific image, such as the `nginx:1.22.1` image, use the `rmi` command. When multiple images share the same repository name, remember to specify the tag:
```bash theme={null}
$ docker rmi nginx:1.22.1
Untagged: nginx:1.22.1
Untagged: nginx@sha256:fc5f5b747575c306aaf884566ebfe0b006240a184d52b923d2f0197108f6b7
Deleted: sha256:0f8498f13fadef3c82cdf069ecc880b01189be63491631d44eeaa5fb29...
```
After deletion, verifying your images again should show only the remaining ones:
```bash theme={null}
$ docker images
REPOSITORY TAG IMAGE ID CREATED SIZE
nginx latest dde0cca083bc 2 weeks ago 188MB
```
***
## Running Containers
Running a container is as easy as issuing the `docker run` command. For instance, to run an Nginx container:
```bash theme={null}
$ docker run nginx
```
This command creates a new container and starts the Nginx daemon. However, running the container this way attaches you to its output, making it challenging to run additional commands simultaneously.
The output may look similar to:
```bash theme={null}
$ docker run nginx
/docker-entrypoint.sh: /docker-entrypoint.d/ is not empty, will attempt to perform configuration
/docker-entrypoint.sh: looking for shell scripts in /docker-entrypoint.d/
/docker-entrypoint.sh: Launching /docker-entrypoint.d/10-listen-on-ipv6-by-default.sh
...
2024/06/14 02:40:53 [notice] 1#1: using the "epoll" event method
2024/06/14 02:40:53 [notice] 1#1: nginx/1.27.0
...
```
Pressing Ctrl-C will detach you from the container but will also stop it. To run the container in the background, publish ports, and assign it a descriptive name, use the following command:
```bash theme={null}
$ docker run --detach --publish 8080:80 --name mywebserver nginx
```
This command does the following:
* `--detach`: Runs the container in the background.
* `--publish 8080:80`: Maps port 8080 on the host to port 80 in the container.
* `--name mywebserver`: Assigns the name "mywebserver" to the container.
To view currently running containers, use:
```bash theme={null}
$ docker ps
```
You might see output like:
```bash theme={null}
CONTAINER ID IMAGE COMMAND NAMES
34ef97c0c6a5 nginx "/docker-entrypoint..." mywebserver
```
Remember that `docker ps` only shows running containers. Use `docker ps --all` to list both active and stopped containers.
To start a stopped container, reference its container ID or name:
```bash theme={null}
$ docker start 833adf46106a
833adf46106a
```
And validate its status with:
```bash theme={null}
$ docker ps
```
If you need to stop a running container, simply run:
```bash theme={null}
$ docker stop mywebserver
```
***
## Testing the Published Port
After running your container with port mapping, it’s important to verify that it’s accessible. You can do this by connecting to the published port on your host using a tool like netcat (`nc`):
```bash theme={null}
$ nc localhost 8080
```
Type the HTTP request:
```text theme={null}
GET /
```
You should receive the HTML response of the Nginx index page:
```html theme={null}
Welcome to nginx!
Welcome to nginx!
If you see this page, the nginx web server is successfully installed and working. Further configuration is required.
For online documentation and support please refer to
nginx.org.
Commercial support is available at
nginx.com.
Thank you for using nginx.
```
Press Ctrl-D to terminate the netcat session.
***
## Understanding Docker Run vs. Docker Start
It’s essential to understand the difference between `docker run` and `docker start`:
* **docker run:** Creates a new container from an image and starts it.
* **docker start:** Simply starts an existing, previously created container.
Use `docker run` when the container does not already exist and `docker start` to resume a stopped container.
***
## Removing Containers and Images
Managing system resources involves cleaning up unused containers and images. To list all containers, run:
```bash theme={null}
$ docker ps --all
```
To remove a stopped container (for example, one named `determined_perlman`), execute:
```bash theme={null}
$ docker rm determined_perlman
```
Remember: the `docker rm` command removes containers, while `docker rmi` is used to remove images.
If an image is still in use, such as by the "mywebserver" container, attempting to remove it will result in an error:
```bash theme={null}
$ docker rmi nginx
```
In that case, stop and remove the container first:
```bash theme={null}
$ docker stop mywebserver
$ docker rm mywebserver
```
Then remove the image:
```bash theme={null}
$ docker rmi nginx
```
***
## Using Restart Policies
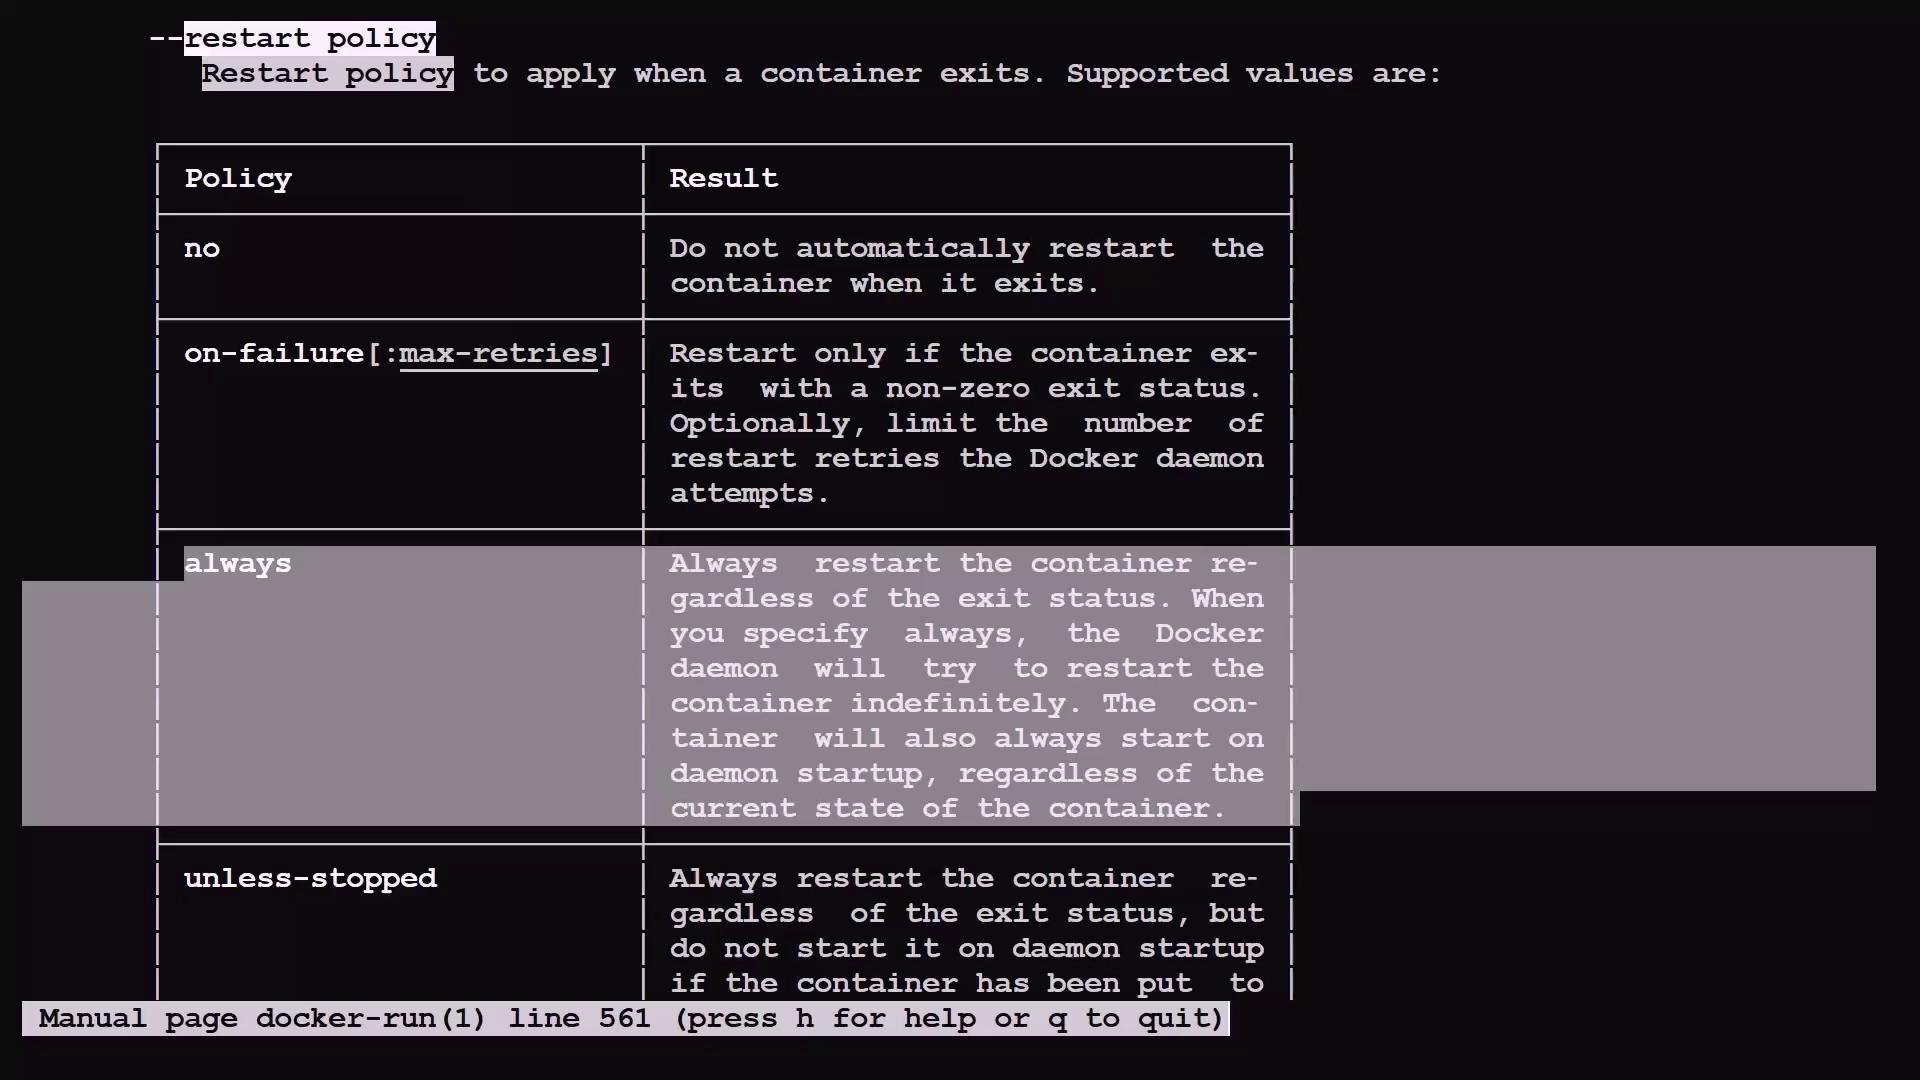
For scenarios where you need your Nginx container to restart automatically after errors or system reboots, you can add a restart policy. The basic command:
```bash theme={null}
$ docker run --detach --publish 8080:80 --name mywebserver nginx
```
Can be enhanced with the `--restart always` option to ensure continuous operation:
```bash theme={null}
$ docker run --detach --publish 8080:80 --name mywebserver --restart always nginx
```
If the specified image is not available locally, Docker will automatically pull it.
***
## Building Custom Docker Images
Sometimes, public images may not meet your exact needs, prompting you to build a custom image. Here’s how you can create your own image based on the Nginx image:
1. Create a directory for your project and navigate into it:
```bash theme={null}
$ mkdir myimage
$ cd myimage
```
2. Create a simple `index.html` file to serve as your custom HTML content:
```bash theme={null}
$ vim index.html
```
*(Insert a line of text as a placeholder for your custom HTML content.)*
3. Create a `Dockerfile` (note the capital D), which provides instructions for building your image:
```bash theme={null}
$ vim Dockerfile
```
Add the following content to the `Dockerfile`:
```dockerfile theme={null}
FROM nginx
COPY index.html /usr/share/nginx/html/index.html
```
This tells Docker to use the official Nginx image as the base and copy your custom HTML file into the appropriate directory inside the container.
Other commonly used Dockerfile instructions include:
* **RUN:** Executes commands during the image build (e.g., installing additional utilities).
* **CMD:** Specifies the default command to run when the container starts (which can be overridden).
* **ENTRYPOINT:** Ensures a command is always executed upon container initialization (and is less easily overridden).
4. Build your custom image using the following command (replace "jeremy" with your Docker Hub username if applicable):
```bash theme={null}
$ docker build --tag jeremy/customnginximage:1.0 myimage
```
You should see output similar to:
```bash theme={null}
Sending build context to Docker daemon 3.072kB
Step 1/2 : FROM nginx
---> dde0cca083bc
Step 2/2 : COPY index.html /usr/share/nginx/html/index.html
---> 58d5a293c951
Successfully built 58d5a293c951
Successfully tagged jeremy/customnginximage:1.0
```
This custom image can now be used in the same way as any other Docker image.
***
## Summary
This article has covered the essentials of creating, managing, running, and building Docker containers—from using public images to constructing your own custom container images. With Docker’s powerful features, deploying applications at scale becomes a seamless process.
For further details and in-depth tutorials, consider exploring the following resources:
* [Docker Documentation](https://docs.docker.com/)
* [Nginx Official Website](http://nginx.org/)
Happy containerizing!