> ## Documentation Index
> Fetch the complete documentation index at: https://notes.kodekloud.com/llms.txt
> Use this file to discover all available pages before exploring further.
# Configure and Manage Swap Space
> This article explains how to configure and manage swap space in Linux, covering both swap partitions and swap files with practical examples.
In this article, we explain how to configure and manage swap space in Linux. Swap space is a dedicated area on your disk that Linux uses to temporarily offload data from RAM when physical memory is low. This guide covers both swap partitions and swap files, providing the necessary commands and practical examples to help you manage them effectively.
## Understanding Swap Space Through a Scenario
Imagine a computer with 4 GB of RAM. You open a video editor that uses 2 GB of RAM and an audio editor that uses the remaining 2 GB. With no free memory left, you may wonder how you can still run additional applications like Chrome. This is where swap space becomes essential:
* Linux monitors memory usage and identifies inactive applications (e.g., a video editor that hasn't been used for a while).
* It moves data from RAM to a designated swap area, for example, a 2 GB swap partition. This process frees up RAM, allowing new applications like Chrome to run.
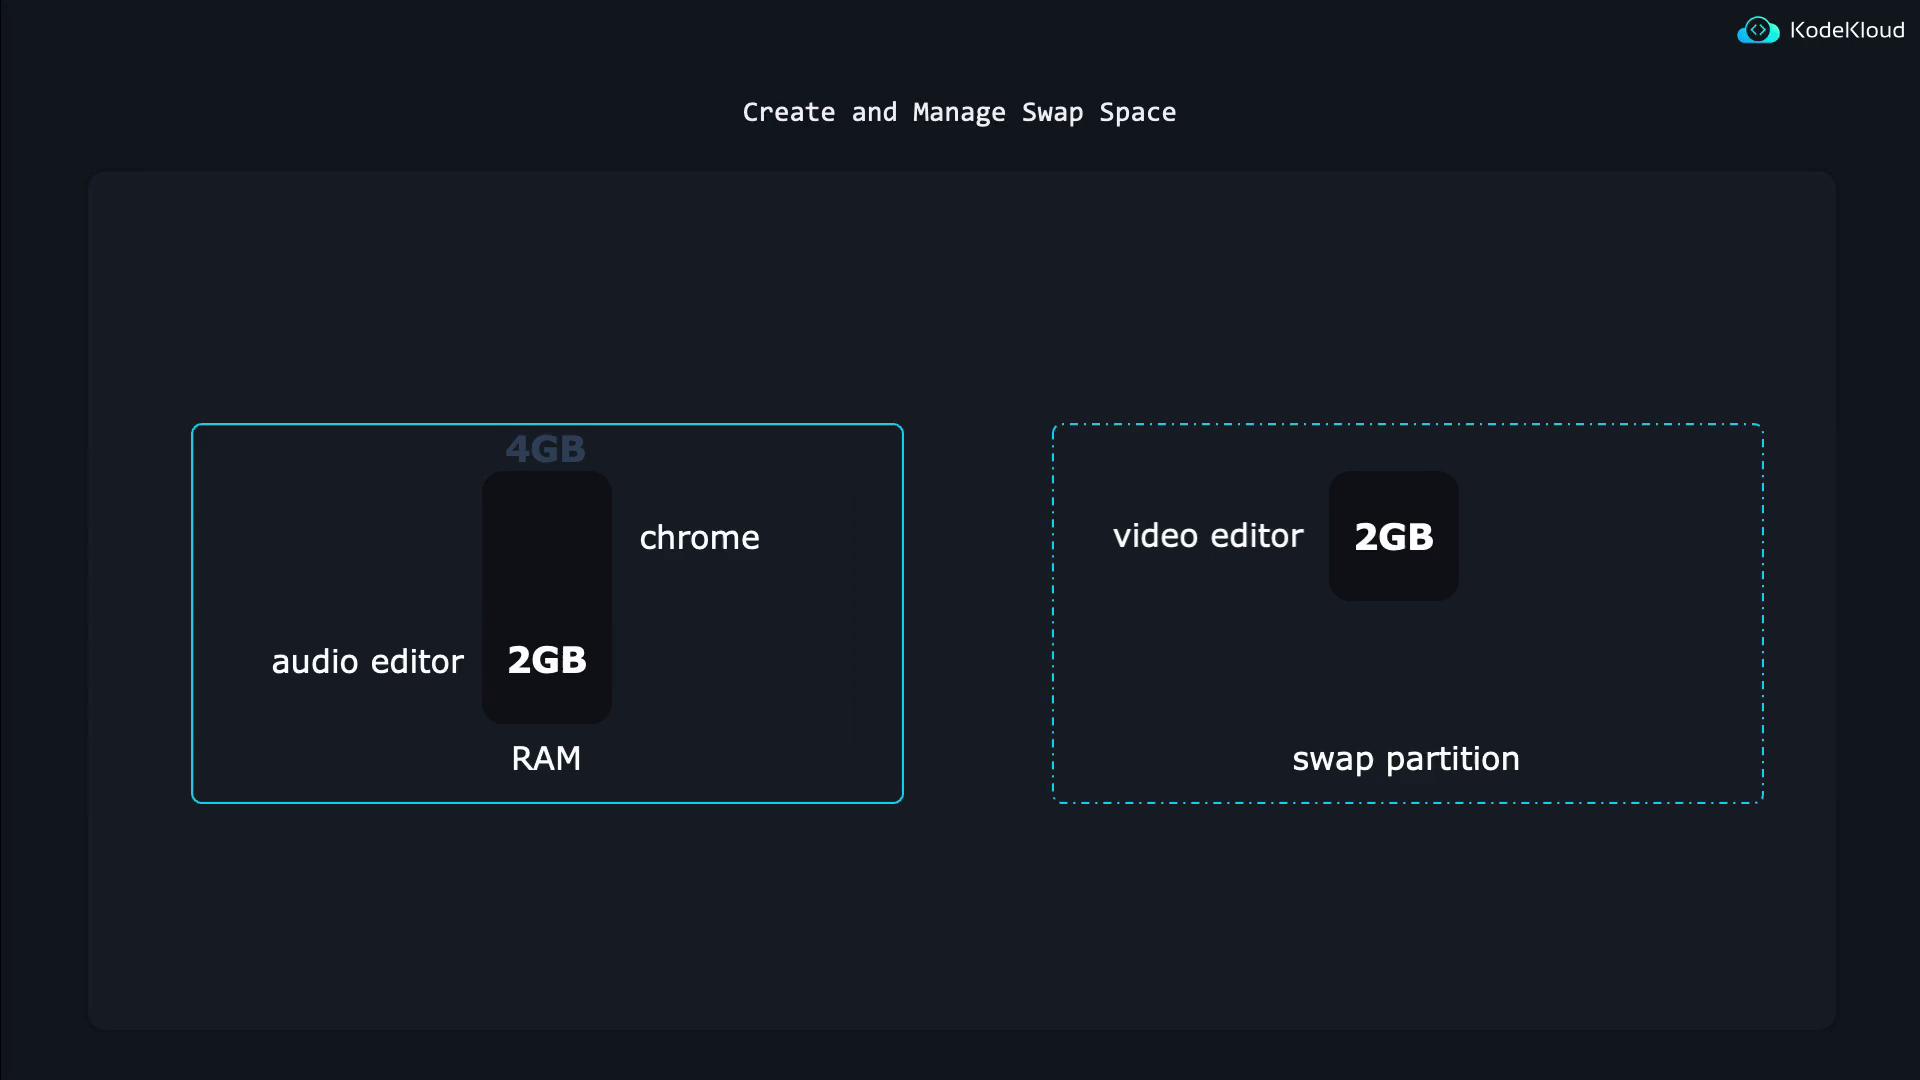
The scenario above is a simplified illustration that demonstrates why and how swap space is used in Linux systems.
## Setting Up a Swap Partition
Before using a swap partition, check if your system is already using swap areas:
```bash theme={null}
$ swapon --show
```
Since swap is not activated initially, this command may not return any output. Next, review the available partitions. For example, assume that a swap partition on `/dev/vdb3` was created earlier. The following command displays your system’s block devices:
```bash theme={null}
$ lsblk
NAME MAJ:MIN RM SIZE RO TYPE MOUNTPOINTS
vda 252:0 0 20G 0 disk
├─vda1 252:1 0 1M 0 part
├─vda2 252:2 0 1.8G 0 part /boot
├─vda3 252:3 0 18.2G 0 part
└─ubuntu--vg-ubuntu--lv 253:0 0 10G 0 lvm /
vdb 252:16 0 10G 0 disk
├─vdb1 252:17 0 4G 0 part
├─vdb2 252:18 0 4G 0 part
└─vdb3 252:19 0 2G 0 part
```
This partition is currently empty. Before Linux can utilize it as swap space, you need to initialize it—similar to formatting a USB stick with FAT32 or NTFS, where a small header is written to define the file system type.
Initialize the partition as swap with:
```bash theme={null}
$ sudo mkswap /dev/vdb3
Setting up swapspace version 1, size = 2 GiB (2146410496 bytes)
no label, UUID=a39c80a1-a0c6-4ba2-a4a3-8a2058d8859
```
Next, enable the swap partition:
```bash theme={null}
$ sudo swapon --verbose /dev/vdb3
swapon: /dev/vdb3: found signature [pagesize=4096, signature=swap]
swapon: /dev/vdb3: pagesize=4096, swapsize=2146414592, devsize=2146418176
swapon /dev/vdb3
```
Verify that the swap area is activated:
```bash theme={null}
$ swapon --show
NAME TYPE SIZE USED PRIO
/dev/vdb3 partition 2G 0B -2
```
The swap configuration made above is temporary. After a reboot, the swap partition will not activate automatically unless it is added to the system's fstab file.
To disable the swap partition when needed, use:
```bash theme={null}
$ sudo swapoff /dev/vdb3
```
## Creating and Using a Swap File
Linux also supports swap files, which can be an alternative to swap partitions. Many modern Ubuntu systems, for instance, use a swap file by default. Follow these steps to create and use a swap file:
1. **Create a Swap File:**\
Use the `dd` command to create a file filled with binary zeros. The following command creates a 128 MB swap file:
```bash theme={null}
$ sudo dd if=/dev/zero of=/swap bs=1M count=128
```
2. **Increase the Swap File Size:**\
To create a larger swap file (e.g., 2 GB), run:
```bash theme={null}
$ sudo dd if=/dev/zero of=/swap bs=1M count=2048 status=progress
```
Example output:
```bash theme={null}
1436549120 bytes (1.4 GB, 1.3 GiB) copied, 2 s, 717 MB/s
2048+0 records in
2048+0 records out
2147483648 bytes (2.1 GB, 2.0 GiB) copied, 2.71801 s, 790 MB/s
```
3. **Set Correct Permissions:**\
For security, restrict access so that only the root user can read and write to the swap file:
```bash theme={null}
$ sudo chmod 600 /swap
```
4. **Initialize the Swap File:**\
Format the file as swap space:
```bash theme={null}
$ sudo mkswap /swap
Setting up swapspace version 1, size = 2 GiB (2147479552 bytes)
no label, UUID=cff8e9dc-54fa-4661-a48e-497610b2f07b
```
5. **Enable the Swap File:**\
Activate the swap file with:
```bash theme={null}
$ sudo swapon --verbose /swap
swapon: /swap: found signature [pagesize=4096, signature=swap]
swapon: /swap: pagesize=4096, swapsize=2147483648, devsize=2147483648
swapon /swap
```
6. **Verify Active Swap Areas:**\
Check to ensure both the swap partition and swap file are active:
```bash theme={null}
$ swapon --show
NAME TYPE SIZE USED PRIO
/dev/vdb3 partition 2G 0B -2
/swap file 2G 0B -3
```
## Conclusion
By following these steps, you can effectively configure and manage both swap partitions and swap files on your Linux system. These methods help ensure that your system can handle low-memory situations efficiently, enhancing overall performance.
For additional information, check out these resources:
* [Kubernetes Basics](https://kubernetes.io/docs/concepts/overview/what-is-kubernetes/)
* [Kubernetes Documentation](https://kubernetes.io/docs/)
* [Docker Hub](https://hub.docker.com/)
* [Terraform Registry](https://registry.terraform.io/)