> ## Documentation Index
> Fetch the complete documentation index at: https://notes.kodekloud.com/llms.txt
> Use this file to discover all available pages before exploring further.
# Alertmanager Installation
> This guide explains how to install and configure Alertmanager for managing alerts in a monitoring infrastructure.
In this guide, you will learn how to install and configure Alertmanager from the Prometheus download page. Alertmanager is an essential component for handling alerts in your monitoring infrastructure.
Ensure that you have wget installed on your system before downloading the binary.
## Step 1: Download the Alertmanager Binary
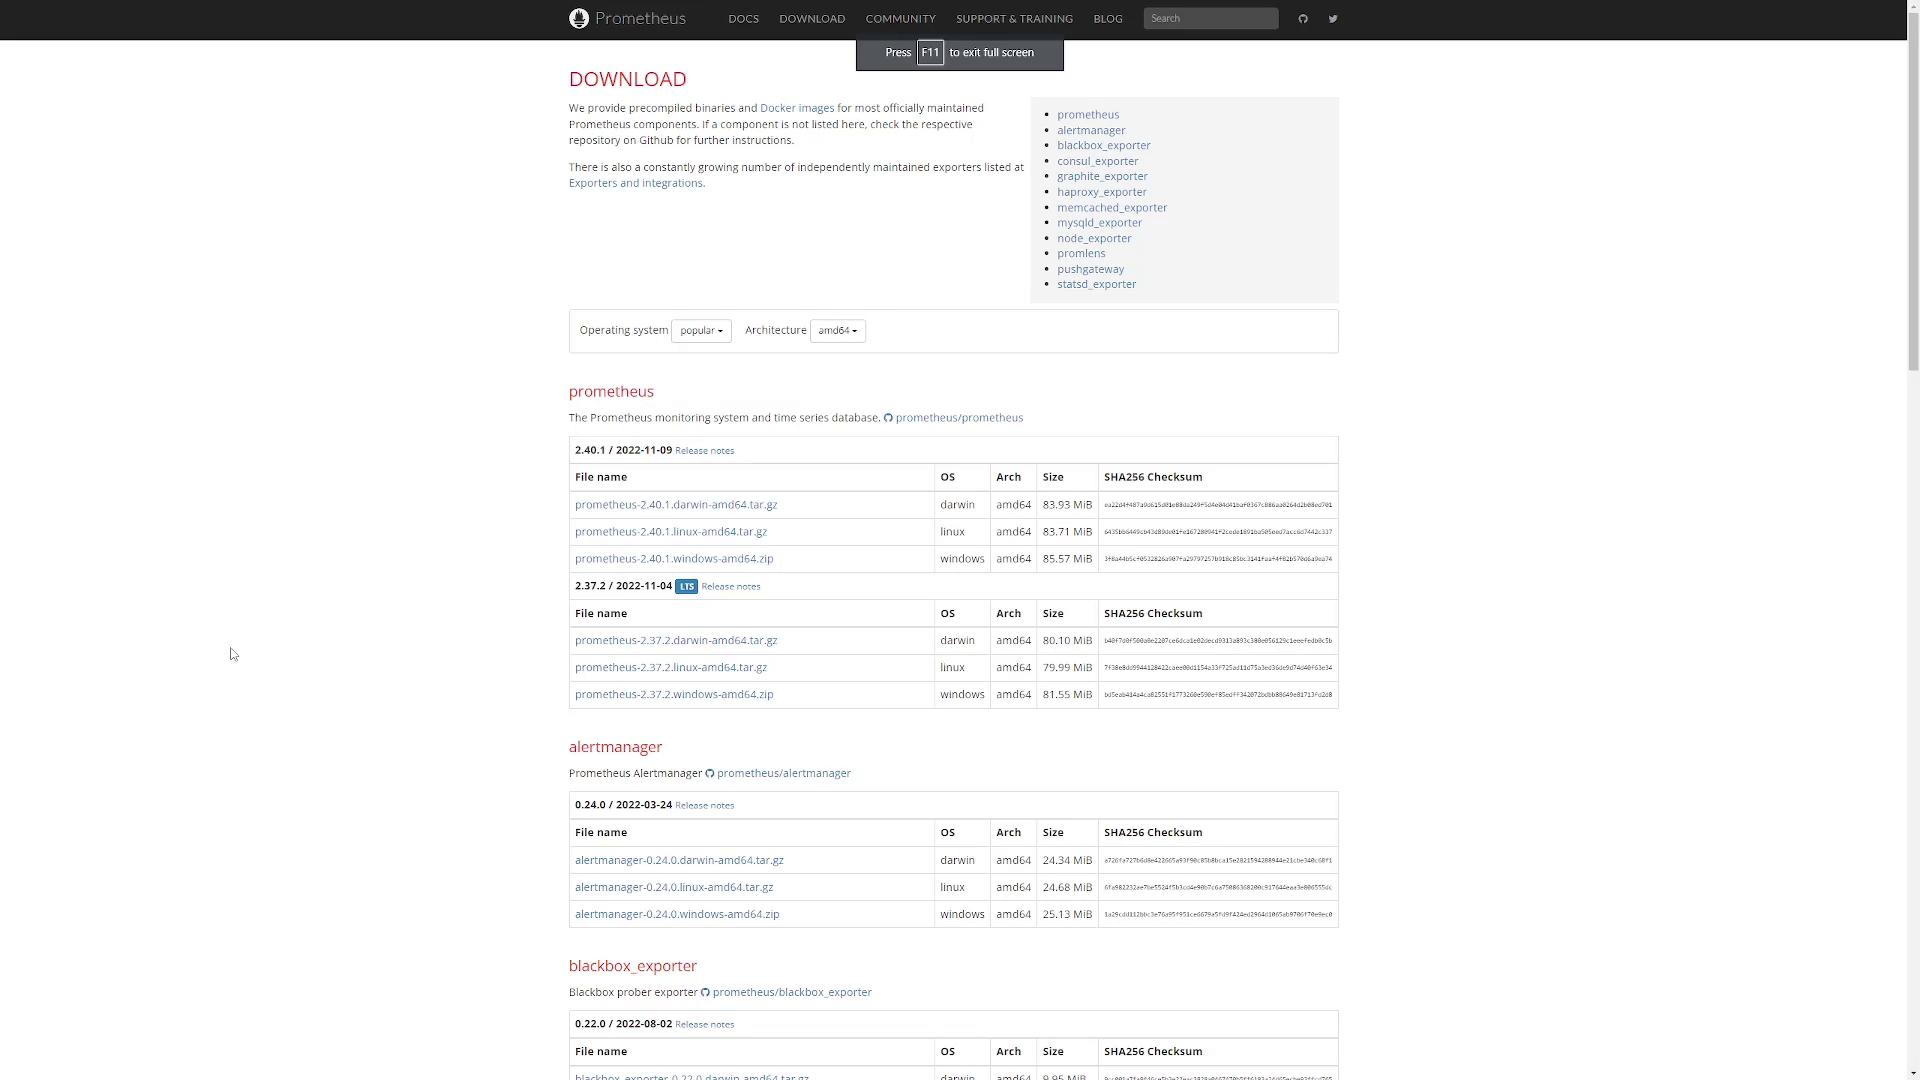
1. Navigate to the [Prometheus download page](https://prometheus.io/download/).
2. Under the Alertmanager section, select the binary that matches your operating system and architecture.
3. Copy the URL for the selected binary.
Download the Alertmanager binary using the following command:
```bash theme={null}
wget https://github.com/prometheus/alertmanager/releases/download/v0.24.0/alertmanager-0.24.0.linux-amd64.tar.gz
```
## Step 2: Extract the Tarball
After downloading the binary, extract the tarball and change into the extracted directory. This directory contains several important files:
* The Alertmanager executable
* A configuration file (`alertmanager.yml`)
* A command-line utility (`amtool`)
* A `data` directory for storing notification states
* Ancillary files such as `LICENSE` and `NOTICE`
You can verify the extracted files by listing the directory contents:
```bash theme={null}
ls -l
```
Expected output:
```plaintext theme={null}
total 55752
-rwxr-xr-x 1 user1 user1 31988661 Mar 25 2022 alertmanager
-rw-r--r-- 1 user1 user1 356 Mar 25 2022 alertmanager.yml
-rw-r--r-- 1 user1 user1 25067944 Mar 25 2022 amtool
drwxrwxr-x 2 user1 user1 4096 Aug 23 19:21 data
-rw-r--r-- 1 user1 user1 11357 Mar 25 2022 LICENSE
-rw-r--r-- 1 user1 user1 457 Mar 25 2022 NOTICE
```
## Step 3: Start Alertmanager
To start Alertmanager, run the executable:
```bash theme={null}
./alertmanager
```
When Alertmanager is running, you should see output similar to the following, which indicates it is up and listening on port 9093:
```plaintext theme={null}
ts=2022-10-04T20:57:44.014Z caller=cluster.go:680 level=info component=cluster msg="Waiting for gossip to settle..."
interval=2s
ts=2022-10-04T20:57:44.065Z caller=coordinator.go:113 level=info component=configuration msg="Loading configuration file" file=alertmanager.yml
ts=2022-10-04T20:57:44.065Z caller=coordinator.go:126 level=info component=configuration msg="Completed loading of configuration file" file=alertmanager.yml
ts=2022-10-04T20:57:44.068Z caller=main.go:535 level=info msg="Listening address=::9093"
ts=2022-10-04T20:57:44.068Z caller=tls_config.go:195 level=info msg="TLS is disabled." http2=false
ts=2022-10-04T20:57:46.014Z caller=cluster.go:705 level=info component=cluster msg="gossip not settled" polls=0 before=0 now=1
elapsed=2.000253818s
ts=2022-10-04T20:57:51.017Z caller=cluster.go:697 level=info component=cluster msg="gossip settled; proceeding"
elapsed=10.002673562s
```
Now, open your browser and navigate to [http://localhost:9093](http://localhost:9093) to access the Alertmanager web interface.
## Step 4: Configure Prometheus to Route Alerts to Alertmanager
To forward alerts from Prometheus to Alertmanager, update Prometheus's configuration file. Locate the alerting section and add the following configuration under `static_configs`:
```yaml theme={null}
global:
scrape_interval: 15s
evaluation_interval: 15s
alerting:
alertmanagers:
- static_configs:
- targets:
- alertmanager1:9093
- alertmanager2:9093
rule_files:
- "rules.yml"
scrape_configs:
# Add your scrape configuration details here.
```
In the `static_configs` section, specify the IP addresses or hostnames along with the port (9093) of your Alertmanager servers.
Review the Prometheus download page for details on various precompiled binaries and Docker images. This ensures that you select the appropriate binary for your system, based on file sizes and checksums provided.
## Diagram: Prometheus Download Page
## Summary of Installation Steps
Follow these steps to successfully install and configure Alertmanager:
| Step | Description | Example Command / URL |
| -------------------- | ------------------------------------------------------------------------------------------- | ---------------------------------------- |
| Download the Binary | Navigate to the Prometheus download page and select the appropriate Alertmanager binary. | URL copied from the download page |
| Extract the Tarball | Unpack the tarball and verify the contents. | `tar -xzf alertmanager-.tar.gz` |
| Start Alertmanager | Run the executable to start the service. | `./alertmanager` |
| Configure Prometheus | Add Alertmanager details in Prometheus configuration under `alerting` and `static_configs`. | See the YAML configuration snippet above |
By following these steps, Alertmanager will be up and running, and Prometheus will be configured to forward alerts to it. This ensures a robust alert handling mechanism in your monitoring setup.