> ## Documentation Index
> Fetch the complete documentation index at: https://notes.kodekloud.com/llms.txt
> Use this file to discover all available pages before exploring further.
# Creating EC2 Instance
> Shows how to create an AWS EC2 instance and S3 bucket using Pulumi Python, export the instance public IP, and configure AMI, key pair, and SSH access.
In this lesson we'll add an Amazon EC2 instance to make the project more practical. Using the Pulumi AWS package and Python, we define an EC2 instance and export its public IP so you can SSH into it after deployment.
Below is a concise, working Pulumi program that creates an Amazon S3 bucket and an EC2 instance. Replace the AMI ID with one appropriate for your AWS region (see the note below).
```python theme={null}
# __main__.py
import pulumi
from pulumi_aws import s3, ec2
# Create an S3 bucket
bucket = s3.Bucket('my-bucket')
# Export the name/ID of the bucket
pulumi.export('bucket_name', bucket.id)
# Create an EC2 instance. Replace ami with an AMI ID valid in your region.
ec2_instance = ec2.Instance('web-server',
ami="ami-053b0d53c279acc90", # replace with a region-appropriate AMI
instance_type="t3.nano",
key_name="test1",
tags={
"Name": "web"
}
)
# Export the public IP of the instance so Pulumi prints it after creation.
# Note: this value will only be set if the instance receives a public IP (e.g., launched in a subnet
# with auto-assign public IP enabled or by specifying associate_public_ip_address).
pulumi.export('public_ip', ec2_instance.public_ip)
```
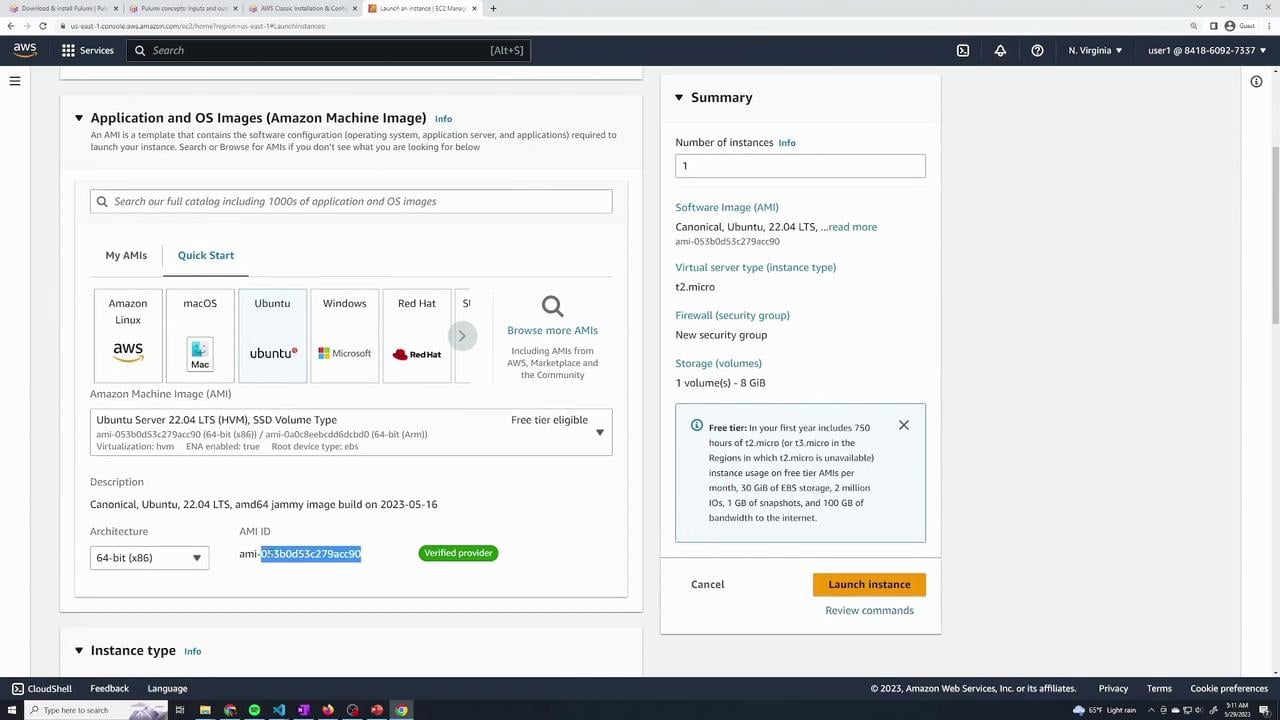
AMI IDs are region-specific. Select an AMI appropriate for your region (for example, Ubuntu 22.04 LTS) from the EC2 console or query the AWS CLI. See the EC2 console's Launch Instance workflow for the image's AMI ID.
To find and copy an AMI ID from the AWS Console, open the EC2 Launch Instance workflow and choose the desired image (Ubuntu in this example). Paste the AMI ID into the `ami` field of the code above.
 EC2 instance arguments at a glance:
| Resource Field | Purpose | Example |
| -------------- | -------------------------------------------------------- | ------------------------- |
| ami | The AMI ID to use for the instance (string). | `"ami-053b0d53c279acc90"` |
| instance\_type | Instance size/flavor. | `"t3.nano"` |
| key\_name | Name of an existing EC2 key pair for SSH access. | `"test1"` |
| tags | Key/value tags for easier identification in the console. | `{"Name":"web"}` |
Run pulumi up to preview and apply the changes. The preview shows the planned resources:
```console theme={null}
$ pulumi up
Previewing update (dev)
Type Name Plan
pulumi:pulumi:Stack pulumi-demo-dev
└─ aws:ec2:Instance web-server create
Outputs:
+ public_ip : output
Resources:
+ 1 to create
2 unchanged
Do you want to perform this update? [Use arrows to move, type to filter]
> yes
```
After you confirm, Pulumi will create the EC2 instance and print outputs, including the public IP once the instance receives one:
```console theme={null}
Updating (dev)
Type Name Status
pulumi:pulumi:Stack pulumi-demo-dev
+ aws:ec2:Instance web-server created (13s)
Outputs:
bucket_name: "my-bucket-5d138fe"
+ public_ip : "34.205.89.1"
Resources:
+ 1 created
2 unchanged
Duration: 15s
```
With the public IP printed, SSH into the instance using the PEM file for the key pair you specified. For an Ubuntu AMI, the default user is `ubuntu`:
```bash theme={null}
ssh -i test1.pem ubuntu@34.205.89.1
```
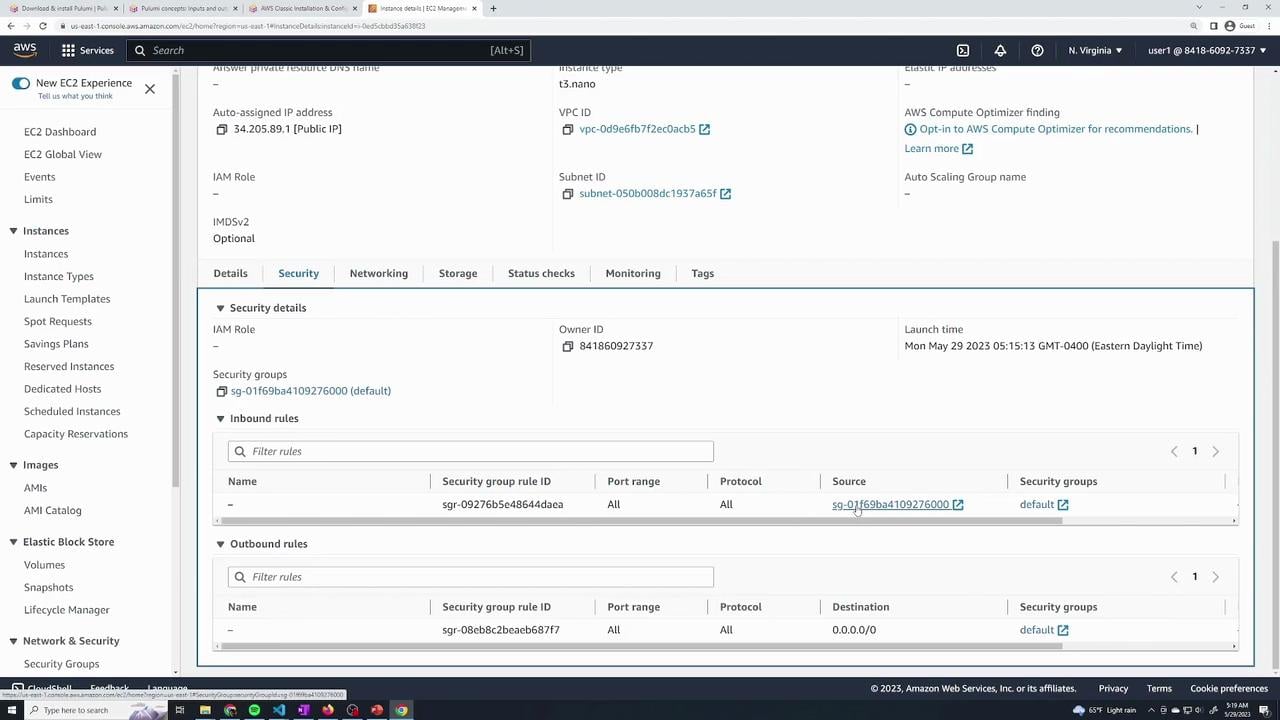
By default, the security group attached to a new EC2 instance may not allow SSH from the internet. If you cannot connect, check the instance’s Security Group inbound rules and ensure SSH (port 22) is allowed from your IP (or an appropriate CIDR). Restrict access to your IP rather than opening SSH to 0.0.0.0/0 whenever possible.
Troubleshooting checklist:
* Verify the AMI ID is valid in your AWS region.
* Confirm your key pair name matches an existing key pair and you have the corresponding PEM file.
* Inspect the instance’s public IP in Pulumi outputs or the EC2 console.
* Check Security Group inbound rules to allow SSH from your IP.
* Ensure the instance was launched in a subnet that provides/associates a public IP or explicitly set associate\_public\_ip\_address if needed.
References and further reading:
* Pulumi AWS provider: [https://www.pulumi.com/docs/reference/pkg/aws/](https://www.pulumi.com/docs/reference/pkg/aws/)
* EC2 documentation: [https://docs.aws.amazon.com/ec2/](https://docs.aws.amazon.com/ec2/)
* Finding AMIs in the AWS Console: [https://docs.aws.amazon.com/AWSEC2/latest/UserGuide/finding-an-ami.html](https://docs.aws.amazon.com/AWSEC2/latest/UserGuide/finding-an-ami.html)
EC2 instance arguments at a glance:
| Resource Field | Purpose | Example |
| -------------- | -------------------------------------------------------- | ------------------------- |
| ami | The AMI ID to use for the instance (string). | `"ami-053b0d53c279acc90"` |
| instance\_type | Instance size/flavor. | `"t3.nano"` |
| key\_name | Name of an existing EC2 key pair for SSH access. | `"test1"` |
| tags | Key/value tags for easier identification in the console. | `{"Name":"web"}` |
Run pulumi up to preview and apply the changes. The preview shows the planned resources:
```console theme={null}
$ pulumi up
Previewing update (dev)
Type Name Plan
pulumi:pulumi:Stack pulumi-demo-dev
└─ aws:ec2:Instance web-server create
Outputs:
+ public_ip : output
Resources:
+ 1 to create
2 unchanged
Do you want to perform this update? [Use arrows to move, type to filter]
> yes
```
After you confirm, Pulumi will create the EC2 instance and print outputs, including the public IP once the instance receives one:
```console theme={null}
Updating (dev)
Type Name Status
pulumi:pulumi:Stack pulumi-demo-dev
+ aws:ec2:Instance web-server created (13s)
Outputs:
bucket_name: "my-bucket-5d138fe"
+ public_ip : "34.205.89.1"
Resources:
+ 1 created
2 unchanged
Duration: 15s
```
With the public IP printed, SSH into the instance using the PEM file for the key pair you specified. For an Ubuntu AMI, the default user is `ubuntu`:
```bash theme={null}
ssh -i test1.pem ubuntu@34.205.89.1
```
By default, the security group attached to a new EC2 instance may not allow SSH from the internet. If you cannot connect, check the instance’s Security Group inbound rules and ensure SSH (port 22) is allowed from your IP (or an appropriate CIDR). Restrict access to your IP rather than opening SSH to 0.0.0.0/0 whenever possible.
Troubleshooting checklist:
* Verify the AMI ID is valid in your AWS region.
* Confirm your key pair name matches an existing key pair and you have the corresponding PEM file.
* Inspect the instance’s public IP in Pulumi outputs or the EC2 console.
* Check Security Group inbound rules to allow SSH from your IP.
* Ensure the instance was launched in a subnet that provides/associates a public IP or explicitly set associate\_public\_ip\_address if needed.
References and further reading:
* Pulumi AWS provider: [https://www.pulumi.com/docs/reference/pkg/aws/](https://www.pulumi.com/docs/reference/pkg/aws/)
* EC2 documentation: [https://docs.aws.amazon.com/ec2/](https://docs.aws.amazon.com/ec2/)
* Finding AMIs in the AWS Console: [https://docs.aws.amazon.com/AWSEC2/latest/UserGuide/finding-an-ami.html](https://docs.aws.amazon.com/AWSEC2/latest/UserGuide/finding-an-ami.html)