> ## Documentation Index
> Fetch the complete documentation index at: https://notes.kodekloud.com/llms.txt
> Use this file to discover all available pages before exploring further.
# Configure and manage swap space
> This guide explains how to create and manage swap space on a Linux system to optimize memory usage.
In this guide, you will learn how to create and manage swap space on a Linux system. Swap space is a designated area on disk where Linux temporarily moves data from RAM when physical memory is fully utilized. This process helps ensure that active applications have sufficient RAM to operate efficiently.
Consider the following scenario that demonstrates how swap space is used:
* A computer has 4 GB of RAM.
* A video editor uses 2 GB of RAM.
* An audio editor uses another 2 GB of RAM.
* With no free RAM available, a 2-GB swap partition is activated.
* When launching an additional application like Chrome, Linux shifts inactive data (for example, from the video editor) into swap space to free up RAM.
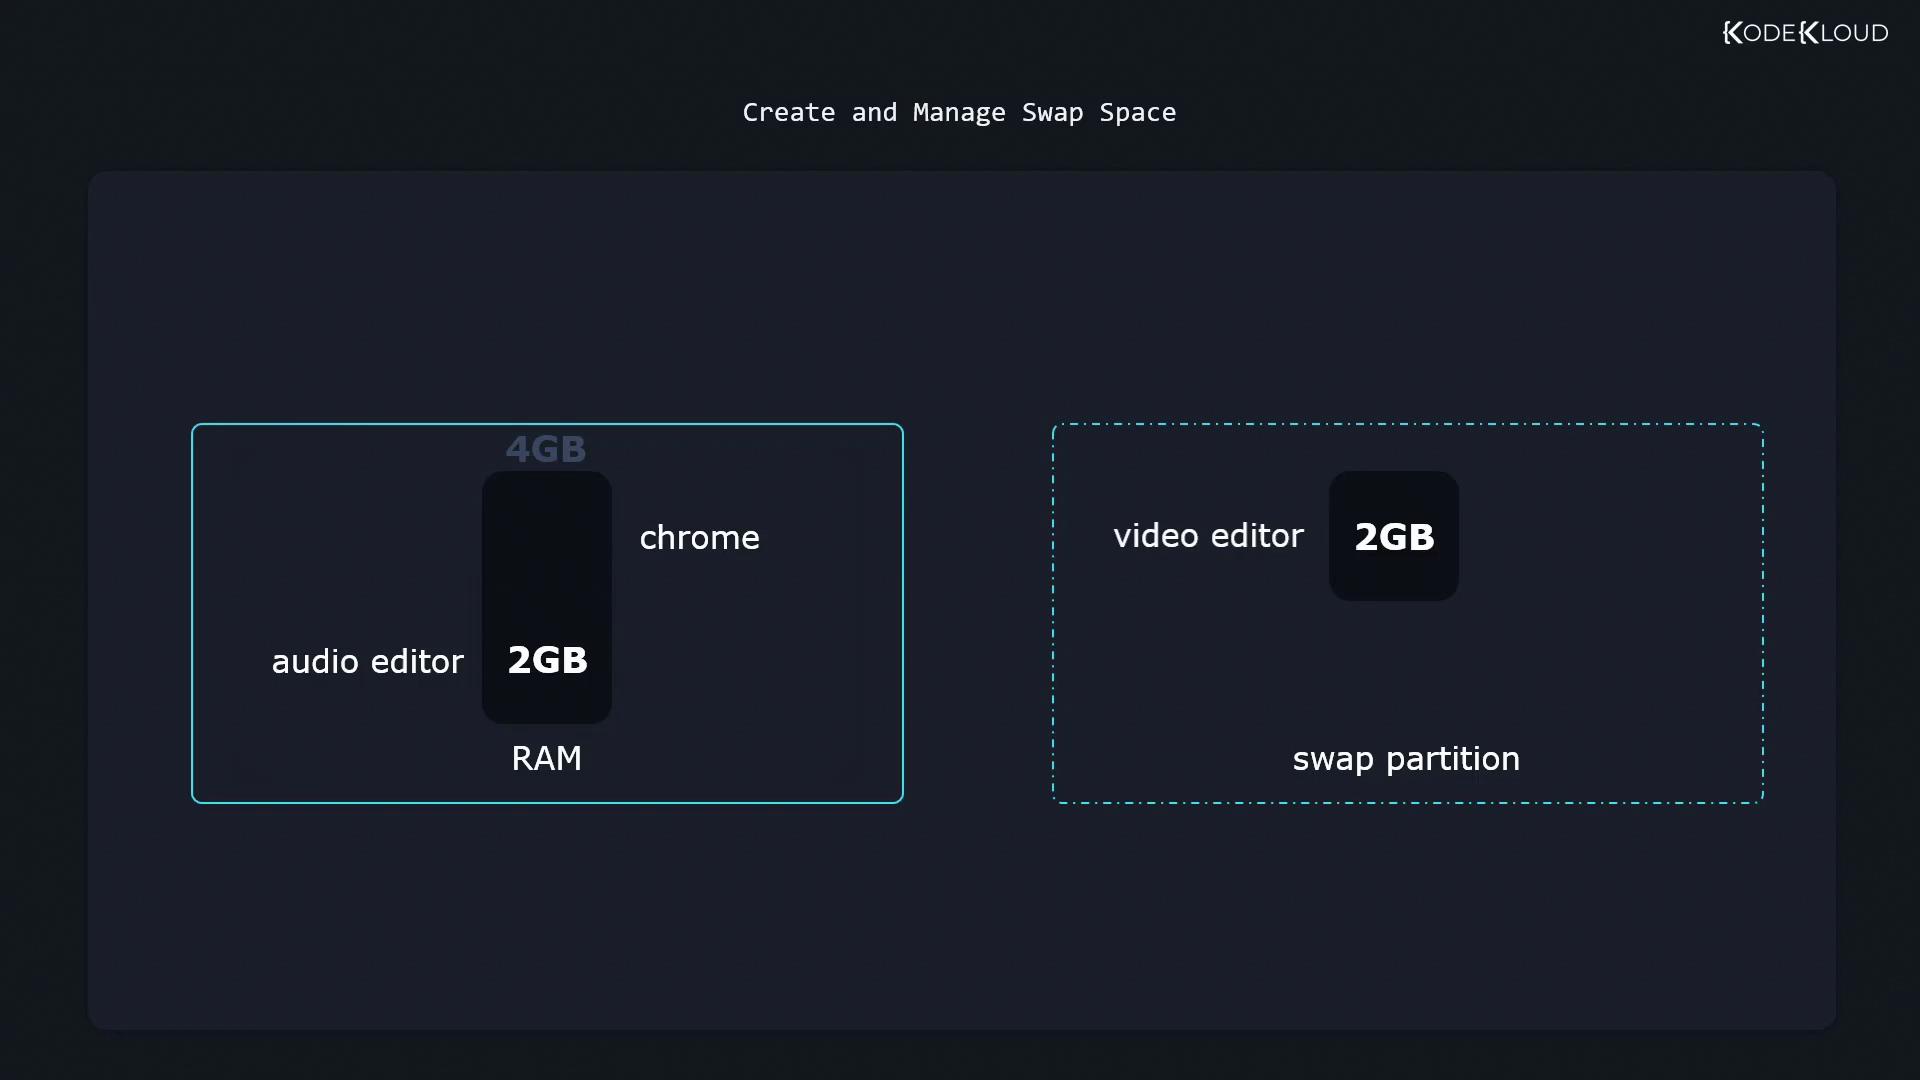
Below are the detailed steps and commands to set up and manage swap space on your Linux system.
***
## Checking Active Swap Space
Before making changes, you can verify your current swap configuration. To display active swap areas, run:
```bash theme={null}
$ swapon --show
NAME TYPE SIZE USED PRIO
/dev/dm-1 partition 2G 0B -2
```
You can also review all disk partitions using the `lsblk` command:
```bash theme={null}
$ lsblk
NAME MAJ:MIN RM SIZE RO TYPE MOUNTPOINT
vda 8:0 0 20G 0 disk
├─vda1 8:1 0 1G 0 part /boot
├─vda2 8:2 0 19G 0 part
├─cs-root 253:0 0 17G 0 lvm /
└─cs-swap 253:1 0 2G 0 lvm [SWAP]
vdb 8:16 0 10G 0 disk
├─vdb1 8:17 0 4G 0 part
├─vdb2 8:18 0 4G 0 part
└─vdb3 8:19 0 2G 0 part
```
In this output, the swap partition on `/dev/dm-1` is active (2 GB), while `/dev/vdb3` is present but not yet enabled for swap usage.
***
## Preparing and Enabling a Swap Partition
Before you can activate a partition as swap space, it must be formatted accordingly. Use the `mkswap` command to initialize the partition:
```bash theme={null}
$ sudo mkswap /dev/vdb3
Setting up swapspace version 1, size = 2 GiB (2146435076 bytes)
no label, UUID=6d6f451e-5fa4-4cd5-b627-b0f39c810002
```
Then, enable the swap partition with the `swapon` command in verbose mode to display details:
```bash theme={null}
$ sudo swapon --verbose /dev/vdb3
swapon: /dev/vdb3: found signature [pagesize=4096, signature=swap]
swapon: /dev/vdb3: pagesize=4096, swapsize=2146435072, devsize=2146435072
swapon /dev/vdb3
```
Reconfirm the swap status:
```bash theme={null}
$ swapon --show
NAME TYPE SIZE USED PRIO
/dev/dm-1 partition 2G 0B -2
```
Linux will utilize all configured swap areas if multiple swap partitions are added.
***
## Making the Swap Configuration Persistent
By default, swap space is not activated after a reboot. To ensure that the swap partition is enabled automatically at startup, add an appropriate entry in the `/etc/fstab` file. This will also help maintain system stability by ensuring that swap is consistently available. For more details on achieving persistent mounts, refer to the [file system documentation](https://www.kernel.org/doc/Documentation/filesystems/fstab.txt).
***
## Disabling Swap Space
There might be times when you need to disable a swap partition—such as for system maintenance or configuration changes. To disable swap temporarily, execute:
```bash theme={null}
$ sudo swapoff /dev/vdb3
```
***
## Creating and Using a Swap File
In addition to swap partitions, Linux supports swap files. Swap files can be a flexible alternative when dedicated partitions are not available.
### Step 1: Creating the Swap File
First, allocate space for the swap file using the `dd` command. For example, to create a 128 MB swap file:
```bash theme={null}
$ sudo dd if=/dev/zero of=/swap bs=1M count=128
```
To create a larger 2 GB swap file with progress updates, run:
```bash theme={null}
$ sudo dd if=/dev/zero of=/swap bs=1M count=2048 status=progress
```
Here:
* `if=/dev/zero` reads zeros.
* `of=/swap` specifies the output file location.
* `bs=1M` sets the block size to 1 megabyte.
* `count` determines how many blocks are allocated.
* `status=progress` displays the progress.
### Step 2: Setting Secure Permissions
Ensure that your swap file is secure by adjusting the permissions so that only the root user can access it:
```bash theme={null}
$ sudo chmod 600 /swap
```
Always set the correct permissions on swap files. Improper permissions can expose sensitive data.
### Step 3: Formatting the File as Swap
Initialize the file as swap space with the `mkswap` command:
```bash theme={null}
$ sudo mkswap /swap
Setting up swapspace version 1, size = 2 GiB (2147487952 bytes)
no label, UUID=cff8e9dc-54fa-4661-a48e-497610b2f07b
```
### Step 4: Enabling the Swap File
Activate the swap file using the `swapon` command:
```bash theme={null}
$ sudo swapon --verbose /swap
swapon: /swap: found signature [pagesize=4096, signature=swap]
swapon: /swap: pagesize=4096, swapsize=2147483648, devsize=2147483648
swapon /swap
```
Verify that your swap space is active by running:
```bash theme={null}
$ swapon --show
NAME TYPE SIZE USED PRIO
/dev/dm-1 partition 2G 268K -2
/swap file 2G 0B -3
```
***
## Conclusion
This article has covered both methods for implementing swap space on Linux: using a dedicated swap partition and creating a swap file. In both cases, the steps involve initializing with mkswap, activating with swapon, and verifying the swap status. For persistent swap configurations across reboots or more advanced setups, consult additional system administration resources.
Now try these steps in your practice environment for enhanced system performance and efficient memory management.