> ## Documentation Index
> Fetch the complete documentation index at: https://notes.kodekloud.com/llms.txt
> Use this file to discover all available pages before exploring further.
# Configure disk compression
> This tutorial explains how to configure disk compression using Virtual Data Optimizer in Linux for effective storage management.
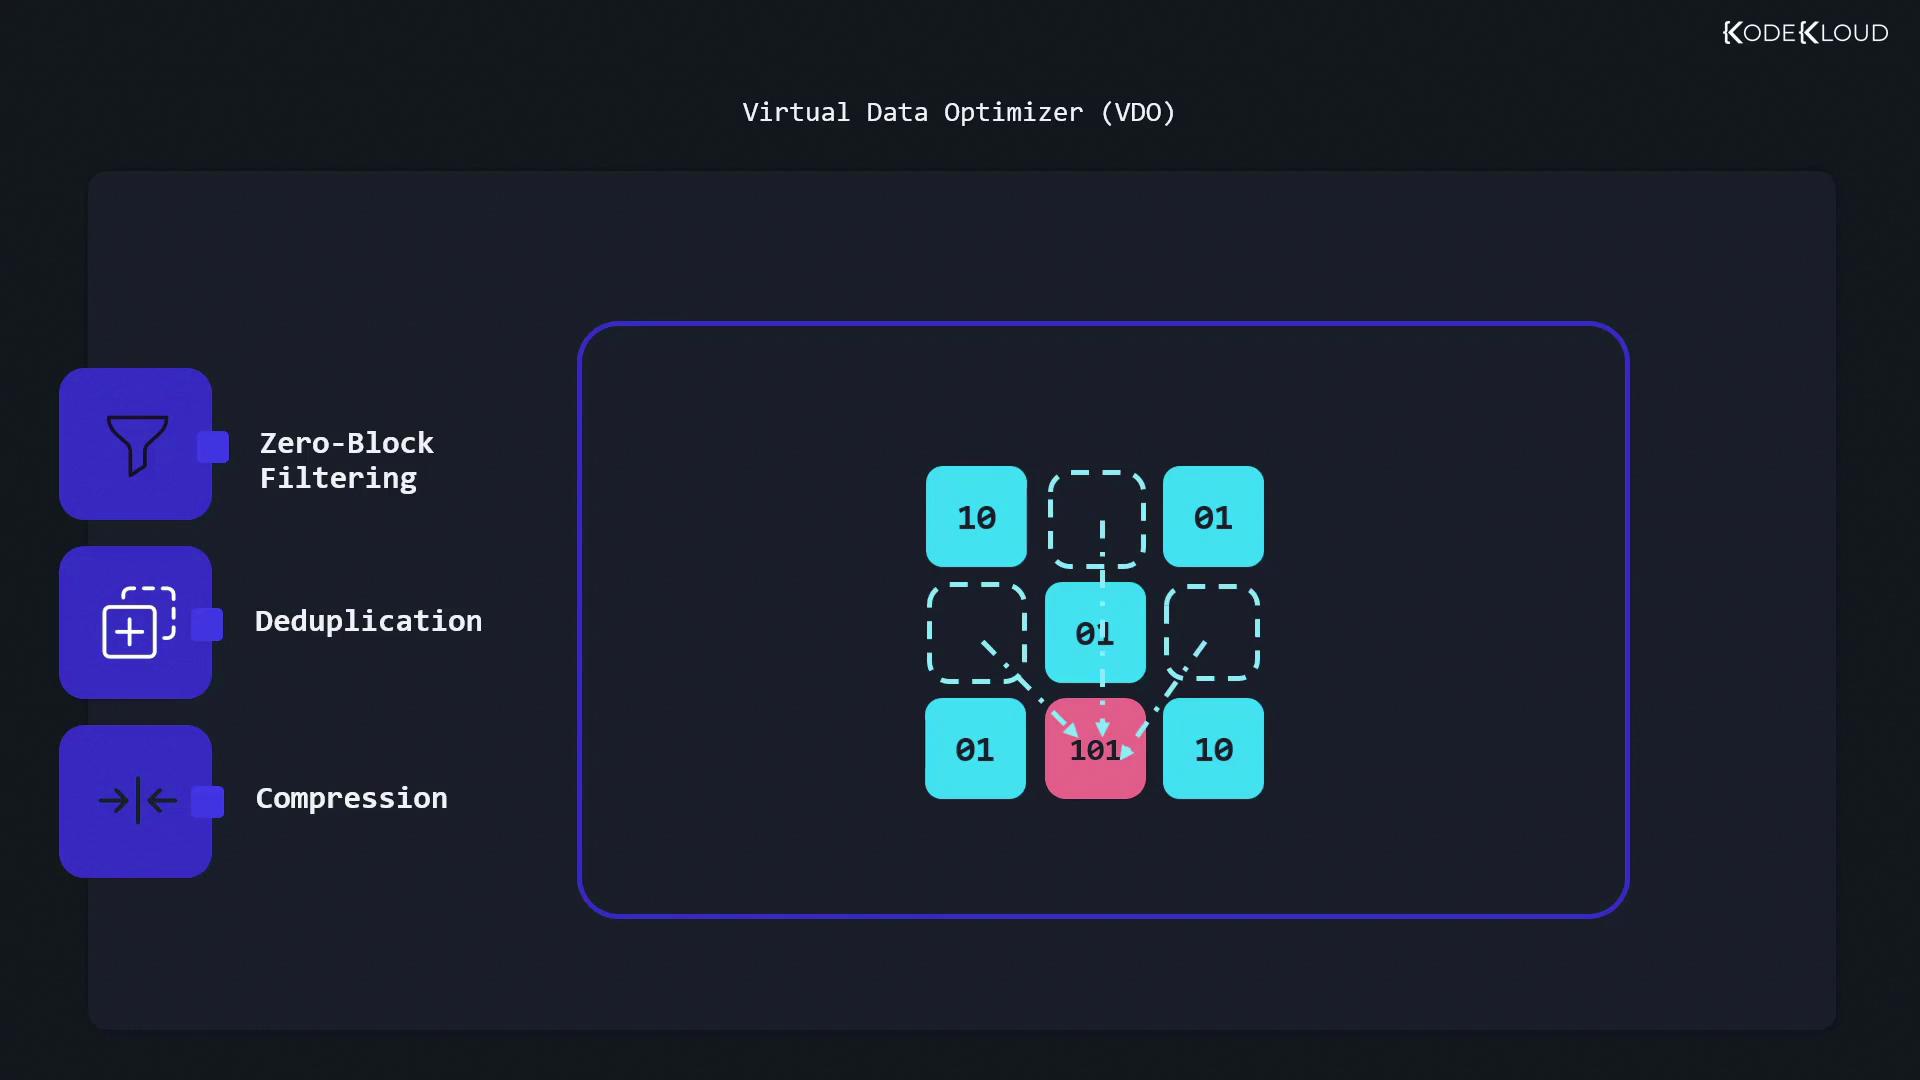
In this tutorial, you'll learn how to configure disk compression using Virtual Data Optimizer (VDO) in Linux. Although storage has become increasingly abundant and affordable, effective storage management remains crucial. VDO optimizes storage use through three key techniques: zero-block filtering, deduplication, and compression. Below, we explain each concept and provide step-by-step instructions to configure VDO on your system.
VDO enhances storage performance by filtering out unnecessary data, eliminating redundant blocks, and compressing data in real time.
## Zero-Block Filtering
VDO begins by scanning the storage device for blocks filled only with zeros—data that does not contribute meaningfully to the stored information. This process is similar to draining water from pasta using a colander: the water (empty data) flows away while the pasta (useful data) is retained.


## Deduplication
Once zero blocks are filtered out, VDO moves on to deduplication. In this step, VDO checks if a block of data is already present elsewhere on the storage device. If a duplicate is found, instead of rewriting the data, VDO updates its metadata to reference the existing block. This method reduces redundant data storage and conserves disk space.
## Compression
The final step in the VDO process is data compression. As data blocks are written to disk, VDO compresses them and packs several compressed blocks into one physical block. This not only saves space but can also improve read performance by reducing the amount of data transferred.
## Installing and Enabling VDO
If VDO is not already installed, you can add it using YUM. Once installed, enable and start the VDO service with systemctl:
```bash theme={null}
sudo yum install vdo
sudo systemctl enable --now vdo.service
```
## Creating a VDO Device
To begin using VDO, you must have a storage device. In this example, we use an unpartitioned device `/dev/vdb` (5 GB in size) and create a VDO device with a logical size of 10 GB:
```bash theme={null}
sudo vdo create --name=vdo_storage --device=/dev/vdb --vdoLogicalSize=10G
```
Explanation of the command options:
* `vdo create`: Initiates the creation of a new VDO-managed device.
* `--name=vdo_storage`: Assigns a name to the new VDO device.
* `--device=/dev/vdb`: Specifies the physical storage device to use.
* `--vdoLogicalSize=10G`: Sets the logical volume size that users will see (10 GB logical, despite a 5 GB physical size).
After creating the VDO device, check its status with:
```bash theme={null}
sudo vdostats --human-readable
```
Expected output:
```bash theme={null}
Device Size Used Available Use% Space saving%
/dev/mapper/vdo_storage 5.0G 3.0G 2.0G 60% N/A
```
Here, the "Size" column reflects the physical capacity while "Use%" indicates current usage. The "Space saving%" field displays N/A until data is written.
## Creating a Filesystem on the VDO Device
Next, create an XFS filesystem on the VDO device. The `-K` option prevents XFS from sending discard requests, which accelerates filesystem creation on an all-zero VDO device:
```bash theme={null}
sudo mkfs.xfs -K /dev/mapper/vdo_storage
sudo udevadm settle
```
After filesystem creation and letting udev settle, check the VDO statistics again:
```bash theme={null}
sudo vdostats --human-readable
```
The updated output should reflect a significant space-saving percentage:
```text theme={null}
Device Size Used Available Use% Space saving%
/dev/mapper/vdo_storage 5.0G 3.0G 2.0G 60% 99%
```
## Mounting the VDO Device
Before mounting the VDO device, create a mount point (e.g., `/mnt/myvdo`) and add an entry to `/etc/fstab` with the necessary options to ensure the VDO service is active before mounting:
```plaintext theme={null}
/dev/mapper/vdo_storage /mnt/myvdo xfs _netdev,x-systemd.device-timeout=0,x-systemd.requires=VDO.service 0 0
```
Then, create the mount point and mount the filesystem:
```bash theme={null}
sudo mkdir /mnt/myvdo
sudo vi /etc/fstab
sudo mount -a
df -h /mnt/myvdo
```
Expected output:
```text theme={null}
Filesystem Size Used Avail Use% Mounted on
/dev/mapper/vdo_storage 10G 104M 9.9G 2% /mnt/myvdo
```
Note that the physical size is 5 GB, but the logical size presented to users is 10 GB.
## Demonstrating Deduplication
To observe how VDO conserves disk space via deduplication, follow these steps:
1. Create a 50 MB file with random data:
```bash theme={null}
head -c 50MB /dev/urandom > mydata.txt
```
2. Create 10 directories on the VDO mount point:
```bash theme={null}
mkdir /mnt/myvdo/dir{1..10}
```
3. Copy the file into each directory using a loop:
```bash theme={null}
for i in $(seq 1 10); do sudo cp /home/aaron/mydata.txt /mnt/myvdo/dir$i; done
```
4. Verify the mount point’s usage:
```bash theme={null}
df -h /mnt/myvdo
```
Expected result:
```text theme={null}
Filesystem Size Used Avail Use% Mounted on
/dev/mapper/vdo_storage 10G 581M 9.5G 6% /mnt/myvdo
```
5. Check the VDO statistics:
```bash theme={null}
sudo vdostats --human-readable
```
Expected output:
```text theme={null}
Device Size Used Available Use% Space saving%
/dev/mapper/vdo_storage 5.0G 3.0G 2.0G 60% 94%
```
Next, copy another file with a different name into each directory:
```bash theme={null}
sudo cp /home/aaron/mydata.txt /home/aaron/moredata.txt
for i in $(seq 1 10); do sudo cp /home/aaron/moredata.txt /mnt/myvdo/dir$i; done
```
Then verify the filesystem usage and VDO statistics again:
```bash theme={null}
df -h /mnt/myvdo
sudo vdostats --human-readable
```
Expected output for filesystem usage:
```text theme={null}
Filesystem Size Used Avail Use% Mounted on
/dev/mapper/vdo_storage 10G 1.1G 9.0G 11% /mnt/myvdo
```
And VDO stats might show:
```text theme={null}
Device Size Used Available Use% Space saving%
/dev/mapper/vdo_storage 5.0G 3.1G 1.9G 61% 95%
```
As you add more identical copies, you will notice an increase in the space-saving percentage, demonstrating VDO's effective deduplication—even when file names differ.
## VDO in RHEL 9 with LVM Integration
In RHEL 9, VDO is integrated with LVM, and the standalone Python-based VDO tools are no longer used. To create a new VDO volume using LVM, proceed with the following steps:
1. Create a physical volume on `/dev/vdb`:
```bash theme={null}
sudo pvcreate /dev/vdb
```
2. Create a volume group named `vdo_volume`:
```bash theme={null}
sudo vgcreate vdo_volume /dev/vdb
```
3. Create a logical volume with VDO options:
```bash theme={null}
sudo lvcreate --type vdo -n vdo_storage -L 100%FREE -V 10G vdo_volume/vdo_pool1
```
4. Create an XFS filesystem on the new VDO volume:
```bash theme={null}
sudo mkfs.xfs -K /dev/vdo_volume/vdo_storage
```
Alternatively, to use an ext4 filesystem:
```bash theme={null}
sudo mkfs.ext4 -E nodiscard /dev/vdo_volume/vdo_storage
```
One clear advantage of the LVM-integrated approach in RHEL 9 is that it simplifies mounting by eliminating the complex options required in previous versions.
## Mounting the LVM-Based VDO Device
First, create a mount point:
```bash theme={null}
sudo mkdir /mnt/myvdo
```
Edit the `/etc/fstab` file with your preferred text editor (e.g., vi) and add the following line:
```plaintext theme={null}
/dev/vdo_volume/vdo_storage /mnt/myvdo xfs defaults 0 0
```
Then, mount the filesystem and verify the mount:
```bash theme={null}
sudo mount -a
df -h /mnt/myvdo
```
Expected output:
```text theme={null}
Filesystem Size Used Avail Use% Mounted on
/dev/vdo_volume/vdo_storage 10G 104M 9.9G 2% /mnt/myvdo
```
This confirms that the VDO volume has a logical size of 10 GB and is correctly mounted.
For more details on LVM-based VDO options, refer to the manual pages:
```bash theme={null}
man lvm vdo
```
This concludes our comprehensive guide on configuring disk compression with VDO. Enjoy the benefits of optimized storage and improved performance in your Linux environment!