This article guides building a WebAssembly log extractor using Rust and JavaScript for efficient log extraction operations on the web.
In this guide, we will build a simple WebAssembly log extractor using Rust, WebAssembly, and JavaScript. By leveraging the powerful wasm-bindgen crate, this project demonstrates how to integrate Rust with JavaScript, enabling efficient log extraction operations on the web.Our objective is to create a web application that parses a log message formatted like this:
Copy
Timestamp: 2024-11-22Severity: INFOMessage: System started
The application will extract the timestamp, severity, and message components, displaying them on the webpage. It will also handle invalid log formats gracefully by showing a clear error message.
Ensure that WASM pack is installed before starting this project.
Edit your Cargo.toml file to include the necessary dependencies for wasm-bindgen, Serde, and serde-wasm-bindgen. These dependencies facilitate serialization and deserialization between Rust and JavaScript:
Define a public struct LogEntry that models the log components. The struct derives the Serialize and Deserialize traits to simplify conversion between Rust and JavaScript objects.
Create the extract_log function that is exposed to JavaScript via the #[wasm_bindgen] attribute. This function splits the input log string into three components and returns a JavaScript value.
Copy
#[wasm_bindgen]pub fn extract_log(log: &str) -> JsValue { // Split the log into at most three parts using a space as the delimiter. let parts: Vec<&str> = log.splitn(3, ' ').collect(); if parts.len() < 3 { return JsValue::from_str("Invalid log format"); } // Create a new LogEntry instance using the parsed parts. let log_entry = LogEntry { timestamp: parts[0].to_string(), severity: parts[1].to_string(), message: parts[2].to_string(), }; // Serialize the LogEntry struct into a JsValue. to_value(&log_entry).unwrap()}
In this function, if the log is improperly formatted (fewer than three parts after splitting), an error message is returned. In a production environment, consider handling errors more robustly instead of using unwrap().
Compile your project to generate the WebAssembly binary along with the JavaScript binding file and package.json for npm integration. Ensure the Cargo.toml file includes the [lib] crate-type fields as shown above. When compiled, the output should resemble:
Copy
Compiling syn v2.0.89Compiling wasm-bindgen-backend v0.2.95Compiling serde_derive v1.0.215Compiling wasm-bindgen-macro-support v0.2.95Compiling wasm-bindgen-macro v0.2.95Compiling js-sys v0.3.72Compiling serde-wasm-bindgen v0.2.0Compiling wasm_log_extractor v0.1.0 (/Users/priyadav/projects/wasm_log_extractor)Finished release [optimized] target(s) in 7.38s[INFO]: Installing wasm-bindgen...[INFO]: Optimizing wasm binaries with `wasm-opt`...[INFO]: Optional fields missing from Cargo.toml: 'description', 'repository', and 'license'.[INFO]: ✨ Done in 7.71s[INFO]: Your wasm pkg is ready to publish at /Users/priyadav/projects/wasm_log_extractor/pkg.
This step produces the WASM binary and the associated files required for further development.
For more advanced projects, consider adding descriptive fields like ‘description’, ‘repository’, and ‘license’ in the Cargo.toml.
Below is the complete HTML file that provides a user interface for the log extractor. The HTML includes basic CSS styling and JavaScript code to initialize and interact with the WebAssembly module.
Copy
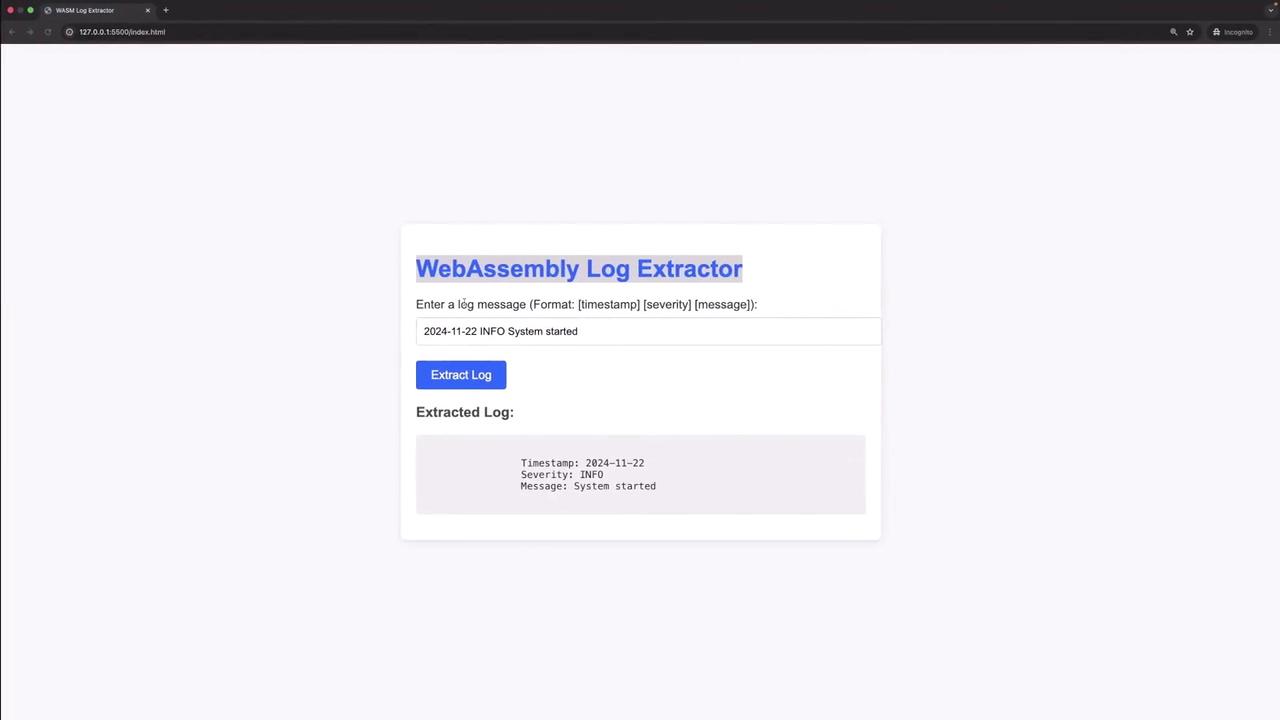
<!DOCTYPE html><html lang="en"><head> <meta charset="UTF-8"> <title>WebAssembly Log Extractor</title> <style> /* CSS styling for the log extractor interface */ .container { margin: 20px; font-family: Arial, sans-serif; } .error { color: red; } .loading { font-style: italic; } </style></head><body> <div class="container"> <h3>Extracted Log:</h3> <pre id="extractedLog"></pre> <!-- Error Message --> <p id="errorMessage" class="error"></p> <!-- Loading Indicator --> <p id="loadingIndicator" class="loading" style="display:none;">Loading...</p> <!-- Log Input Section --> <label for="logInput">Enter Log Message:</label> <input id="logInput" type="text" placeholder="2024-11-22 INFO System started"> <button id="extractButton">Extract Log</button> </div> <script type="module"> import init, { extract_log } from "./pkg/wasm_log_extractor.js"; // Show loading indicator until the WASM module finishes loading. document.getElementById("loadingIndicator").style.display = "block"; // Initialize the WebAssembly module. init().then(() => { console.log("WASM module loaded."); document.getElementById("loadingIndicator").style.display = "none"; }).catch((err) => { console.error("Error loading WASM:", err); document.getElementById("loadingIndicator").innerText = "Failed to load"; }); // Extract log when the user clicks the button. document.getElementById("extractButton").addEventListener("click", () => { const logMessage = document.getElementById("logInput").value; const extractedLog = extract_log(logMessage); // Check if the returned value is a structured LogEntry object. if (typeof extractedLog === 'object' && extractedLog !== null) { const logObj = extractedLog; if (logObj.timestamp) { document.getElementById("extractedLog").innerText = `Timestamp: ${logObj.timestamp}Severity: ${logObj.severity}Message: ${logObj.message}`; document.getElementById("errorMessage").innerText = ""; // Clear any existing error } else { document.getElementById("extractedLog").innerText = ""; document.getElementById("errorMessage").innerText = "Error: Invalid log format returned."; } } else { // Display an error message if an error string was returned. document.getElementById("extractedLog").innerText = ""; document.getElementById("errorMessage").innerText = extractedLog; } }); </script></body></html>
In the HTML code above:
A loading indicator is shown while the WASM module loads.
Once initialized, the module is ready to process log entries.
When the “Extract Log” button is clicked, the extract_log function processes the input and displays the parsed output or an error message accordingly.
To test the application, serve the HTML file using a live server extension or your preferred local server. When the page loads, the WASM module initializes. Enter a log message in the specified format (e.g., “2024-11-22 INFO System started”) and click the “Extract Log” button to display the extracted timestamp, severity, and message.For improperly formatted log messages, the error “Invalid log format” will be shown.
This tutorial has demonstrated how to build a WebAssembly-powered log extractor using Rust. We accomplished the following:
Created a Rust library with wasm-bindgen to interface with JavaScript.
Defined a LogEntry struct to model log data.
Implemented a function to extract and parse log entries.
Compiled the project to WebAssembly and integrated it with a web interface.
Tested the application with valid and invalid log formats.
This project highlights the flexibility and performance benefits of integrating Rust with WebAssembly, paving the way for building high-performance web applications.Happy coding!