Telepresence For Kubernetes
Telepresence For Kubernetes
Telepresence with Docker
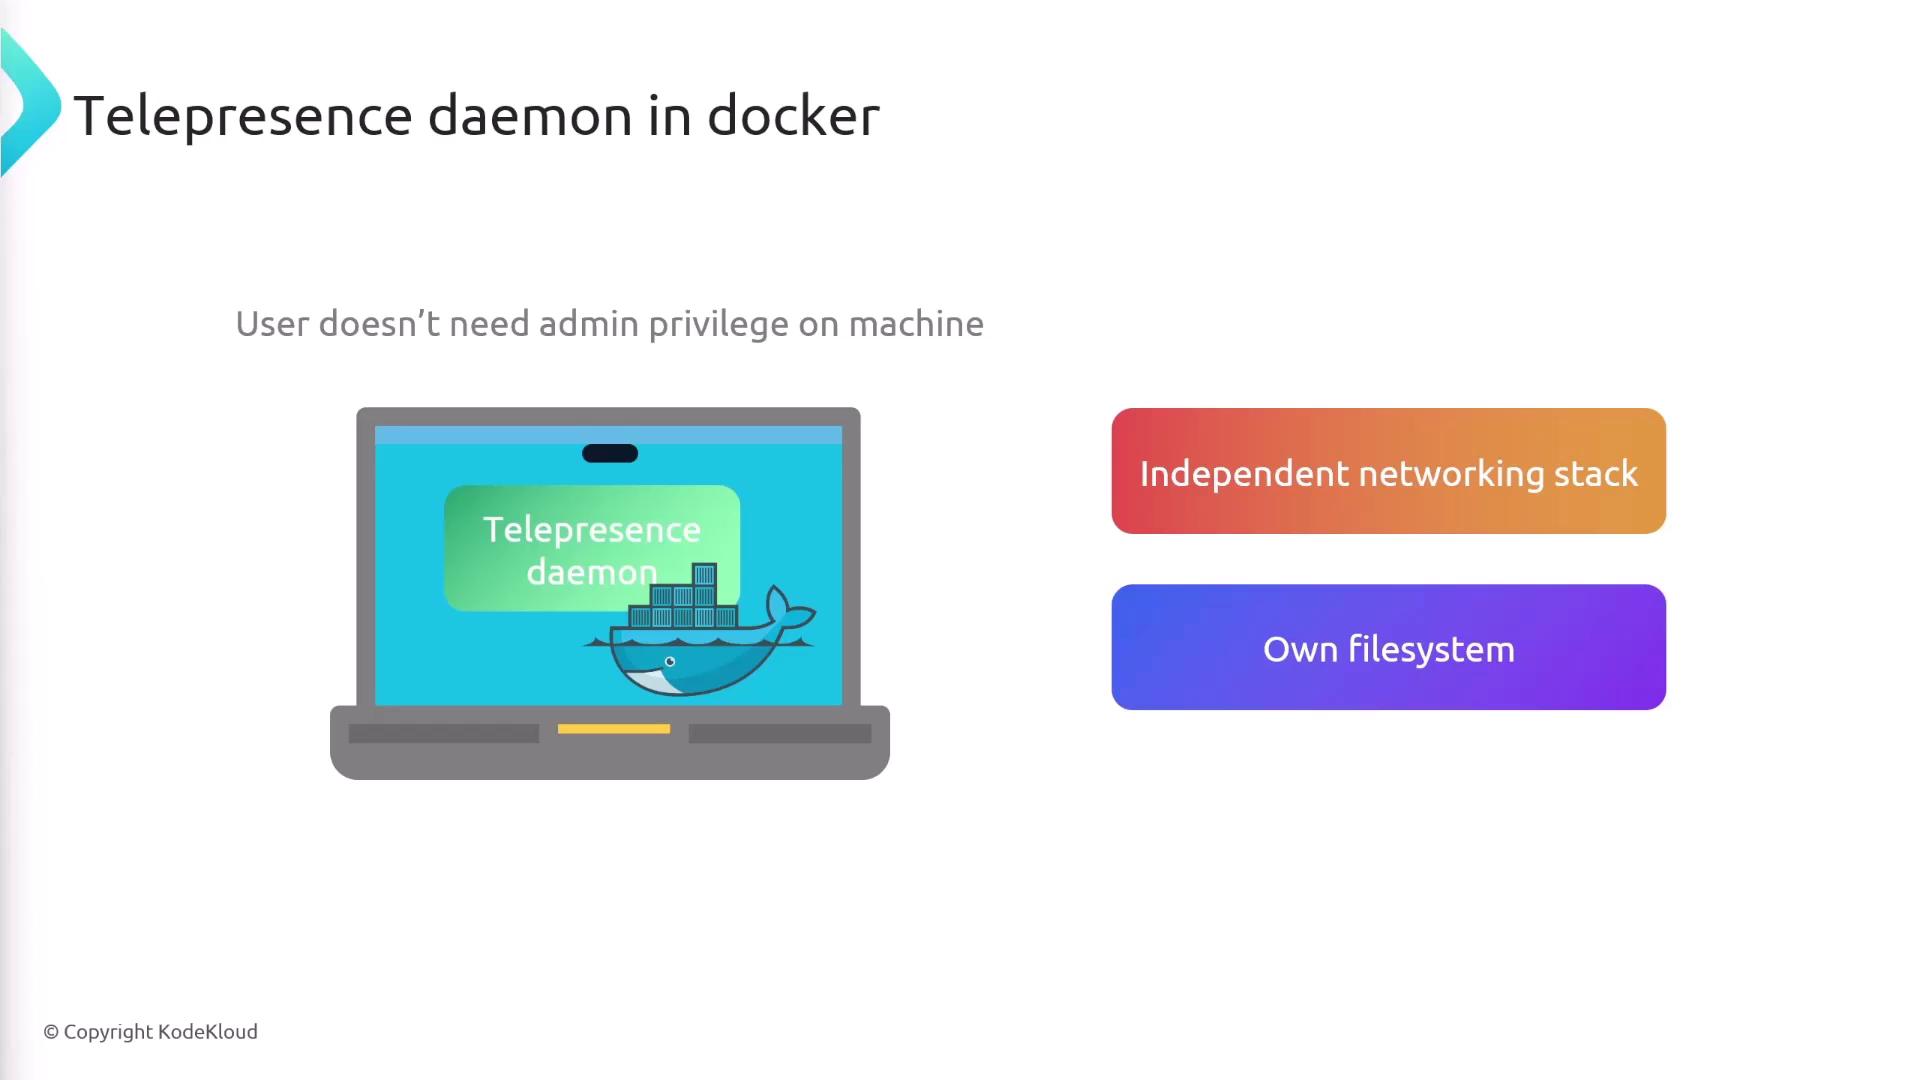
In this guide, you’ll discover how to run the Telepresence daemon inside a Docker container, enabling local development against your Kubernetes cluster without requiring admin privileges on your machine. By isolating the daemon’s networking stack and filesystem, Docker eliminates the need to modify host network routes or DNS, making Telepresence accessible on corporate laptops and environments with restricted permissions.
Prerequisites
- Docker Engine installed and running
- Kubernetes cluster context configured (
kubectl config current-context) - Telepresence CLI installed (see Telepresence Docs)
1. Starting the Telepresence Daemon in Docker
Launch Telepresence with the --docker flag to spin up its daemon inside a container:
telepresence connect --docker
Note
Using --docker gives the Telepresence daemon its own network namespace, avoiding any host‐level network or DNS changes.
2. Key Docker Flags
| Flag | Purpose |
|---|---|
--docker | Run the Telepresence daemon in a Docker container |
--docker-run <image> | Start your intercepted service inside the specified Docker image |
--docker-build <dir> | Build a Docker image from <dir> (containing Dockerfile or source code) |
--docker-build-opt | Additional build options (e.g., tag=new-image-name) |
3. Intercepting a Service Normally
With the daemon running, you can intercept a Kubernetes service and route its traffic to your machine:
telepresence intercept products-depl --port 8000
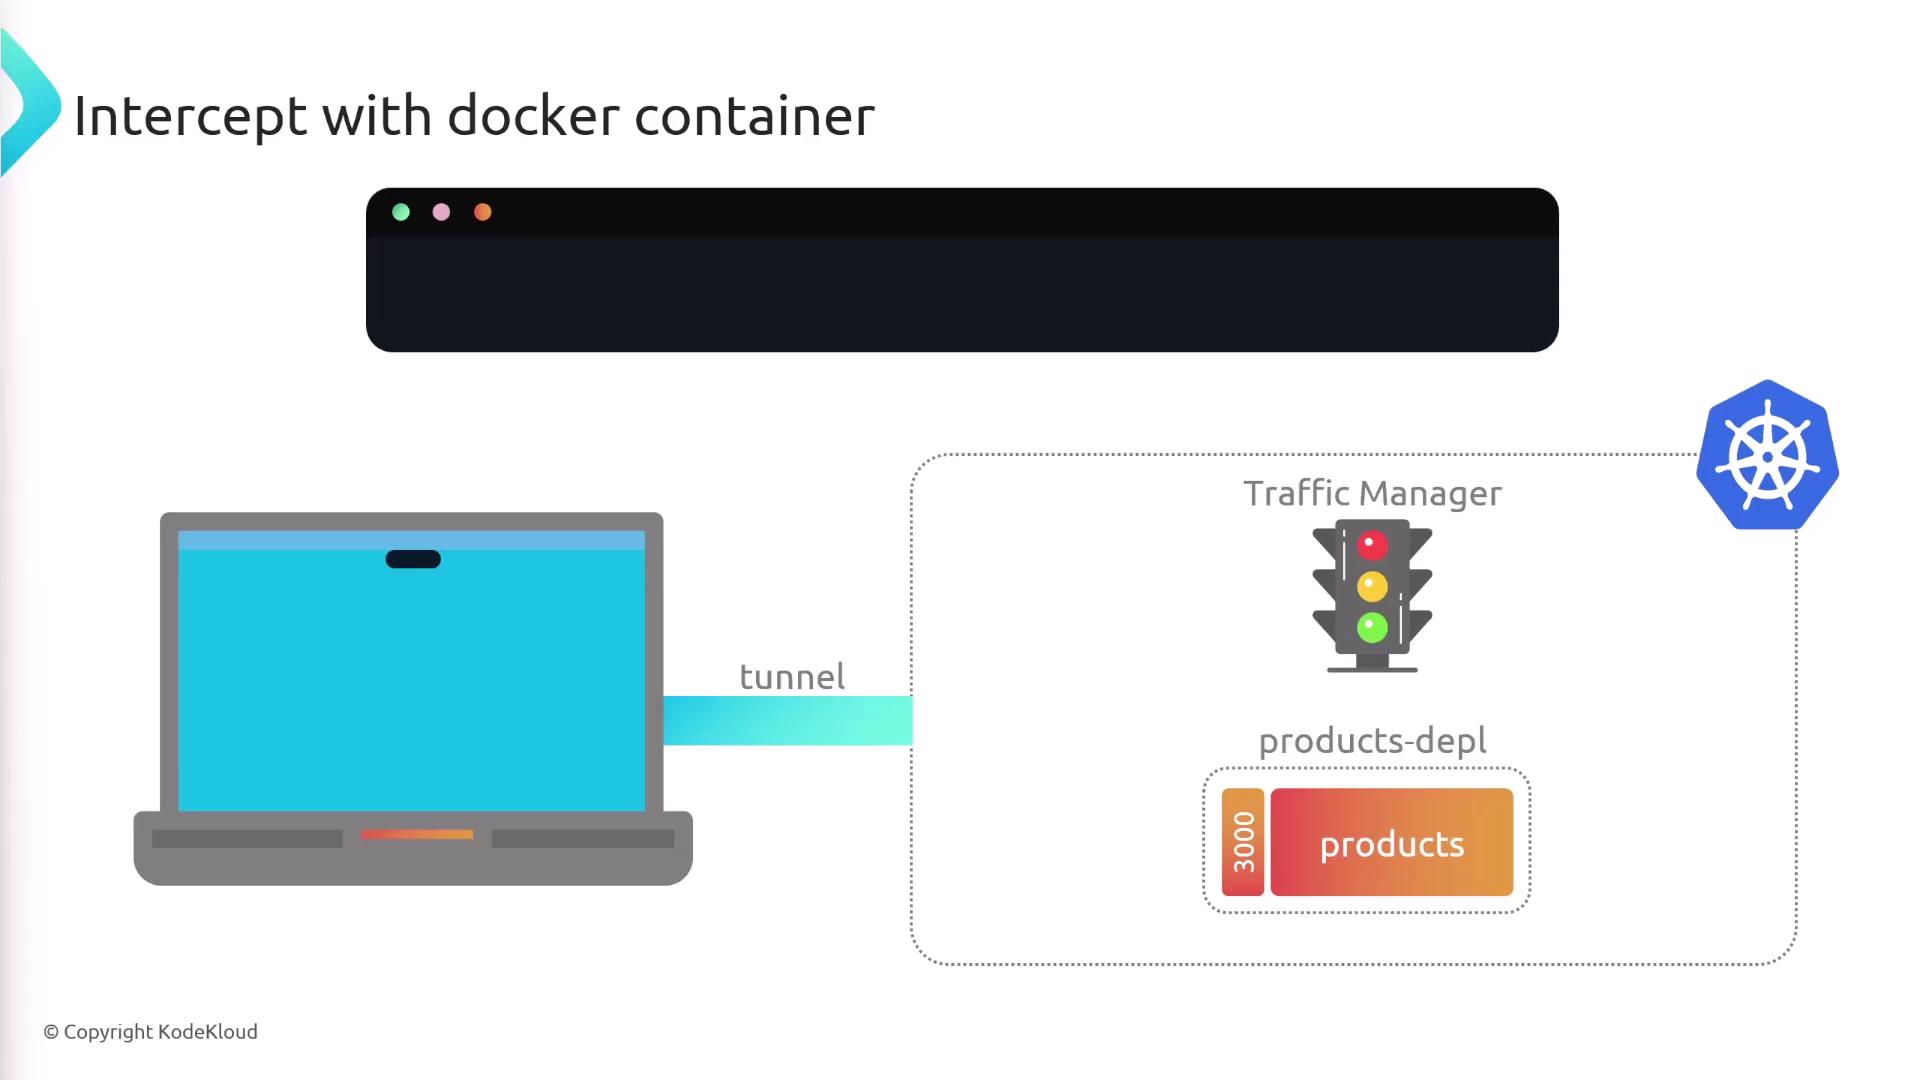
4. Running the Intercepted Service in Docker
Instead of running your code locally, you can launch the intercepted service inside a container:
telepresence intercept products-depl \
  --port 8000 \
  --docker-run your-image-name
Replace your-image-name with the Docker image you’ve built for the products service.
5. Building and Running in One Command
Skip manual builds by letting Telepresence build and run your image in a single step:
telepresence intercept products-depl \
  --port 8000 \
  --docker-build products/src \
  --docker-build-opt tag=new-image-name \
  --docker-run new-image-name
--docker-build products/srcpoints to the directory with yourDockerfileor source code.--docker-build-opt tag=new-image-namesets the image tag.--docker-run new-image-nameruns the freshly built container and establishes the intercept.
This command compiles your code into a Docker image, starts the container locally, and directs Kubernetes cluster traffic to your container.
Links and References
Watch Video
Watch video content