Before you begin, ensure that you have the necessary permissions to install software on your system.
Installing Terraform
Installation is straightforward:- Download the binary for your operating system.
- Unzip the downloaded file.
- Move the binary to your system path.
Understanding HashiCorp Configuration Language (HCL)
Terraform configurations are written in HCL and stored in files with a.tf extension. These files are composed of blocks and arguments:
- Blocks: Define the infrastructure components or describe which resources to create.
- Arguments: Provided as key-value pairs within the blocks, they specify configuration parameters.
Example: Creating a Local File Resource
The following is an example configuration file namedlocal.tf that creates a file on the local system. This simple example helps illustrate the basics, even though the majority of this course will focus on AWS-based resources.
Let’s review the configuration in local.tf:
Explanation of the Configuration
-
Resource Block:
The block starts with the keywordresourceand is enclosed in curly braces. It tells Terraform which infrastructure object to manage. -
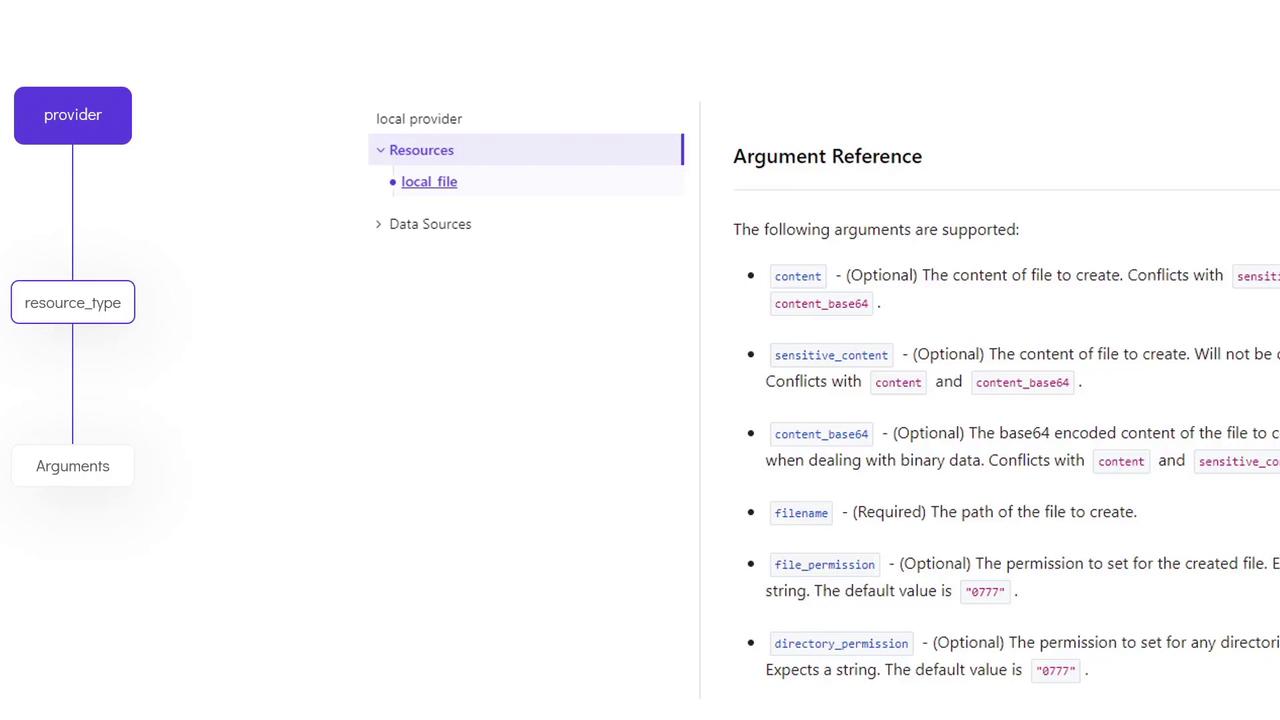
Resource Type and Provider:
In this example, the resource type islocal_file. The prefix before the underscore (“local”) indicates the provider, while the suffix (“file”) specifies the resource type. -
Resource Name:
The namepetacts as a logical identifier for this resource, allowing you to reference it in other parts of your configuration. -
Arguments:
Inside the block, there are two key-value pairs:filename(the path of the file) andcontent(the content to be written to the file).
Example: Creating an AWS EC2 Instance
The configuration structure remains consistent across providers. Here is an example used to create an AWS EC2 instance:Overview of Terraform Resources
A resource in Terraform is any object that it manages. This includes:- Local files (e.g.,
local_file) - Virtual machine instances (e.g., AWS EC2)
- Cloud services such as S3 buckets, ECS clusters, DynamoDB tables, IAM users, and many more
filename for local_file), while others, including ACLs or permissions, may be optional.
Terraform Workflow
After writing your configuration files, use the following steps to provision your resources:-
Write the Configuration File:
Create your.tffiles with the required resource definitions. -
Initialize the Directory:
Run theterraform initcommand to initialize the working directory and download necessary provider plugins. -
Review the Execution Plan:
Useterraform planto preview the actions Terraform will perform. The output will show symbols; for example, a plus sign (+) indicates a resource creation. -
Apply the Configuration:
Runterraform applyto execute the execution plan. Terraform will prompt you for confirmation before proceeding unless you supply the-auto-approveflag.To verify the resource creation, use theterraform showcommand:Theterraform showcommand displays the state of the created resource.
For more details on Terraform state management and best practices, check out the official Terraform Documentation.
Recap
-
Resource Blocks:
Define the objects Terraform manages. They include the resource type, a logical identifier, and configuration arguments. -
Arguments:
Specify the parameters for each resource. They can be either mandatory or optional depending on the resource. -
Providers:
Terraform works with multiple providers, each offering a unique set of resources and configuration options. Always refer to the provider’s documentation to understand all available arguments.