Configuring Azure Blob Storage
Azure Blob Storage is a robust service for storing a vast amount of unstructured data, including text and binary data. Accessible globally via HTTP or HTTPS, it is ideal for serving images, documents, streaming media, writing log files, and handling backup, restore, disaster recovery, or archival scenarios. The Blob Storage architecture is structured into three main components: storage accounts, containers, and blobs.Storage Account
At the highest level is the Storage Account, which serves as the unique namespace in Azure for your data. This account holds all access keys, properties, and configurations, functioning as the “web files” repository where your data is stored.Containers
Inside a storage account, containers work like directories in a file system. They group related blobs and dictate access policies. For example, within the “web files” storage account, you might create separate containers for documents and videos. A documents container could hold PDF files, while a videos container might store MP4 files.Blobs
Blobs are the individual files stored in Azure Blob Storage and can be of any type and size. Azure Blob Storage supports three types of blobs:-
Block Blobs
These are optimal for storing text and binary data, with a maximum size of up to 4.75 TB. They allow efficient management of large data sets by handling each block individually.
Examples include various documents and media files. -
Append Blobs
Specifically designed for append operations, these blobs are perfect for logging scenarios. When your application continuously writes logs, append blobs ensure efficient addition of new entries. -
Page Blobs
With a capacity of up to 8 TB, page blobs are engineered for frequent read-write operations and are ideal for storing virtual machine disks.
Creating and Managing Containers
Containers can be created through the Azure Portal, Azure PowerShell, CLI, or REST APIs. They function similarly to directories on your local machine. A critical setting for containers is the public access level, which determines how blobs are available to the public. The access levels include:- Private
No anonymous access is allowed. Access is restricted to the account owner or specifically authorized users.
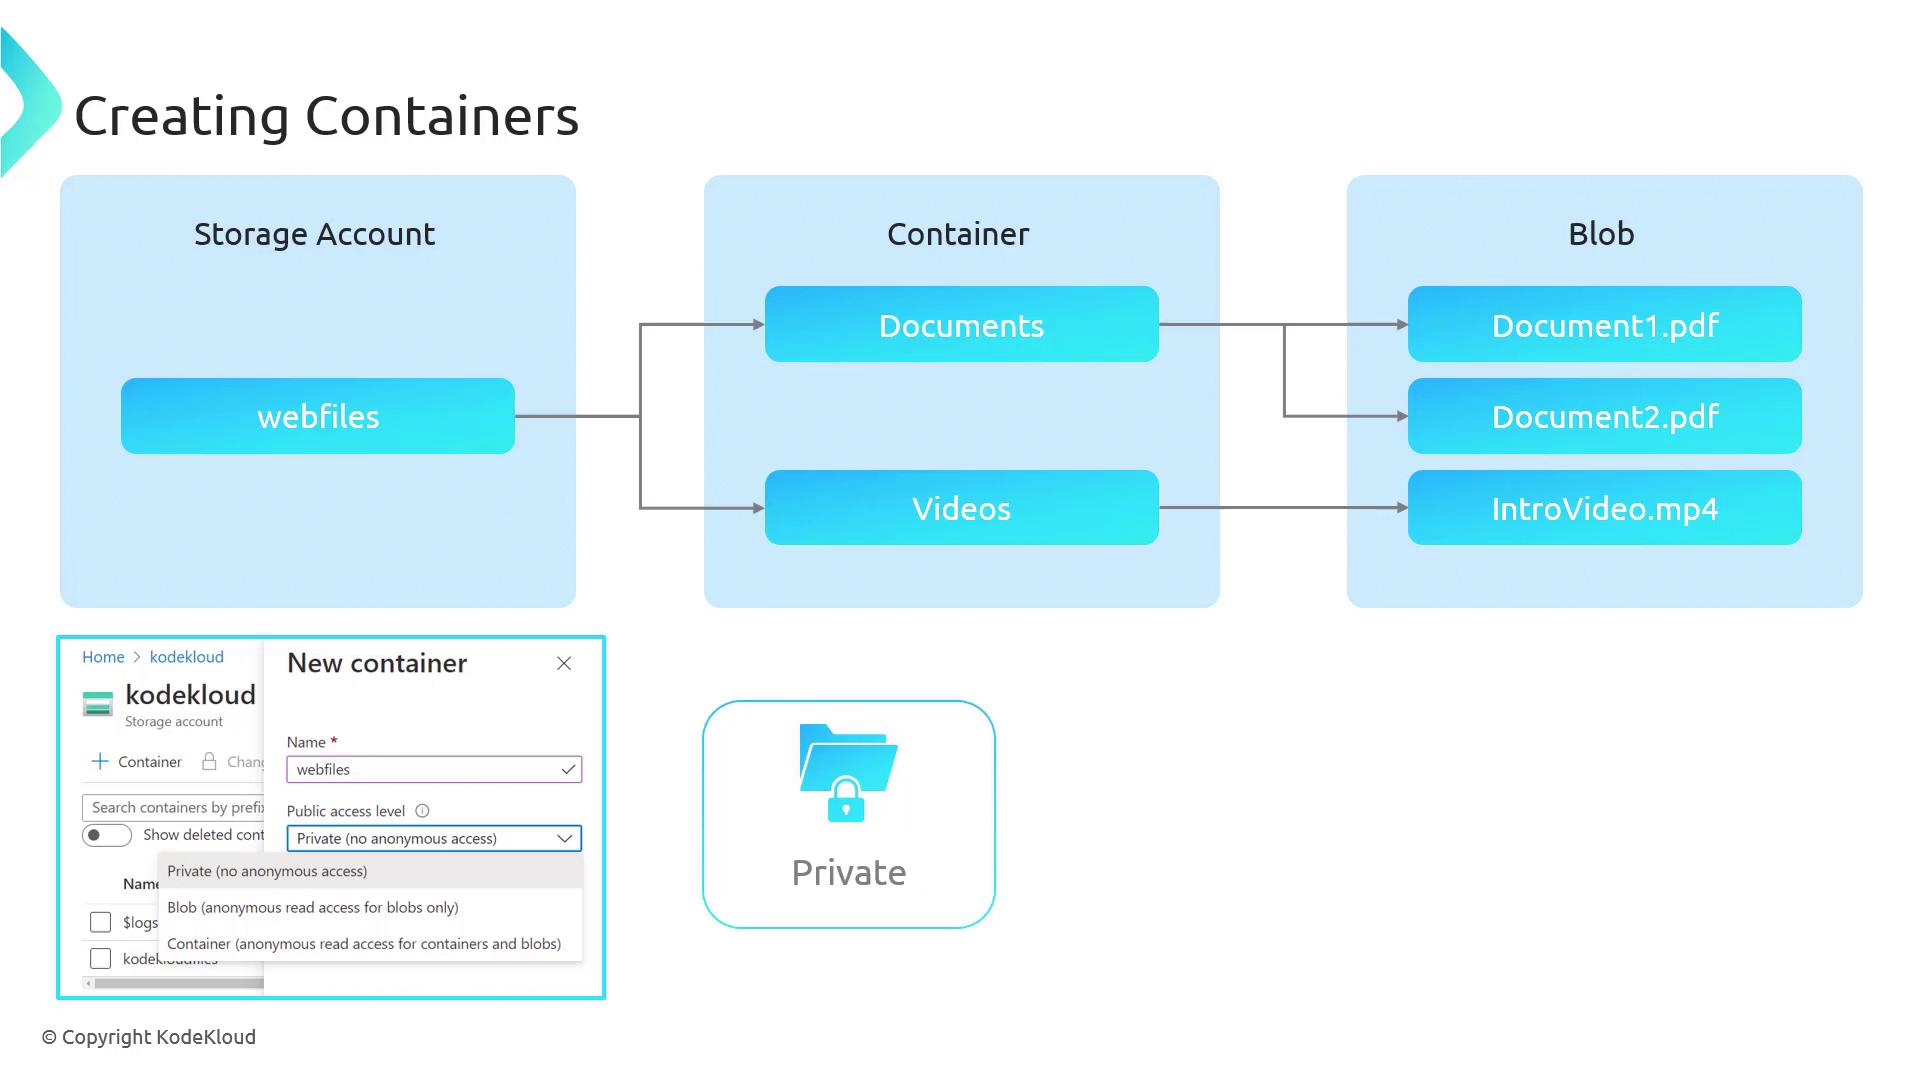
Enabling private access ensures that sensitive data remains protected unless accessed with proper authentication and authorization.
-
Blob
This setting permits anonymous read access to individual blobs, though container metadata remains concealed. Users can access blobs via direct URLs but cannot list all blobs in the container. -
Container
With container-level access, all content within the container is publicly readable. This setting allows users to list and download blobs, making it suitable for hosting public content like images or documents.
Creating a Container and Uploading Blobs via the Azure Portal
Follow these steps to create and manage containers in the Azure Portal:- Navigate to your storage account and select the “Containers” section.
- Click “Add” to create a new container. For example, name the container “images”.
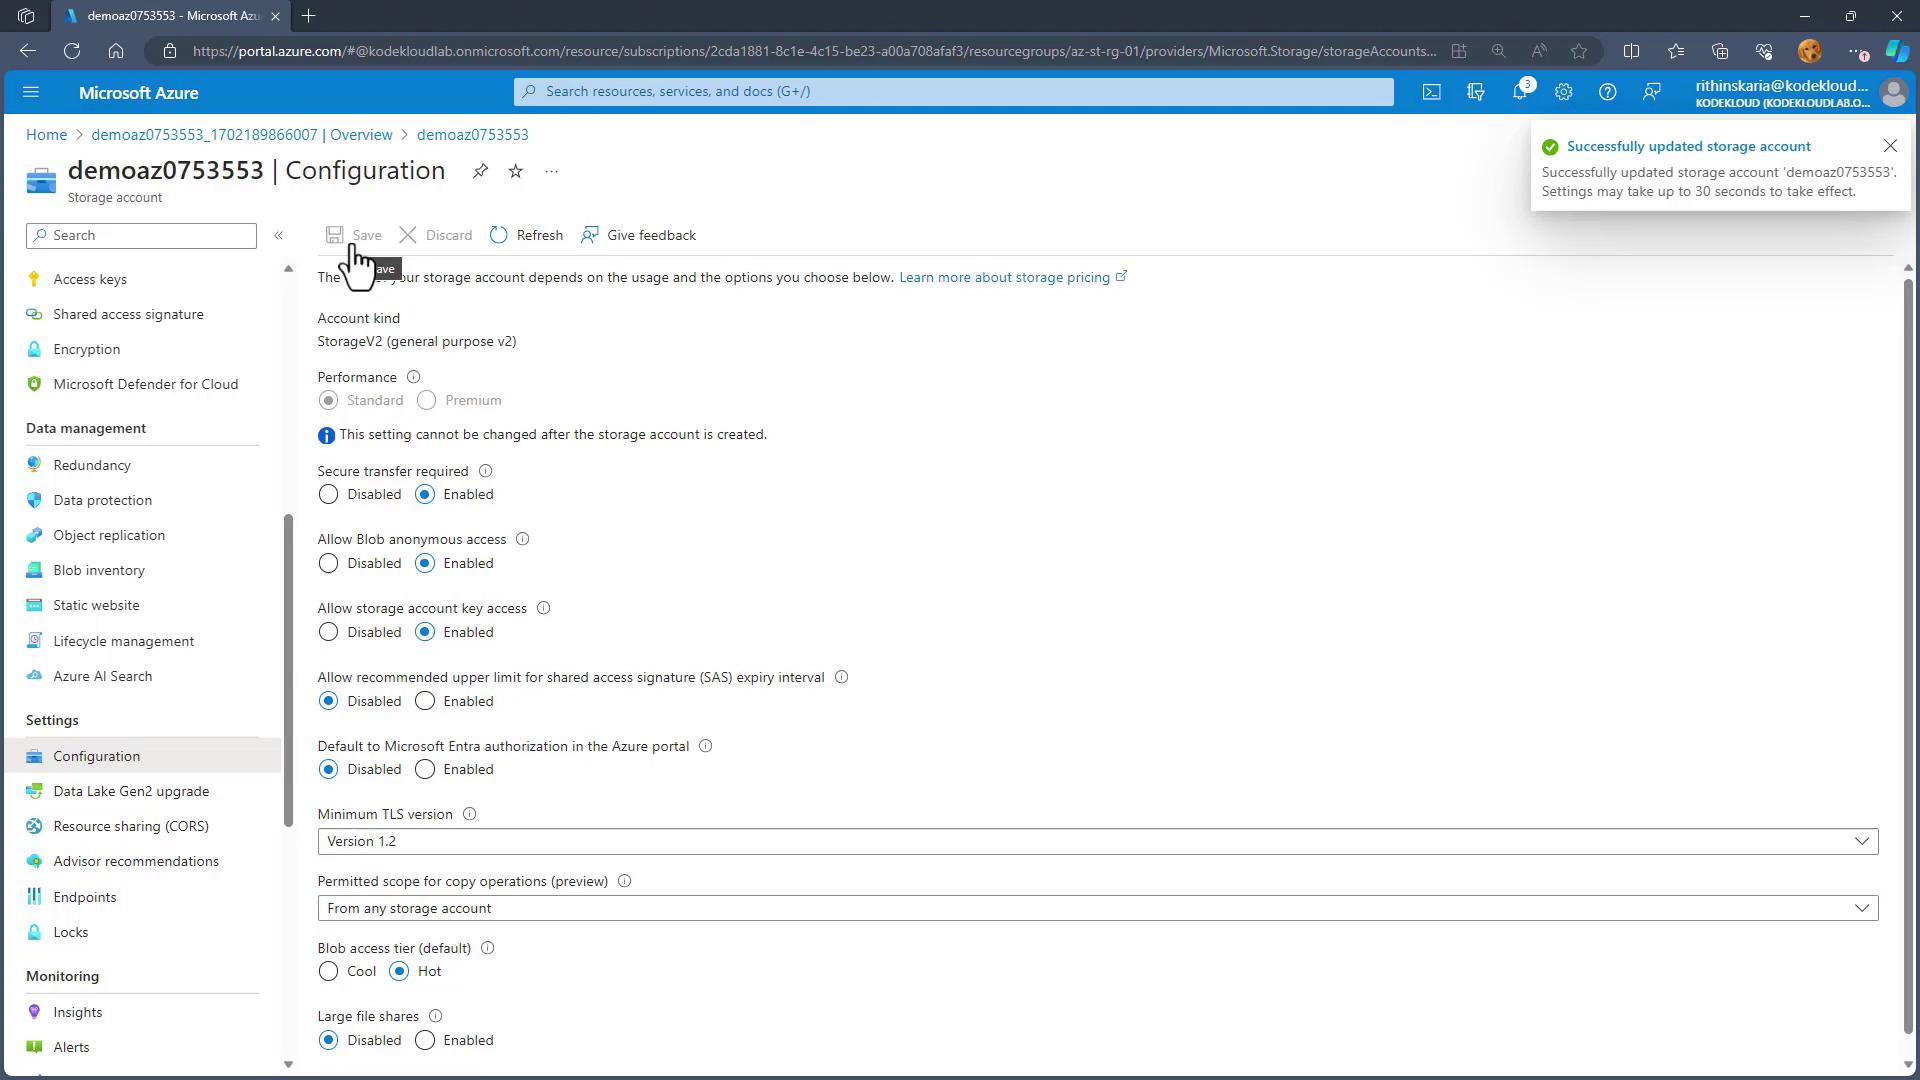
If certain options appear greyed out, it may be due to your storage account’s default settings. You might need to enable the “allow blob anonymous access” option in the storage account’s configuration.
- After enabling the appropriate settings, select the desired public access level—in this case, container-level access for the “images” container.
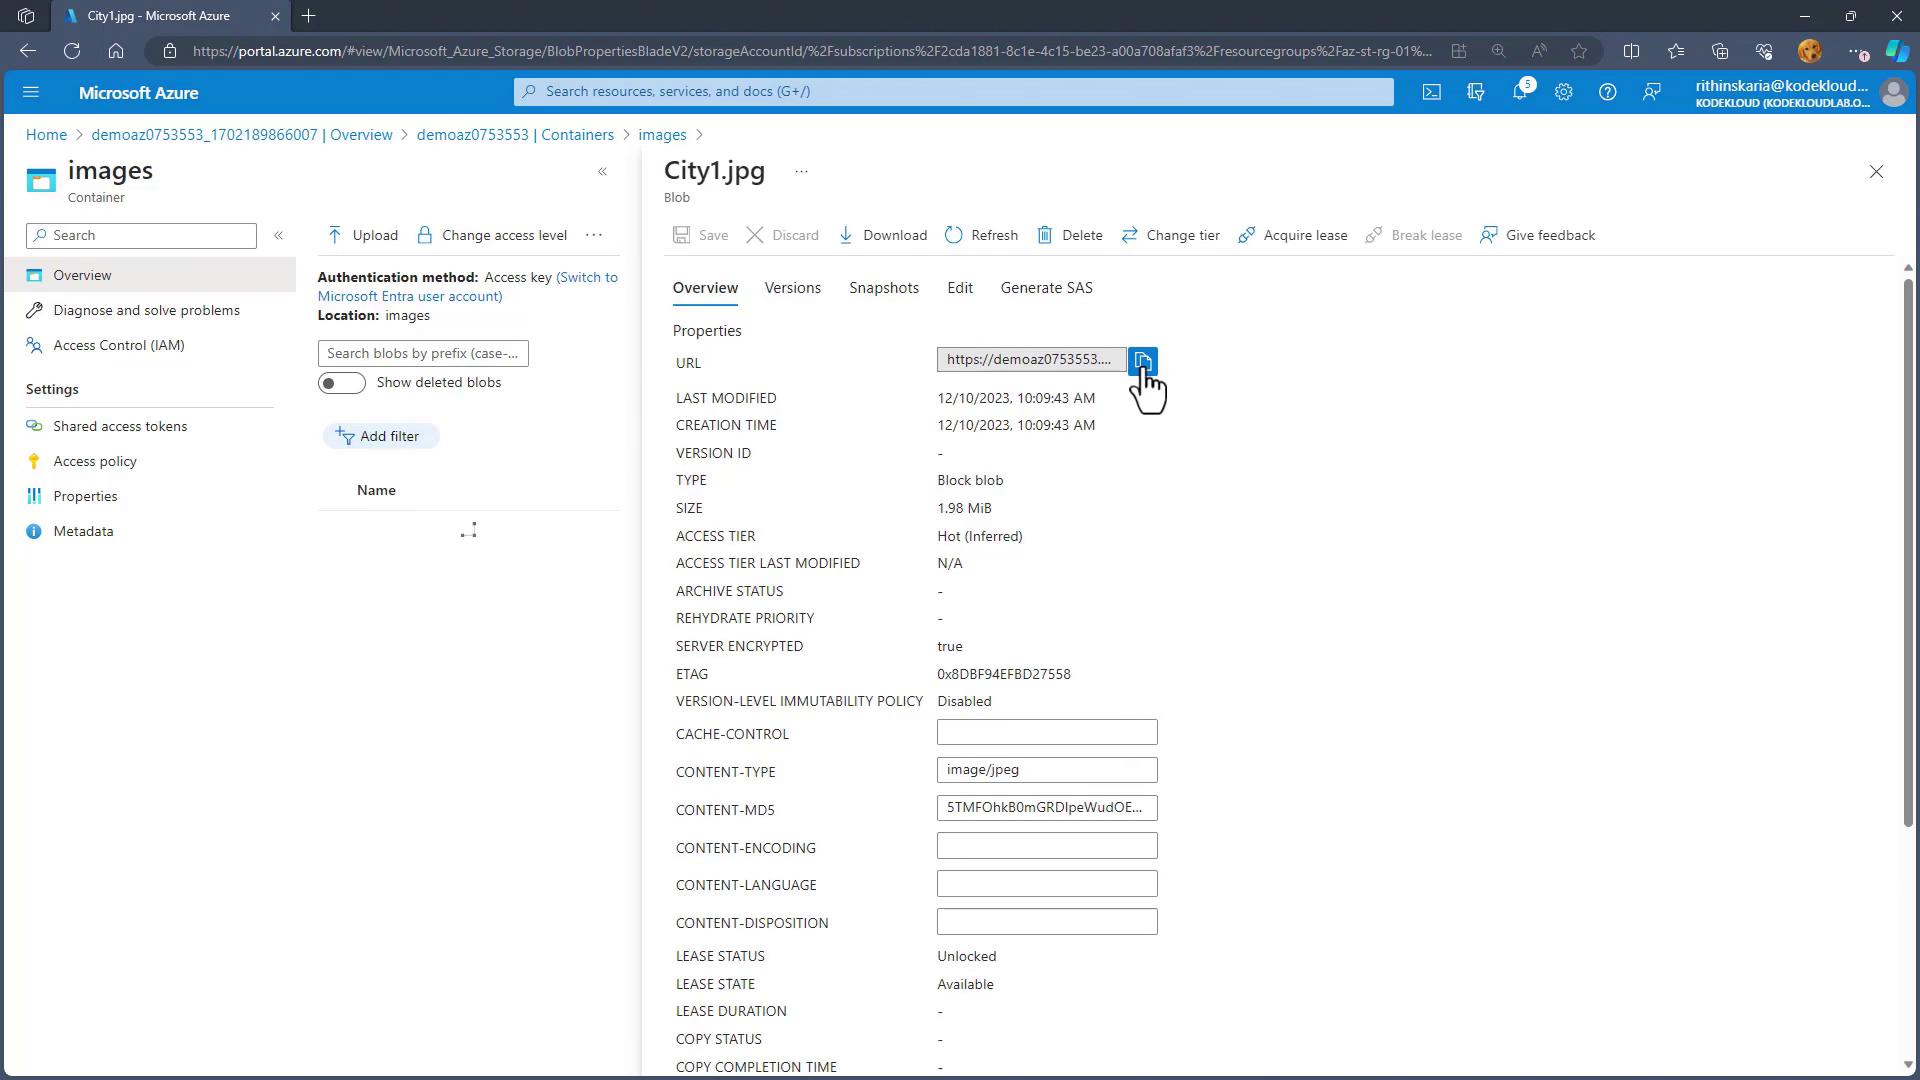
- Open the “images” container and click “Upload” to add your files. Browse for your files, select them, and confirm the upload. The portal automatically checks for naming conflicts before completing the process.