[Updated] AZ-104: Microsoft Azure Administrator
Administer Azure Storage
Shared Access Signatures
Shared Access Signatures (SAS) provide a secure, fine-grained method to grant temporary access to your Azure storage resources without exposing your account keys. With SAS, you can allow limited-time access to blobs, queues, tables, or files with specified permissions—such as read, write, delete, or list—while maintaining strict control over your data.
There are three types of SAS tokens:
- Service SAS: Grants access to specific resources within a storage account, offering detailed control over service operations.
- Account SAS: Provides broader access across multiple services in a storage account (blobs, files, queues, etc.) with extended permissions.
- User Delegated SAS: Secured using Microsoft Entra ID, it allows you to delegate access without exposing your account keys.
Understanding the SAS Structure
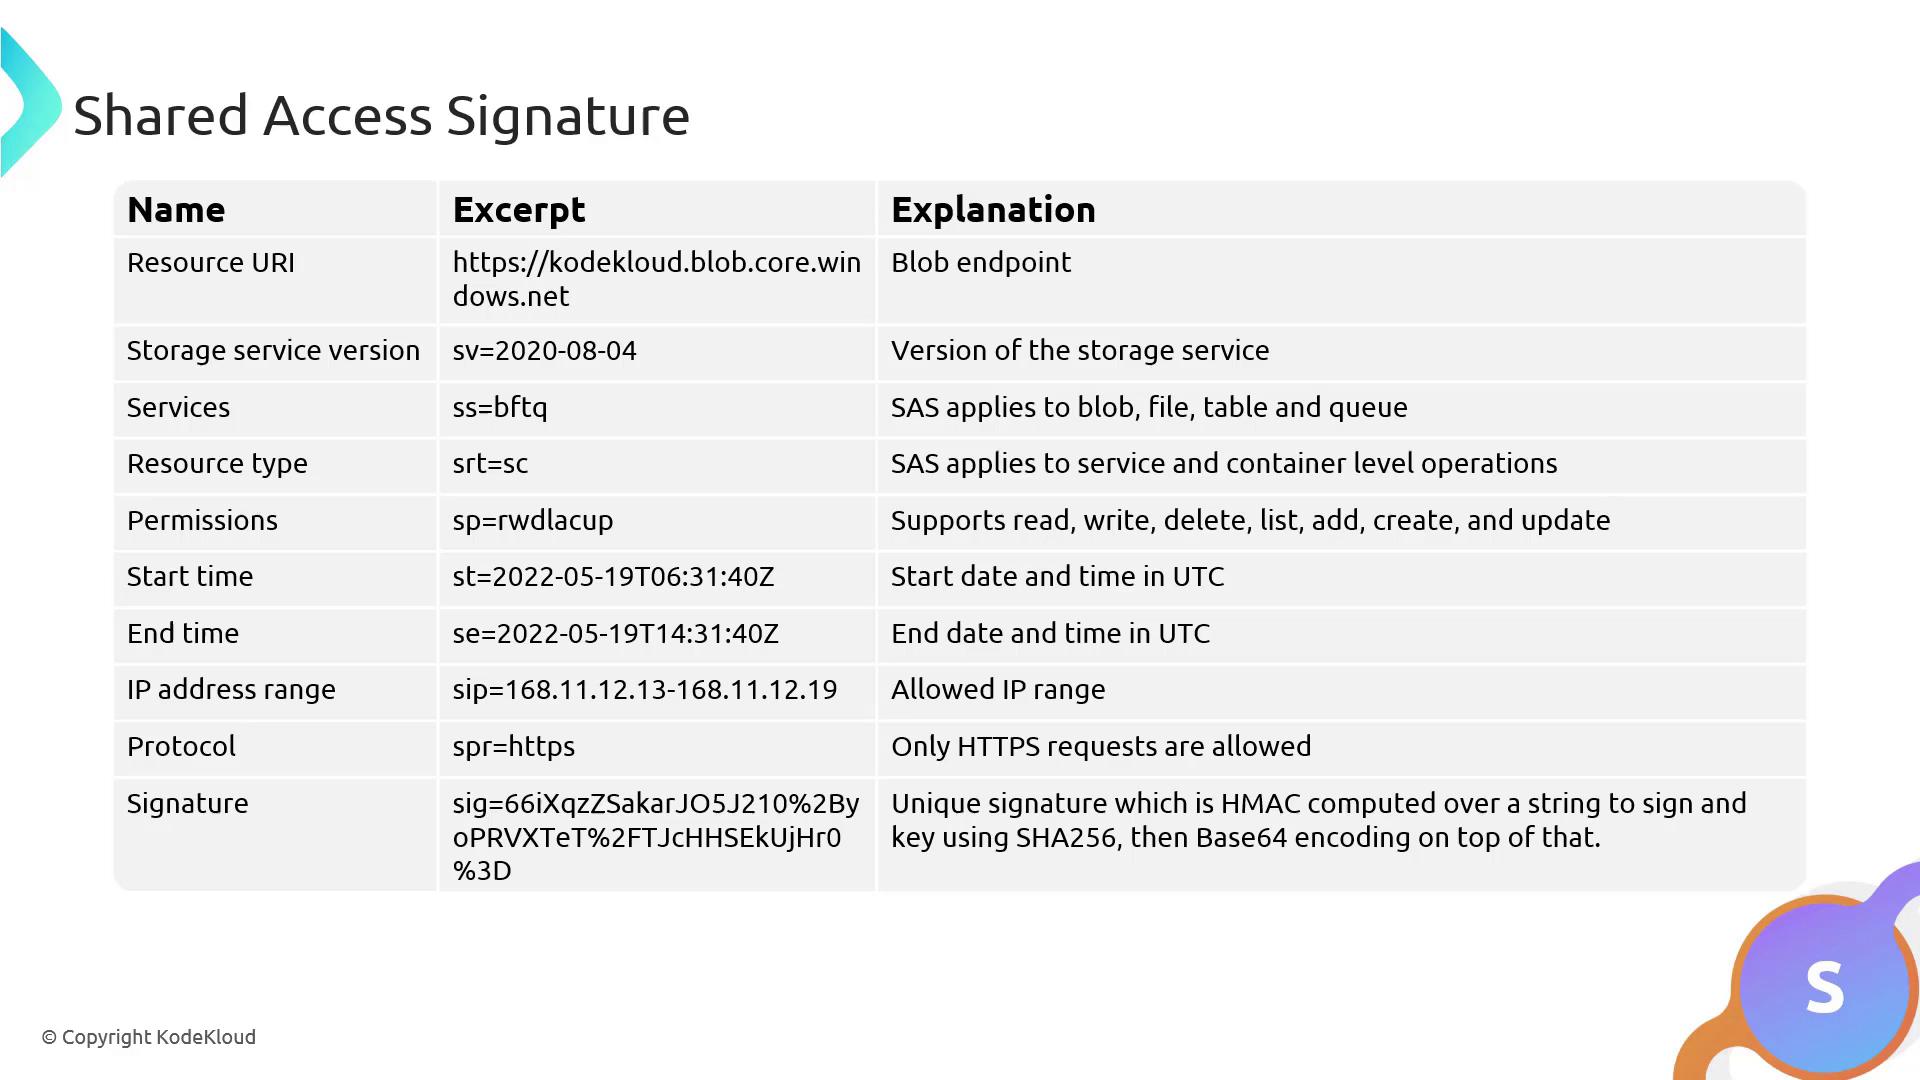
A SAS token is composed of two essential components:
- Resource Endpoint: The specific endpoint you want to access. For example, to access a blob endpoint of a storage account named "code block", this is your target resource.
- SAS Token: This token carries several parameters that define access details, including:
- Resource URI (e.g., blob, file, queue, or table; our example focuses on blobs)
- Storage service version (indicated by
svfollowed by a date) - Services (denoted by
SSBFTQfor blob, file, table, and queue services) - Resource type (denoted by
SRT, indicating access to containers and services) - Permissions (denoted by
sp, which could include read, write, delete, list, add, create, update) - Start time (
st) and expiry time (se) - Optional IP address range (using CIDR notation) and protocol (HTTP/HTTPS)
- Signature: A unique hash computed using your storage account keys
The following diagram illustrates the components of a Shared Access Signature:
Configuring a SAS in the Azure Portal
Follow these steps to configure a SAS via the Azure portal:
Access Your Storage Account
Open your storage account and navigate to the "Containers" section.Set the Container Access Level
- Initially, you may set the container to "blob" for anonymous access. For demonstration purposes, copy the URL, paste it in a browser, and view the content (e.g., "site1").
- To enforce secure access, change the access level to "private" to restrict anonymous access.

Locate the Access Keys
Inside your storage account, find the "Access keys" section which includes:- Two root keys for your storage account.
- A connection string for REST API access.
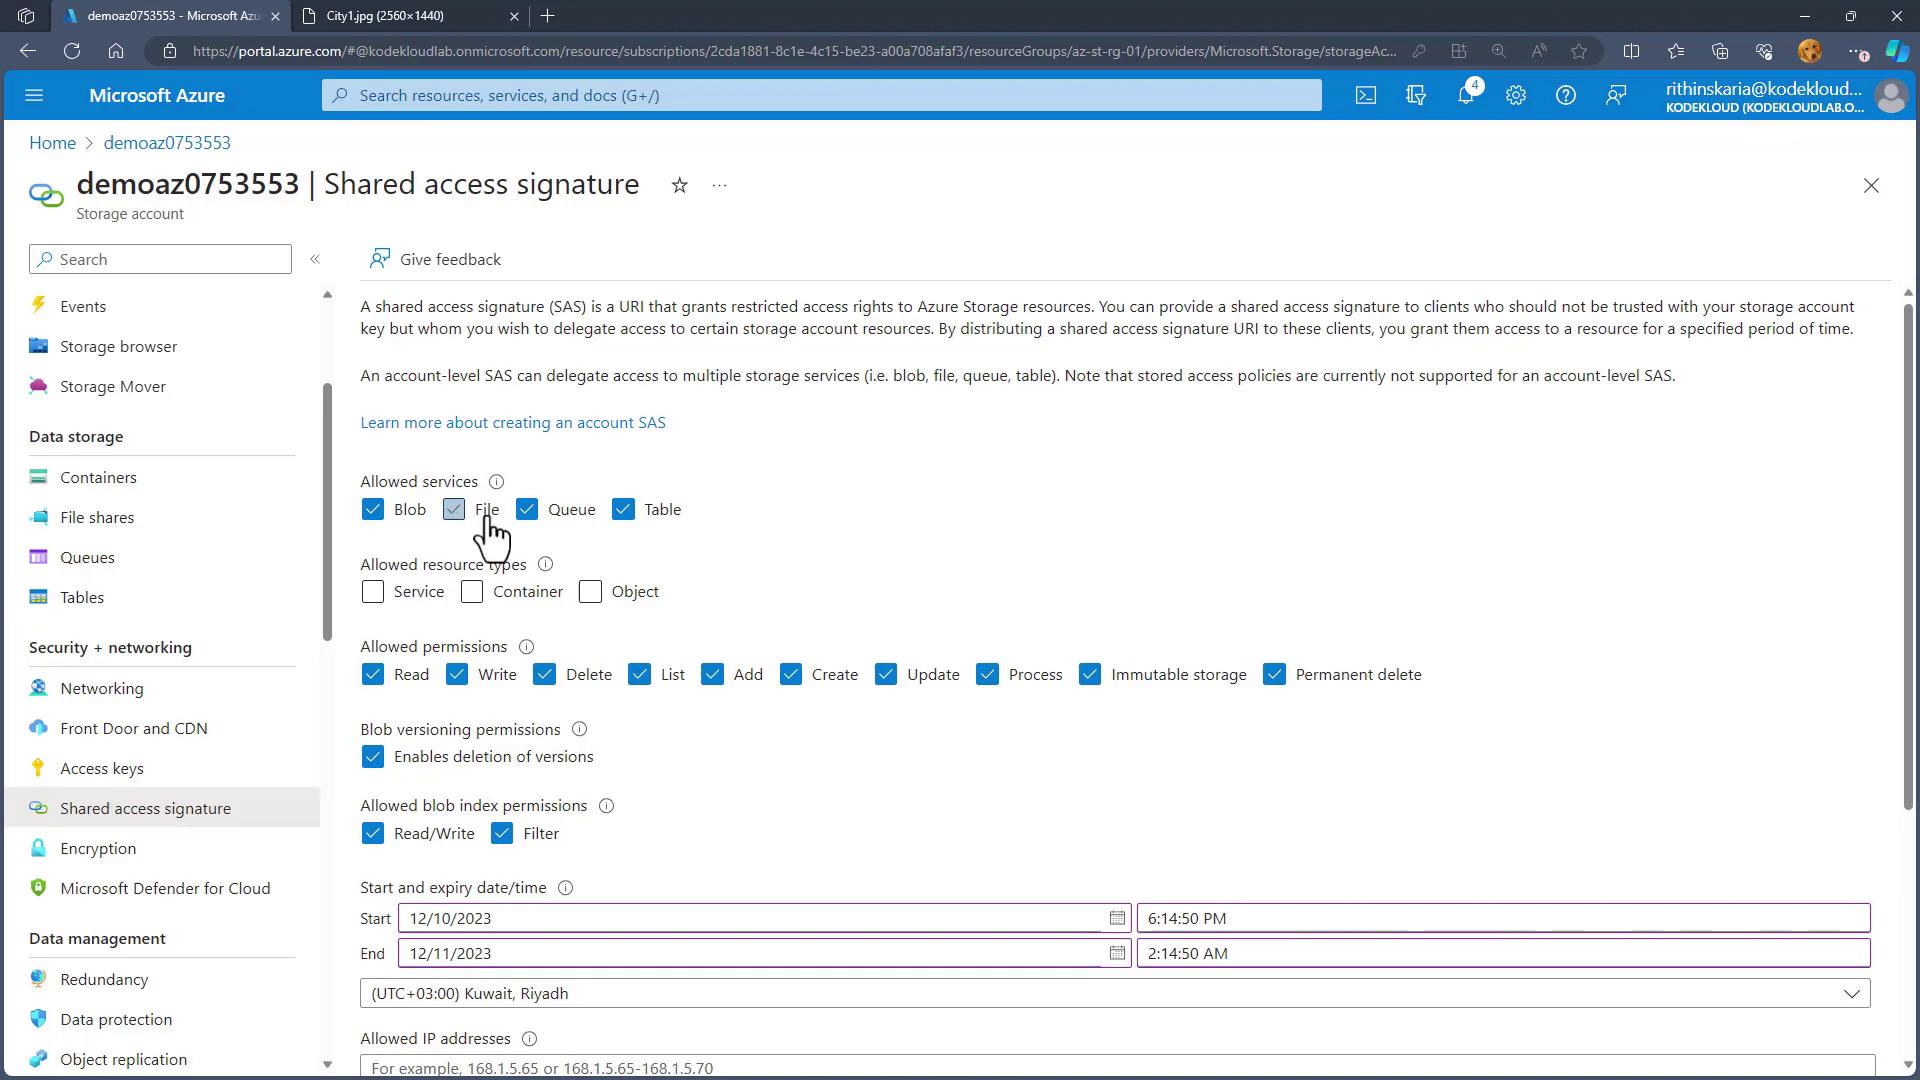
Configure the Shared Access Signature
Select the "Shared access signature" option, then configure the following:- Allowed Services: For example, select blob only if you are granting access exclusively to blob resources.
- Resource Types: Choose from service, container, and object.
- Permissions: Define the necessary permissions (e.g., read-only).
- Time Frame: Set start and expiry dates.
- IP Addresses: Optionally specify allowed IP addresses (leave empty to allow all IPs).
- Protocol: Select HTTPS only for improved security.
- Key Selection: Choose which storage account key (Key 1 or Key 2) will sign the SAS token.
Note
Regenerating a key will invalidate any SAS tokens generated with that key.
Generate and Validate the SAS Token
After configuring, generate and copy the SAS token from the portal. Append this token to your resource URL and test access in your browser. The URL will include parameters like:- Storage service version (
sv) - Service specification (e.g., "B" for blob)
- Access permissions (
sp=Rfor read permission) - Defined start and expiry times
- Enforced protocol (HTTPS)
- A unique signature generated using your storage account key
Security Warning
Do not modify the SAS token parameters (e.g., changing the access period) as the service will reject any unauthorized changes, thus ensuring the integrity of your secure access.
- Storage service version (
Below is an example error message that appears when an invalid SAS token is used:
<Error>
    <Code>AuthenticationFailed</Code>
    <Message>Server failed to authenticate the request. Make sure the value of Authorization header is formed correctly including the signature. <AuthenticationErrorDetail>Signature did not match. String to sign used was demoaz0753553 r b sco 2023-12-10T15:14:50Z 2023-12-12T23:14:50Z https 2022-11-02 </AuthenticationErrorDetail></Message>
</Error>
This lesson demonstrates how SAS tokens work and how to use them to control access to your Azure storage resources both securely and effectively.
Additional Resources
Watch Video
Watch video content