> ## Documentation Index
> Fetch the complete documentation index at: https://notes.kodekloud.com/llms.txt
> Use this file to discover all available pages before exploring further.
# Creating VMs
> This guide provides a step-by-step process for deploying virtual machines in Azure using the Portal and command-line tools.
Deploying a virtual machine (VM) in Azure involves several steps that are carefully organized into distinct sections for clarity and ease of management. This guide covers the basics of configuring a VM using both the Azure Portal and command-line tools, ensuring you have all the necessary details for effective deployment.
## VM Basics
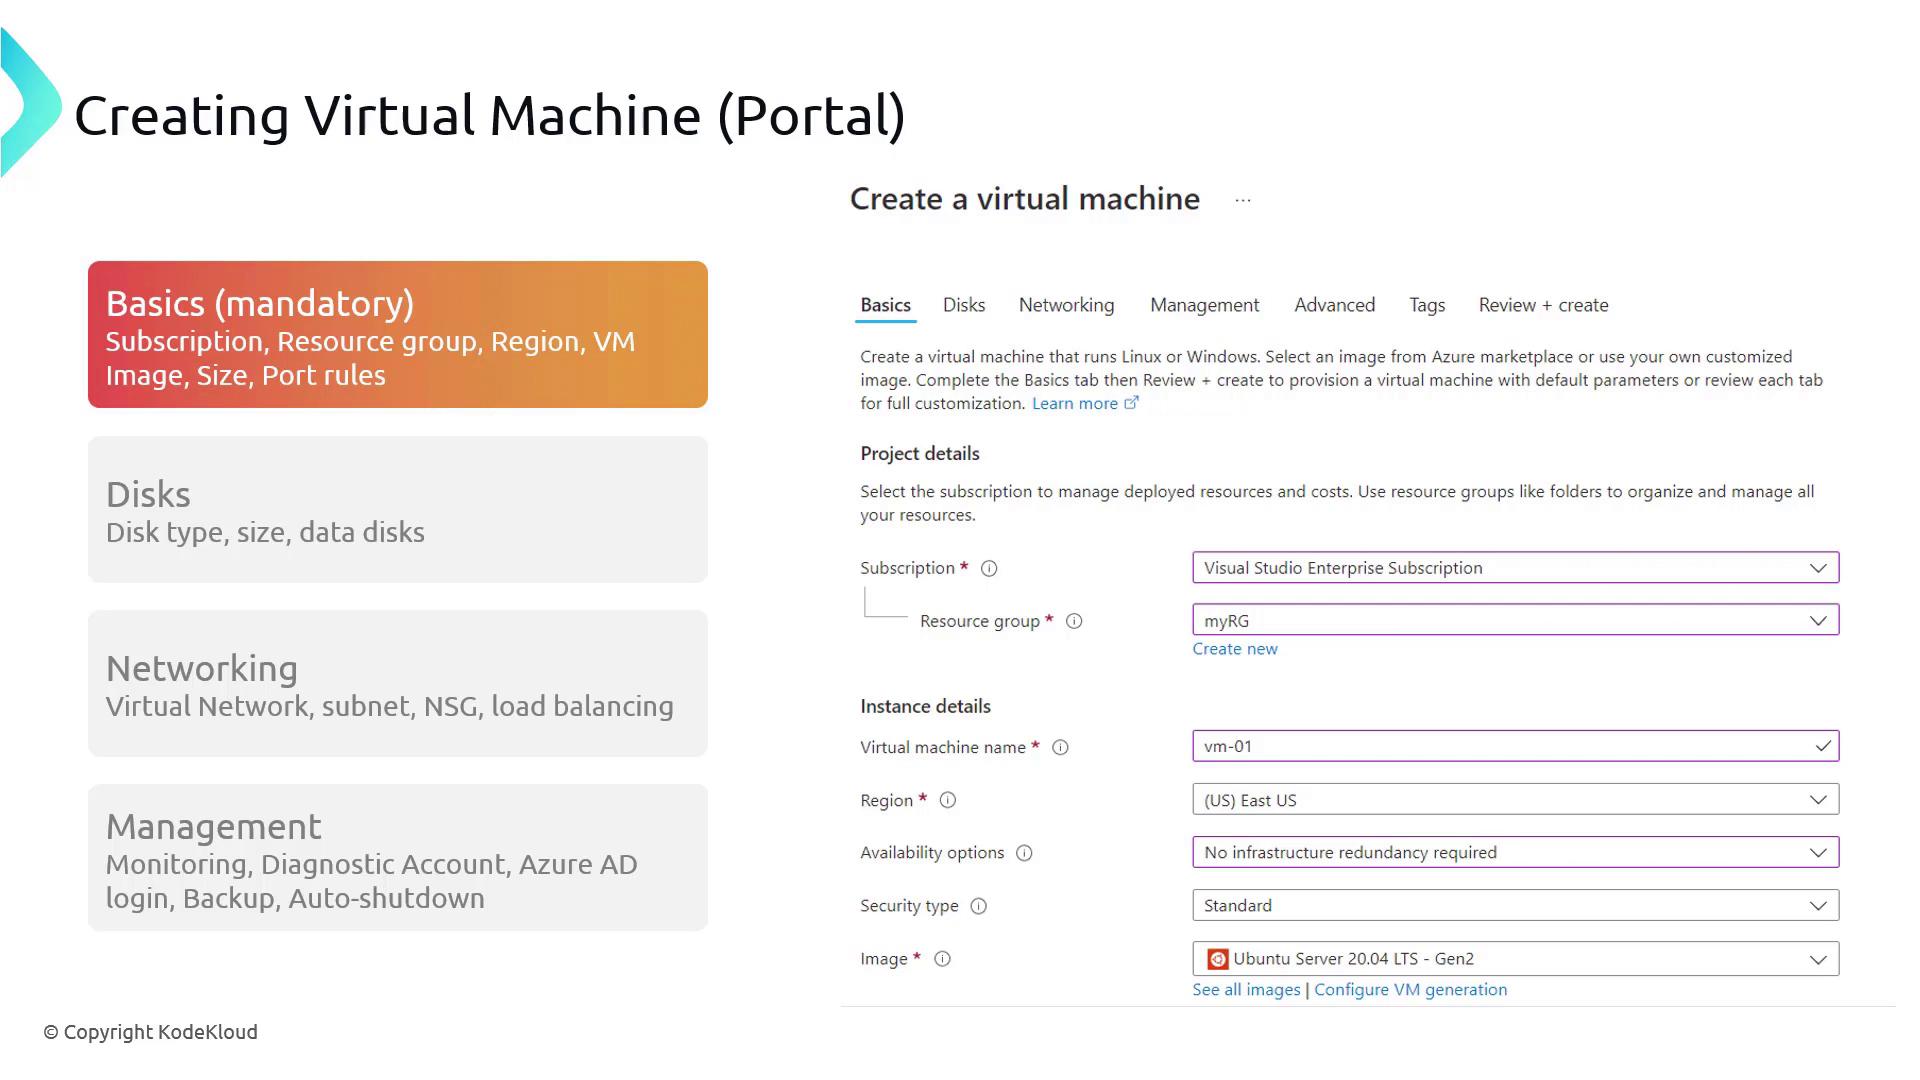
Before you begin, you need to specify the following details:
* **Subscription Details & Resource Group:** Define which subscription and resource group will host your VM.
* **Region:** Choose the regional data center where your VM will be deployed.
* **VM Name & Image:** Provide a unique name and select a VM image (operating system) to run.
* **Size & Disk Configuration:**
* The **size** should match your application's performance and scalability requirements.
* Configure the disk settings to choose between SSDs or HDDs, set the desired disk size, and add additional data disks if necessary.
## Networking Configuration
Within the networking section, you can:
* Select your virtual network and the specific subnet for the VM.
* Configure associated network security groups (NSG), load balancers, and public IP settings.
This configuration ensures that your VM is both reachable and secure.
## Management Options
The management section offers additional configurations:
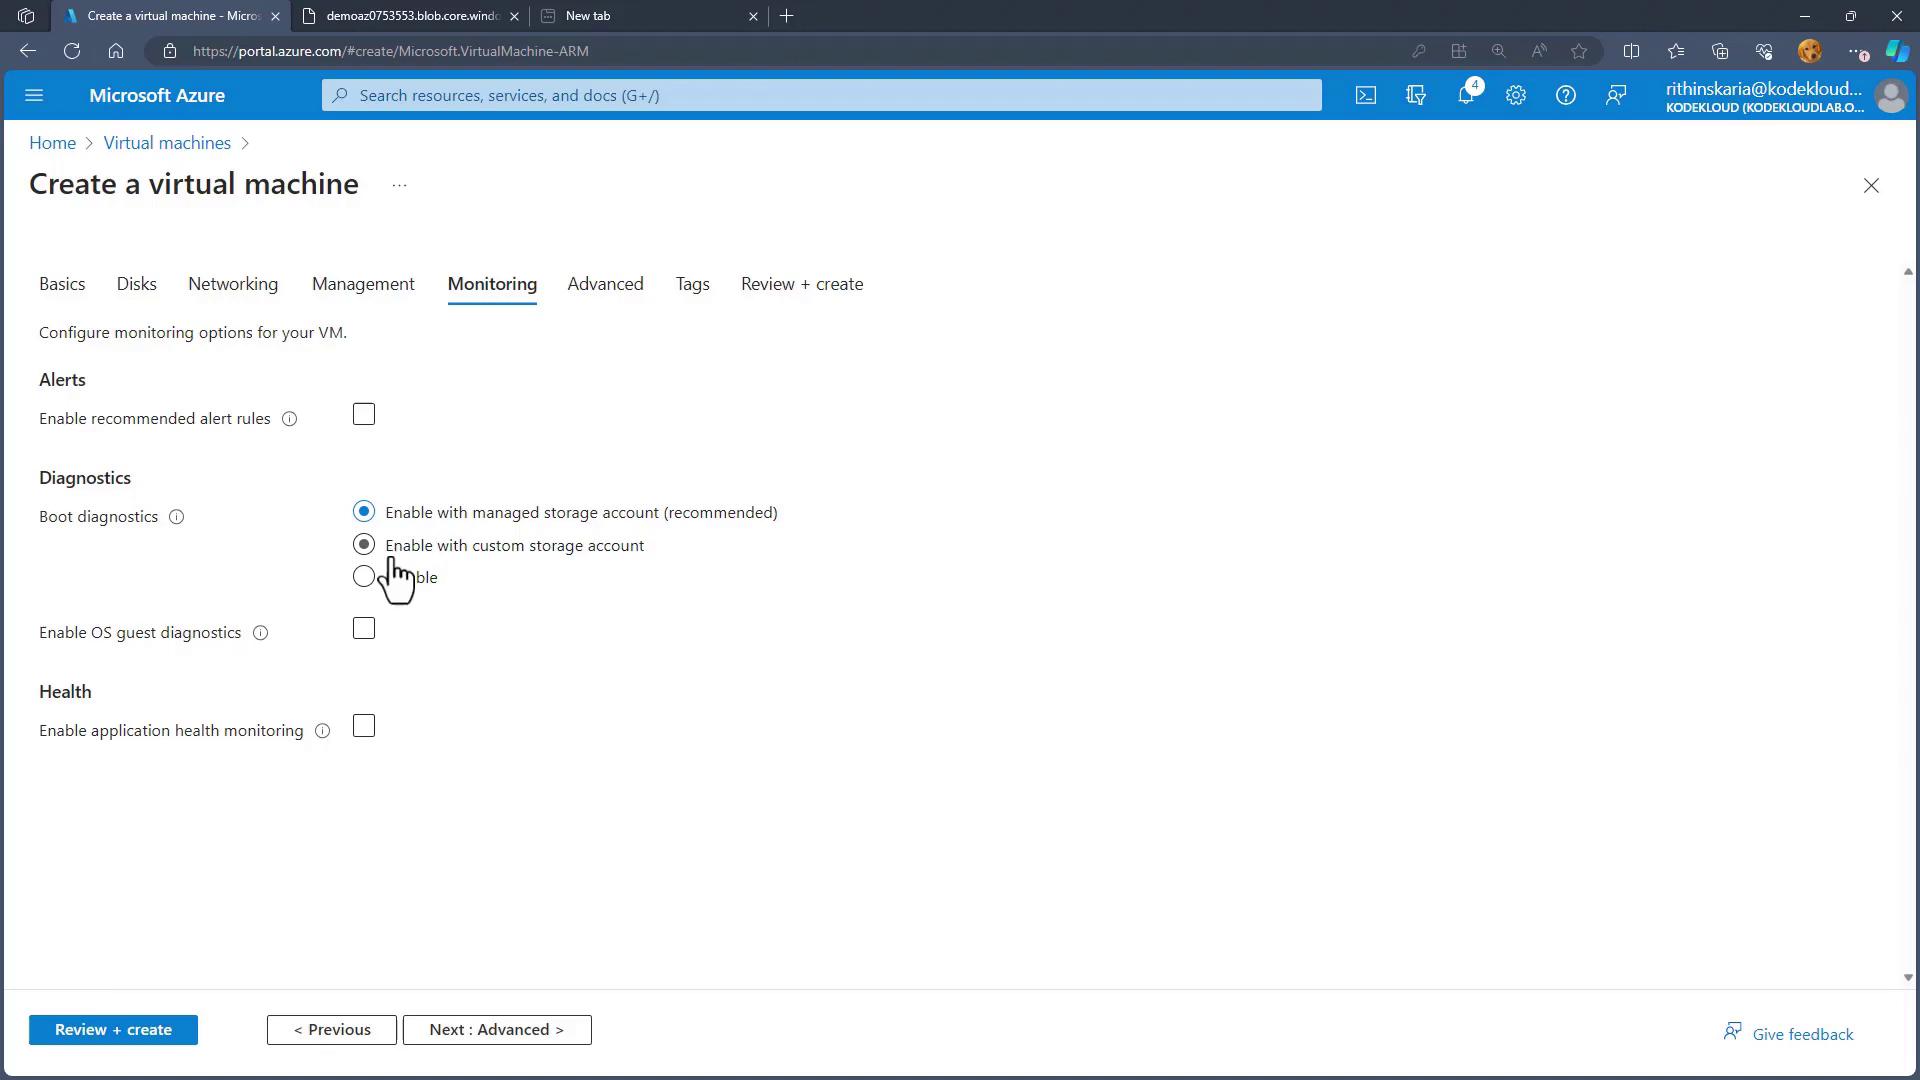
* **Monitoring:** Set up monitoring to keep track of your VM’s performance.
* **Diagnostics:** Send diagnostics information to a storage account for analysis.
* **Microsoft Entra ID (Azure AD):** Integrate for streamlined login and identity management.
* **Backup & Auto Shutdown:** Configure backups and scheduled shutdowns to optimize cost control, especially useful during testing.
For optimal cost management, always review the auto shutdown and backup options when configuring your VM.
## Creating VMs Using Command-Line Tools
You can create a VM using either Azure PowerShell or the Azure CLI. Both methods allow you to configure your resource details from scratch.
### Using Azure PowerShell
Run the following command to create a VM with the necessary resource parameters:
```powershell theme={null}
PS > New-AzVm `
-ResourceGroupName "web-rg" `
-Name "vm-01" `
-Location "East US" `
-VirtualNetworkName "vm-01-vnet" `
-SubnetName "default" `
-SecurityGroupName "vm-01-nsg" `
-PublicIpAddressName "vm-01-pip"
```
### Using Azure CLI
Alternatively, use the Azure CLI with this command:
```bash theme={null}
$ az vm create \
--name vm-01 \
--resource-group web-rg \
--image UbuntuLTS \
--location EastUS2 \
--admin-username adminuser \
--admin-password Pa$$w0rd1234
```
## Deploying a VM via the Azure Portal
Follow these steps to deploy a VM using the Azure Portal:
1. **Navigate and Initiate Creation:**\
Open the "Virtual Machines" blade, click "Create," and select "Azure Virtual Machine."
2. **Set Up Basics:**
* In the **Basics** tab, select your subscription and resource group (or create a new one, e.g., "azvm01rg").
* Enter a VM name (e.g., "azvm01") and choose the region.
* For availability, select "No infrastructure redundancy required" if applicable.
* Choose the security type as "Standard VMs" to avoid unnecessary configurations like trusted machines if not needed.
3. **Select the OS Image and Size:**
* Under the **Image** section, pick your preferred operating system (e.g., Ubuntu 22.04 for a Linux environment).
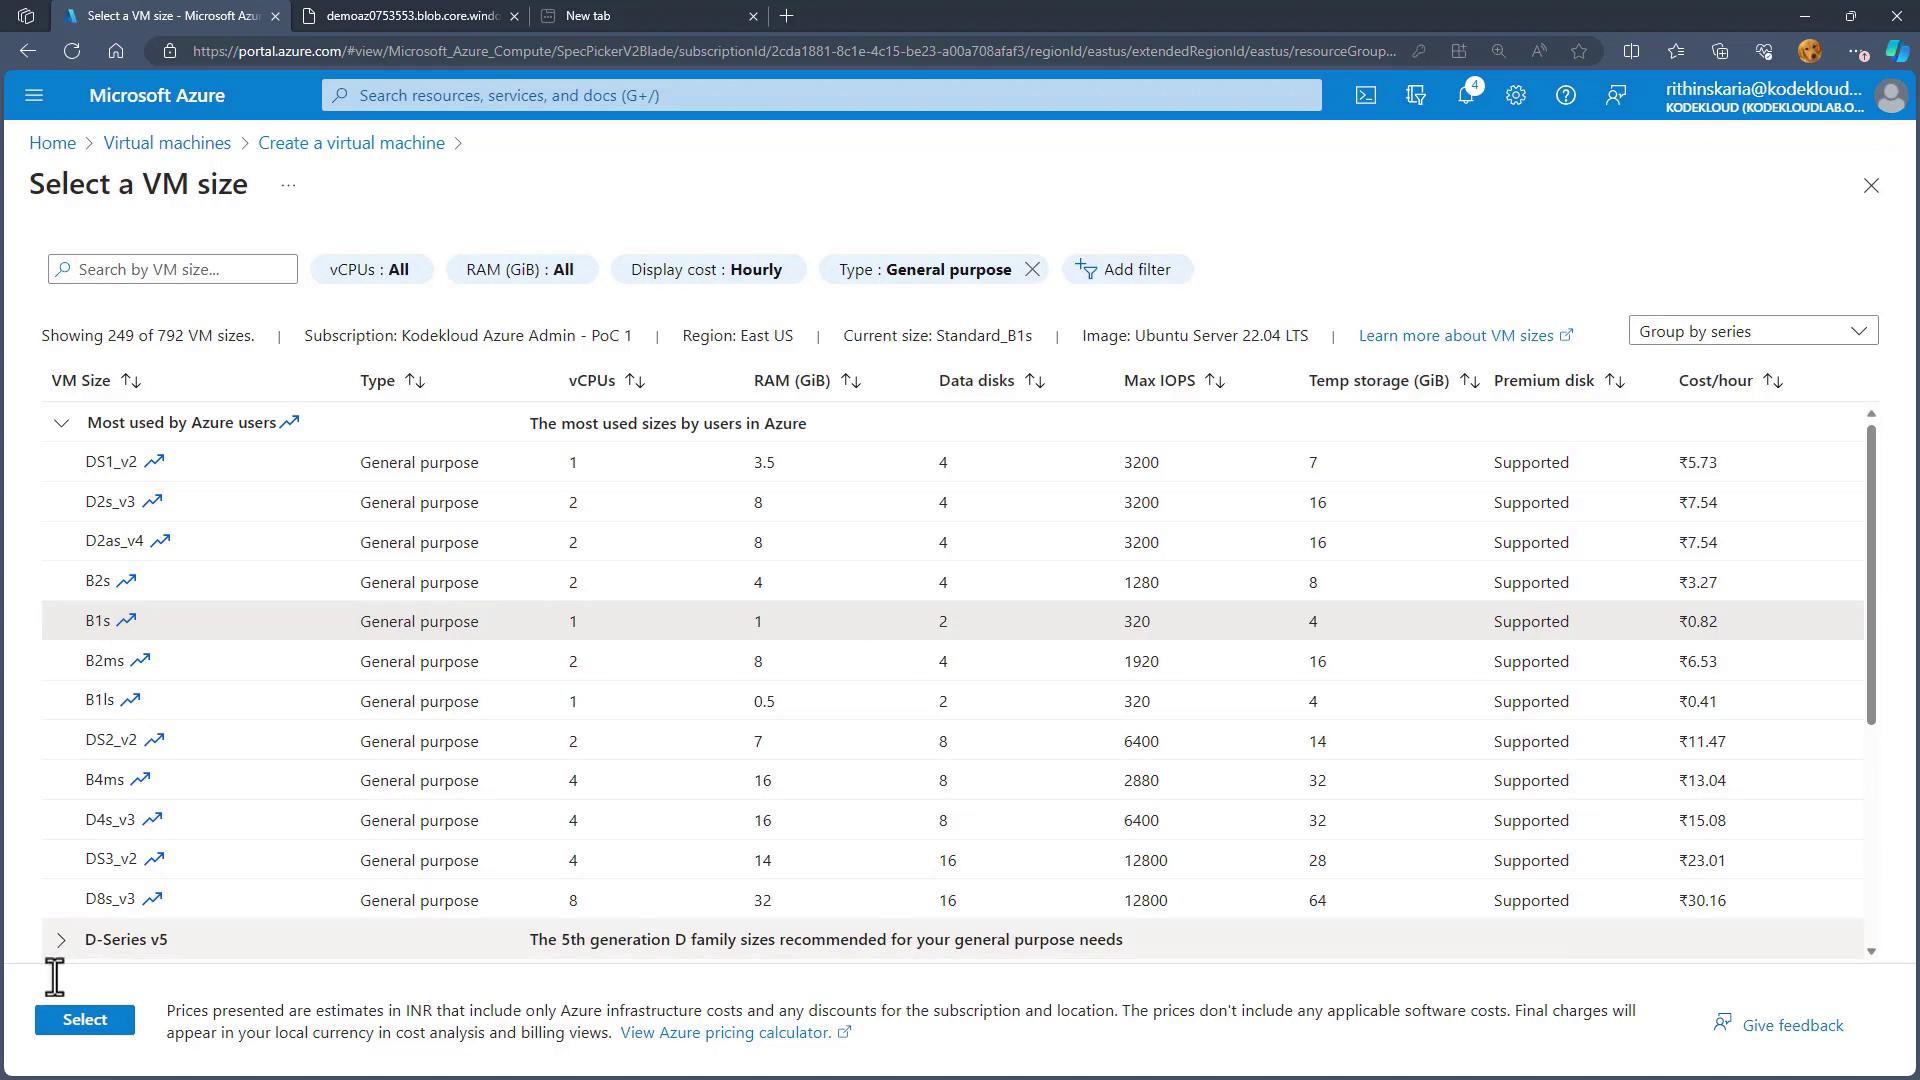
* Click "See all sizes" in the **Size** section. Use filters (e.g., general purpose) to choose an appropriate size, such as the B1S for a cost-effective instance.
4. **Configure Authentication and Inbound Ports:**
* Set the administrative credentials, choosing a robust password and username.
* Under the **Inbound ports** section, select the necessary ports (HTTP, HTTPS, or SSH) based on your requirements.
5. **Disk Configuration:**
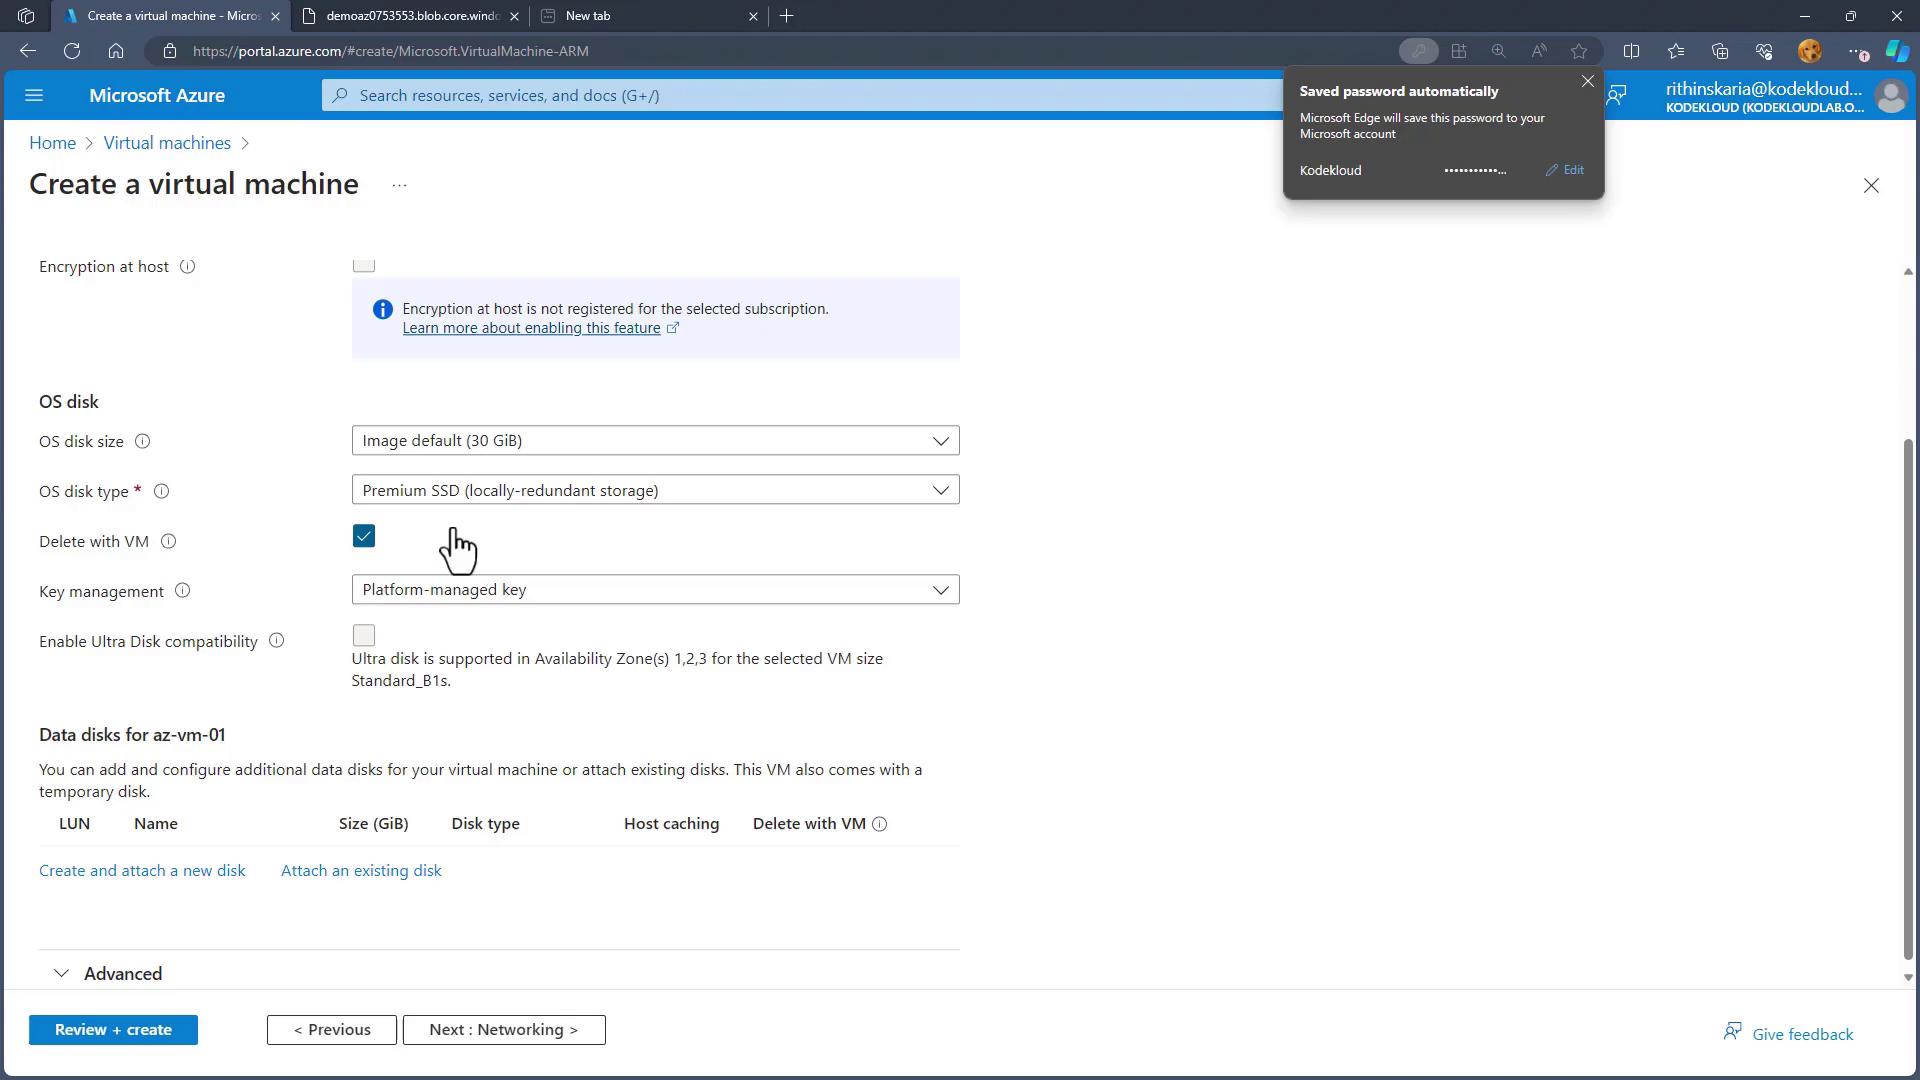
* In the **Disk** tab, choose the disk type (e.g., Standard SSD) and specify the disk size (e.g., 30 GB).
* Optionally, add more data disks as needed.
6. **Networking Configuration:**
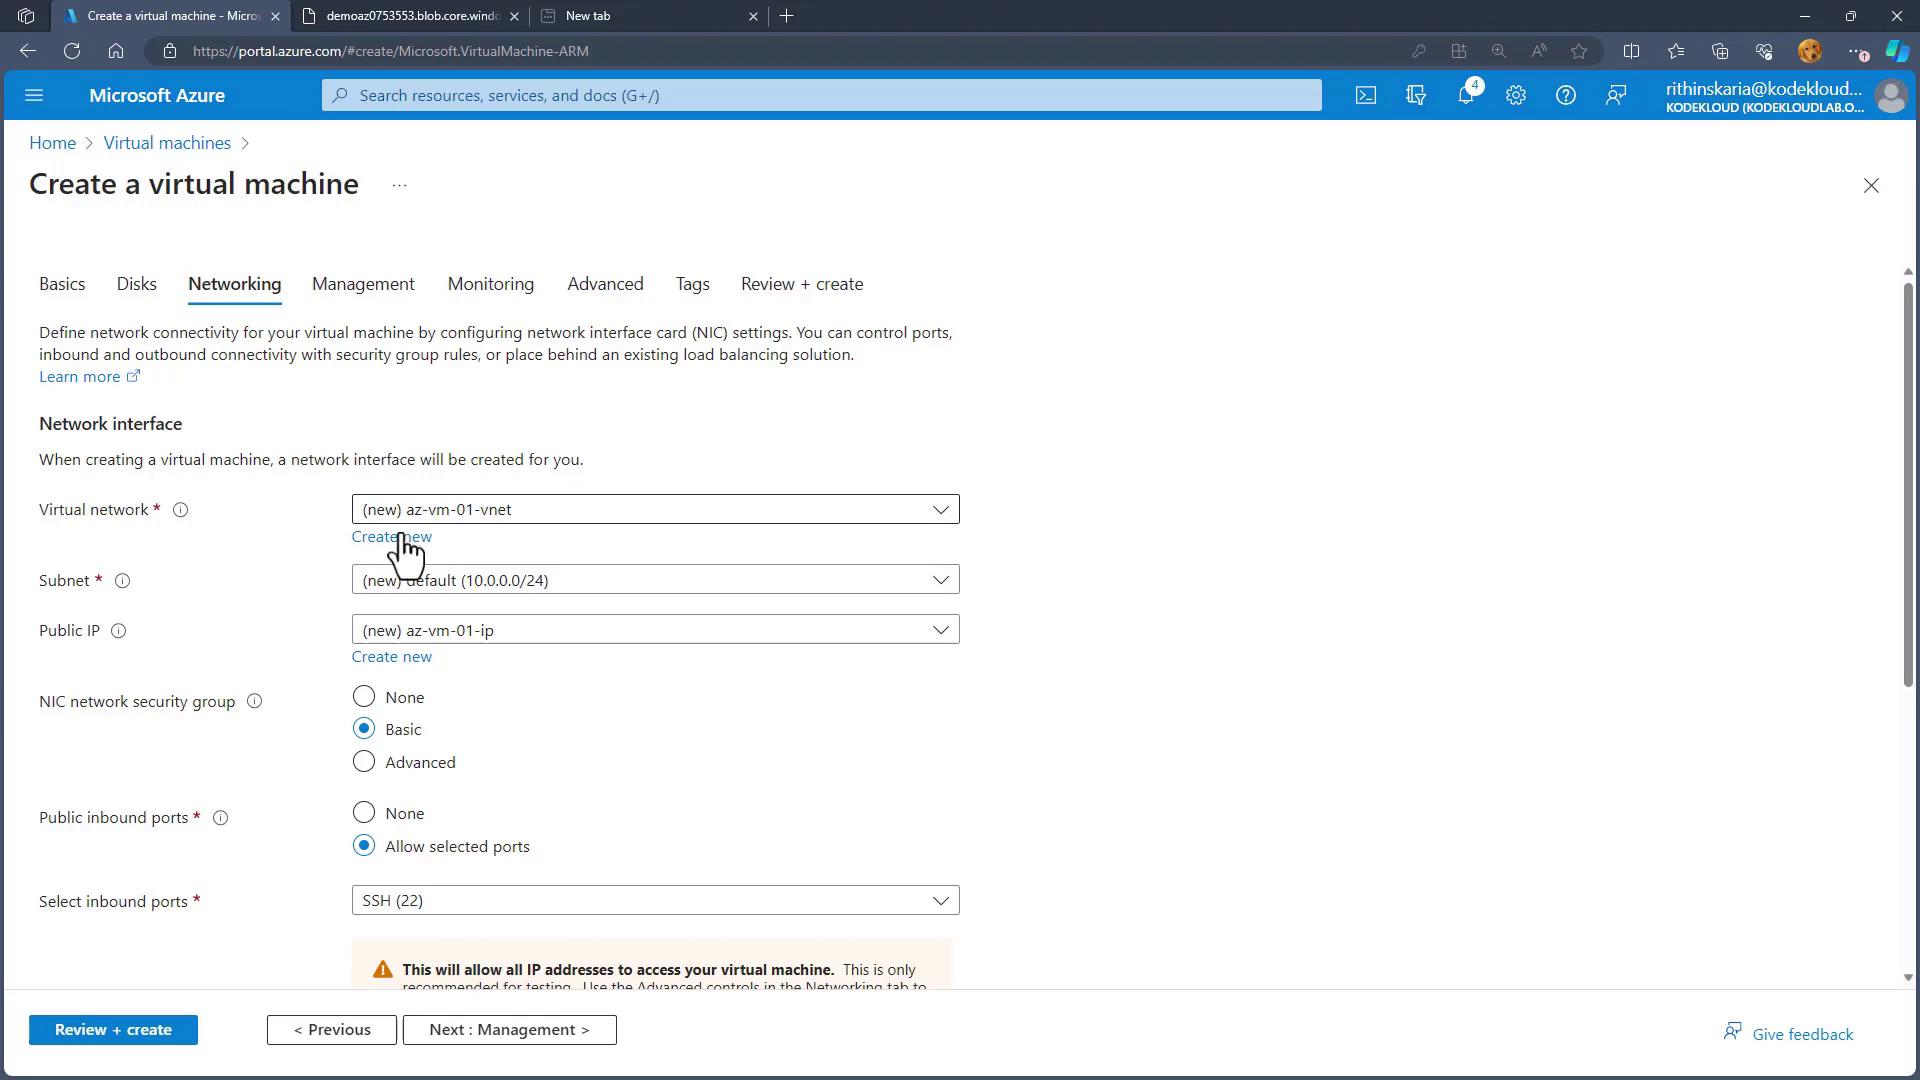
* Under the **Networking** tab, either select an existing virtual network or create a new one.
* Configure the public IP and associate a network security group (NSG) appropriately.
7. **Management Settings:**\
Configure options including Defender for Cloud, managed identities, Azure AD login, auto shutdown, backup, and monitoring (alerts, diagnostics, and health monitoring).
8. **Advanced Configuration:**\
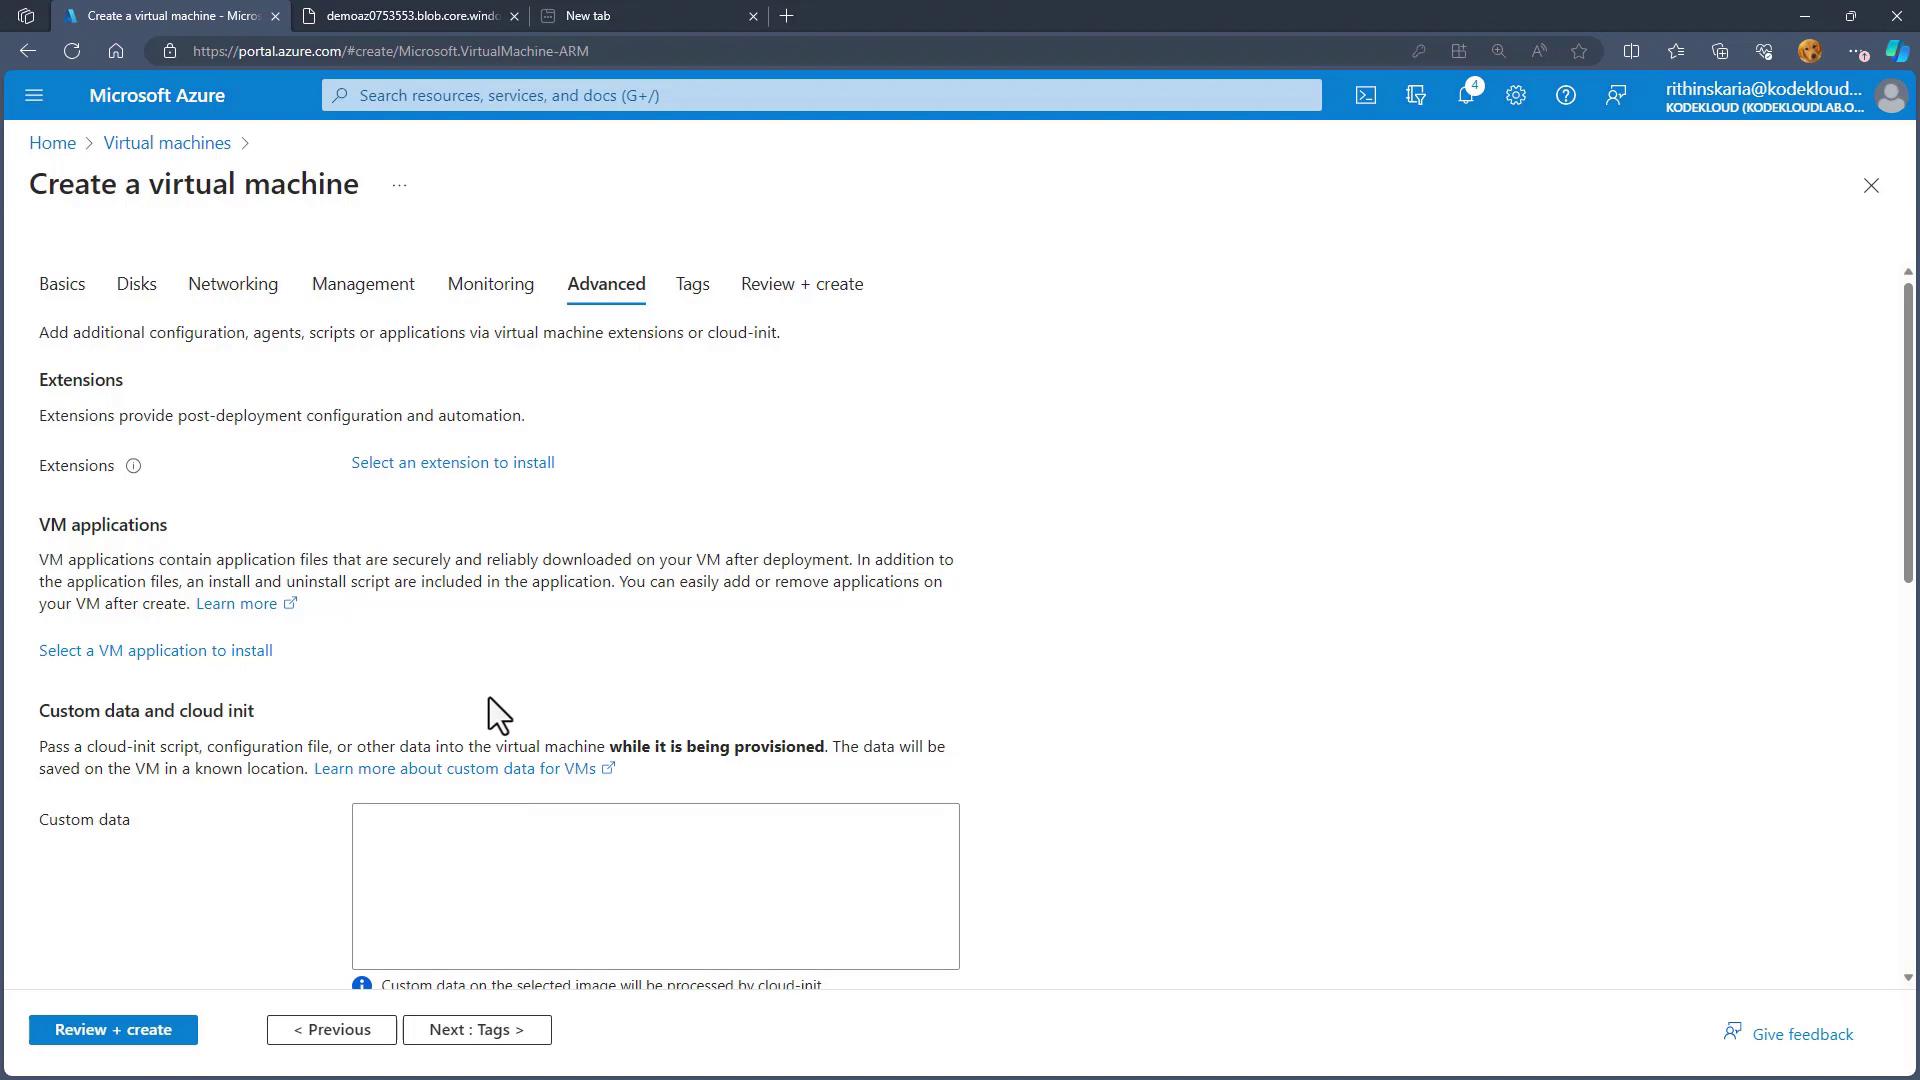
Use the **Advanced** tab to set up extensions for post-deployment configuration and automation.
9. **Finalize and Create:**
* Optionally, add tags to your VM for better organization.
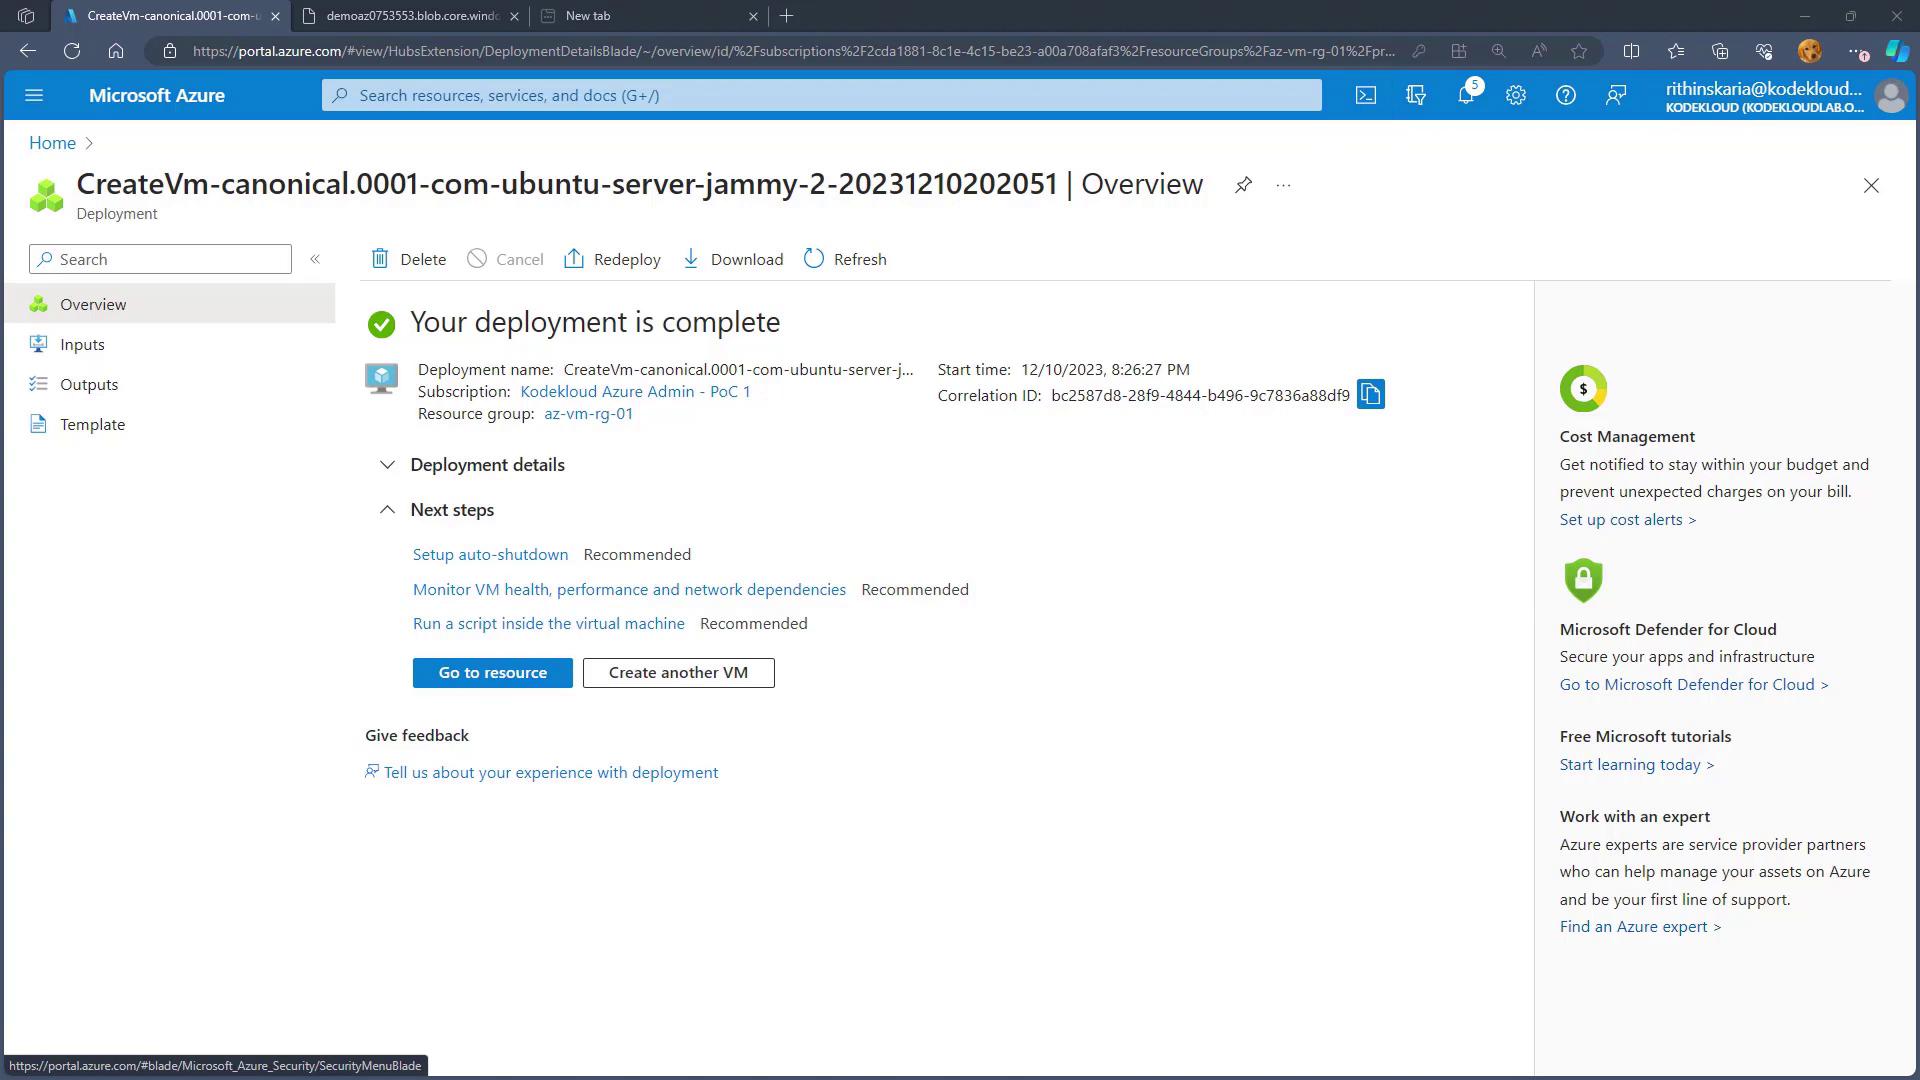
* Click "Review + create," then "Create" once validation passes.
After deployment, you can access your VM using a terminal or remote access tool.
## Connecting to Your Deployed VM
Once the VM is running, connect using your preferred remote access method:
* **Linux VMs:** Typically accessed via SSH.
* **Windows VMs:** Access using Remote Desktop Protocol (RDP).
You can use Cloud Shell or a locally installed version of PowerShell/Azure CLI for further management tasks.
Remember to update your firewall rules or NSG configurations to allow the required inbound connections.
This guide has provided a step-by-step walkthrough for deploying a VM in Azure using both the Portal and command-line tools. With your VM now in place, you can focus on installing applications and configuring additional services as needed.
For further reading and more advanced configurations, visit the [Azure Documentation](https://docs.microsoft.com/en-us/azure/virtual-machines/).