[Updated] AZ-104: Microsoft Azure Administrator
Administer Intersite Connectivity
User Defined Routes
This article explains how User-Defined Routes (UDRs) work in Azure, compares them with default system routes, and shows how they can be applied to manage inter-site connectivity for advanced traffic control.
Azure automatically includes a set of system routes that allow most networking scenarios. These routes enable virtual machines (VMs) and other resources within the same virtual network to communicate and access the internet for outbound traffic. However, when you need enhanced control over traffic—such as directing traffic through a network virtual appliance (NVA) for security or inspection—you must implement custom routing policies using UDRs.
Virtual Network Traffic and System Routes
By default, system routes allow seamless communication between VMs in the same subnet or across subnets within a virtual network. For example:
- VMs within the same subnet can ping one another.
- VMs can access external resources (like NTP servers or Windows updates) using outbound connectivity.
Keep in mind that these system routes govern outbound connections initiated by VMs. Inbound connectivity from the internet is restricted by Network Security Groups (NSGs) and is typically disabled by default.
When to Use User-Defined Routes
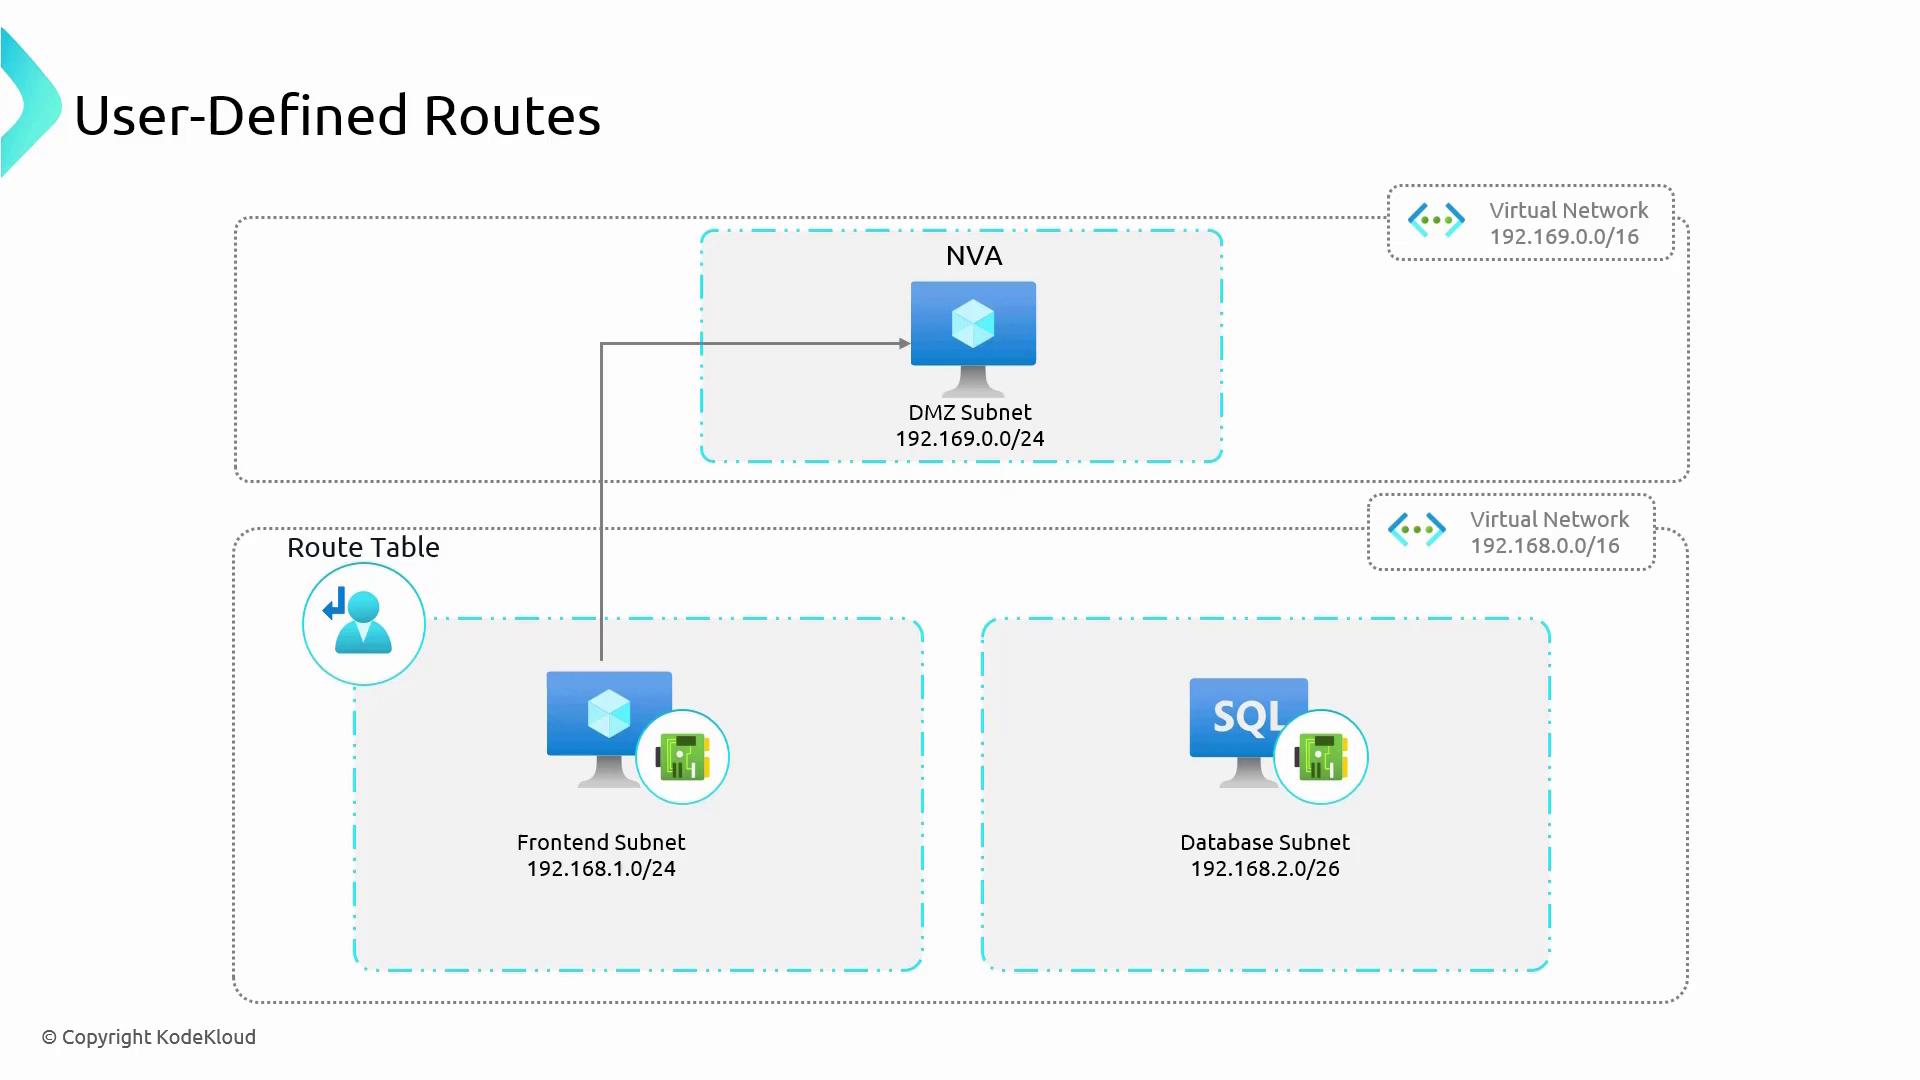
Imagine a scenario where traffic from a frontend subnet must communicate with a database subnet. Normally, system routes would enable direct connectivity between these subnets. However, if your organization’s security policy requires that all traffic from the frontend to the database passes through an NVA (acting as a firewall), then default routing is insufficient.
To enforce this level of security:
- Create a route table to redirect traffic from the frontend subnet to the NVA’s IP address.
- Associate the route table with the frontend subnet.
- Ensure there is a peering connection between the virtual network containing the frontend and database subnets and the network where the NVA is deployed.
The diagram below illustrates this setup:

After associating the route table with the frontend subnet, all outbound traffic destined for the database subnet is routed through the NVA. The NVA inspects and then forwards the traffic to the database subnet—an extra layer of security that system routes alone cannot provide.
Creating a Route Table in the Azure Portal
To configure a UDR in the Azure portal, follow these steps:
- Sign in to the Azure portal and search for "Route table".
- Create a new route table. For example, you could use a resource group named "inter-site" and name your route table "RT-inter-site".
- Enable the "Propagate gateway routes" option to automatically include routes learned from connected gateways.
- Once deployed, you can add one or more user-defined routes to the table.
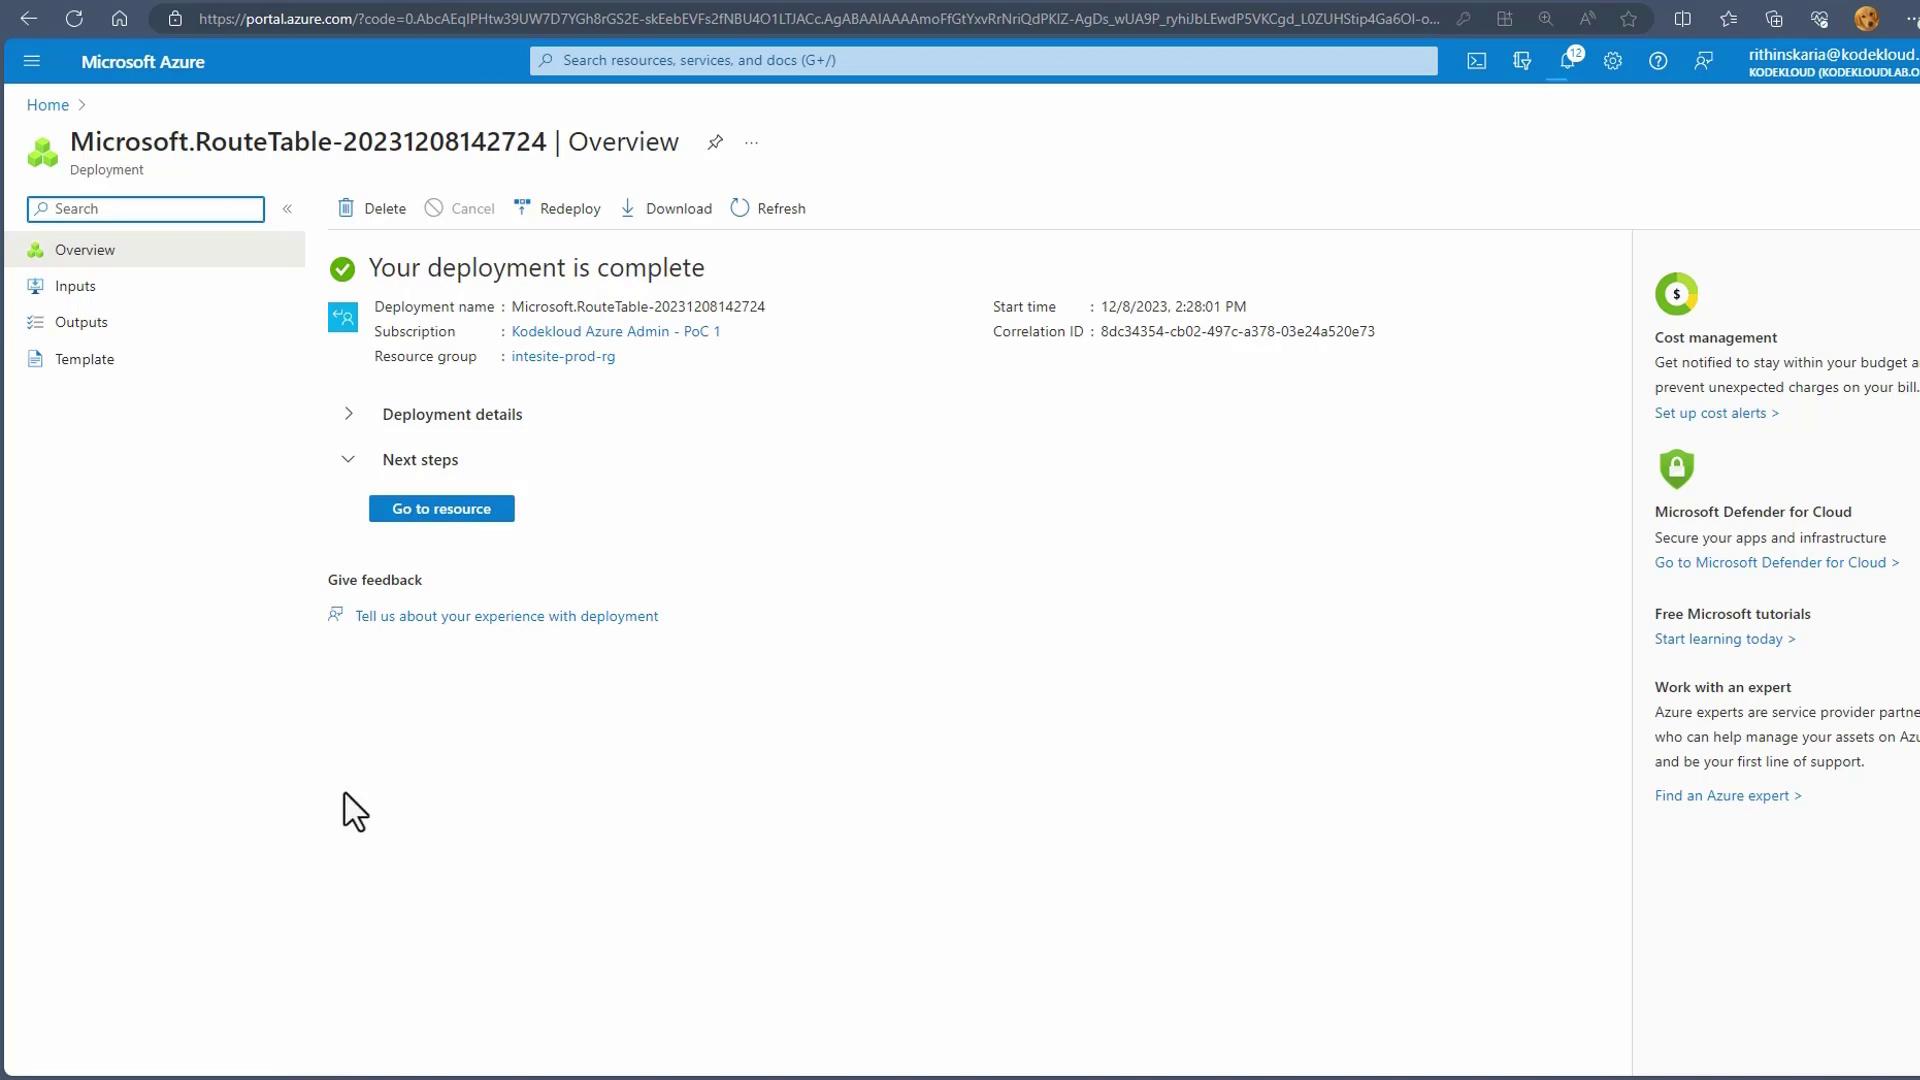
After deployment, the portal displays a confirmation message similar to the following:

Tip
After deployment, review the deployment details to ensure your route table is configured correctly before association.
Associating the Route Table with a Subnet
- In the Azure portal, select your newly created route table and click on "Associate".
- Choose the appropriate virtual network and subnet (for example, the default subnet).
- Associating the route table with the subnet ensures that all traffic from that subnet follows the defined routing rules.
Adding User-Defined Routes
Suppose you want all traffic from the associated subnet to route through a firewall. To add a specific route:
- Click on "Routes" within the route table and then click "Add".
- Create a route (e.g., name it "all traffic firewall") with these settings:
- Destination Type: IP address
- Destination IP address range: 0.0.0.0/0 (to capture all traffic)
- Next Hop Type: Virtual Appliance
- Next Hop IP Address: Enter the IP address of your firewall (e.g., 15.1.x.x)
This route forces all outbound traffic from the subnet to pass through your firewall for inspection.
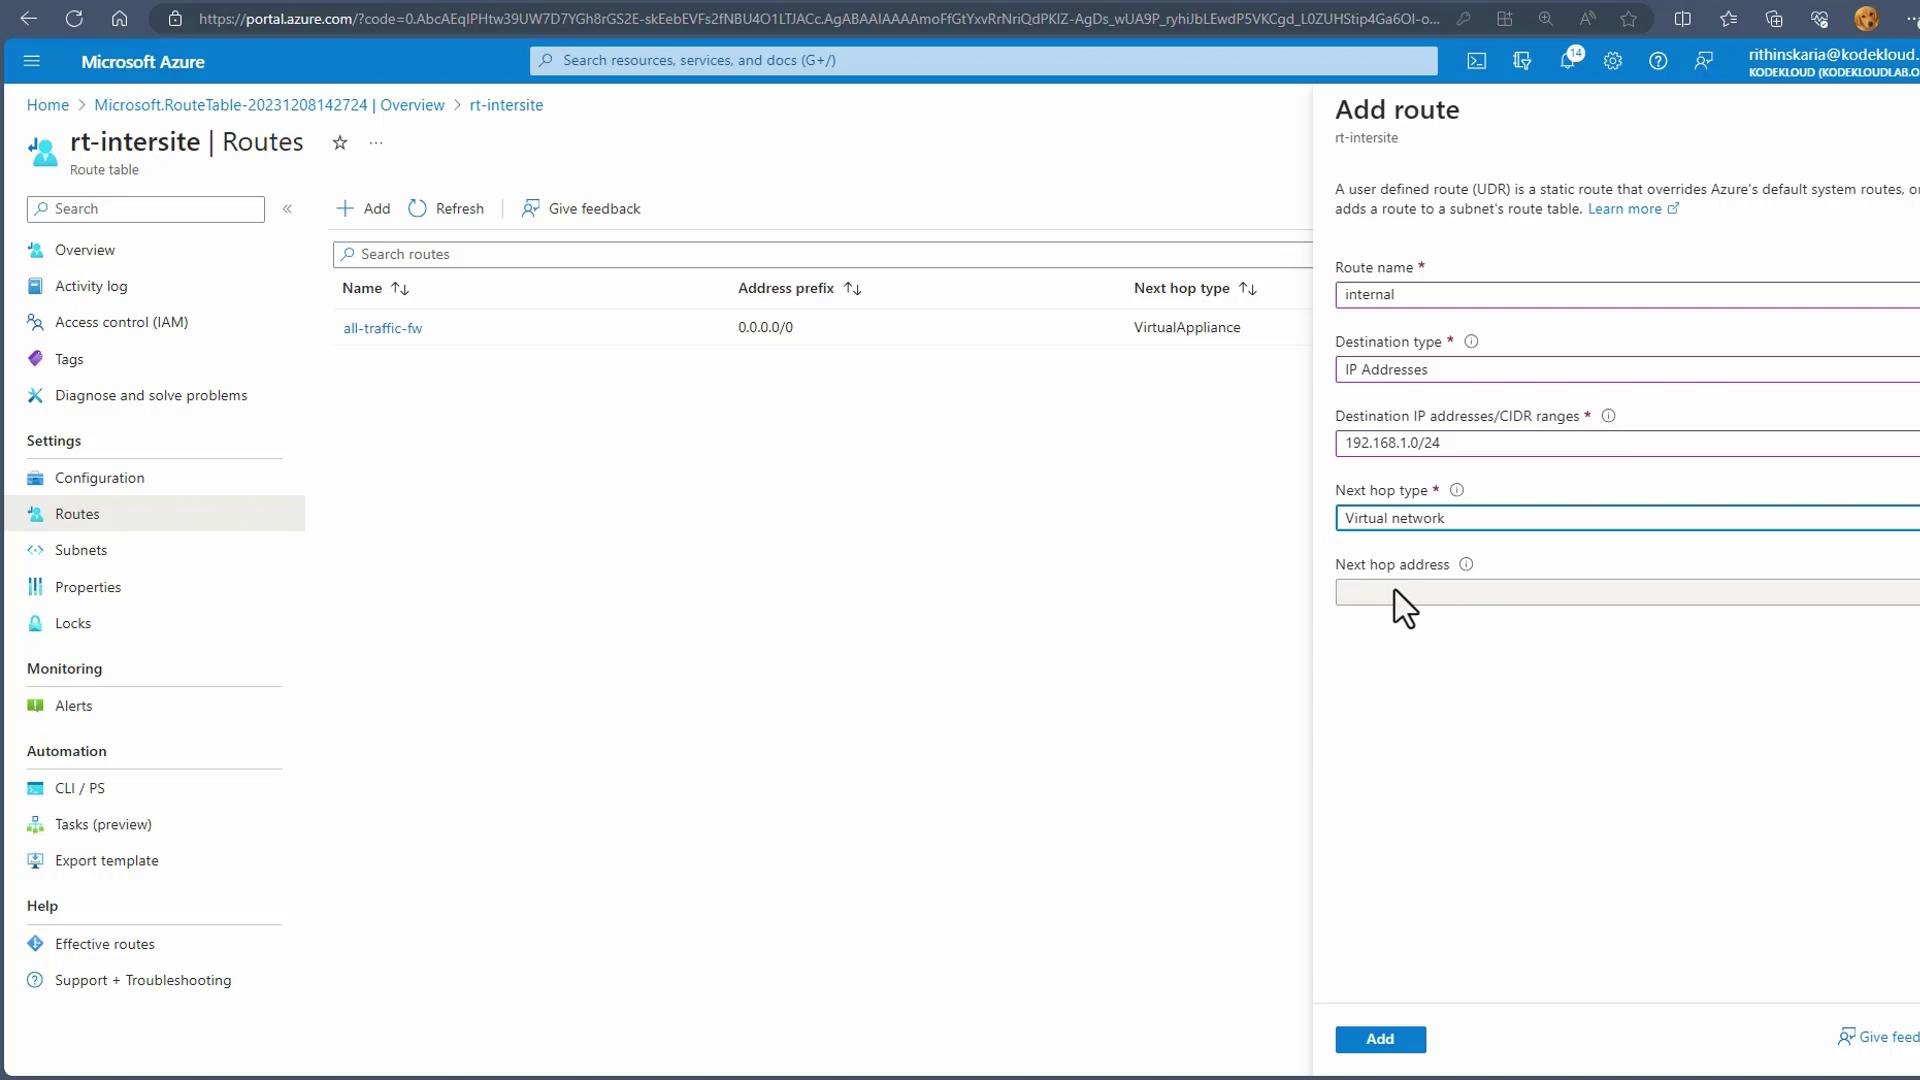
If further segmentation is needed, you can add additional routes. For example, to add a route for internal traffic:
- Click "Add" again within the route table.
- Create a route named "internal" with these settings:
- Destination Type: IP address
- Destination IP address range: 192.168.1.0/24
- Next Hop Type: Virtual network

Routing Specificity
When multiple routes are configured, Azure selects the route with the most specific address range. For example, a route for 192.168.1.0/24 takes precedence over one for 0.0.0.0/0. Adding an even more specific CIDR (like /27) will override both.
Route Priority
Azure’s routing engine selects the route with the most specific destination range. In the example above:
- The route with destination 192.168.1.0/24 (more specific) is prioritized over the generic 0.0.0.0/0 route.
- If a route with an even narrower range (such as /27) is added, it will take precedence over both the /24 and /0 routes.
You can configure multiple routing rules to selectively direct traffic. For instance:
- General outbound traffic may be forwarded to a firewall.
- Specific traffic blocks, such as those for on-premises addresses, may be directed to a VPN Gateway.
Conclusion
This guide demonstrated how to leverage User-Defined Routes in Azure to enforce custom traffic routing policies. Key steps include creating a route table, adding specific routing rules, and ensuring proper network peering. By implementing UDRs, you can ensure traffic flows securely—such as directing traffic through an NVA before it reaches a sensitive database subnet.
Additionally, consider using Service Endpoints for enhanced security and streamlined connectivity in your Azure environments.
For more detailed information on Azure networking concepts, explore these resources:
Understanding and properly configuring UDRs is essential for maintaining secure and efficient network architectures in Azure.
Watch Video
Watch video content