[Updated] AZ-104: Microsoft Azure Administrator

Administer Network Traffic

Routing Rules

Azure Application Gateway offers advanced routing capabilities including both path-based and multi-site routing. This guide explains these routing methods and presents a practical deployment using the Azure Portal.

Path-Based Routing

Path-based routing directs incoming traffic to different backend pools based on the URL path. For example, when a user accesses a URL containing "/images," the Application Gateway forwards the request to an image server pool optimized for image delivery. Similarly, if the URL includes "/video," the gateway directs the request to a video server pool designed to efficiently handle video content. This approach is ideal for applications that serve specific content types from dedicated infrastructure components.

Multiple-Site Routing

Multi-site routing allows a single Application Gateway to service multiple web applications by directing requests based on the domain name. For instance, traffic arriving at KodeKloud.com may be routed to a learning pool, while requests to KodeKloudLabs.com are sent to a lab pool. This consolidated approach simplifies infrastructure management and reduces costs by centralizing traffic management onto a single gateway. Both routing methodologies leverage Layer 7 load balancing to ensure that users receive responses from the correct backend resources.

The image illustrates application gateway routing rules, showing path-based routing and multiple-site routing with different server pools for images, videos, learning, and labs.

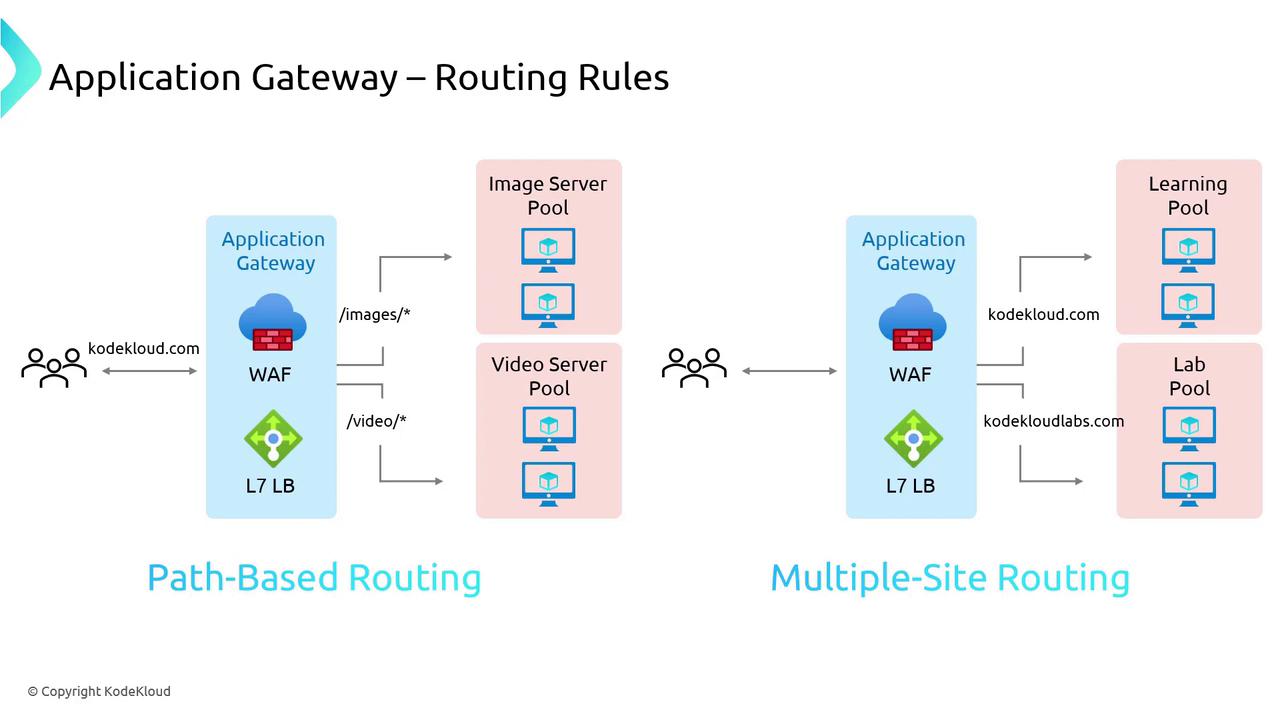
Demonstration: Configuring Azure Application Gateway

In this demonstration, we deploy an Application Gateway that uses path-based routing. The deployment script named AppGatewayPrepInfra1 sets up the required infrastructure—including two red VMs, two blue VMs, and two green VMs. Initially, all requests are routed to the red servers. If the URL path offers a clue (e.g., containing "blue" or "green"), the traffic is directed to the blue or green servers as appropriate.

RequestId              : True
IsSuccessStatusCode    : OK
StatusCode             : True
ReasonPhrase           : OK
Creating jumpbox VM	
RequestId              : True
IsSuccessStatusCode    : OK
StatusCode             : True
ReasonPhrase           : OK

Jumpbox VM DNS name   : jumpbox-vm-168e36.eastus.cloudapp.azure.com
Private IP (webserver-01) : 10.0.2.4
Private IP (webserver-02) : 10.0.2.5
Private IP (webserver-03) : 10.0.2.6
PS C:\Users\RithinSkarla\Documents\kodekloud-az104>
PS C:\Users\RithinSkarla\Documents\kodekloud-az104> & .\070-Administer Network Traffic\appgw-prep

Warning: Deployment Error

If a deployment error occurs, you might see output similar to the following:

ErrorTarget:
StartTime: 12/9/2023 1:30:31 PM
EndTime: 12/9/2023 1:34:21 PM
OperationID: 1f1ca72-477d-4e69-91c2-024f13617746
Status: Failed
At C:\Users\RithinSkaria\Documents\kodekloud-az104\070-Administer Network Traffic\appgw_prep-infra.ps1:178 char:1
+ Set-AzVMExtension @Params
    + CategoryInfo          : CloseError: (:) [Set-AzVMExtension], ComputeCloudException
    + FullyQualifiedErrorId : Microsoft.Azure.Commands.Compute.SetAzureVMExtensionCommand
Deployment Completed!
Jumpbox VM DNS name: jumpbox-vm-e6c623.eastus.cloudapp.azure.com
Private IP (green-01): 10.0.1.4
Private IP (green-02): 10.0.1.5
Private IP (blue-01): 10.0.1.4
Private IP (blue-02): 10.0.1.5
Private IP (red-01): 10.0.2.4
Private IP (red-02): 10.0.2.5
Use username: kodekLoud and password: VMP055w0rd to login to any VMs
PS C:\Users\RithinSkaria\Documents\kodekloud-az104>

Once the deployment completes, verify that the virtual machines (including blue, green, red, and the jumpbox VMs) are visible in the Azure Portal.

Deploying the Application Gateway via the Azure Portal

Step 1: Virtual Machines Overview

Access the Azure Portal and verify your list of virtual machines to ensure all instances are deployed correctly.

The image shows a Microsoft Azure portal interface displaying a list of virtual machines, including details like name, type, status, and operating system.

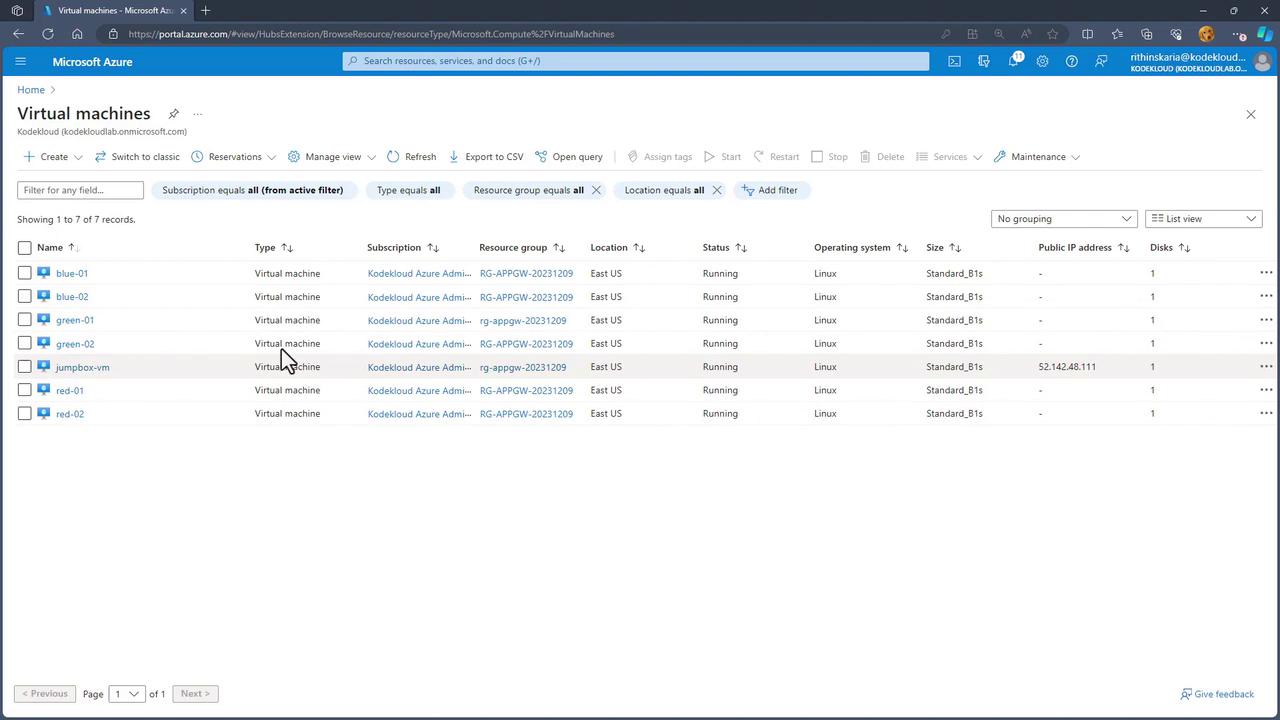
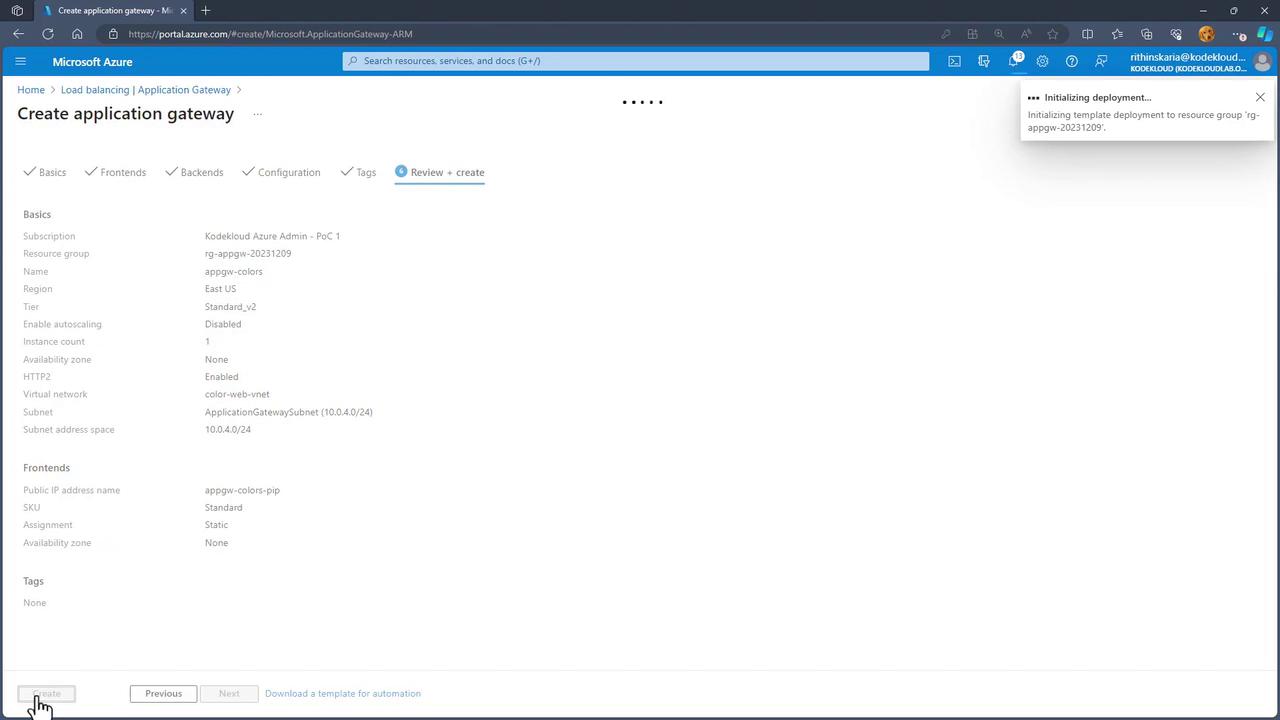
Step 2: Creating the Application Gateway

Click on "Create" and complete the configuration fields including subscription, resource group, Application Gateway name (e.g., APPGW Colors or H2S), and region.

The image shows a Microsoft Azure portal interface for creating an application gateway, with fields for project and instance details such as subscription, resource group, and region.

Select the Standard V2 SKU to leverage auto-scaling capabilities (which are disabled in this demo). Set the instance count and do not select availability zones.

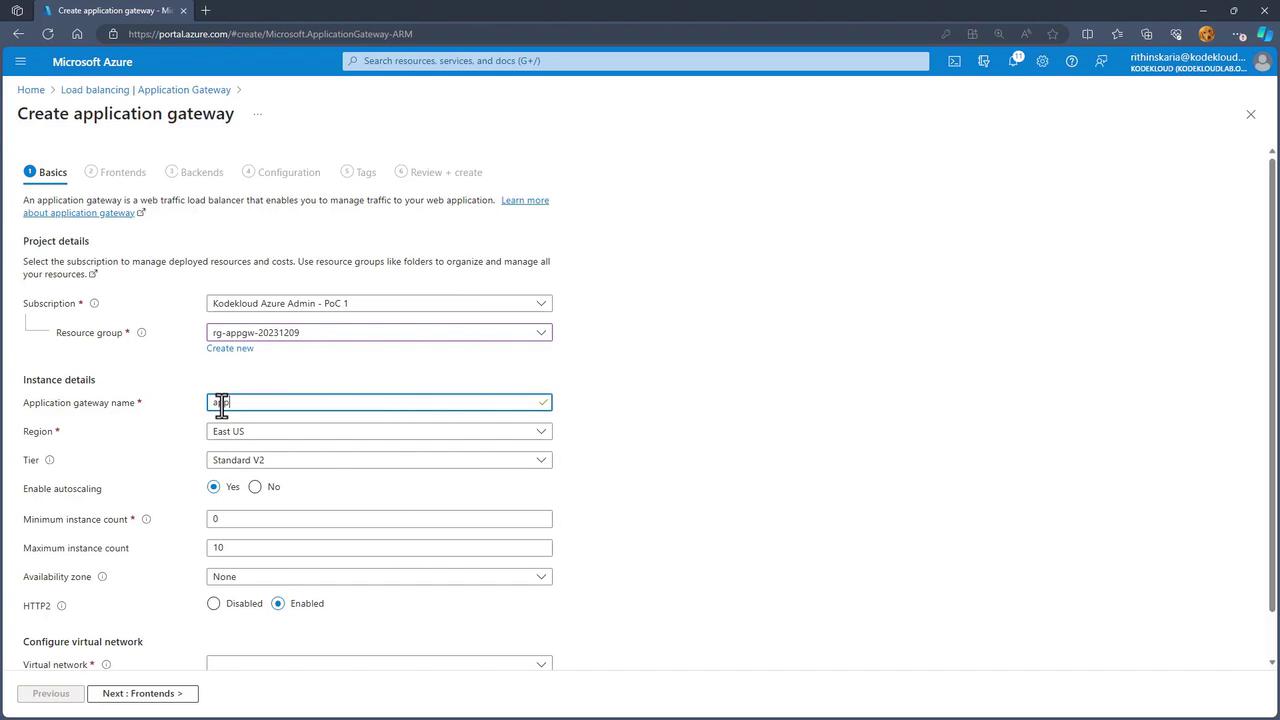
Step 3: Configuring the Virtual Network

The Application Gateway requires a dedicated subnet. Select your Virtual Network and click on "Manage subnet configuration" to add a new subnet specifically for the Application Gateway. With a large address space (e.g., /16), you can configure a subnet with a /24 CIDR.

The image shows the Microsoft Azure portal interface for managing subnets within a virtual network. It includes a list of existing subnets and a form to add a new subnet with various configuration options.

Ensure that the Application Gateway subnet is created and selected without errors before proceeding.

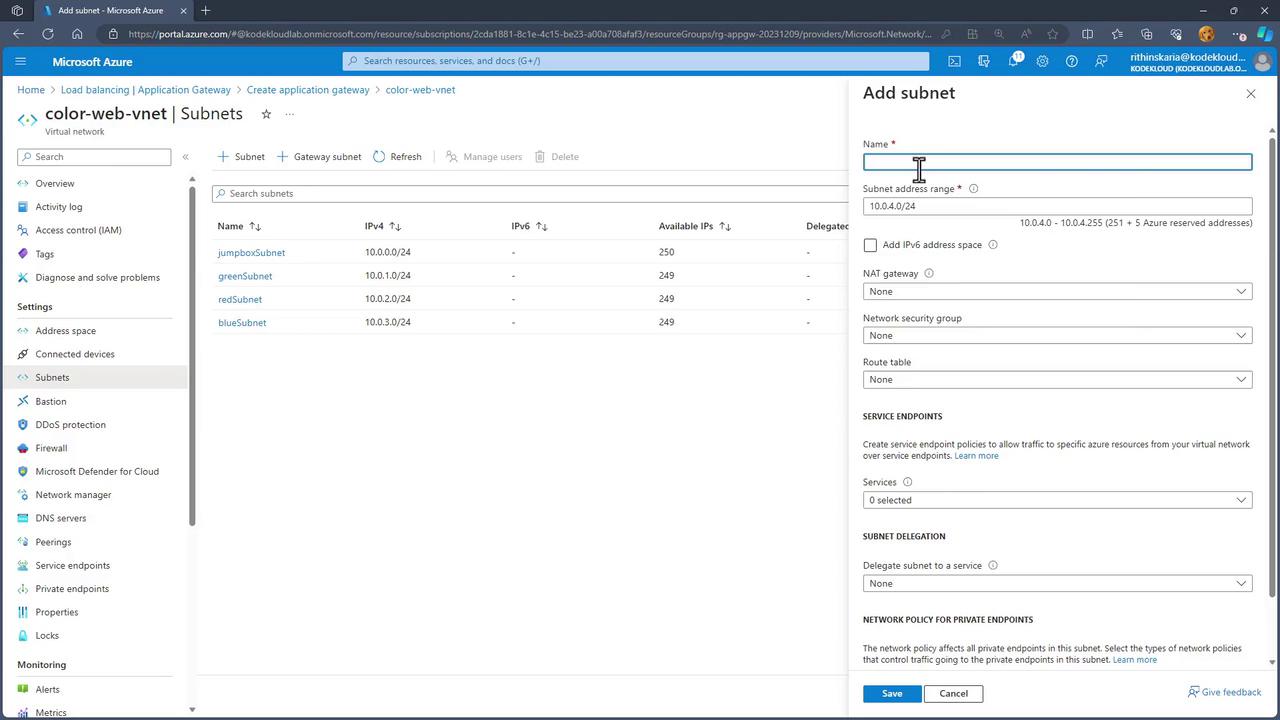
Step 4: Frontend Setup

For the frontend configuration, create a new public IP address (named "PIP") for the public-facing gateway.

The image shows a Microsoft Azure portal interface for creating an application gateway, specifically on the "Frontends" tab, with a pop-up window for adding a public IP address.

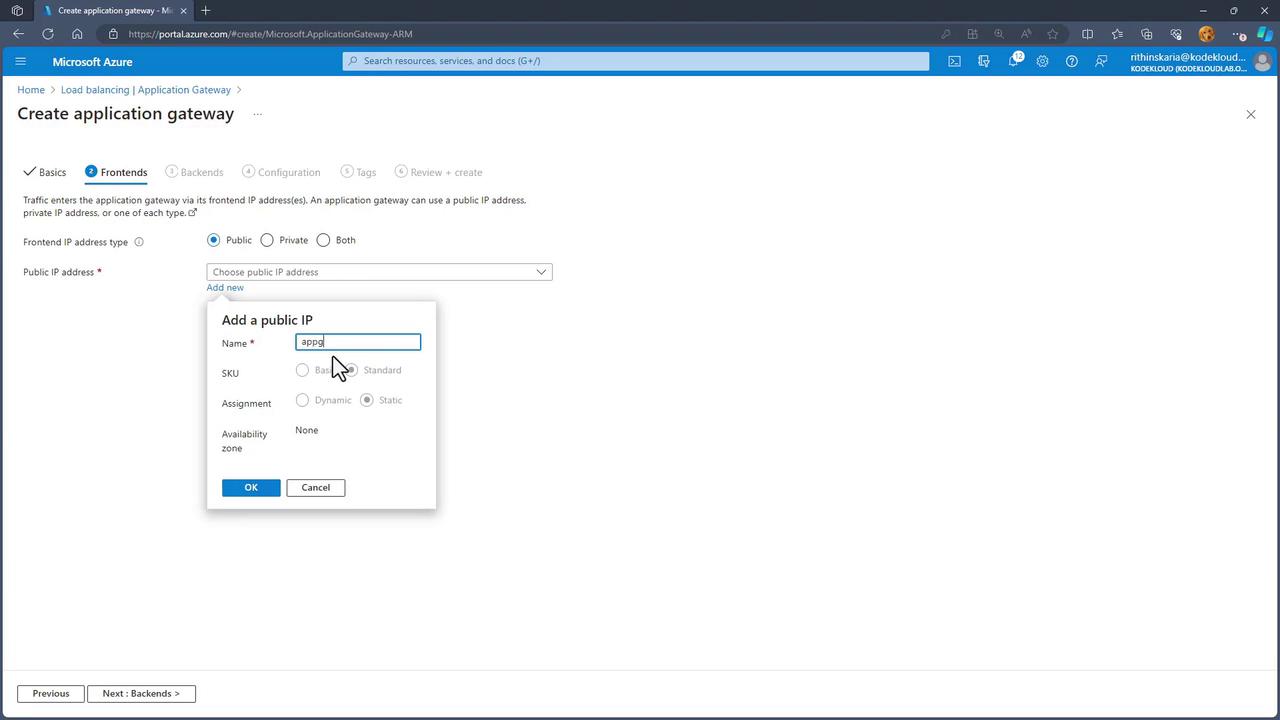
Step 5: Backend and Routing Rule Configuration

  1. Create backend pools for your server groups. Initially, define pools for red, blue, and green servers.
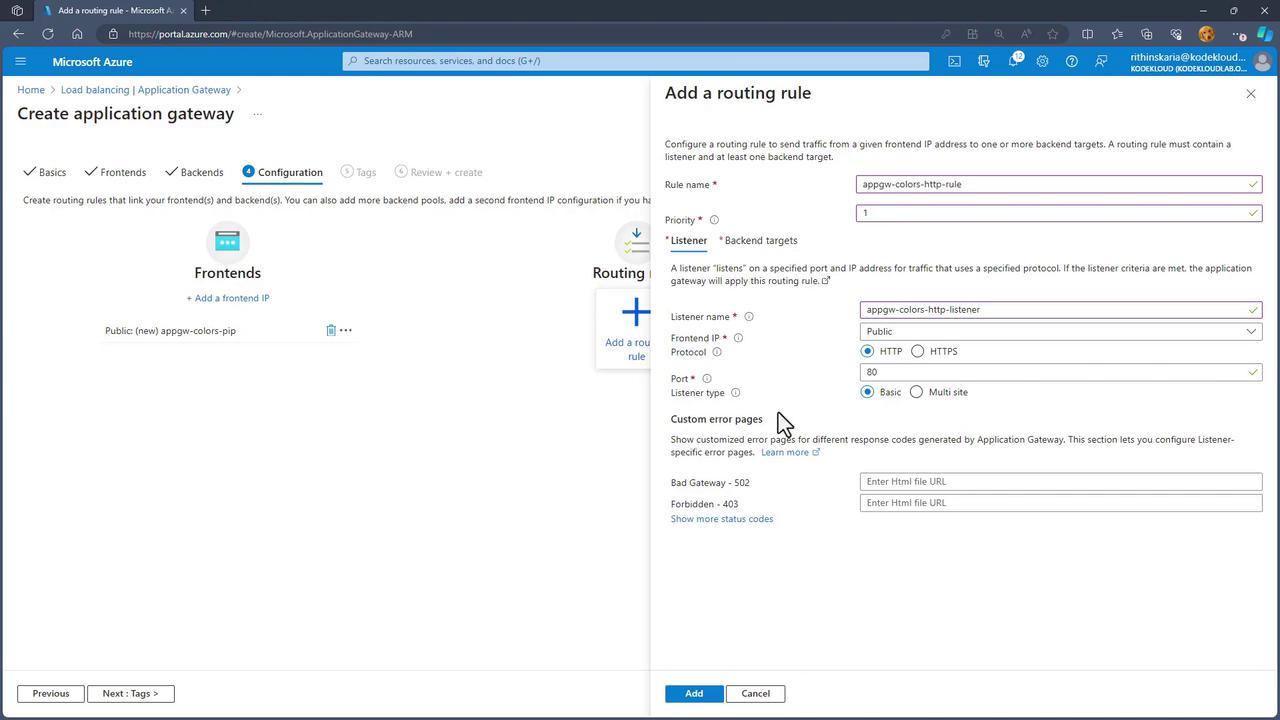
  2. Configure the routing rules:
    • Create a primary routing rule (e.g., "App GW Colors HTTP Route") with a priority of 1.
    • Set up a listener (e.g., "App Gateway Colors HTTP Listener") with the following details:
      • Frontend IP: Public
      • Protocol: HTTP
      • Port: 80
      • Listener type: Basic (no multi-site configuration)

The image shows a Microsoft Azure portal interface for creating an application gateway, specifically focusing on adding a routing rule with configuration options for listener settings and custom error pages.

Configure the default backend target to use the red pool on port 80 with HTTP. Then, add path-based routing rules:

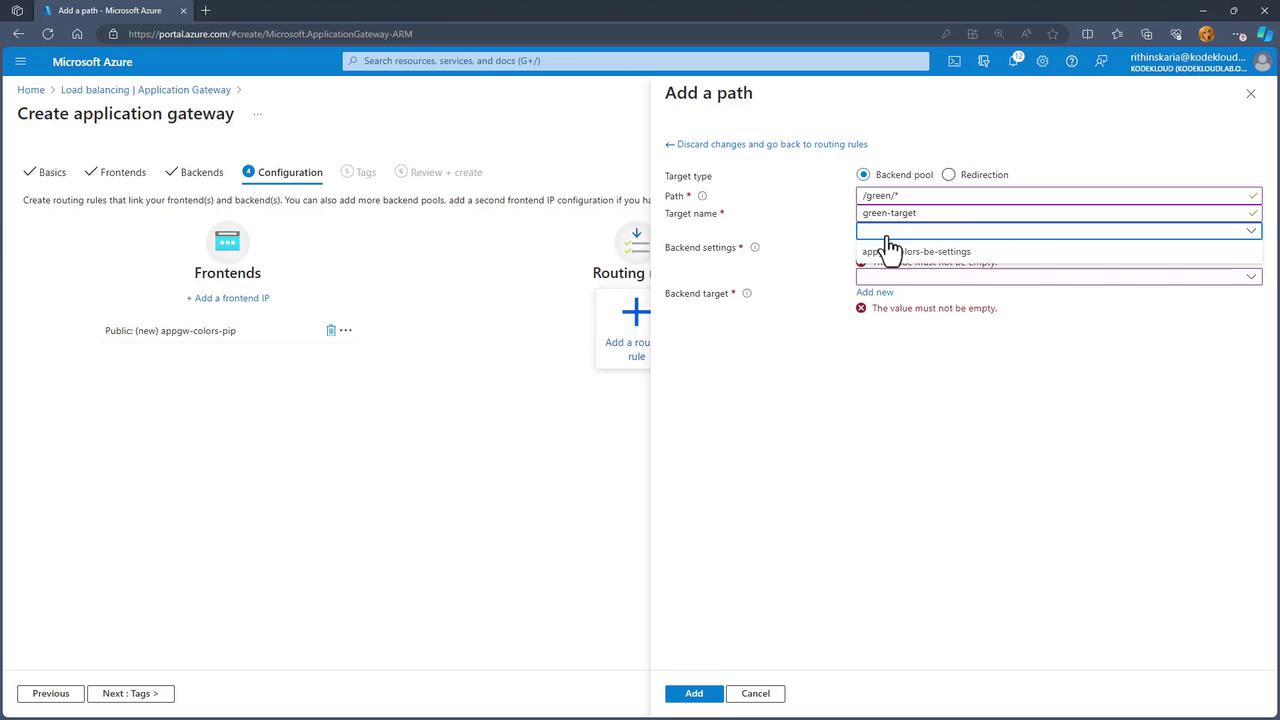
  • For instance, create a rule such that when the URL path contains "blue/*", traffic is forwarded to the blue pool.
  • Similarly, configure a rule for "green" paths that directs traffic to the green pool.

The image shows a Microsoft Azure portal interface for creating an application gateway, specifically in the "Configuration" step, with a pop-up for adding a path to a routing rule.

Review your configurations, add tags if needed, and start the deployment of the Application Gateway. The deployment process typically takes 10 to 15 minutes.

The image shows a Microsoft Azure portal page for creating an application gateway, displaying configuration details such as subscription, resource group, and network settings. A notification indicates the initialization of a template deployment.

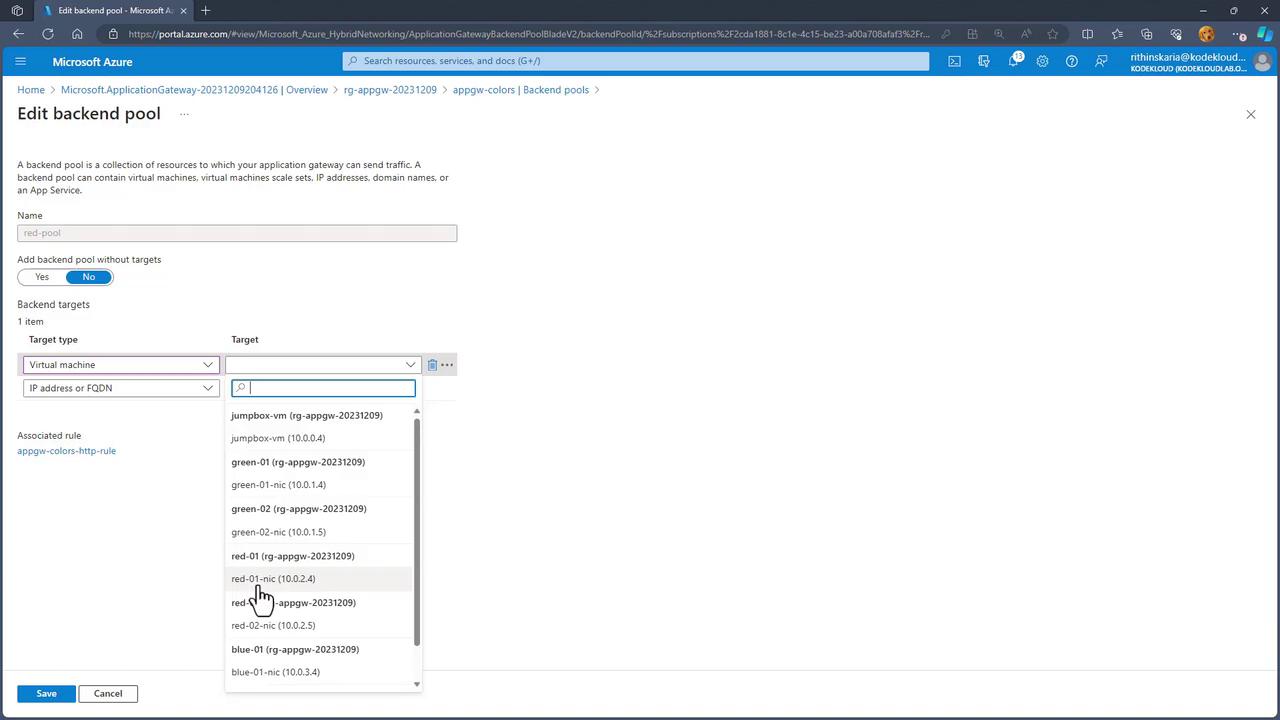
Step 6: Mapping Virtual Machines to Backend Pools

After successful deployment, navigate to the Resource Group to locate your Application Gateway. Since backend pools are empty initially, manually add virtual machines to the respective pools:

  • For the red pool, assign the "Red One" and "Red Two" VMs.
  • Similarly, add the appropriate blue and green VMs to their designated pools.

The image shows a Microsoft Azure portal interface for editing a backend pool. It includes options to select a target type and target, with a dropdown list of virtual machines and their associated IP addresses.

Testing the Application Gateway

After mapping the virtual machines, test the routing configuration:

  • Access the public IP of the Application Gateway to verify that traffic is, by default, routed to the red servers (using a round-robin distribution).
  • Append the specific path (e.g., "/blue") to the URL and confirm that the request is directed to the blue servers.
  • Similarly, test a path corresponding to the green rules to ensure traffic is properly forwarded to the green pool.

Troubleshooting and Final Steps

If you encounter issues with the server setup or if the custom script extension becomes unresponsive, download and run the Gembox script from the jumpbox. This script will apply the necessary configuration changes to all machines.

The image illustrates application gateway routing rules, showing path-based routing and multiple-site routing with different server pools for images, videos, learning, and labs.

Conclusion

In this guide, we demonstrated how to deploy and configure the Azure Application Gateway using both path-based and multi-site routing. We mapped backend pools to virtual machines and verified the entire setup through the Azure Portal. For additional load balancing strategies and performance optimizations, consider exploring alternative solutions to further enhance your network infrastructure.

Watch Video

Watch video content

Previous
Application Gateway components