Session Persistence Options
None (Default)
When session persistence is set to “none,” Azure Load Balancer uses a five-tuple hash to distribute incoming requests. This hash includes:- Source IP address
- Destination IP address
- Source port
- Destination port
- Protocol
Client IP
Selecting the “client IP” option, also known as the two-tuple hash, causes the load balancer to use a combination of the source and destination IP addresses. This ensures that all requests from a specific client IP are directed to the same server. This approach is particularly beneficial for applications that maintain user state, such as e-commerce shopping carts or scenarios requiring persistent server-side sessions.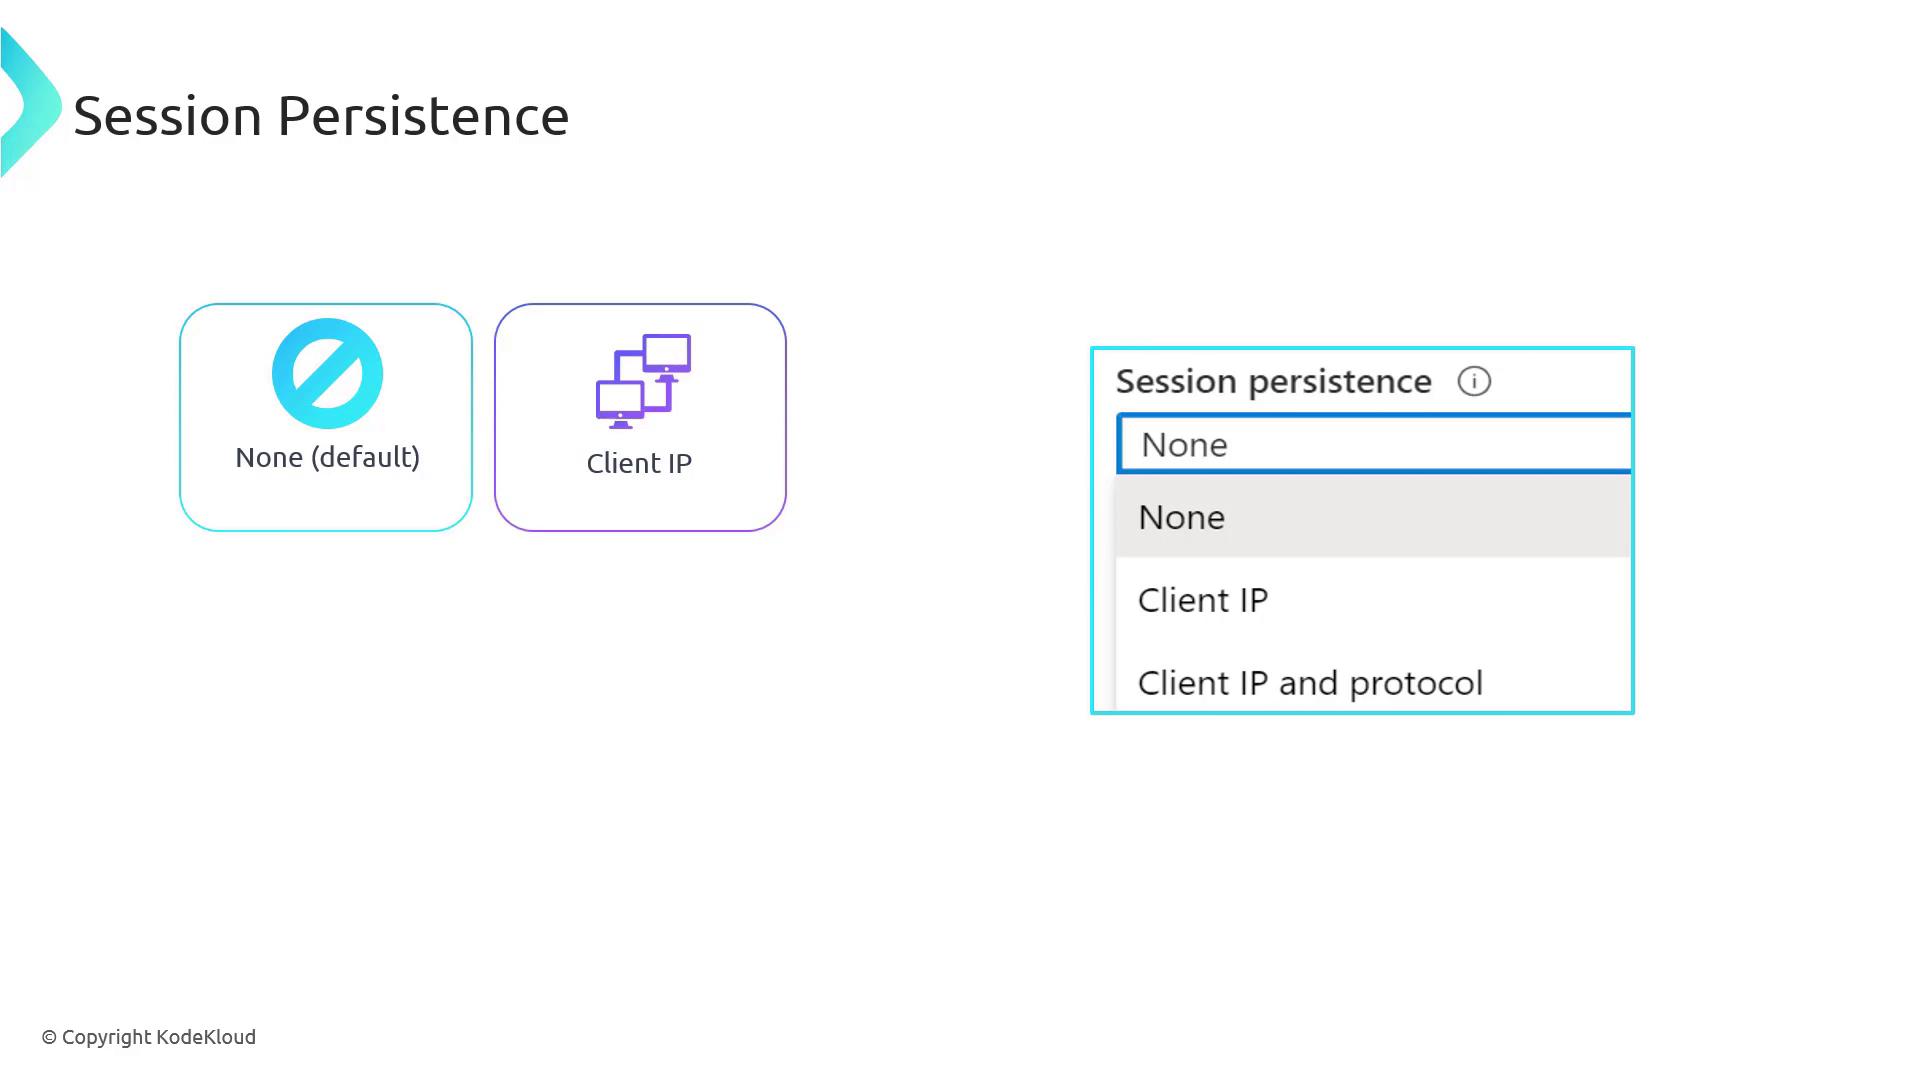
Client IP and Protocol
The “client IP and protocol” option, known as the three-tuple hash, adds the protocol to the source and destination IP addresses. This method is particularly useful when a single virtual machine hosts multiple services (for example, secure and non-secure traffic on different protocols, even when sharing the same IP address).Choosing the appropriate session persistence option is key to balancing session affinity with efficient resource utilization and delivering an optimal user experience.
Deploying and Configuring the Azure Load Balancer
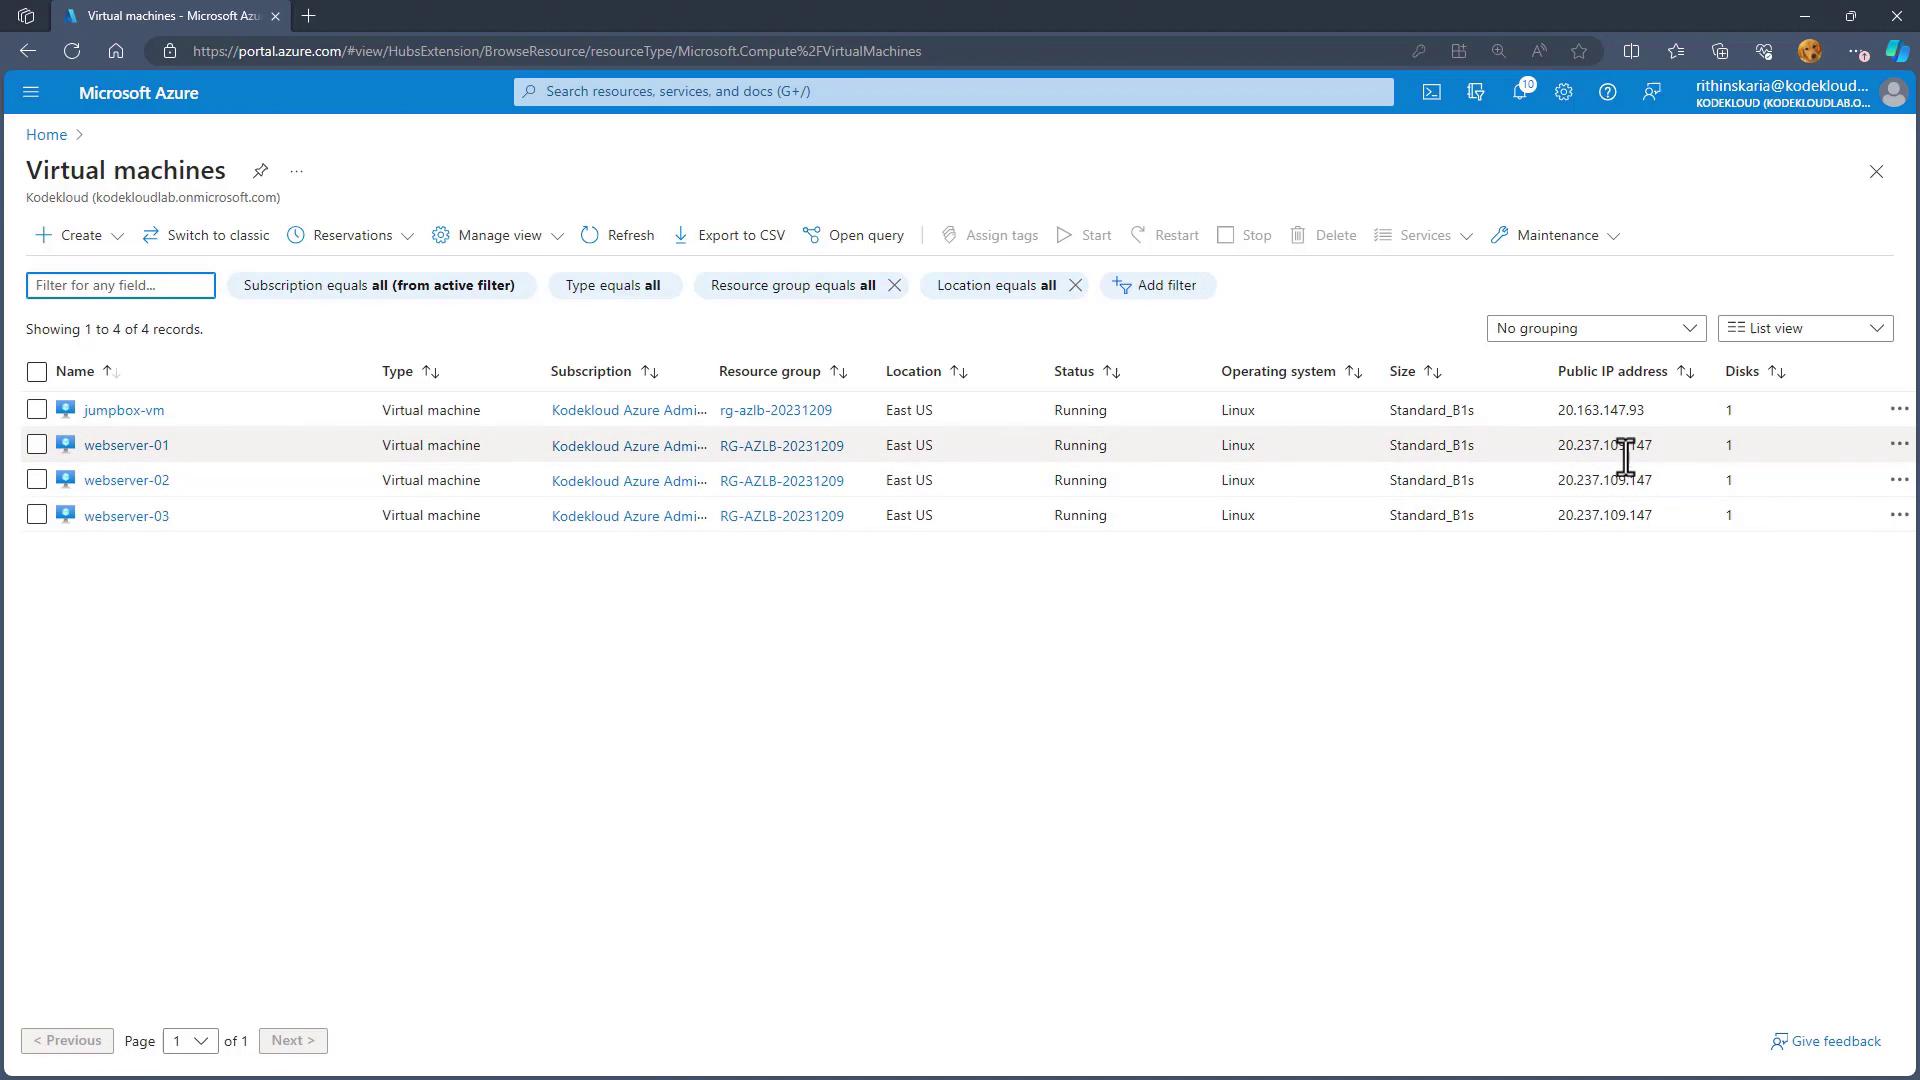
In this section, you will learn how to deploy an Azure Load Balancer to distribute traffic across web servers. This process includes deploying virtual machines (VMs), installing a web server role, updating web pages, and configuring the load balancer.Preparing the Infrastructure
Within the repository, there is a script (for example, “070_load_balancer_prep_infra.ps1”) that deploys virtual machines and sets up the environment. Navigate to the repository folder using the following commands:prep_infra.ps1) to deploy resources such as VMs and a jumpbox. When the script runs, it outputs important details like the jumpbox DNS name and the private IP addresses of the web servers. Note that these servers are not yet exposed to the internet—they will be made accessible via the load balancer.
The output should resemble the following:
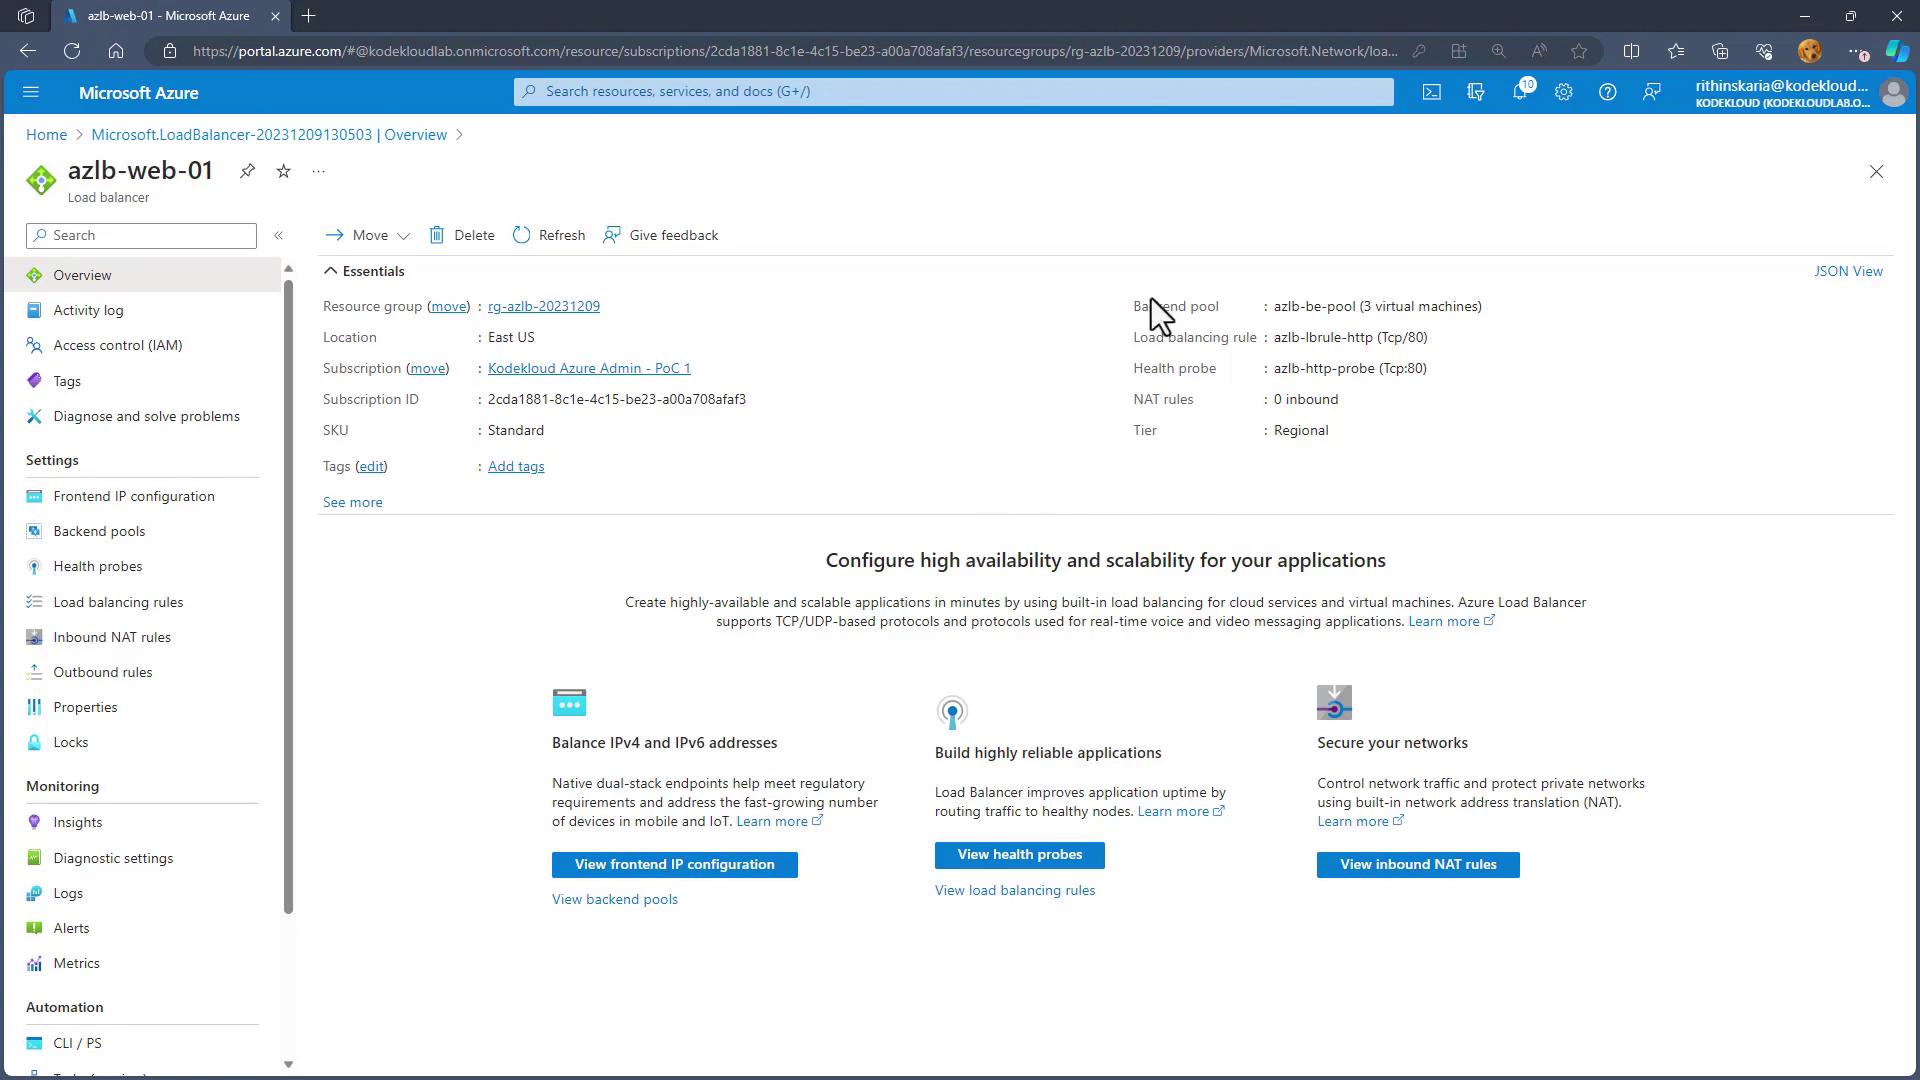
Configuring the Azure Load Balancer
Follow these steps to create and configure your Azure Load Balancer:-
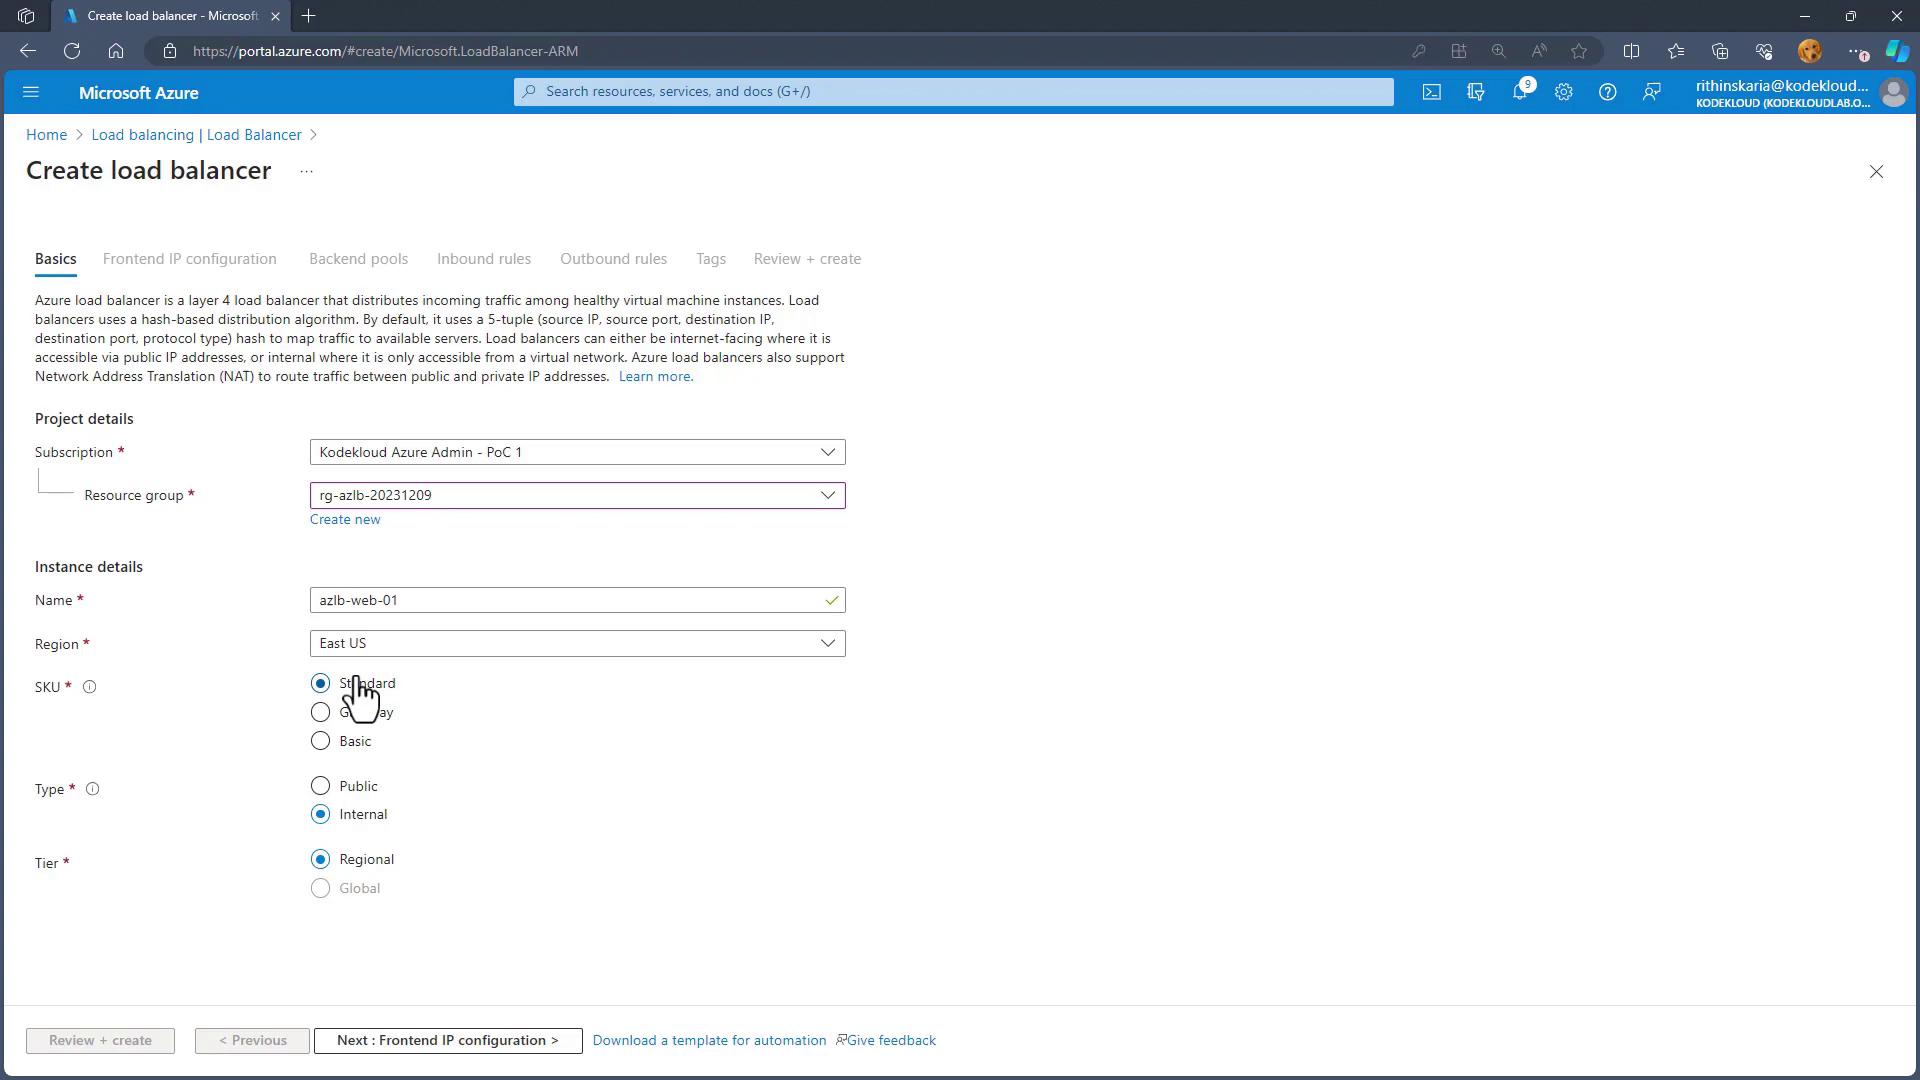
Create the Load Balancer:
- In the Azure portal, navigate to “Create a resource” and choose “Load Balancer.”
- Select the Standard SKU for production use and opt for a public (regional) load balancer.
- Provide a name (e.g.,
sclbweb01) and ensure it belongs to the same resource group as your VMs.
-
Configure the Frontend IP:
- Create a public IP address resource (for example,
sclbpipor named “fe” for frontend). - Associate this public IP with the frontend configuration of the load balancer.
- Create a public IP address resource (for example,

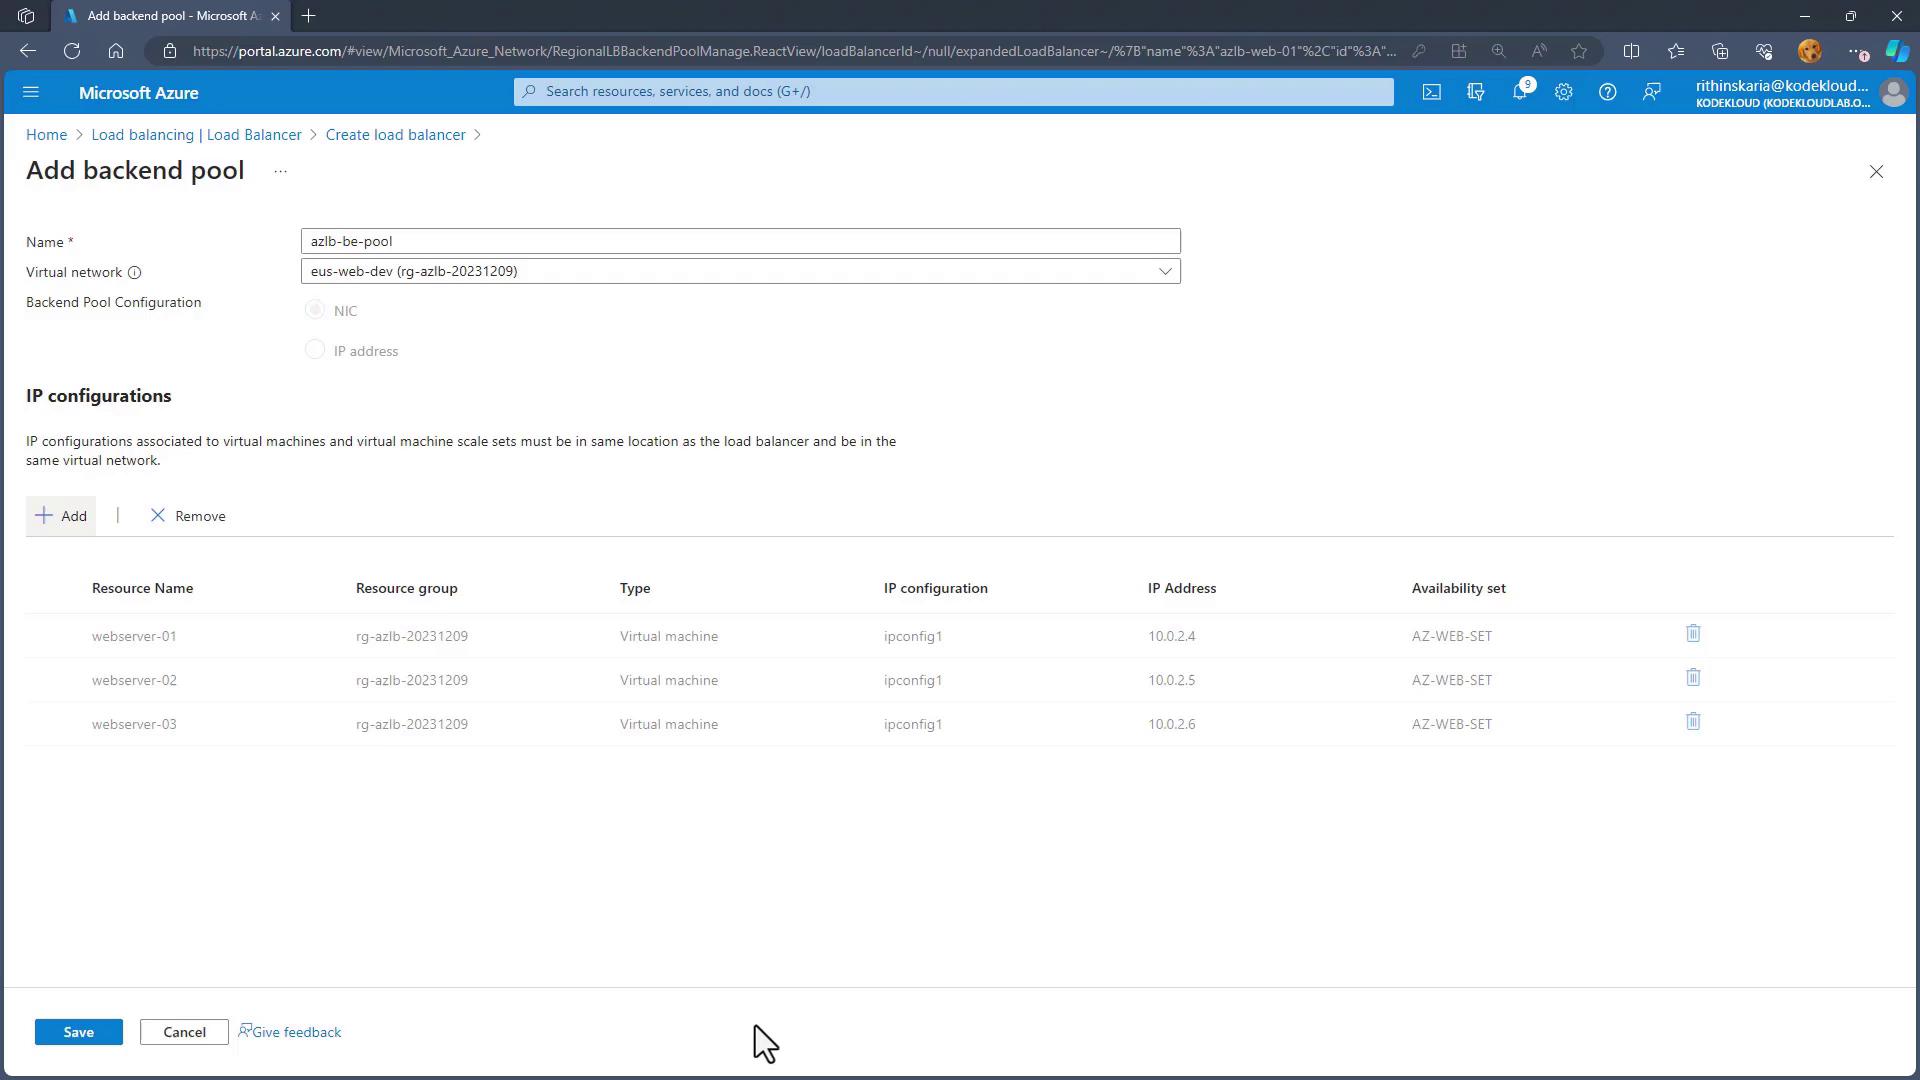
- Set Up the Backend Pool:
- Create a backend pool and choose the virtual network where your web servers are located.
- Add all three web servers to the backend pool.
- Add Load Balancing Rules:
Create a load balancing rule to connect the frontend with the backend pool:- Provide a rule name (e.g.,
sclb_lb_http). - Select the previously created frontend IP address.
- Choose the appropriate backend pool.
- Set both the frontend and backend TCP port to 80.
- Create a new health probe (e.g.,
sclb_http_probe) that checks port 80 every 5 seconds. If a server fails to respond, it is marked as unhealthy and excluded from the load-balanced pool.
- Provide a rule name (e.g.,

-
Configure Session Persistence:
Within the load balancing rule settings, select the session persistence method. By default, the five-tuple hash (none) is used. You may choose the two-tuple (client IP) or three-tuple (client IP and protocol) option based on your application’s needs. For demonstration purposes, we’ll keep the default “none” setting. -
Finalize and Create:
Review your settings carefully, ensuring that no extra inbound NAT or outbound rules are enabled since the jumpbox handles management. When ready, click “Review and Create” followed by “Create.” Wait for the deployment to complete.