This article explains how to manage and deploy containerized applications using Azure Container Apps in a serverless environment.
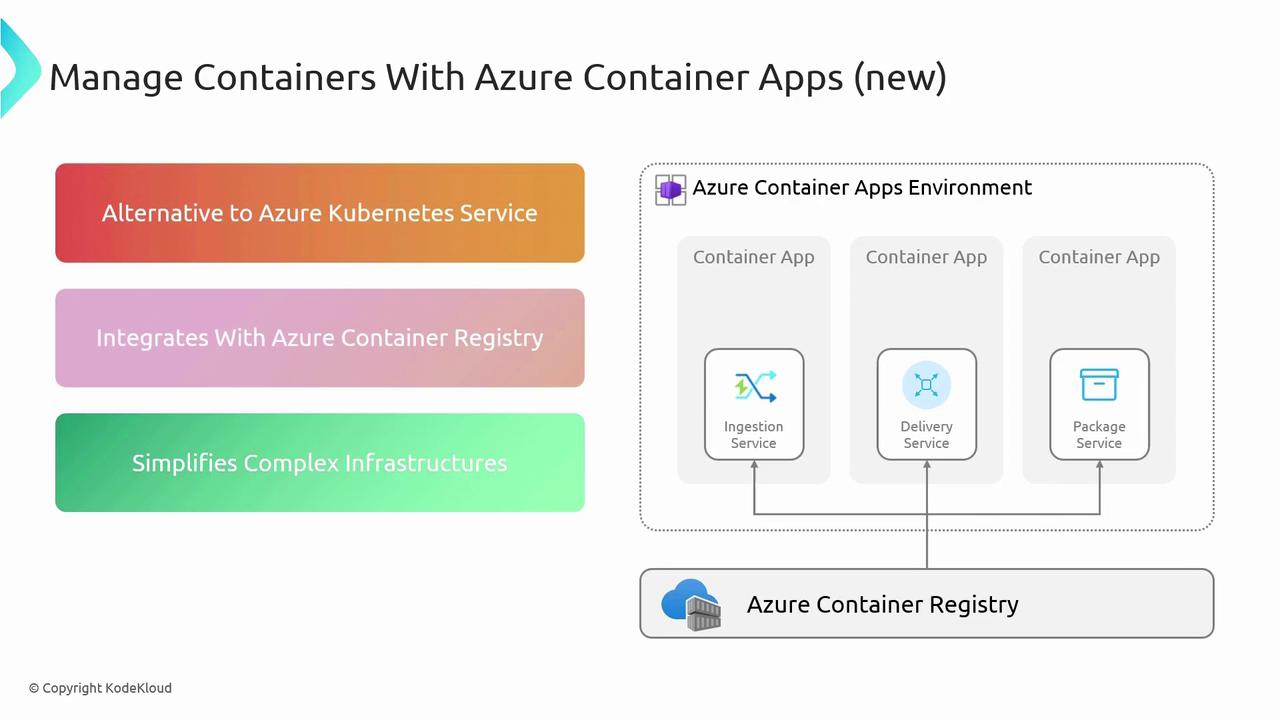
Azure Container Apps provide a serverless hosting environment that simplifies running containerized applications without the burden of managing underlying infrastructure. They offer a streamlined alternative to Azure Kubernetes Service (AKS) by enabling partial orchestration for microservices instead of full orchestration. This setup is particularly effective when each container operates as a distinct component within a larger application architecture.For example, one container might be dedicated to data ingestion (the ingestion service), another to processing that data (the delivery service), and a third to packaging processed data for consumption (the packaging service). This modular approach demonstrates how microservices can be effectively managed within an Azure Container Apps environment, where each service is isolated in its own container for optimal performance and scalability.Integration with the Azure Container Registry is straightforward. A DevOps pipeline can build container images, push them to the registry, and trigger deployments seamlessly. In this context, Azure Container Instances (ACI) serve as the building blocks of container apps. While ACI provides rapid scalability for single containers, Azure Container Apps excel when orchestrating multiple containers as a grouped service.
Azure Container Apps reduce deployment complexity and streamline scaling operations, enabling developers to focus on application logic rather than managing intricate Kubernetes configurations.
Deploying Azure Container Apps via the Azure Portal
Follow these steps to deploy Azure Container Apps using the Azure Portal:
Open the Azure Portal and search for “Container Apps.” Click on the “Create” option.
Choose your subscription and select an existing resource group or create a new one.
Provide a name for your container app (e.g., “demo-app”).
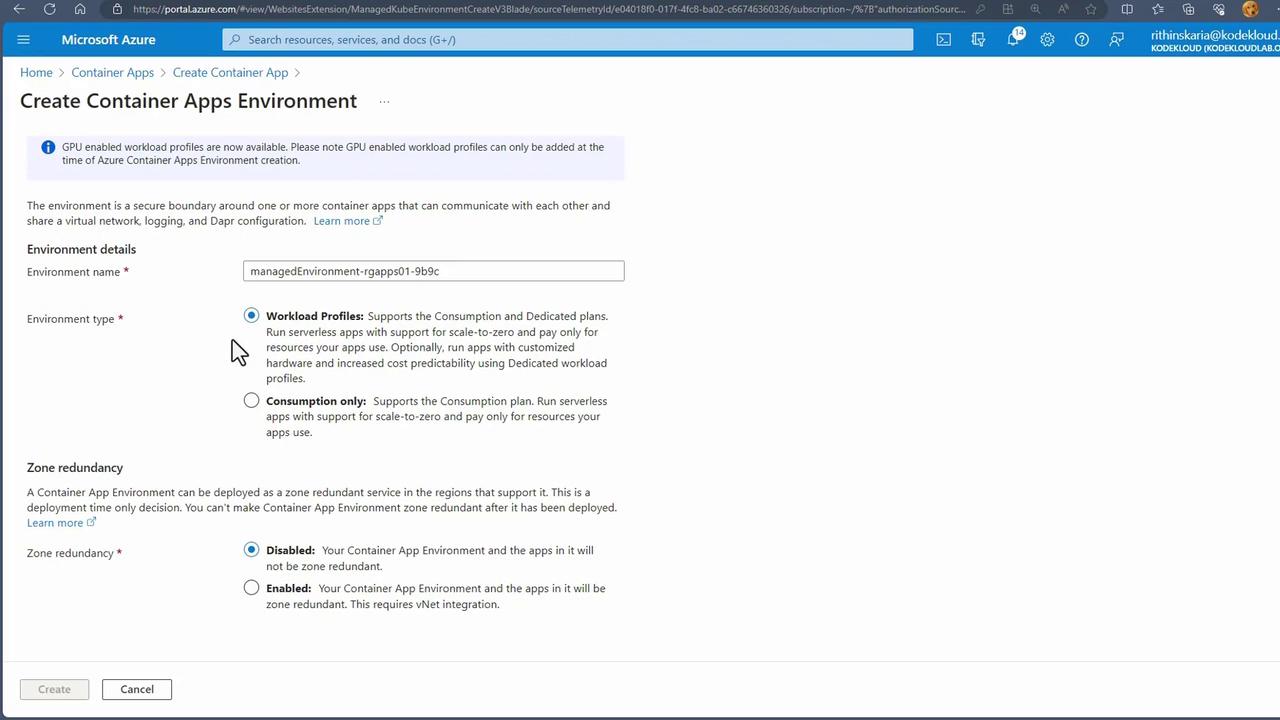
Select the appropriate Container Apps environment where your apps will run. You can create a new environment by clicking on “Create new” and configuring options such as workload profiles (consumption or dedicated plans), redundancy, and networking (either your own network or a Microsoft-provided network).
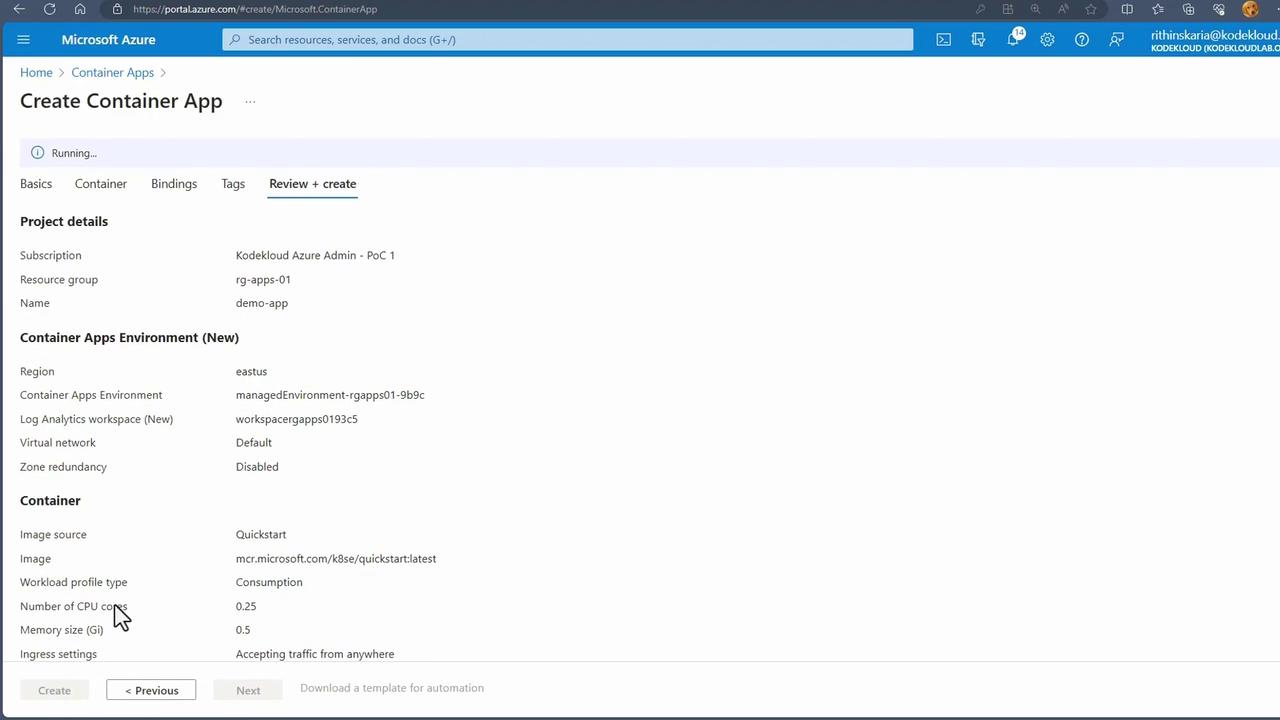
In the container settings, select a quickstart image for convenience. In this example, a simple “Hello World” container is chosen with HTTP traffic enabled on port 80.
Click on “Review + Create” to validate your settings. Once validation passes, proceed with creating the Azure Container App.
After deployment, click “Go to resource” to view your demo app. A URL will be displayed for accessing the deployed application, allowing you to verify the deployment.
Within the demo app resource, additional options include:
Adding more containers for further orchestration.
Configuring scaling, specifying replica counts, and enabling continuous deployment.
Setting up a custom domain, integrating Dapr, or using service connectors for enhanced customization.
This guide has walked you through the deployment process and key configuration options for Azure Container Apps. By leveraging these features, managing and scaling containerized applications becomes more accessible, significantly reducing the complexity associated with traditional Kubernetes deployments.Next, we will discuss data protection.