Kubernetes for the Absolute Beginners - Hands-on Tutorial

Kubernetes on the Cloud

Kubernetes on GCP GKE

In this article, you will learn how to deploy your application on Google Kubernetes Engine (GKE) within the Google Cloud Platform (GCP). Before getting started, ensure you have access to a Google Cloud account. Google offers a 12-month free trial with a $300 credit, which is sufficient for following along with this guide.

The image describes Google Cloud's Free Tier, offering a 12-month trial with $300 credit and limited free access to resources.

A basic understanding of the GCP console and shell usage is essential, as you will configure the prerequisites directly in the cloud console.

Pre-requisites

Ensure you have:

  • A valid Google Cloud account.
  • Familiarity with GCP Console and basic terminal commands.

Creating the Cluster

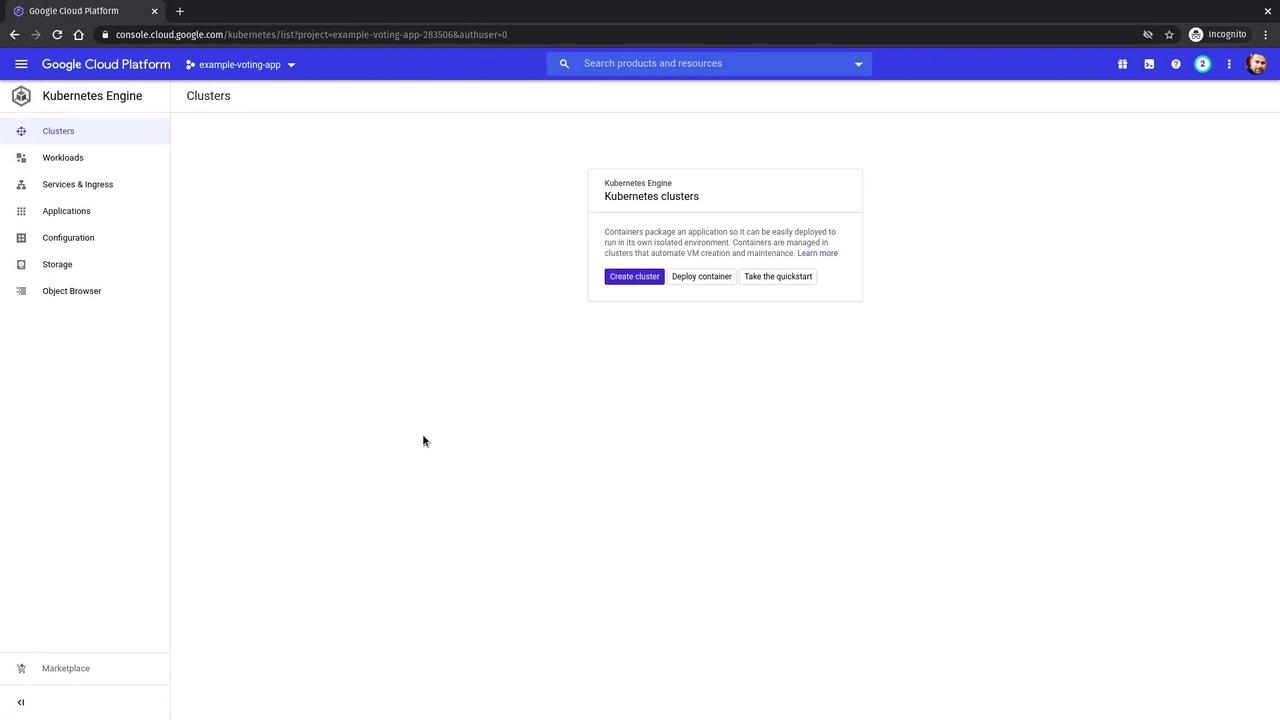
After logging into the GCP console, locate your project. In this example, we will use the project named "Example Voting App". Follow these steps to begin configuring GKE:

  1. Click the navigation menu at the top left corner.
  2. Under the Compute section, select Kubernetes Engine.
  3. In the Kubernetes Engine section, click Create Cluster.

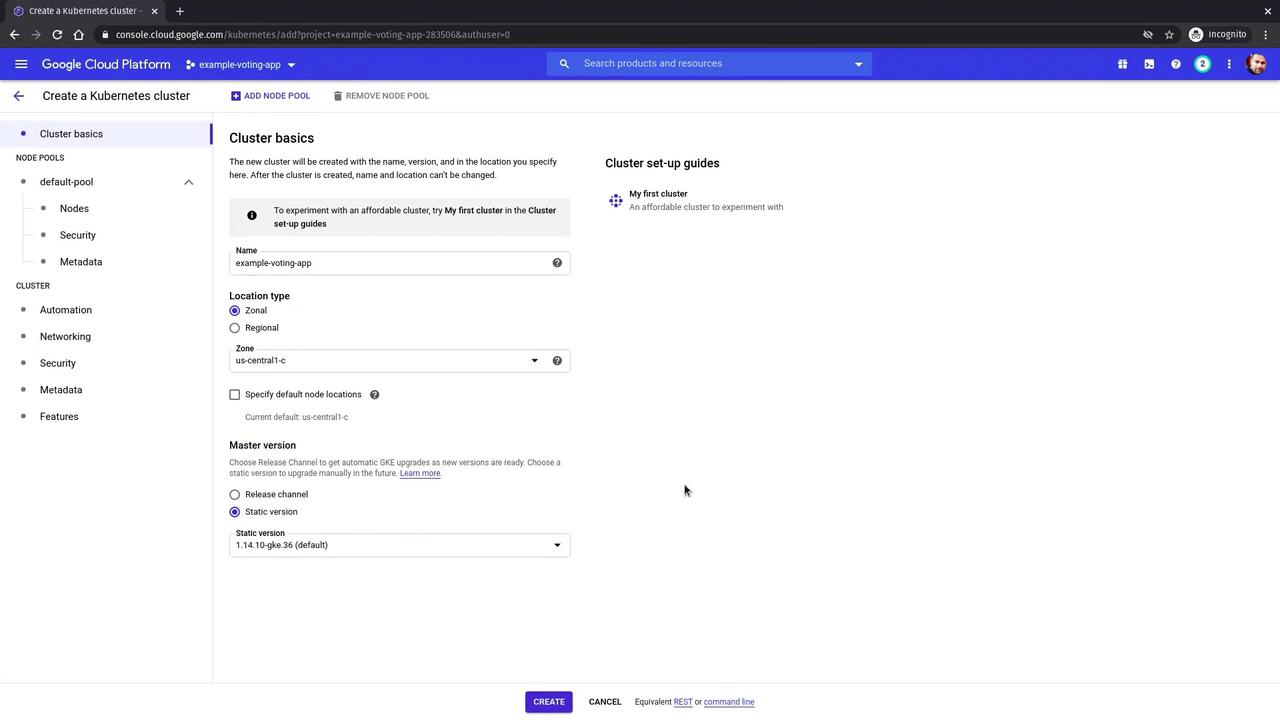
This action opens the Kubernetes cluster creation interface:

The image shows the Google Cloud Platform interface, specifically the Kubernetes Engine section, with options to create a cluster, deploy a container, or take a quickstart.

Cluster Settings

  • Rename the cluster to "Example Voting App".
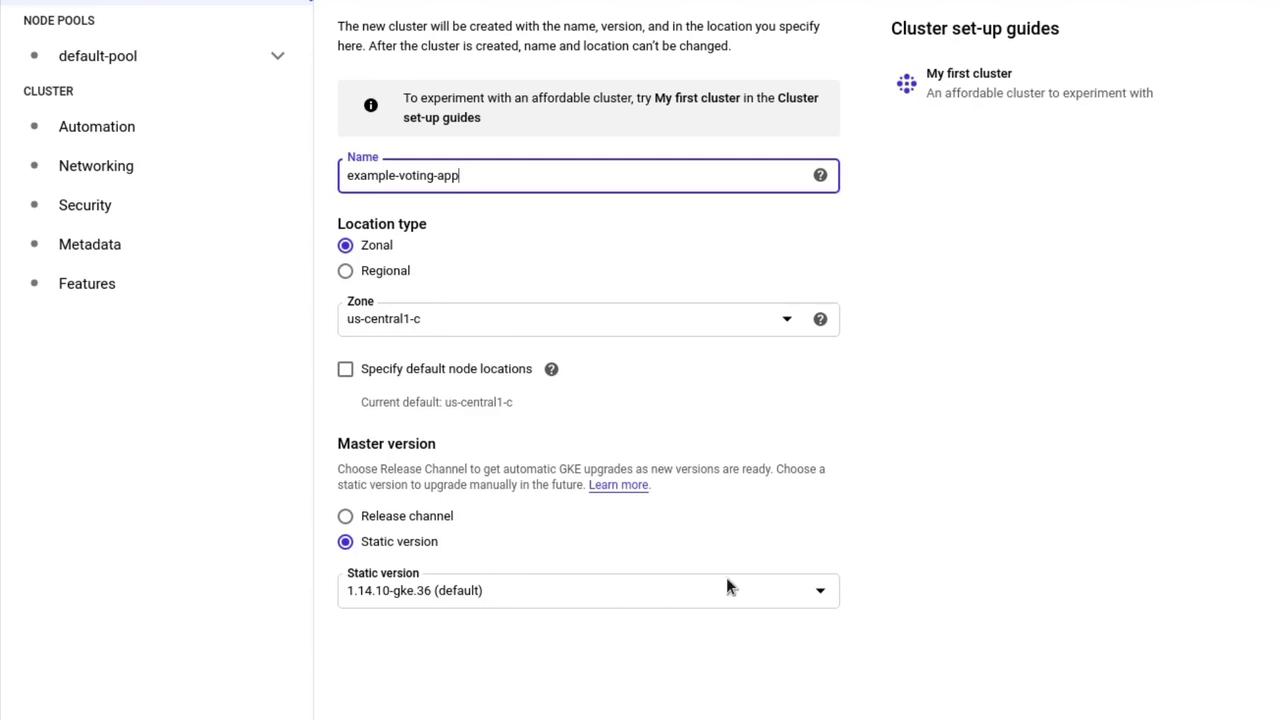
  • Use the default values for location type and zone.
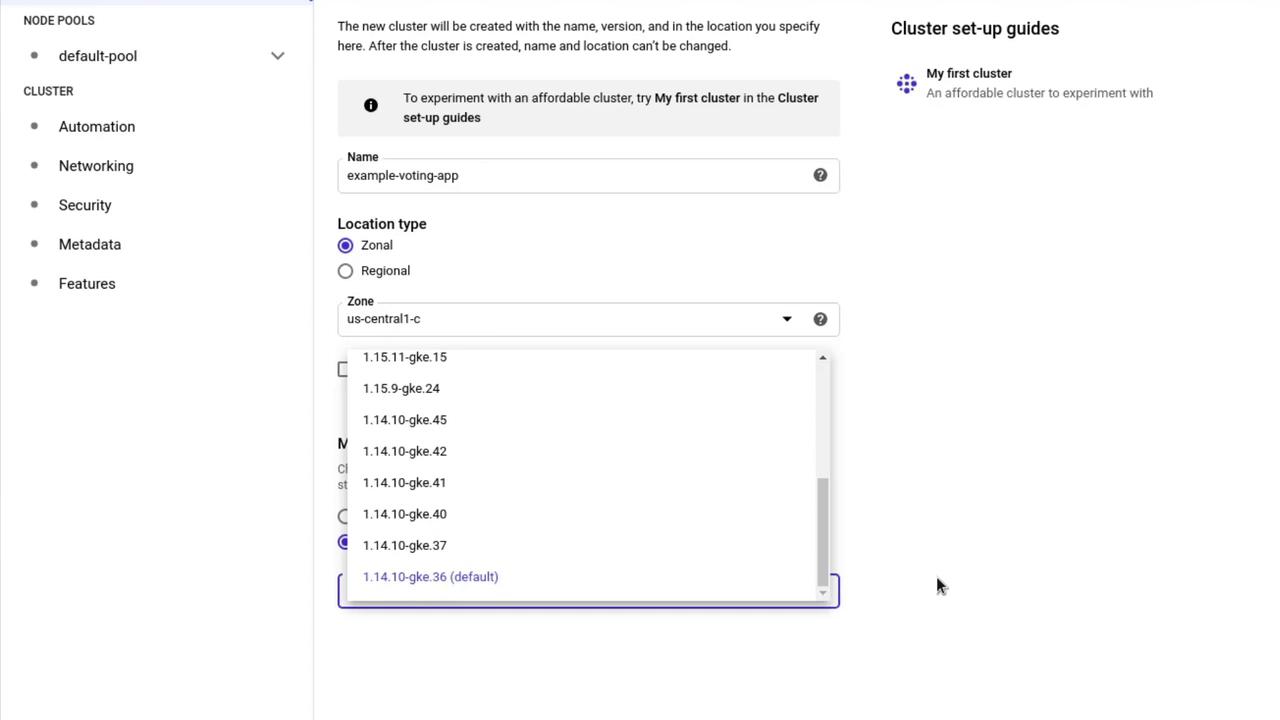
  • For the master version, you can either select a static version or a release channel for automatic upgrades. For this demonstration, leave it at the default setting.

Additional options are available for worker nodes, such as configuring the VM type or size; however, the default settings will suffice for this tutorial.

The image shows a Google Kubernetes Engine (GKE) cluster setup interface, detailing options for naming, location type, zone, and master version selection.

The image shows a Google Cloud Platform interface for setting up a Kubernetes cluster, with options for naming, location type, and version selection.

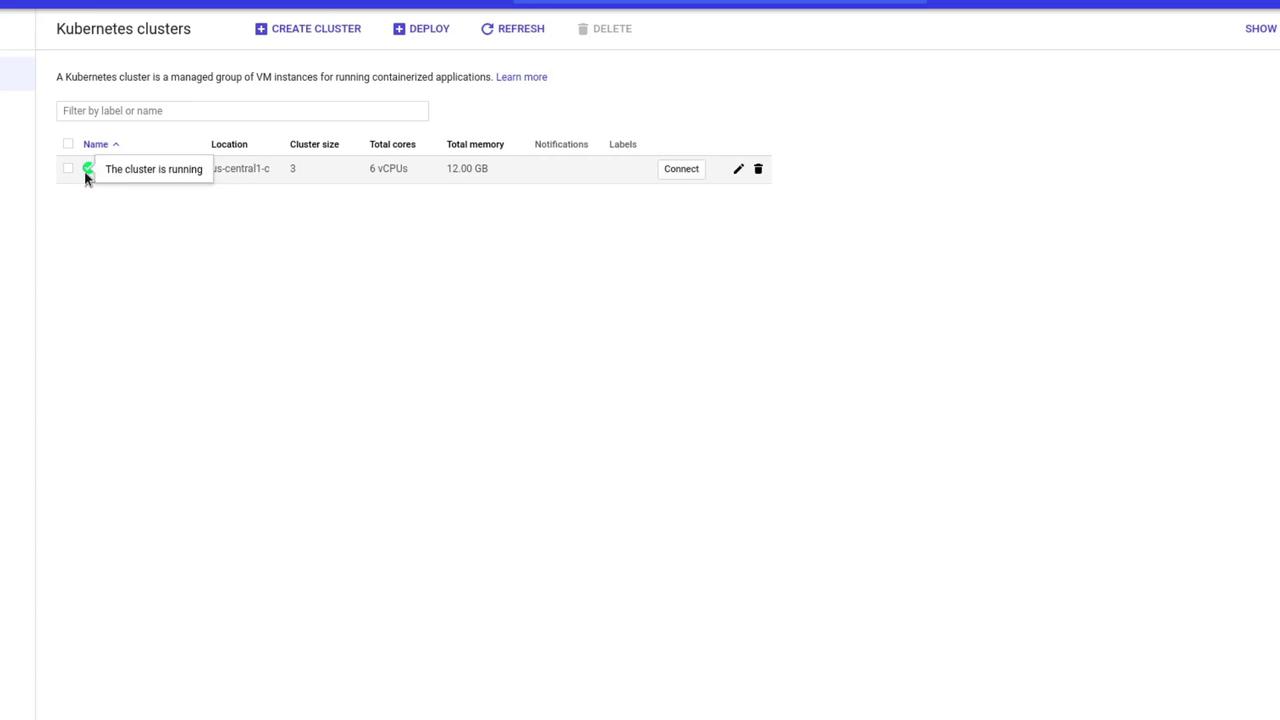
Once your configuration is complete, click Create to begin provision the cluster. Note that this process typically takes between 5 to 10 minutes. You can monitor the progress by clicking the Refresh button:

The image shows the Google Cloud Platform interface for creating a Kubernetes cluster, with options for cluster basics, location, and master version settings.

When the cluster setup is complete, you'll see a green check mark next to the cluster name.


Connecting to Your Cluster

The simplest method to connect to your cluster is by clicking the Connect button:

The image shows a Kubernetes clusters dashboard with one running cluster, displaying details like location, size, cores, and memory.

Click Connect to display the command needed to configure kubectl using Cloud Shell. Once the Cloud Shell opens (you can maximize the window for convenience), run the provided command:

gcloud container clusters get-credentials example-voting-app --zone us-central1-c --project example-voting-app-283506

This command updates your kubectl configuration, allowing you to interact with your GKE cluster. To verify the connection, run:

kubectl get nodes

The output should look similar to this:

NAME                                                  STATUS   ROLES    AGE   VERSION
gke-example-voting-app-default-pool-e388a8c8-46b0       Ready    <none>   86s   v1.14.10-gke.36
gke-example-voting-app-default-pool-e388a8c8-bjx4       Ready    <none>   95s   v1.14.10-gke.36
gke-example-voting-app-default-pool-e388a8c8-rp73       Ready    <none>   94s   v1.14.10-gke.36

Deploying the Application

Now that your cluster is connected, you can deploy the YAML files for the various Deployments and Services that make up the voting application. These files are available in a GitHub repository. Follow the steps below in your Cloud Shell:

Step 1. Clone the Repository

Execute the following commands to clone the repository and navigate into the project directory:

git clone <repository-url>
cd example-voting-app

Step 2. Navigate to the Kubernetes Specifications Directory

Change into the directory containing the deployment and service definitions:

cd k8s-specifications
ls

You should see files similar to:

postgres-deploy.yaml   redis-deploy.yaml   result-app-deploy.yaml   voting-app-deploy.yaml   worker-app-deploy.yaml
postgres-service.yaml  redis-service.yaml  result-app-service.yaml  voting-app-service.yaml

Updating Service Definitions

To ensure the application works seamlessly in a cloud environment, a minor modification was made to the service definitions. For example, the voting service YAML now uses a LoadBalancer instead of a NodePort:

apiVersion: v1
kind: Service
metadata:
  name: voting-service
  labels:
    name: voting-service
    app: demo-voting-app
spec:
  type: LoadBalancer
  ports:
    - port: 80
      targetPort: 80
  selector:
    name: voting-app-pod
    app: demo-voting-app

A similar update applies to the result app service.

Creating Kubernetes Objects

Create the Kubernetes objects in the order below to ensure proper dependency management:

  1. Deploy the voting application and its corresponding service.
  2. Deploy Redis (both deployment and service).
  3. Deploy PostgreSQL (both deployment and service).
  4. Deploy the worker application.
  5. Deploy the result application and its corresponding service.

You can create each object individually:

kubectl create -f voting-app-deploy.yaml
kubectl create -f voting-app-service.yaml
kubectl create -f redis-deploy.yaml
kubectl create -f redis-service.yaml
kubectl create -f postgres-deploy.yaml
kubectl create -f postgres-service.yaml
kubectl create -f worker-app-deploy.yaml
kubectl create -f result-app-deploy.yaml
kubectl create -f result-app-service.yaml

Alternatively, create all objects at once with:

kubectl create -f .

After executing the creation commands, verify that the deployments and services have been successfully created:

kubectl get deployments,svc

The output should resemble:

NAME                                         READY   UP-TO-DATE   AVAILABLE   AGE
deployment.extensions/postgres-deploy        1/1     1            1           34s
deployment.extensions/redis-deploy           1/1     1            1           43s
deployment.extensions/result-app-deploy      1/1     1            1           20s
deployment.extensions/voting-app-deploy      1/1     1            1           52s
deployment.extensions/worker-app-deploy      0/1     1            0           26s

NAME                        TYPE          CLUSTER-IP     EXTERNAL-IP   PORT(S)         AGE
service/db                 ClusterIP     10.71.3.164    <none>        5432/TCP        30s
service/kubernetes         ClusterIP     10.71.0.1      <none>        443/TCP         5m58s
service/redis              ClusterIP     10.71.2.124    <none>        6379/TCP        39s
service/result-service     LoadBalancer  10.71.3.179    <pending>     80:30764/TCP    13s
service/voting-service     LoadBalancer  10.71.0.147    <pending>     80:31036/TCP    48s

Load Balancer Provisioning

Note that the external IP for load balancers might initially show as <pending>. Wait a few minutes and rerun the command to confirm that the IPs have been assigned.


Verifying Load Balancer Configuration

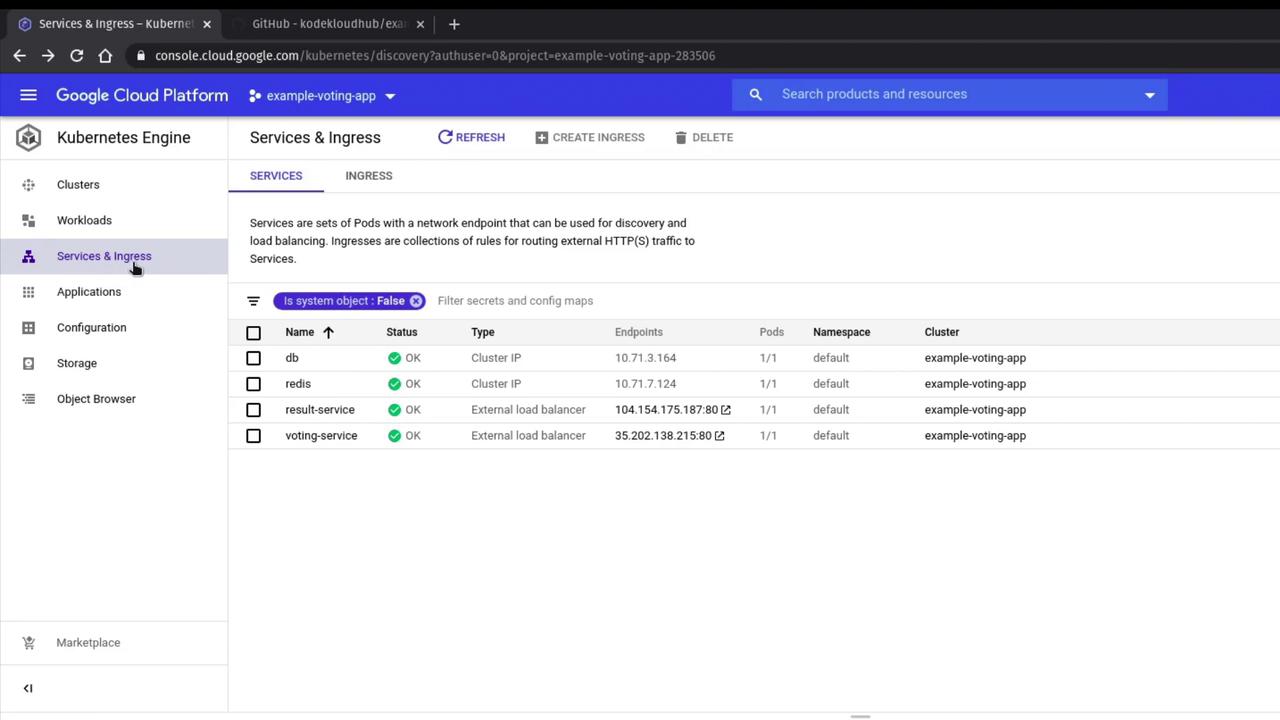
Once all deployments are ready and pods are running, verify the load balancer settings in the GCP console. Navigate to Services & Ingress under the Kubernetes Engine section. Here, you'll see internal services (such as PostgreSQL and Redis) and front-end services that utilize the cloud provider’s native load balancer.

The image shows the Google Cloud Platform Kubernetes Engine interface, displaying services and ingress details for an "example-voting-app" with various endpoints and statuses.

Click on each service to view detailed information including ClusterIP, load balancer IP, and URL endpoints. Ensure that all statuses are marked as OK.


Testing the Application

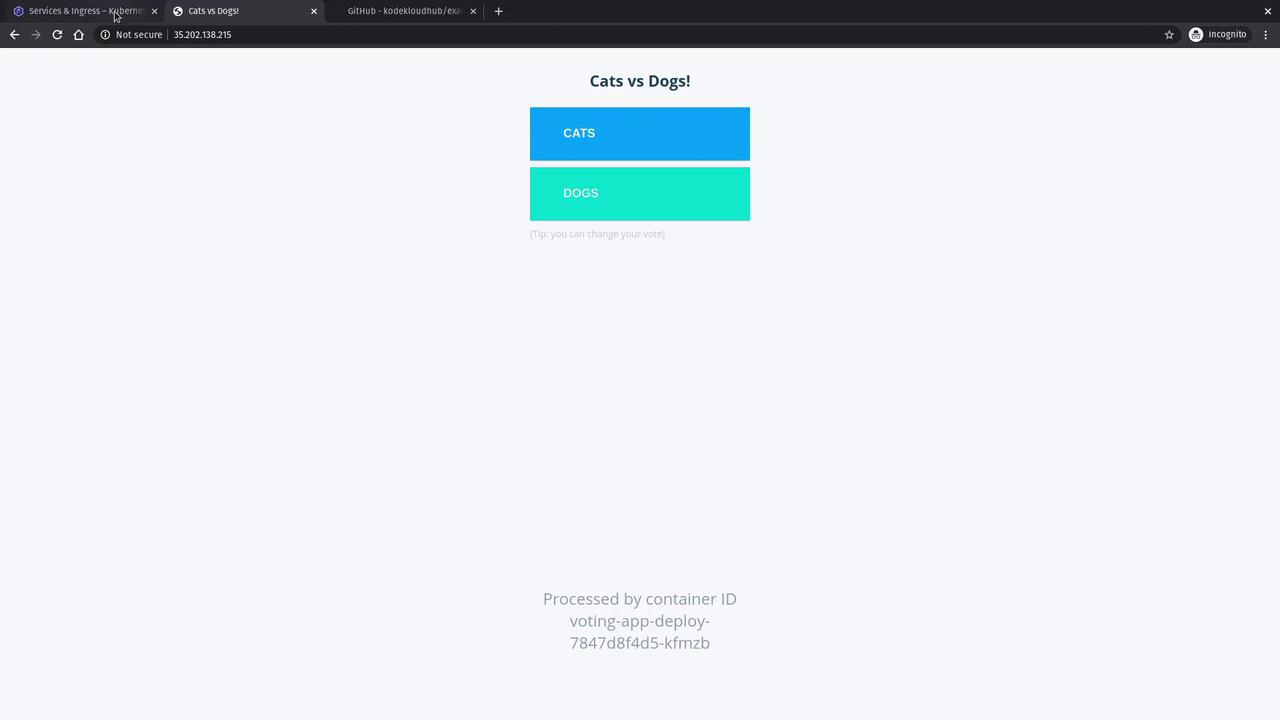
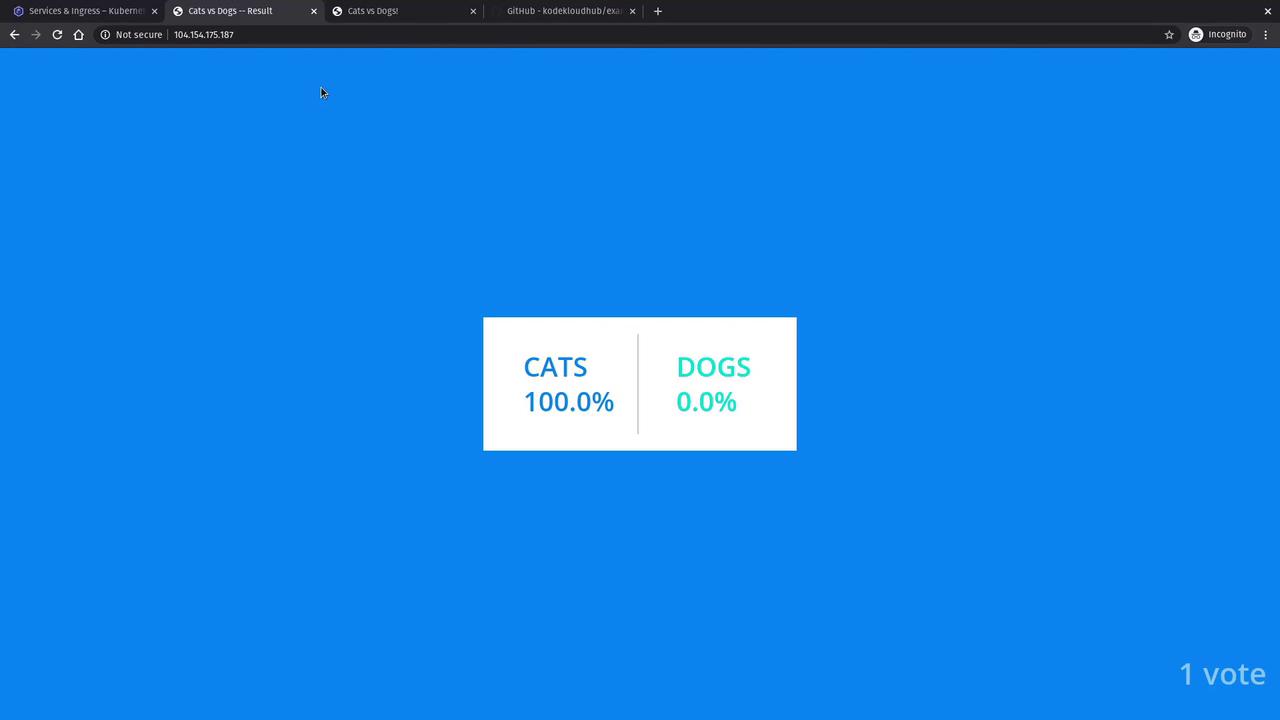
After the load balancers are assigned external IPs, open a new browser tab and navigate to the external IP associated with the voting service to load the voting application interface. Open another tab to view the results application.

The image shows a webpage titled "Cats vs Dogs!" with buttons to vote for either "CATS" or "DOGS," processed by a container ID.

Cast a vote and observe that the results update dynamically to reflect the percentage of votes. Further voting should continuously update the displayed results.

The image shows a voting result with "CATS" at 100% and "DOGS" at 0% on a blue background.


This guide has demonstrated the process of deploying a Kubernetes cluster on GKE and launching a multi-component voting application. Happy deploying, and stay tuned for more advanced Kubernetes tutorials!

Watch Video

Watch video content

Previous
Section Introduction