> ## Documentation Index
> Fetch the complete documentation index at: https://notes.kodekloud.com/llms.txt
> Use this file to discover all available pages before exploring further.
# Lab Walkthrough Building Your First AI Email Agent on n8n
> Walkthrough for building an AI email agent in n8n labs, covering KK Keyspace versus OpenAI credentials plus Gmail OAuth setup and troubleshooting.
This lesson compares running n8n inside the KodeKloud lab playgrounds with running on n8n Cloud. The workflow you’ll build is the same in both environments — an Email AI Agent triggered by chat messages — but the credential configuration and a few behaviors differ. Below you’ll find a streamlined walkthrough that highlights the exact steps needed to get the workflow running in the KodeKloud lab, plus tips to avoid common credential pitfalls.
Lab instances are ephemeral: the owner account (email, first name, last name, password) you create is temporary and tied to that lab session only. Feel free to reuse different credentials for different lab runs.
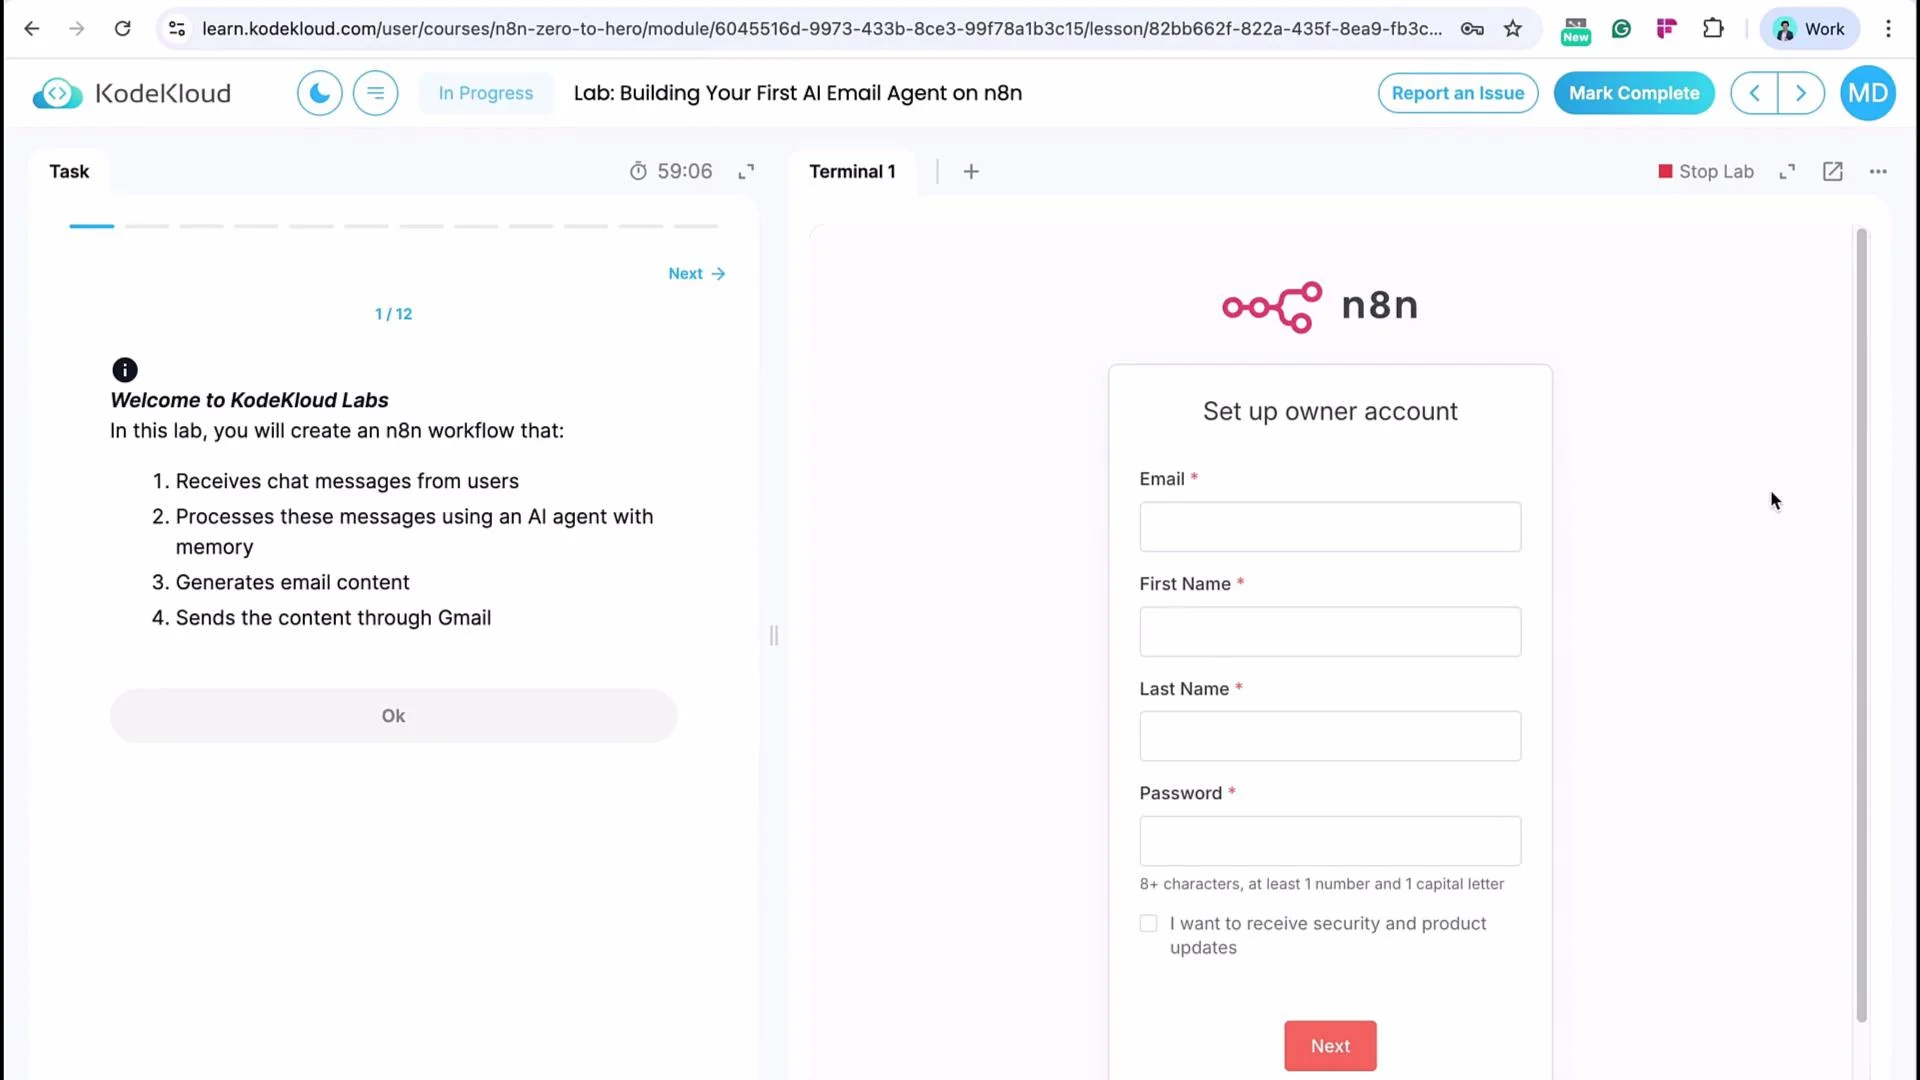 After completing the account form, click Next. You can skip the onboarding screens (select Get Started) and bypass any paid-features prompts.
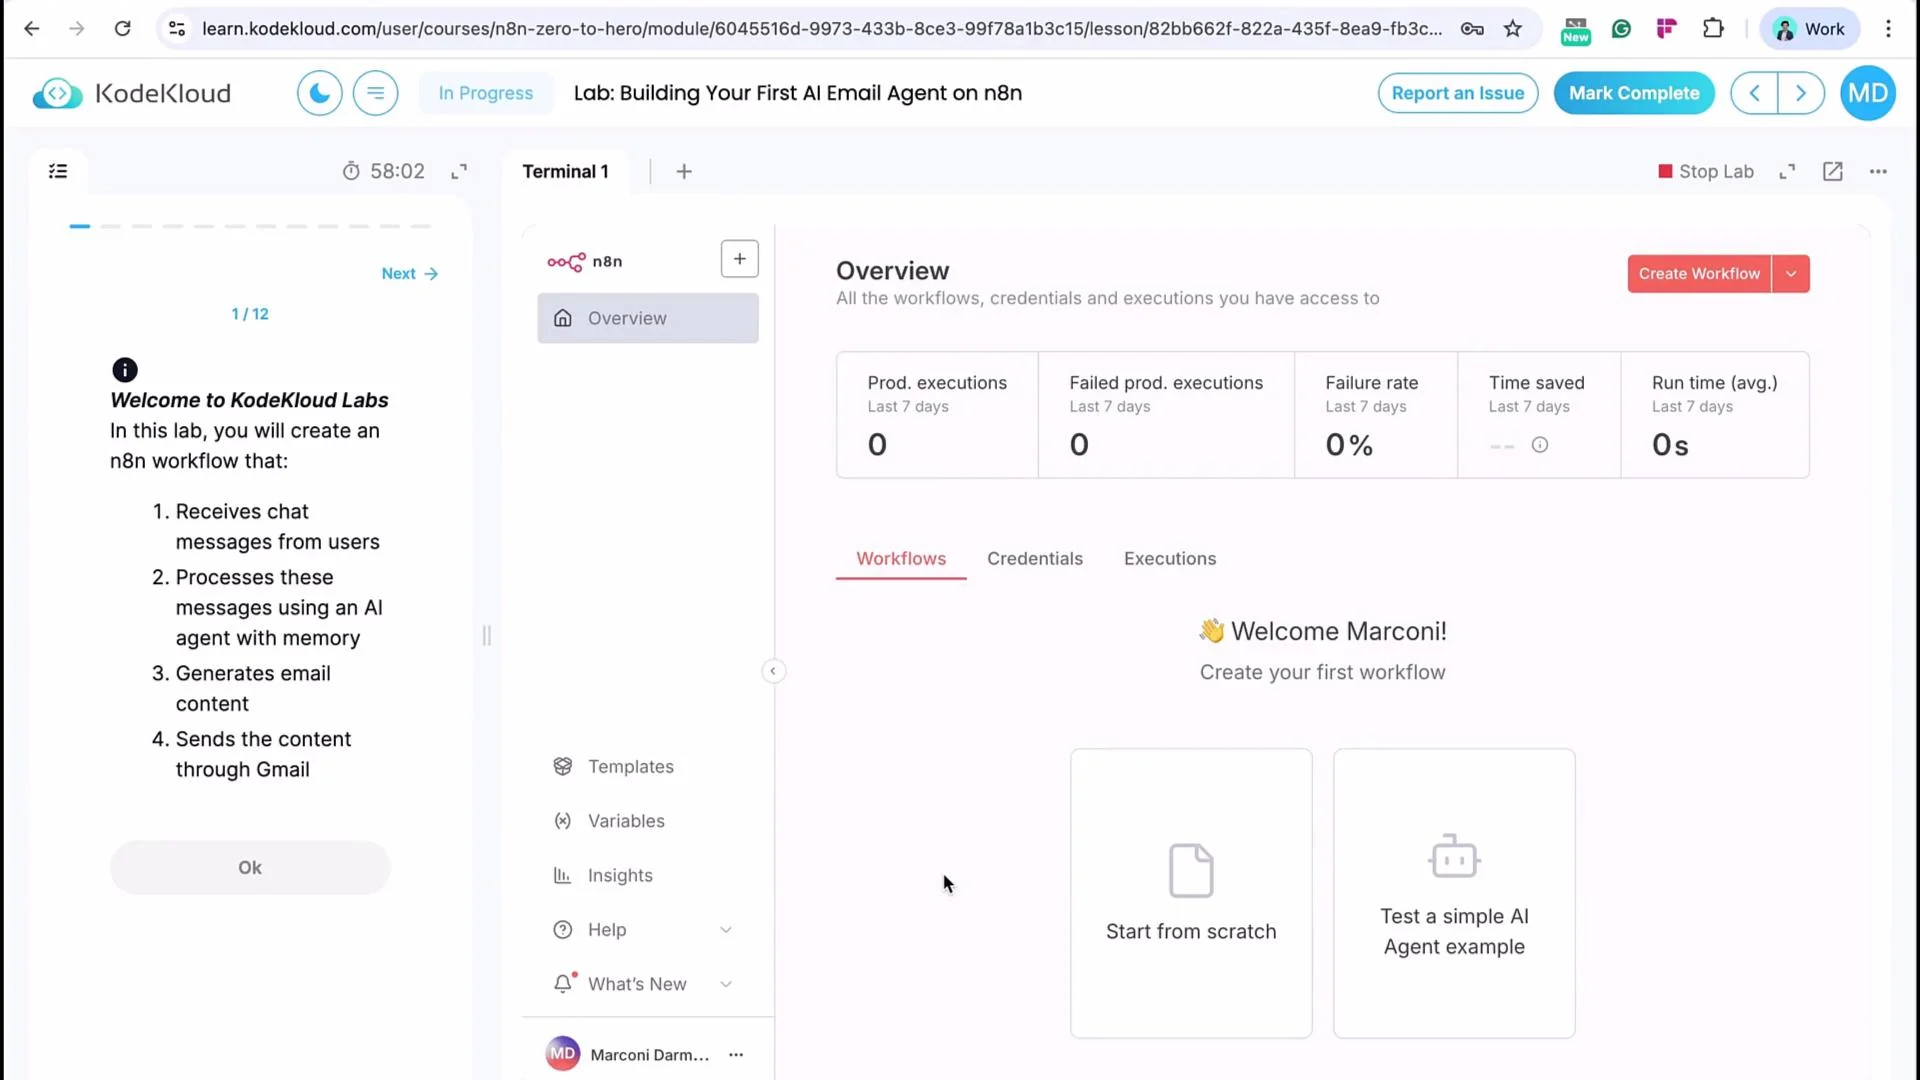
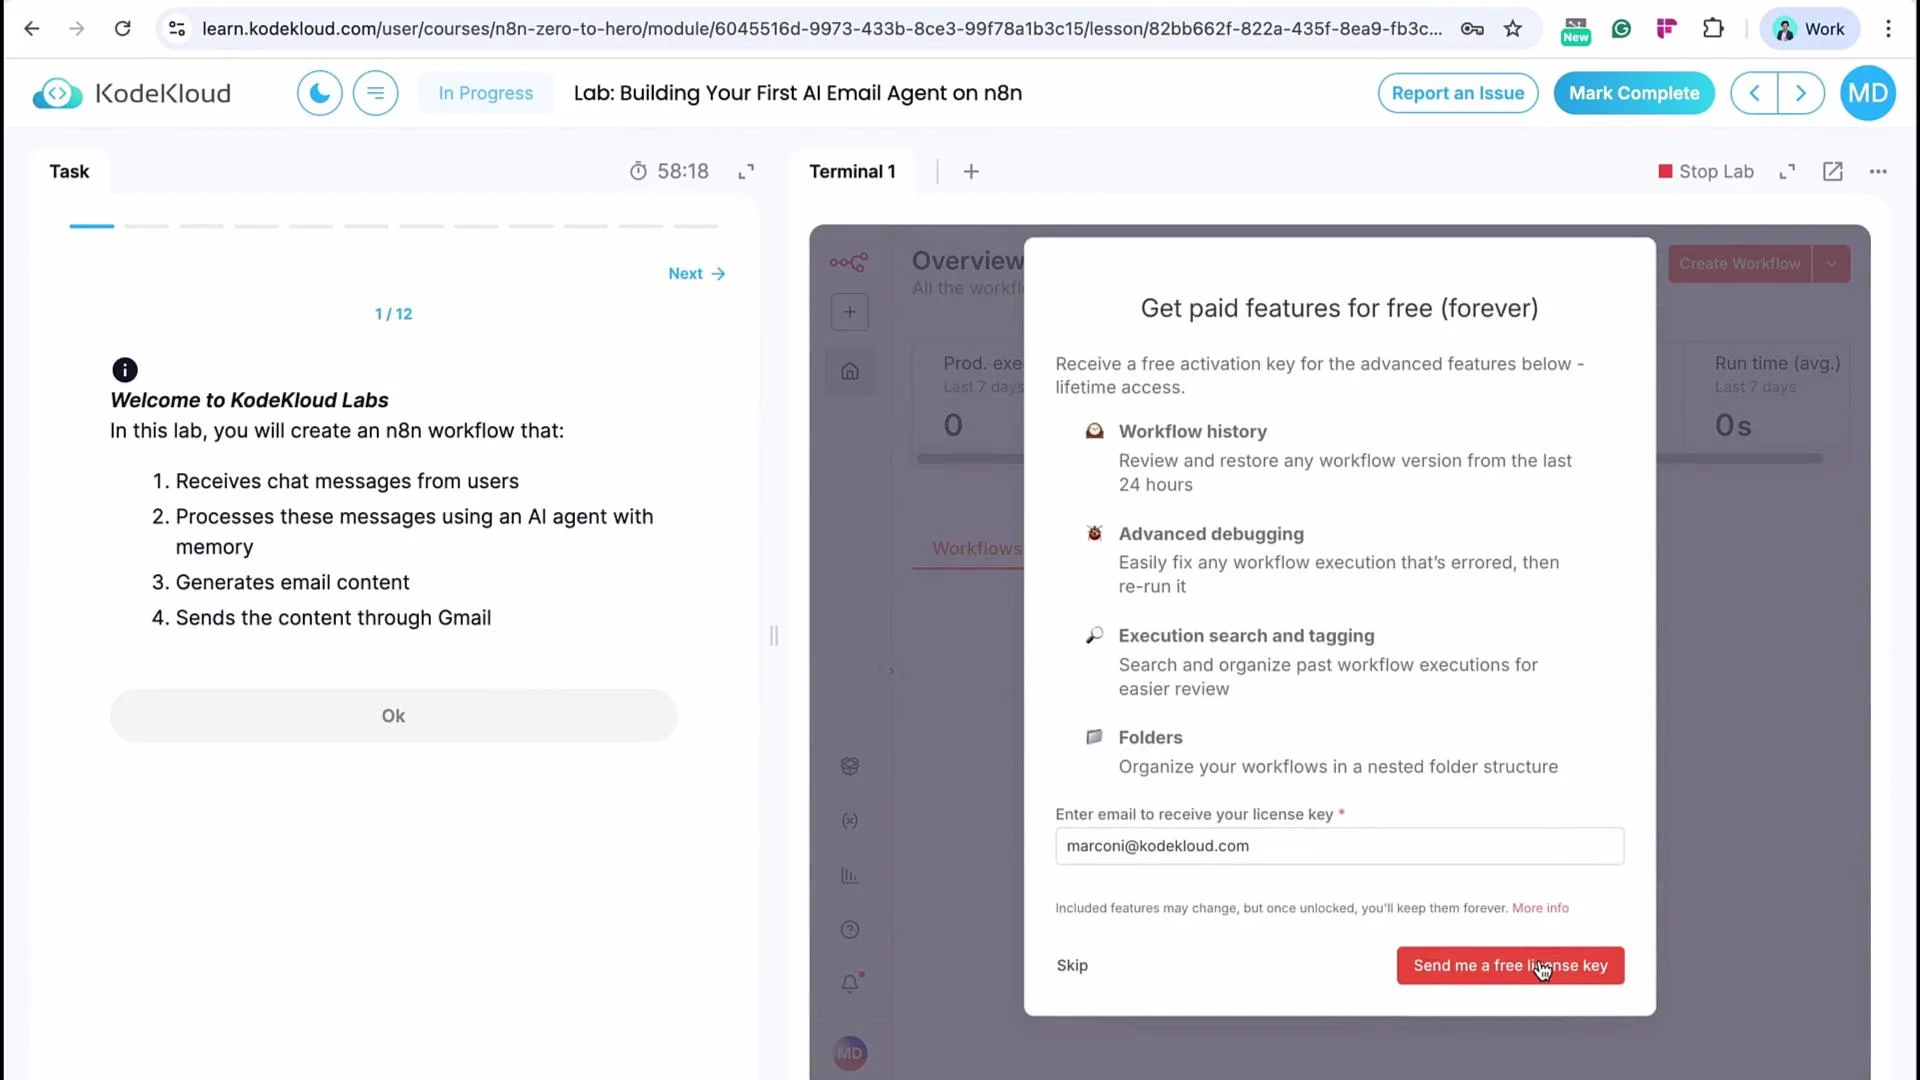 You will land on the n8n admin dashboard provided by the lab. It looks like n8n Cloud, but the available nodes, credential behavior, and some integrations may differ.
 ## Start the workflow
1. Click **Start from Scratch**.
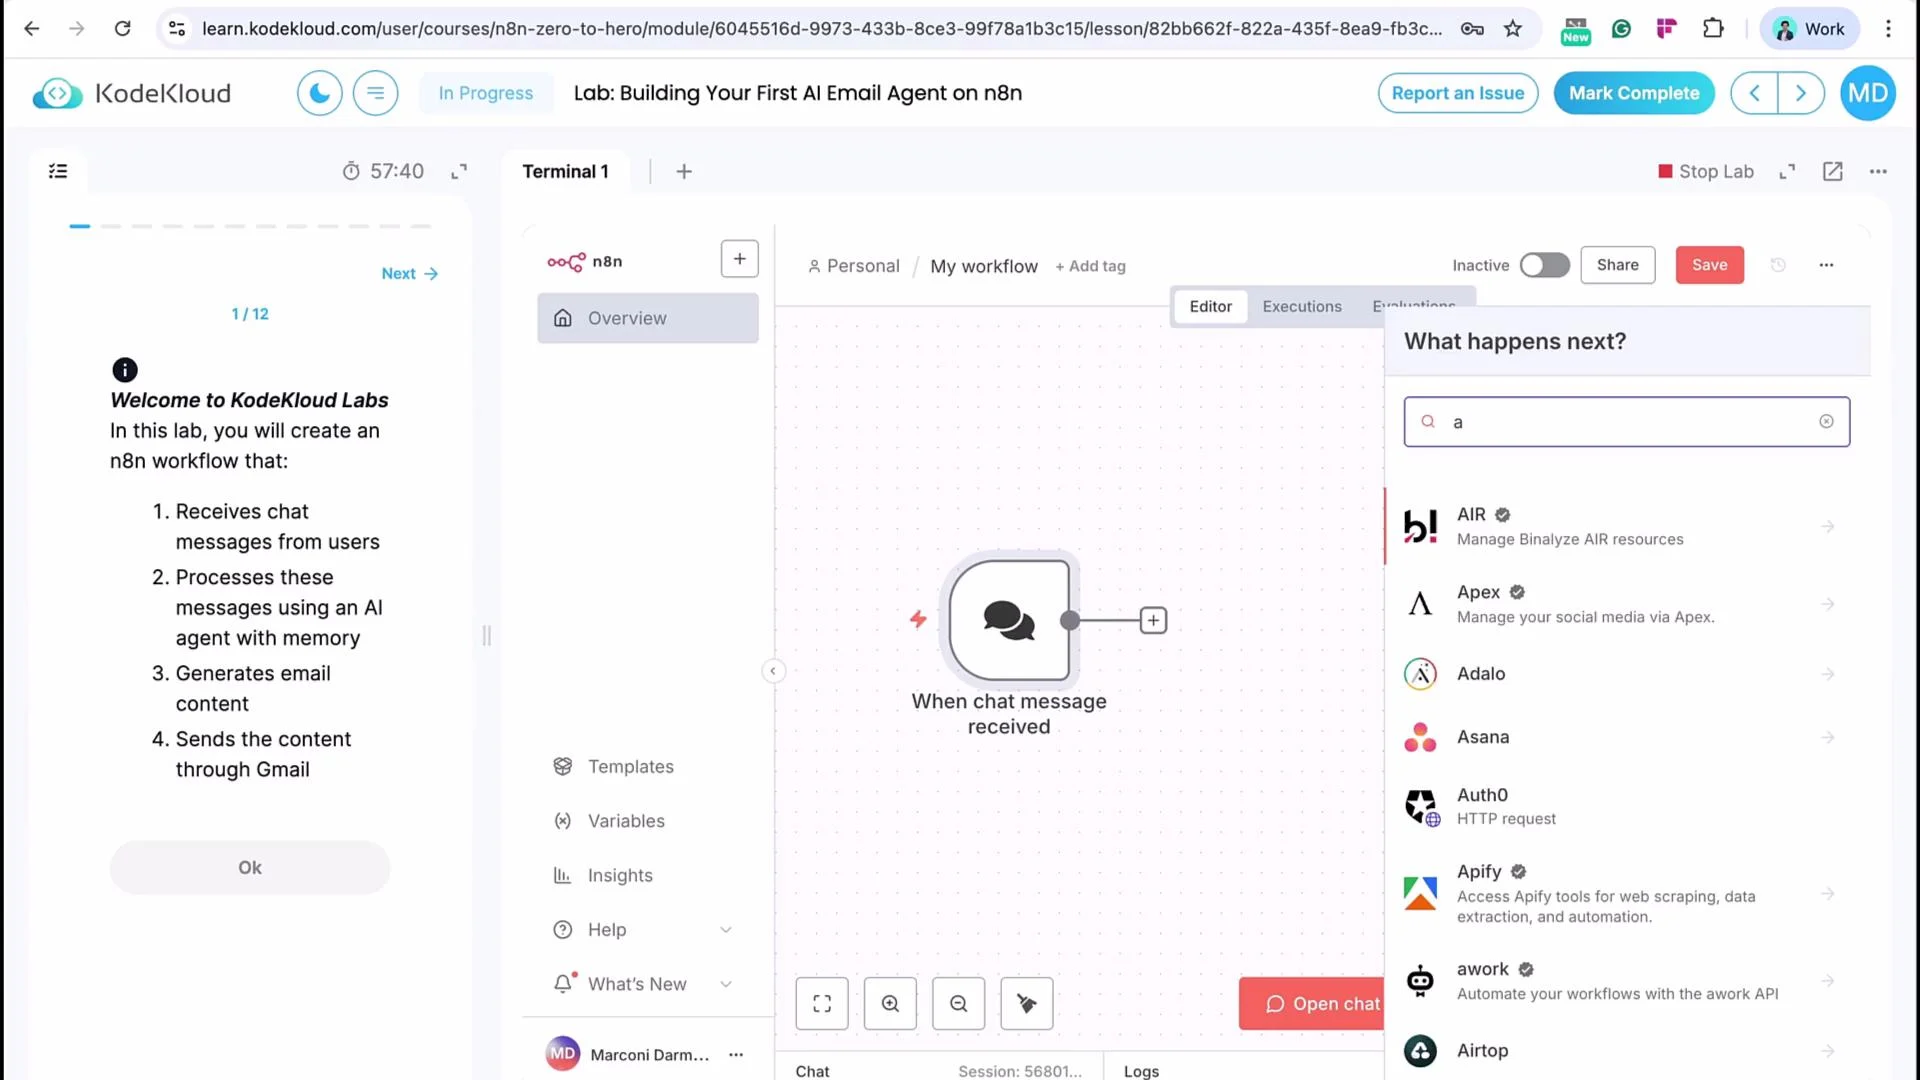
2. Build a simple Email AI Agent:
* Trigger: Chat Trigger
* Chain: Chat input → AI model node → Gmail node
The workflow’s logic is intentionally simple: receive chat input, call an AI model to generate email content, then send the email. The main differences to watch for are credential and model configuration.
## Start the workflow
1. Click **Start from Scratch**.
2. Build a simple Email AI Agent:
* Trigger: Chat Trigger
* Chain: Chat input → AI model node → Gmail node
The workflow’s logic is intentionally simple: receive chat input, call an AI model to generate email content, then send the email. The main differences to watch for are credential and model configuration.
 ## AI Model Options: KK Keyspace vs. Official OpenAI API
In the KodeKloud lab you can use either KodeKloud Keyspace (KK Keyspace) or an official OpenAI API key. Each option has slightly different steps.
## AI Model Options: KK Keyspace vs. Official OpenAI API
In the KodeKloud lab you can use either KodeKloud Keyspace (KK Keyspace) or an official OpenAI API key. Each option has slightly different steps.
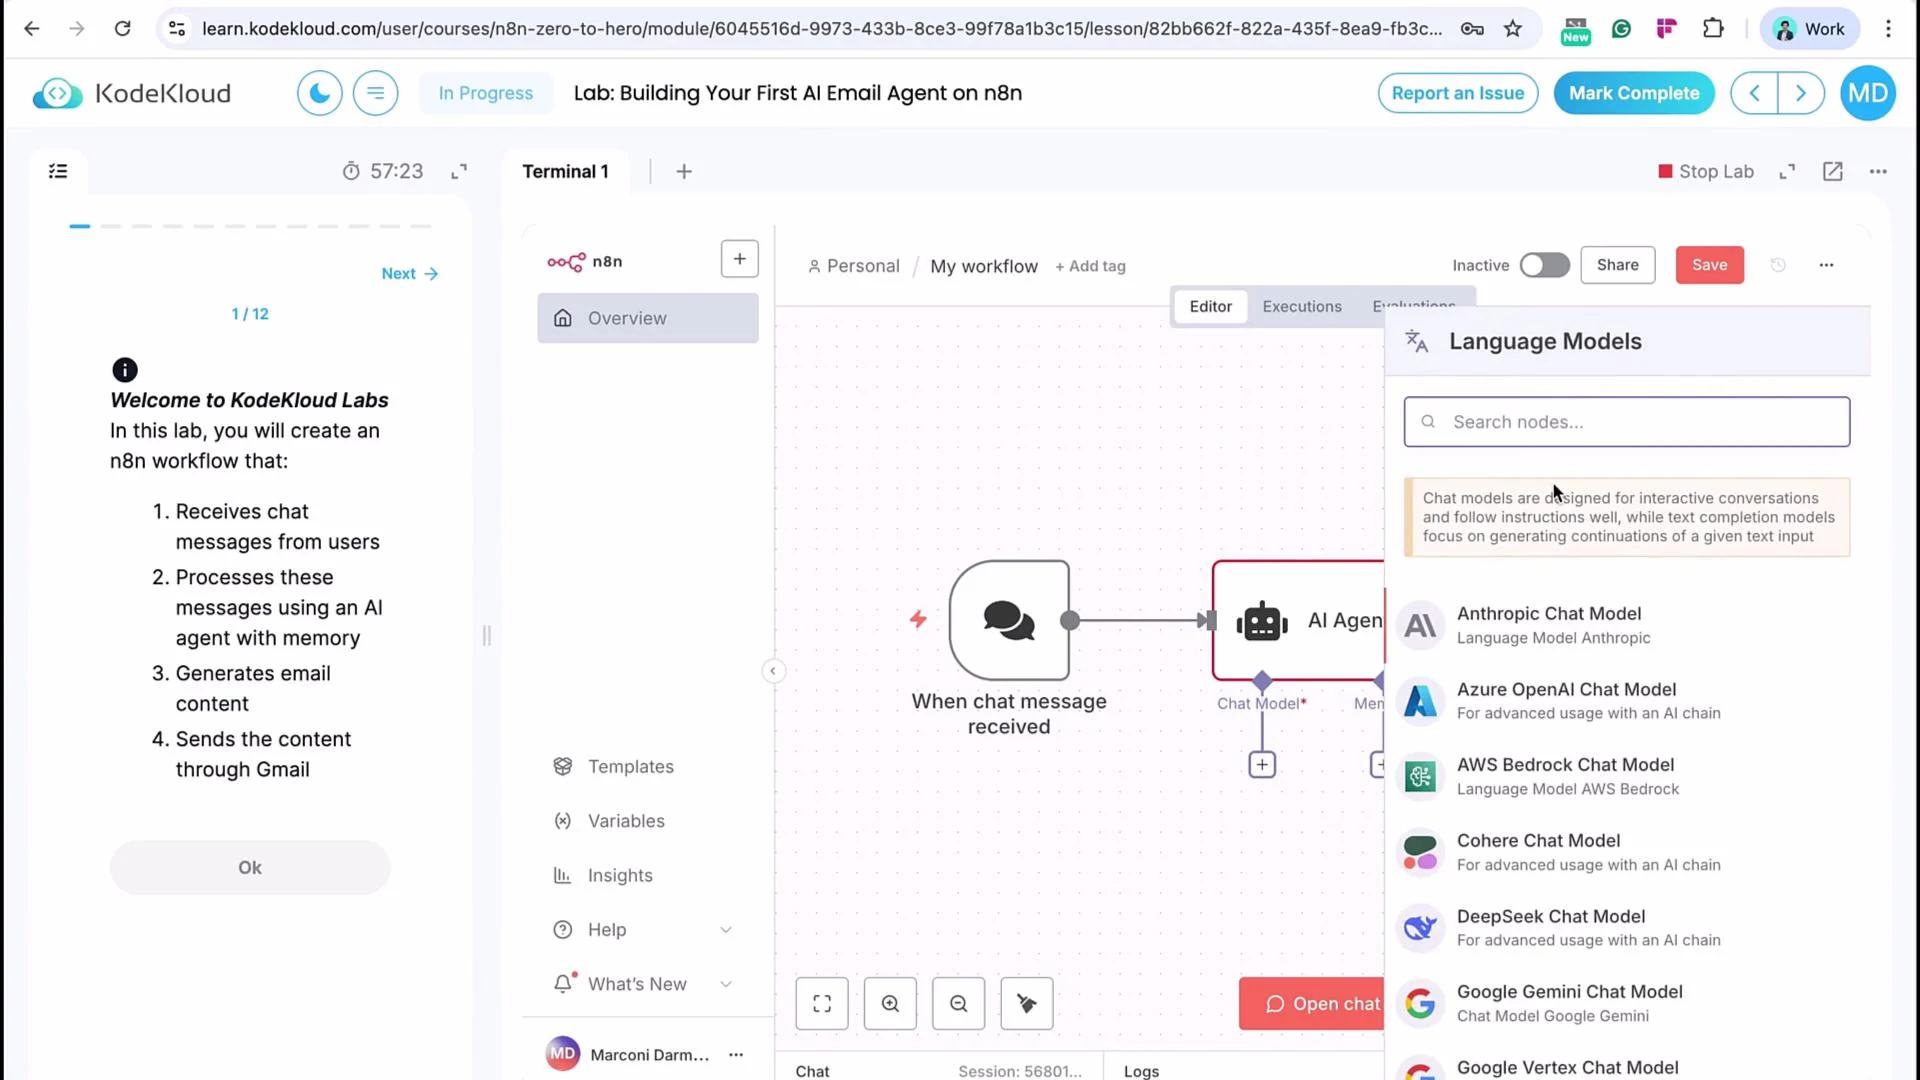 ### Using KK Keyspace (lab-provided)
* Follow the lab instructions (left-hand panel) to open the KK Keyspace dashboard and copy:
* Keyspace base URL
* Keyspace API key
* In n8n, create a new credential for the OpenAI/Chat node:
* Paste the Keyspace API key
* Leave organization ID blank
* Set the base URL to the Keyspace base URL
* Save and test the credential.
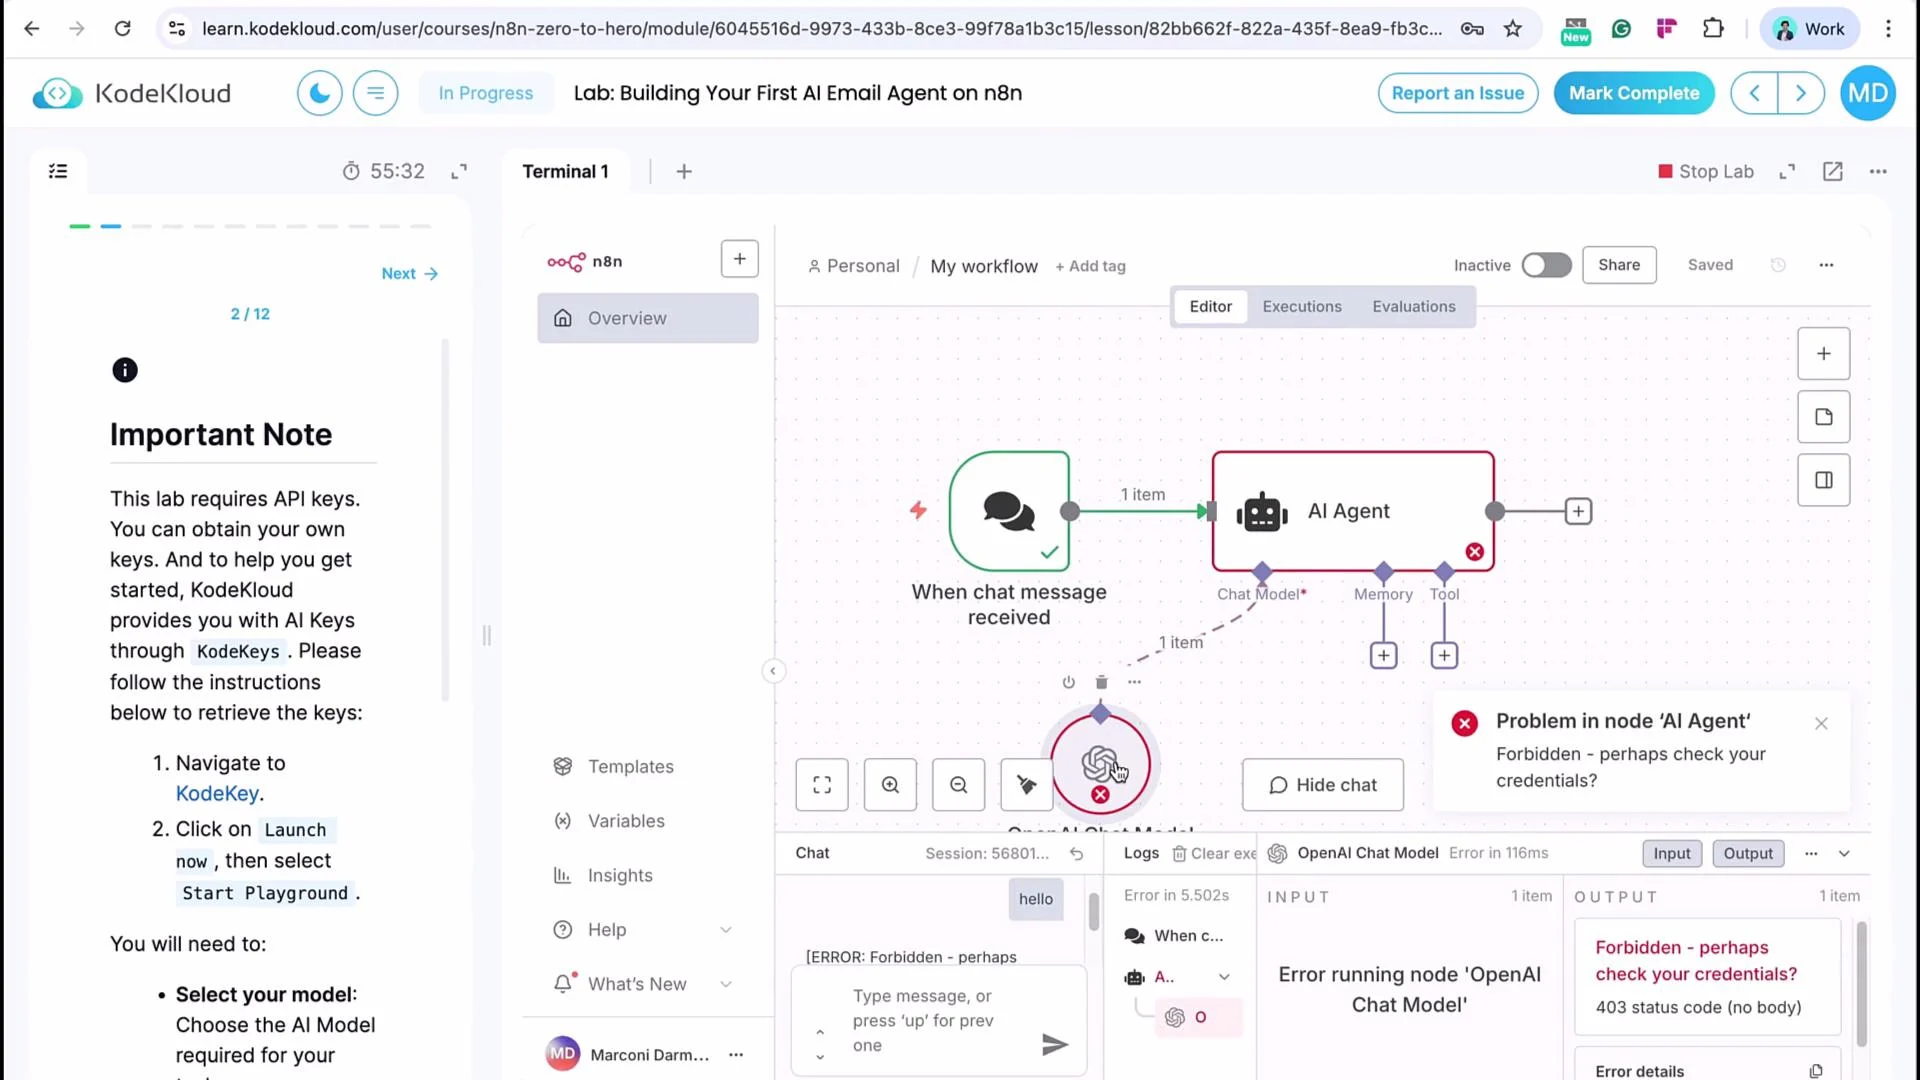
Important: the model dropdown in n8n may not list familiar OpenAI model names when using KK Keyspace. If a simple test (e.g., sending “hello”) fails, use the exact model ID string provided in the lab instructions.
### Using KK Keyspace (lab-provided)
* Follow the lab instructions (left-hand panel) to open the KK Keyspace dashboard and copy:
* Keyspace base URL
* Keyspace API key
* In n8n, create a new credential for the OpenAI/Chat node:
* Paste the Keyspace API key
* Leave organization ID blank
* Set the base URL to the Keyspace base URL
* Save and test the credential.
Important: the model dropdown in n8n may not list familiar OpenAI model names when using KK Keyspace. If a simple test (e.g., sending “hello”) fails, use the exact model ID string provided in the lab instructions.
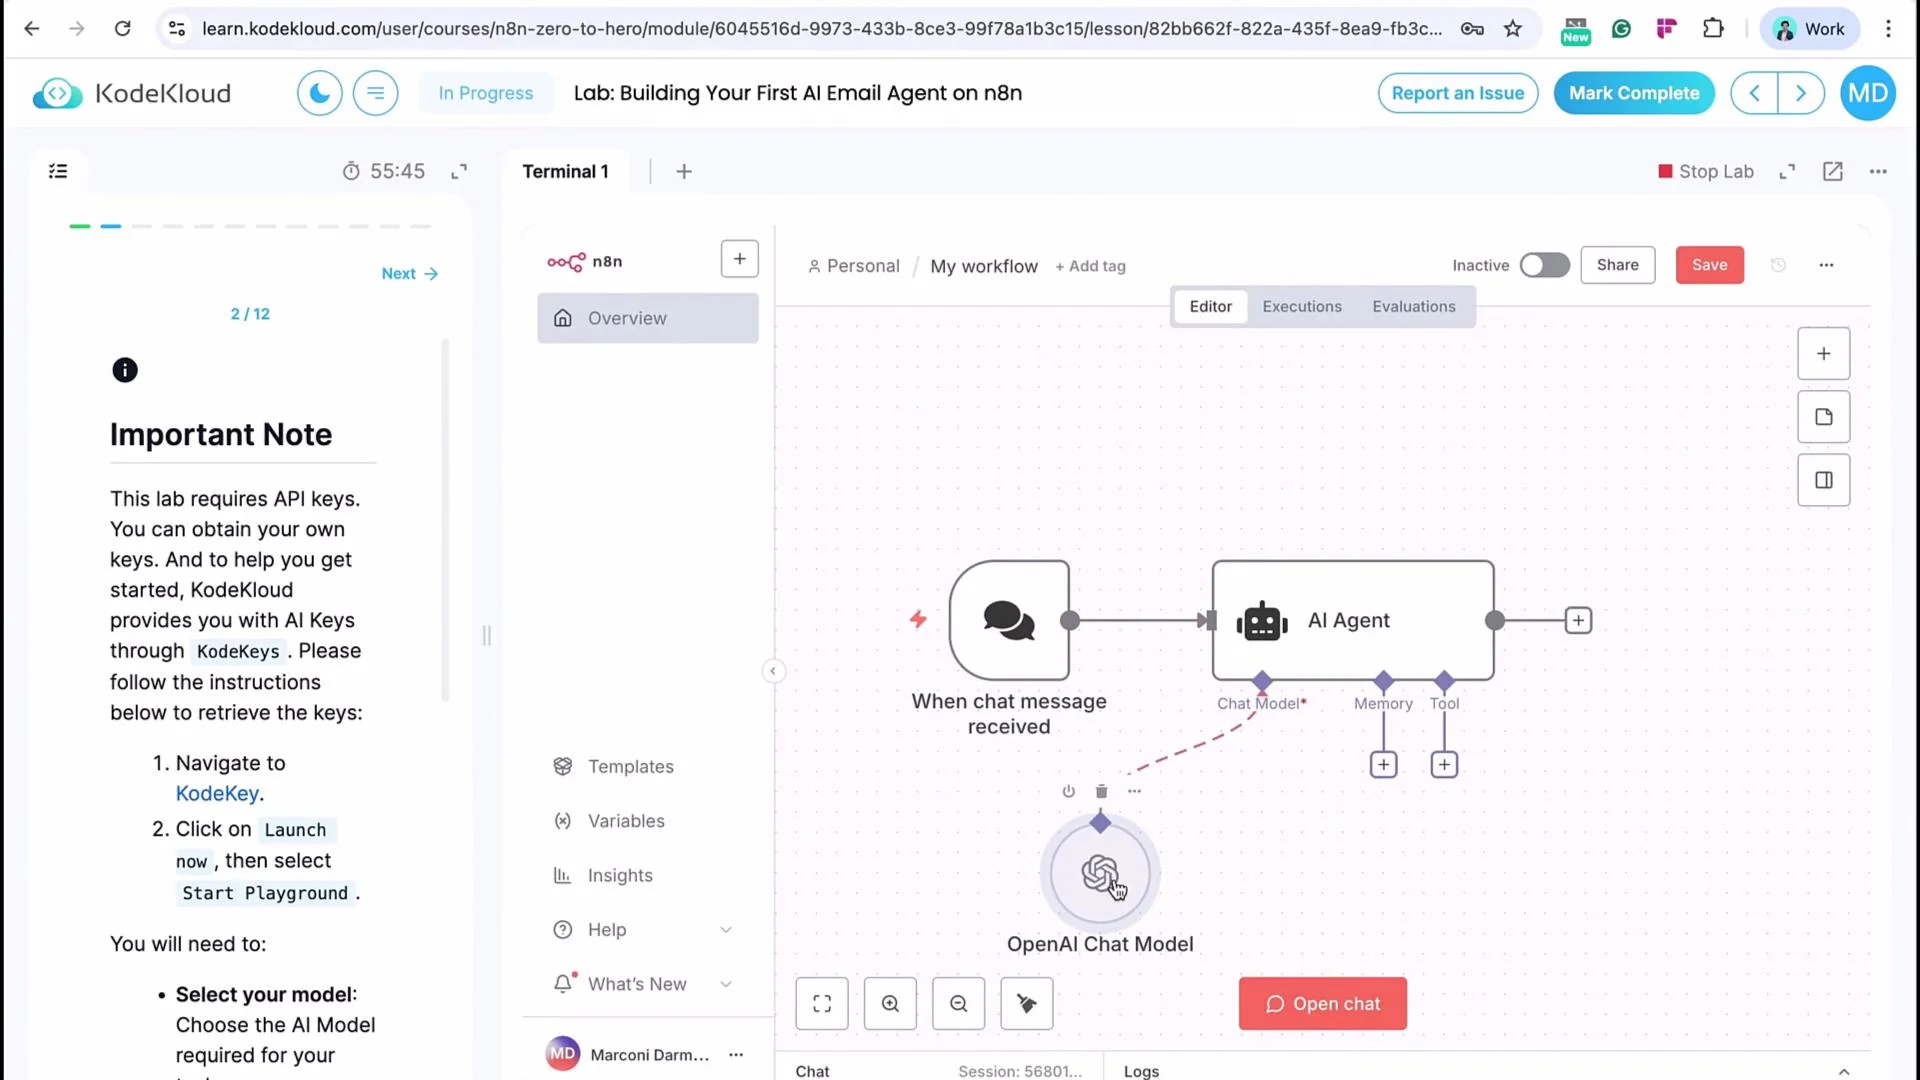 If you encounter an error when running a test message, set the Chat Model ID manually with the exact model string from the lab (for example):
```text theme={null}
OpenAI/GPT-4.1
```
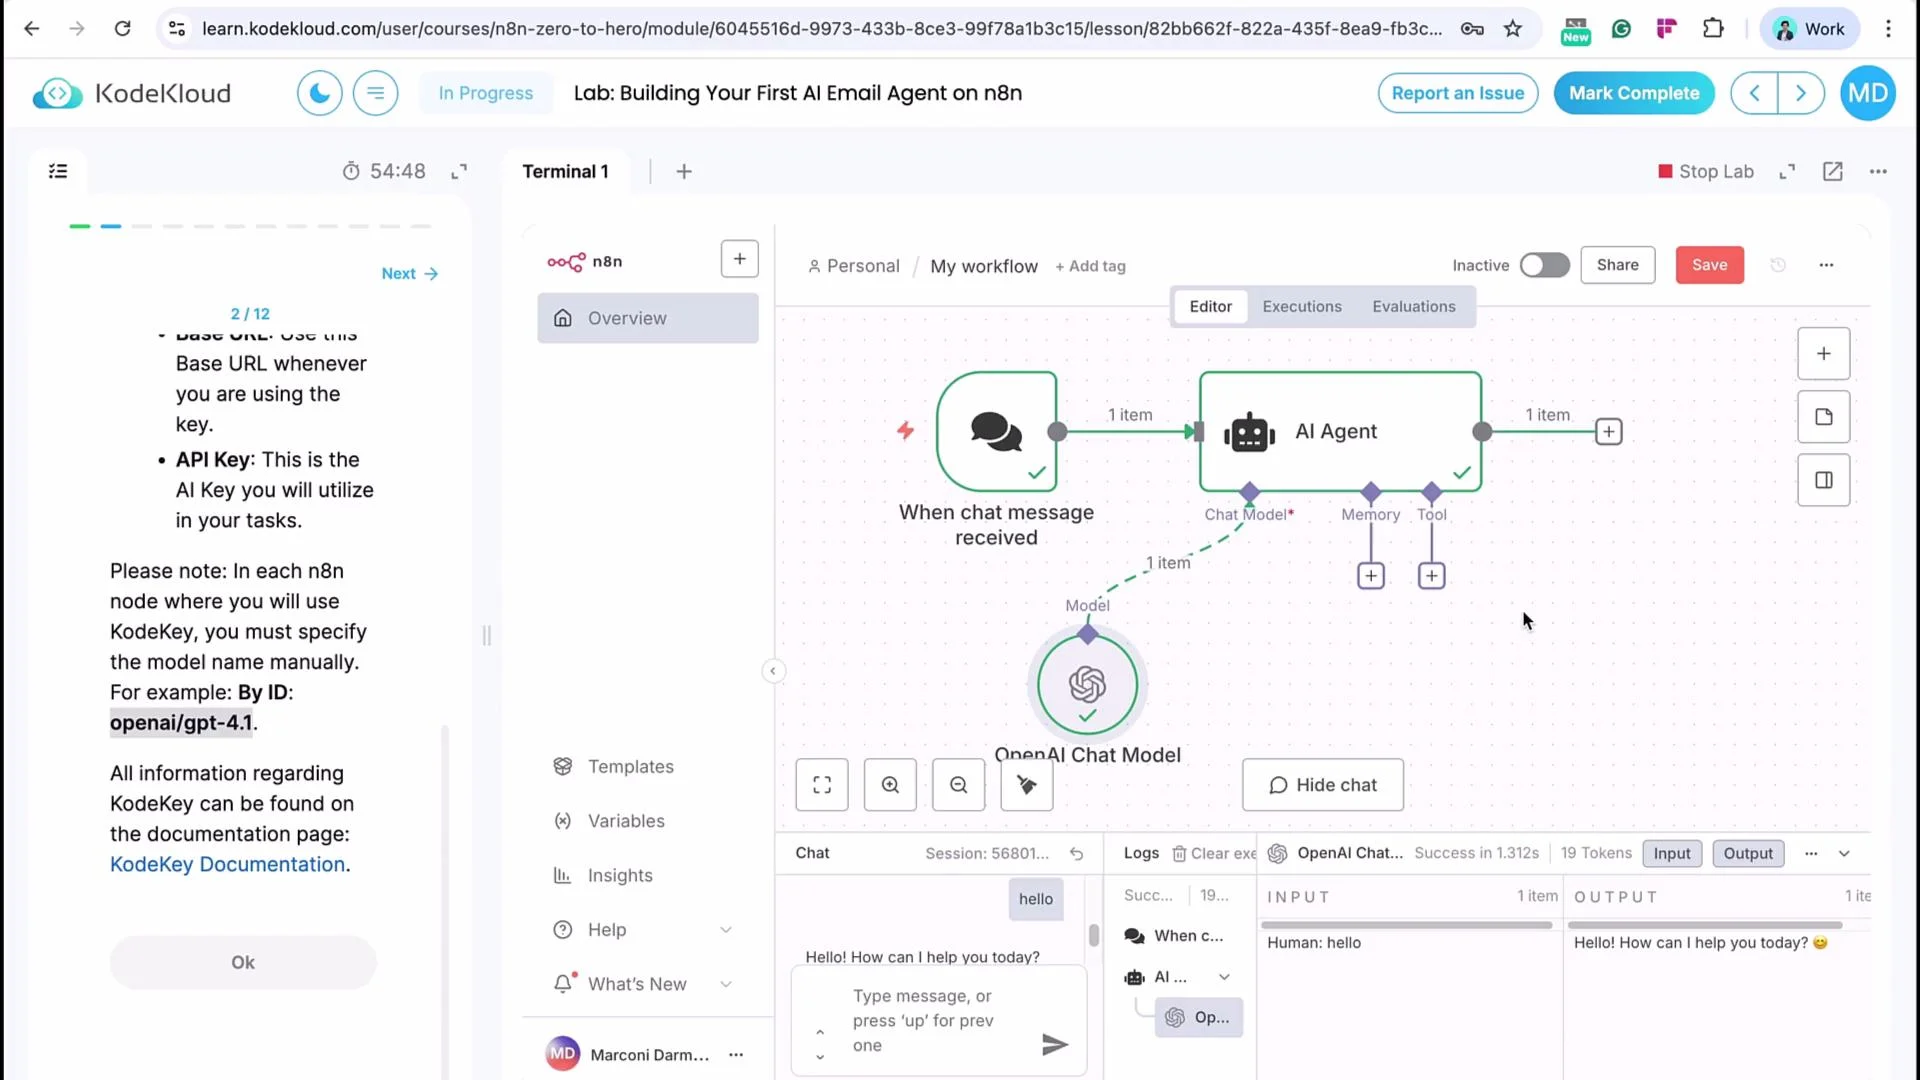
Paste that into the Chat Model ID field and run the node again.
If you encounter an error when running a test message, set the Chat Model ID manually with the exact model string from the lab (for example):
```text theme={null}
OpenAI/GPT-4.1
```
Paste that into the Chat Model ID field and run the node again.
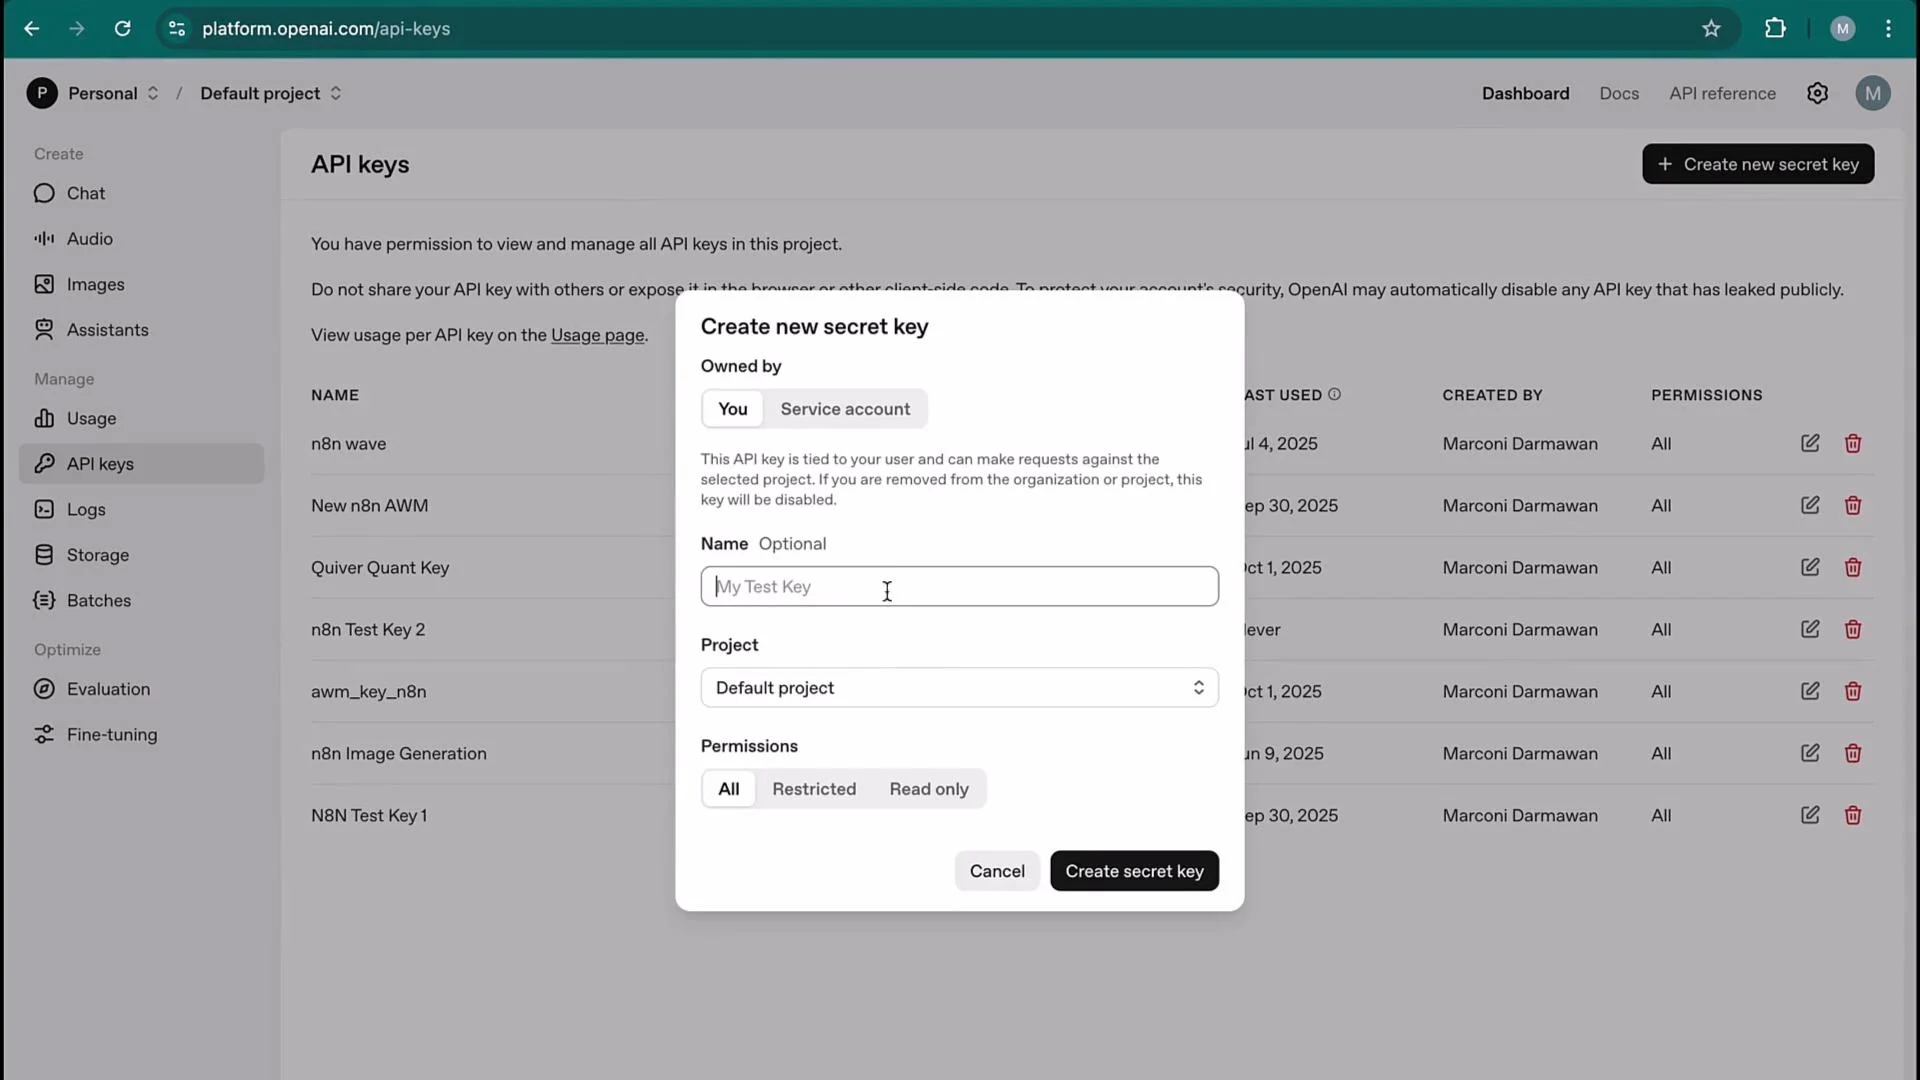
 ### Using an official OpenAI API key
* Go to [https://platform.openai.com](https://platform.openai.com) and create an API key:
* Sign in → View API keys → Create new secret key (label it like `n8n email integration`)
* Copy the secret
* In n8n, create an OpenAI credential:
* Paste the API key
* Leave base URL as default
* The model dropdown will populate with standard OpenAI names — you can select GPT-4.1 (or other supported models) directly.
### Using an official OpenAI API key
* Go to [https://platform.openai.com](https://platform.openai.com) and create an API key:
* Sign in → View API keys → Create new secret key (label it like `n8n email integration`)
* Copy the secret
* In n8n, create an OpenAI credential:
* Paste the API key
* Leave base URL as default
* The model dropdown will populate with standard OpenAI names — you can select GPT-4.1 (or other supported models) directly.
 Once the credential is configured correctly, a test chat should show the node calling the intended model and returning a response.
### Quick comparison: KK Keyspace vs OpenAI API
| Area | KK Keyspace (lab) | Official OpenAI API |
| -------------------- | --------------------------------------------- | ------------------------------------- |
| Credential base URL | Must set Keyspace base URL | Uses default `api.openai.com` |
| Model selection | May require exact model ID (`OpenAI/GPT-4.1`) | Models appear in dropdown |
| Credential source | KK Keyspace dashboard | platform.openai.com |
| Typical failure mode | Model not found when chosen from dropdown | API key misconfigured or rate-limited |
## Gmail and Google OAuth in the lab
In n8n Cloud you sometimes get a “Sign in with Google” button that uses your browser session. In the KodeKloud lab you must create OAuth credentials in Google Cloud Console and paste them into the Gmail credential in n8n.
Once the credential is configured correctly, a test chat should show the node calling the intended model and returning a response.
### Quick comparison: KK Keyspace vs OpenAI API
| Area | KK Keyspace (lab) | Official OpenAI API |
| -------------------- | --------------------------------------------- | ------------------------------------- |
| Credential base URL | Must set Keyspace base URL | Uses default `api.openai.com` |
| Model selection | May require exact model ID (`OpenAI/GPT-4.1`) | Models appear in dropdown |
| Credential source | KK Keyspace dashboard | platform.openai.com |
| Typical failure mode | Model not found when chosen from dropdown | API key misconfigured or rate-limited |
## Gmail and Google OAuth in the lab
In n8n Cloud you sometimes get a “Sign in with Google” button that uses your browser session. In the KodeKloud lab you must create OAuth credentials in Google Cloud Console and paste them into the Gmail credential in n8n.
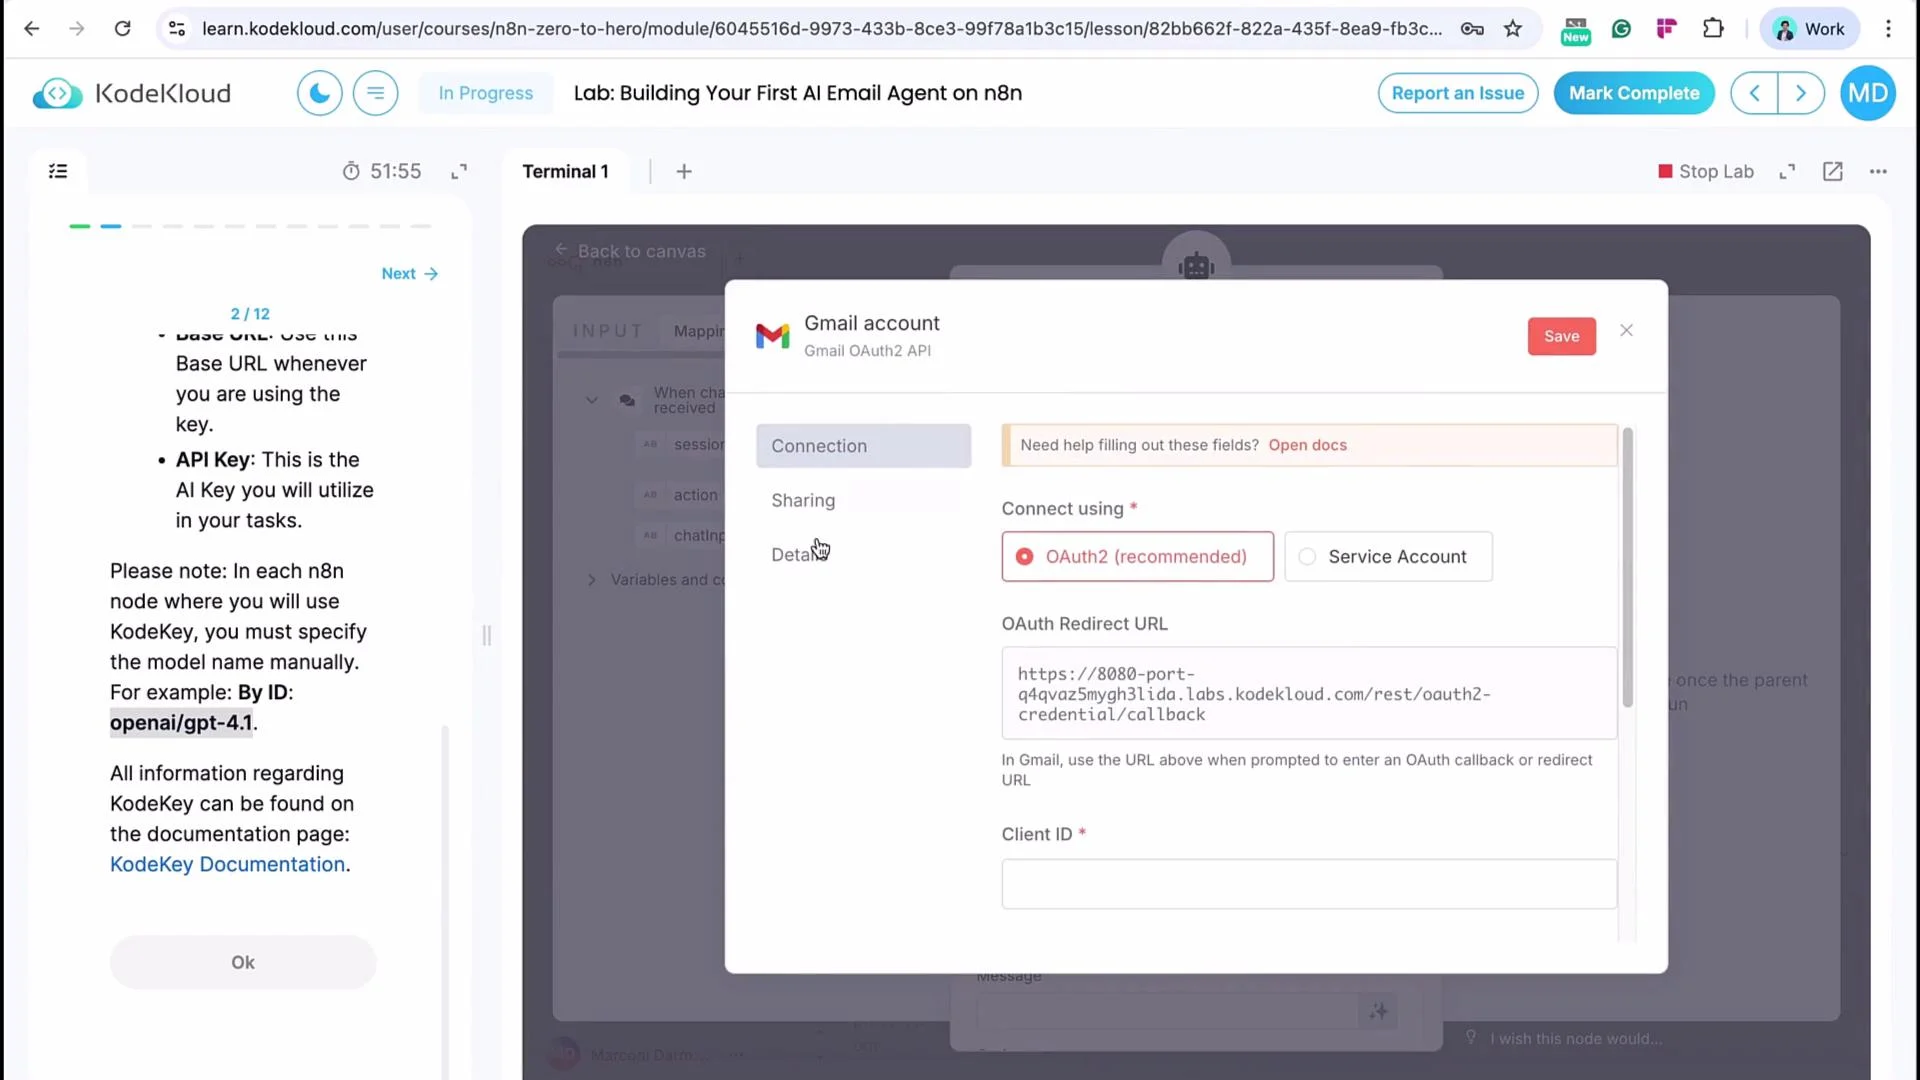 Steps to configure Gmail OAuth for the lab:
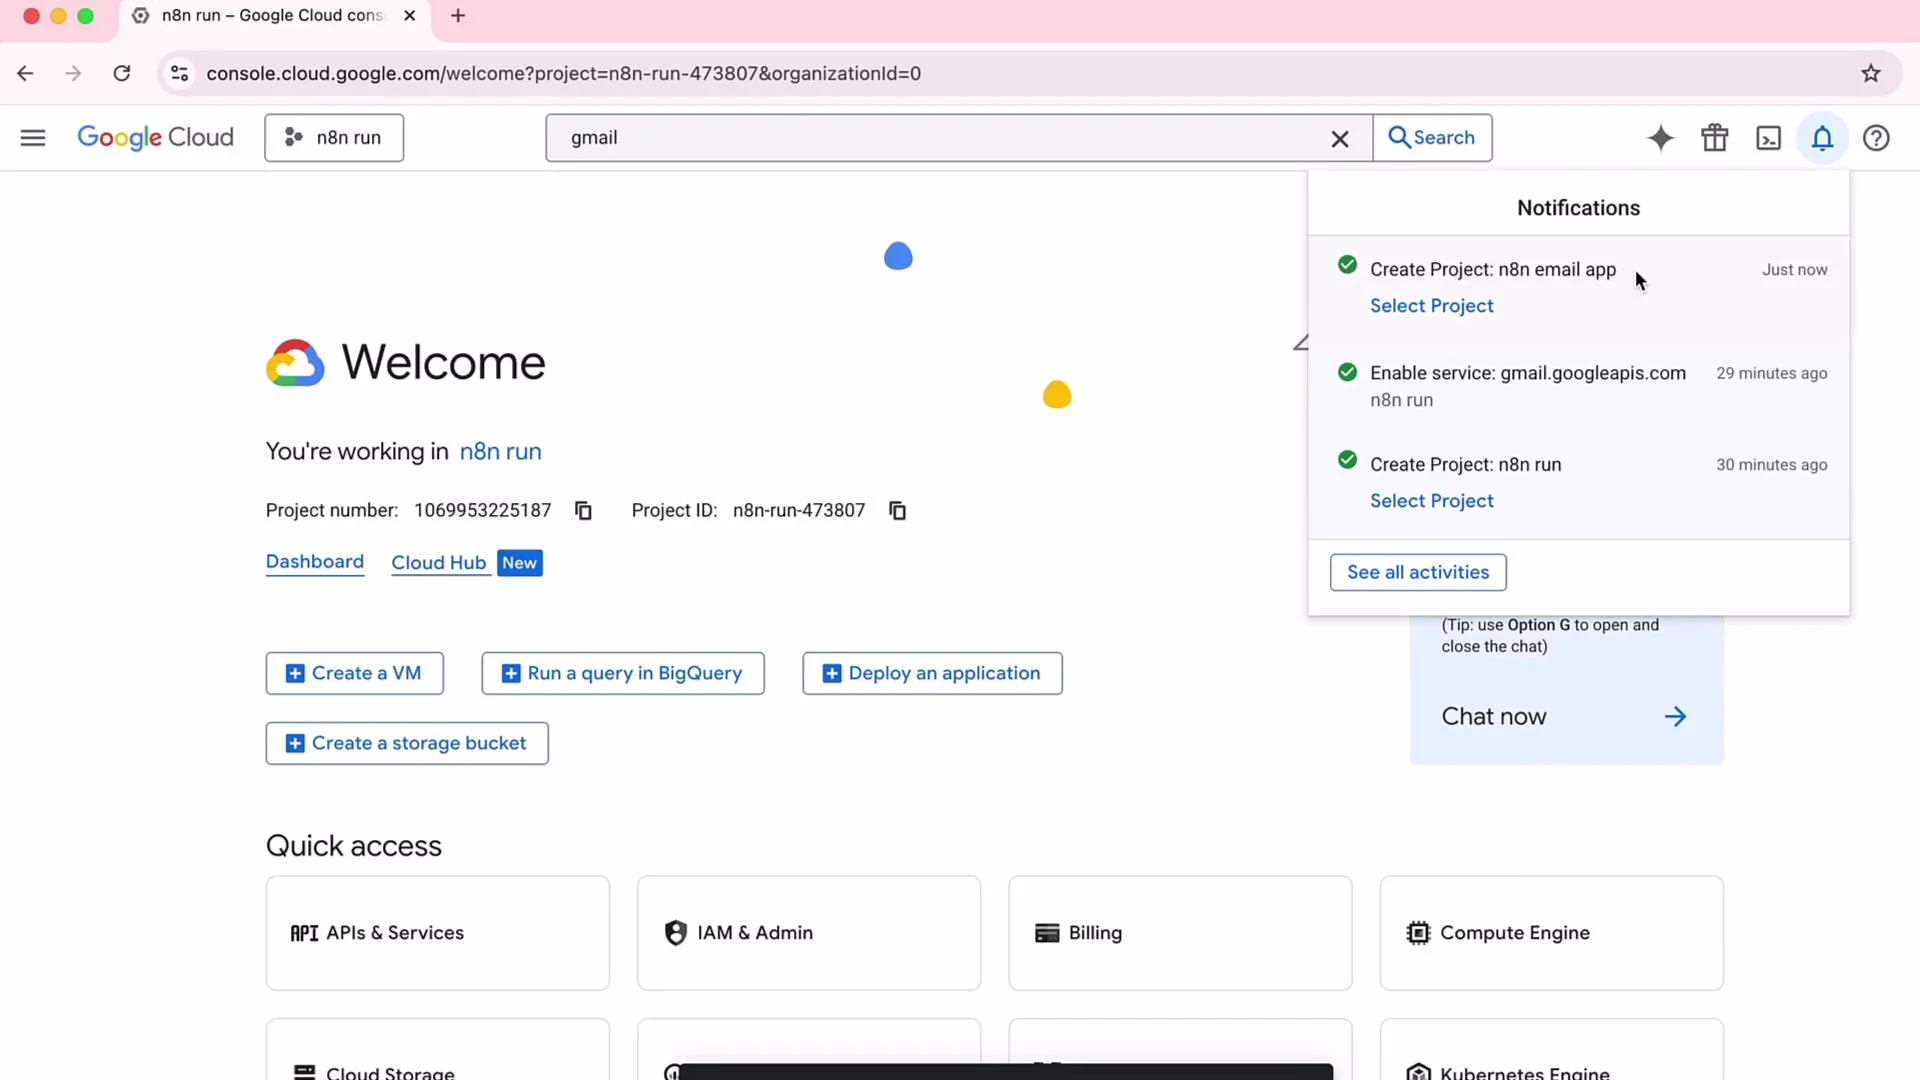
1. Open `https://console.cloud.google.com` and create a new project (e.g., `n8n email app`). Select No organization and Create.
2. Select the new project and enable the Gmail API.
Steps to configure Gmail OAuth for the lab:
1. Open `https://console.cloud.google.com` and create a new project (e.g., `n8n email app`). Select No organization and Create.
2. Select the new project and enable the Gmail API.
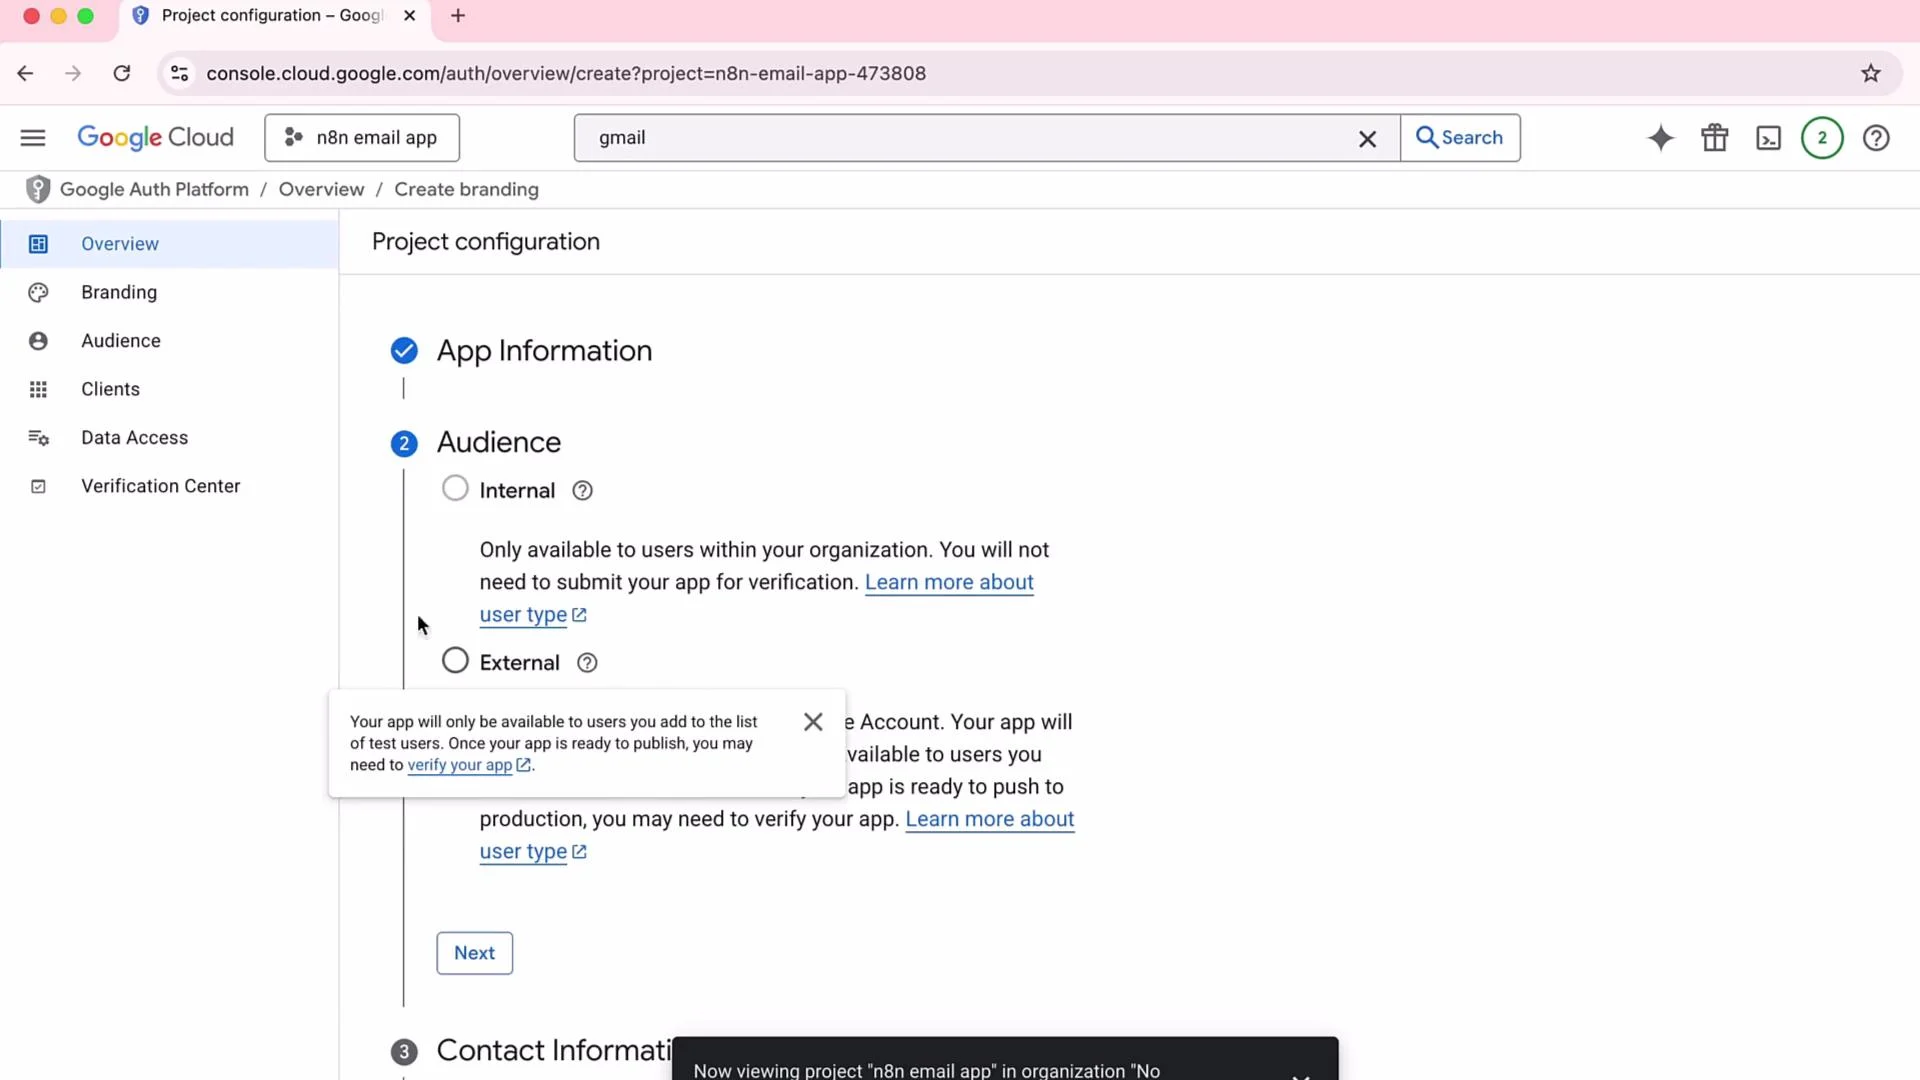
 3. Configure the OAuth consent screen:
* Set App name (e.g., `n8n email`)
* Provide a support/contact email
* Choose *External* and fill required fields
4. Add a test user (the email you’ll use for testing), for example `marconi@kodekloud.com`, and save.
3. Configure the OAuth consent screen:
* Set App name (e.g., `n8n email`)
* Provide a support/contact email
* Choose *External* and fill required fields
4. Add a test user (the email you’ll use for testing), for example `marconi@kodekloud.com`, and save.
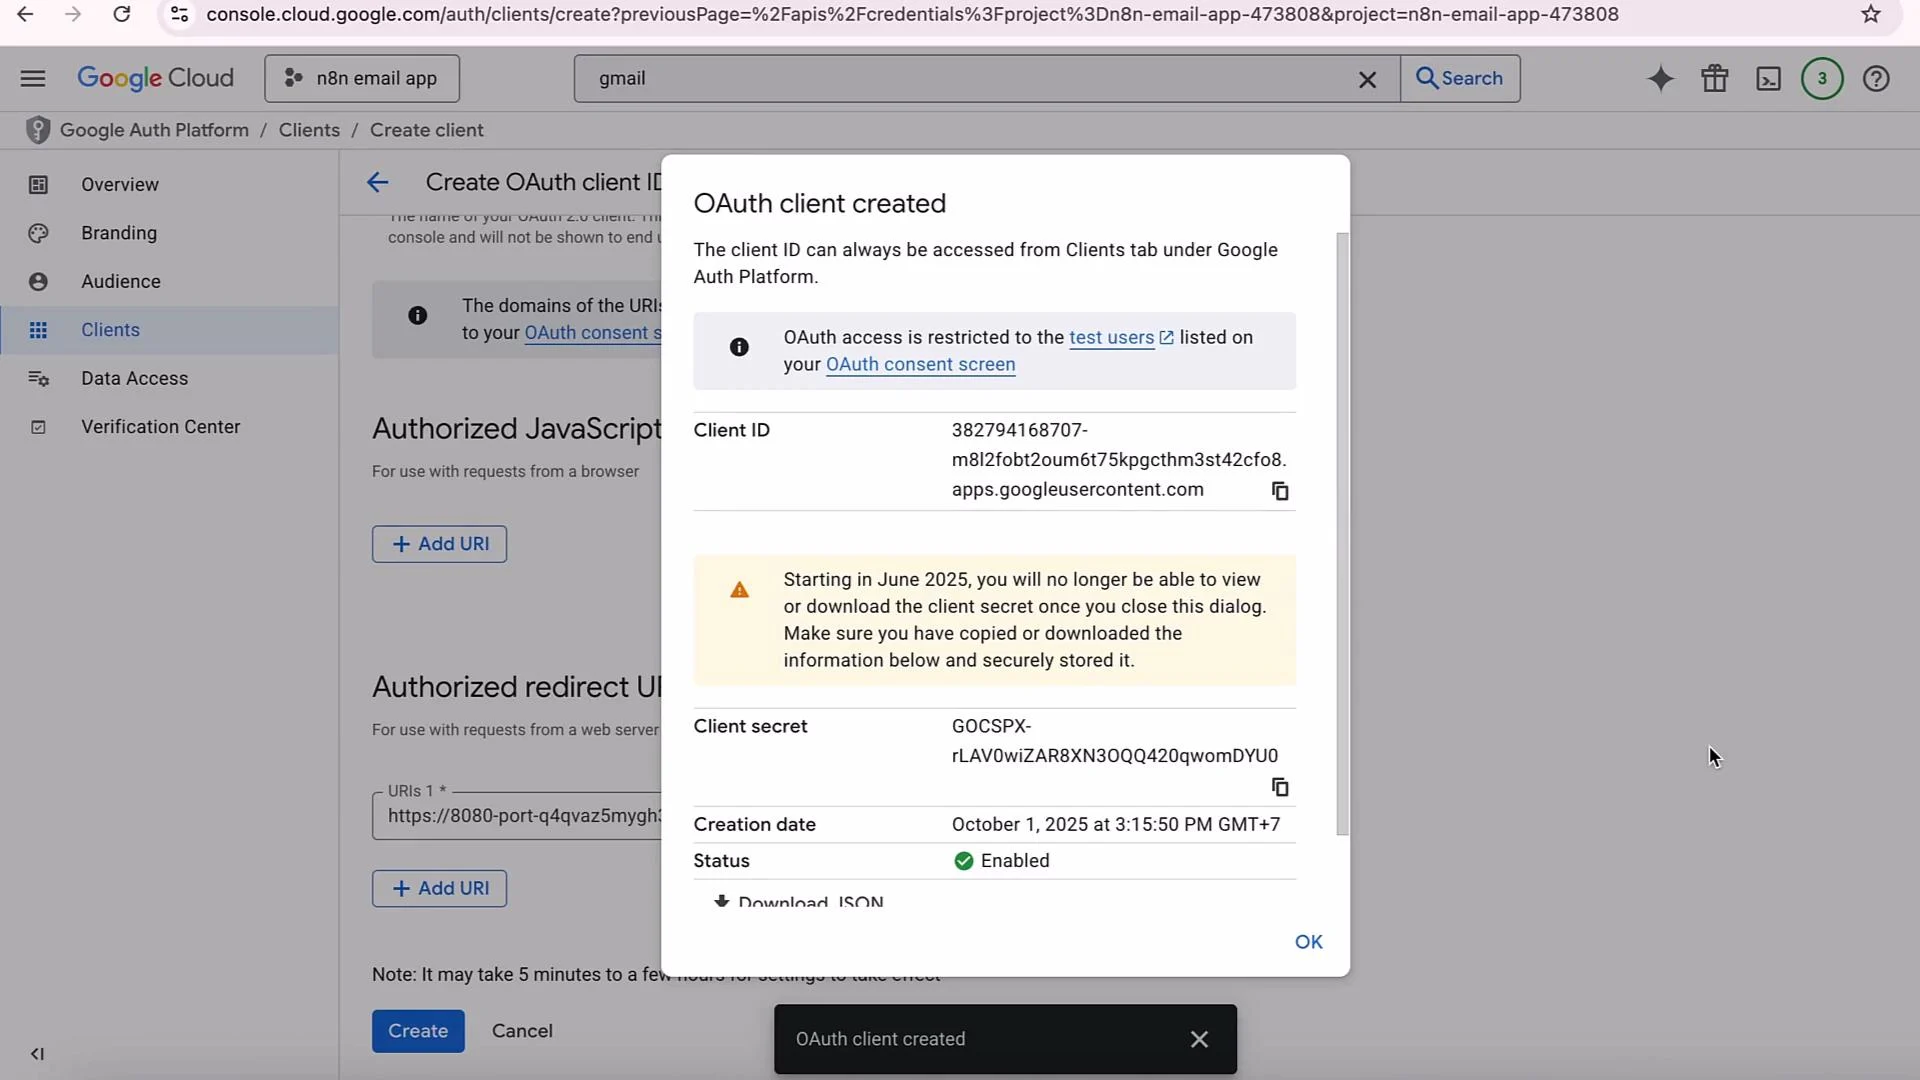
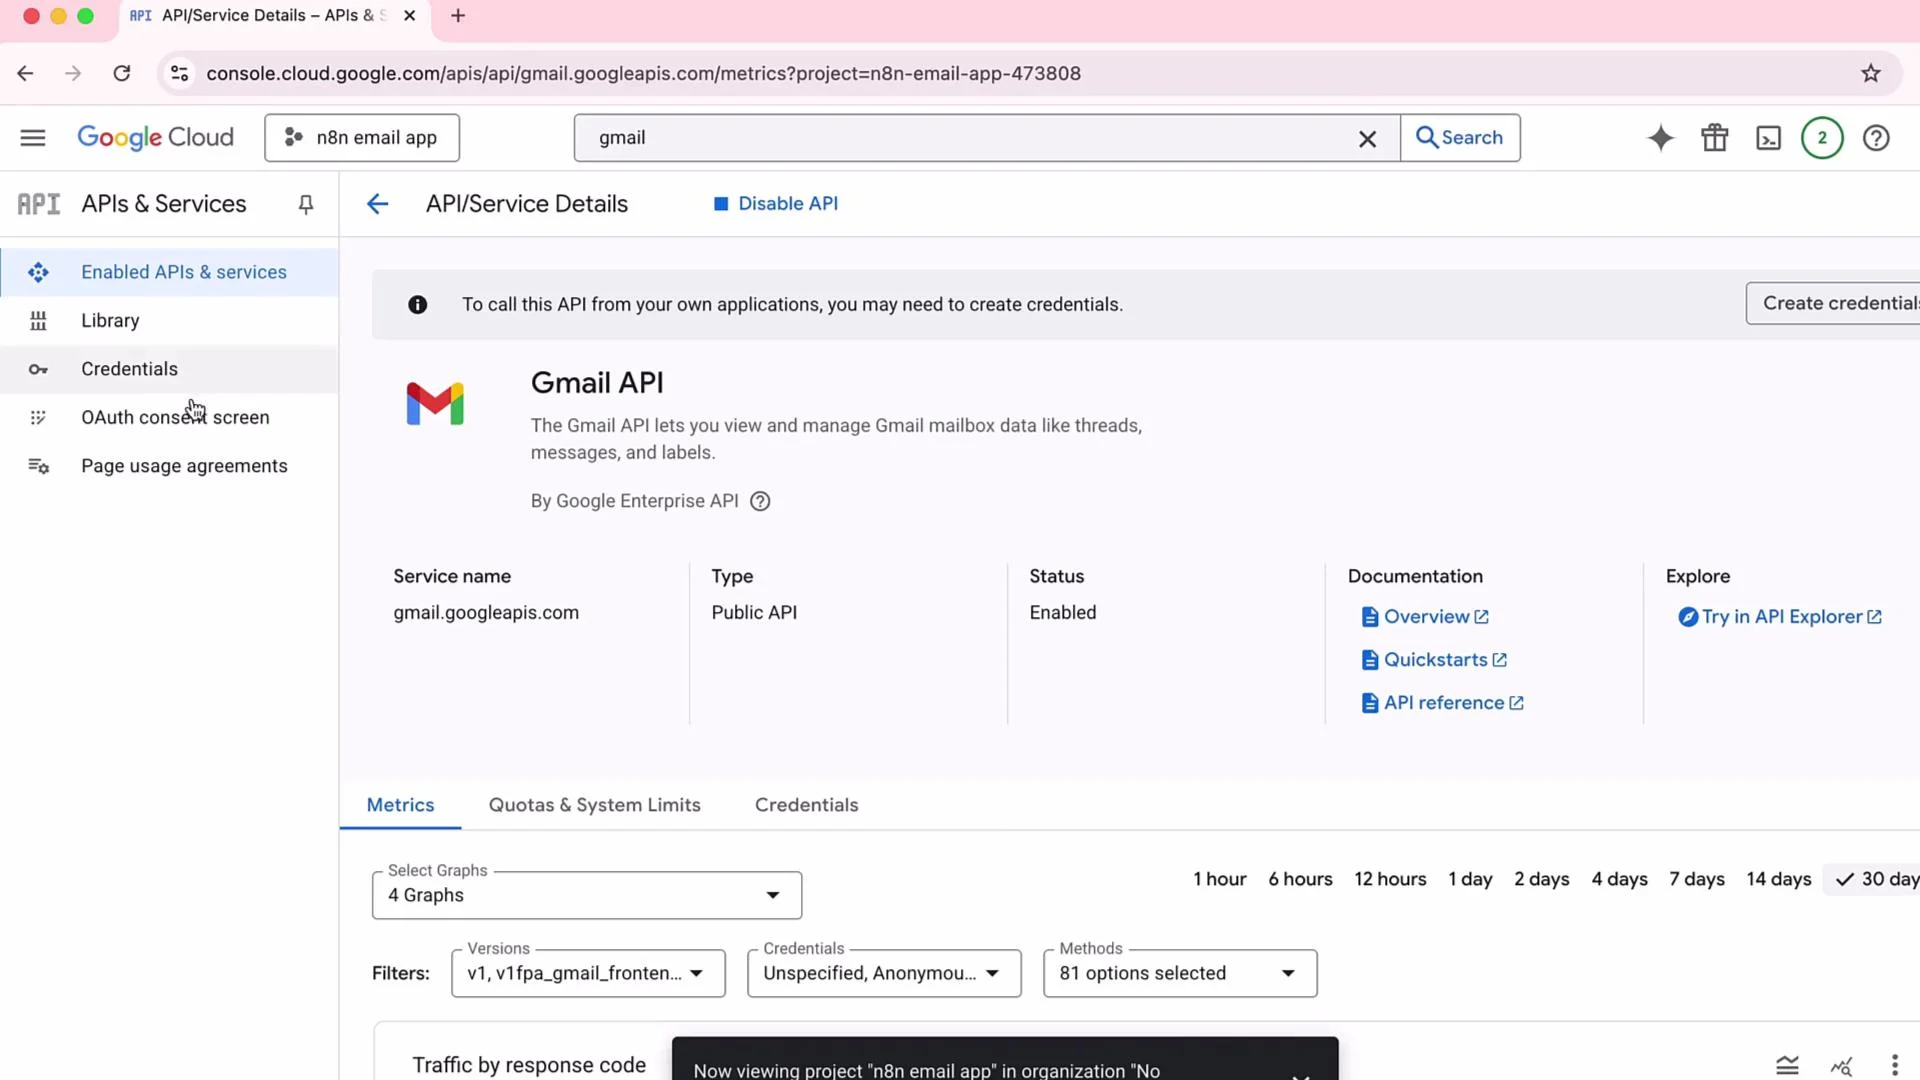 5. Go to API & Services → Credentials → Create Credentials → OAuth client ID:
* Application type: Web application
* Name: e.g., `n8n email OAuth client`
* Add the authorized redirect URI from your lab’s credential setup page
* Create the client and copy the Client ID and Client Secret
5. Go to API & Services → Credentials → Create Credentials → OAuth client ID:
* Application type: Web application
* Name: e.g., `n8n email OAuth client`
* Add the authorized redirect URI from your lab’s credential setup page
* Create the client and copy the Client ID and Client Secret
 6. Paste the Client ID and Client Secret into the Gmail credential in the n8n lab. After doing so a “Sign in with Google” button will appear — use it to authenticate with the test user and grant the requested scopes.
 When you see the “unverified app” message, it is expected for test apps created in your own Google Cloud project. Only proceed if you created the project and trust the app; otherwise, do not grant access.
After authorizing, save the Gmail credential in n8n. In the lab environment it may take a few seconds for the lab backend to register the credential — then run an Execute step to validate the integration.
## Test the complete workflow
With the Chat Trigger, AI model, and Gmail credential in place, test the end-to-end flow:
* Trigger using the Chat Trigger: “Hi, can you send an email to [coding@dot.com](mailto:coding@dot.com) to just say hello?”
* Execute the workflow and check the target inbox. You should receive a simple generated email (for example: “Hello Marconi, I just want to say hello. Best regards.”).
The sample workflow intentionally omits a system prompt — the goal here is to demonstrate lab-specific configuration differences (KK Keyspace vs OpenAI API and Google OAuth setup), not advanced prompting techniques.
## Troubleshooting tips
* If AI model calls fail with KK Keyspace: verify the base URL, API key, and paste the exact model ID string from lab instructions.
* If the OpenAI model list is empty: ensure your OpenAI API key is correct and saved in the OpenAI credential.
* If Google OAuth fails: confirm the redirect URI in Google Cloud Console exactly matches the URI shown in the n8n credential setup page, and that test user is added to the OAuth consent settings.
* Remember that some issues are environment-specific (lab vs Cloud vs self-host). When a node behaves differently in a lab, re-check credential configuration and environment-specific instructions.
As you explore n8n in different environments you’ll notice additional differences: available community nodes, supported versions, or features that exist in n8n Cloud but not in the lab or a self-hosted instance. Often these differences are resolved by using the correct credentials or a small configuration change.
## Links and references
* n8n documentation: [https://docs.n8n.io/](https://docs.n8n.io/)
* OpenAI platform: [https://platform.openai.com](https://platform.openai.com)
* Google Cloud Console: [https://console.cloud.google.com](https://console.cloud.google.com)
* KodeKloud Labs: [https://kodekloud.com](https://kodekloud.com)
When you see the “unverified app” message, it is expected for test apps created in your own Google Cloud project. Only proceed if you created the project and trust the app; otherwise, do not grant access.
After authorizing, save the Gmail credential in n8n. In the lab environment it may take a few seconds for the lab backend to register the credential — then run an Execute step to validate the integration.
## Test the complete workflow
With the Chat Trigger, AI model, and Gmail credential in place, test the end-to-end flow:
* Trigger using the Chat Trigger: “Hi, can you send an email to [coding@dot.com](mailto:coding@dot.com) to just say hello?”
* Execute the workflow and check the target inbox. You should receive a simple generated email (for example: “Hello Marconi, I just want to say hello. Best regards.”).
The sample workflow intentionally omits a system prompt — the goal here is to demonstrate lab-specific configuration differences (KK Keyspace vs OpenAI API and Google OAuth setup), not advanced prompting techniques.
## Troubleshooting tips
* If AI model calls fail with KK Keyspace: verify the base URL, API key, and paste the exact model ID string from lab instructions.
* If the OpenAI model list is empty: ensure your OpenAI API key is correct and saved in the OpenAI credential.
* If Google OAuth fails: confirm the redirect URI in Google Cloud Console exactly matches the URI shown in the n8n credential setup page, and that test user is added to the OAuth consent settings.
* Remember that some issues are environment-specific (lab vs Cloud vs self-host). When a node behaves differently in a lab, re-check credential configuration and environment-specific instructions.
As you explore n8n in different environments you’ll notice additional differences: available community nodes, supported versions, or features that exist in n8n Cloud but not in the lab or a self-hosted instance. Often these differences are resolved by using the correct credentials or a small configuration change.
## Links and references
* n8n documentation: [https://docs.n8n.io/](https://docs.n8n.io/)
* OpenAI platform: [https://platform.openai.com](https://platform.openai.com)
* Google Cloud Console: [https://console.cloud.google.com](https://console.cloud.google.com)
* KodeKloud Labs: [https://kodekloud.com](https://kodekloud.com)