> ## Documentation Index
> Fetch the complete documentation index at: https://notes.kodekloud.com/llms.txt
> Use this file to discover all available pages before exploring further.
# n8n Hosted on AWS EC2
> Guide to deploy n8n on an AWS EC2 Ubuntu instance using Docker and Docker Compose v2 for demos, including setup, environment configuration, and accessing the UI
This guide shows how to deploy n8n on an AWS EC2 instance using Docker and Docker Compose v2. Follow the steps to:
* Launch an EC2 instance (Ubuntu).
* Install Docker and Docker Compose v2 (CLI plugin).
* Clone the n8n self-hosted AI starter kit.
* Configure environment variables and run the stack.
* Access n8n via the instance public IP.
Recommended for quick demos and testing. For a production deployment, see the "Closing notes" section below.
Start by launching an AWS sandbox playground (or use your own AWS account). For a quick demo, KodeKloud provides interactive cloud sandboxes.
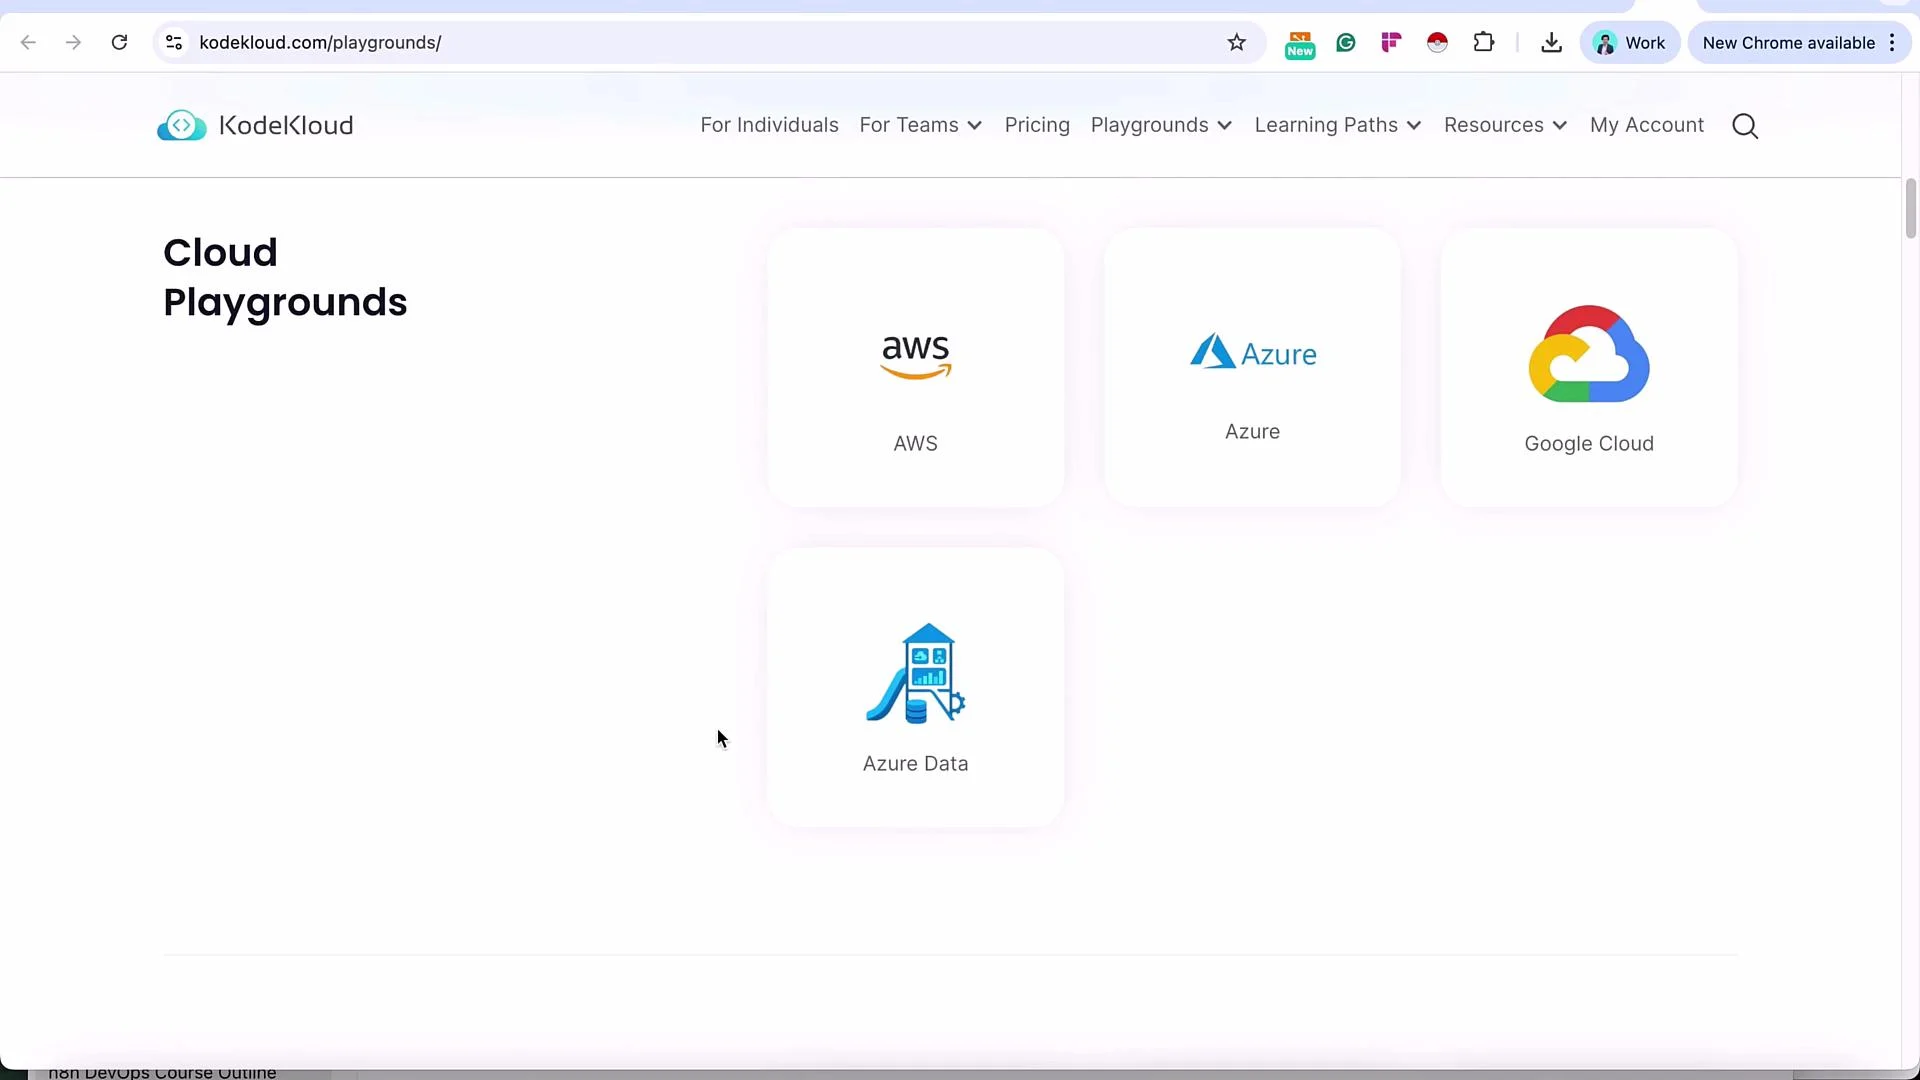 Sign into the AWS Console using the credentials provided by the playground. Copy and paste the username/password into the AWS sign-in page to access the console.
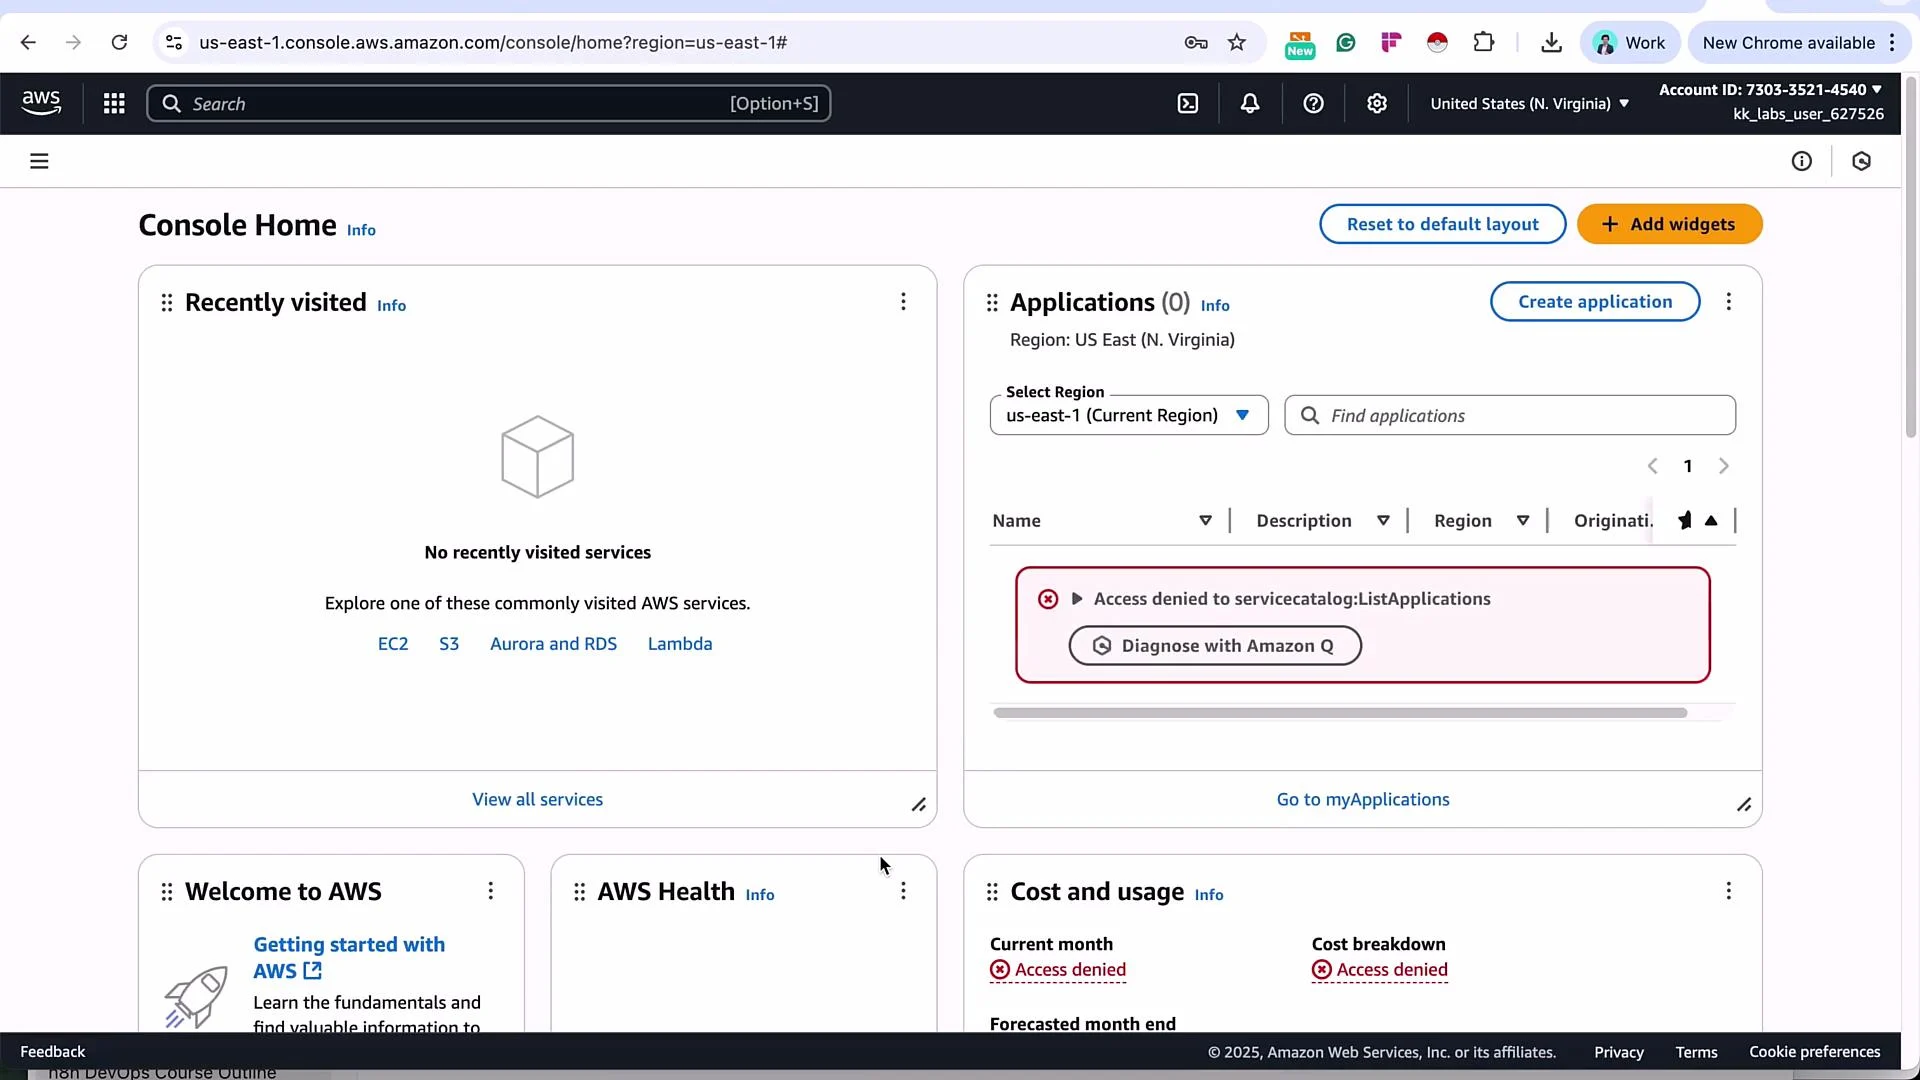 ## 1 — Launch an EC2 instance
1. Console: EC2 → Instances → Launch Instance.
2. Name the instance `n8n-demo` and select an Ubuntu AMI (e.g., Ubuntu 22.04 LTS).
3. Choose an instance type (e.g., `t2.medium`). This demo uses a slightly larger instance to accommodate Ollama and extra repo data.
4. Increase the root volume to 30 GB (or larger as needed).
5. Create a new key pair `n8n-demo-key` in PEM format and download it.
6. Configure the security group to allow:
* SSH (port 22) — for administration.
* n8n (port 5678) — to access the UI.
* Additional ports used by included services (Ollama, Qdrant) if needed.
When configuring the instance, confirm SSH and any other required ports are allowed.
## 1 — Launch an EC2 instance
1. Console: EC2 → Instances → Launch Instance.
2. Name the instance `n8n-demo` and select an Ubuntu AMI (e.g., Ubuntu 22.04 LTS).
3. Choose an instance type (e.g., `t2.medium`). This demo uses a slightly larger instance to accommodate Ollama and extra repo data.
4. Increase the root volume to 30 GB (or larger as needed).
5. Create a new key pair `n8n-demo-key` in PEM format and download it.
6. Configure the security group to allow:
* SSH (port 22) — for administration.
* n8n (port 5678) — to access the UI.
* Additional ports used by included services (Ollama, Qdrant) if needed.
When configuring the instance, confirm SSH and any other required ports are allowed.
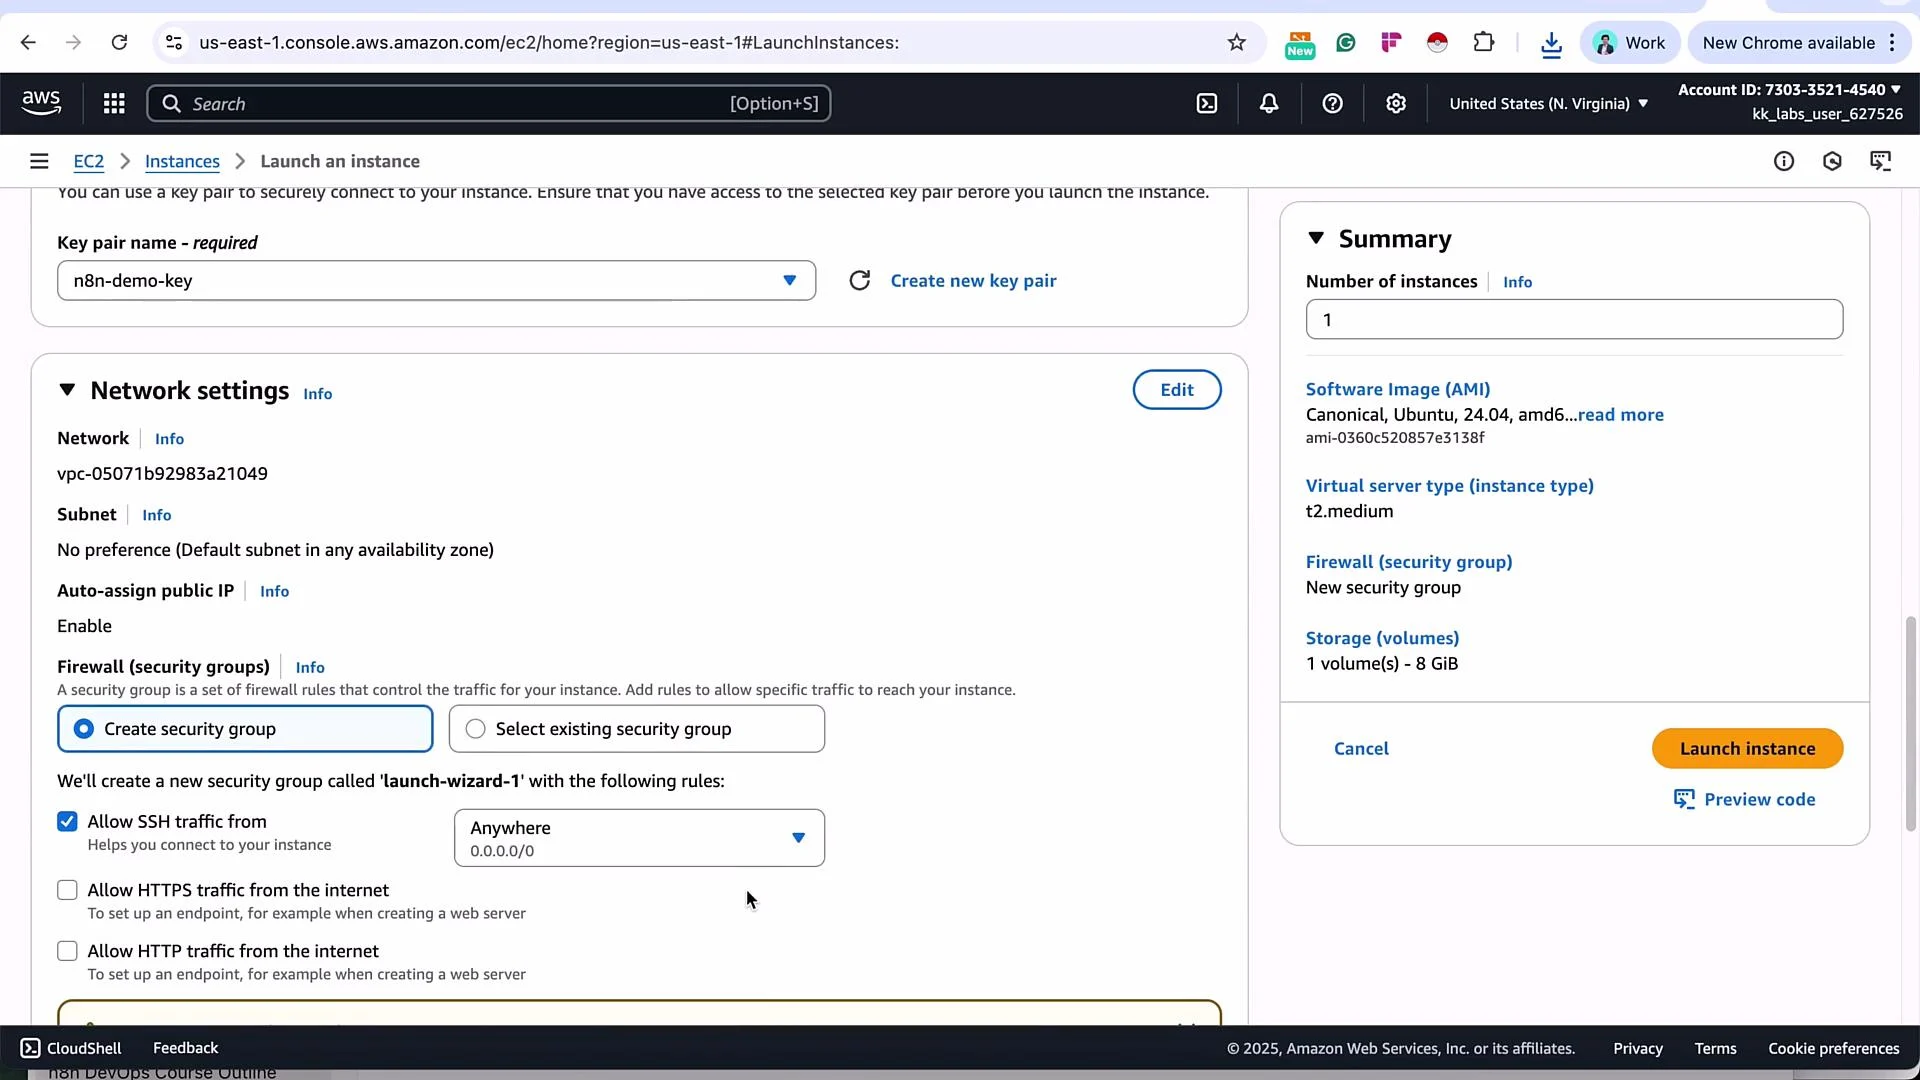 Increase the storage size to ensure enough room for components like Ollama.
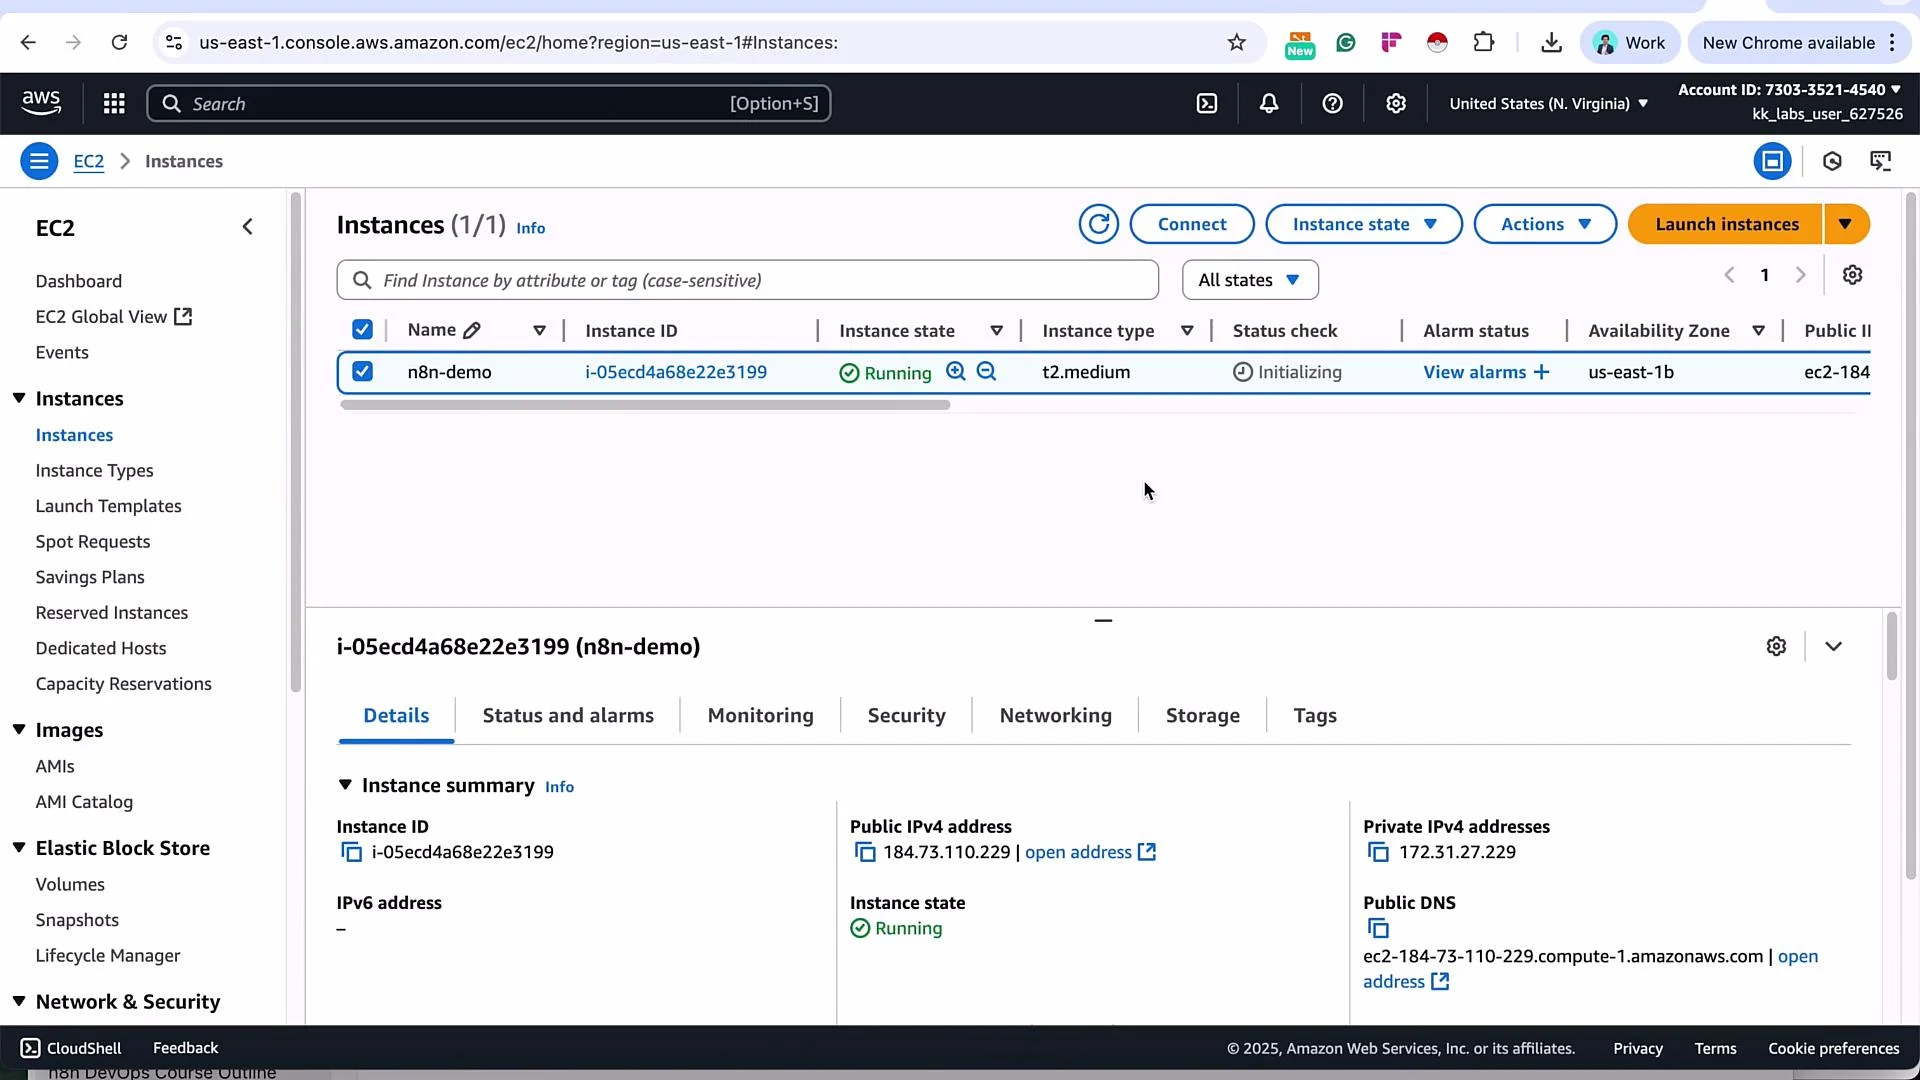
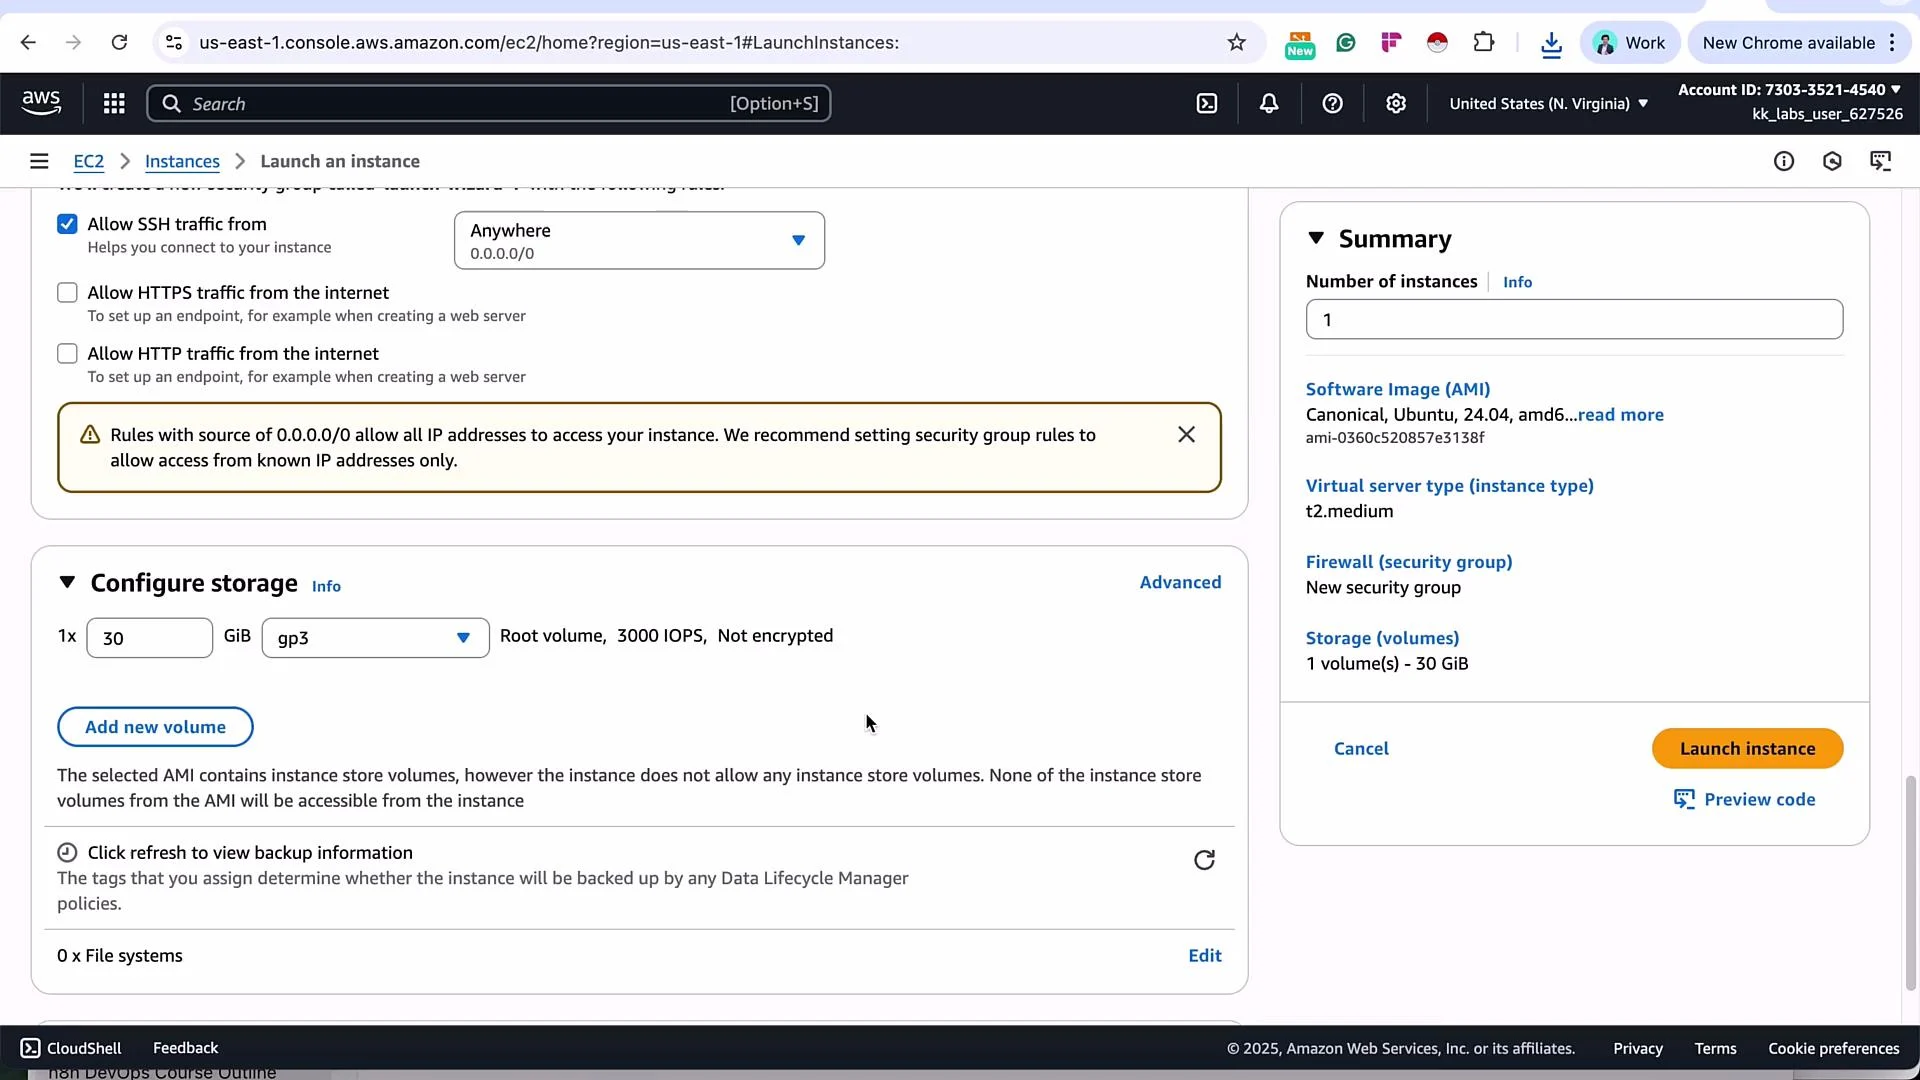 Launch the instance. After it starts, open the instance details to confirm and review the security group inbound rules.
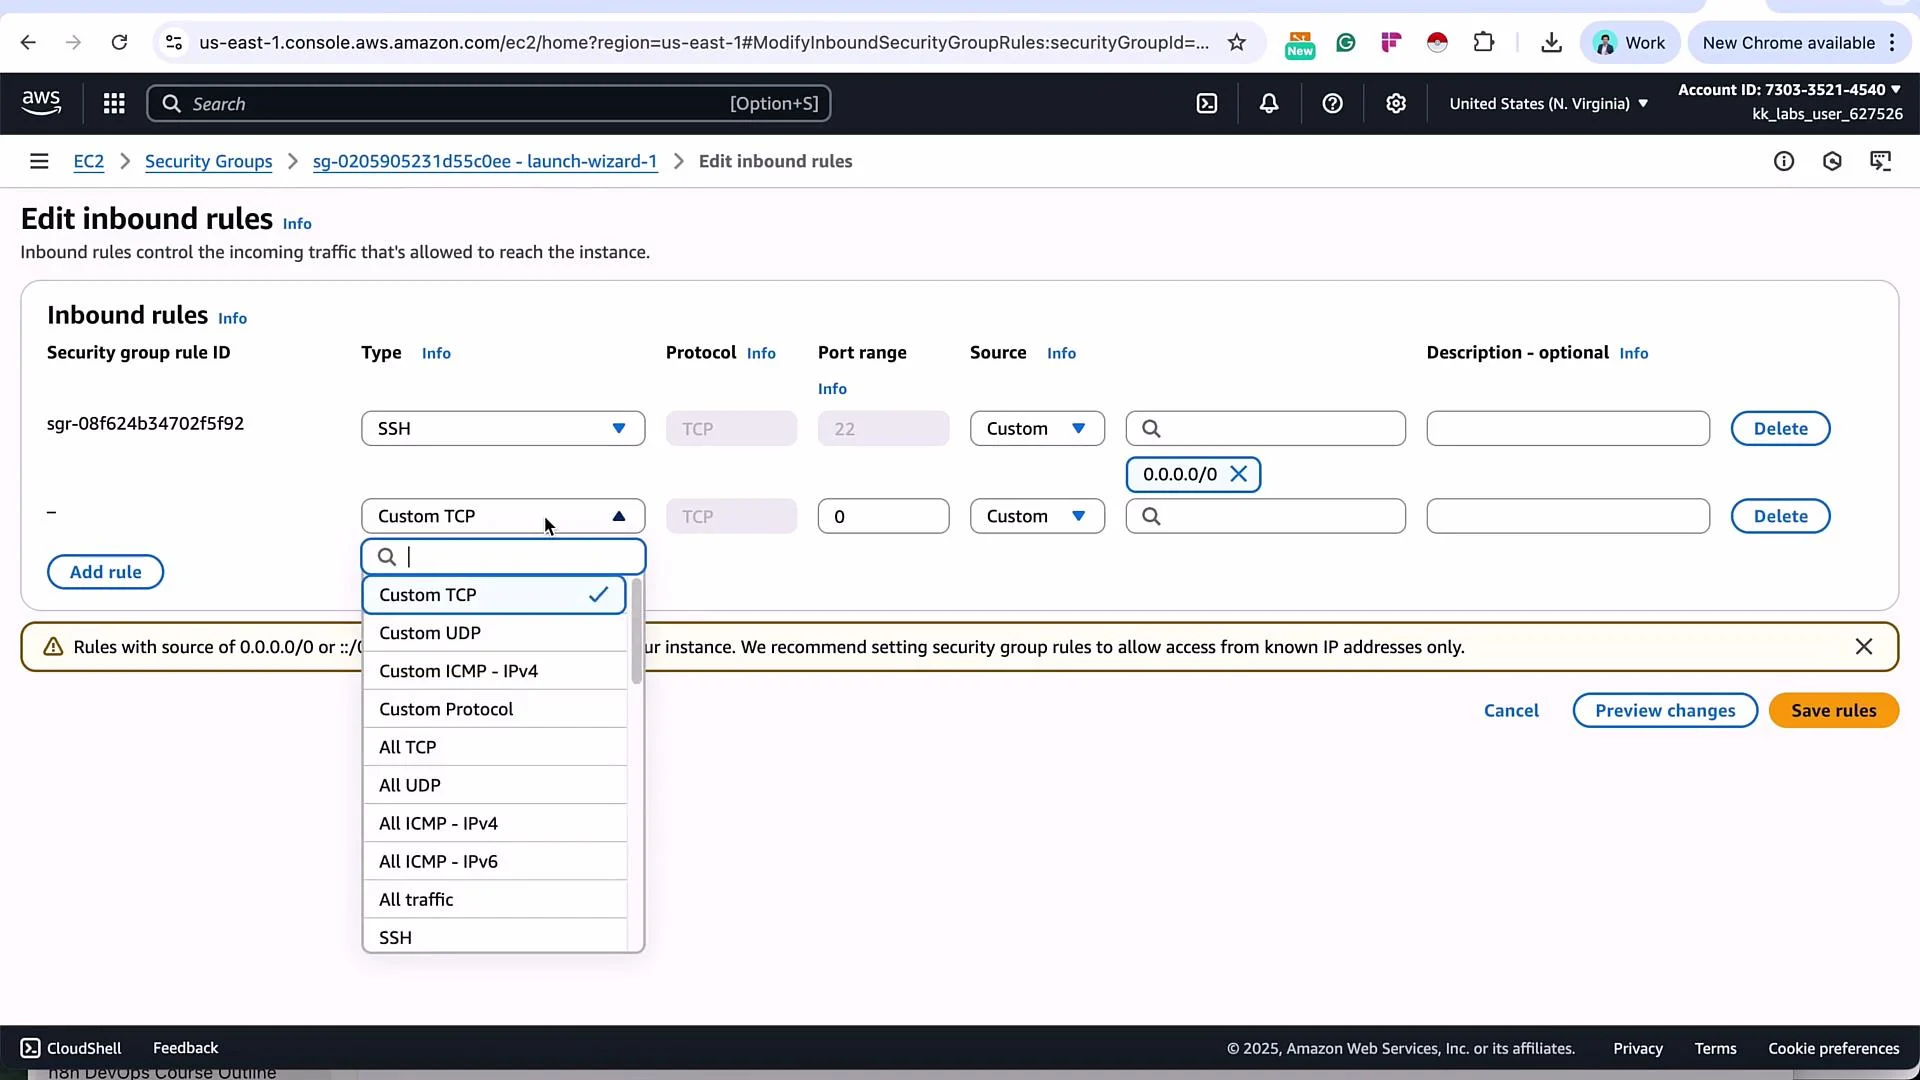
 Edit the security group's inbound rules to allow SSH and the n8n port (5678). In the demo we configured Custom TCP on port 5678 and allowed it from anywhere.
 Save the rules after editing.
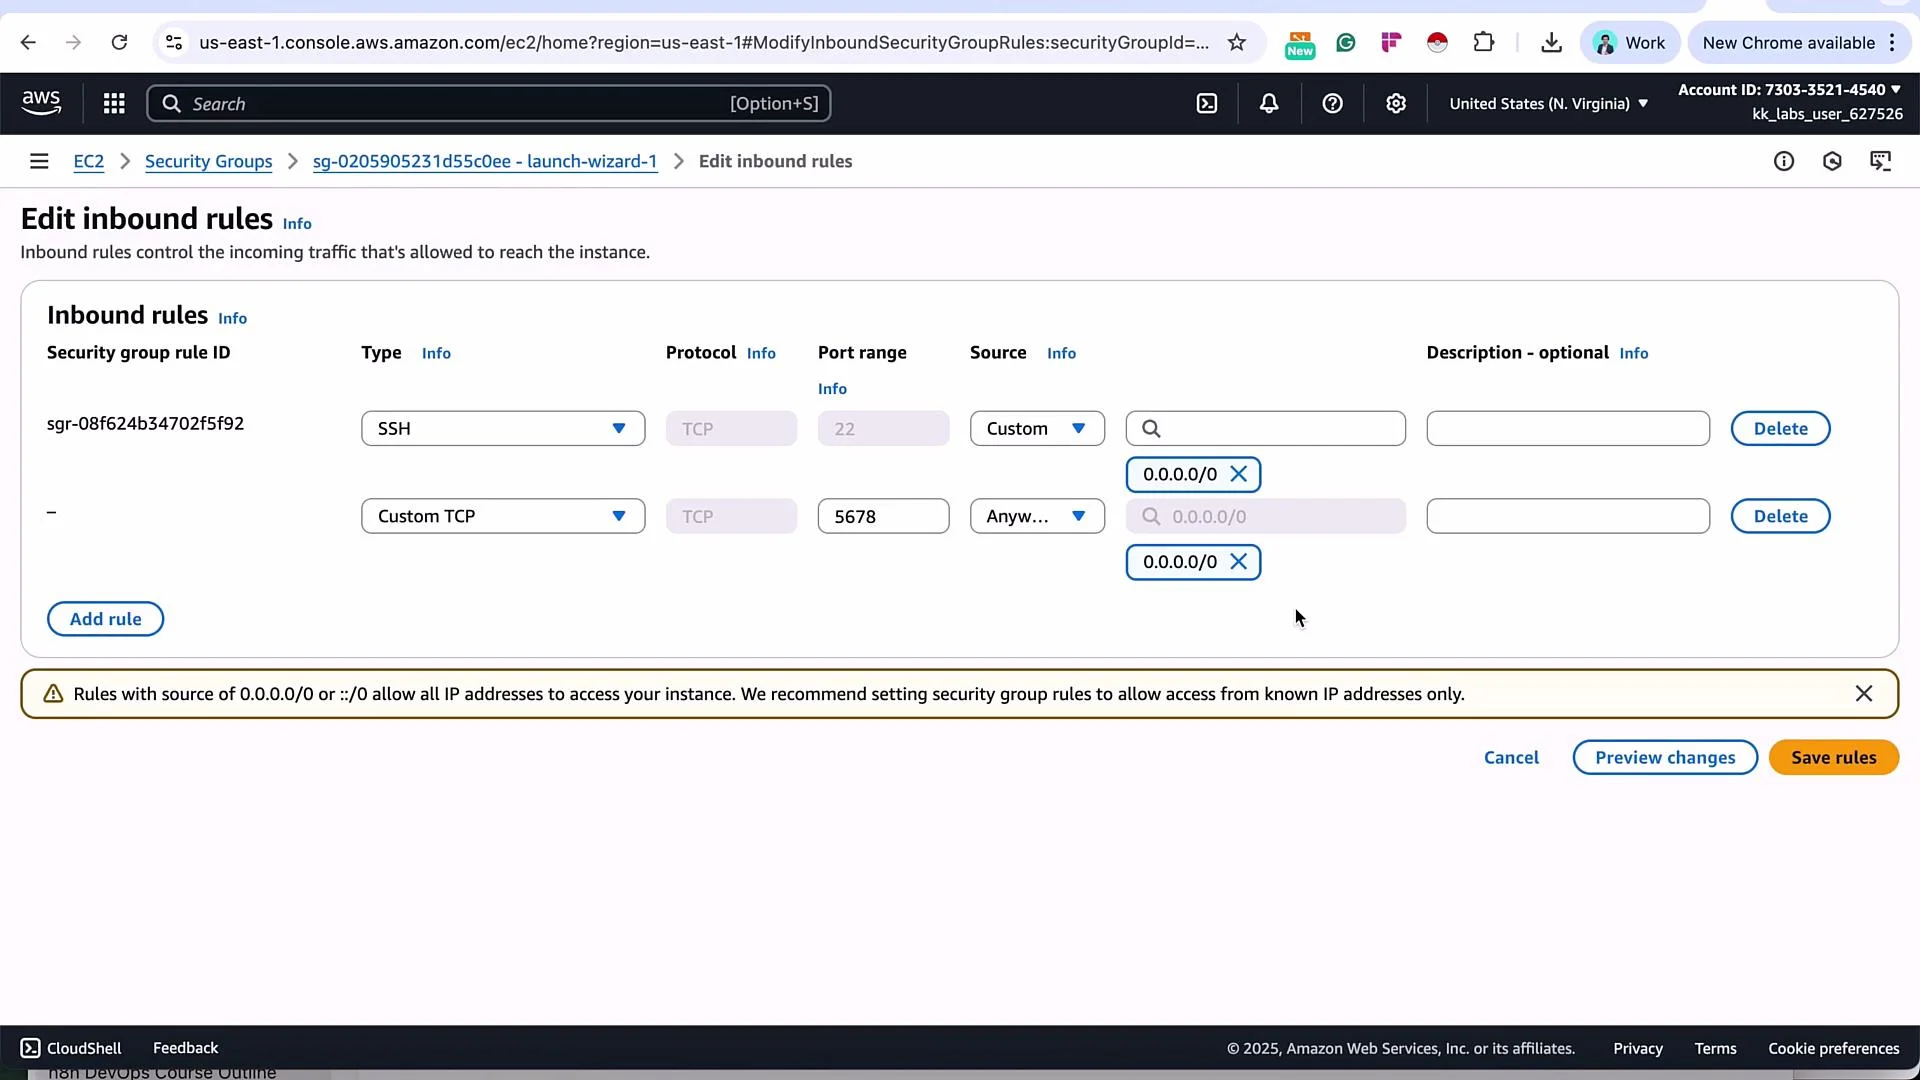 For production, do not leave SSH (22) or n8n (5678) open to the entire internet (`0.0.0.0/0`). Restrict access by IP range, use a VPN or bastion host, and implement least-privilege security. The open rules shown here are only acceptable for a short-lived demo sandbox.
## 2 — SSH into the instance
On your local machine, move to the folder where the PEM key was downloaded and secure the file:
```bash theme={null}
chmod 400 n8n-demo-key.pem
```
SSH into the instance using the `ubuntu` user and the instance public IP (replace ``):
```bash theme={null}
ssh -i "n8n-demo-key.pem" ubuntu@
```
On first connect you may see a host authenticity prompt; type `yes` to continue. Example:
```text theme={null}
The authenticity of host ' ()' can't be established.
ED25519 key fingerprint is SHA256:oc3mo7aChuiTyieEkiDuCvPTLBliSDNLMrXc9W0c.
Are you sure you want to continue connecting (yes/no/[fingerprint])? yes
```
## 3 — Install Docker and Docker Compose v2
Update packages and install Docker using the official convenience script:
```bash theme={null}
sudo apt update && sudo apt upgrade -y
curl -fsSL https://get.docker.com -o get-docker.sh
sudo sh get-docker.sh
```
Enable Docker, add the current user to the docker group, and apply the group change:
```bash theme={null}
sudo systemctl enable docker
sudo usermod -aG docker $USER
newgrp docker
```
Install Docker Compose v2 as a CLI plugin (adjust the version URL if you prefer another release):
```bash theme={null}
mkdir -p ~/.docker/cli-plugins
curl -SL https://github.com/docker/compose/releases/download/v2.23.3/docker-compose-linux-x86_64 -o ~/.docker/cli-plugins/docker-compose
chmod +x ~/.docker/cli-plugins/docker-compose
```
Verify the Compose plugin (note: use `docker compose`, not `docker-compose`):
```bash theme={null}
docker compose version
# Example output:
# Docker Compose version v2.23.3
```
Helpful links:
* Docker docs: [https://docs.docker.com/engine/install/ubuntu/](https://docs.docker.com/engine/install/ubuntu/)
* Docker Compose CLI plugin: [https://docs.docker.com/compose/cli-command/](https://docs.docker.com/compose/cli-command/)
## 4 — Clone the repository and configure environment
Clone the n8n self-hosted AI starter kit and prepare the environment file:
```bash theme={null}
git clone https://github.com/n8n-io/self-hosted-ai-starter-kit
cd self-hosted-ai-starter-kit
cp .env.example .env
```
Edit `.env` and set relevant variables. Minimum example (only key variables shown):
```text theme={null}
POSTGRES_USER=root
POSTGRES_PASSWORD=password
POSTGRES_DB=n8n
N8N_ENCRYPTION_KEY=super-secret-key
N8N_USER_MANAGEMENT_JWT_SECRET=even-more-secret
N8N_DEFAULT_BINARY_DATA_MODE=filesystem
# Disable secure cookie for demo on a non-HTTPS public IP.
N8N_SECURE_COOKIE=false
# For Mac users running OLLAMA locally
# OLLAMA_HOST=host.docker.internal:11434
```
Notes:
* Ensure variable names are `N8N_` prefixed and `POSTGRES_DB` is `n8n`.
* `N8N_SECURE_COOKIE=false` is used here because the demo uses HTTP. For production with HTTPS, set `N8N_SECURE_COOKIE=true`.
* Replace `N8N_ENCRYPTION_KEY` and `N8N_USER_MANAGEMENT_JWT_SECRET` with strong, unique secrets.
## Quick reference — Ports and services
| Service | Default Port | Notes |
| -------- | --------------: | -------------------------------------------- |
| n8n UI | `5678` | HTTP access in demo; use HTTPS in production |
| Ollama | `11434` | Local LLM server (if enabled in compose) |
| Qdrant | `6333` / `6334` | Vector DB used by starter kit |
| Postgres | `5432` | Database used by n8n |
## 5 — Start the stack with Docker Compose
Start services using the Compose profile included in the repo:
```bash theme={null}
docker compose --profile cpu up -d
```
This command pulls images and creates volumes. It may take several minutes (n8n, postgres, ollama, qdrant, etc.). Verify containers:
```bash theme={null}
docker ps
```
Example output (IDs and images will differ):
```text theme={null}
CONTAINER ID IMAGE COMMAND CREATED STATUS PORTS NAMES
c5549fabe571 n8nio/n8n:latest "docker-entrypoint.s…" 2 minutes ago Up 2 minutes 0.0.0.0:5678->5678/tcp n8n
653b4f492de6 postgres:16-alpine "docker-entrypoint.s…" 2 minutes ago Up 2 minutes (healthy) 5432/tcp self-hosted-ai-starter-kit_postgres-1
3bc8a2aeb73b ollama/qdrant "/start-service.sh" 2 minutes ago Up 2 minutes 0.0.0.0:6333->6333/tcp, 6334/tcp qdrant
1f6b0c27bd91 ollama/ollama:latest "/bin/ollama serve" 2 minutes ago Up 2 minutes 0.0.0.0:11434->11434/tcp ollama
```
Troubleshooting:
* Use `docker compose logs -f` or `docker compose logs ` to inspect startup issues.
* Ensure sufficient disk and CPU on the instance; Ollama and Qdrant are resource-intensive.
## 6 — Access n8n in the browser
Open:
```text theme={null}
http://:5678
```
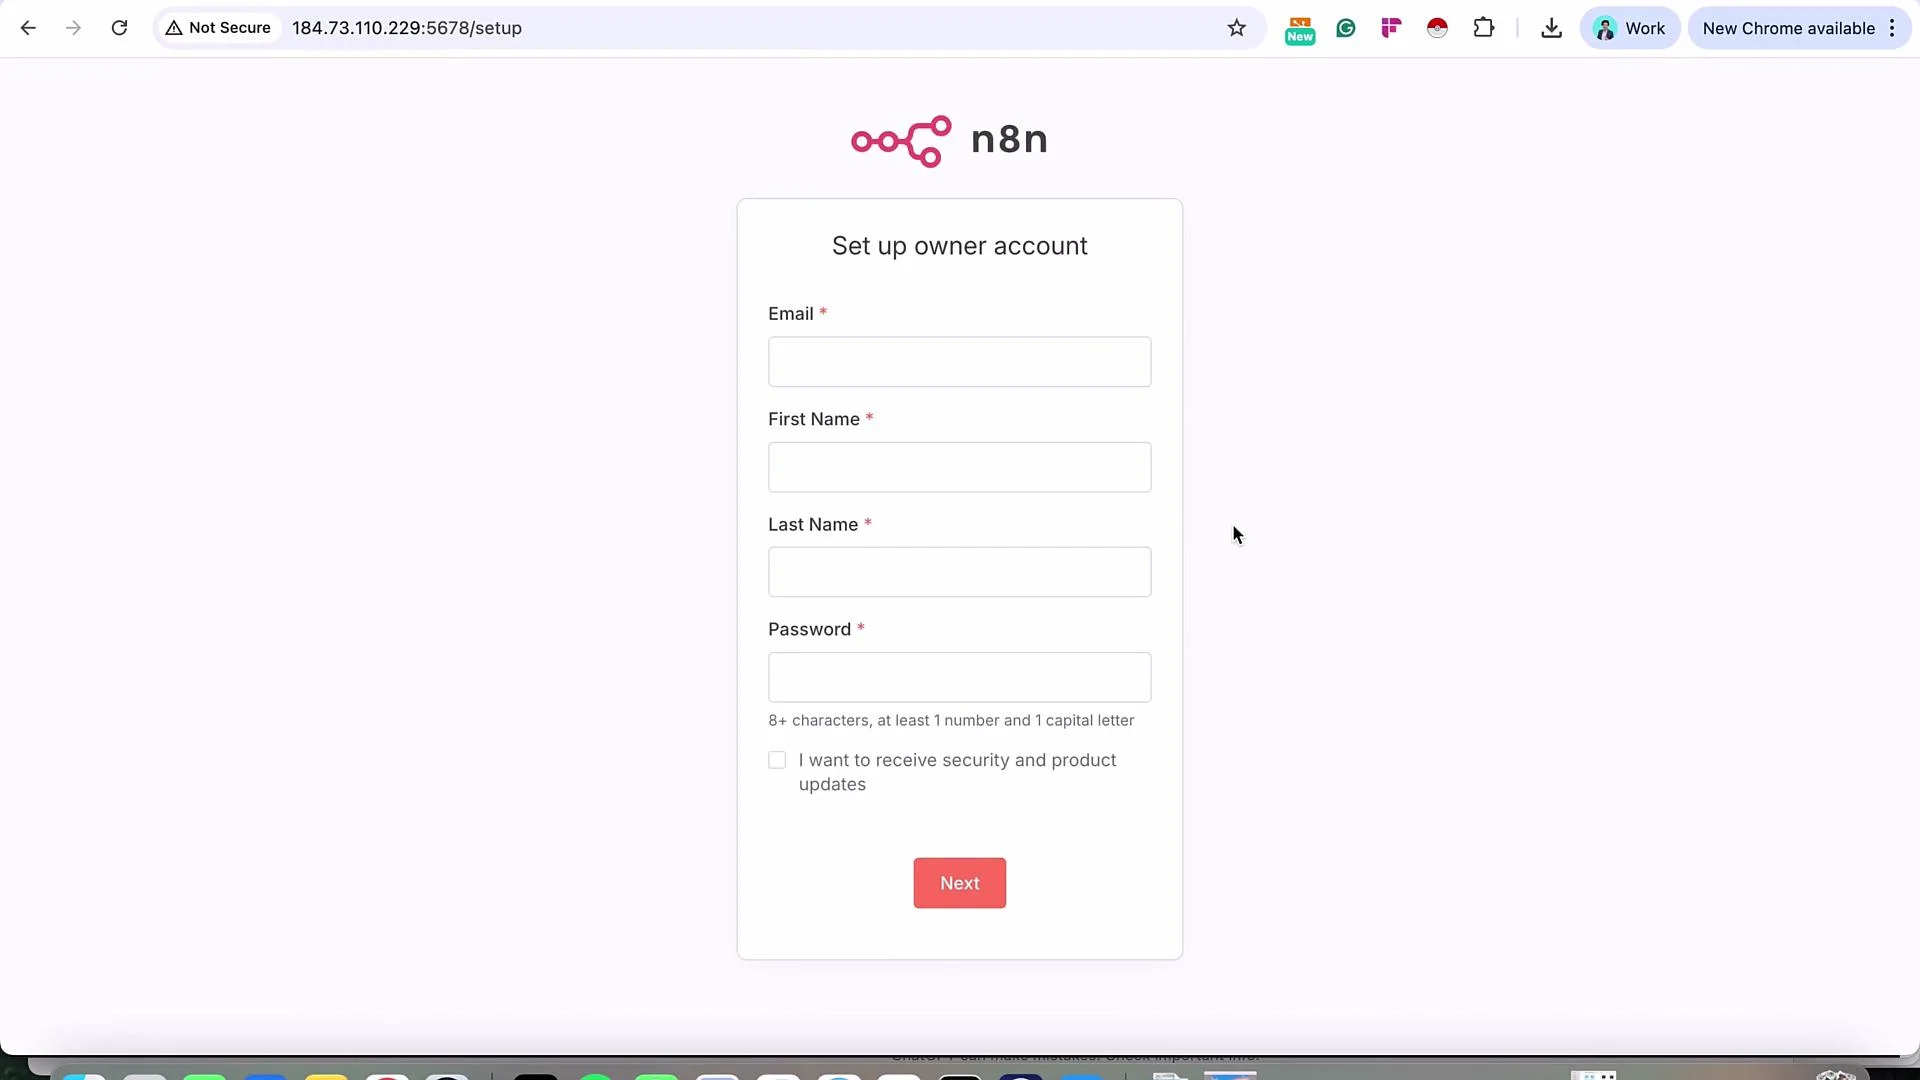
Replace `` with your EC2 instance public IPv4 address. On first access you will be prompted to create an owner account (email, first name, last name, password).
For production, do not leave SSH (22) or n8n (5678) open to the entire internet (`0.0.0.0/0`). Restrict access by IP range, use a VPN or bastion host, and implement least-privilege security. The open rules shown here are only acceptable for a short-lived demo sandbox.
## 2 — SSH into the instance
On your local machine, move to the folder where the PEM key was downloaded and secure the file:
```bash theme={null}
chmod 400 n8n-demo-key.pem
```
SSH into the instance using the `ubuntu` user and the instance public IP (replace ``):
```bash theme={null}
ssh -i "n8n-demo-key.pem" ubuntu@
```
On first connect you may see a host authenticity prompt; type `yes` to continue. Example:
```text theme={null}
The authenticity of host ' ()' can't be established.
ED25519 key fingerprint is SHA256:oc3mo7aChuiTyieEkiDuCvPTLBliSDNLMrXc9W0c.
Are you sure you want to continue connecting (yes/no/[fingerprint])? yes
```
## 3 — Install Docker and Docker Compose v2
Update packages and install Docker using the official convenience script:
```bash theme={null}
sudo apt update && sudo apt upgrade -y
curl -fsSL https://get.docker.com -o get-docker.sh
sudo sh get-docker.sh
```
Enable Docker, add the current user to the docker group, and apply the group change:
```bash theme={null}
sudo systemctl enable docker
sudo usermod -aG docker $USER
newgrp docker
```
Install Docker Compose v2 as a CLI plugin (adjust the version URL if you prefer another release):
```bash theme={null}
mkdir -p ~/.docker/cli-plugins
curl -SL https://github.com/docker/compose/releases/download/v2.23.3/docker-compose-linux-x86_64 -o ~/.docker/cli-plugins/docker-compose
chmod +x ~/.docker/cli-plugins/docker-compose
```
Verify the Compose plugin (note: use `docker compose`, not `docker-compose`):
```bash theme={null}
docker compose version
# Example output:
# Docker Compose version v2.23.3
```
Helpful links:
* Docker docs: [https://docs.docker.com/engine/install/ubuntu/](https://docs.docker.com/engine/install/ubuntu/)
* Docker Compose CLI plugin: [https://docs.docker.com/compose/cli-command/](https://docs.docker.com/compose/cli-command/)
## 4 — Clone the repository and configure environment
Clone the n8n self-hosted AI starter kit and prepare the environment file:
```bash theme={null}
git clone https://github.com/n8n-io/self-hosted-ai-starter-kit
cd self-hosted-ai-starter-kit
cp .env.example .env
```
Edit `.env` and set relevant variables. Minimum example (only key variables shown):
```text theme={null}
POSTGRES_USER=root
POSTGRES_PASSWORD=password
POSTGRES_DB=n8n
N8N_ENCRYPTION_KEY=super-secret-key
N8N_USER_MANAGEMENT_JWT_SECRET=even-more-secret
N8N_DEFAULT_BINARY_DATA_MODE=filesystem
# Disable secure cookie for demo on a non-HTTPS public IP.
N8N_SECURE_COOKIE=false
# For Mac users running OLLAMA locally
# OLLAMA_HOST=host.docker.internal:11434
```
Notes:
* Ensure variable names are `N8N_` prefixed and `POSTGRES_DB` is `n8n`.
* `N8N_SECURE_COOKIE=false` is used here because the demo uses HTTP. For production with HTTPS, set `N8N_SECURE_COOKIE=true`.
* Replace `N8N_ENCRYPTION_KEY` and `N8N_USER_MANAGEMENT_JWT_SECRET` with strong, unique secrets.
## Quick reference — Ports and services
| Service | Default Port | Notes |
| -------- | --------------: | -------------------------------------------- |
| n8n UI | `5678` | HTTP access in demo; use HTTPS in production |
| Ollama | `11434` | Local LLM server (if enabled in compose) |
| Qdrant | `6333` / `6334` | Vector DB used by starter kit |
| Postgres | `5432` | Database used by n8n |
## 5 — Start the stack with Docker Compose
Start services using the Compose profile included in the repo:
```bash theme={null}
docker compose --profile cpu up -d
```
This command pulls images and creates volumes. It may take several minutes (n8n, postgres, ollama, qdrant, etc.). Verify containers:
```bash theme={null}
docker ps
```
Example output (IDs and images will differ):
```text theme={null}
CONTAINER ID IMAGE COMMAND CREATED STATUS PORTS NAMES
c5549fabe571 n8nio/n8n:latest "docker-entrypoint.s…" 2 minutes ago Up 2 minutes 0.0.0.0:5678->5678/tcp n8n
653b4f492de6 postgres:16-alpine "docker-entrypoint.s…" 2 minutes ago Up 2 minutes (healthy) 5432/tcp self-hosted-ai-starter-kit_postgres-1
3bc8a2aeb73b ollama/qdrant "/start-service.sh" 2 minutes ago Up 2 minutes 0.0.0.0:6333->6333/tcp, 6334/tcp qdrant
1f6b0c27bd91 ollama/ollama:latest "/bin/ollama serve" 2 minutes ago Up 2 minutes 0.0.0.0:11434->11434/tcp ollama
```
Troubleshooting:
* Use `docker compose logs -f` or `docker compose logs ` to inspect startup issues.
* Ensure sufficient disk and CPU on the instance; Ollama and Qdrant are resource-intensive.
## 6 — Access n8n in the browser
Open:
```text theme={null}
http://:5678
```
Replace `` with your EC2 instance public IPv4 address. On first access you will be prompted to create an owner account (email, first name, last name, password).
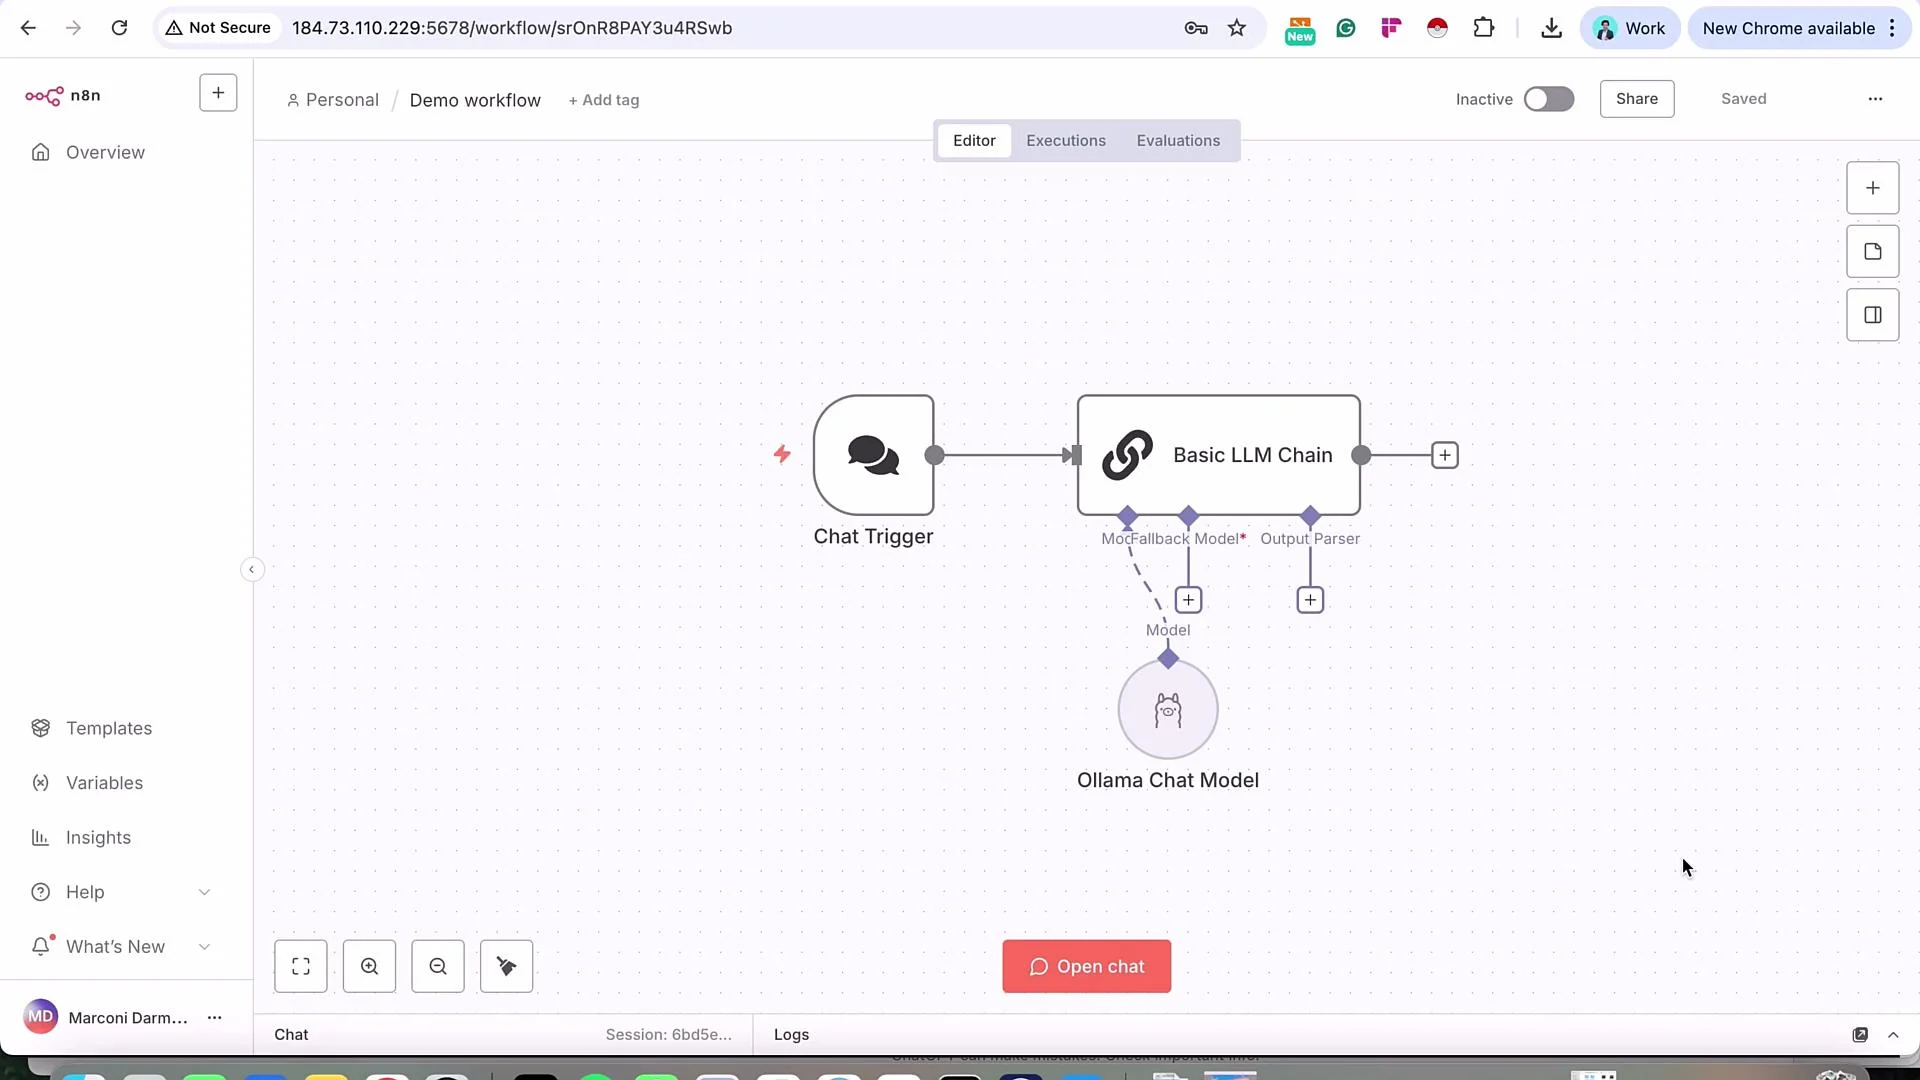
 Once signed in, you will see the n8n dashboard and a default demo workflow — the same n8n experience but now running on your EC2 instance. Ollama and the other services in the repo are available to workflows as configured.
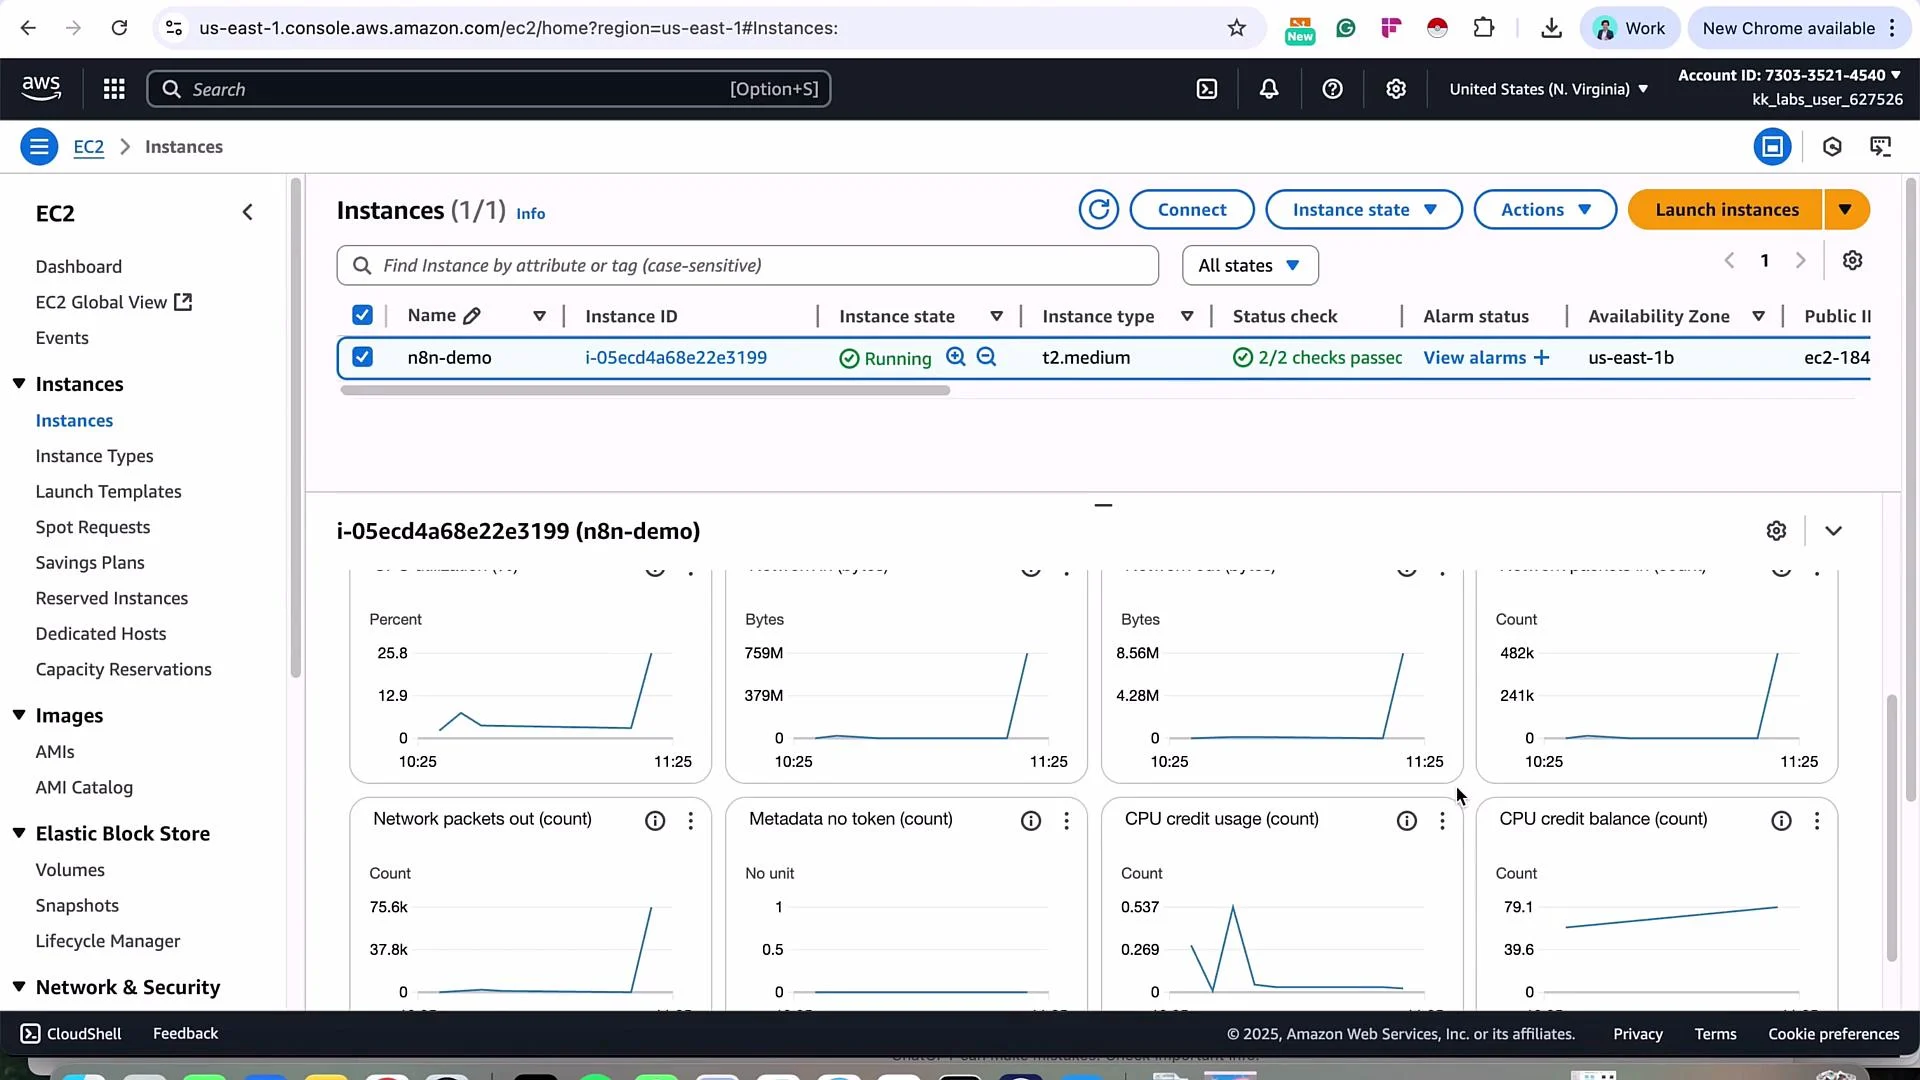
Monitor EC2 resource usage (CPU, network, disk) from the EC2 console to observe the impact of running these services.
Once signed in, you will see the n8n dashboard and a default demo workflow — the same n8n experience but now running on your EC2 instance. Ollama and the other services in the repo are available to workflows as configured.
Monitor EC2 resource usage (CPU, network, disk) from the EC2 console to observe the impact of running these services.
 Here is an example workflow that uses a Chat Trigger, a basic LLM chain, and an Ollama chat model — components you can test once Ollama is running.
 ## Closing notes
* This walkthrough demonstrates a simple self-hosted n8n setup on EC2 using Docker Compose. If you prefer a managed service, consider [n8n Cloud](https://n8n.io/cloud).
* For production:
* Terminate public-only SSH/n8n access; restrict by IP or use a bastion/VPN.
* Enable HTTPS (reverse proxy, load balancer, or TLS termination).
* Use secure secret management, backups, and monitoring/alerts.
* Learn more:
* Docker docs: [https://docs.docker.com/](https://docs.docker.com/)
* AWS EC2: [https://docs.aws.amazon.com/ec2/](https://docs.aws.amazon.com/ec2/)
* n8n self-hosted starter kit: [https://github.com/n8n-io/self-hosted-ai-starter-kit](https://github.com/n8n-io/self-hosted-ai-starter-kit)
* KodeKloud Docker course: [https://learn.kodekloud.com/user/courses/docker-training-course-for-the-absolute-beginner](https://learn.kodekloud.com/user/courses/docker-training-course-for-the-absolute-beginner)
* KodeKloud EC2 course: [https://learn.kodekloud.com/user/courses/amazon-elastic-compute-cloud-ec2](https://learn.kodekloud.com/user/courses/amazon-elastic-compute-cloud-ec2)
If you want, I can provide a step-by-step production-ready recipe (HTTPS, domain, automated backups, and secure security group rules).
## Closing notes
* This walkthrough demonstrates a simple self-hosted n8n setup on EC2 using Docker Compose. If you prefer a managed service, consider [n8n Cloud](https://n8n.io/cloud).
* For production:
* Terminate public-only SSH/n8n access; restrict by IP or use a bastion/VPN.
* Enable HTTPS (reverse proxy, load balancer, or TLS termination).
* Use secure secret management, backups, and monitoring/alerts.
* Learn more:
* Docker docs: [https://docs.docker.com/](https://docs.docker.com/)
* AWS EC2: [https://docs.aws.amazon.com/ec2/](https://docs.aws.amazon.com/ec2/)
* n8n self-hosted starter kit: [https://github.com/n8n-io/self-hosted-ai-starter-kit](https://github.com/n8n-io/self-hosted-ai-starter-kit)
* KodeKloud Docker course: [https://learn.kodekloud.com/user/courses/docker-training-course-for-the-absolute-beginner](https://learn.kodekloud.com/user/courses/docker-training-course-for-the-absolute-beginner)
* KodeKloud EC2 course: [https://learn.kodekloud.com/user/courses/amazon-elastic-compute-cloud-ec2](https://learn.kodekloud.com/user/courses/amazon-elastic-compute-cloud-ec2)
If you want, I can provide a step-by-step production-ready recipe (HTTPS, domain, automated backups, and secure security group rules).