AI-Assisted Development
Introduction to AI Assisted Development
A Quick Look Tabnine
In this article, we explore how Tabnine integrates with Visual Studio Code to boost your coding productivity. Similar to BlackboxAI and GitHub Copilot, Tabnine runs as an extension directly within VS Code—making it a convenient companion for developers who already spend most of their time in this environment.
Visual Studio Code Integration
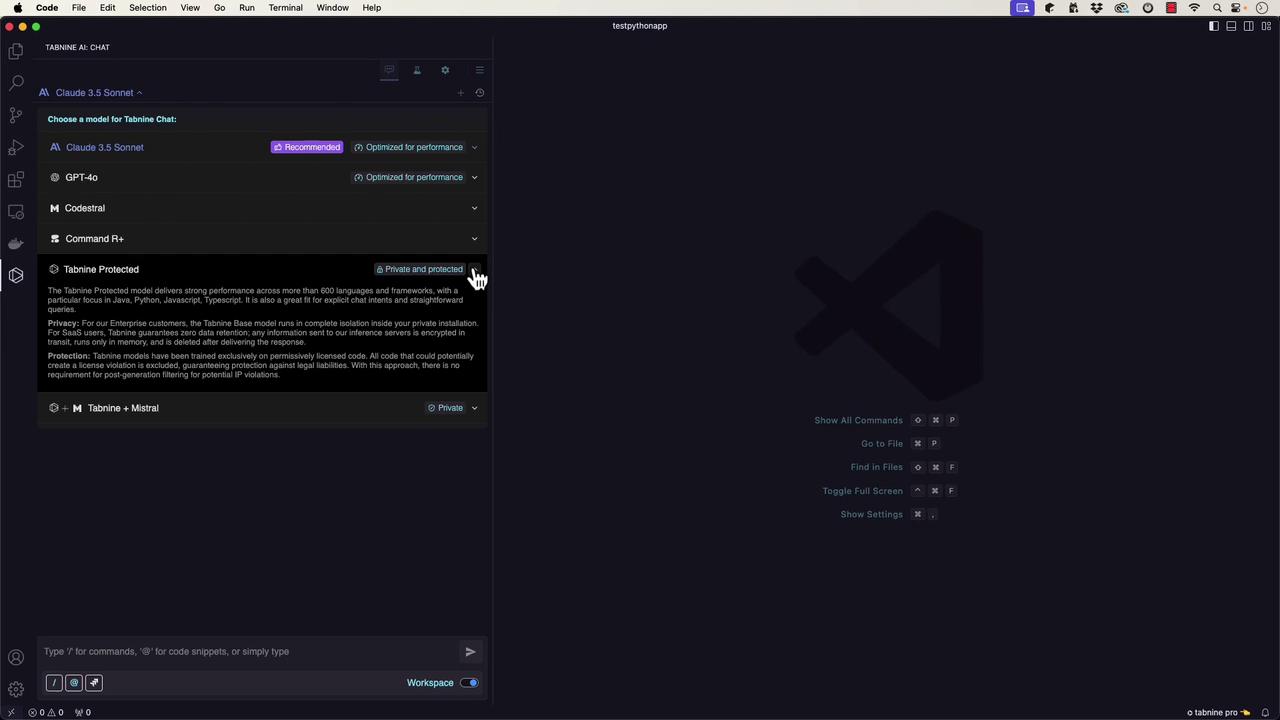
Once installed, Tabnine adds its own bar to the interface along with additional options at the bottom. Unlike BlackboxAI, Tabnine allows you to select from various models for its chat interface. For example, you can opt for models such as Claude 3.5 Sonnet (ideal for programming), GPT 4.0, CodeStroll (available on Hugging Face and runnable locally), Command R+, Tabnine Protected, and Tabnine Plus Mistral. Models labeled as "private" or "protected" are designed to run within your private network, ensuring that your proprietary code remains confidential and is not used for training.
Creating a "Hello, World!" Python Application
Scaffolding with Tabnine
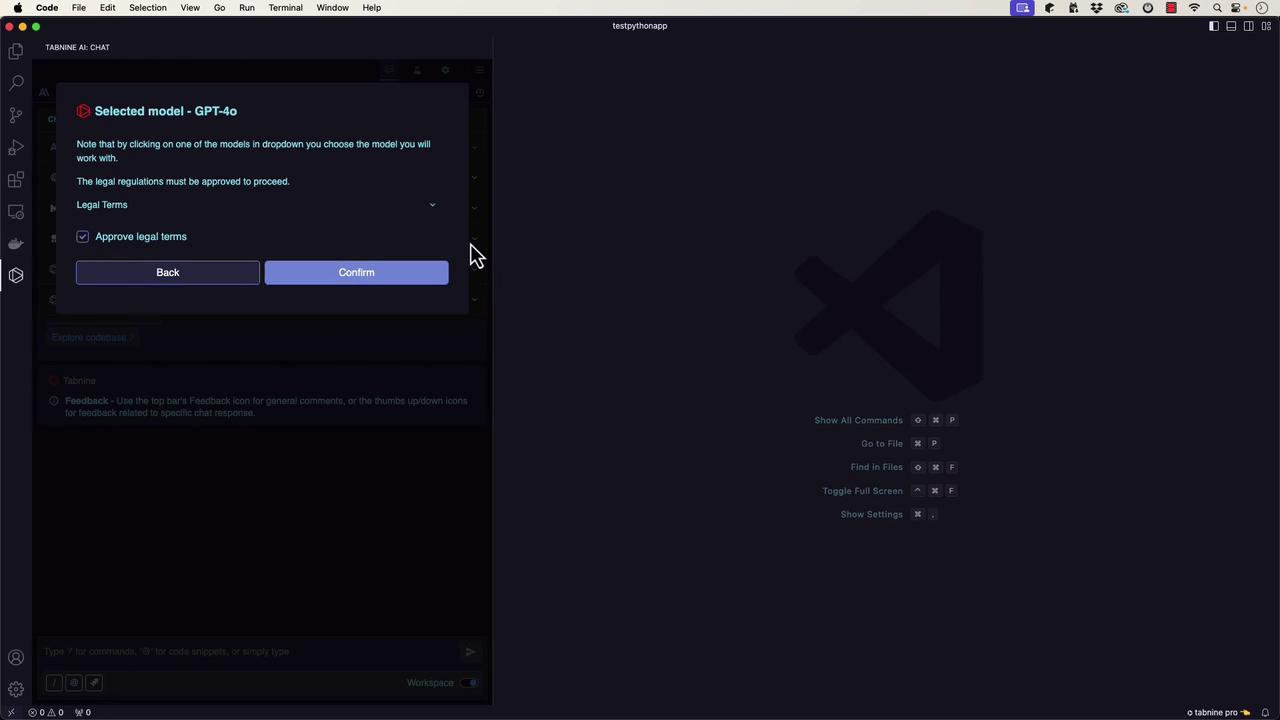
To demonstrate Tabnine's capabilities, we will scaffold a basic "Hello, World!" Python project. Instead of merely creating a script, we'll instruct Tabnine to generate a fully structured project using the term "scaffold" to enforce best practices. When you select a model—for instance, GPT 4.0—a legal terms popup will appear that you must acknowledge before proceeding.
After acknowledging, the coding companion interface will open. You can then pose a prompt such as:
"How can I scaffold a hello world application in Python? I want to expand it later and use best practices."
Tabnine responds with a detailed process that not only creates a Python file to print "Hello, World!" but also sets up:
- A project directory
- A virtual environment
- A structured project hierarchy
- A README file
- A .gitignore file
- A LICENSE file
Below is an outline of the suggested process:
# 1. Create a Project Directory:
mkdir hello_world_project
cd hello_world_project

# 2. Set Up a Virtual Environment:
python3 -m venv venv
source venv/bin/activate  # For Windows use: venv\Scripts\activate

# 3. Create a Basic Project Structure:
# Directory tree:
# hello_world_project/
# ├── venv/
# ├── src/
# │   └── main.py
# ├── tests/
# ├── README.md
# ├── .gitignore
# 4. Write the Application Code in src/main.py:
Now, add the Python code in src/main.py:
def main():
    print("Hello, World!")

if __name__ == "__main__":
    main()
Tabnine further recommends setting up version control:
git init
echo "venv/" >> .gitignore
git add .
git commit -m "Initial commit"
Note
Even if your project only uses base libraries, setting up a virtual environment and a proper project structure is a best practice for ensuring maintainability and scalability.
Setting Up the Project
Follow these steps in your terminal to set up the project structure:
mkdir hello_world_project
cd hello_world_project
python3 -m venv venv
source venv/bin/activate
mkdir src tests
touch README.md .gitignore LICENSE
touch src/main.py
Next, open src/main.py in Visual Studio Code and paste the following:
def main():
    print("Hello, World!")

if __name__ == "__main__":
    main()
Run your application with:
python src/main.py
The output will be:
Hello, World!
If you wish to enable version control later, initialize a Git repository with these commands:
git init
echo "venv/" >> .gitignore
git add .
git commit -m "Initial commit"
Enhancing Code Quality: Comments and Tests
Tabnine is also capable of guiding you to add inline code comments for better documentation. For example, the code can be revised as follows:
def main():
    # This function prints "Hello, World!" to the console.
    print("Hello, World!")

# Ensures main() is executed only when the script runs directly,
# not when it's imported as a module.
if __name__ == "__main__":
    main()
Additionally, Tabnine can scaffold test cases using pytest. Create a new file, such as tests/main.test.py, with the following unit test:
from main import main

def test_main(capsys):
    main()
    captured = capsys.readouterr()
    assert captured.out == "Hello, World!\n"
Running these tests will confirm that your program outputs the expected text.
Tip
Adding descriptive comments and tests early in the development process helps maintain code quality and facilitates future enhancements.
Code Explanation and Documentation
If you ask Tabnine for an explanation, it might provide this breakdown:
- The
defkeyword is used to define themainfunction, which serves as the entry point. - The line
if __name__ == "__main__":ensures that the script is executed only when run directly. - Proper code documentation is essential for maintaining clarity and easing future modifications.
Moreover, Tabnine can insert PyDoc documentation. For example:
def main():
    """
    Prints a greeting message to the console.

    This function does not take any parameters and does not return a value.
    It simply prints "Hello, World!" to the standard output.
    """
    print("Hello, World!")

if __name__ == "__main__":
    main()
Extending the Implementation
Tabnine's "Ask" feature can also suggest code enhancements. For instance, you might see a recommendation to use Python’s logging module and parameterize the greeting message:
import logging

def main(message: str = "Hello, World!") -> None:
    """
    Prints a greeting message to the console using the logging module.

    :param message: The message to print. Defaults to "Hello, World!".
    """
    logging.basicConfig(level=logging.INFO)
    logging.info(message)

if __name__ == "__main__":
    main()
This modification adds type annotations and employs logging instead of print statements, which improves robustness and maintainability.
Conclusion
Tabnine offers a powerful array of features that extend far beyond basic code completion. Whether you need to scaffold entire projects, create tests, insert detailed documentation, or simply get a better understanding of your code, Tabnine proves to be an invaluable tool. Stay tuned for our next article, where we will dive into GitHub Copilot, another leading solution in AI-assisted development.
Happy coding!
Watch Video
Watch video content