AWS Certified Developer - Associate
Containers on AWS
ECS Demo Part 2
In this guide, we will walk through setting up a multi-container application on Amazon ECS. The application consists of two containers: an Express API container built with Node.js and a MongoDB container. The following Docker Compose file demonstrates the basic architecture:
version: "3"
services:
  api:
    build: .
    image: kodekloud/ecs-project2
    environment:
      - MONGO_USER=mongo
      - MONGO_PASSWORD=password
      - MONGO_IP=mongo
      - MONGO_PORT=27017
    ports:
      - "3000:3000"
  mongo:
    image: mongo
    environment:
      - MONGO_INITDB_ROOT_USERNAME=mongo
      - MONGO_INITDB_ROOT_PASSWORD=password
    volumes:
      - db:/data/db
volumes:
  db:
The API container hosts a simple CRUD application for managing notes. It connects to MongoDB using environment variables defined in both containers. For example, the API constructs a connection URL similar to:
const mongoURL = `mongodb://${process.env.MONGO_USER}:${process.env.MONGO_PASSWORD}@${process.env.MONGO_IP}:${process.env.MONGO_PORT}/?authSource=admin`;
Key RESTful endpoints include the following:
Retrieve All Notes
A GET request to/notes:app.get("/notes", async (req, res) => { try { const notes = await Note.find(); res.status(200).json({ notes }); } catch (e) { console.log(e); res.status(400).json({}); } });Retrieve a Specific Note
A GET request to/notes/:id:app.get("/notes/:id", async (req, res) => { try { const note = await Note.findById(req.params.id); if (!note) { return res.status(404).json({ message: "Note not found" }); } res.status(200).json({ note }); } catch (e) { console.log(e); res.status(400).json({ status: "fail" }); } });Create a New Note
A POST request to/notes:app.post("/notes", async (req, res) => { console.log(req.body); try { const note = await Note.create(req.body); return res.status(201).json({ note }); } catch (e) { console.log(e); return res.status(400).json({ status: "fail" }); } });Update an Existing Note
A PATCH request to/notes/:id:app.patch("/notes/:id", async (req, res) => { try { const note = await Note.findByIdAndUpdate(req.params.id, req.body, { new: true, runValidators: true, }); if (!note) { return res.status(404).json({ message: "Note not found" }); } res.status(200).json({ note }); } catch (e) { console.log(e); res.status(400).json({ status: "fail" }); } });Delete a Note
A DELETE request to/notes/:id:app.delete("/notes/:id", async (req, res) => { try { const note = await Note.findByIdAndDelete(req.params.id); if (!note) { return res.status(404).json({ message: "Note not found" }); } res.status(200).json({ status: "success" }); } catch (e) { console.log(e); res.status(400).json({ status: "fail" }); } });
The application leverages the Mongoose library to manage MongoDB connections. A simplified example of the setup is shown below:
const express = require("express");
const mongoose = require("mongoose");
const cors = require("cors");
const Note = require("./models/noteModel");

const app = express();
app.use(cors({}));
app.use(express.json());

const mongoURL = `mongodb://${process.env.MONGO_USER}:${process.env.MONGO_PASSWORD}@${process.env.MONGO_IP}:${process.env.MONGO_PORT}/?authSource=admin`;

// Alternative for local development:
// const mongoURL = 'mongodb://localhost:27017/?authSource=admin';

app.get("/notes", async (req, res) => {
  try {
    const notes = await Note.find();
    res.status(200).json({ notes });
  } catch (error) {
    res.status(500).json({ message: error.message });
  }
});
Before deploying the containerized app on ECS, several AWS components must be configured.
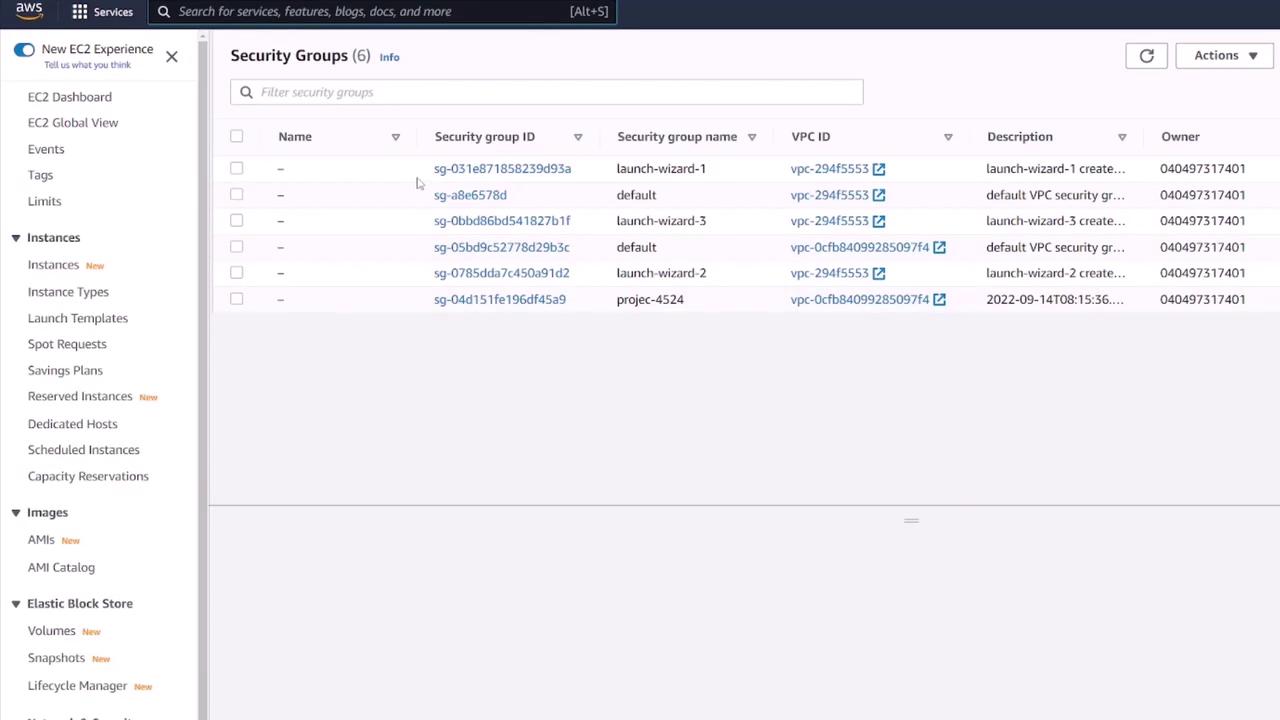
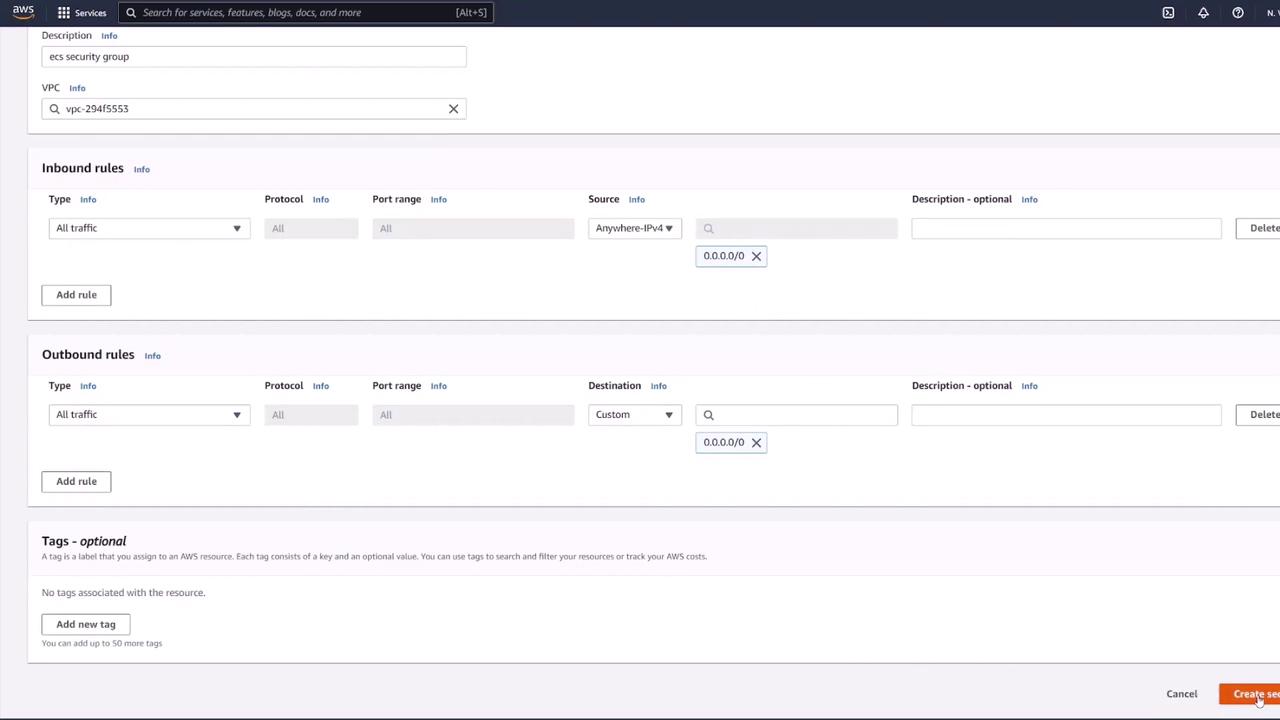
Creating a Security Group
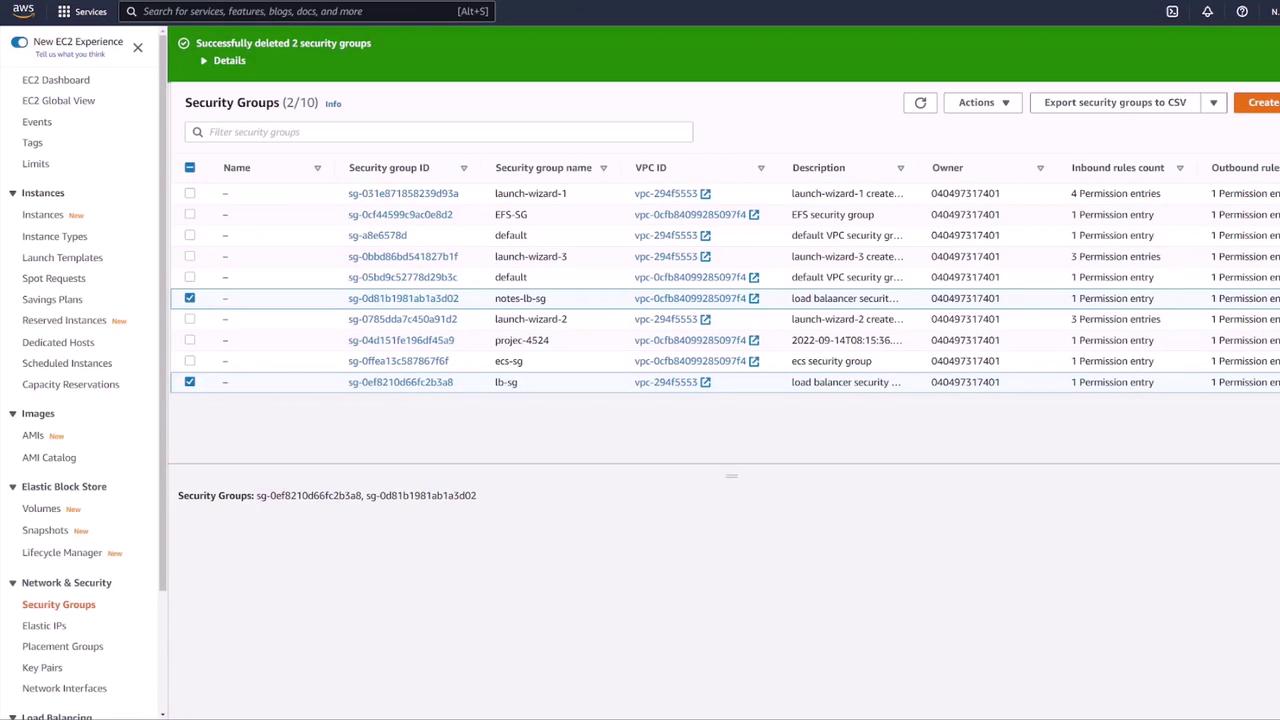
Begin by creating a security group for your ECS application. In the EC2 console, navigate to "Security Groups" and create a new group named "ECS SG" with a description like "ECS security group." For testing purposes, add a rule to allow all traffic from any IP (note that this is not recommended for production). Ensure that the security group is associated with the correct VPC.
After configuring the security group, proceed to create your ECS task definition.
Creating an ECS Task Definition
In the ECS console under "Task Definitions," create a new Fargate task definition (for example, "ECS-project-one"). Configure the following settings:
- Task Role: Use the ECS task execution role.
- Memory: Choose minimal memory options for testing.
- Containers: Add both containers to the task definition.
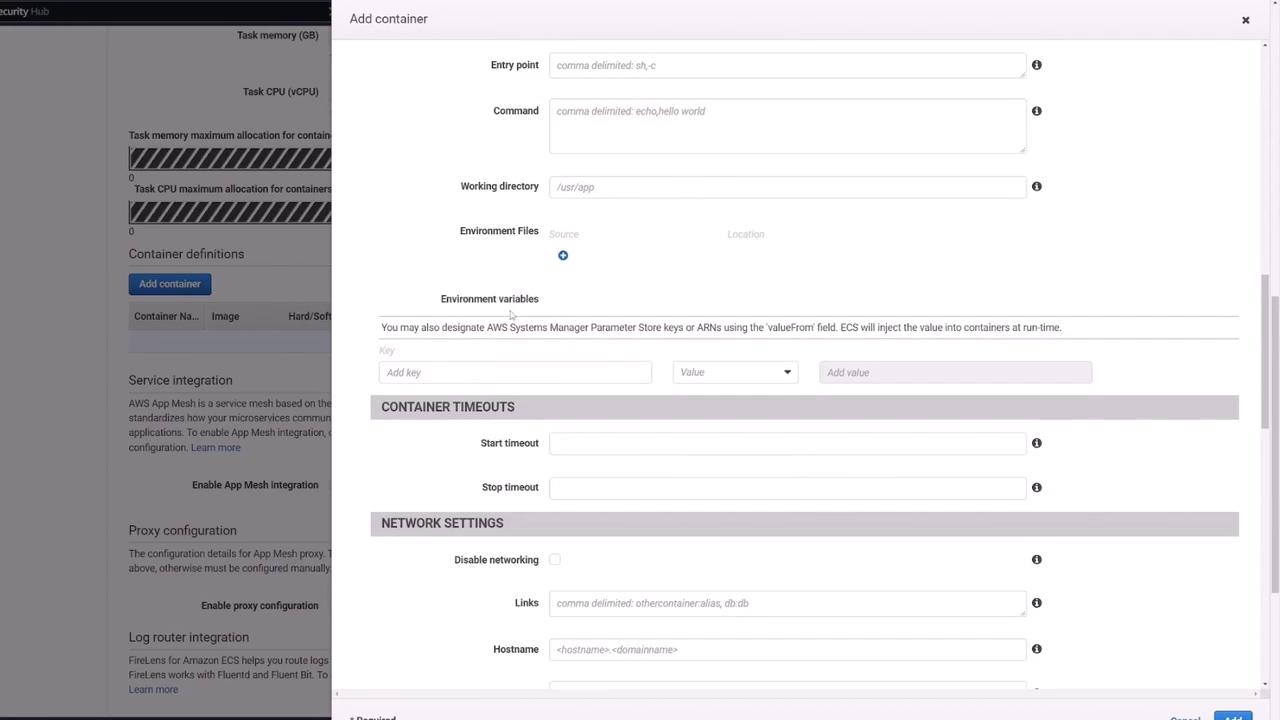
Configuring the MongoDB Container
For the MongoDB container, use the following configuration:
- Name: Mongo
- Image: Use the default Mongo image from Docker Hub.
- Port Mapping: Map port 27017.
- Environment Variables: Set up the MongoDB root username and password (e.g., mongo/password).
- Volume: Mount a persistent volume.
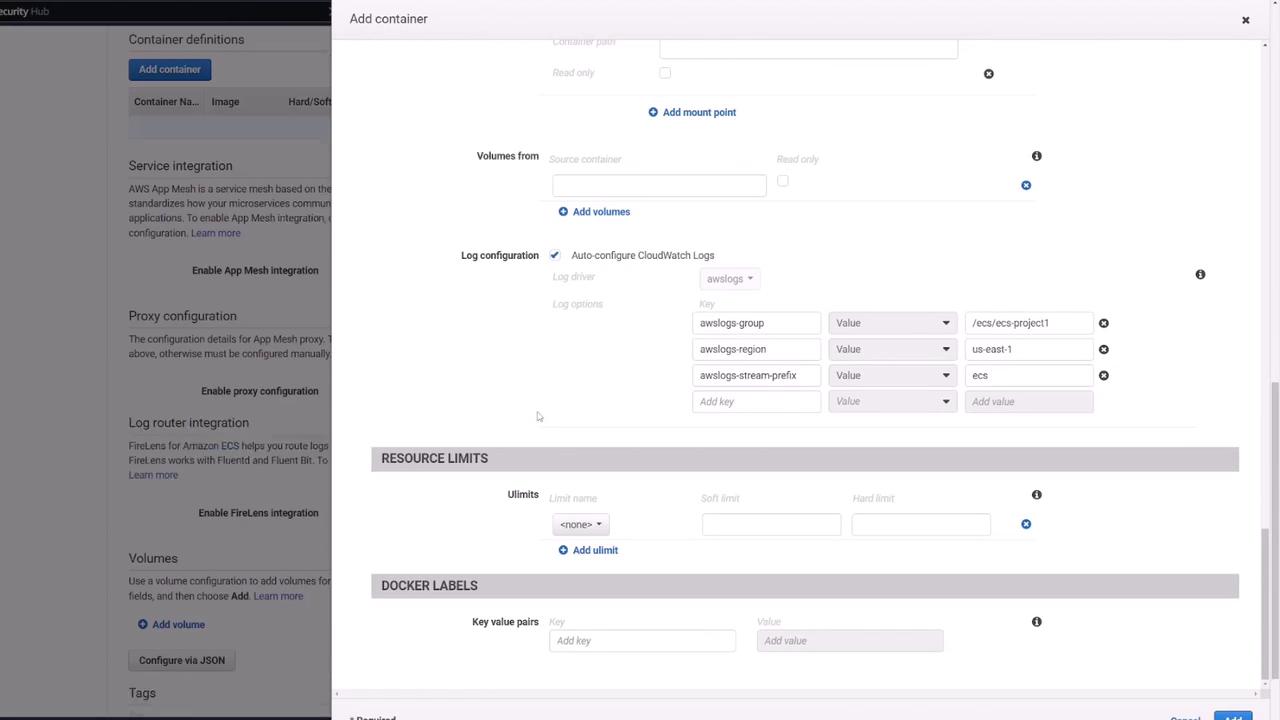
Add the following environment variables to mirror the Docker Compose file:
environment:
  - MONGO_USER=mongo
  - MONGO_PASSWORD=password
  - MONGO_IP=mongo
  - MONGO_PORT=27017
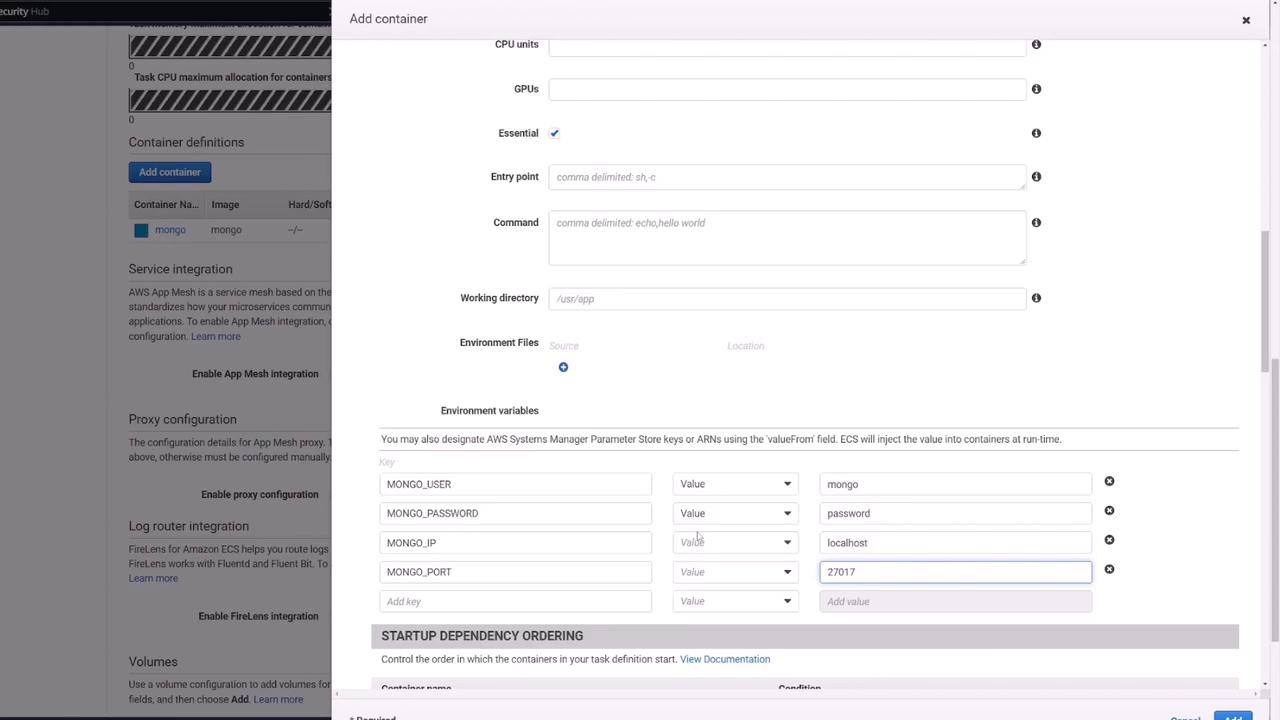
Configuring the Express API Container
For the API container:
- Name: Web API (or similar)
- Image: Use your pre-built image from Docker Hub (e.g., kodekloud/ecs-project2).
- Port Mapping: Map container port 3000.
- Environment Variables: Supply the four variables required for MongoDB connectivity.
Because ECS does not offer DNS-based inter-container resolution like Docker Compose, the API must use localhost to reach the Mongo container within the same task. With Mongo listening on port 27017, ensure your connection string matches that configuration.
Defining Volumes
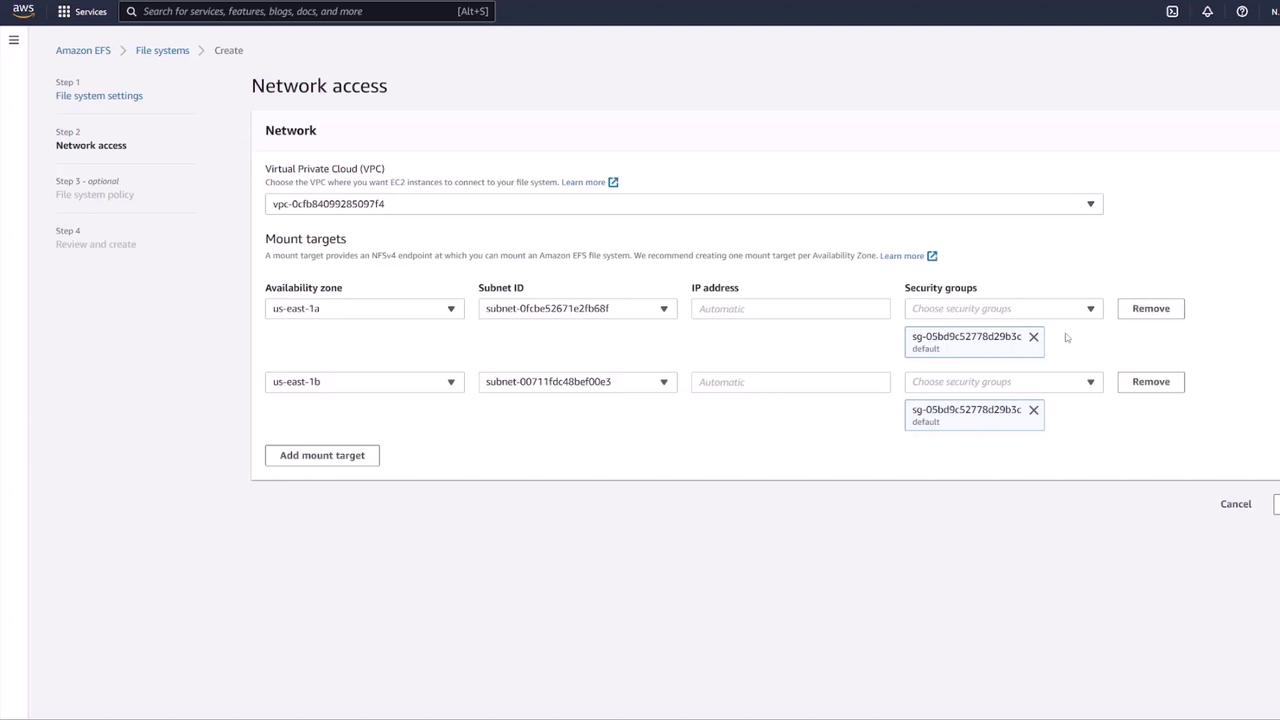
Next, add a volume (e.g., "Mongo-DB") using AWS Elastic File System (EFS) to persist MongoDB data. In the ECS task definition, navigate to the "Volumes" section and create a new volume. You must first create an EFS from the AWS console.

Follow these steps for setting up EFS:
- Create a new file system in the EFS console. Provide a name (e.g., MongoDB) and ensure it is within the same VPC as your ECS cluster.
- Customize mount targets by choosing appropriate subnets and update the default security group to one that allows NFS (typically port 2049). For enhanced security, create a dedicated security group for EFS that permits inbound NFS traffic only from the ECS security group.
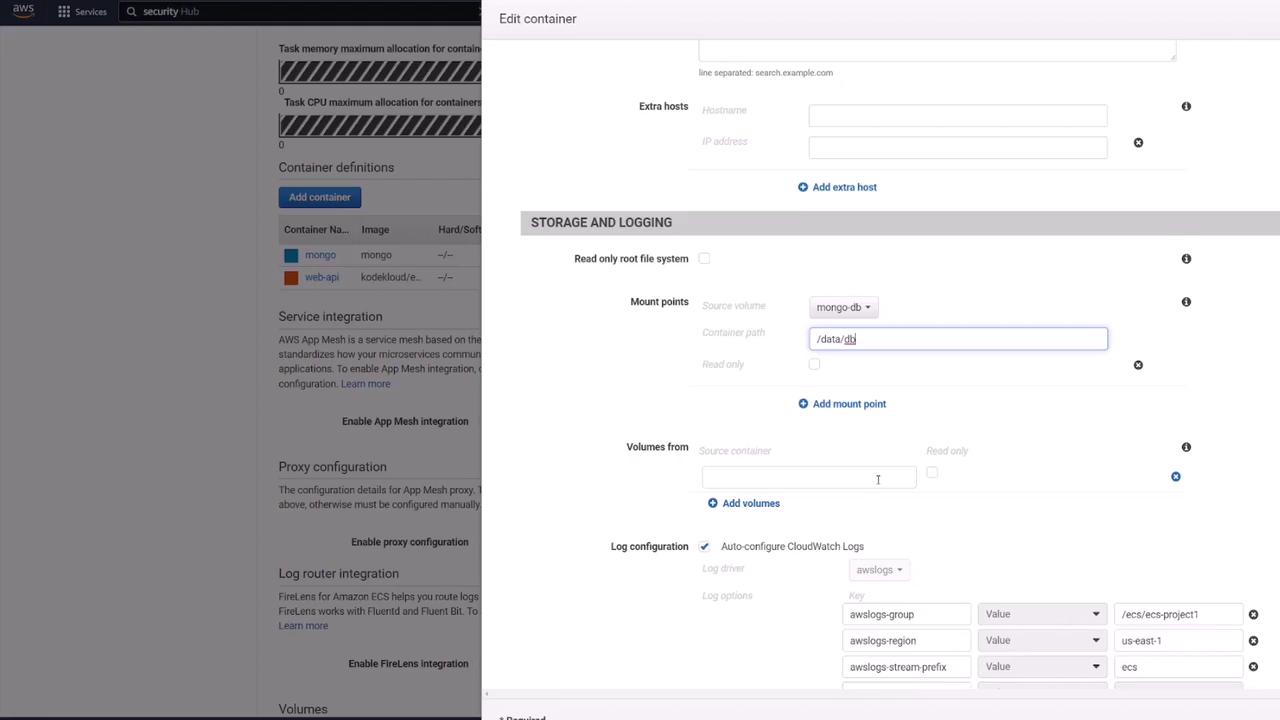
Once your EFS is created and secured, update the Mongo container’s storage settings:
- Under "Mount Points," set the source to the created volume (e.g., MongoDB) and mount it to
/data/dbas required by MongoDB.
After configuring the volumes, create or update the task definition and verify that both containers (API and Mongo) display the correct settings.
Creating the ECS Service and Load Balancer
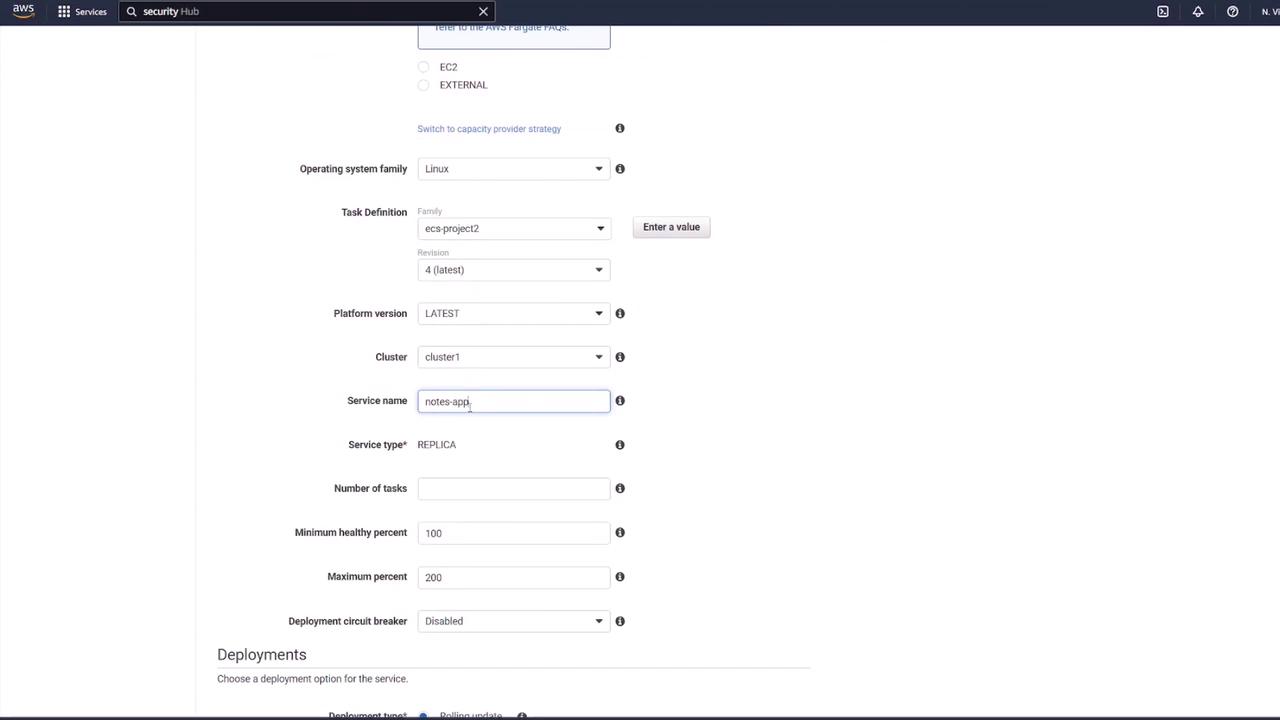
After finalizing your task definition, create an ECS service with the following steps:
- Navigate to your ECS Cluster (e.g., Cluster One) and create a new Fargate service.
- Select the newly created task definition (e.g., ECS-project-two) and specify a service name (e.g., "notes app service"). Set the desired number of tasks (typically one for testing).
- Ensure you select the proper VPC and subnets, and attach the previously created "ECS SG" security group.
Configuring the Application Load Balancer
To distribute traffic and provide a static endpoint for the application:
- Choose an Application Load Balancer and open its configuration in a new tab.
- Provide a name (e.g., "notes lb"), set it as internet-facing, and select the IPv4 address type. Ensure that it is associated with the same VPC.
- Create a dedicated security group for the load balancer (e.g., "lb-SG"). Although opening port 3000 might be an initial thought, it is preferable to have the load balancer listen on the default HTTP port (80) and forward traffic to the container’s port (3000). Configure the rule to allow HTTP traffic from any source.
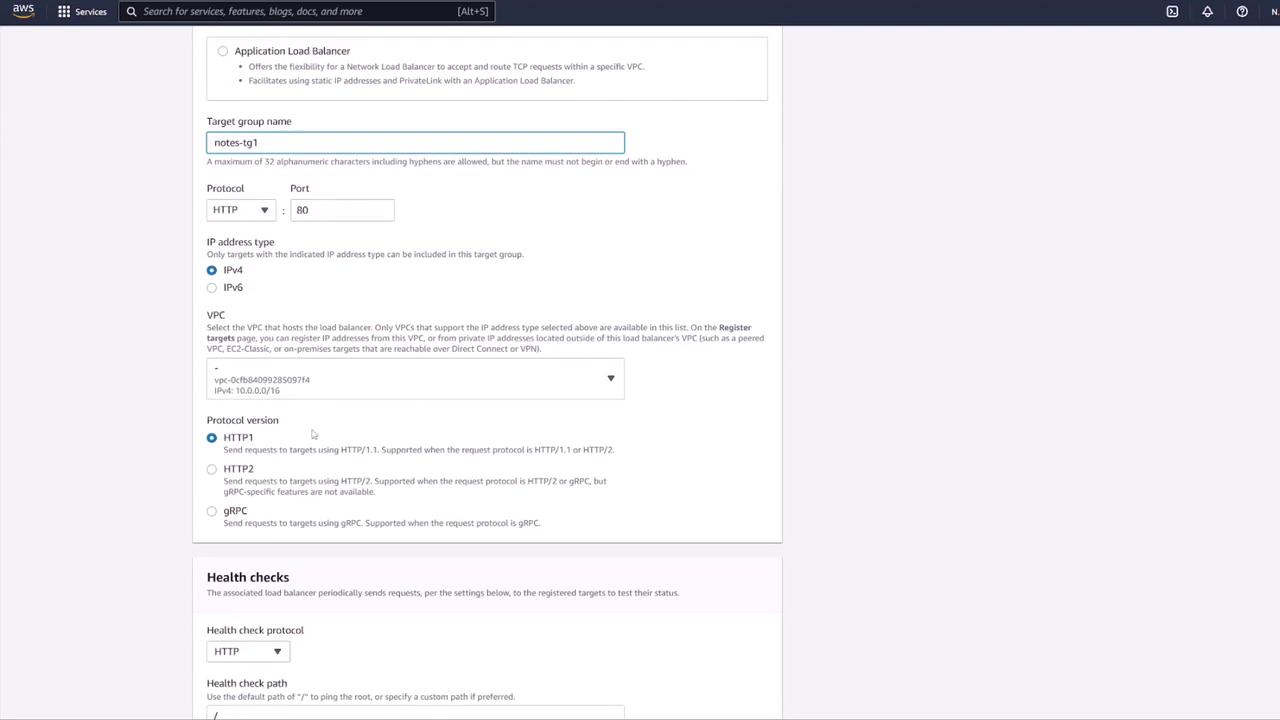
- Next, create a target group (e.g., "notes-targetgroup1"). For ECS tasks, select the target type as IP. Configure the health check settings—by default, the health check is set to
/, but since application endpoints reside under/notes, update the health check path to/notes(or set up a dedicated health check endpoint).
- In the ECS service configuration, link the load balancer by selecting the Application Load Balancer and mapping it to the API container (listening on port 3000). The load balancer will listen on port 80 and forward traffic to the target group.

Review all settings and create the service. Initially, the ECS console will show tasks in a provisioning state until they run.
Verifying the Deployment
Once the tasks are running, test the setup by either accessing the container’s public IP or, preferably, using the load balancer’s DNS name. For example, sending a GET request to:
http://<load-balancer-dns>/notes
should return the list of notes. Tools like Postman can be used to verify the RESTful API endpoints.
A sample POST request body to create a new note:
{
  "title": "second note",
  "body": "remember to do dishes!!!!"
}
A successful GET request may return a response similar to:
{
  "notes": [
    {
      "_id": "6321a3c034fd55dce212834",
      "title": "second note",
      "body": "remember to do dishes!!!!",
      "__v": 0
    }
  ]
}
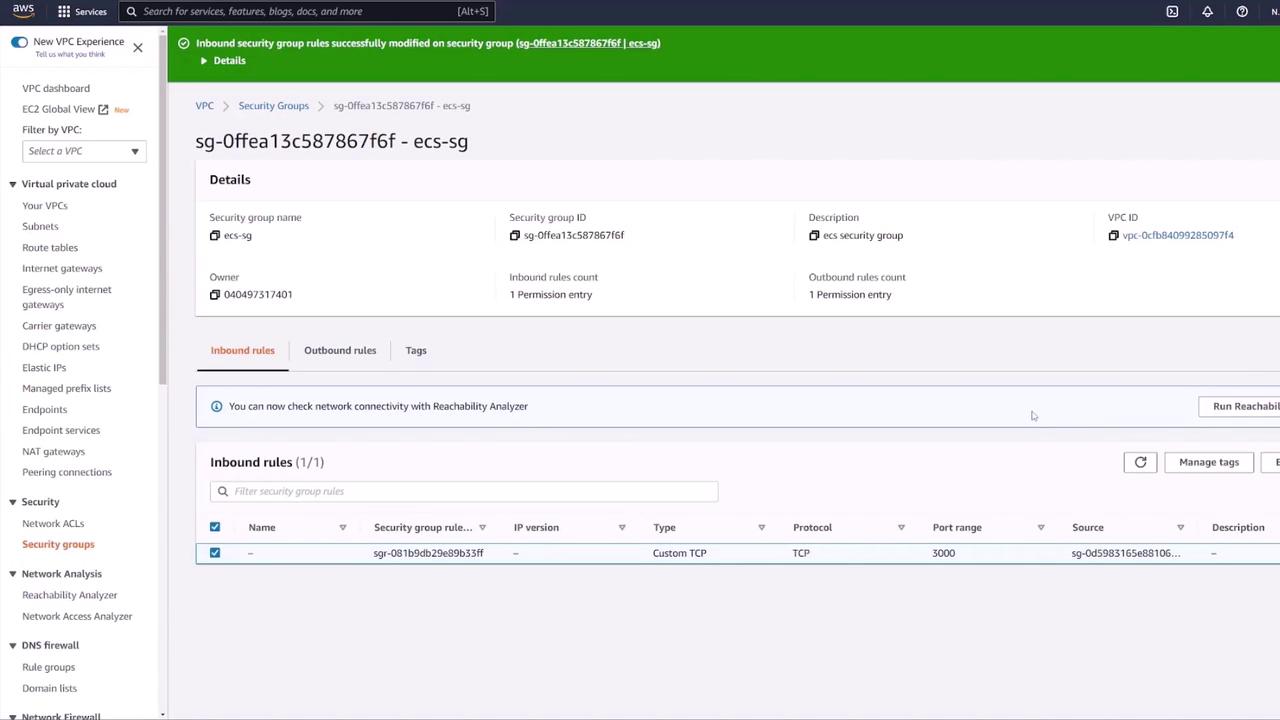
Once the deployment is verified, update your ECS security group ("ECS SG") to restrict inbound traffic. Instead of allowing all traffic, configure a custom TCP rule for port 3000 that permits traffic only from the load balancer’s security group. This ensures that only load-balanced traffic reaches the API container.
Next Steps
After confirming that your application is functioning as expected, consider tightening your security group rules and reviewing best practices for production deployments.
This article demonstrated how to deploy a multi-container application on ECS using Docker Compose as a reference. We covered the configuration of ECS task definitions, setting up persistent storage with EFS, and configuring an Application Load Balancer to securely distribute traffic among containers.
For additional resources and detailed AWS documentation, please refer to:
Happy deploying!
Watch Video
Watch video content