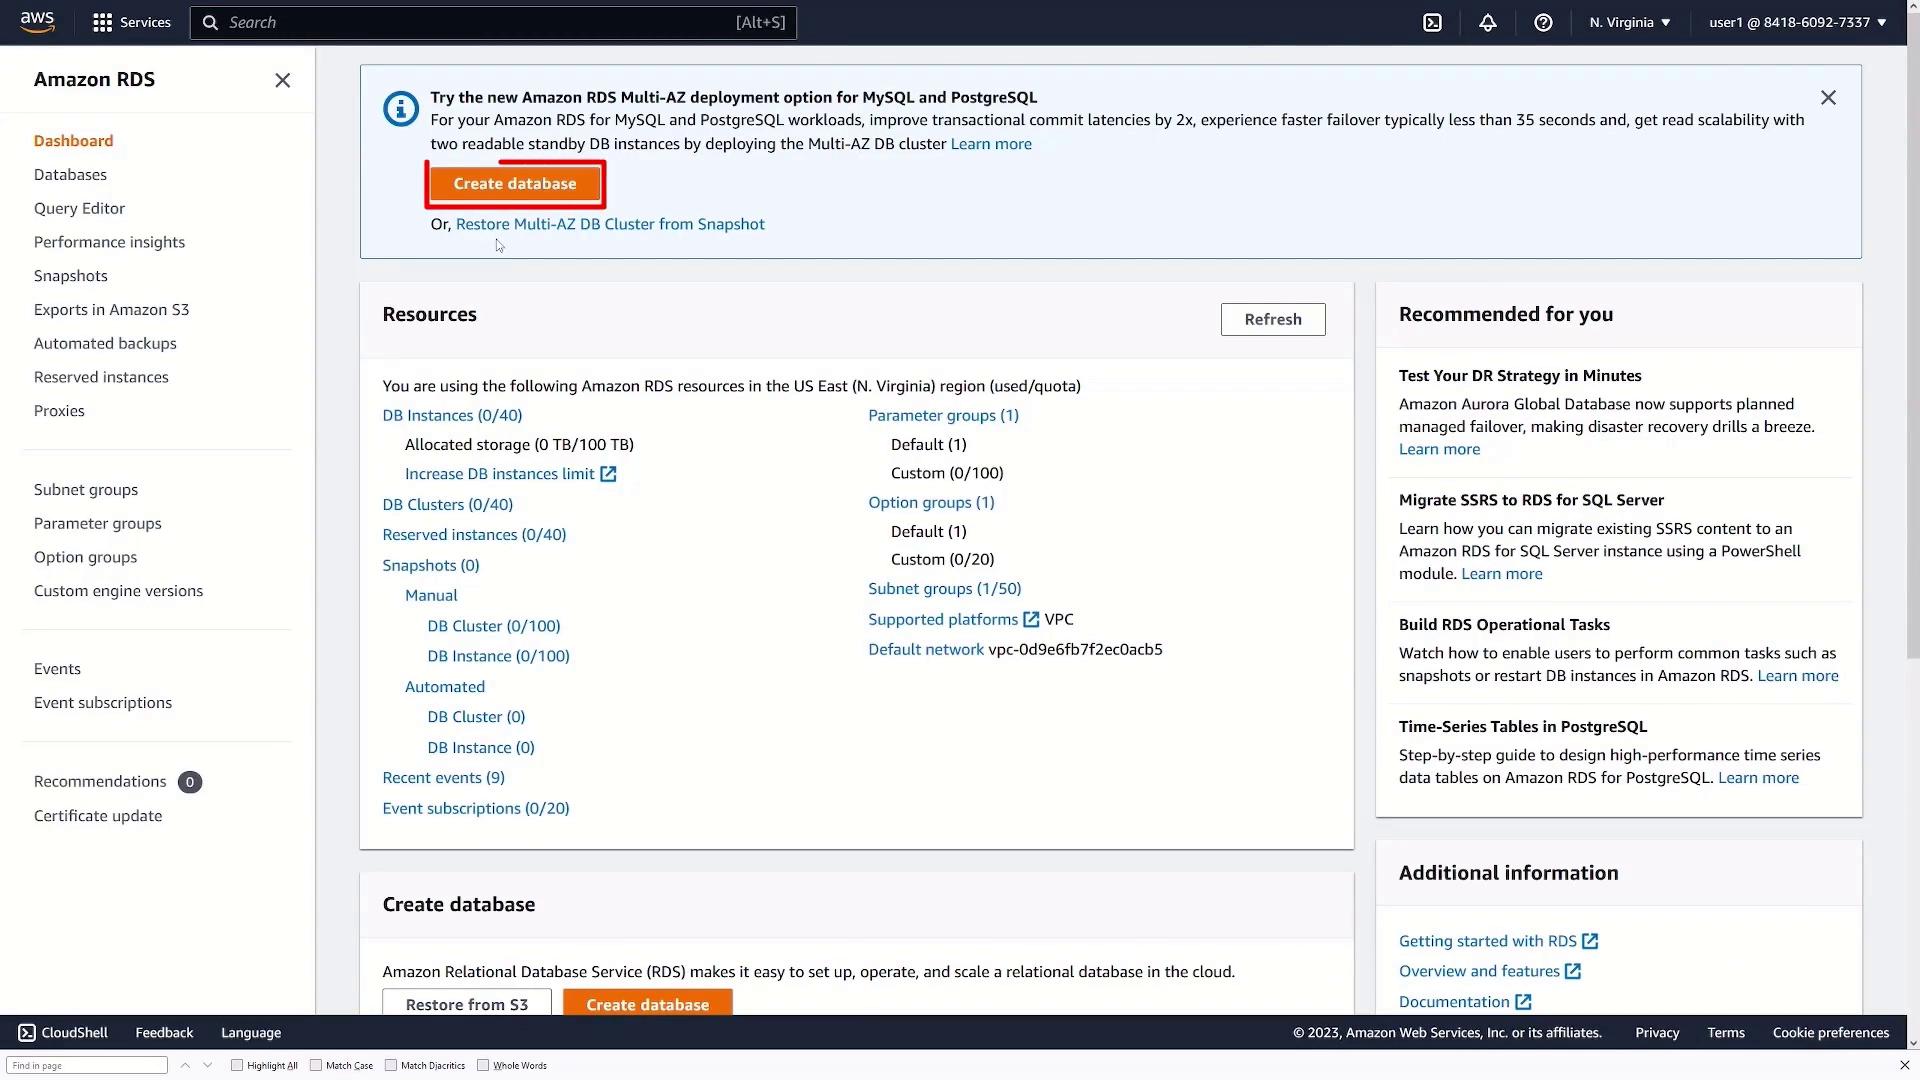
Step 1: Launching the AWS RDS Console
- Log in to the AWS Console.
- Search for “RDS” and navigate to the Amazon RDS dashboard.
- Click Create database. This button might appear at the top of the page or in another prominent location.
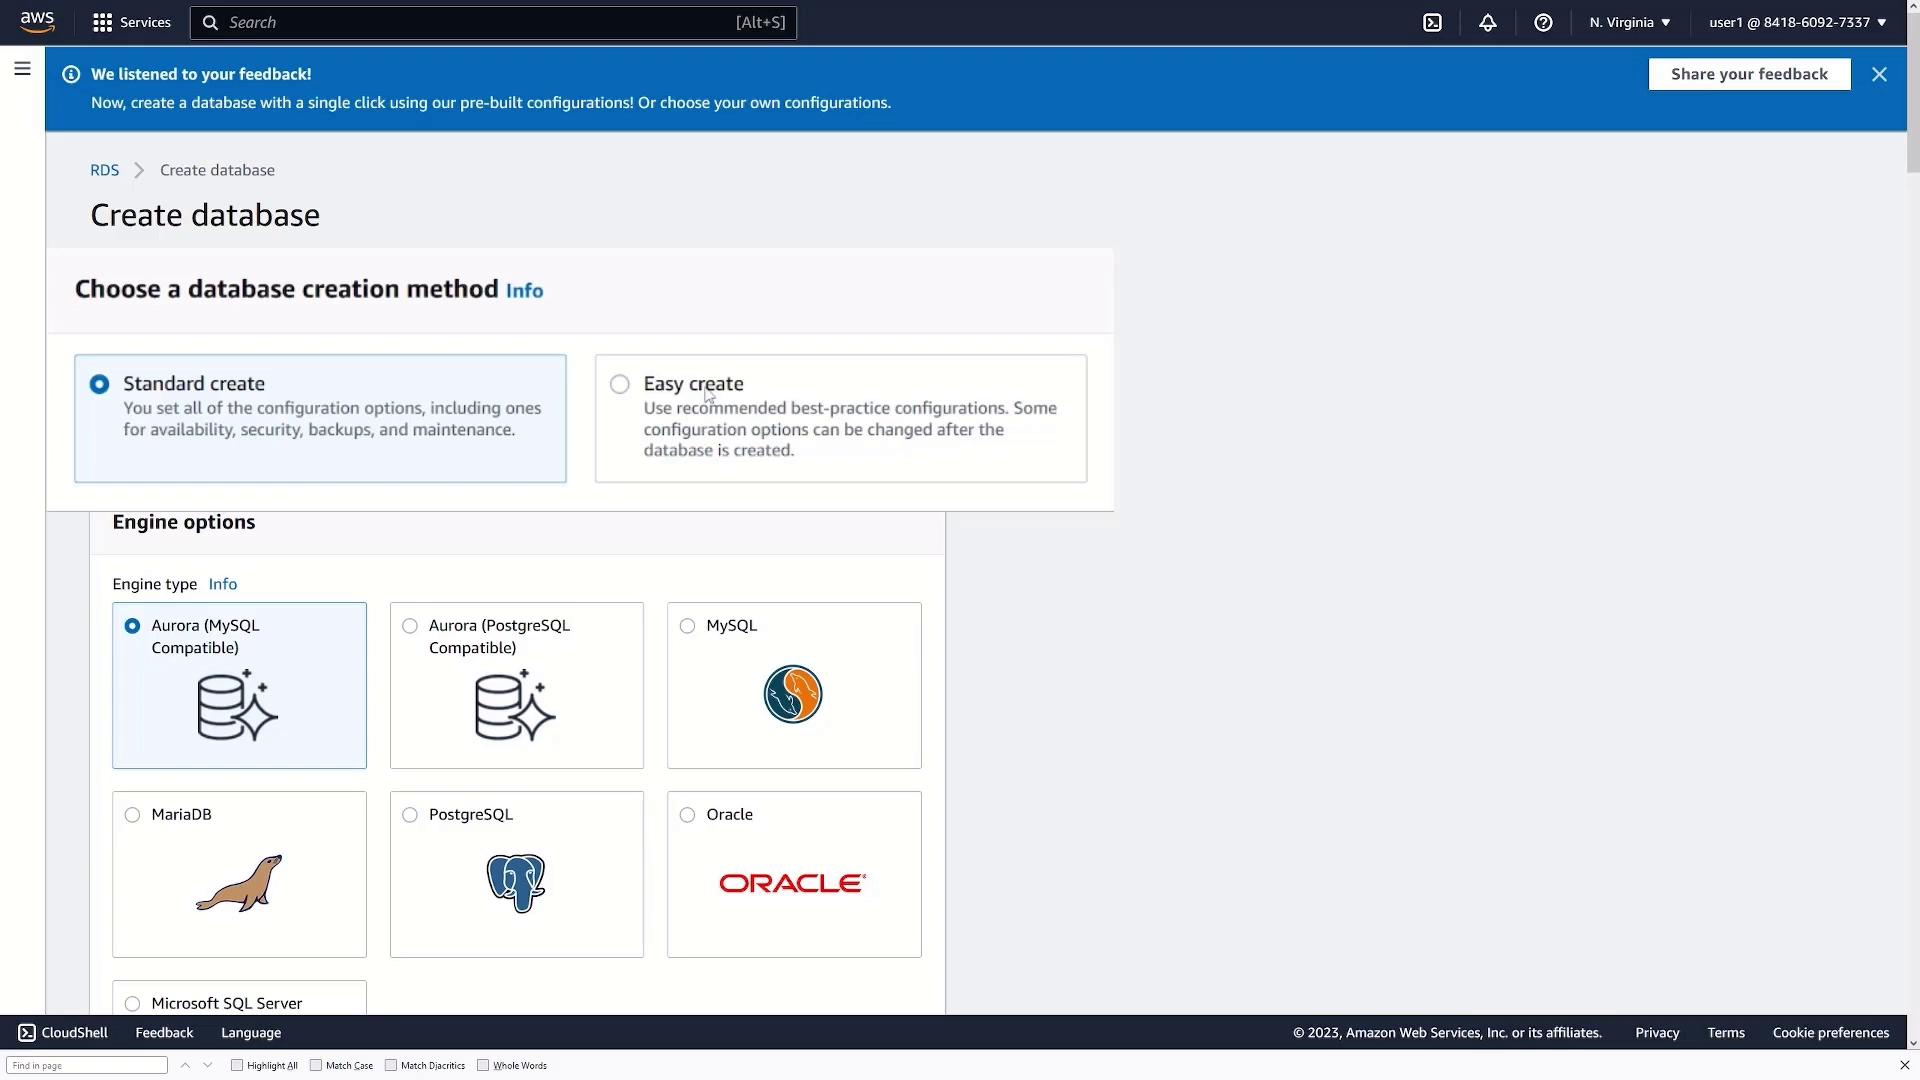
Step 2: Choosing the Creation Method
If you’re new to the RDS creation page:- Click Create database.
- You will see two options: Standard Create and Easy Create.
- Easy Create applies best practices automatically.
- For this demo, select Standard Create to access all configuration settings.
Step 3: Configuring the Database Engine
Under Engine Options, perform the following:- Select PostgreSQL or your preferred database engine.
- Choose the specific PostgreSQL version (the default version works fine for this demonstration).
- Production for high availability.
- Dev/Test for development or testing scenarios.
- Free Tier if eligible.
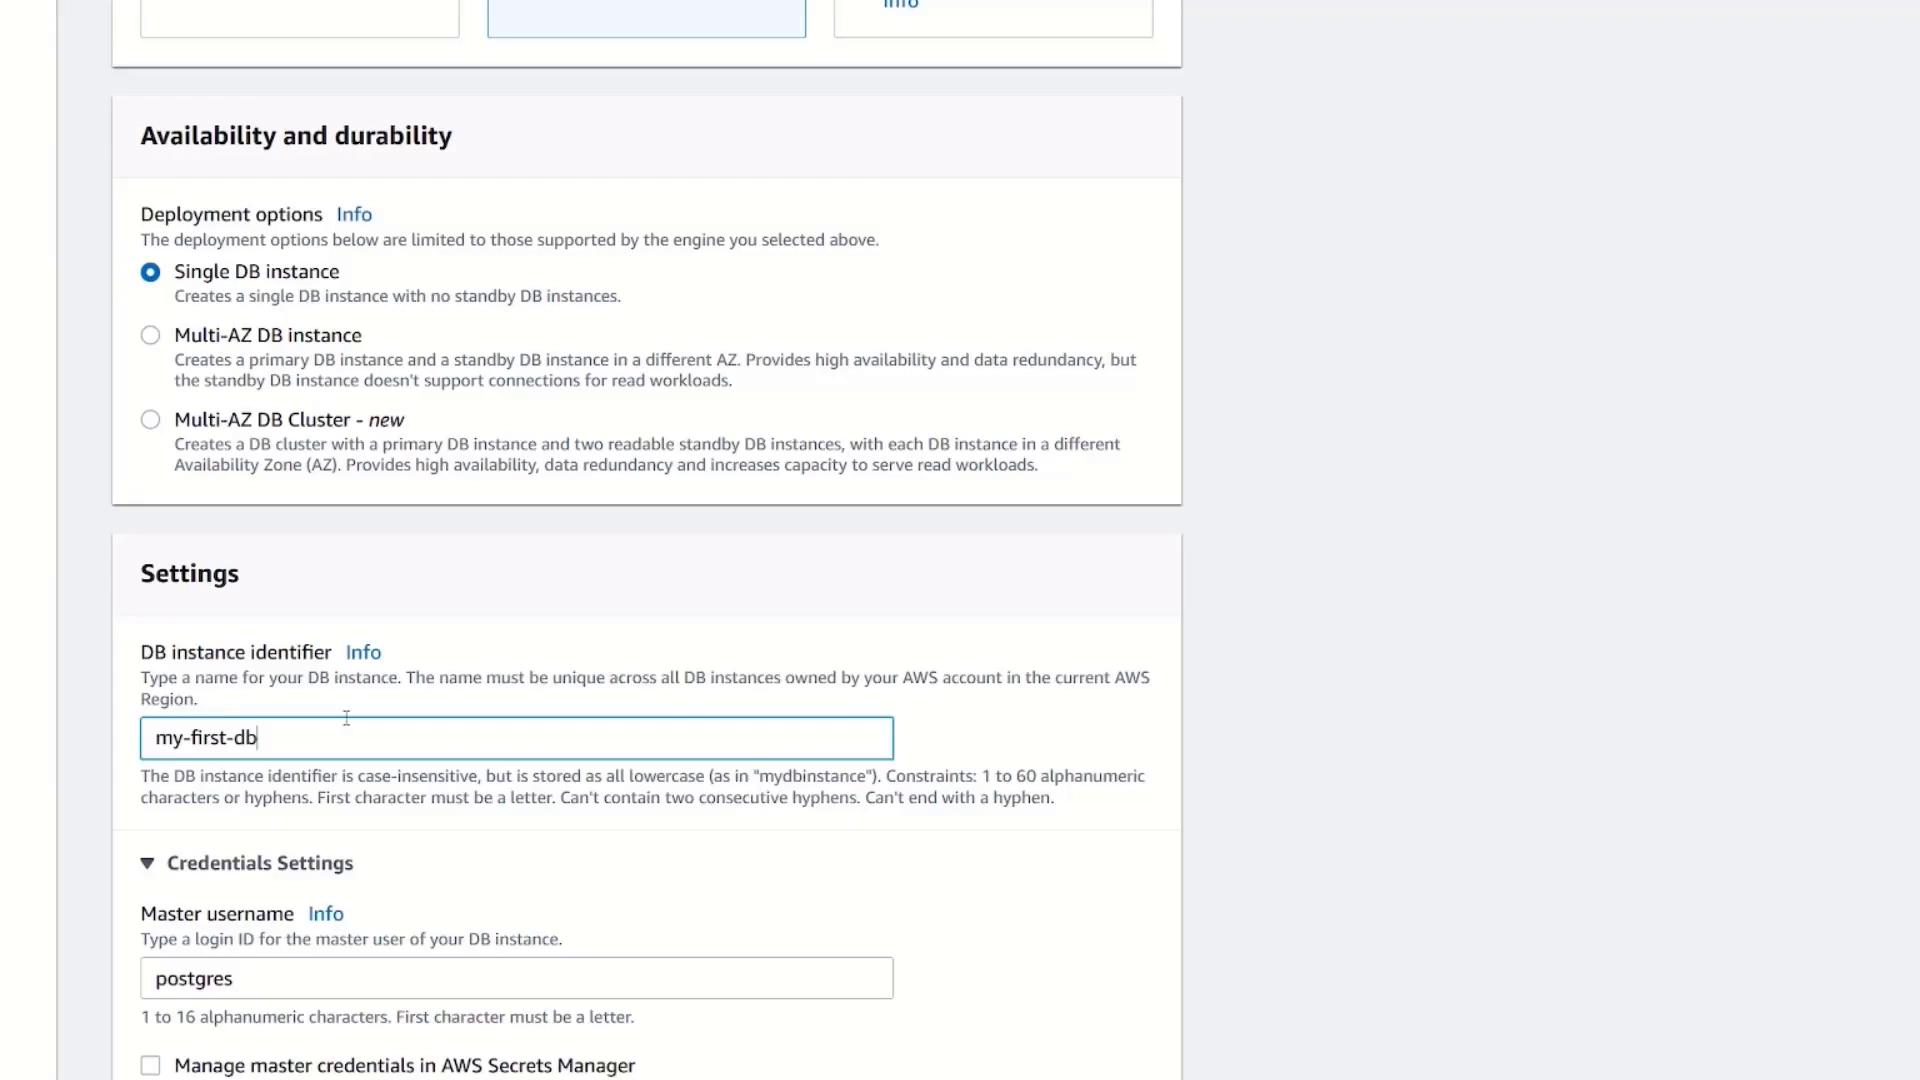
Step 4: Database Instance Configuration
Configure your database instance with these details:- DB Instance Identifier: Provide a name (e.g., “my-first-db”).
- Master Username: The default for PostgreSQL is “postgres.”
- Password: Enter a secure password or let AWS generate one.
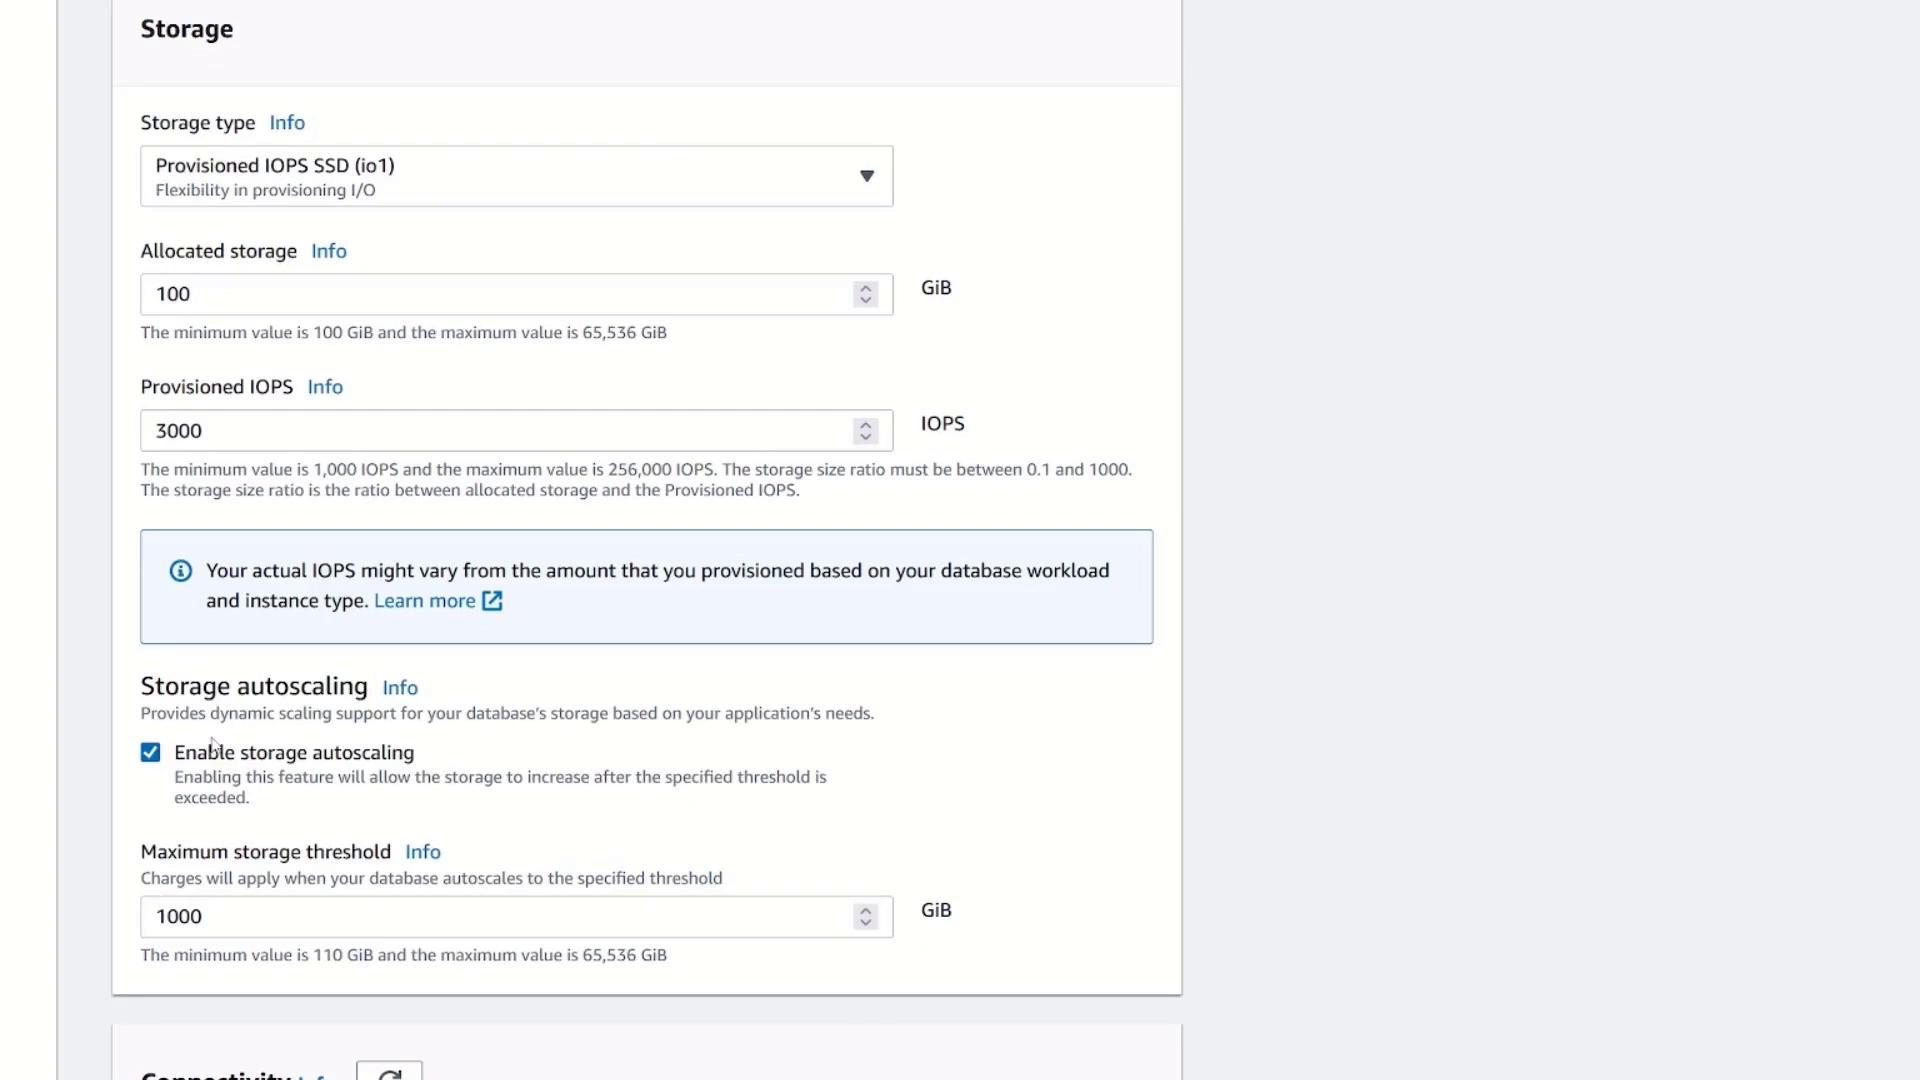
Instance and Storage Settings
Under Instance Configuration:- Select the EC2 instance type. The default suffices for a demo.
- Adjust storage settings:
- Specify the storage type.
- Allocate an appropriate amount (e.g., free tier typically requires at least 100 GB).
- Enable storage autoscaling if desired.
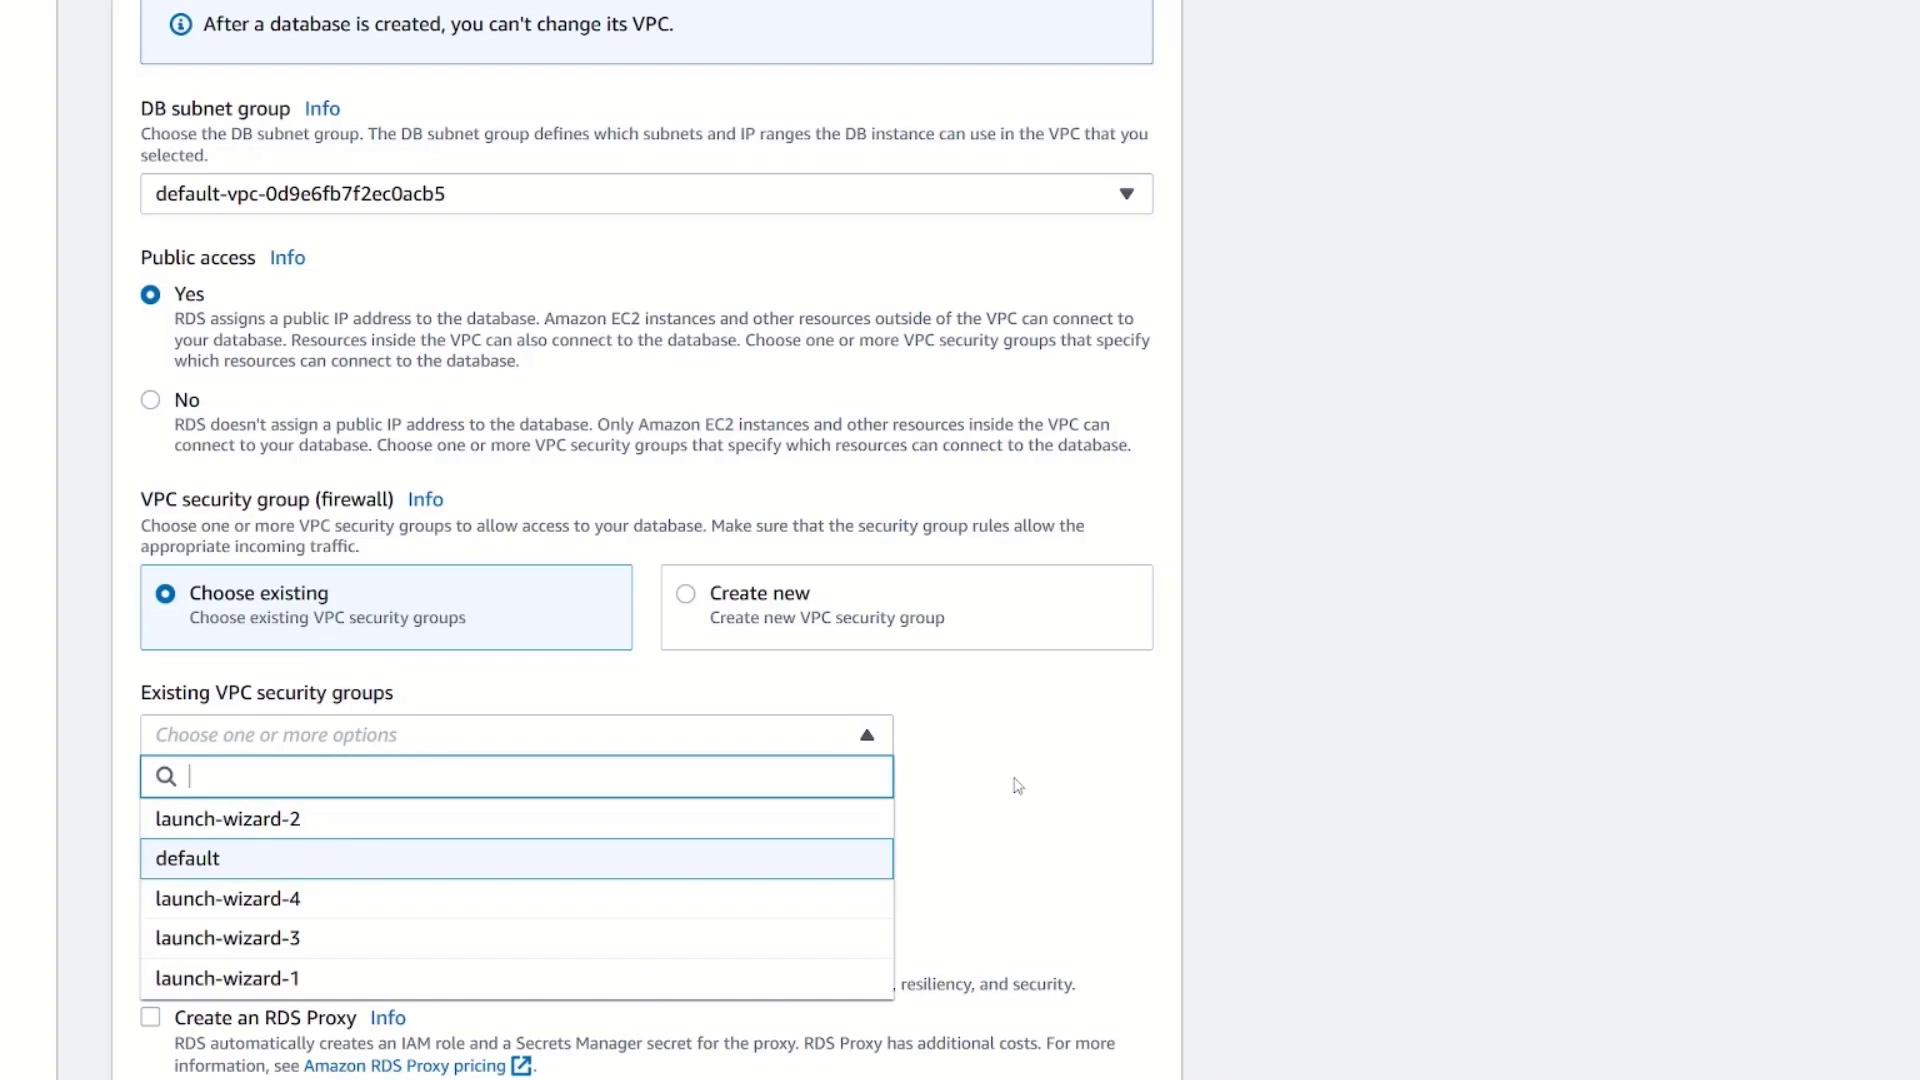
Step 5: Establishing Connectivity
Move to the Connectivity section and configure the following:- Select a VPC. If unsure, choose the default VPC.
- Use the default subnet group if applicable.
- For demonstration purposes, enable public access to connect directly from your local machine.
- Create or select a security group; for this demo, create a new security group named “my DB security group.”
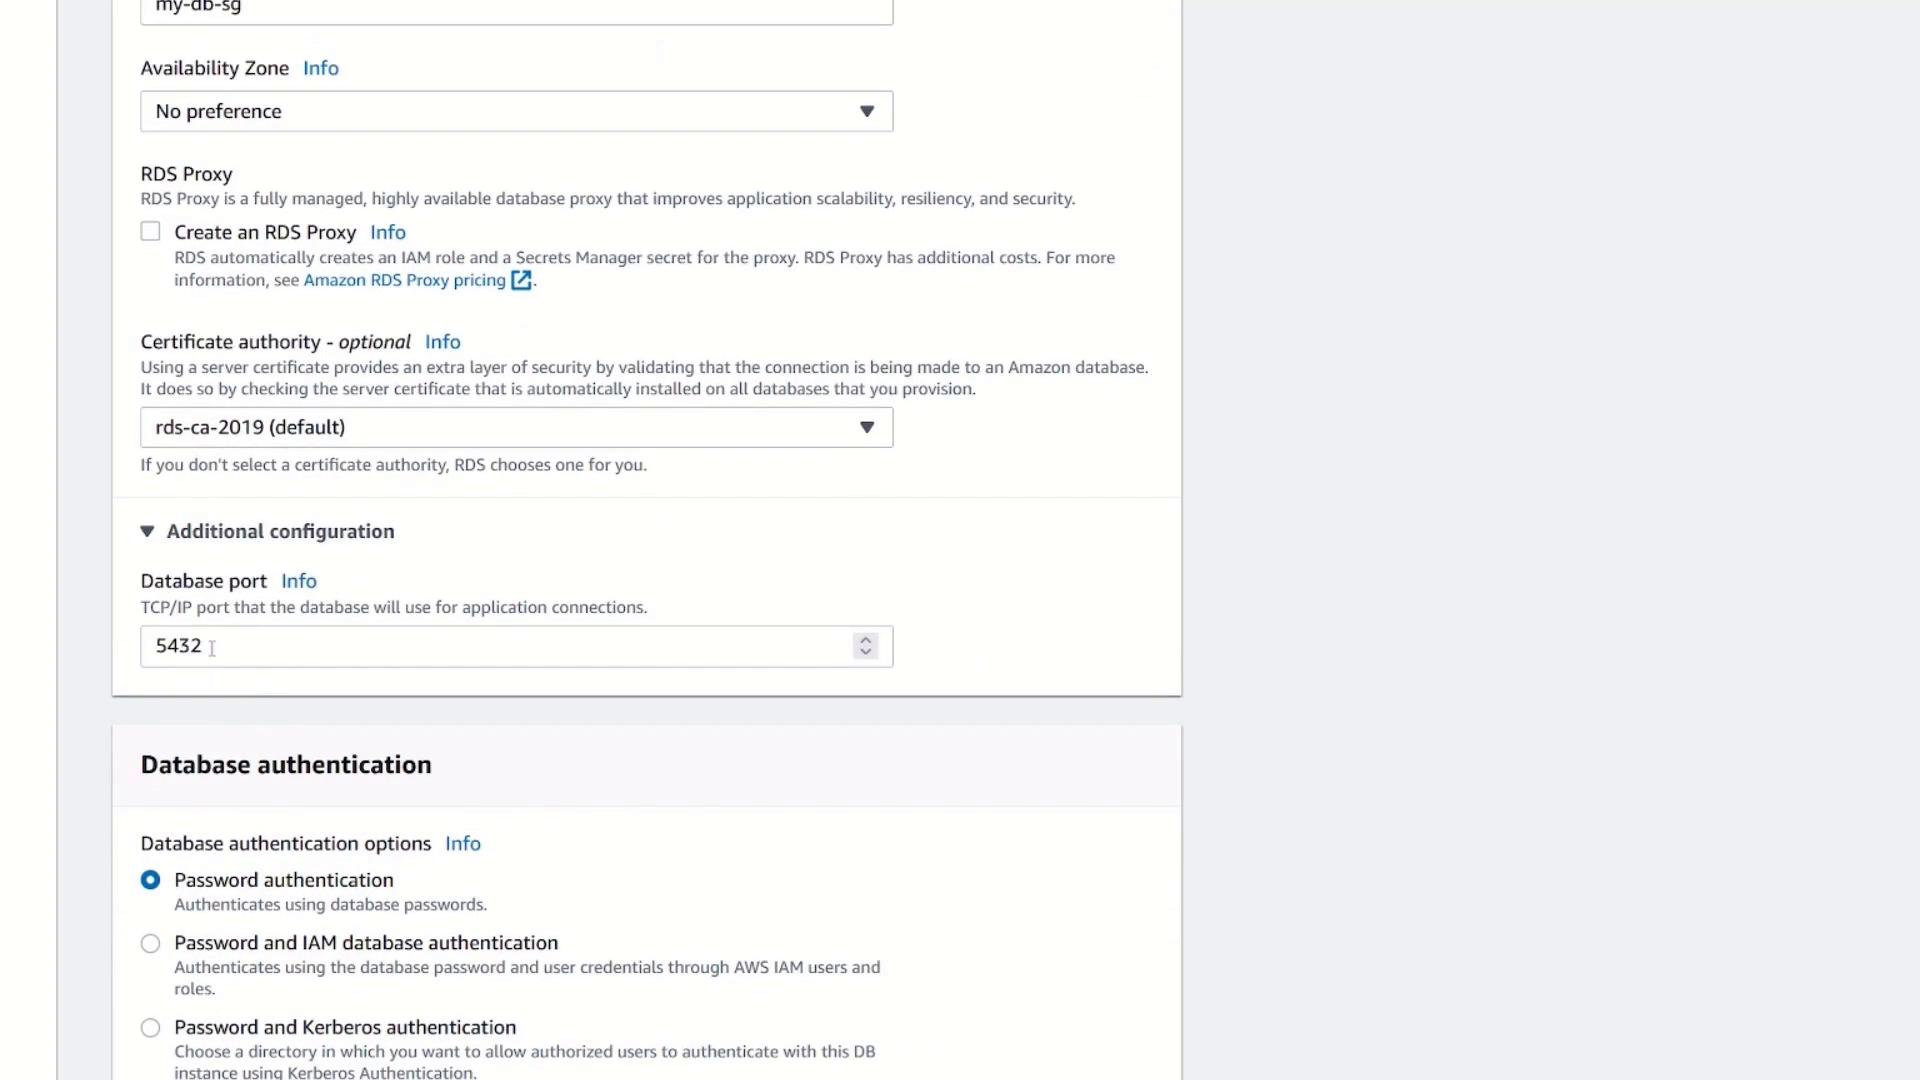
- Choose the preferred availability zone.
Step 6: Additional Configuration Settings
In the Additional Configuration section:- Confirm that the database will use the default PostgreSQL port.
- You can modify authentication methods if needed, but for this demonstration, we’ll use the default password authentication.
- Other options such as monitoring, backup configurations, encryption, and RDS Proxy remain at their default values.
Step 7: Creating the Database
Review all settings carefully and click Create database. The creation process might take several minutes. When completed, the database status will update and display connectivity information.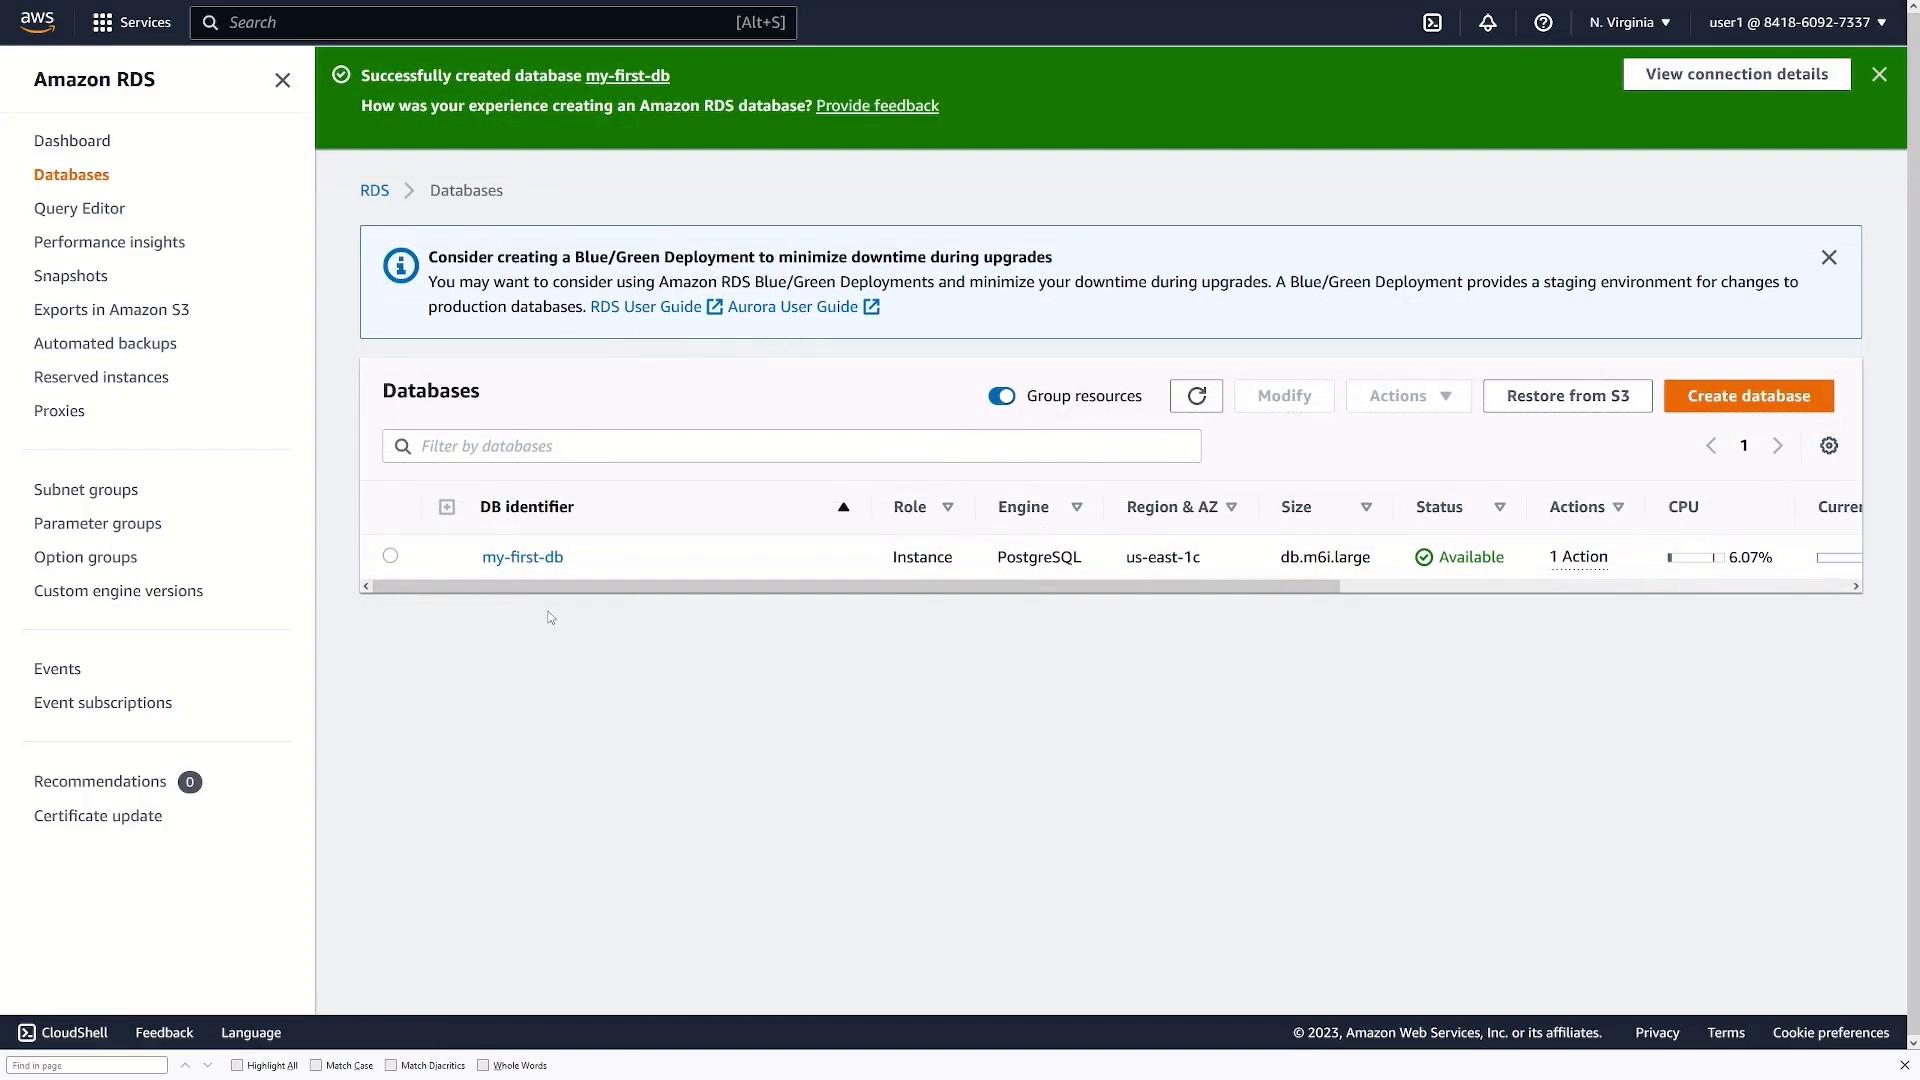
Step 8: Retrieving Connection Details
Select your new database to access its details. You will see the endpoint (acting as a domain name or IP address) and the port number (default PostgreSQL port). These details are vital for connecting your applications to the RDS instance.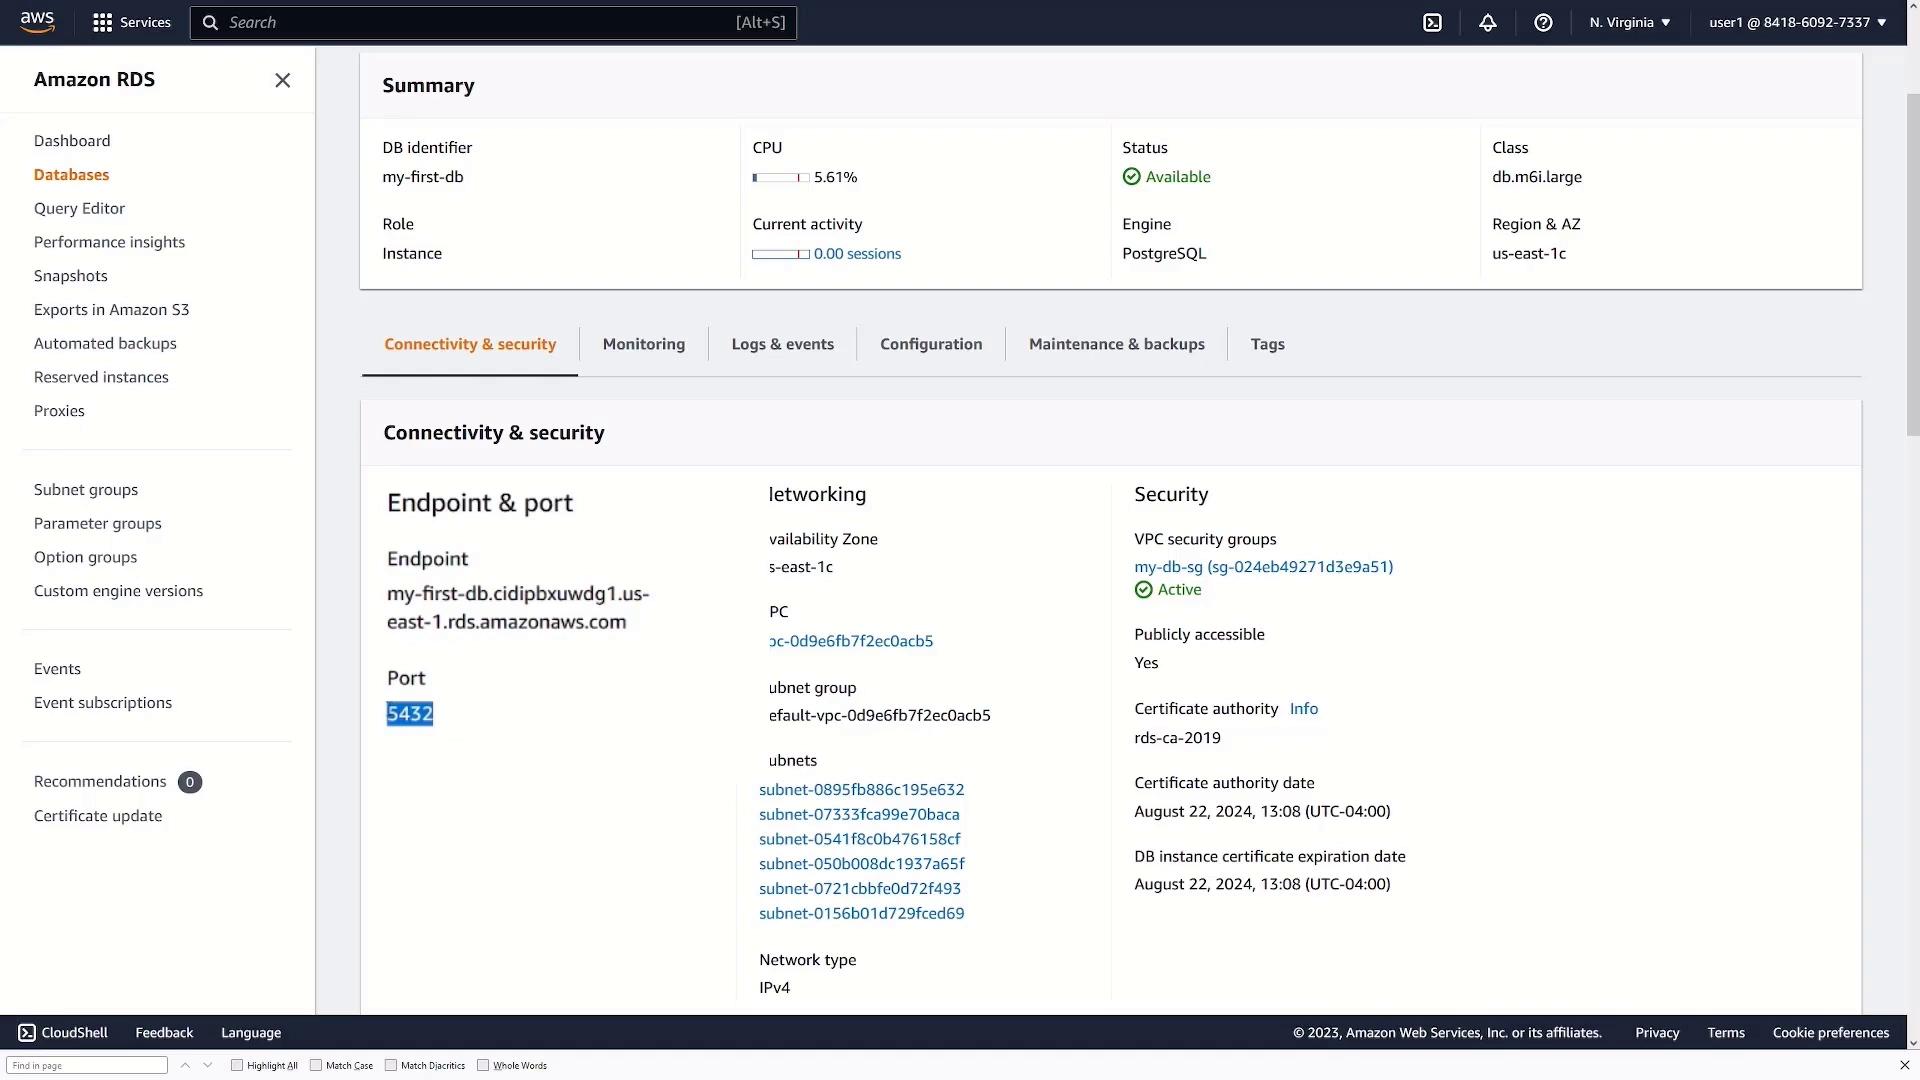
Connection Information
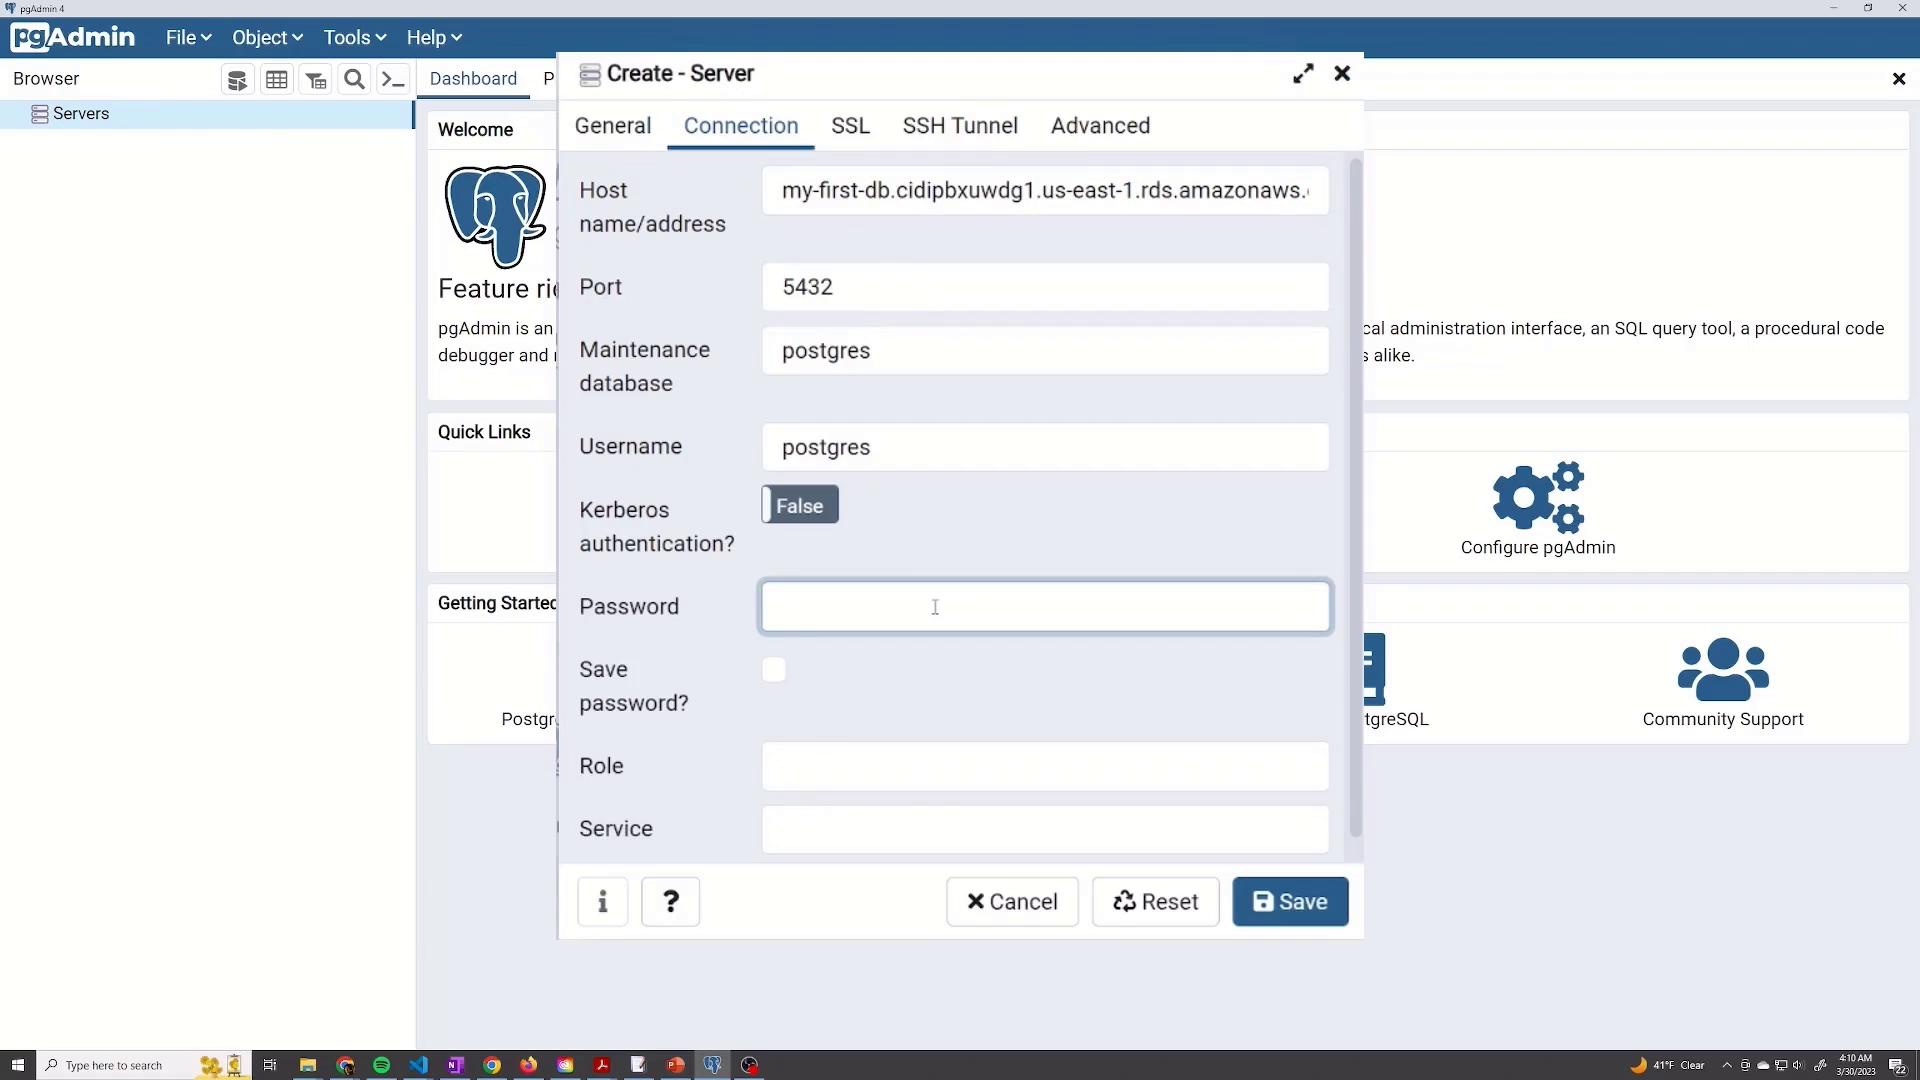
For example, when configuring your application, use the following credentials:- Host: [Endpoint from RDS]
- Port: [Port number from RDS]
- Username: postgres
- Password: [Your password]
- Database: postgres (default database)
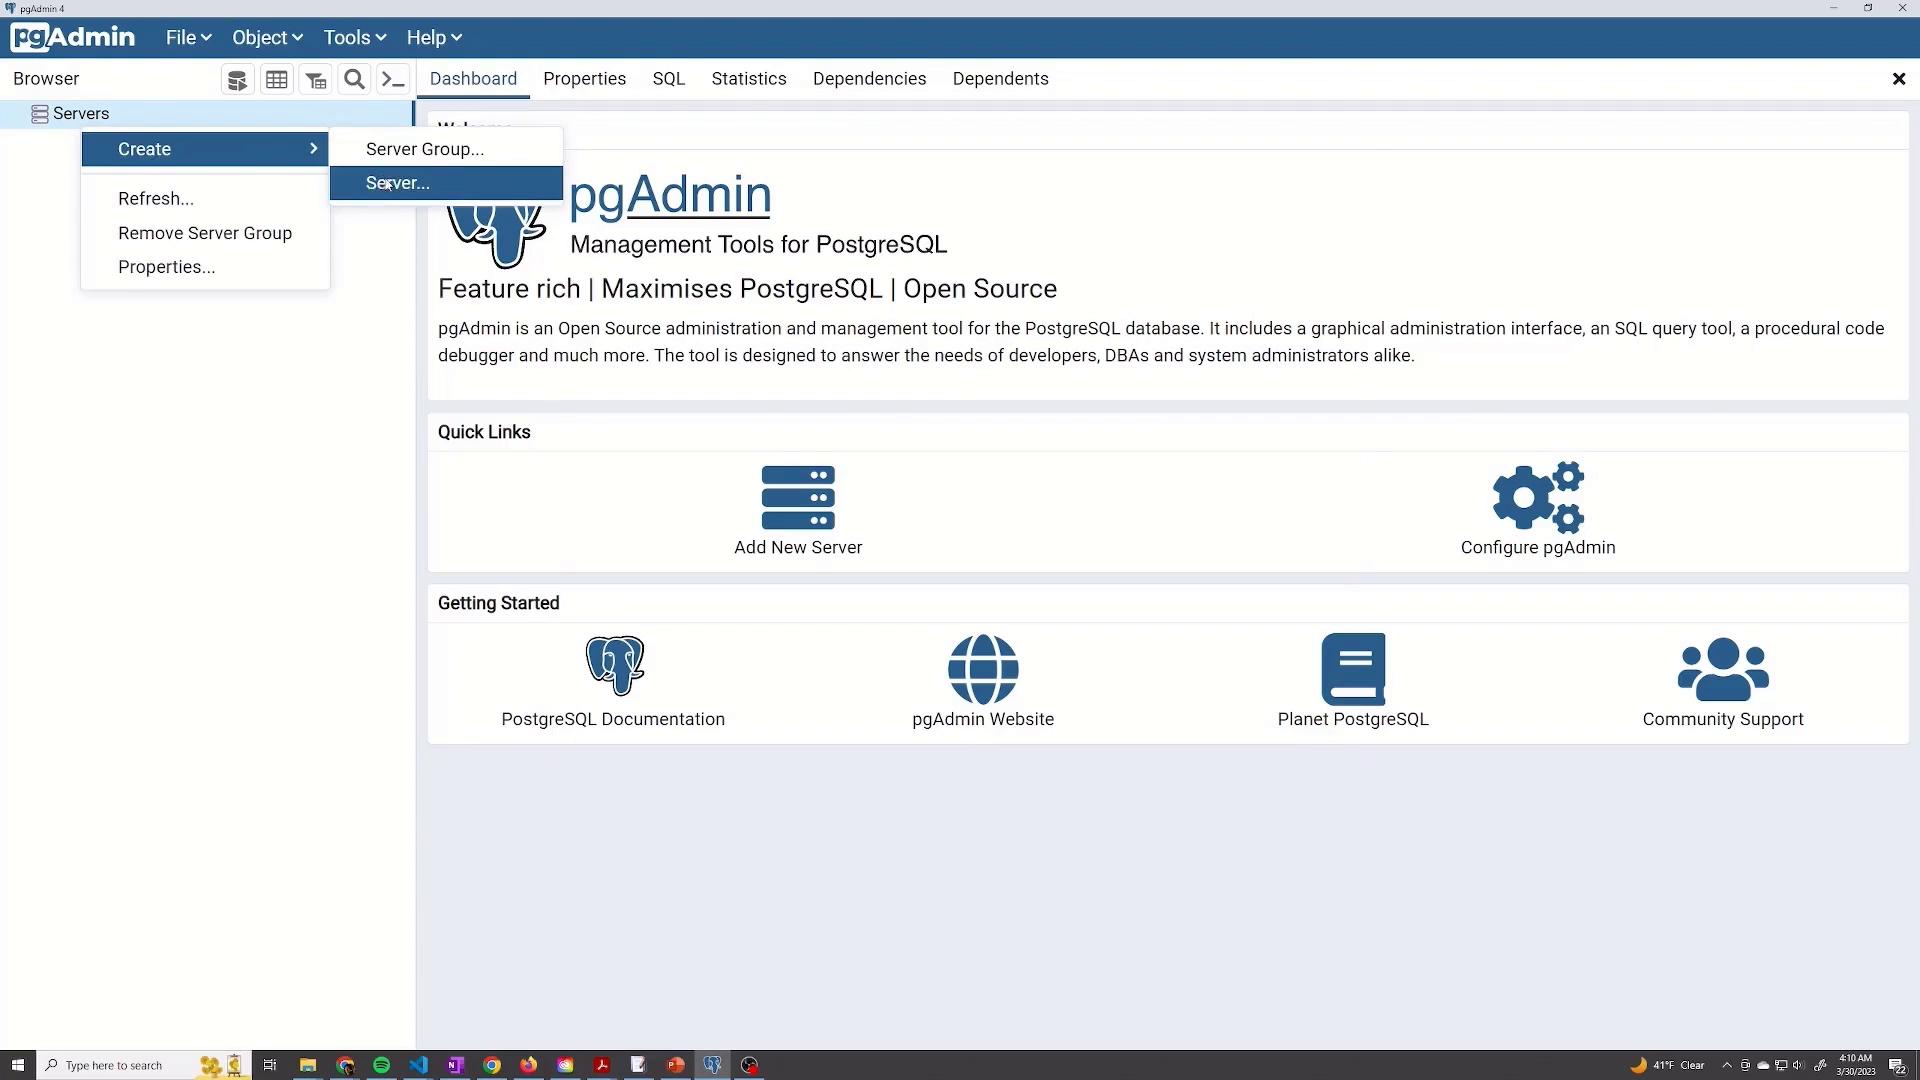
You can also manage your PostgreSQL database using pgAdmin, a graphical user interface. Simply create a new server connection in pgAdmin using the RDS endpoint and your credentials.
Step 9: Managing the PostgreSQL Database
Once connected, you can manage your PostgreSQL database as if it were locally hosted. For instance, you might create a new database for your application:- Database Name: my-app

Always verify your SQL schema definitions to avoid UNIQUE constraint errors during data insertion.
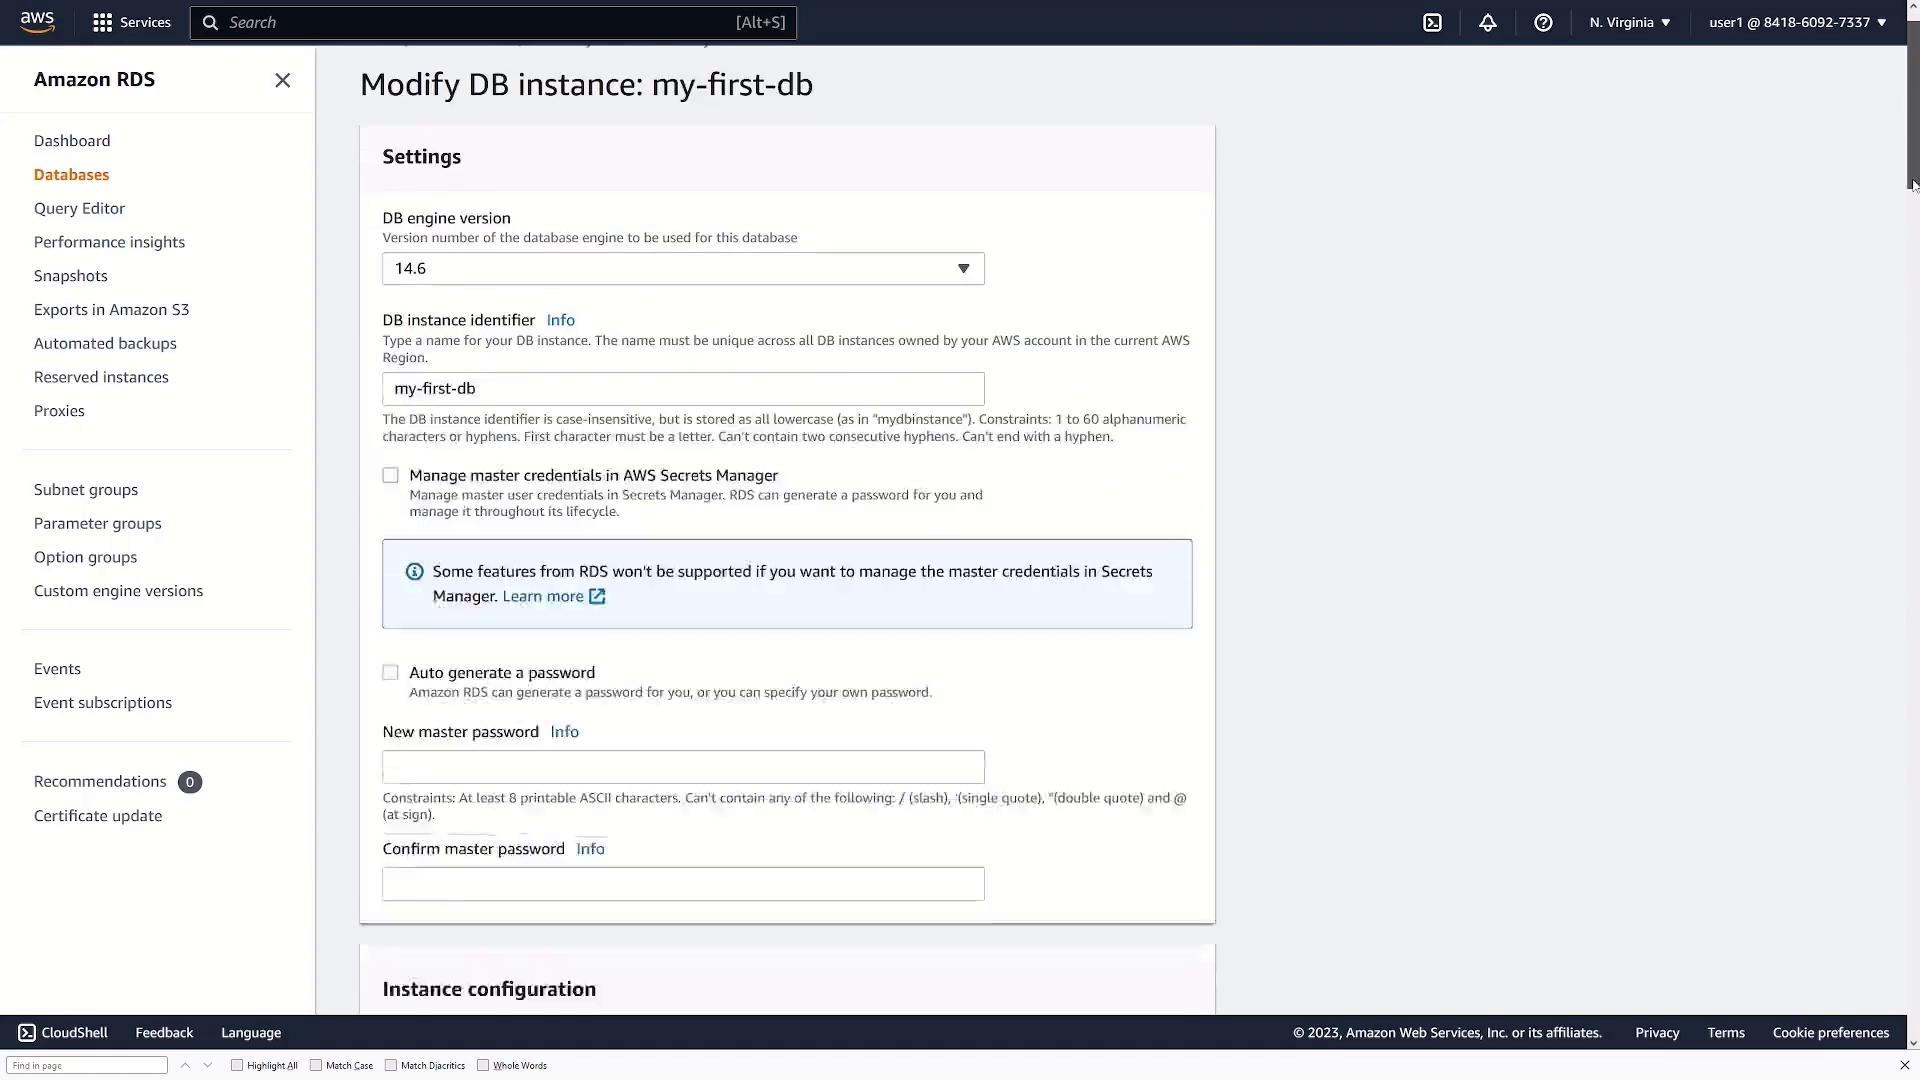
Step 10: Modifying and Deleting the Database Instance
If you need to update configurations later:- Click Modify in the AWS Console to change settings such as the DB engine version, instance identifier, or password management options.
- Click Delete.
- Choose whether to retain snapshots and backups.
- Acknowledge the deletion confirmation to permanently remove the instance.
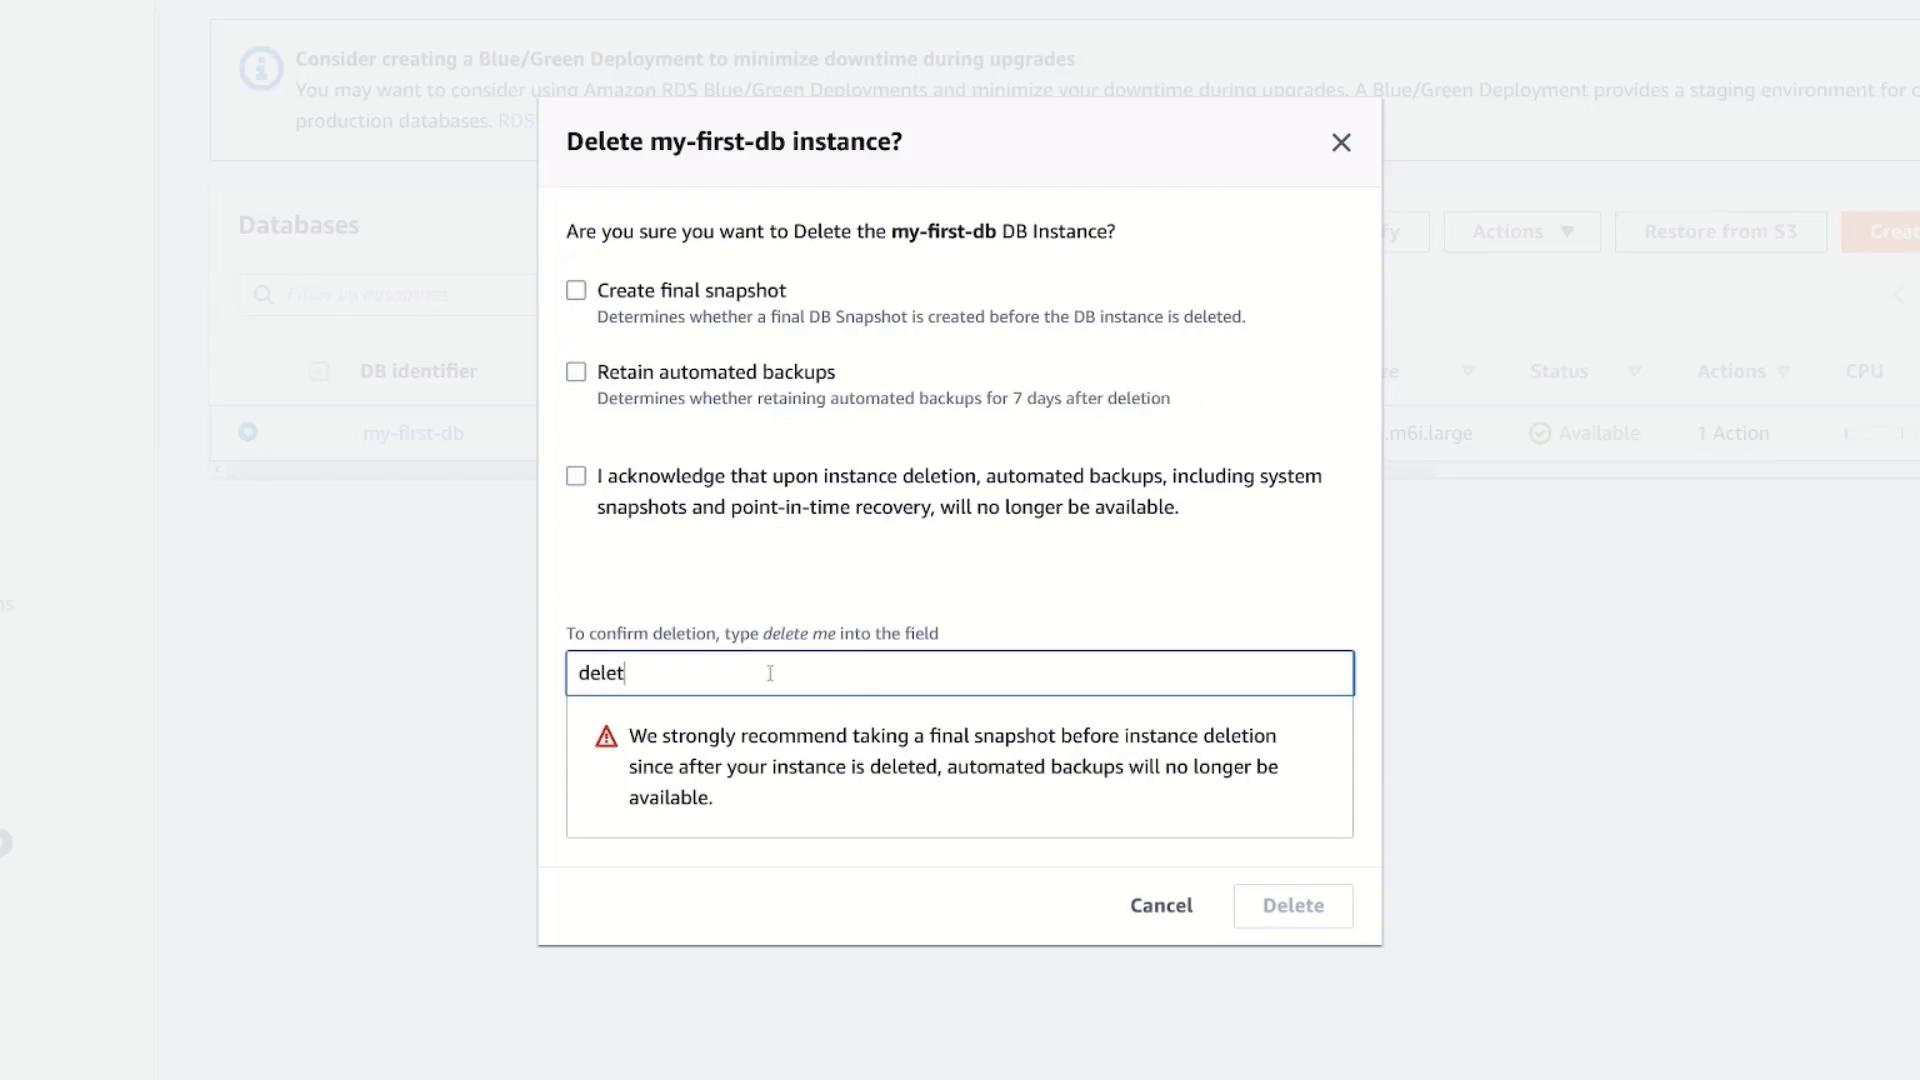
Deleting your database is irreversible. Ensure you have backups or snapshots if you need to restore your data later.