This guide demonstrates setting up an AWS Elastic Beanstalk application with multiple environments for development and production, simplifying web application deployment.
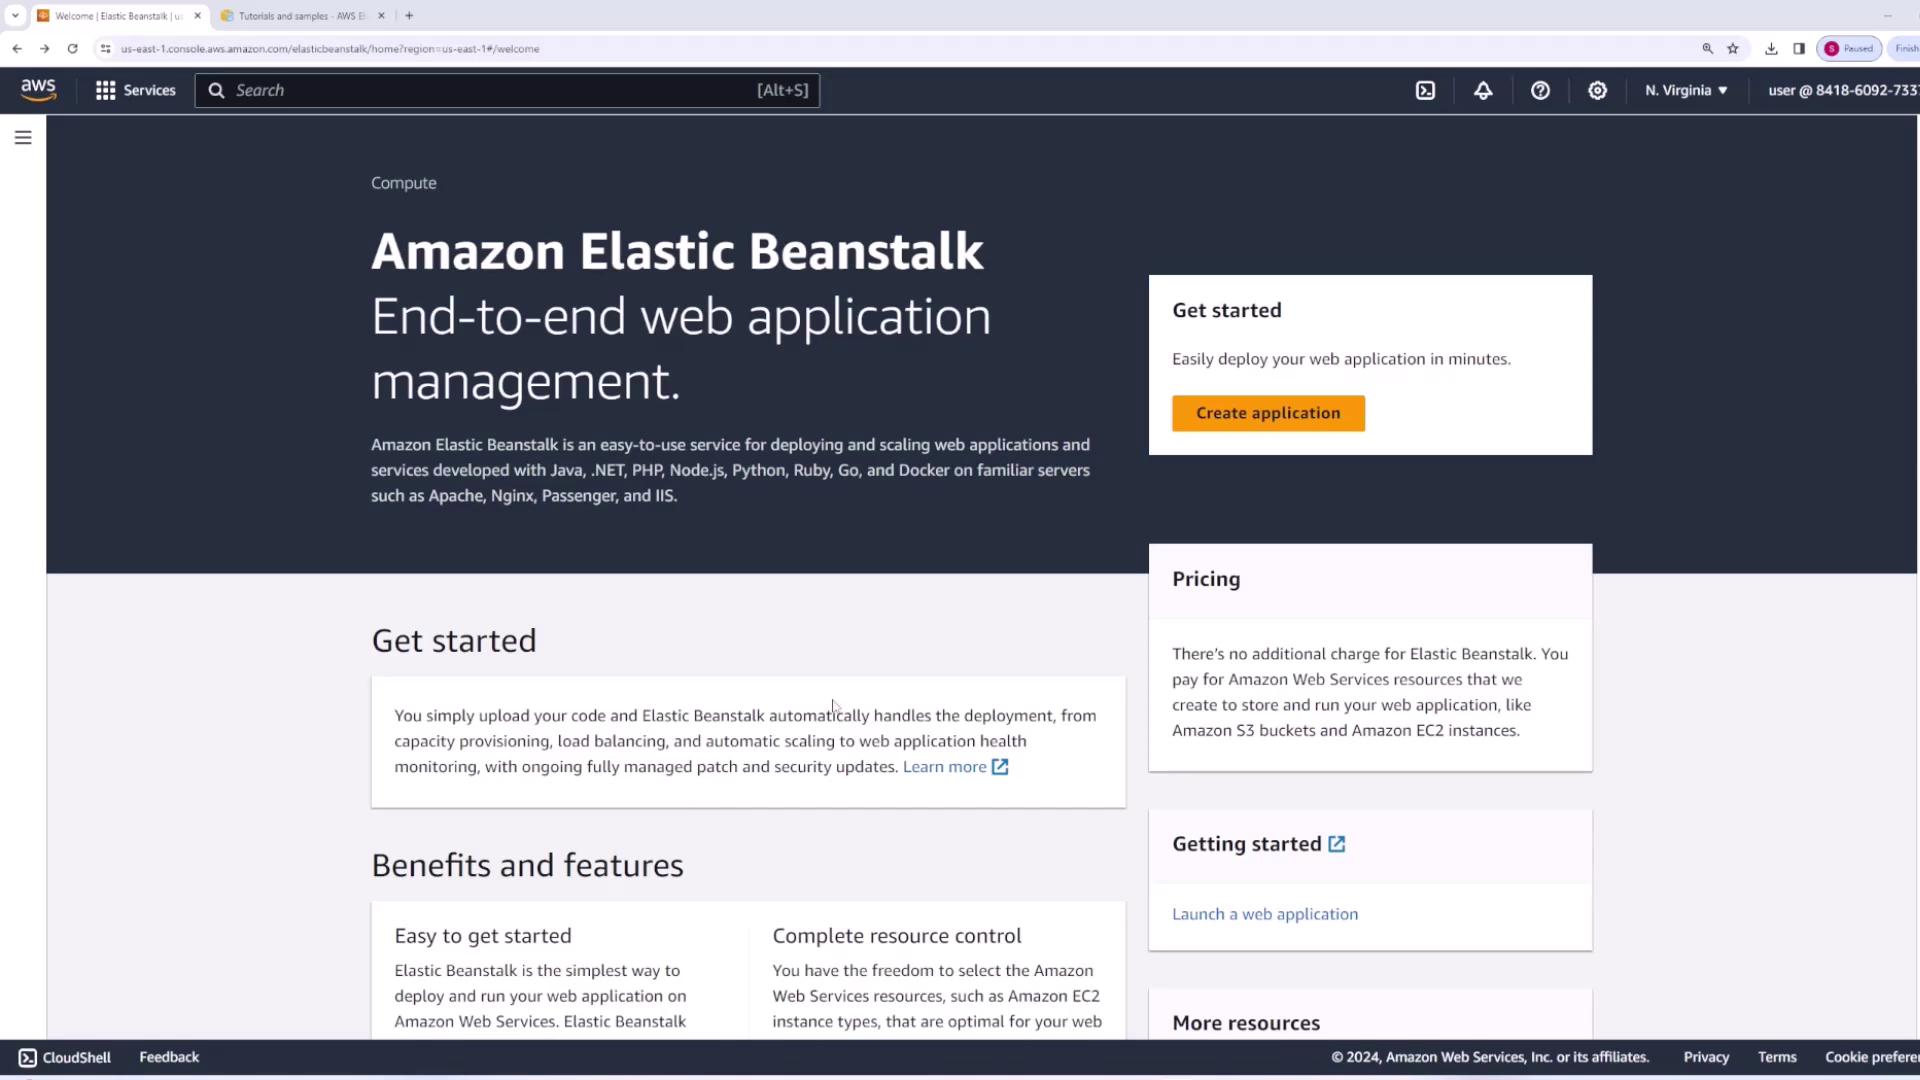
In this guide, we demonstrate how to set up an AWS Elastic Beanstalk application, including the creation of multiple environments for development and production. With Elastic Beanstalk, you can deploy your web application seamlessly while AWS manages the underlying infrastructure.
Begin by selecting Create Application. This launches a wizard that not only creates your application but also provisions your first environment. Remember that an application represents your code base and can host multiple isolated environments—for example, development, staging, and production.
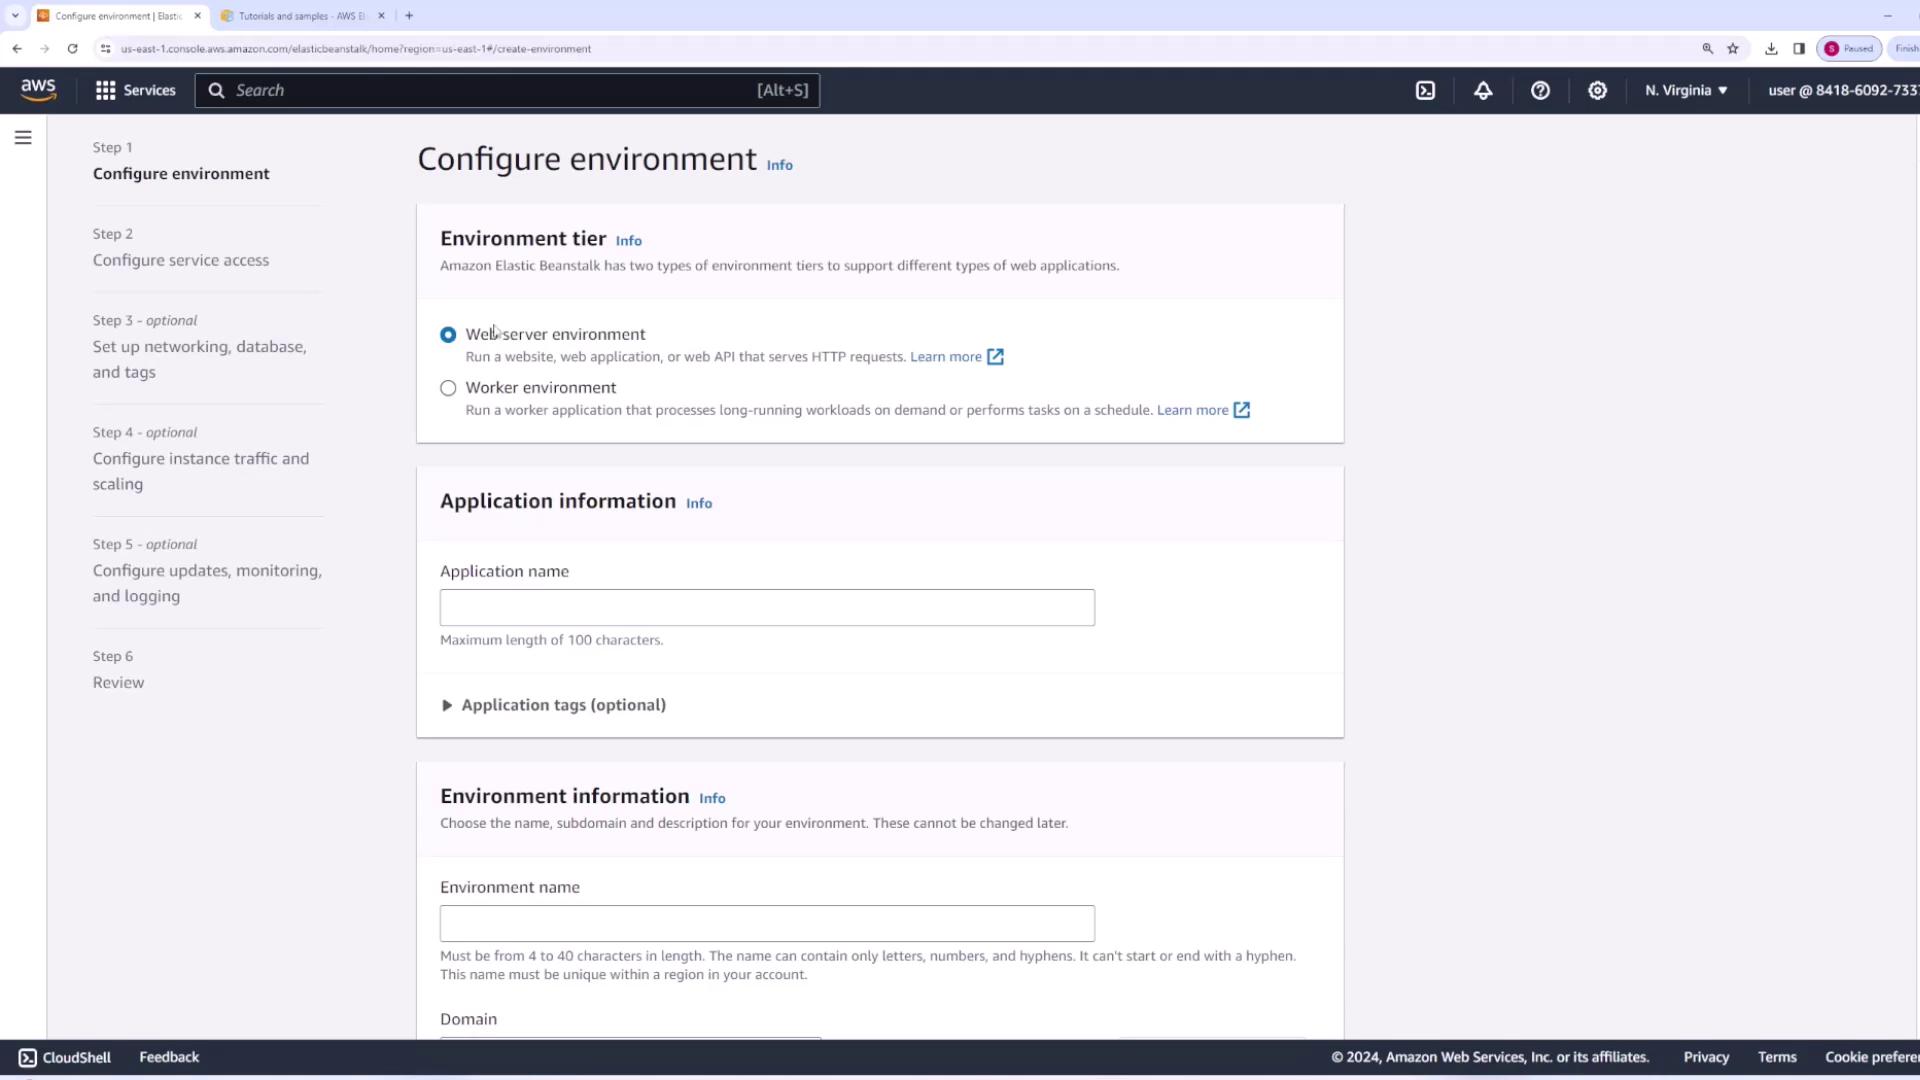
Depending on your project, choose the appropriate environment tier:
For web applications, APIs, or web servers, select the web server environment.
For long-running tasks, background processes, or scheduled jobs, select the worker environment.
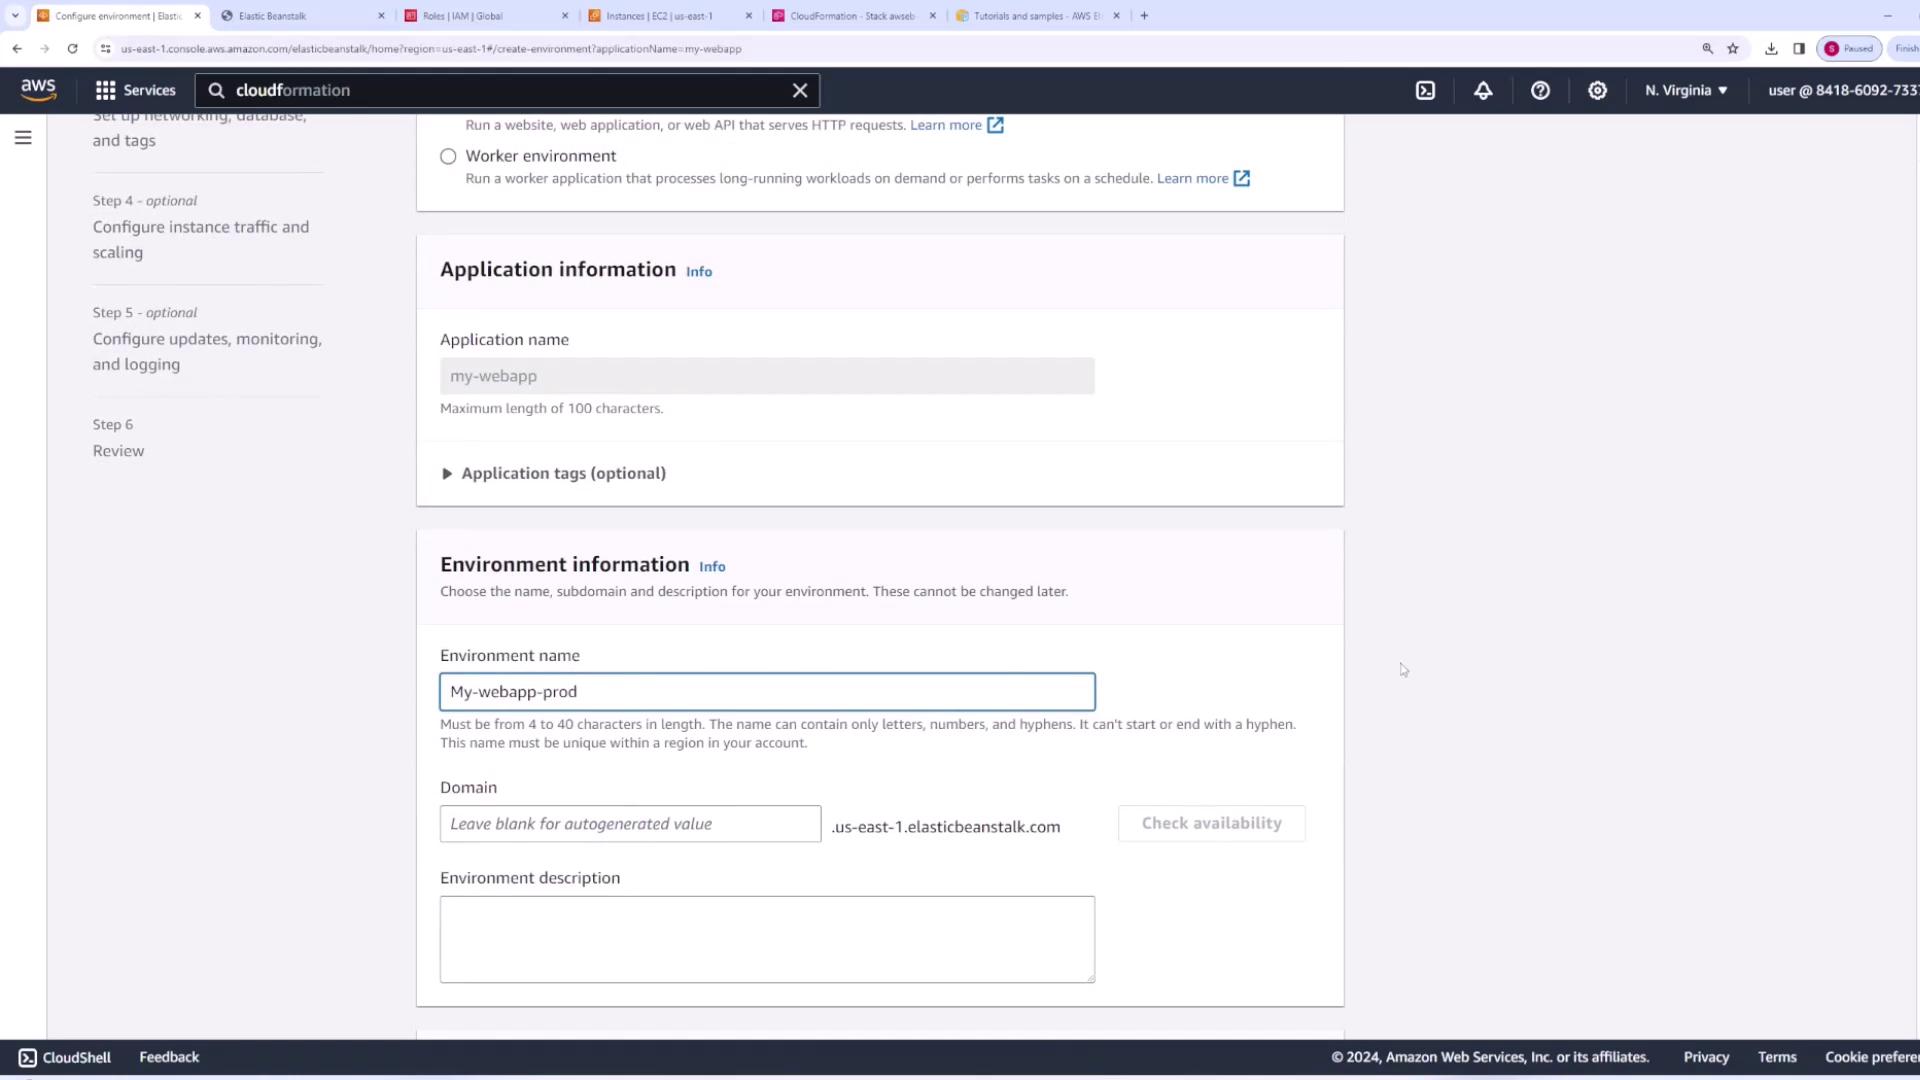
Since this demo focuses on a web application, select the web server environment. Next, assign a name to your application (for example, “My Web App”). Optionally, you can add tags, though they are not required for this demonstration.
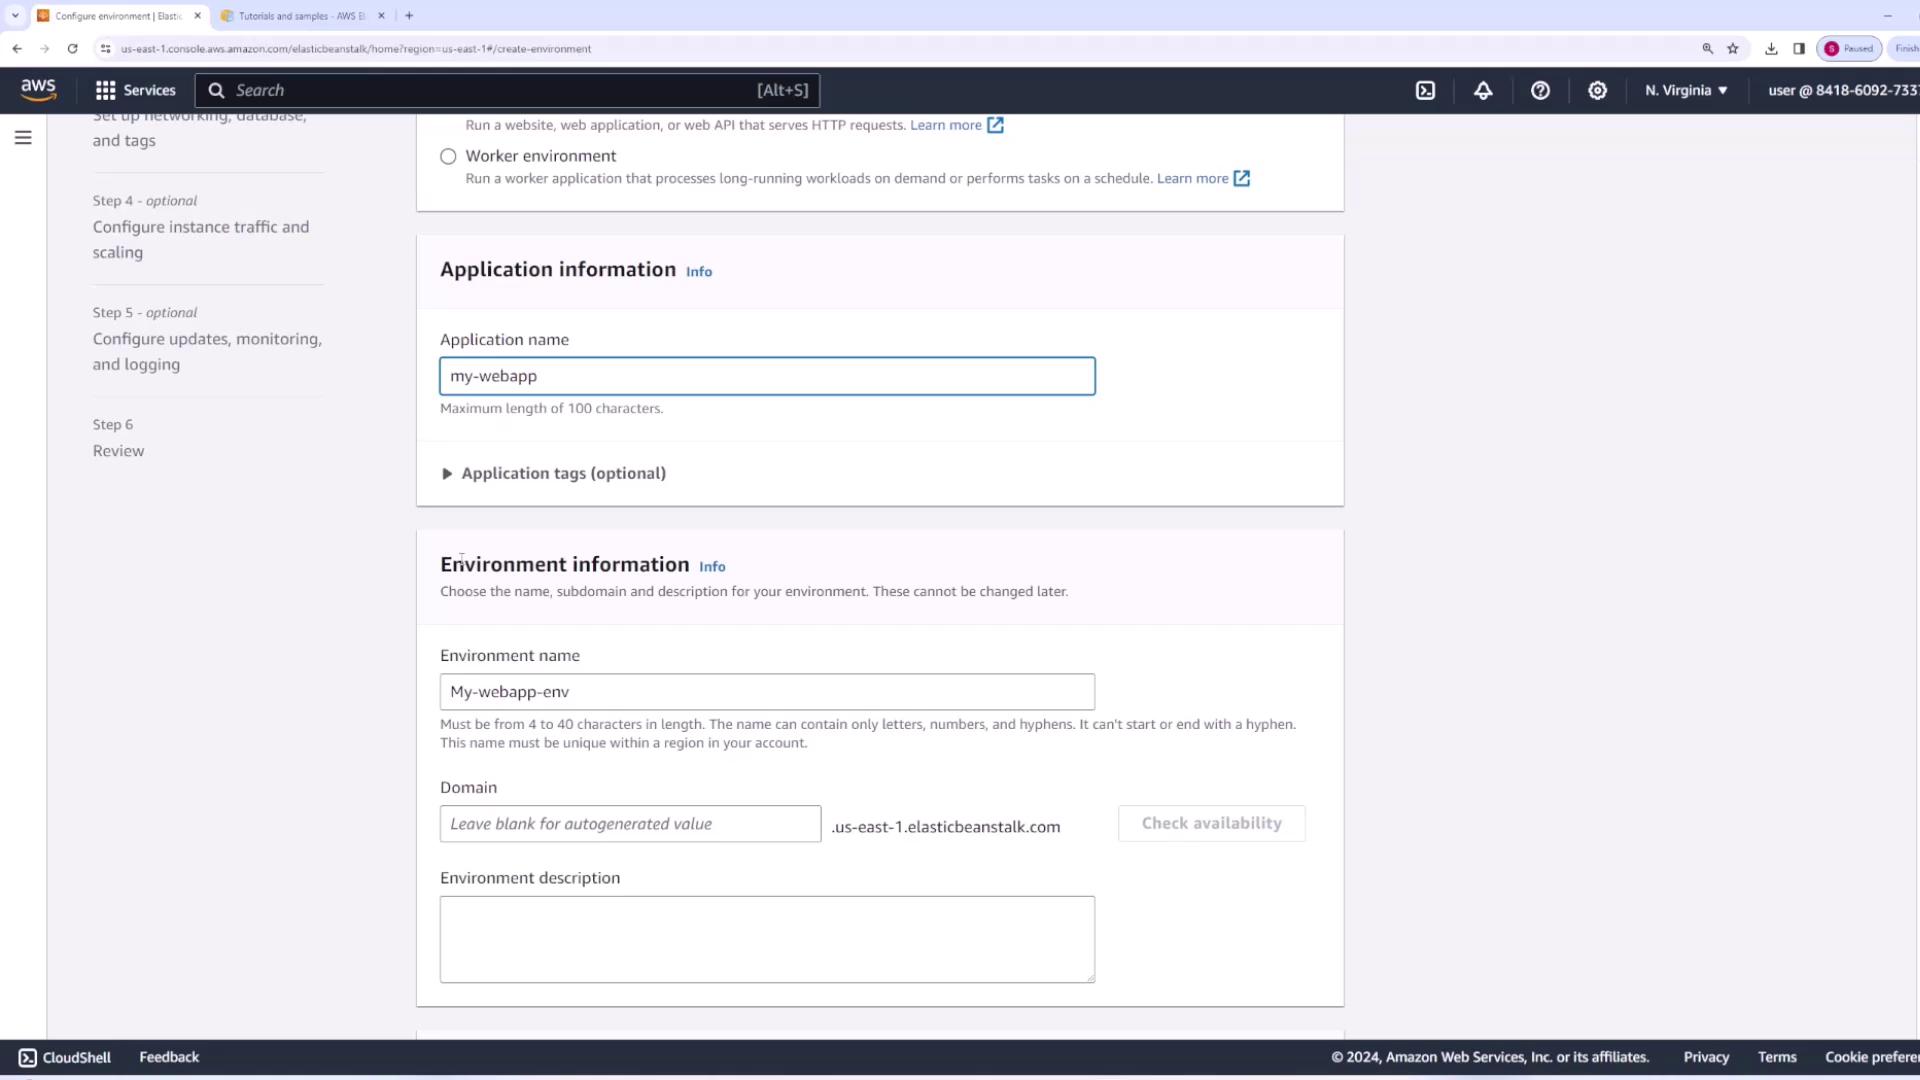
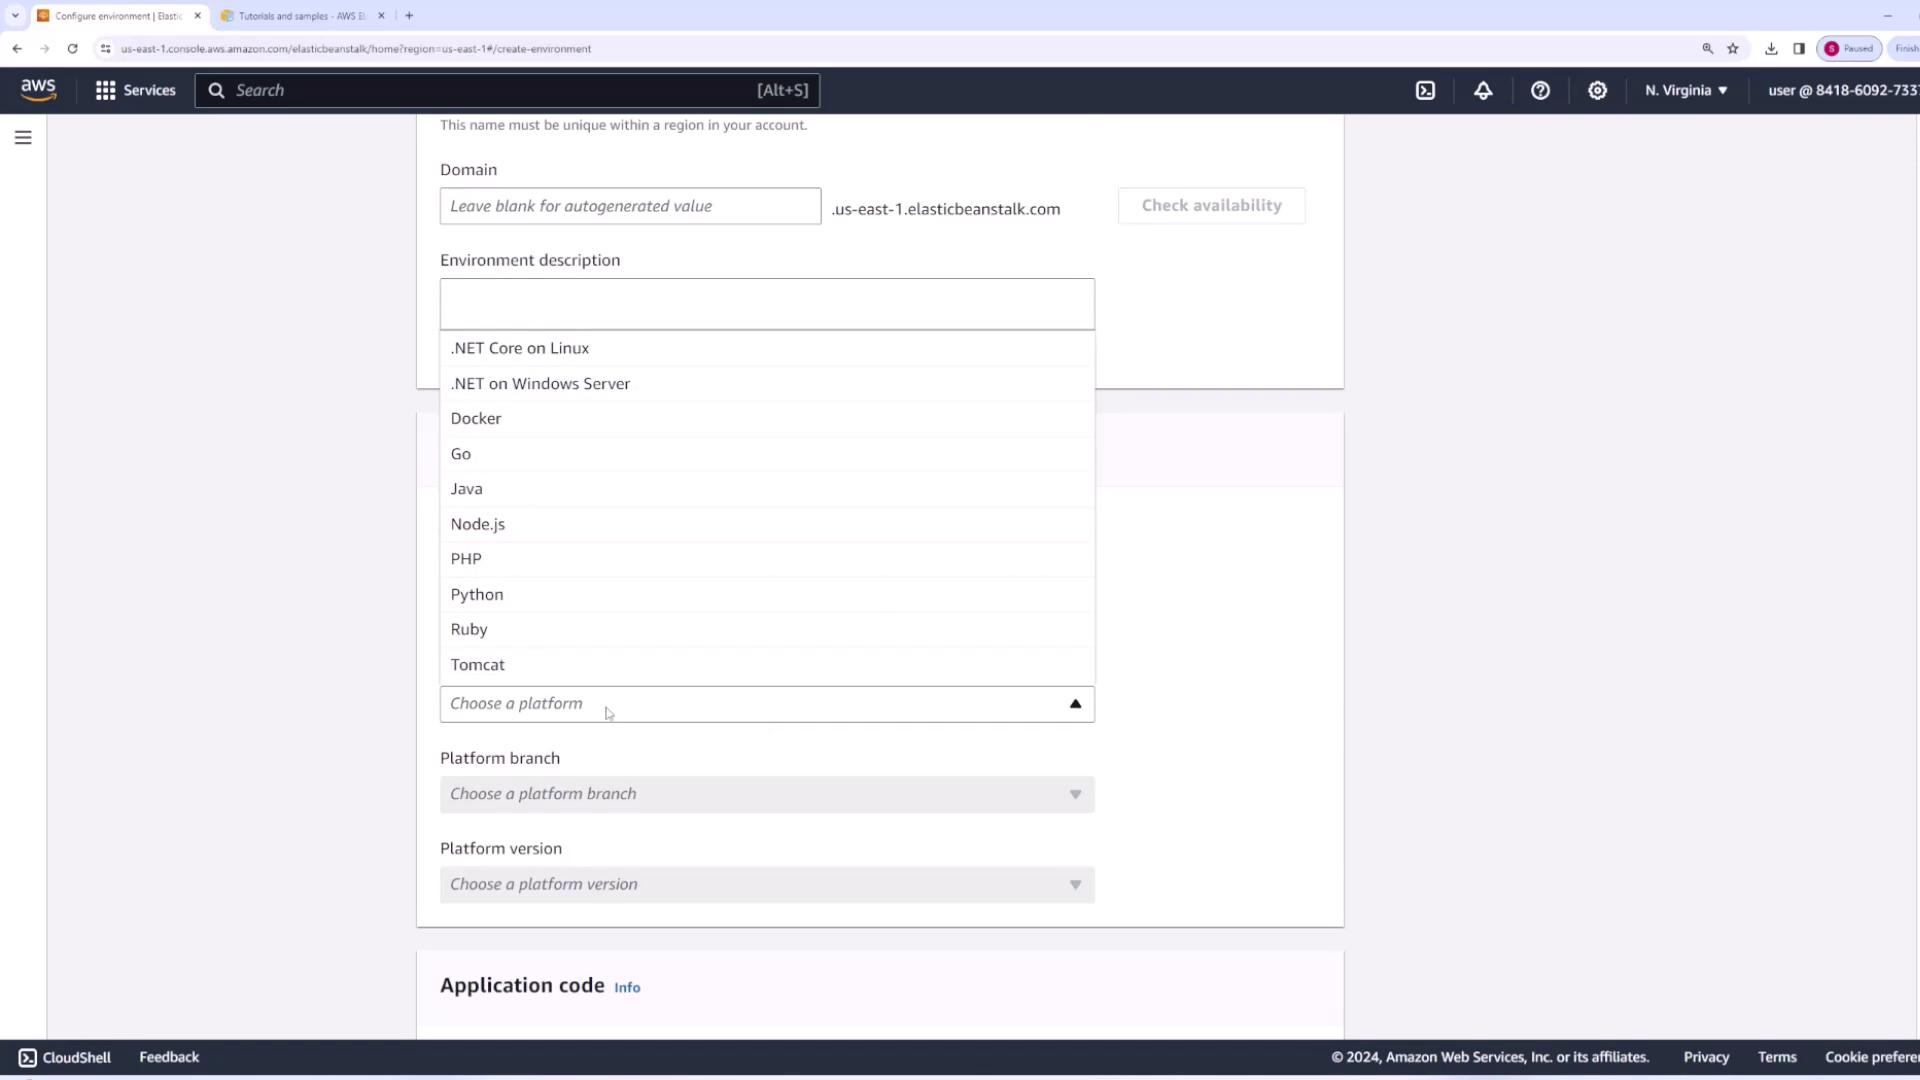
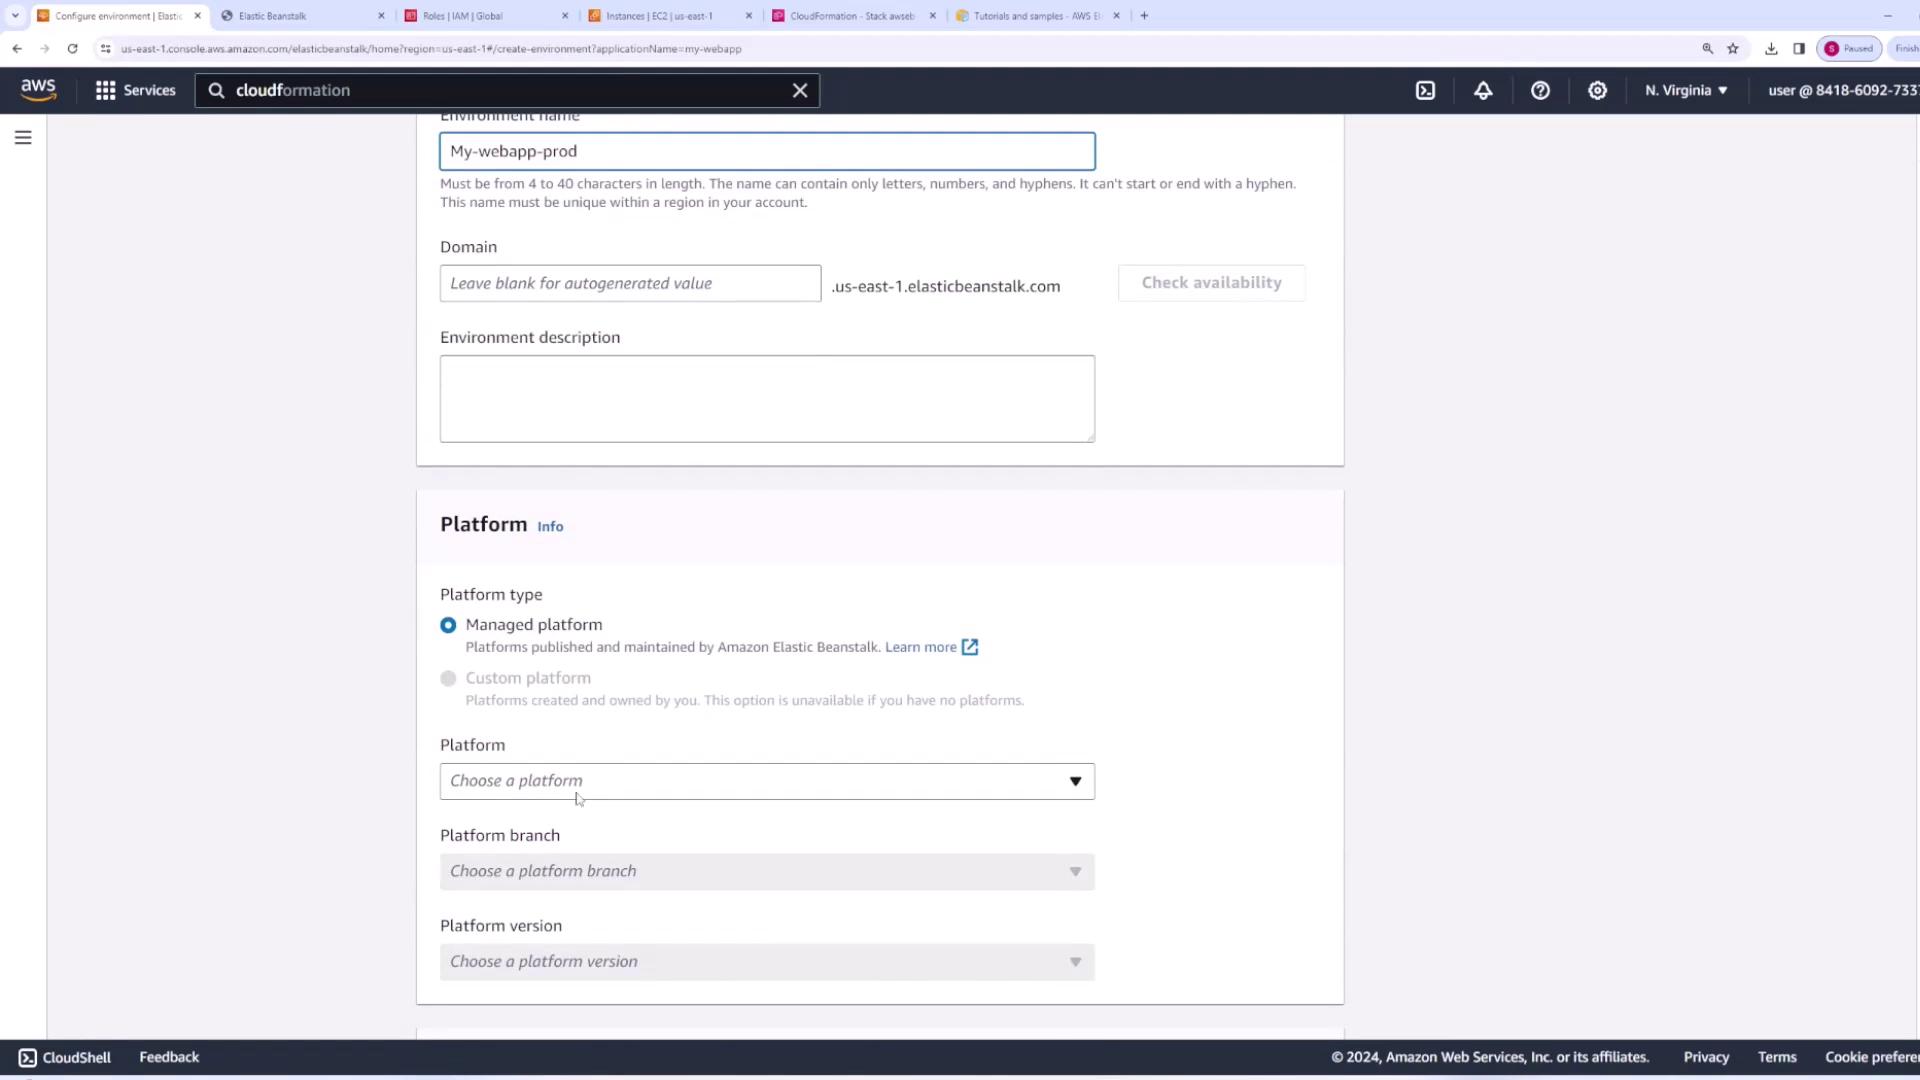
When you create your application, you also create your first environment. An environment is a single deployment of your application. For instance, you could have separate environments for development, staging, and production. In this demo, we create a development environment named “My Web App-Dev”. You can either use an auto-generated domain name or specify one manually. Then, choose the platform suitable for your application. For this demonstration, we have selected a Node.js application.
You have three methods to deploy your code:
Use a built-in sample application provided by AWS.
Upload an existing application version.
Manually upload your code.
For this demo, we walk through uploading your own Node.js code. AWS provides a sample application for Node.js which you can use as a starting point. To get the sample code, visit the Elastic Beanstalk documentation under Tutorials and Samples, download the Node.js zip file, and extract it.
Below is a snippet of the sample Node.js code. This basic web server reads an HTML file and logs POST requests.
Copy
const port = process.env.PORT || 3000, http = require('http'), fs = require('fs'), html = fs.readFileSync('index.html');const log = function(entry) { fs.appendFileSync('/tmp/sample-app.log', new Date().toISOString() + ' - ' + entry + '\n');};const server = http.createServer(function (req, res) { if (req.method === 'POST') { let body = ''; req.on('data', function(chunk) { body += chunk; }); req.on('end', function() { if (req.url === '/') { log('Received a message.'); } else if (req.url === '/scheduled') { // Scheduled tasks can be handled here. } }); }});
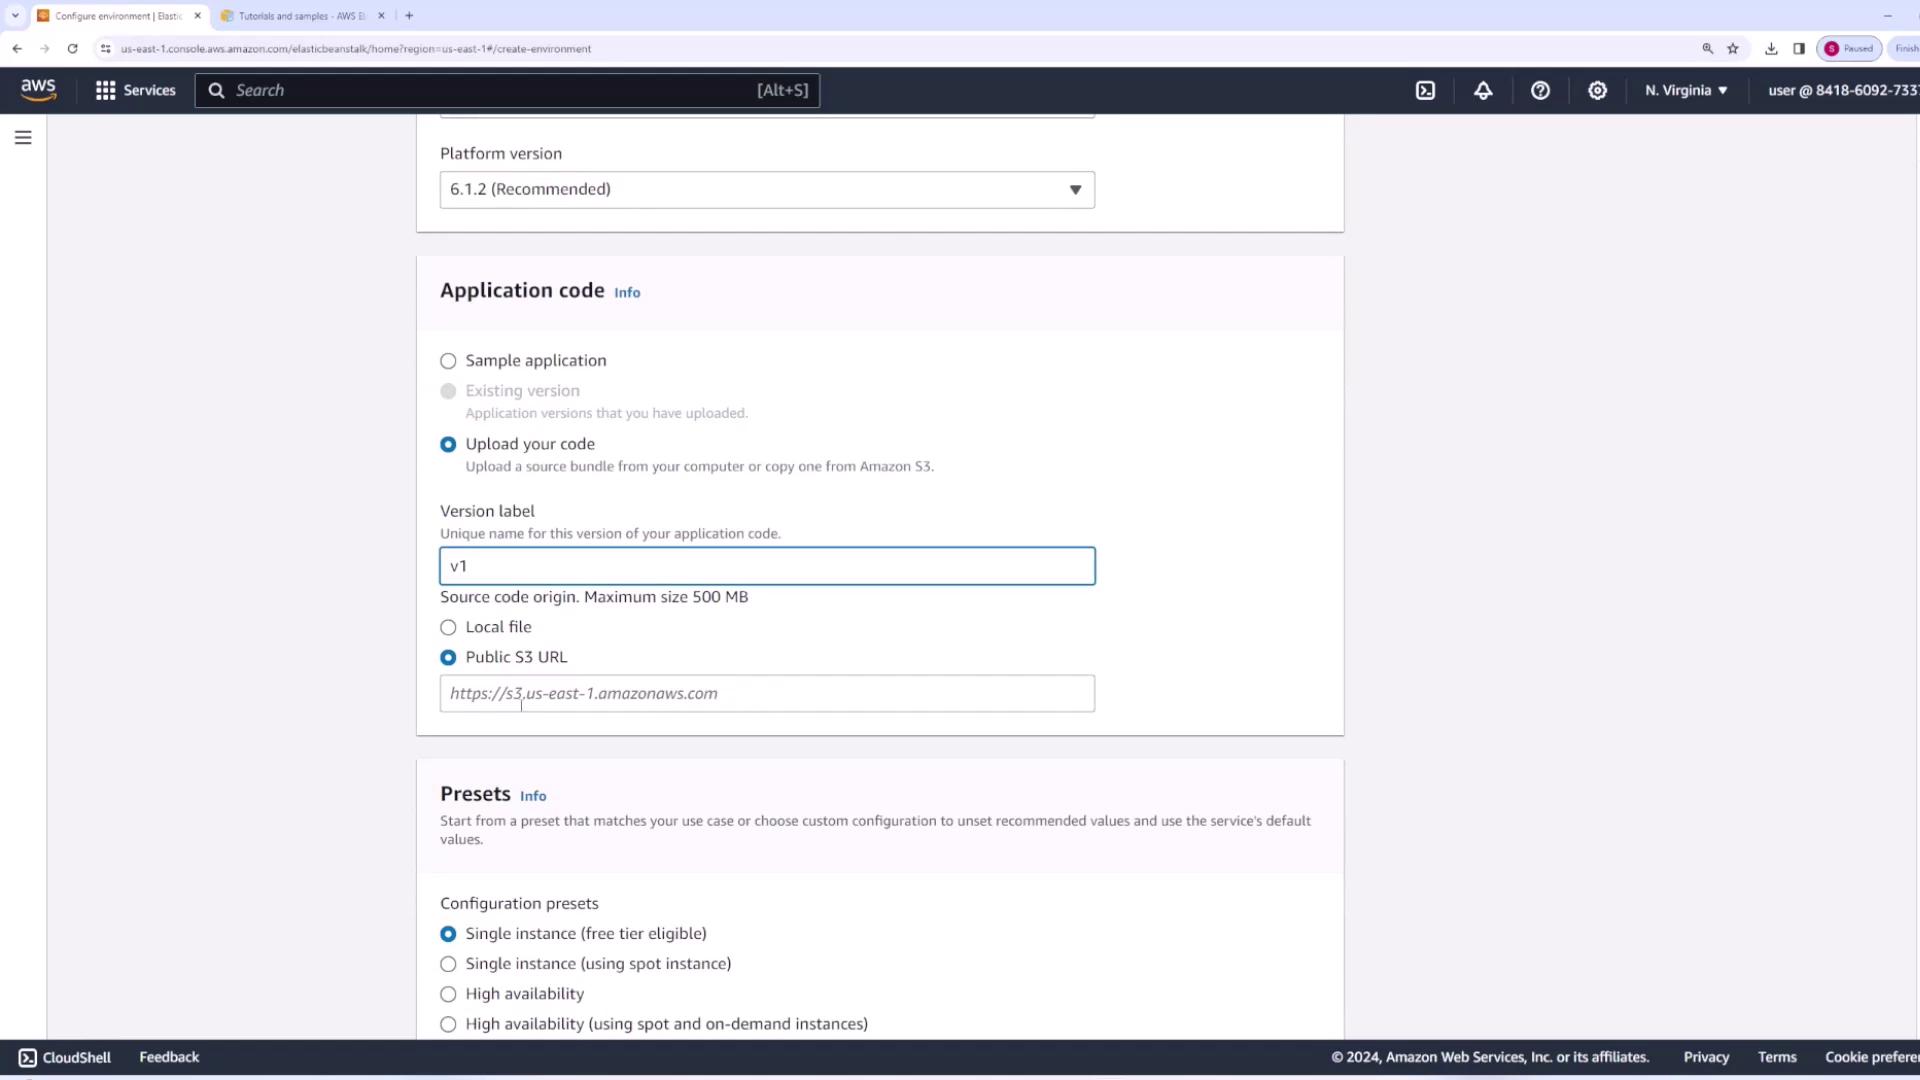
Compress all the application files into a single zip file (e.g., “version1.zip”). Then, return to Elastic Beanstalk and choose Upload Your Code. Provide an appropriate label (for example, “version 1”) and upload your zip file from your local computer.
After uploading, Elastic Beanstalk offers configuration presets that simplify the deployment process:
Single Instance: Deploys your application on a single EC2 instance (free-tier eligible) using spot instances.
High Availability: Deploys the application on multiple EC2 instances behind a load balancer.
High Availability with Spot/On-Demand: Deploys with a mix of spot and on-demand instances.
Custom Configuration: Offers manual configuration of all settings.
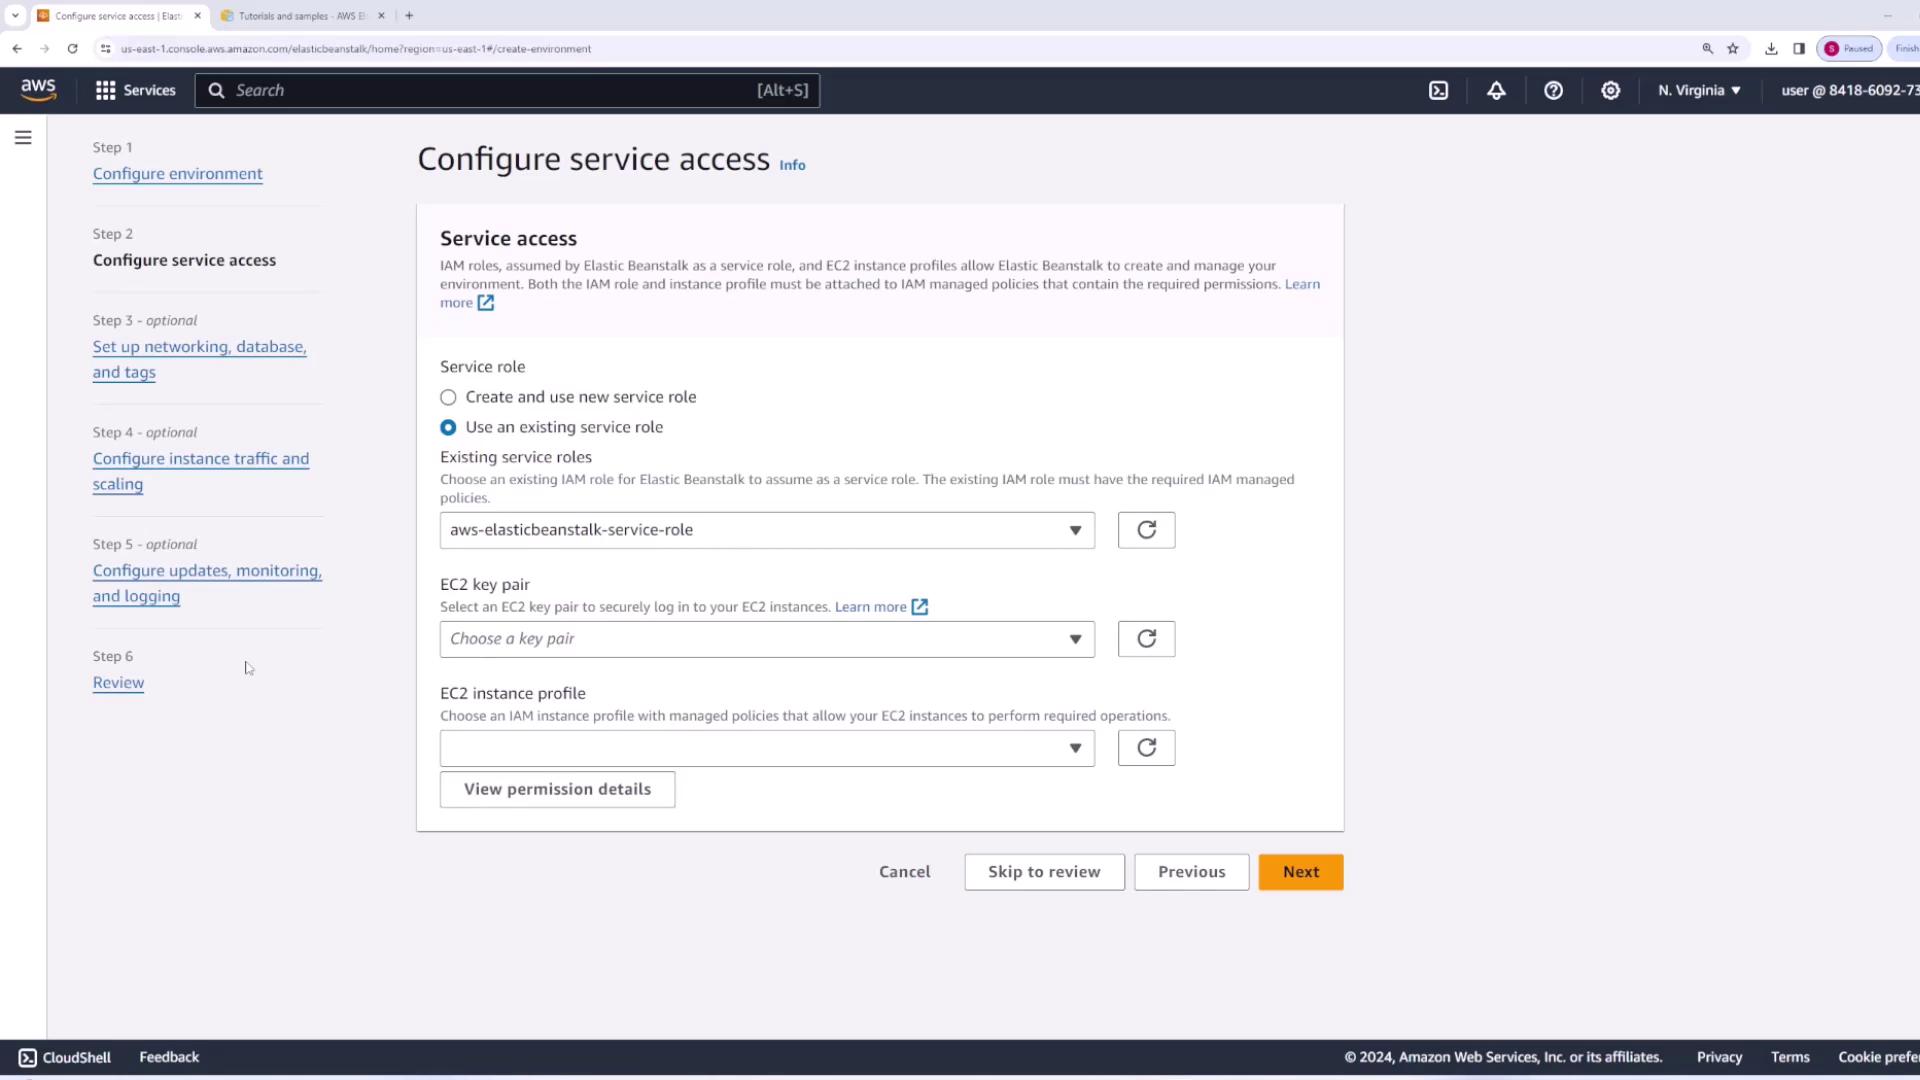
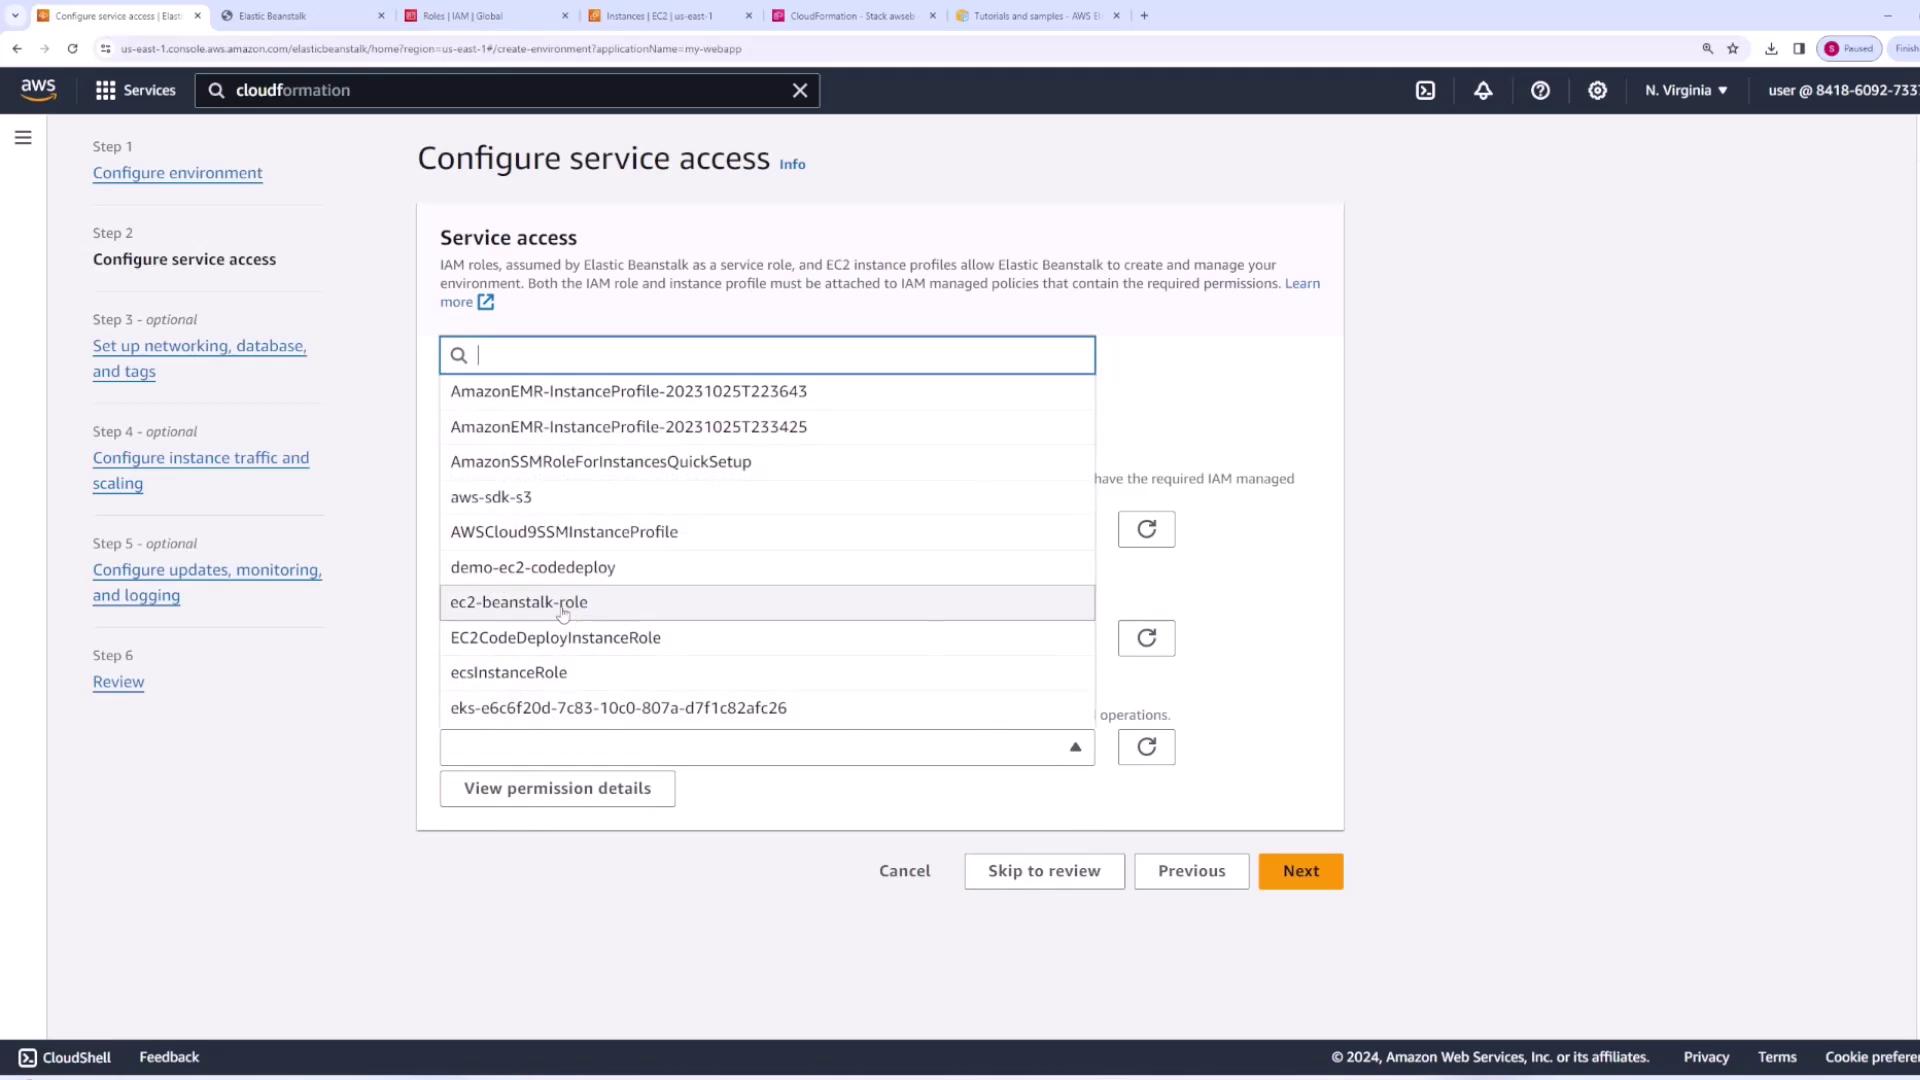
For this demo, select the Single Instance option and click Next.At this point, you need to configure IAM roles so that Elastic Beanstalk can handle operations on your behalf. This includes creating a service role for Elastic Beanstalk and designating an EC2 instance profile. New users should select “Create and use a new service role.” If a service role already exists that suits your requirements, you can select it instead. Then, choose an EC2 key pair and create or select an existing instance profile.
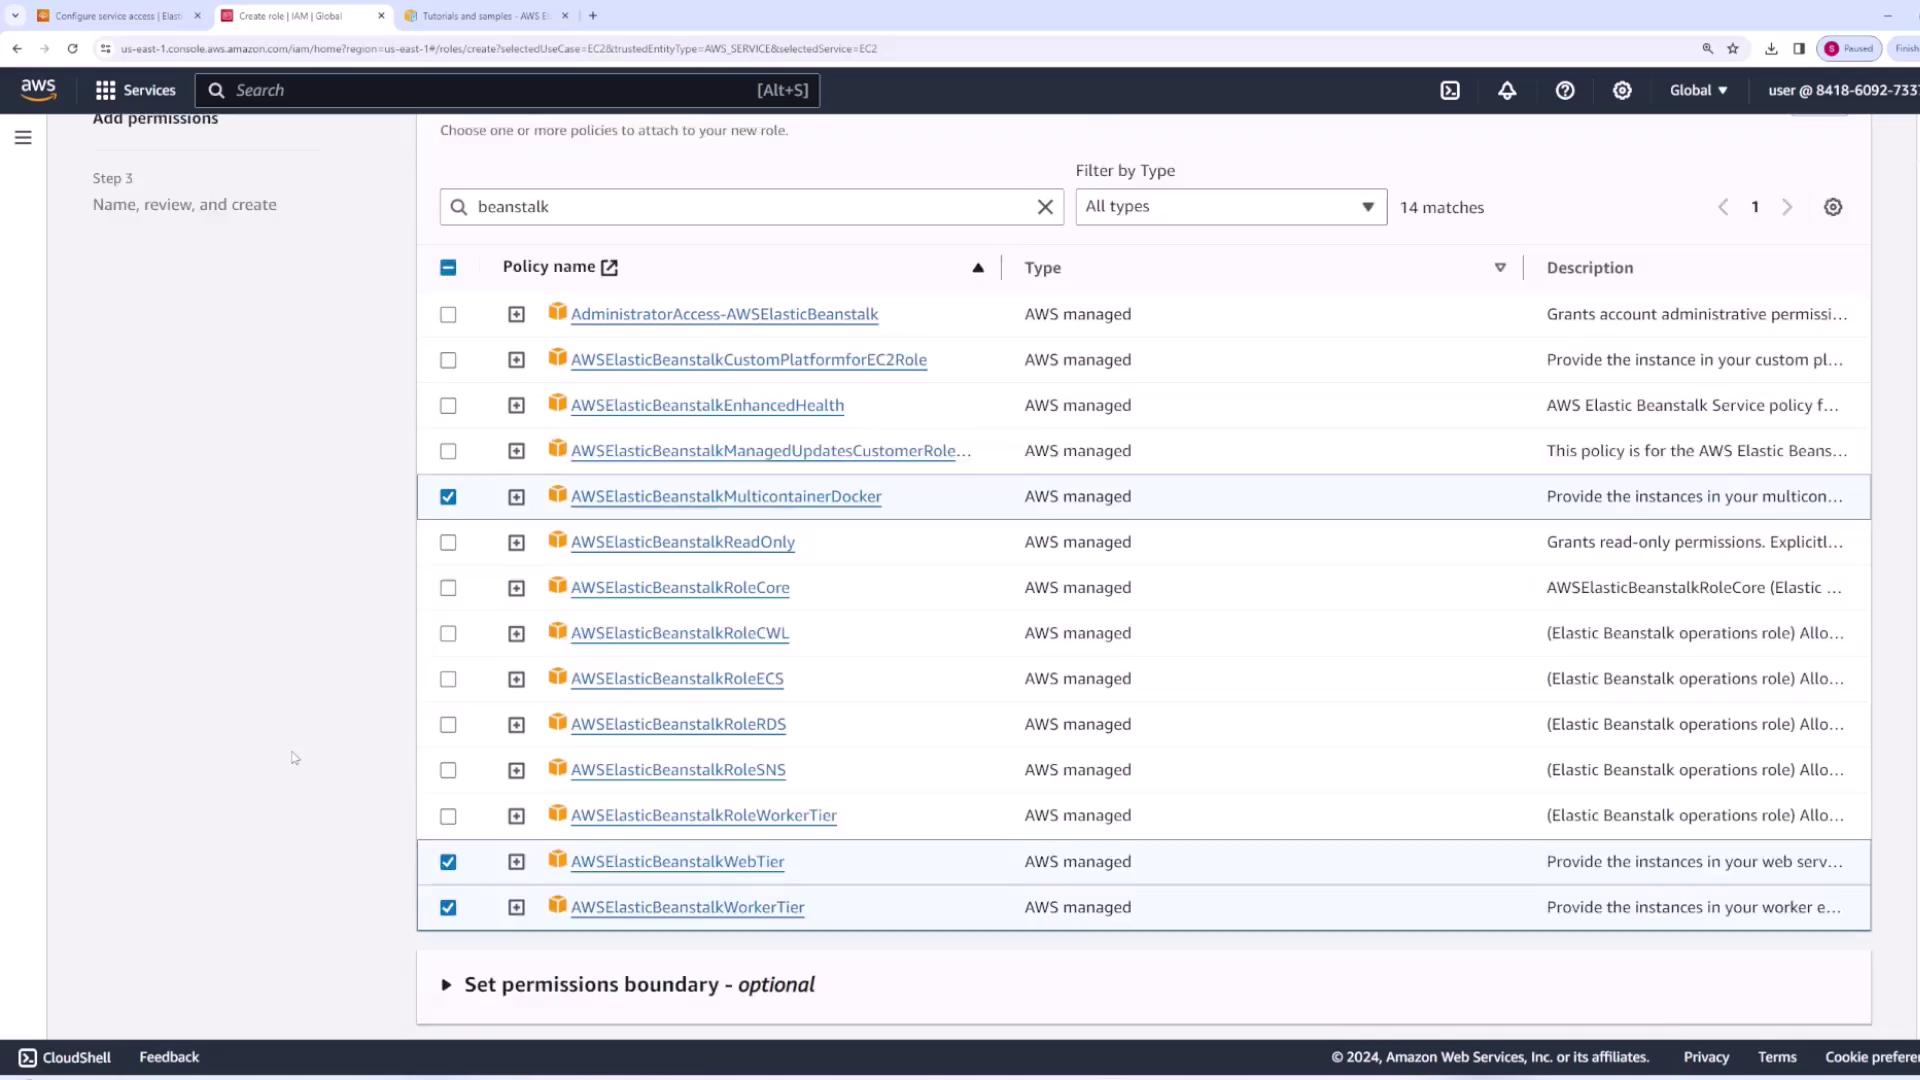
To establish a new EC2 instance profile with the required permissions:
Open the IAM console and create a new role for AWS Service.
Choose EC2 as the trusted entity.
Attach these policies:
AWS Elastic Beanstalk Web Tier
AWS Elastic Beanstalk Worker Tier
AWS Elastic Beanstalk Multicontainer Docker
Assign a name to the role (for example, “EC2-BeanstalkRole”) and complete the role creation process. Refresh the Elastic Beanstalk configuration page to select the new instance profile.
Once all settings are configured, click Next. Although you can customize network and other settings in the next section, for this demo select Skip to Review and then click Submit to deploy the environment.
If you receive an error indicating that a role with the same name already exists, provide a new unique name and try again.
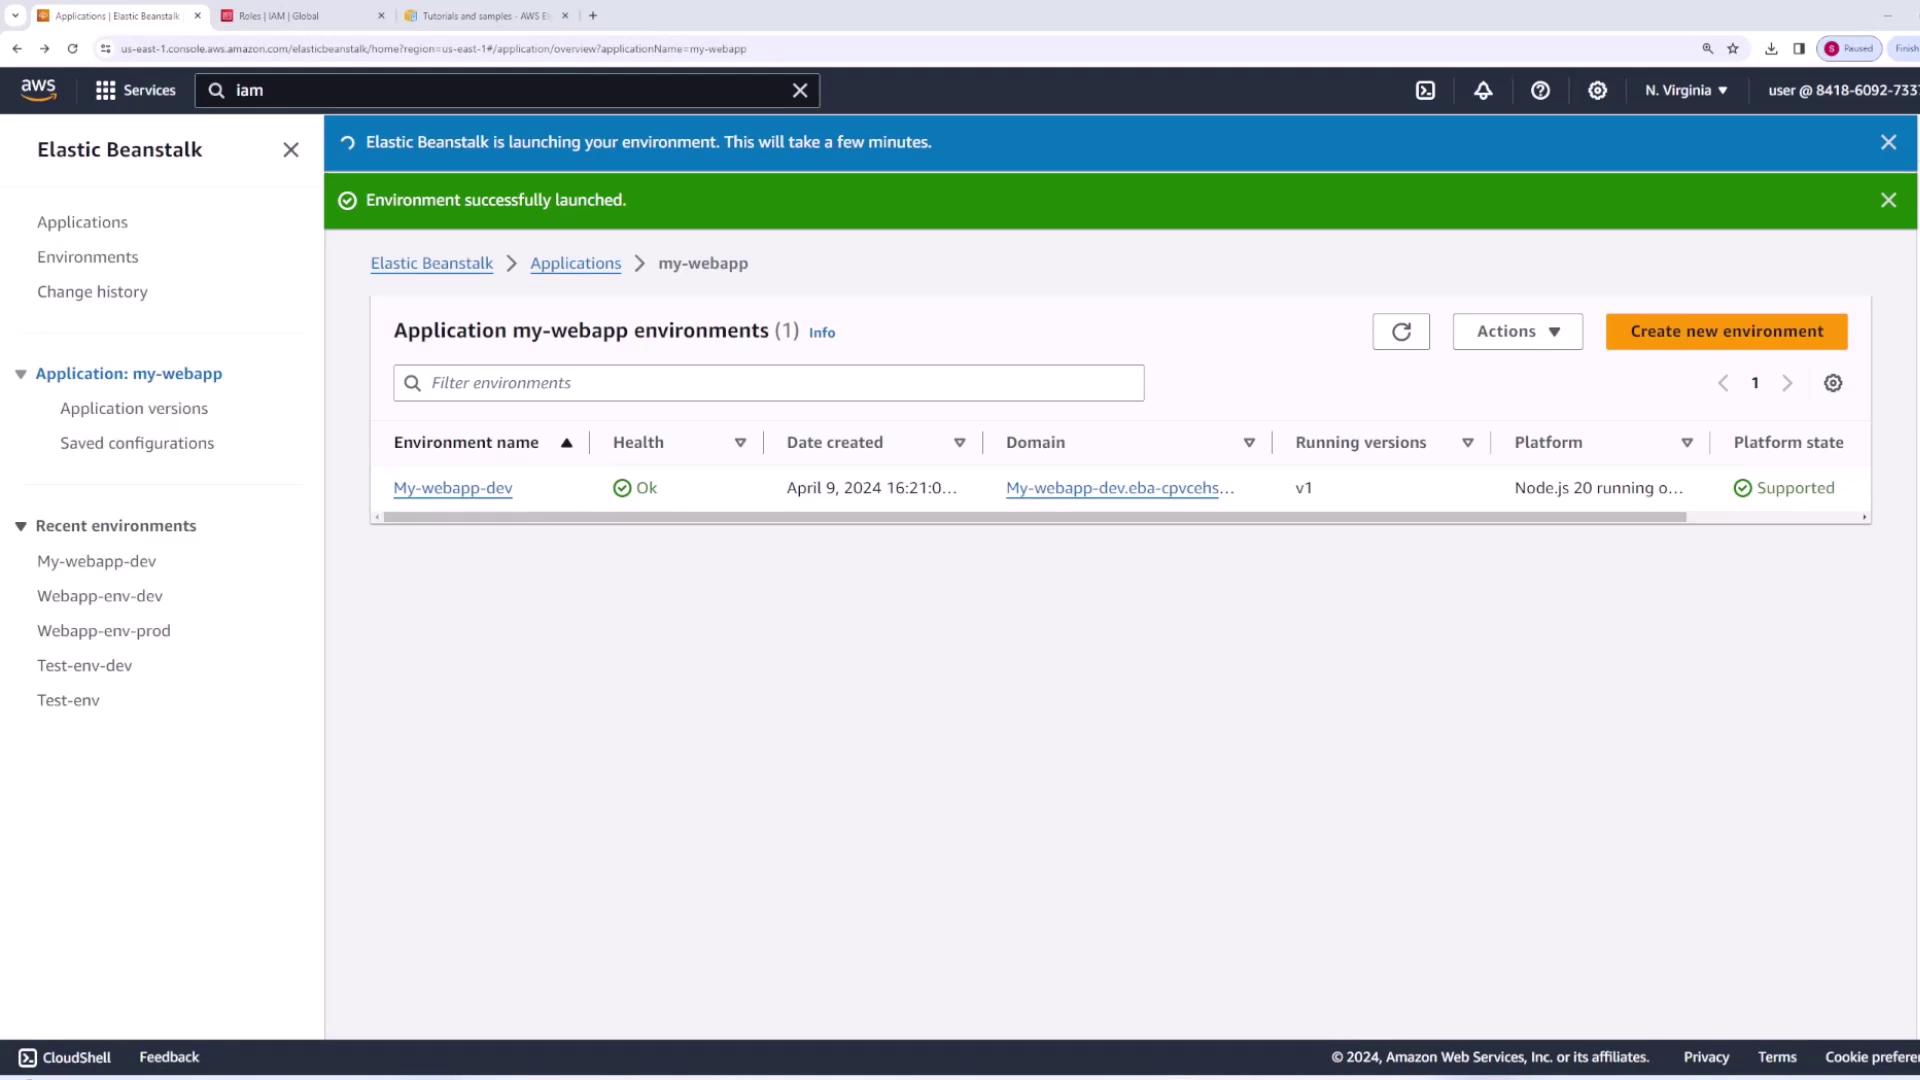
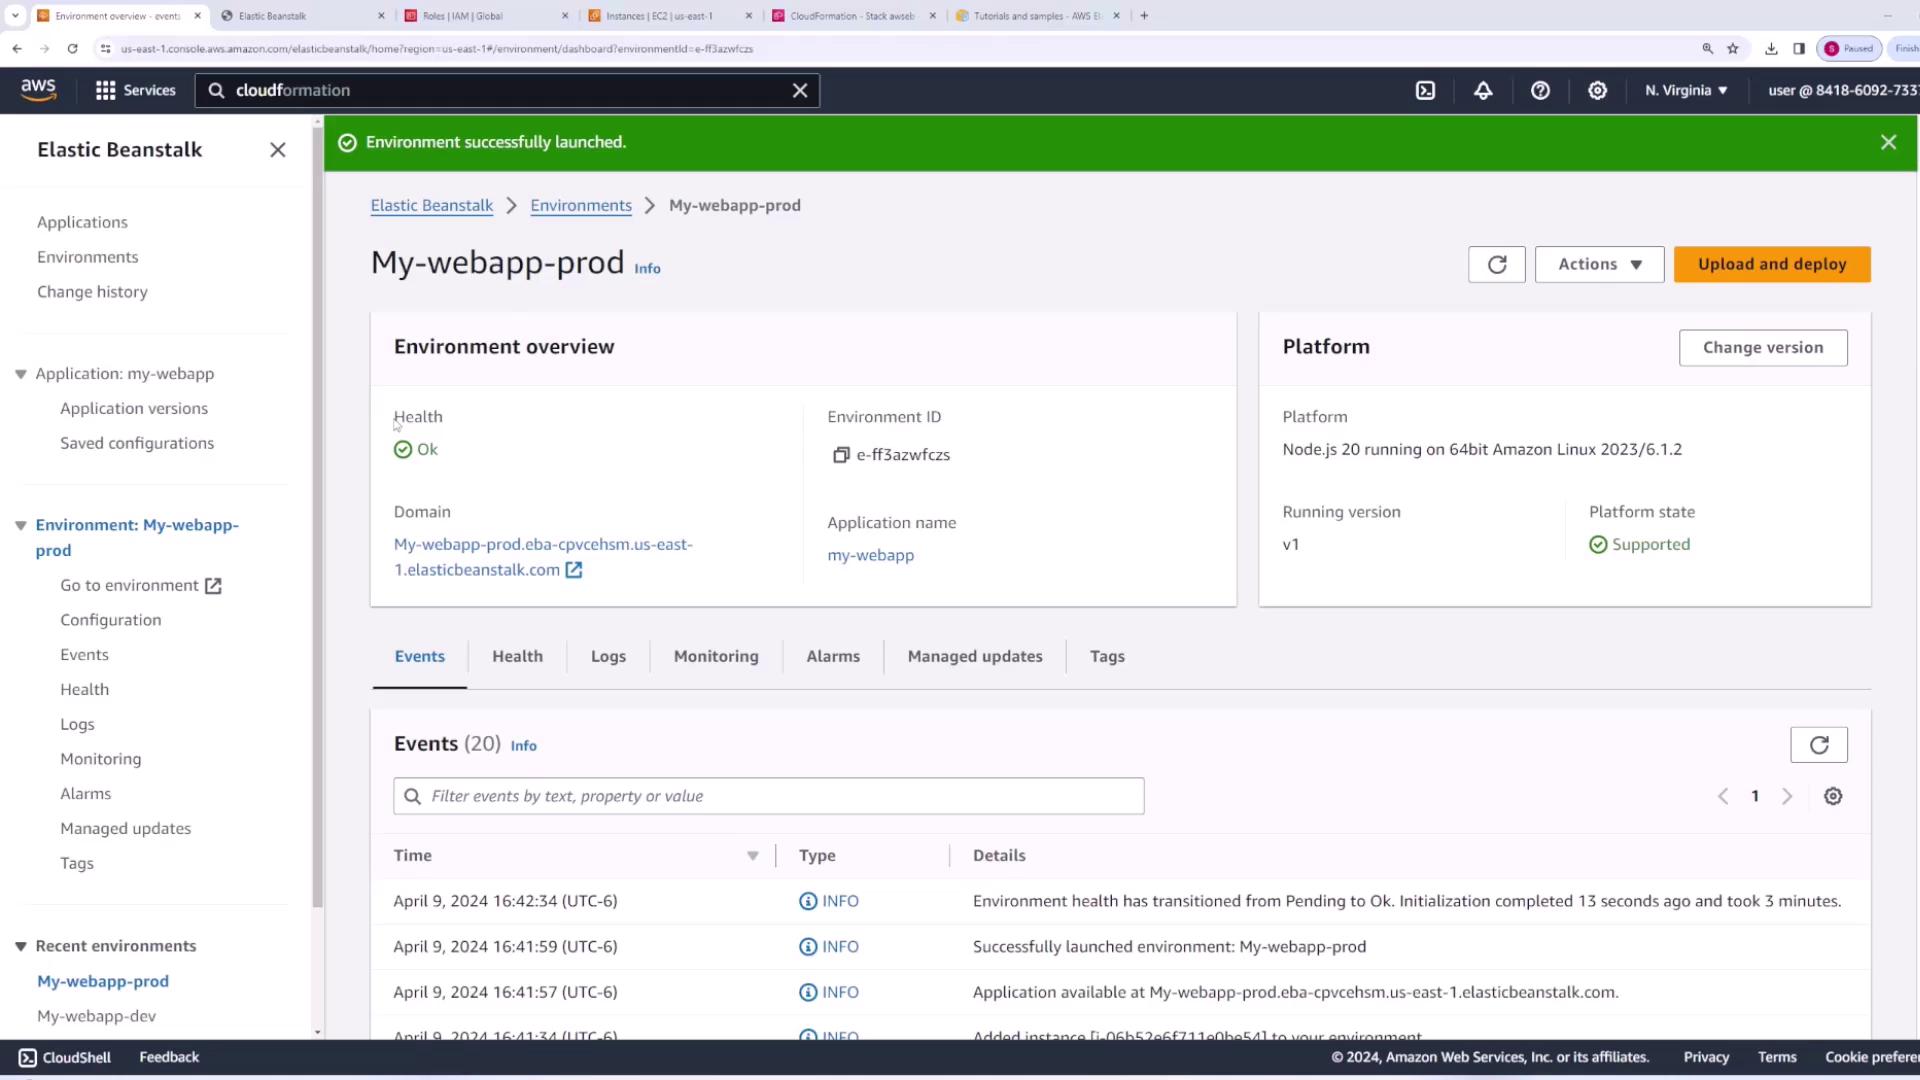
During deployment, Elastic Beanstalk provisions your environment. You can monitor progress via the Events tab, which logs actions such as the creation of security groups, Elastic IPs, and EC2 instances. An S3 bucket is also used to store environment information. After a few minutes, the environment health will change to “OK”.
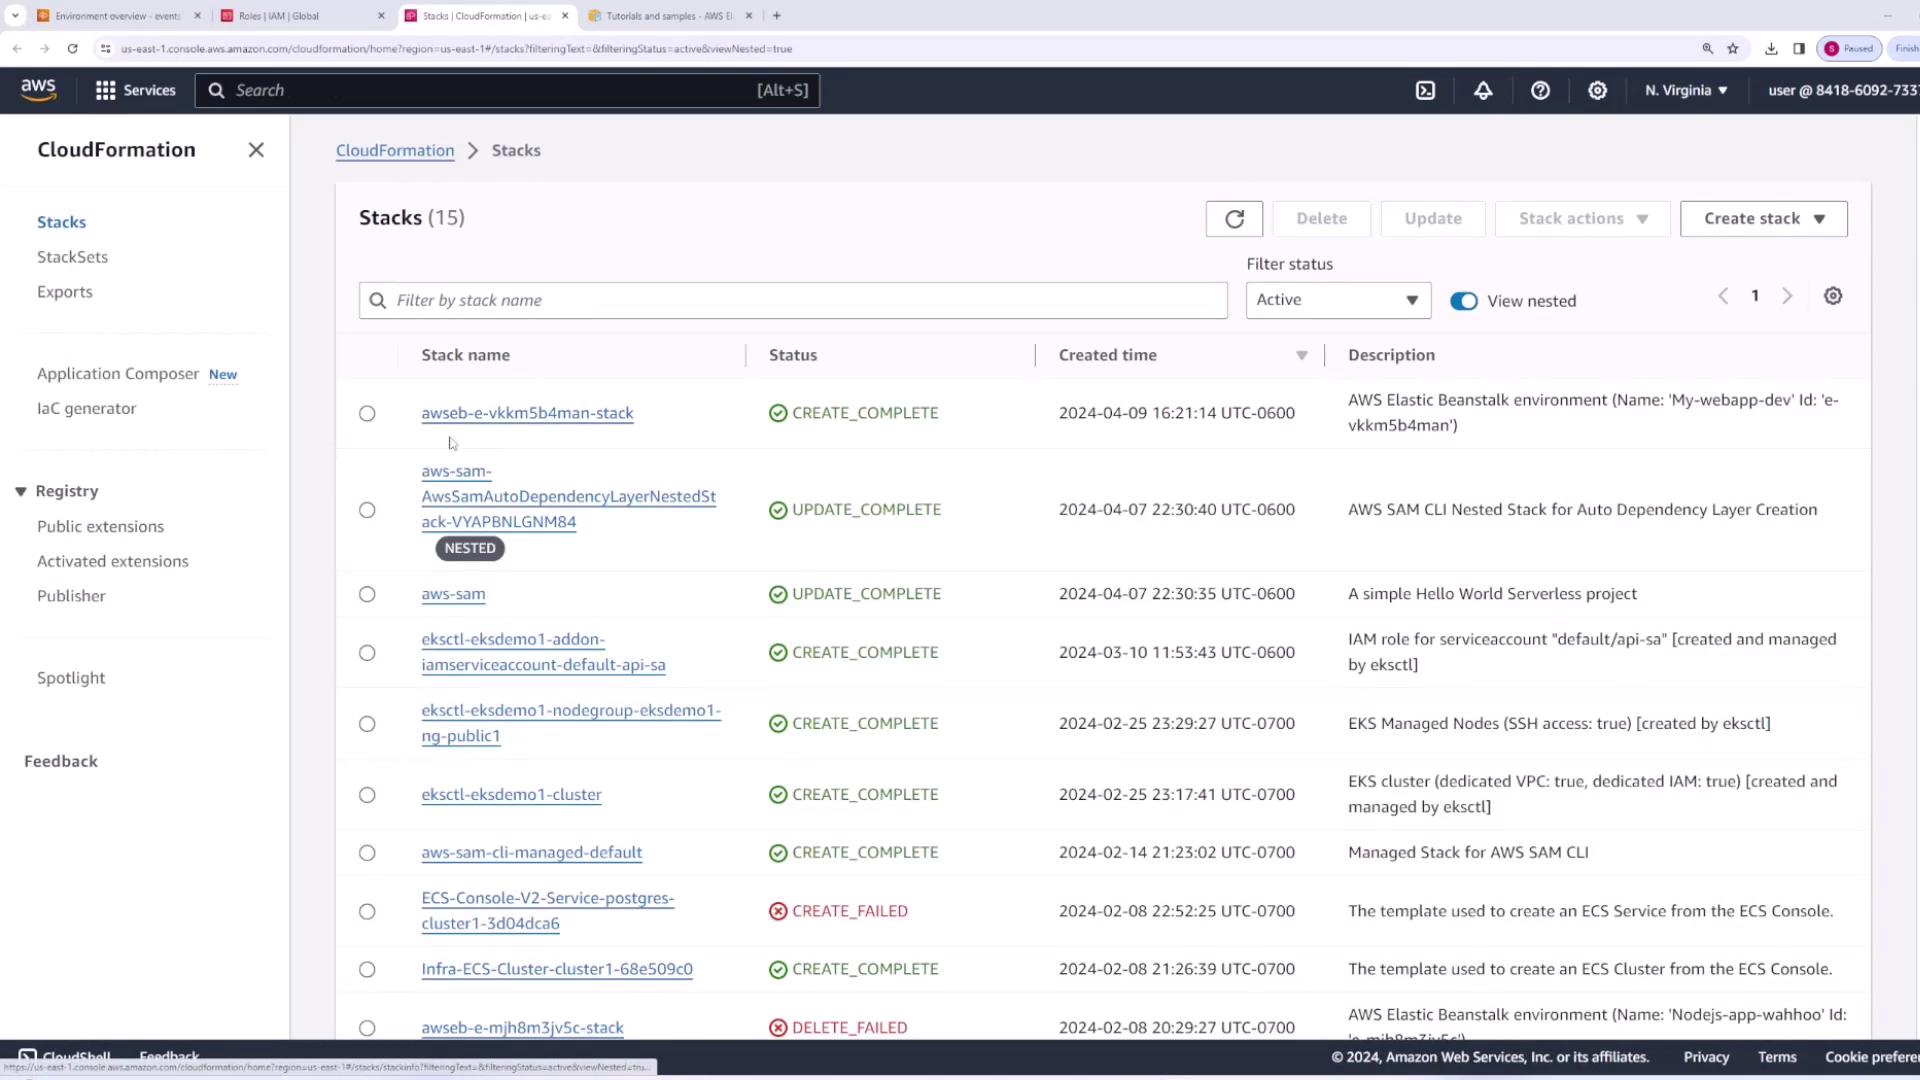
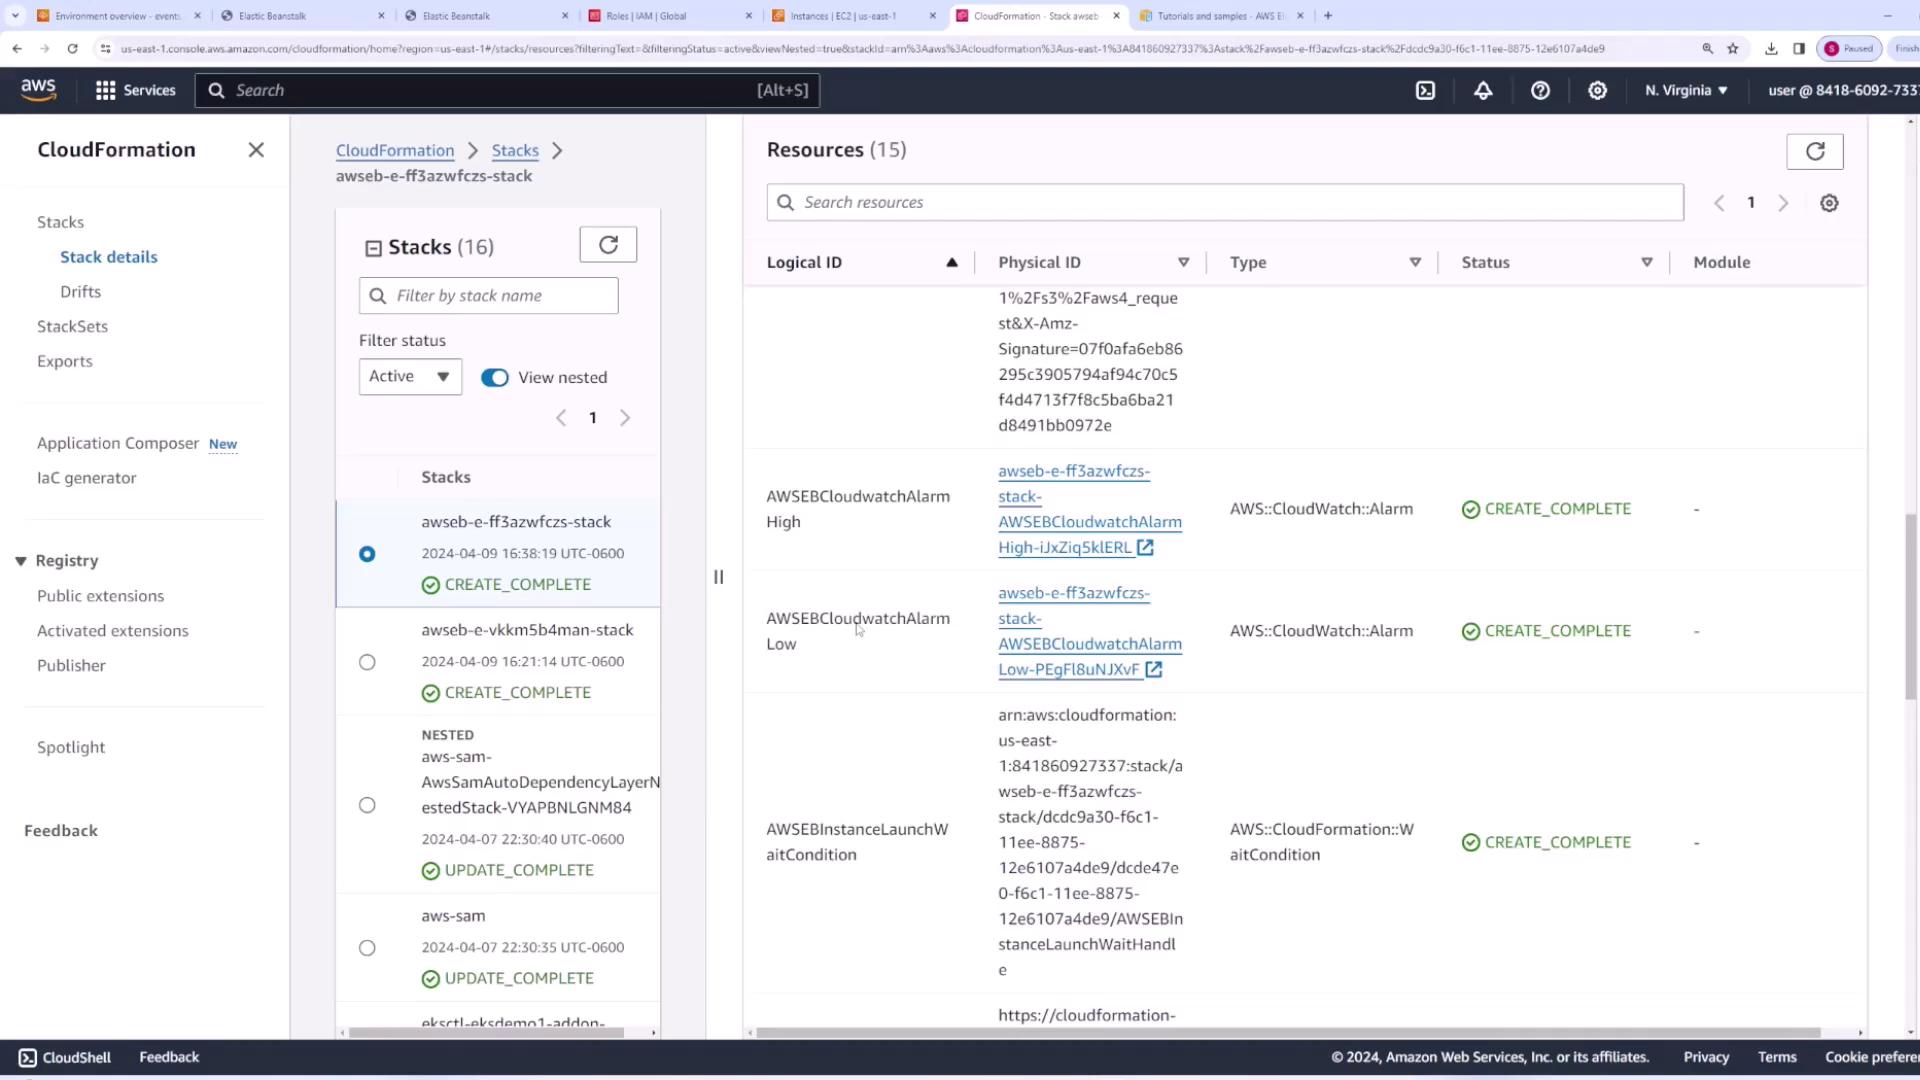
Click on the environment name to access detailed information about events and resource configurations. This dashboard provides insights about instance health, deployment events, and log summaries, thereby verifying that your application is functioning as expected.Elastic Beanstalk uses AWS CloudFormation to manage resources. In the CloudFormation console, you will find a stack corresponding to your environment (for example, “mywebapp-dev”). Reviewing the CloudFormation events and resources confirms that elements such as auto-scaling groups, launch configurations, security groups, and Elastic IPs are in place.
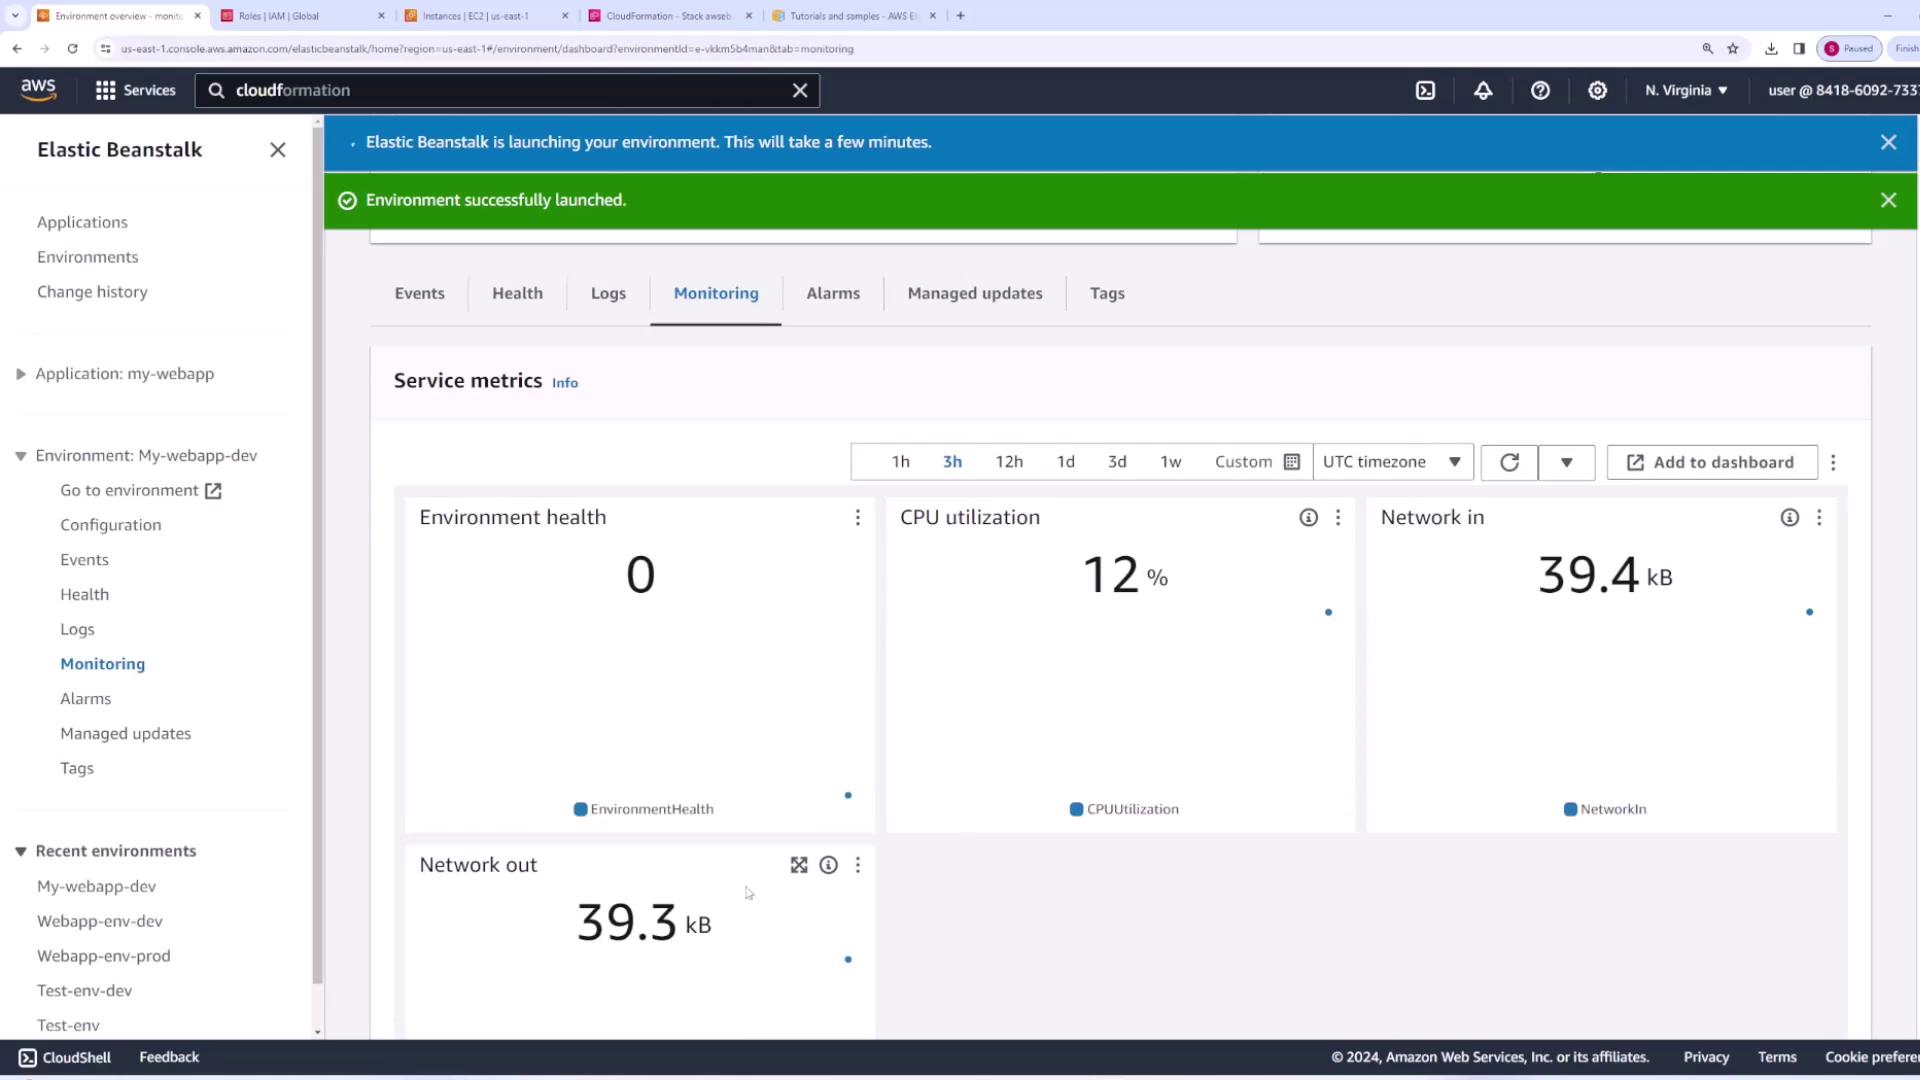
The Elastic Beanstalk dashboard also provides health metrics for your environment, including CPU utilization and network traffic. Links to CloudWatch alarms and logs offer deeper insights into the application’s performance.
To test your application, click the domain link under the environment details. This will open your application in a new tab, displaying the AWS sample HTML page rendered via Node.js.At this stage, the development environment is live. Next, we move on to deploying a production environment, showcasing Elastic Beanstalk’s capability to manage multiple environments within a single application.
Return to your application (“My Web App”) and click Create New Environment. Name this environment “mywebapp-prod” and select the Node.js platform. You can reuse the previously uploaded version (“version 1”).
For production, choose the High Availability configuration. This setup deploys your application across multiple EC2 instances behind a load balancer to ensure redundancy. Click Next to continue.Select the same IAM roles, EC2 key pair, and instance profile used in the development environment.
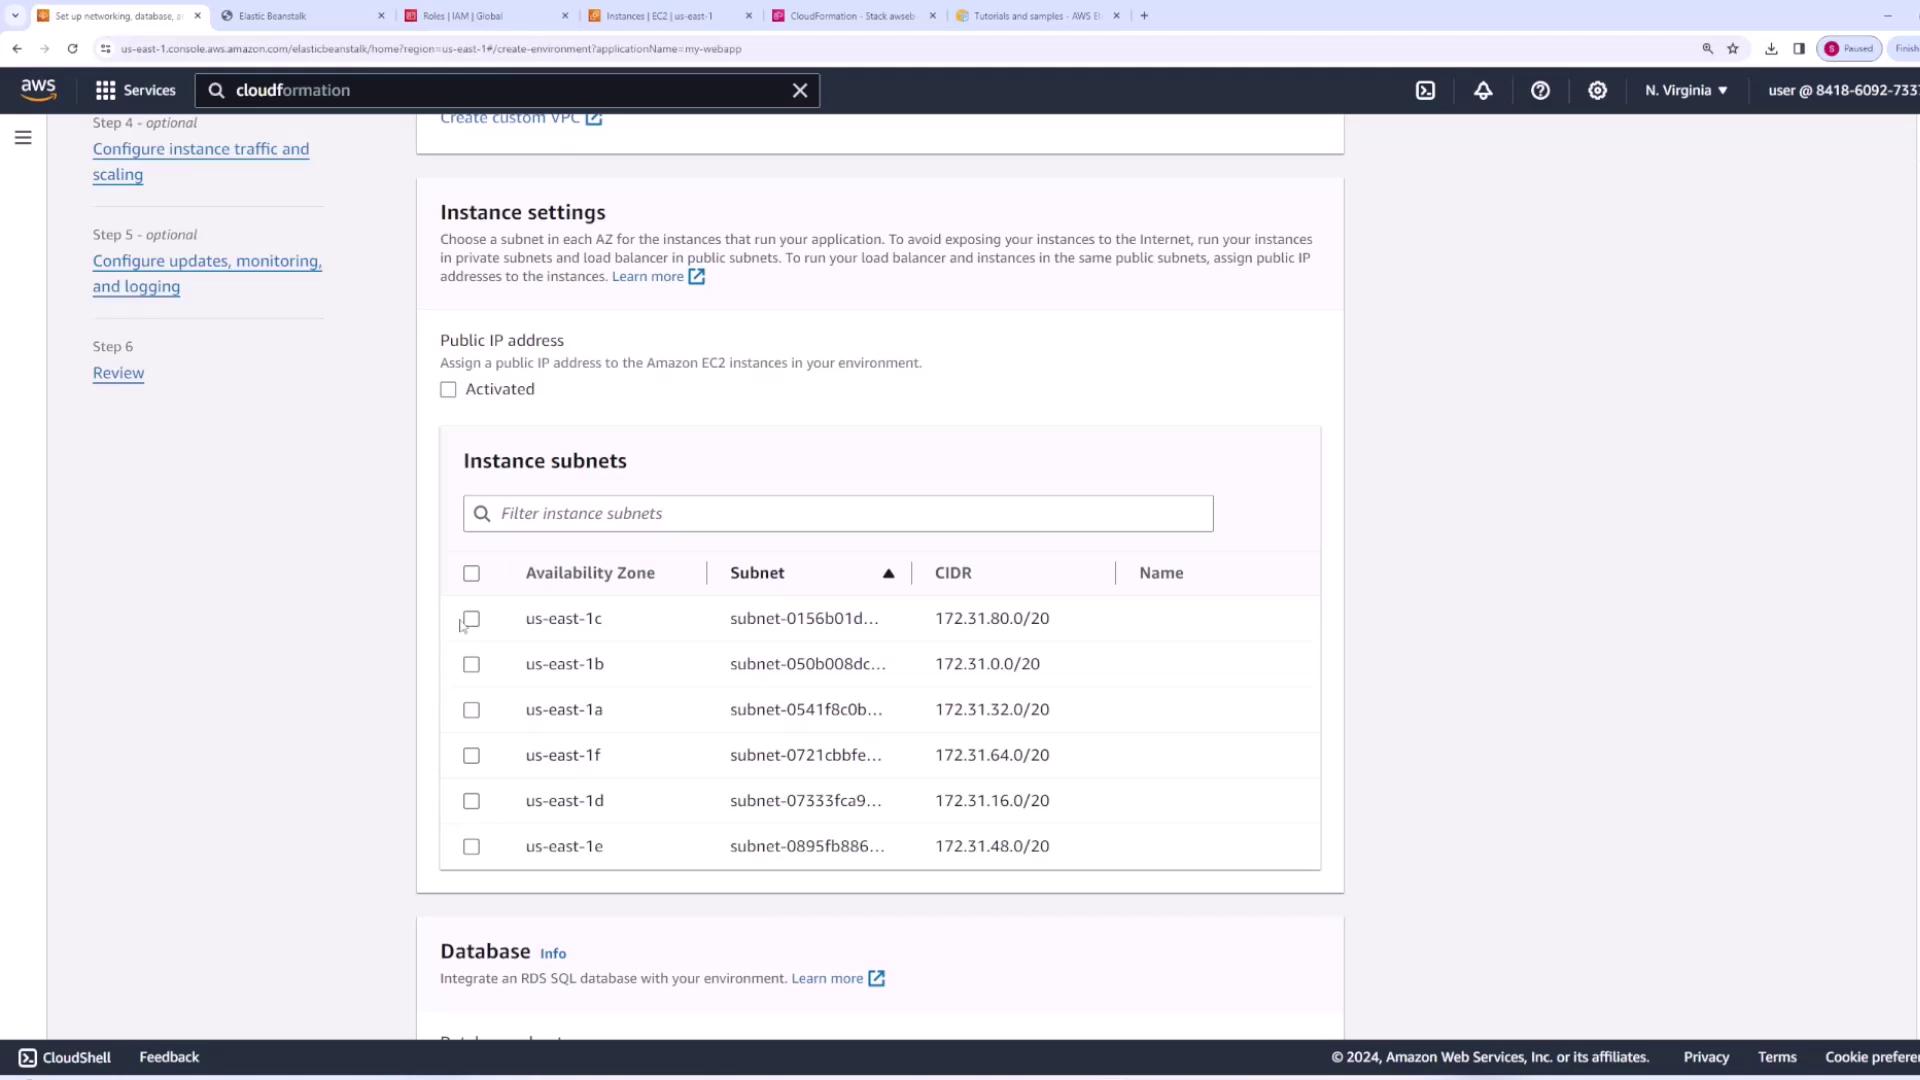
You will now be presented with a full suite of configuration options. These settings allow customization of networking, database integration, instance types, auto-scaling policies, load balancer rules, logging, and deployment strategies (e.g., rolling updates, immutable deployments, or traffic splitting).For example, within the networking section you can:
Select a Virtual Private Cloud (VPC) and multiple subnets for redundancy.
Choose whether EC2 instances receive public IP addresses.
Enable and configure an RDS database, selecting instance type, storage options, and deletion policies.
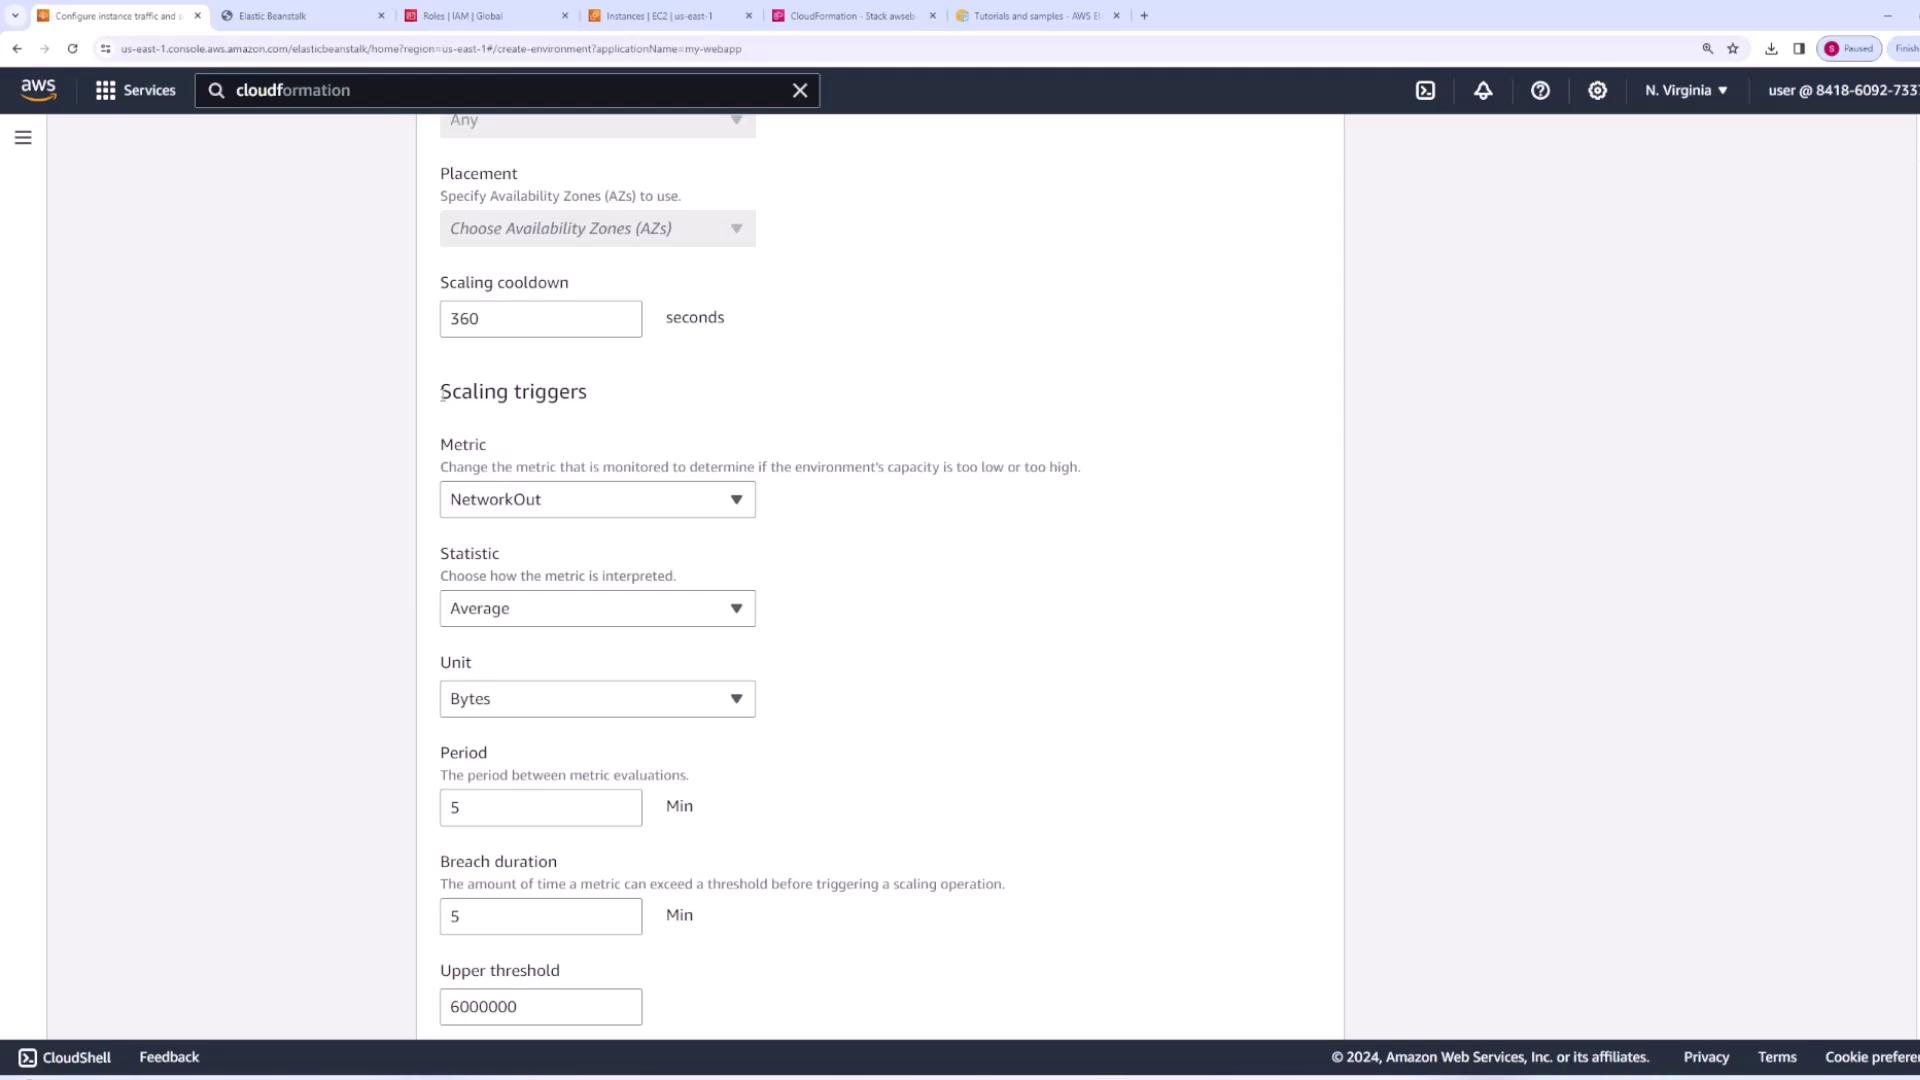
In the auto-scaling settings, define the minimum, maximum, and desired number of instances. Choose between on-demand or mixed spot and on-demand instances, and configure scaling triggers based on metrics such as CPU utilization or network traffic.
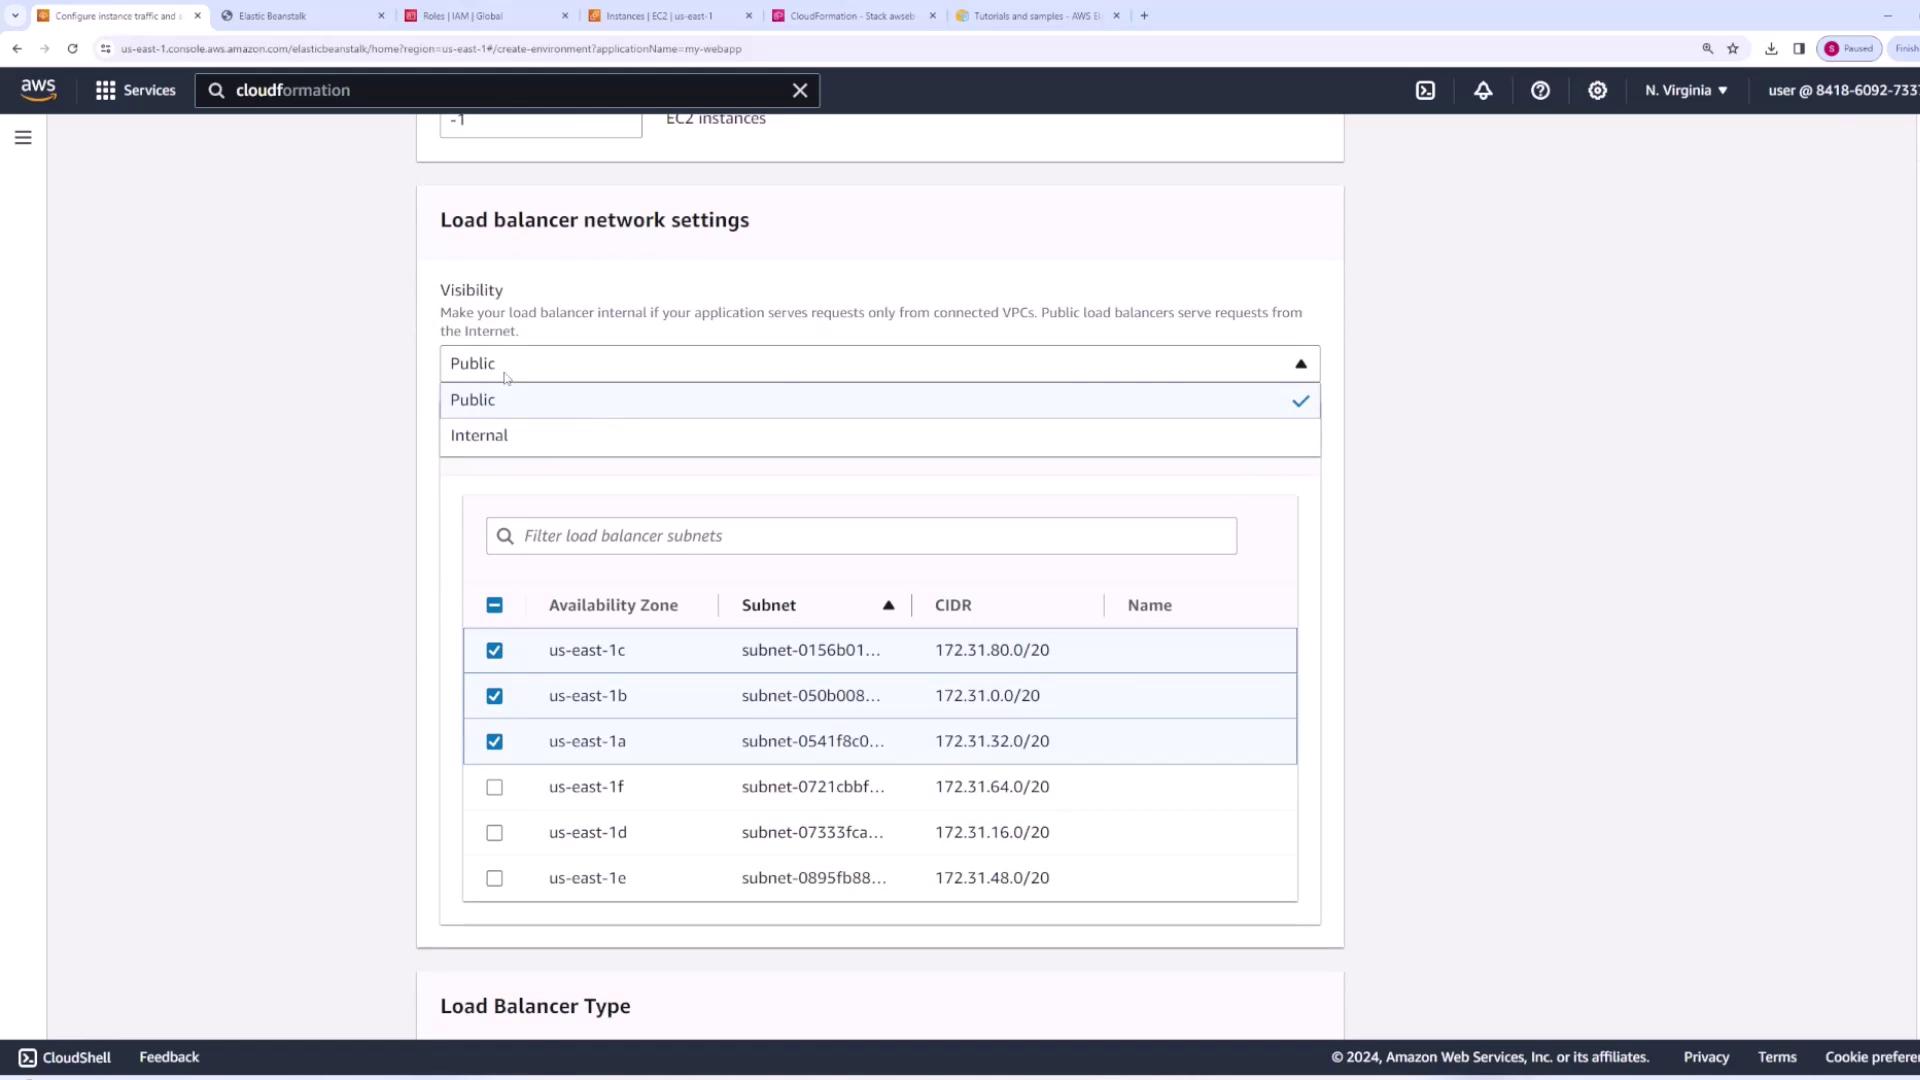
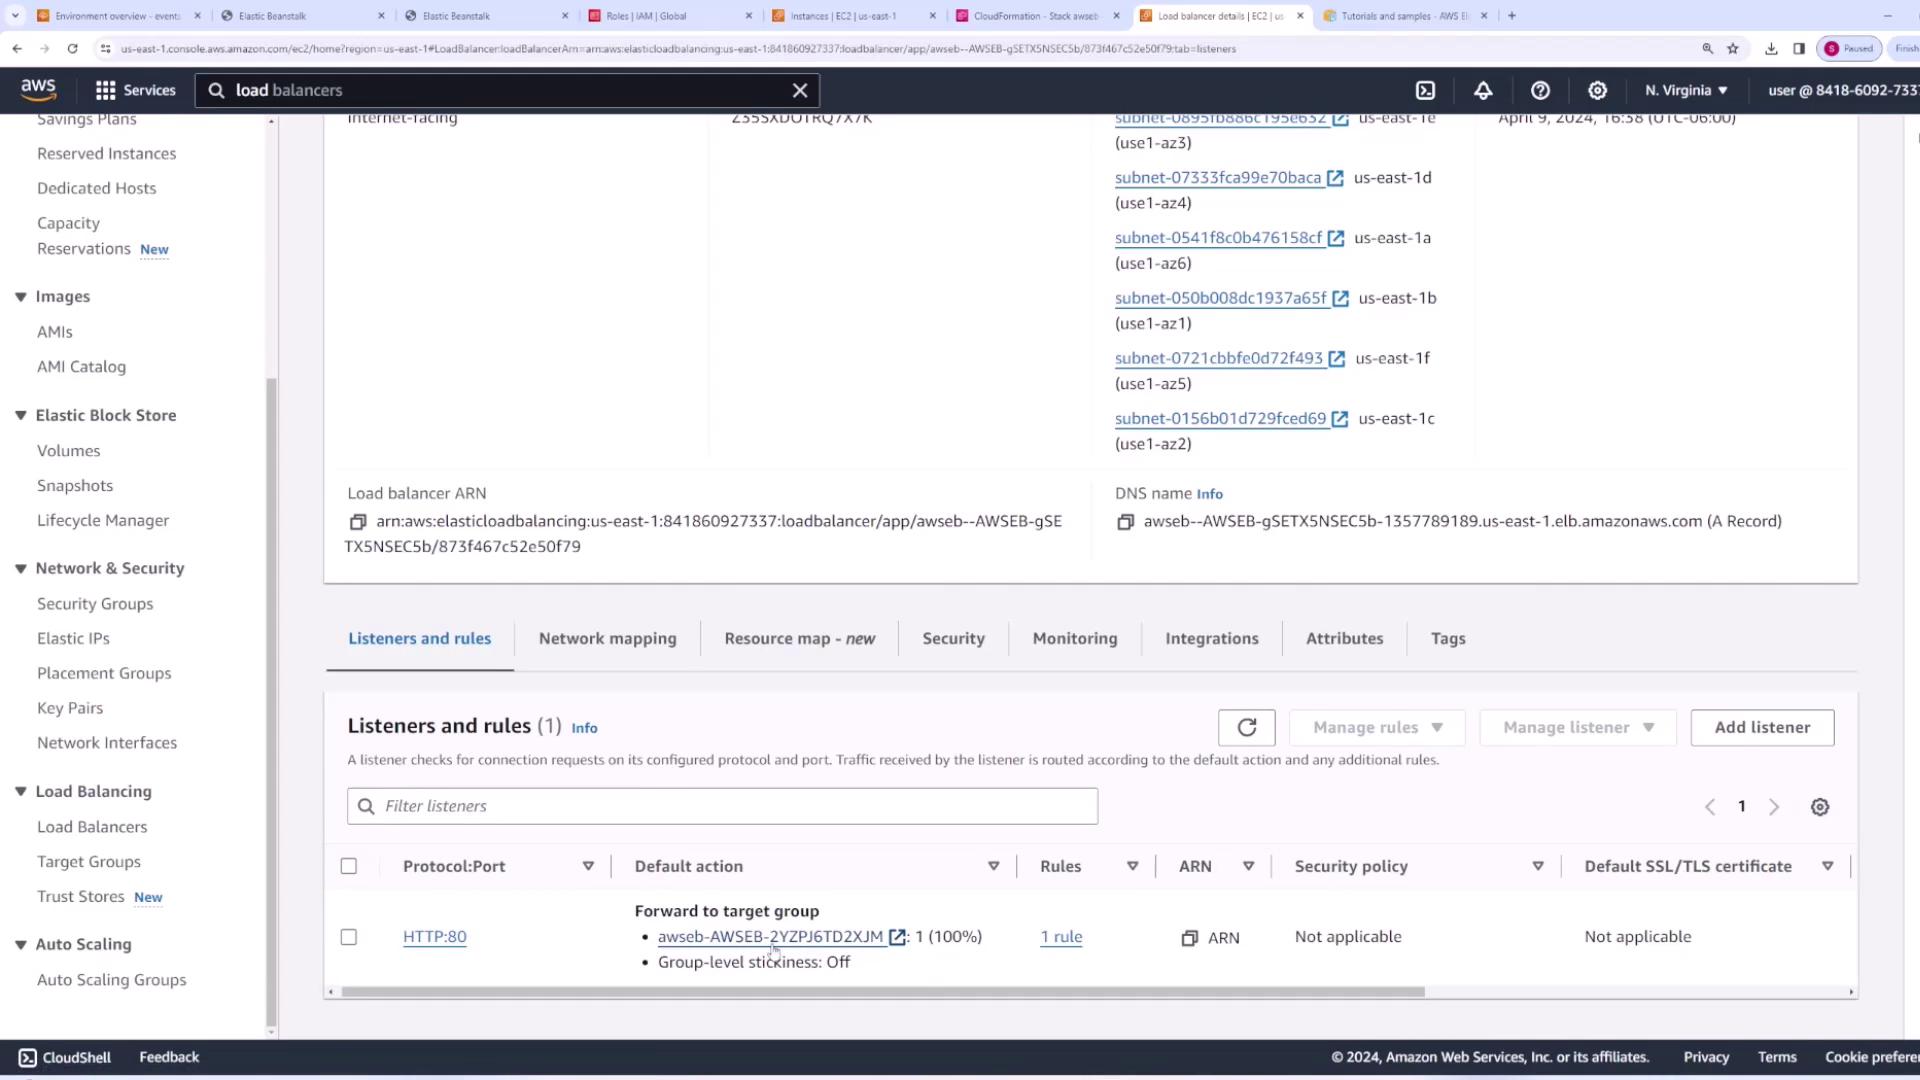
The load balancer configuration lets you:
Choose between a public and internal load balancer.
Select the load balancer type (Application Load Balancer or Network Load Balancer).
Configure dedicated or shared load balancers.
Set listener rules, such as the default rule for port 80 and health check settings.
Additional settings include log file access, CloudWatch monitoring, email notifications, and deployment strategies. After reviewing all settings, click Submit to launch the production environment. If needed, you can cancel and restart the process with AWS-recommended defaults.
Once deployed, the production environment should display a health status of “OK” on the dashboard.
Click the production domain to confirm that your application is accessible. With both development and production environments live under the same application, you can test new features in development before promoting changes to production.
Elastic Beanstalk leverages AWS CloudFormation to create and manage resources. For your production environment, you can review these components:
CloudFormation Stack: Lists resources including auto-scaling groups, launch configurations, CloudWatch alarms, and load balancer settings.
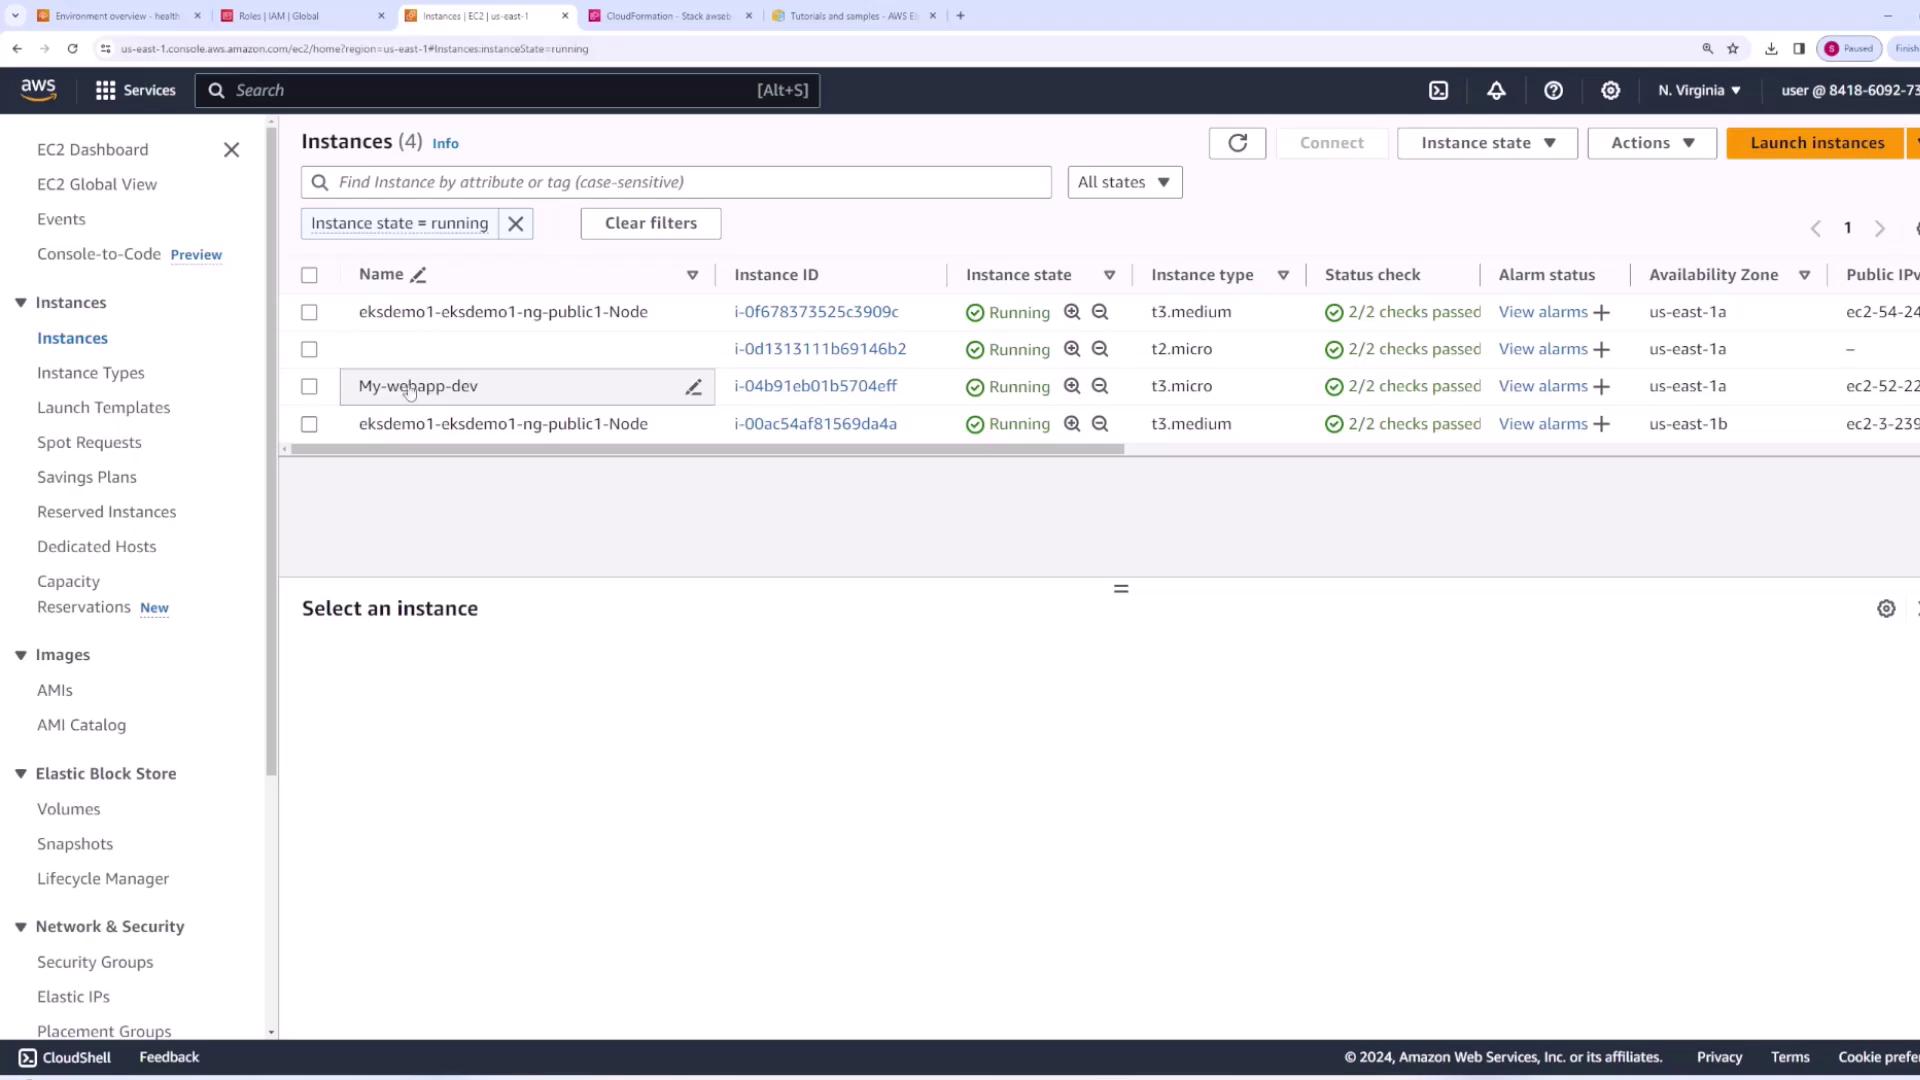
EC2 Instances: Displays the running instances that are part of an auto-scaling group, detailing the desired, minimum, and maximum instance counts.
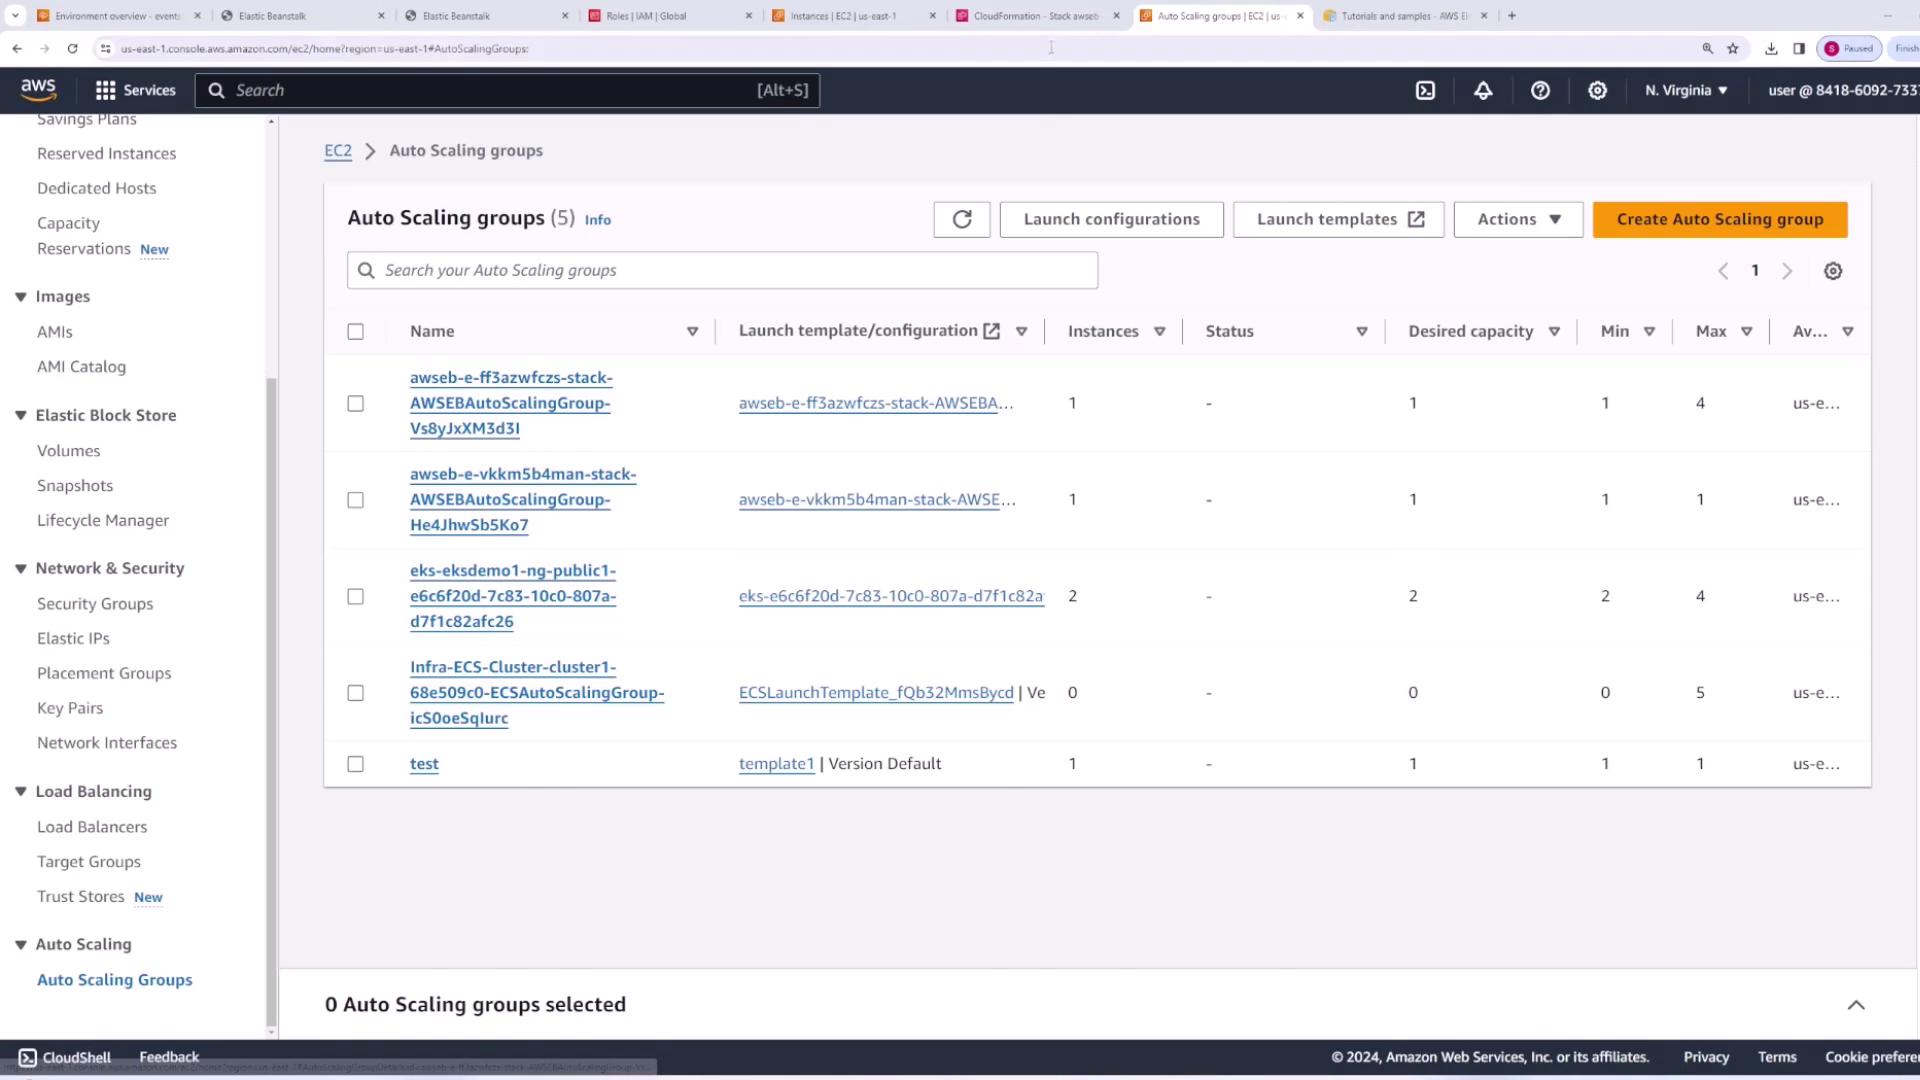
Auto Scaling Groups: Provides configurations linked to launch configurations and scaling policies.
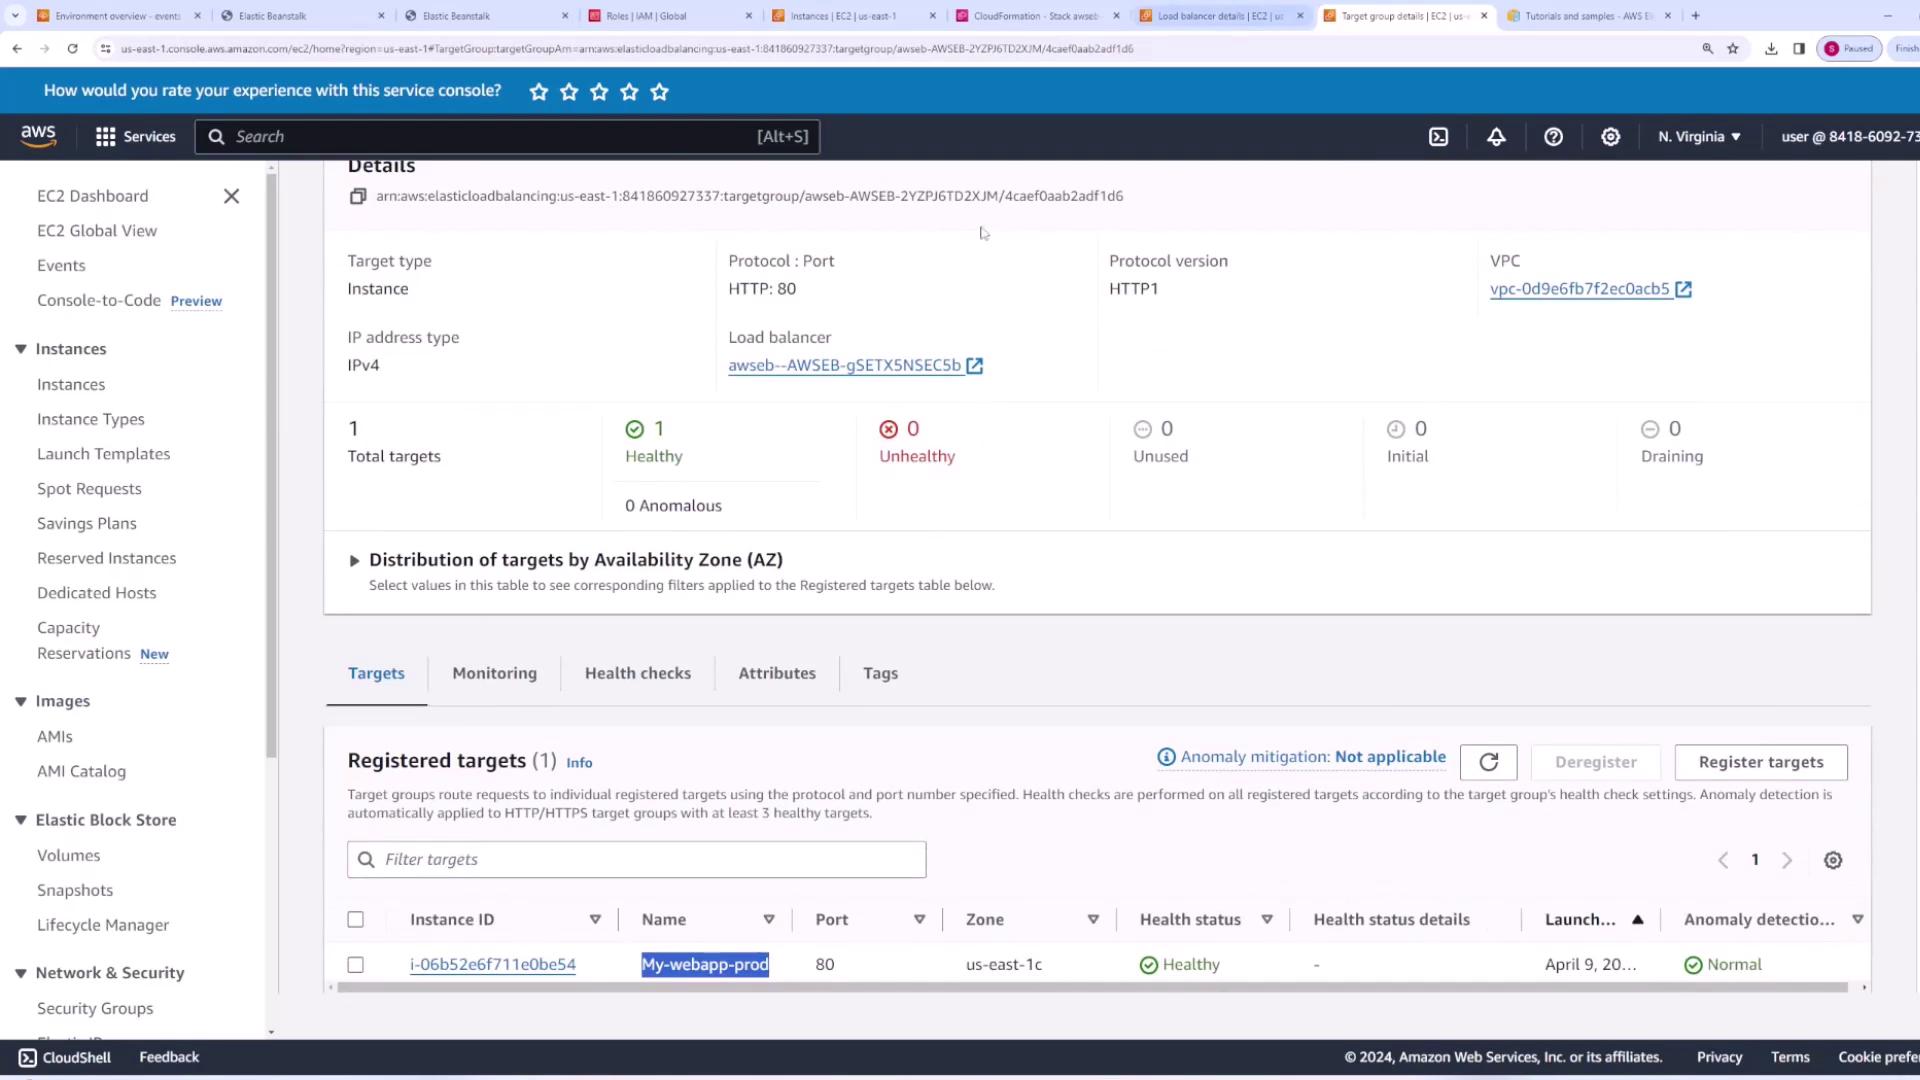
Load Balancer Details: Includes listener rules and target groups, ensuring seamless traffic forwarding to your EC2 instances.
This comprehensive view highlights how Elastic Beanstalk streamlines deployment by automatically managing the underlying AWS components.In summary, this demo illustrated how to deploy multiple environments with AWS Elastic Beanstalk. The development environment allows for safe testing of new code changes, while the production environment is configured for high availability and scalability. Through the use of AWS CloudFormation, Elastic Beanstalk efficiently manages all necessary resources, greatly reducing deployment complexity.Enjoy leveraging AWS Elastic Beanstalk for your web applications, and explore its robust features to optimize your deployment workflows!