- Create an EFS file system and configure options (storage class, encryption, lifecycle, throughput, performance).
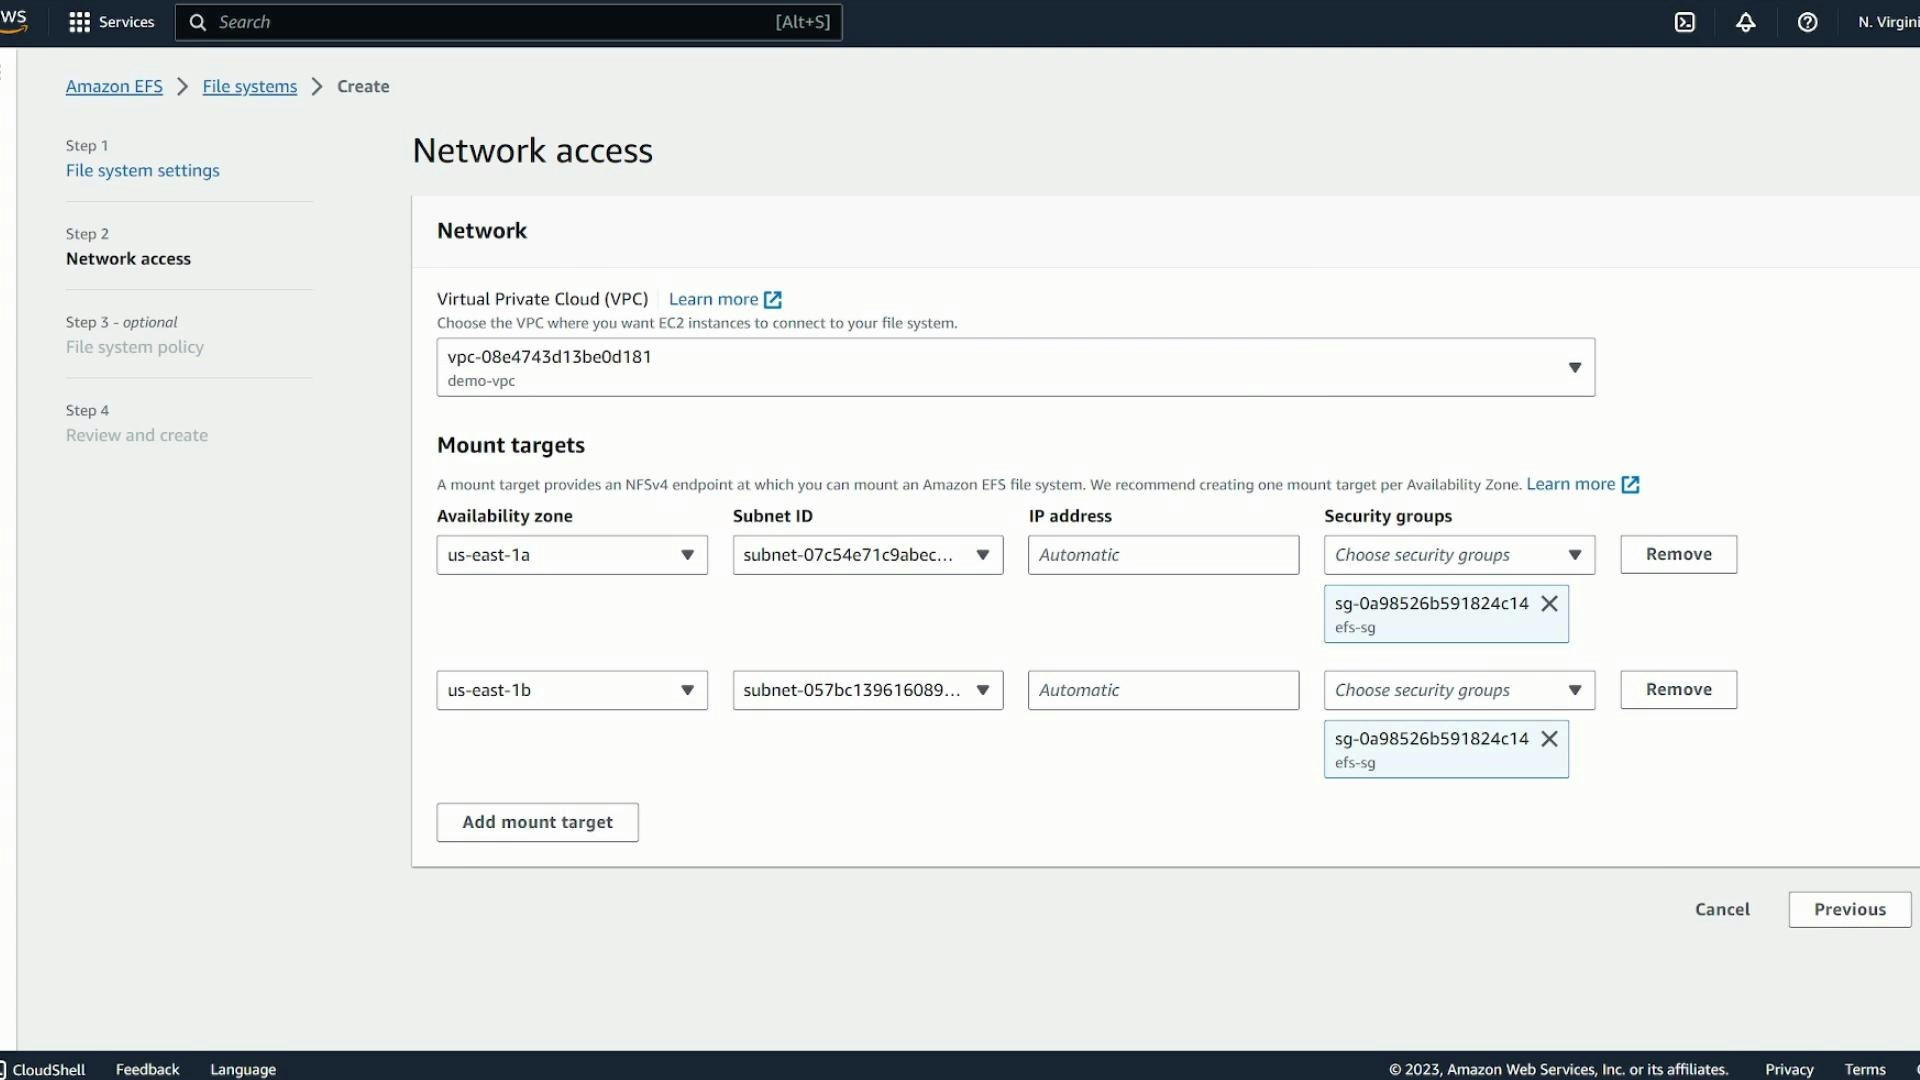
- Add mount targets in the VPC subnets for all AZs used by your EC2 clients.
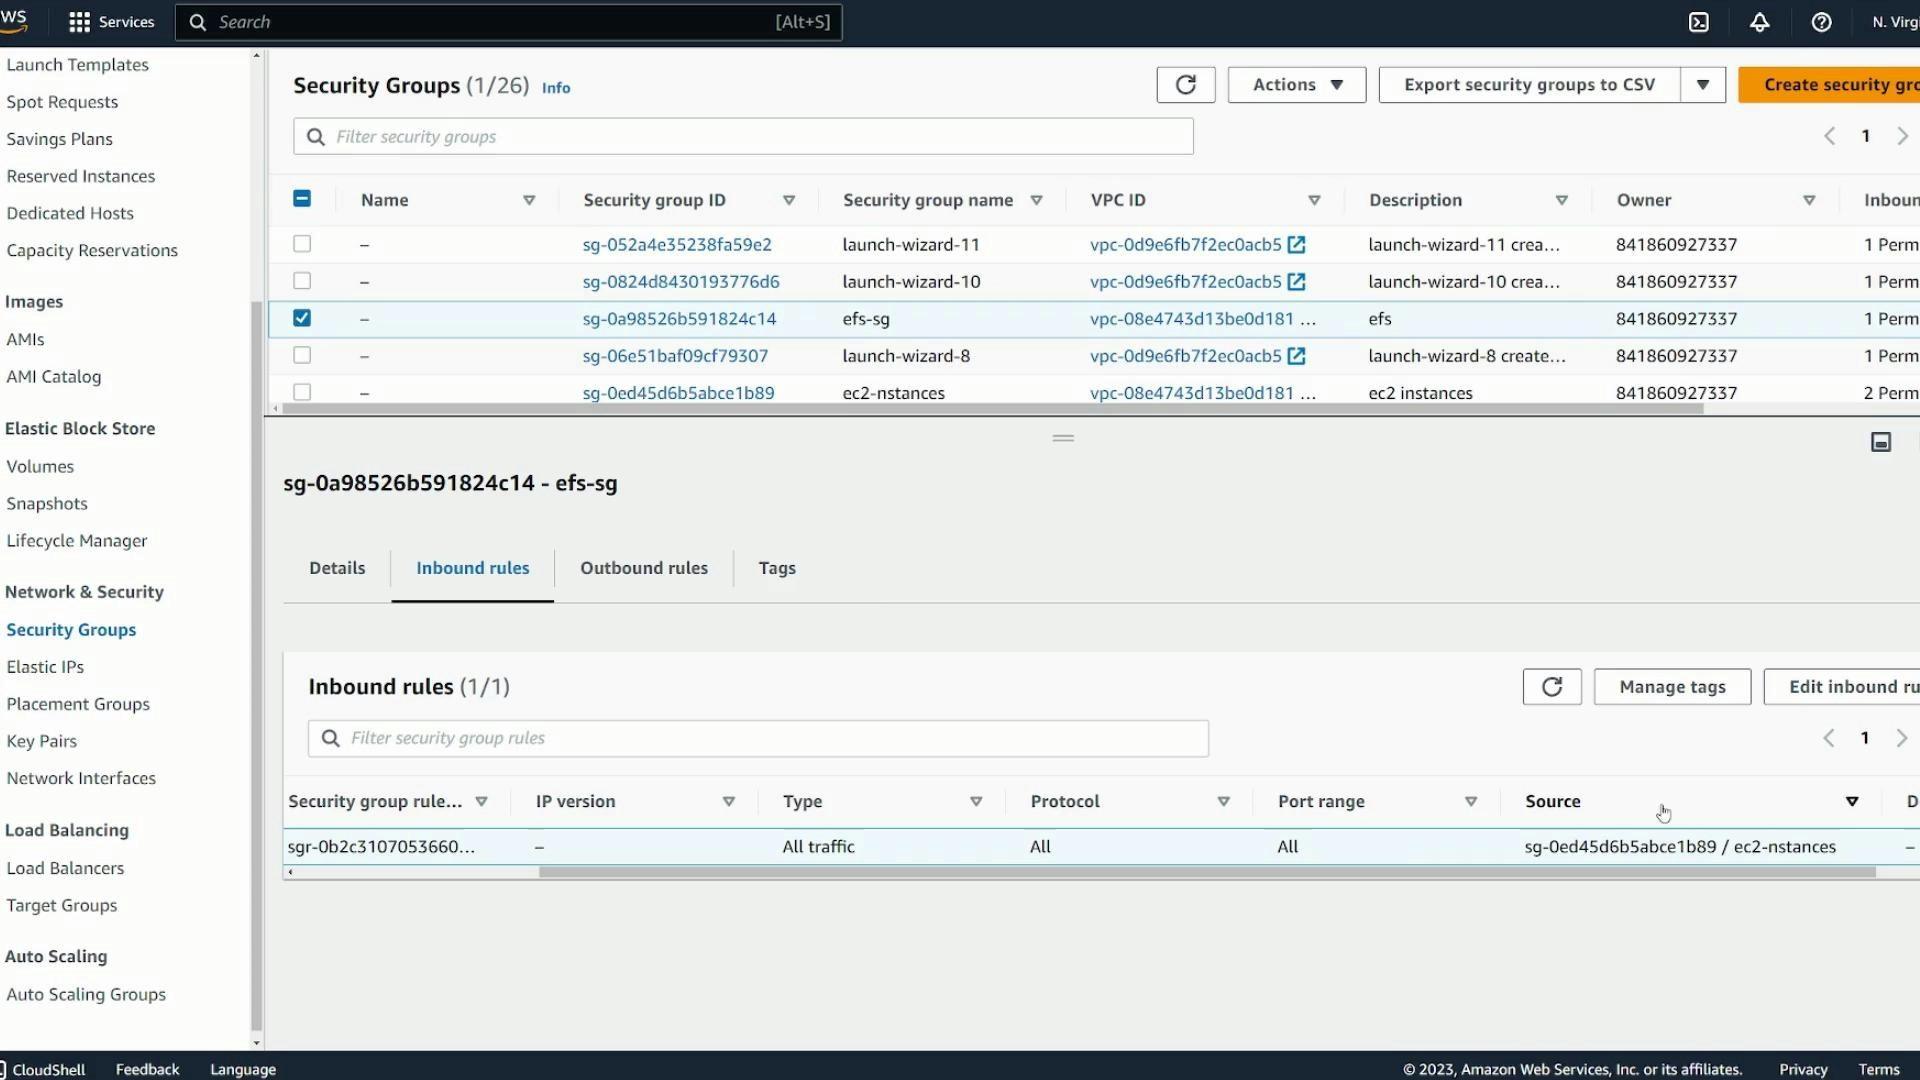
- Configure security groups to permit NFS (TCP/2049) traffic from EC2 instances to EFS mount targets.
- Install amazon-efs-utils on each EC2 instance and mount the file system.
- Verify shared file visibility and make mounts persistent across reboots.
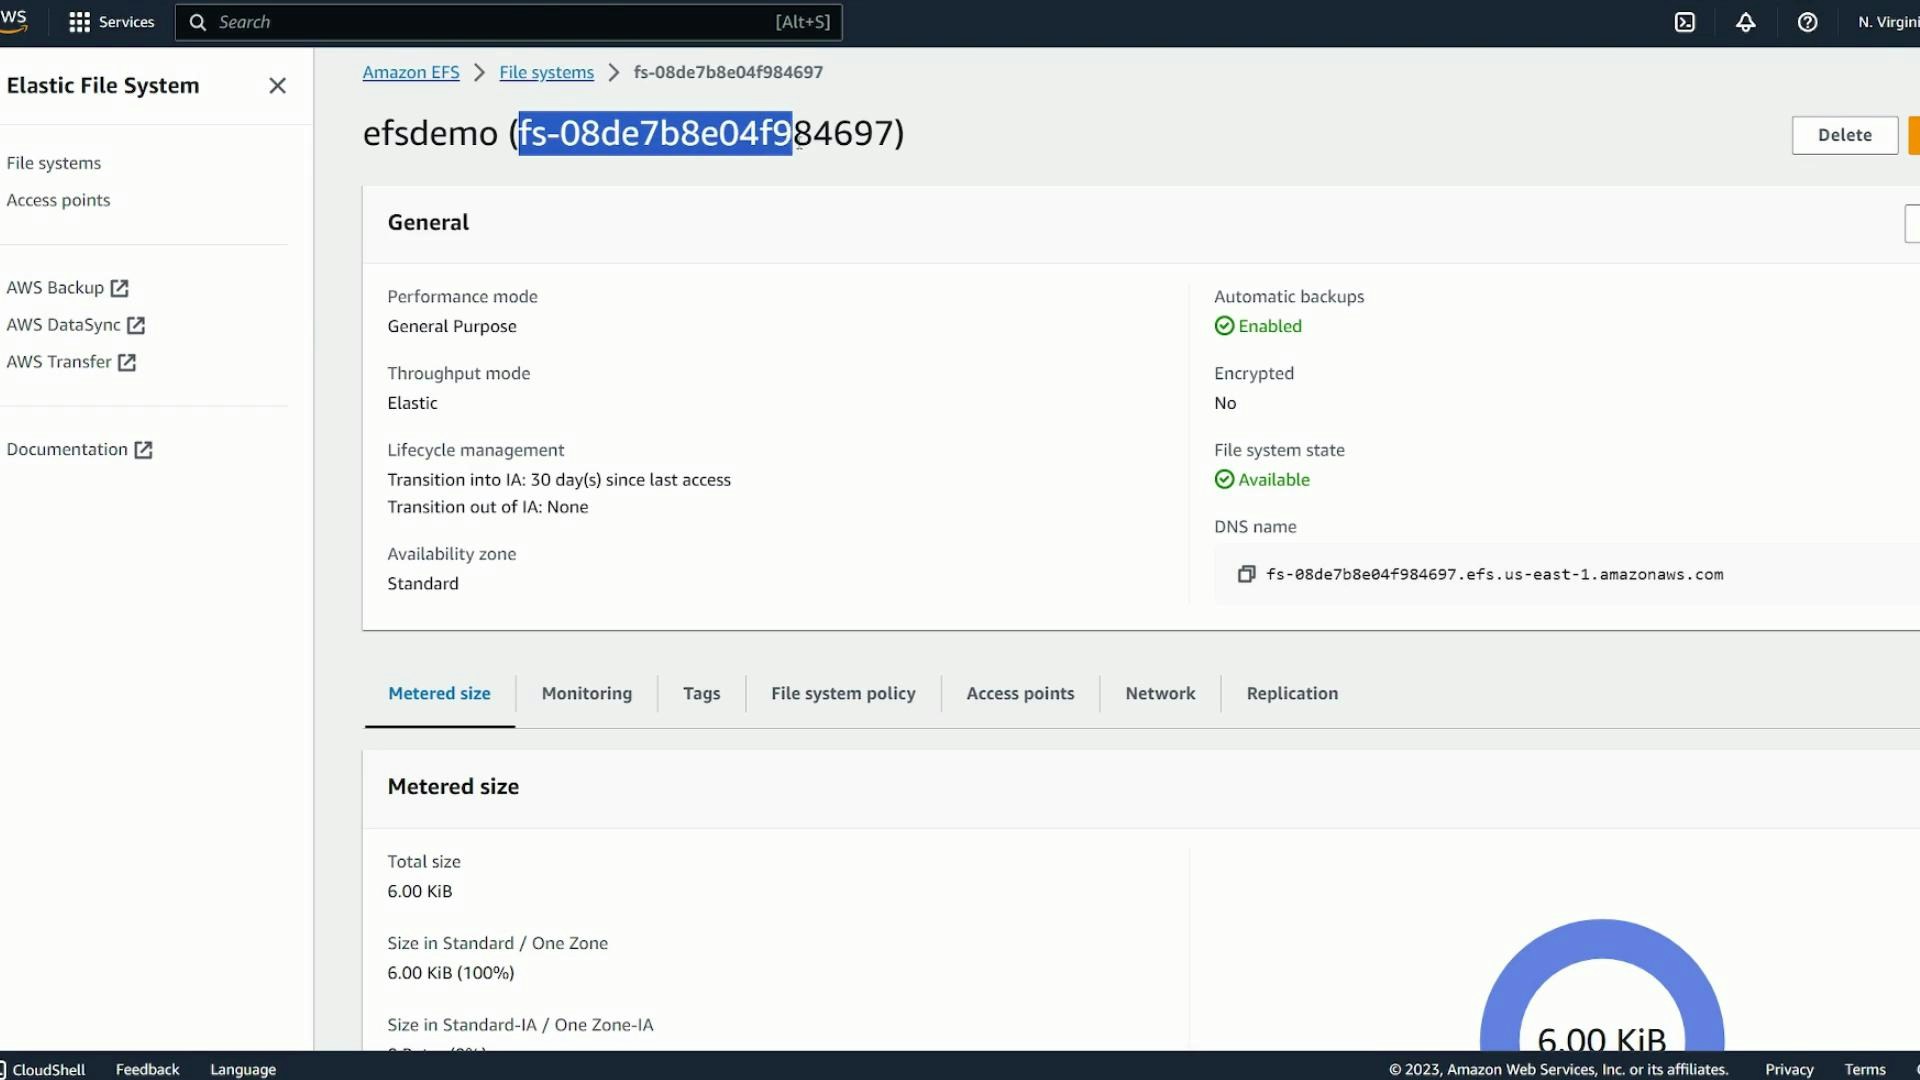
- Open the Amazon EFS console and choose Create file system. Use Quick create for defaults or Customize to set options manually.
- Provide a name (for example: efsdemo).
- Choose a storage class:
- Regional: redundant across AZs (recommended for HA)
- One Zone: lower cost, single AZ
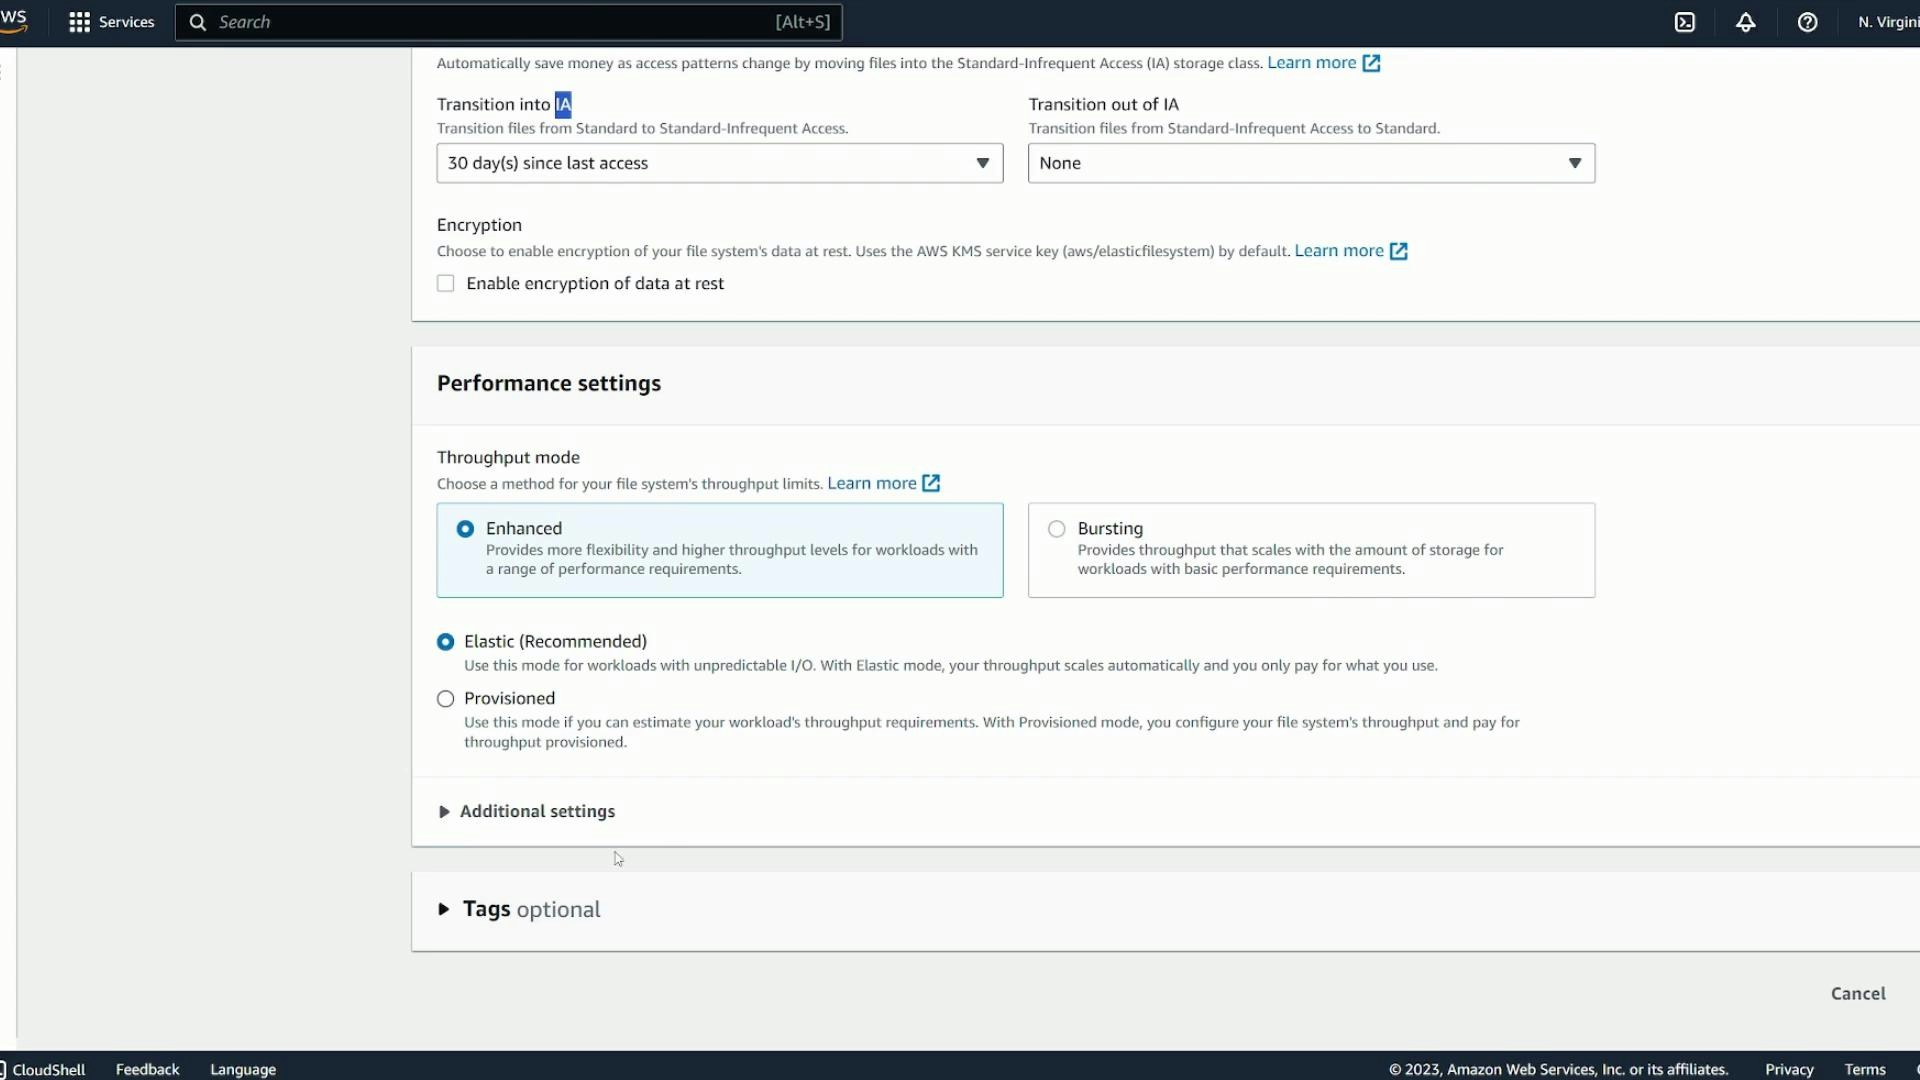
- Optionally enable automatic backups and configure lifecycle management to transition older files to Infrequent Access (IA) to save cost.
- Choose encryption options (at-rest via AWS KMS) if required.
- Choose throughput and performance modes to match your workload (bursting vs provisioned throughput; General Purpose vs Max I/O).
| Setting | Purpose | Considerations |
|---|---|---|
| Storage class | Regional or One Zone | Regional gives AZ redundancy; One Zone lowers cost |
| Lifecycle management | Transition to IA | Save cost for infrequently accessed files |
| Encryption | At-rest via KMS | Required for compliance or security needs |
| Throughput mode | Bursting / Provisioned | Choose based on predictable throughput requirements |
| Performance mode | General Purpose / Max I/O | Use Max I/O for highly parallel workloads |
- Select the VPC where your EC2 instances run. Create mount targets in each AZ/subnet where clients will mount the file system for redundancy and low-latency access.
- Assign a security group to the mount targets that permits NFS traffic (TCP port 2049) from your EC2 instances. A recommended pattern is:
- Create an EFS security group (efs-sg)
- Allow inbound TCP/2049 from the EC2 instances security group
To persist mounts across reboots, add an appropriate entry in /etc/fstab (or configure boot scripts). See the official AWS EFS mounting instructions for recommended options and examples: https://docs.aws.amazon.com/efs/latest/ug/mounting-fs.html
- Ensure mount targets exist in every AZ used by your EC2 clients.
- Verify mount target security group allows inbound TCP/2049 from EC2 instances.
- Confirm amazon-efs-utils is installed on each client instance.
- If mounts fail, check:
- VPC route tables and network ACLs between instances and mount targets
- Security group rules for both EC2 instances and EFS mount targets
- DNS resolution (EFS uses regional endpoint names that resolve to mount target IPs)
- System logs (/var/log/messages or journalctl) for mount helper errors
- Create an EFS file system, place mount targets in each AZ used by clients, and attach a security group that permits TCP/2049 from your EC2 instances.
- Install amazon-efs-utils on each EC2 instance and mount with mount.efs or mount -t efs (optional: use -o tls for encrypted in-transit traffic).
- Files created by any instance are immediately visible to all instances mounting the same EFS file system.
- To persist mounts across reboots, add a proper /etc/fstab entry following AWS documentation.
- Amazon EFS documentation — Mounting instructions: https://docs.aws.amazon.com/efs/latest/ug/mounting-fs.html
- Amazon EFS product page: https://aws.amazon.com/efs/
- amazon-efs-utils GitHub: https://github.com/aws/efs-utils