Environment Setup
On your screen, you should see three colored tabs:- Blue Tab: Account One, User One (the bucket creator)
- Green Tab: Account One, User Two
- Yellow Tab: Account Two, User One (commonly named “Admin”)
Creating the S3 Bucket
Log in as Account One, User One (Blue Tab) and complete the following steps:- Open the S3 console.
- Create a new bucket (e.g.,
demo-bucket) using default settings.
ACLs are not used in this demo because they are considered a legacy method.
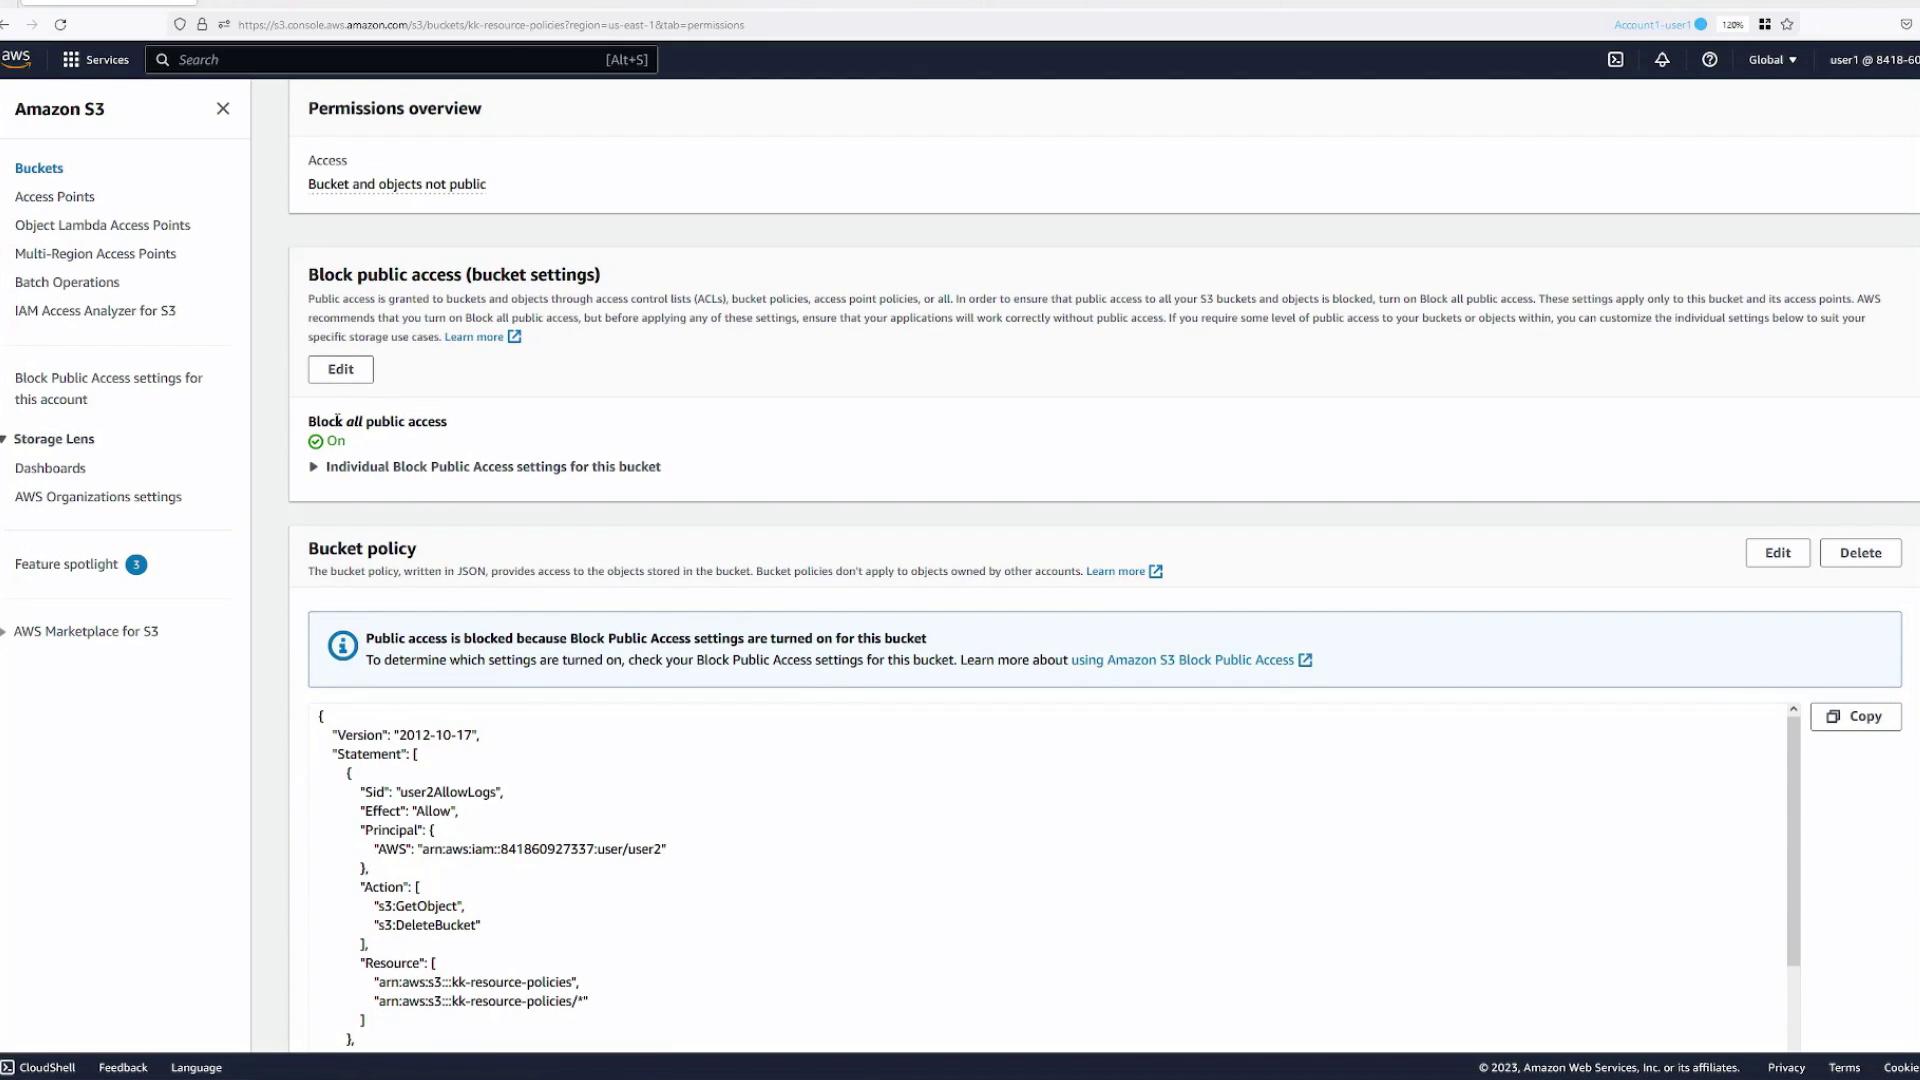
- Public access is blocked.
- Versioning is disabled.
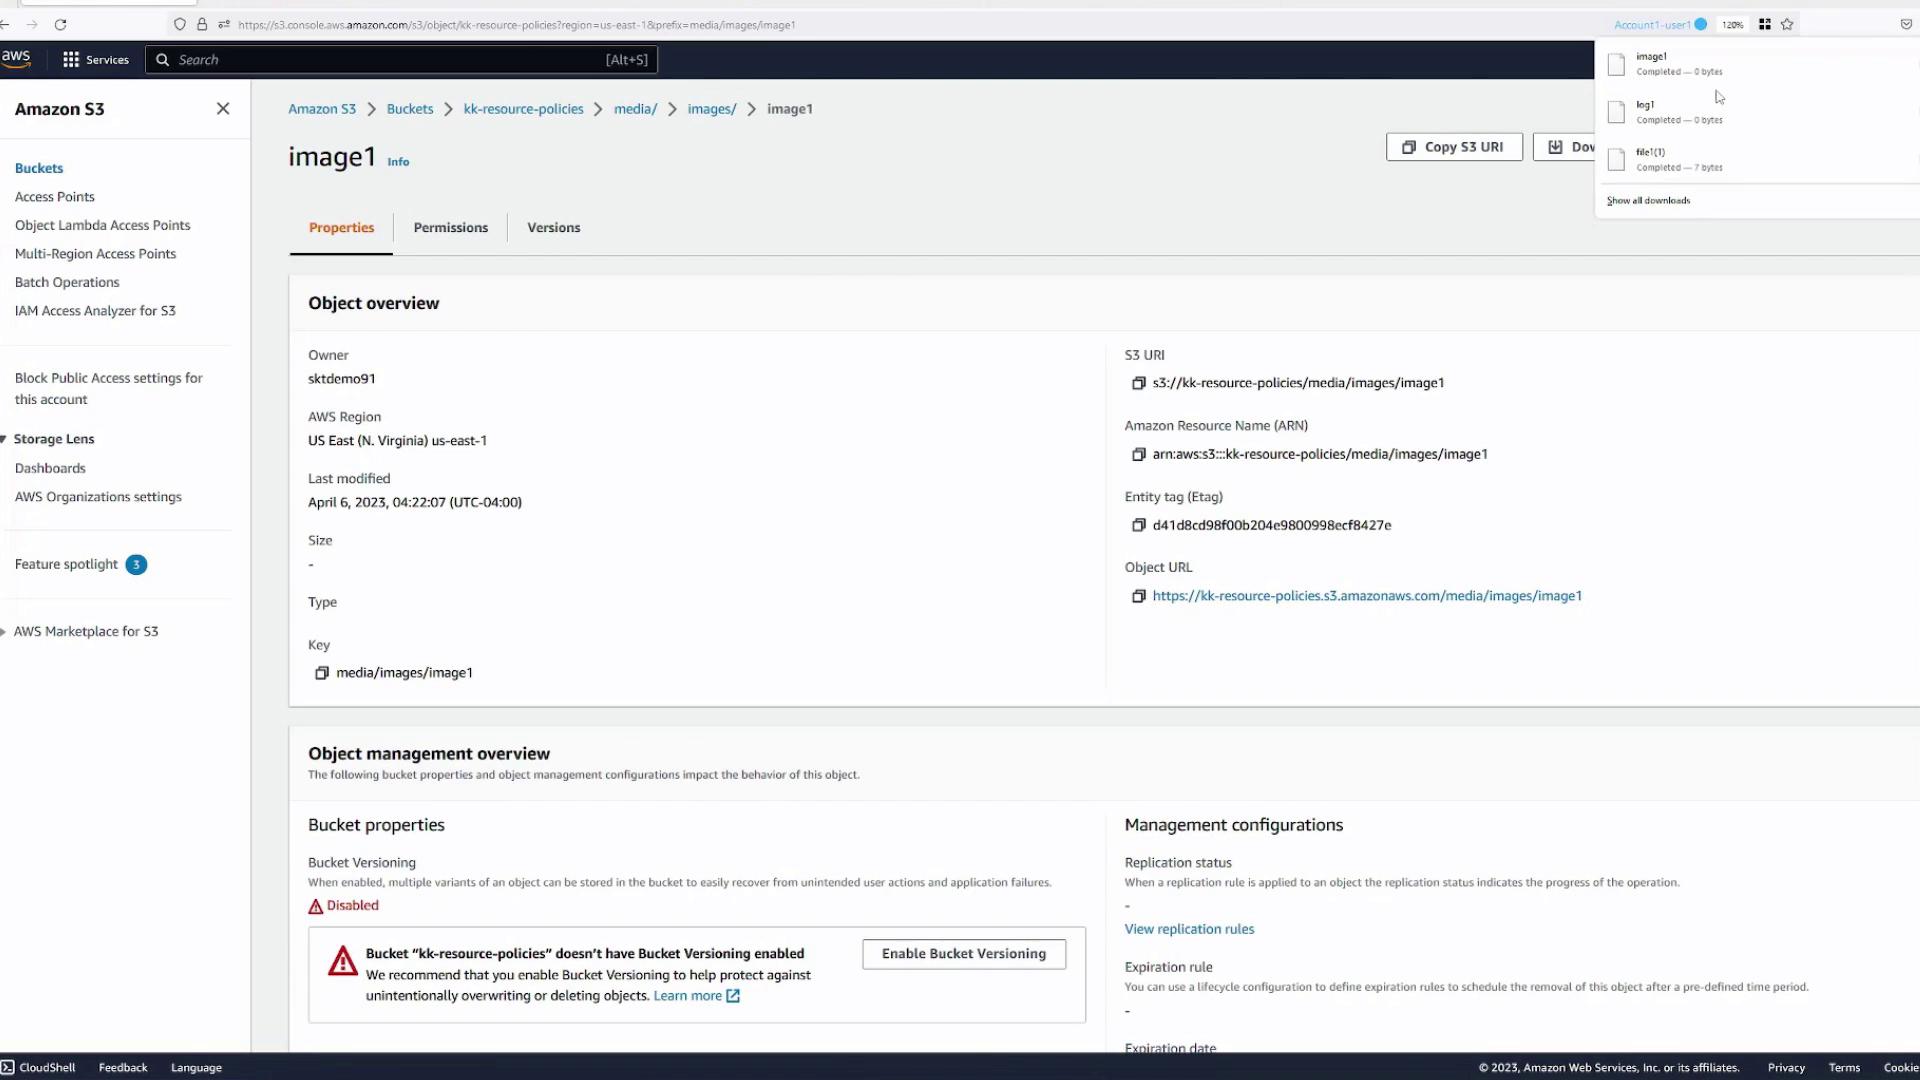
- After the bucket is created, open it and upload several files.
- When accessing a file through the Open action in the S3 console, the file is viewable.
- Accessing the file via its public URL returns an “Access Denied” error due to the bucket’s secure default settings.
Testing IAM Policy Permissions
Switch to the Green Tab (Account One, User Two) and evaluate the following:- Review the IAM policy attached to User Two. This policy, named “list buckets,” permits listing buckets and their contents.
- As a result, User Two can see the bucket and its file list but receives an “Access Denied” error when trying to open any object.
- Account One, User One: Has full access as the bucket creator.
- Account One, User Two: Can list buckets and view their contents based on the IAM policy, but cannot open files such as
file1.txt.
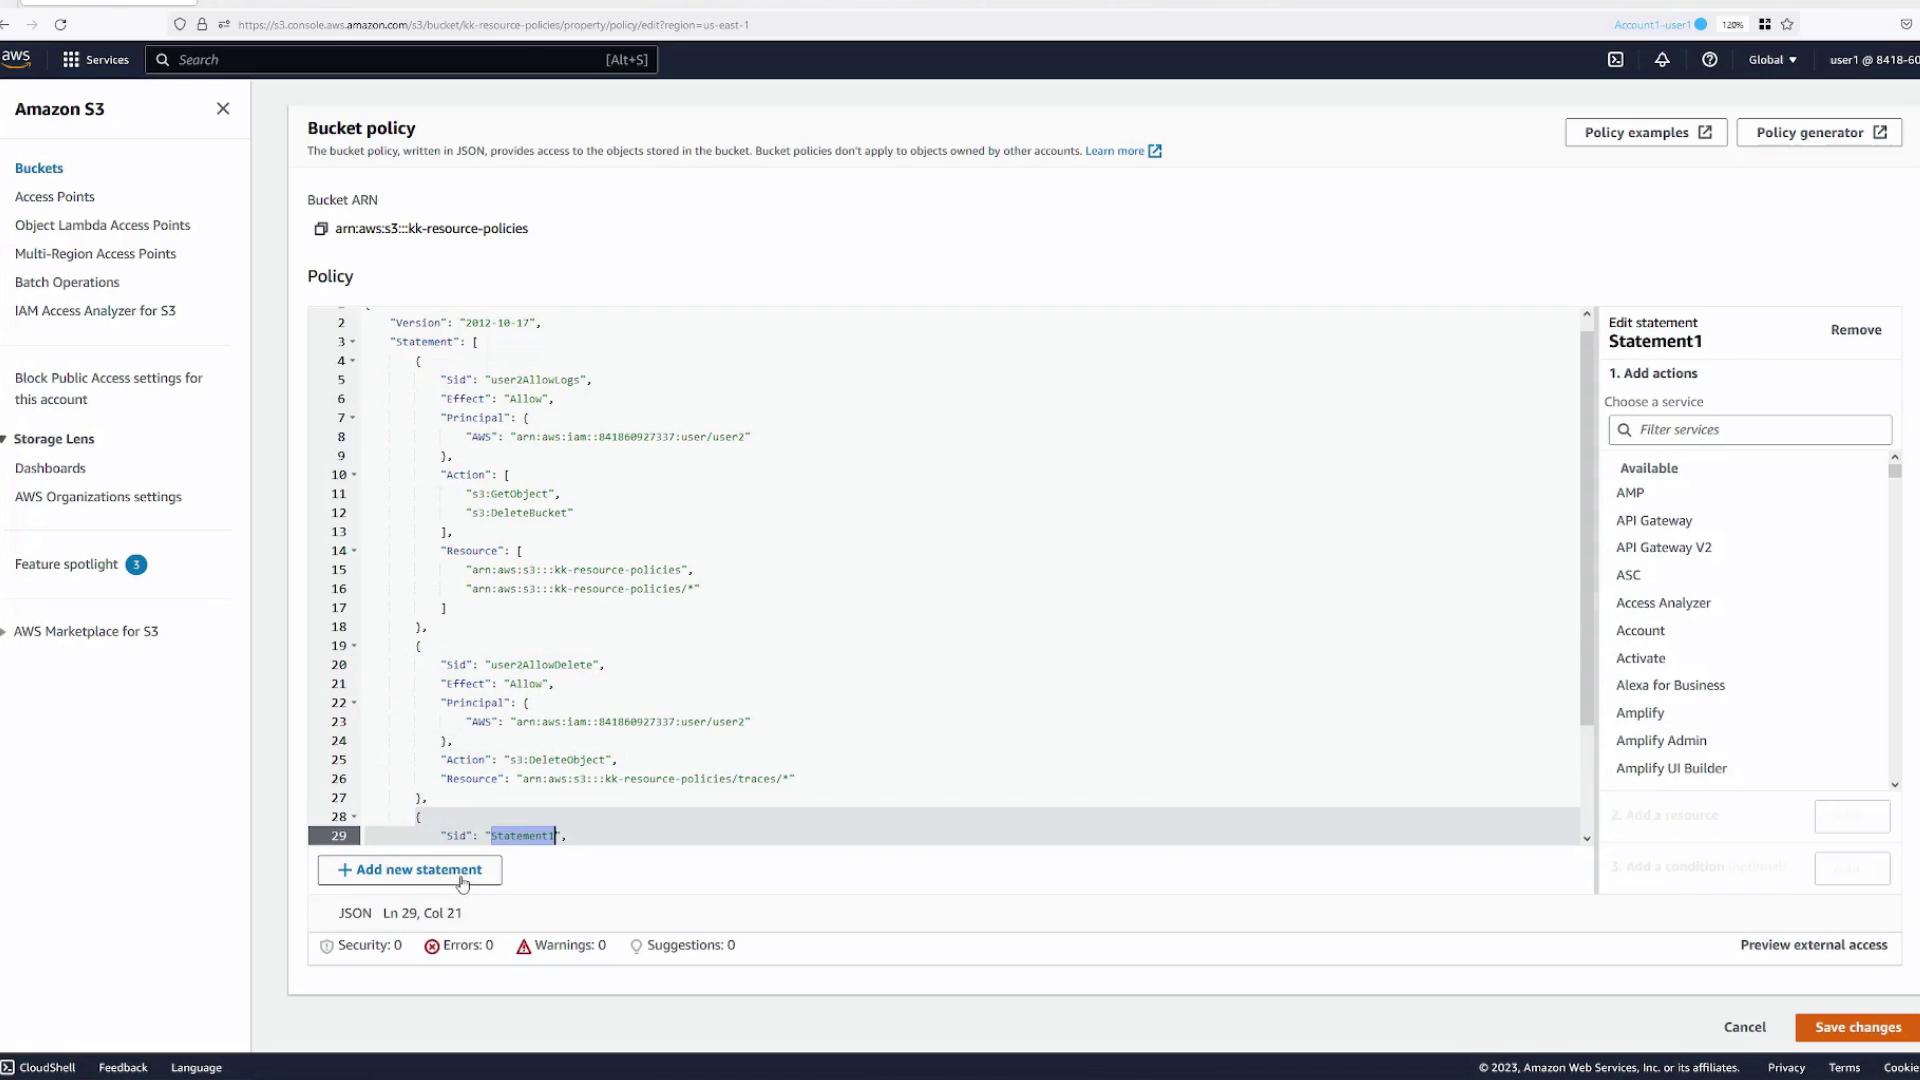
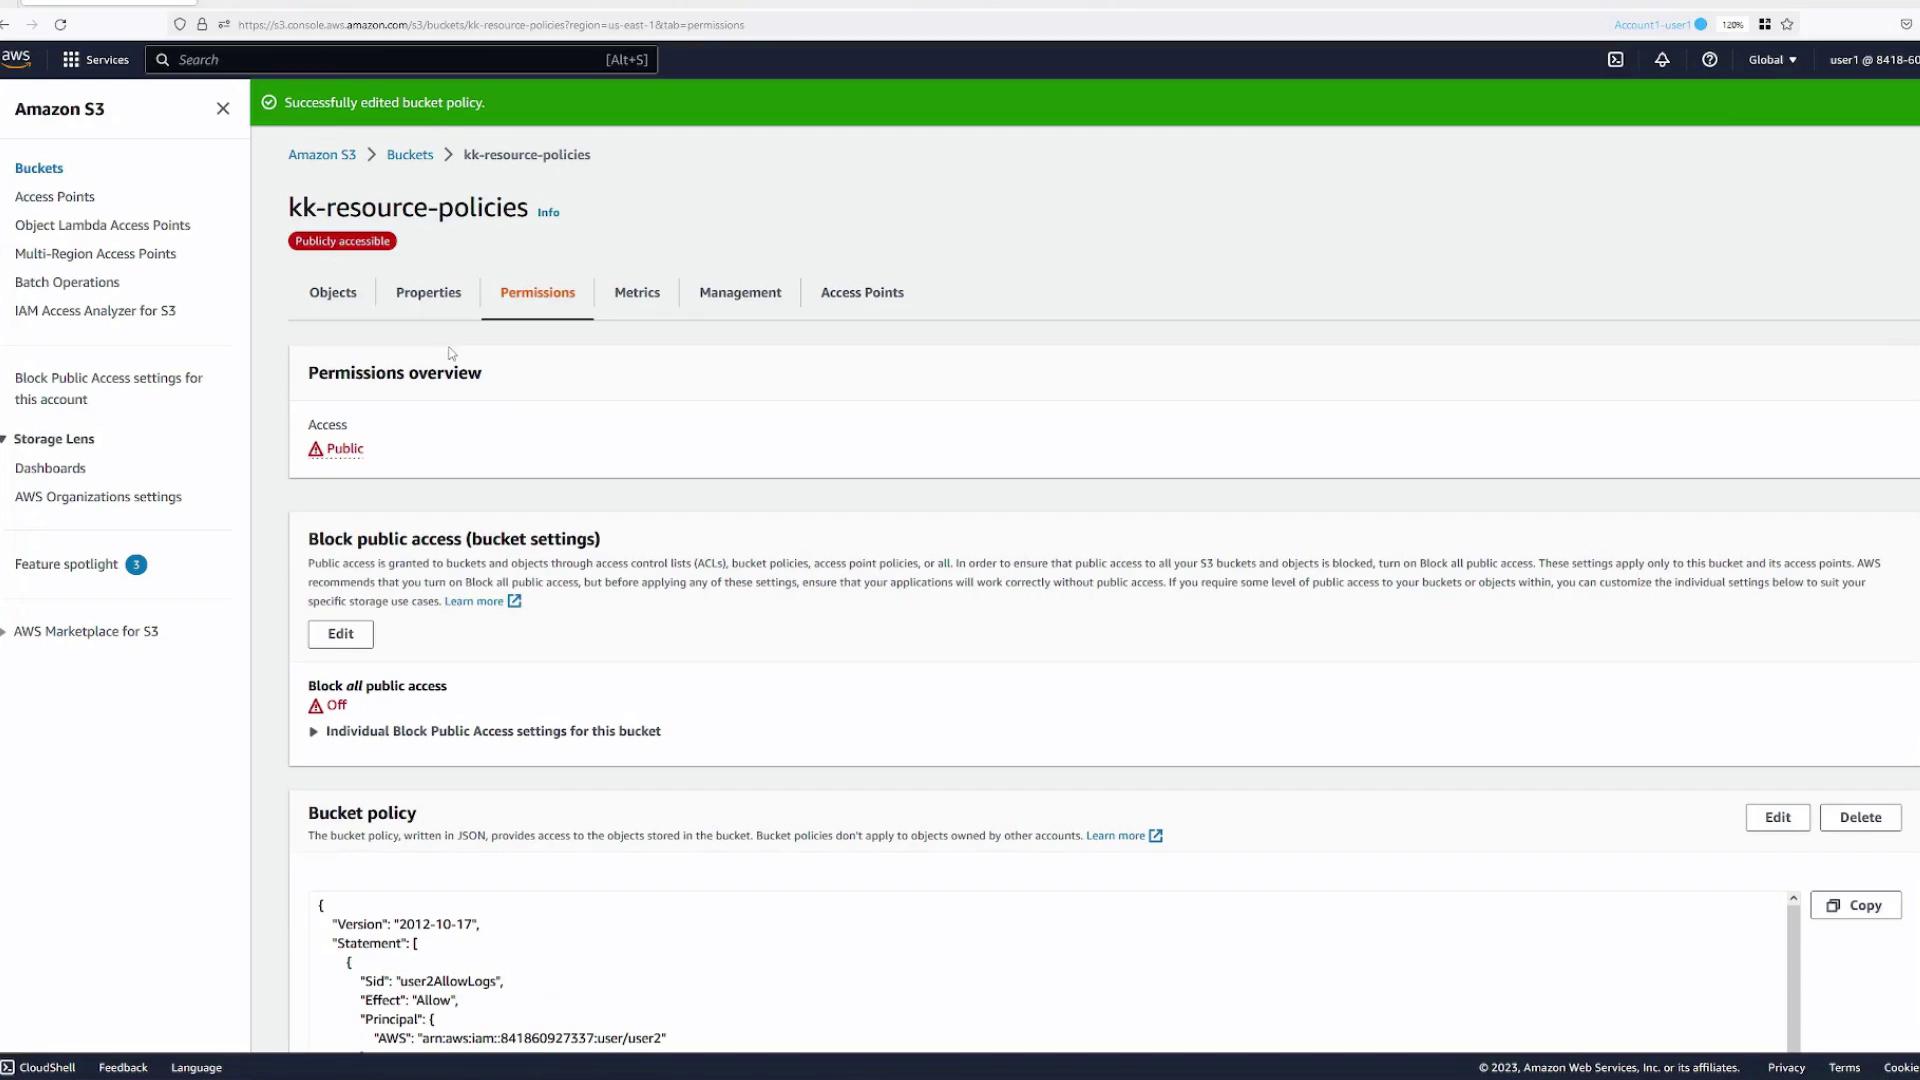
Defining a Resource Policy for User Two
Switch back to Account One, User One (Blue Tab) to create a resource policy that allows User Two to access thelogs folder in the bucket.
- Navigate to the bucket’s Permissions tab and click Edit Bucket Policy.
- Start with the provided policy wizard template and modify the statement as follows:
- Statement Name:
user2-allow-logs - Principal: Specify the ARN of Account One, User Two (e.g.,
arn:aws:iam::<account-number>:user/user2). - Effect:
Allow - Action:
s3:GetObject
(Refer to the S3 Actions reference for more details.) - Resource: Apply the policy only to objects within the
logsfolder. For example:
arn:aws:s3:::kk-resource-policies/logs/*
The asterisk ensures that all objects underlogsare covered.
- Statement Name:
- Save the policy.
- Navigate to the
logsfolder and open a file (e.g.,log1). It should open successfully. - Attempting to open files outside the
logsfolder (likefile1.txt) should result in “Access Denied.”
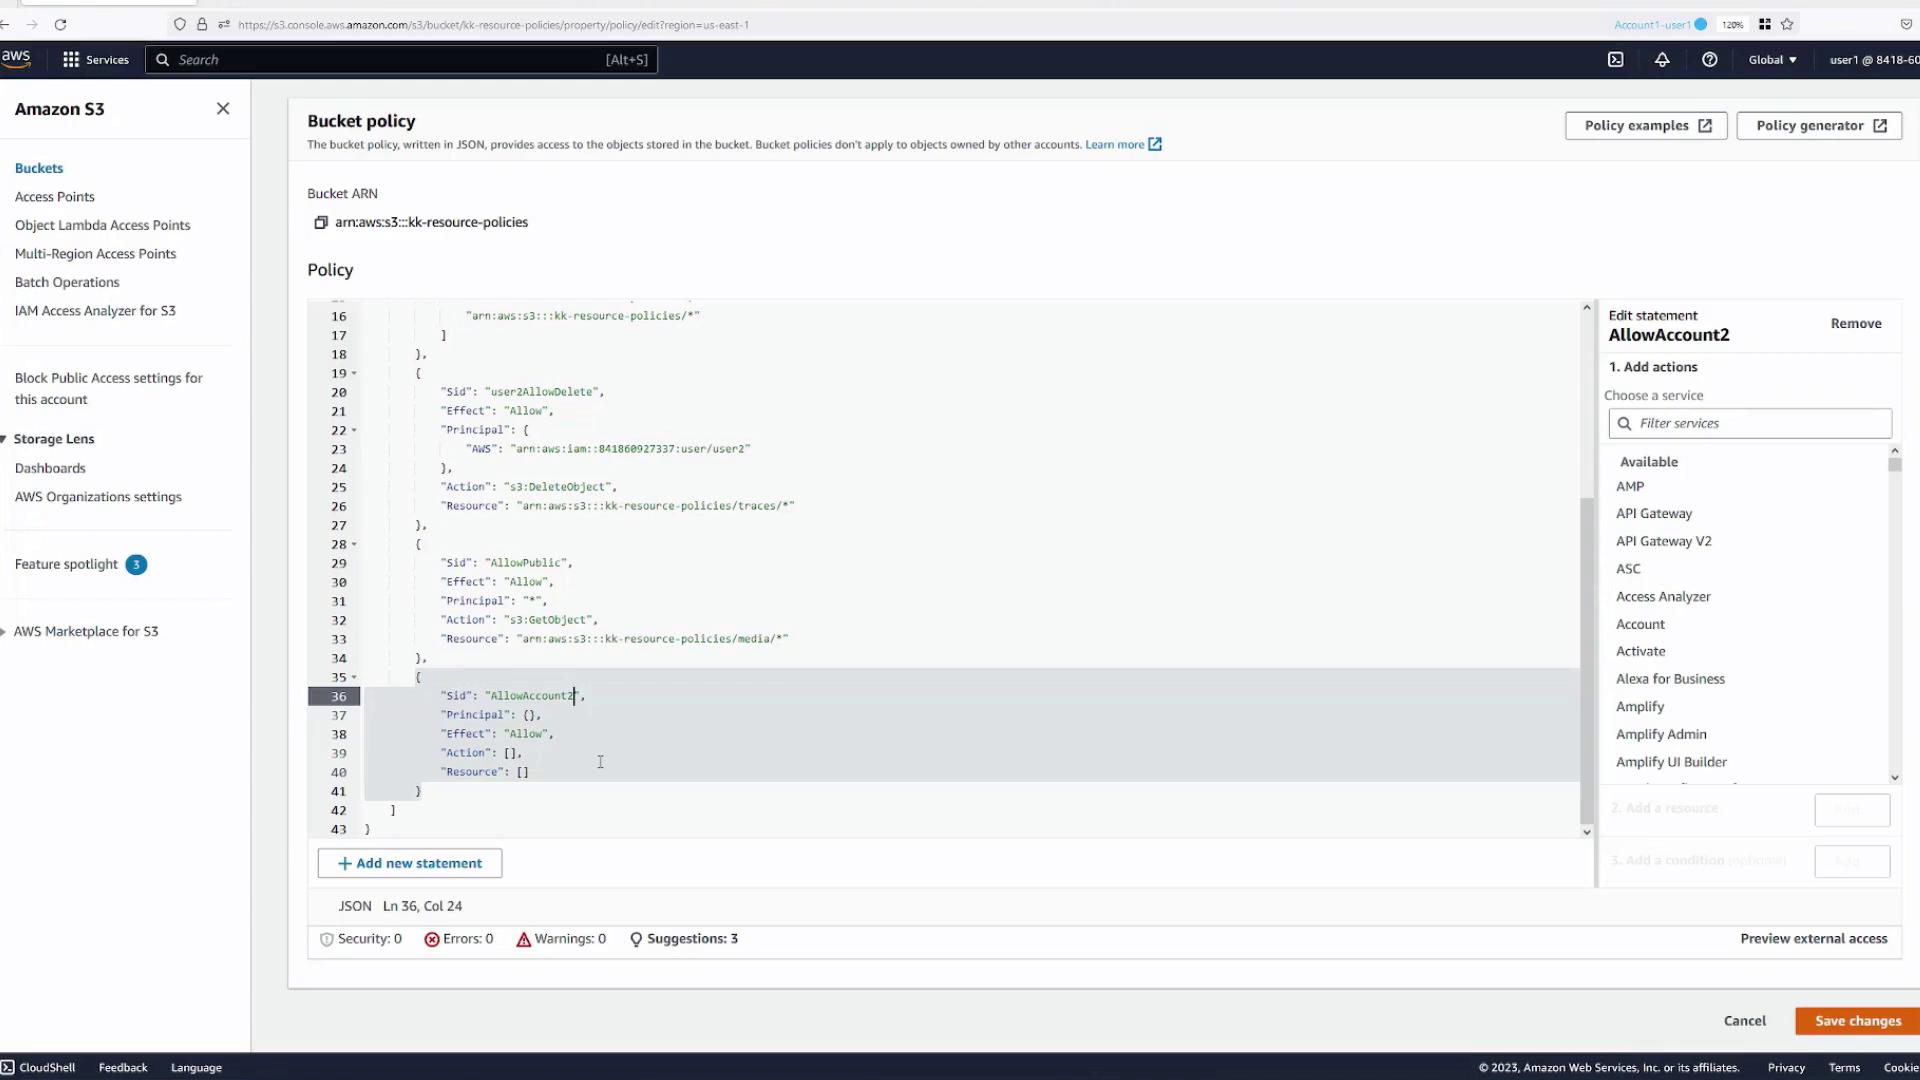
Allowing Deletion in the Traces Folder
Next, allow User Two to delete objects within thetraces folder:
- While still logged in as Account One, User One, add a new statement to the bucket policy:
- Statement Name:
user2-allow-delete - Principal: Same as before (Account One, User Two).
- Effect:
Allow - Action:
s3:DeleteObject - Resource: Limit this action to objects in the
tracesfolder, for example:
arn:aws:s3:::kk-resource-policies/traces/*
- Statement Name:
- Save the updated policy.
- Navigate to the
tracesfolder and try deleting an object (e.g.,trace1). The deletion should succeed. - Attempts to delete objects outside this folder should fail.
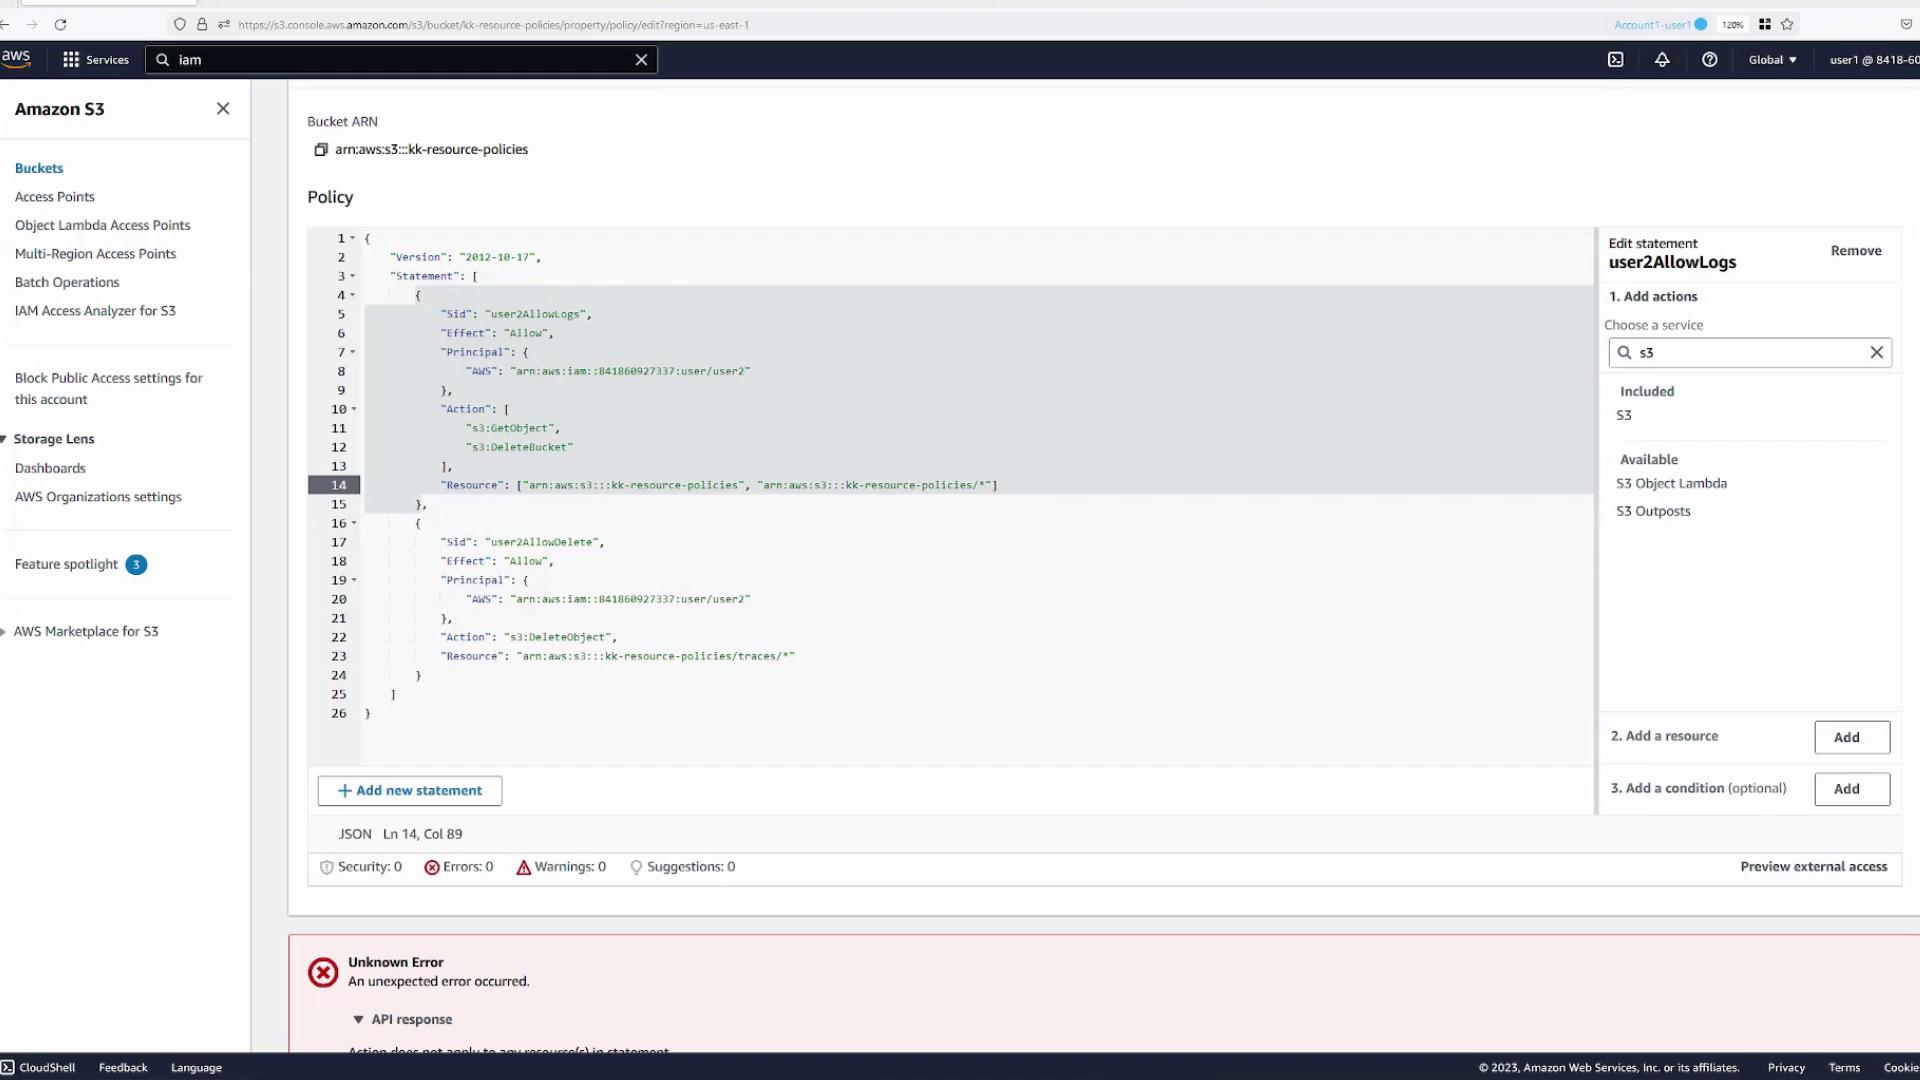
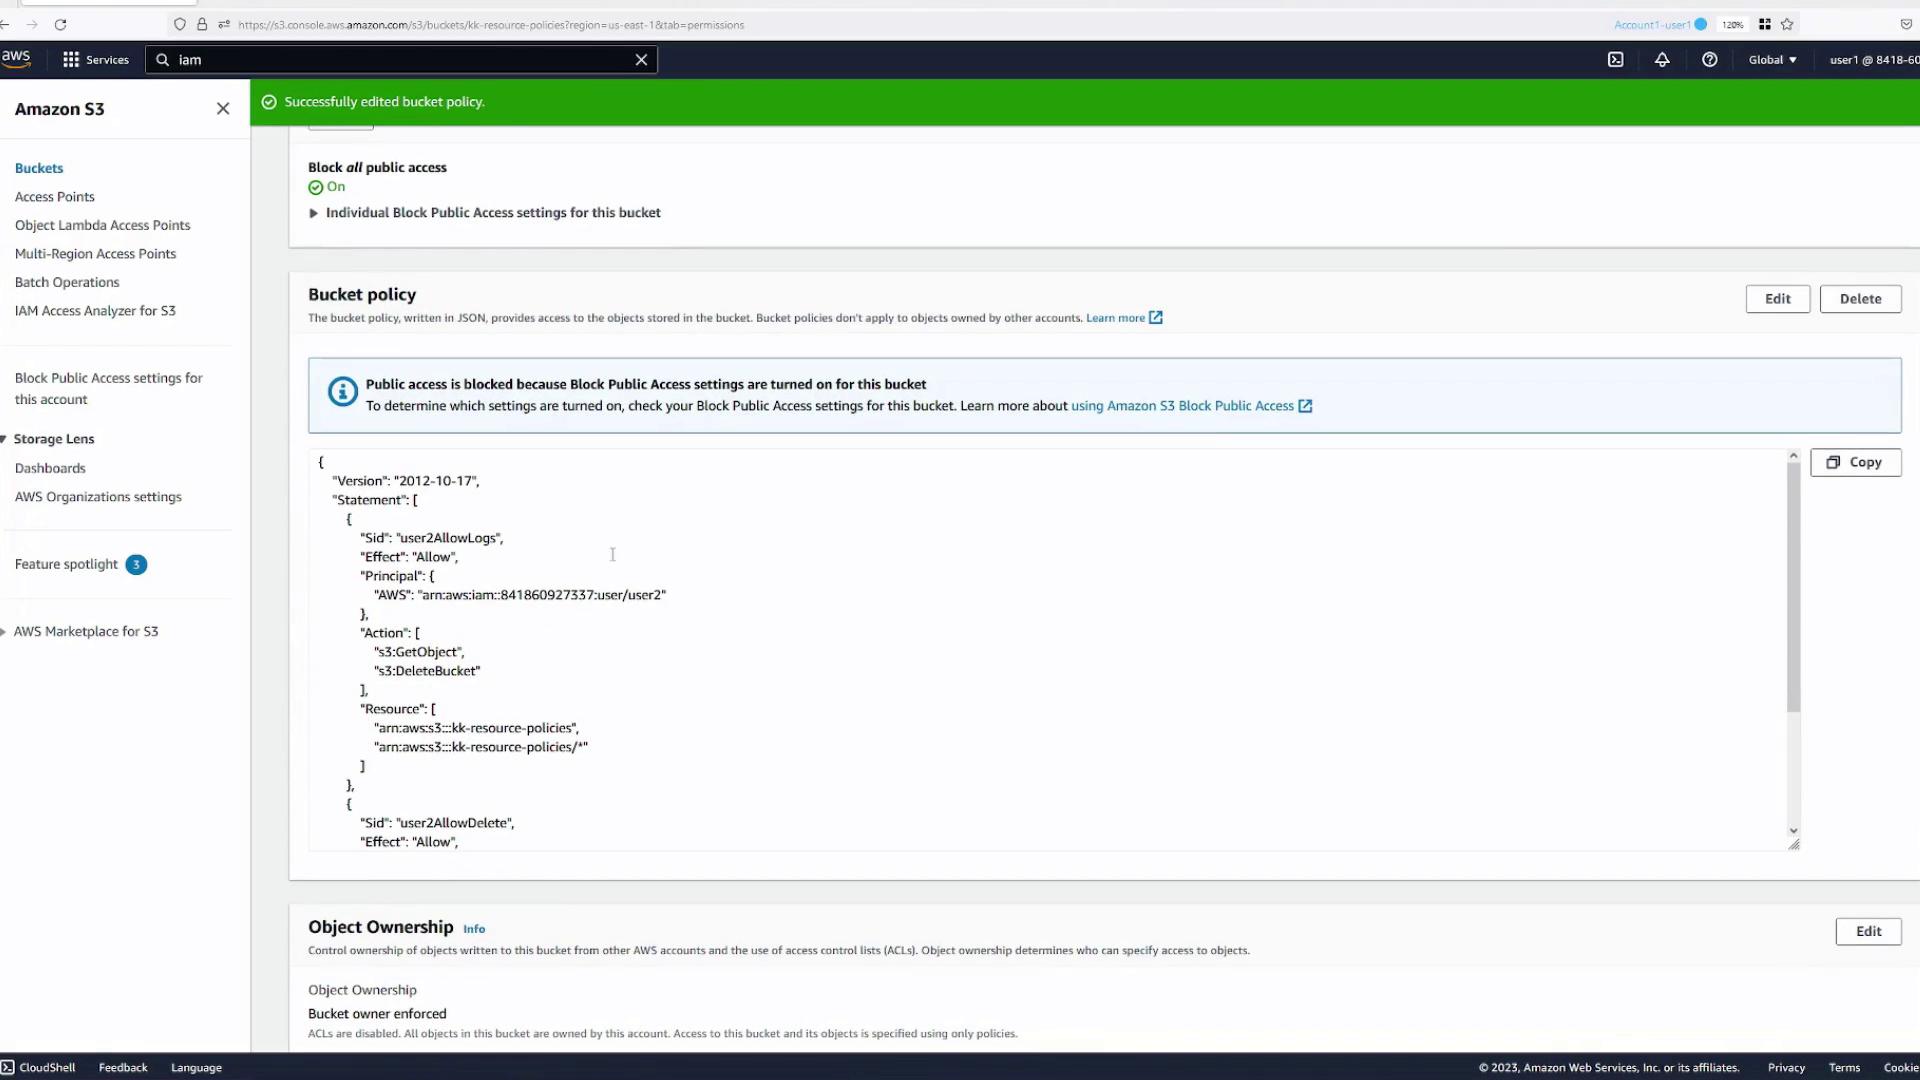
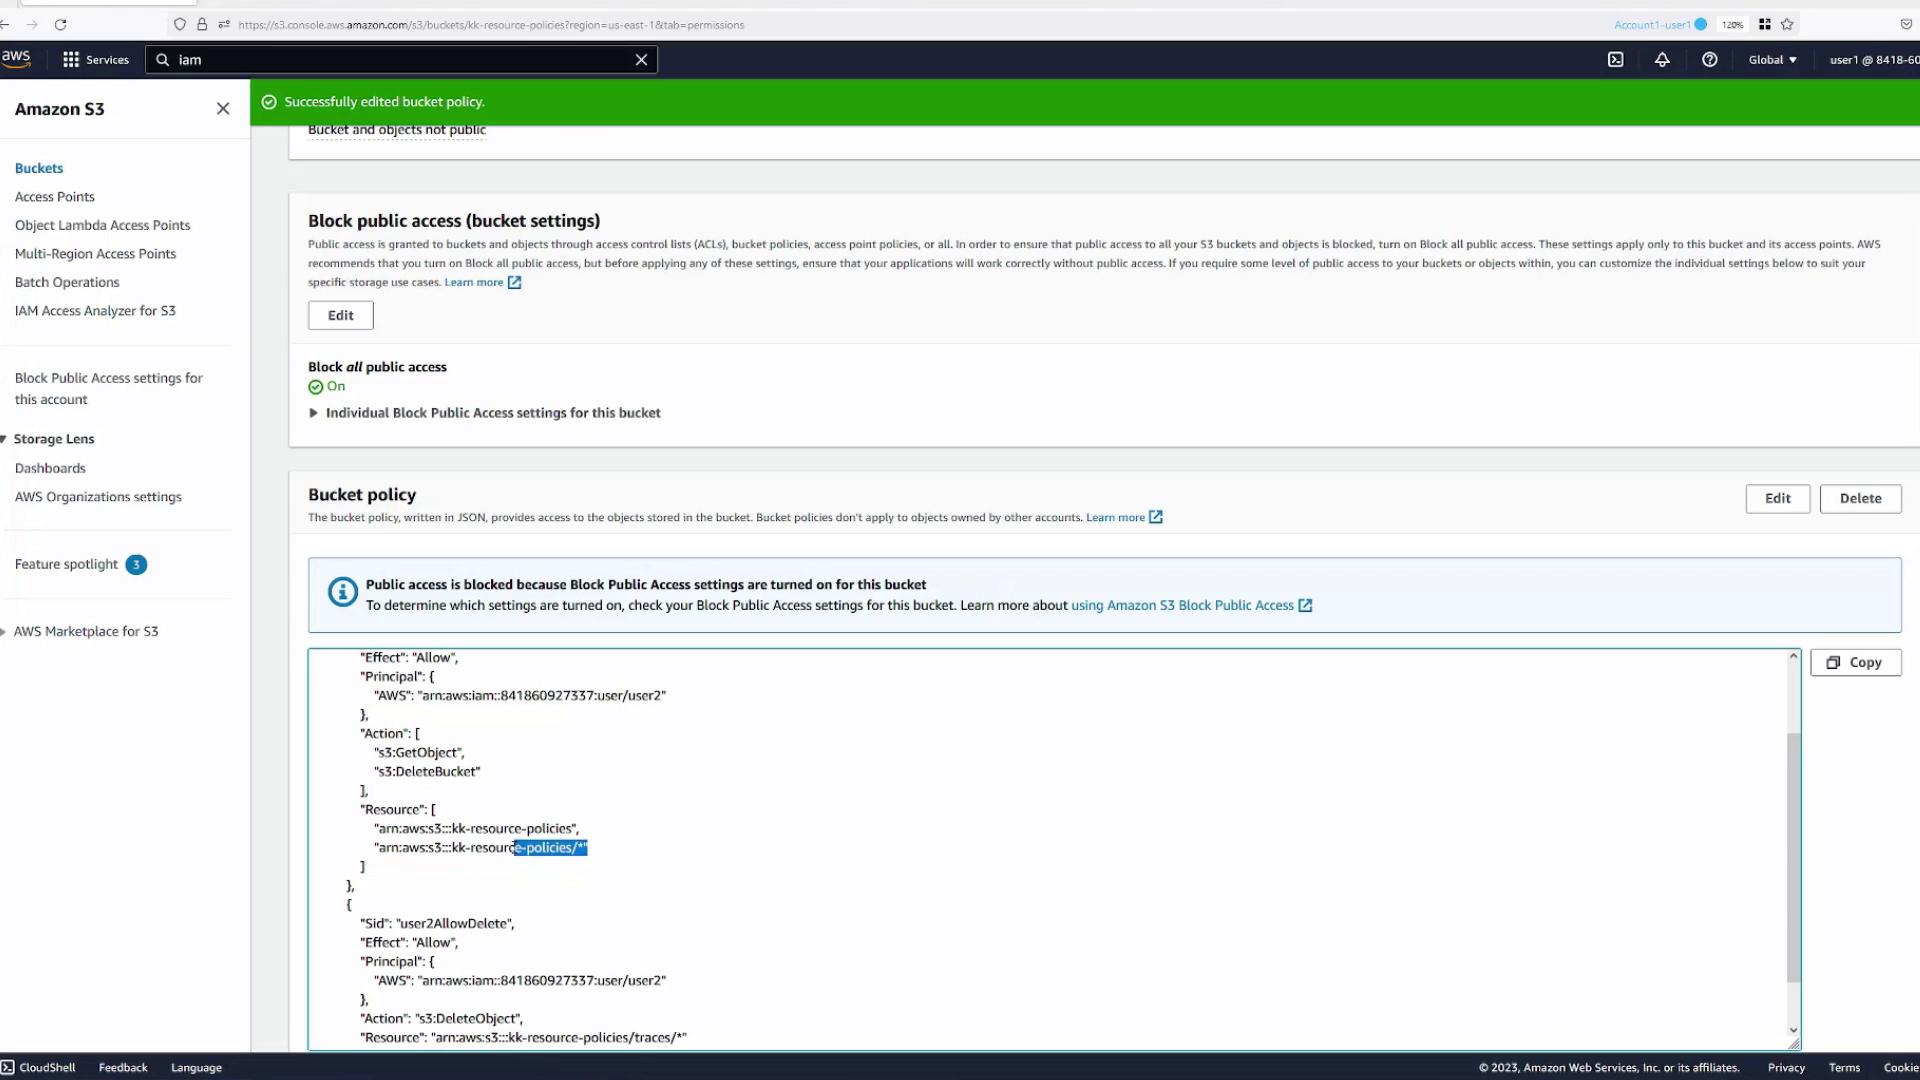
Combining Multiple Actions in a Single Statement
It’s possible to include multiple actions in a single policy statement with proper resource definitions. For example, if you try to adds3:DeleteBucket (which applies to the bucket) alongside s3:GetObject (which applies to objects), you will encounter errors unless you specify both resources correctly.
Solution:Include an array of resources:
- One for bucket-level actions (e.g.,
arn:aws:s3:::kk-resource-policies) - Another for object-level actions (e.g.,
arn:aws:s3:::kk-resource-policies/*)
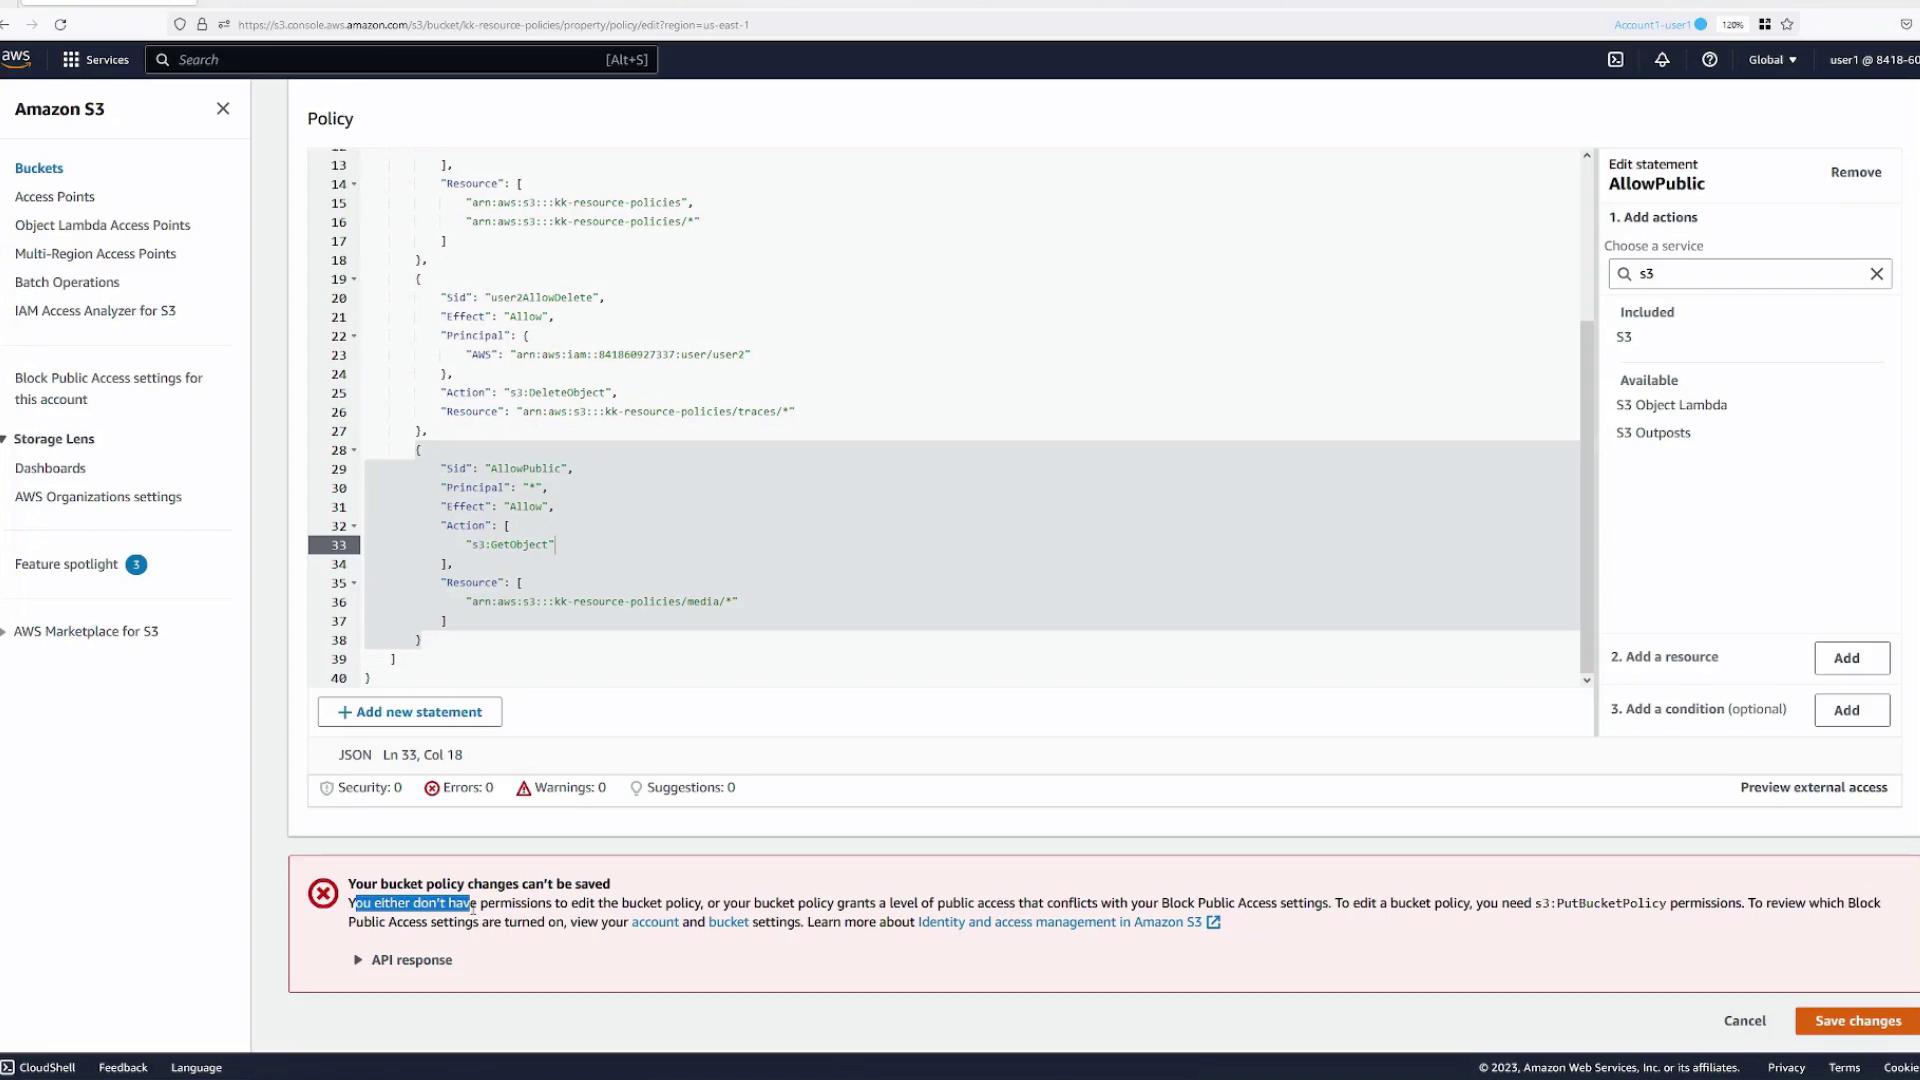
Allowing Public (Anonymous) Access to a Specific Folder
By default, the bucket is not publicly accessible. To allow anonymous users to access specific objects (for instance, those in themedia folder), follow these steps:
- Open the bucket’s Permissions tab and add a new policy statement.
- Update the statement as follows:
- Principal:
"*"(all users) - Effect:
Allow - Action:
s3:GetObject - Resource: Specify access to the
mediafolder objects; for example:
arn:aws:s3:::kk-resource-policies/media/*
- Principal:
- Save the changes.
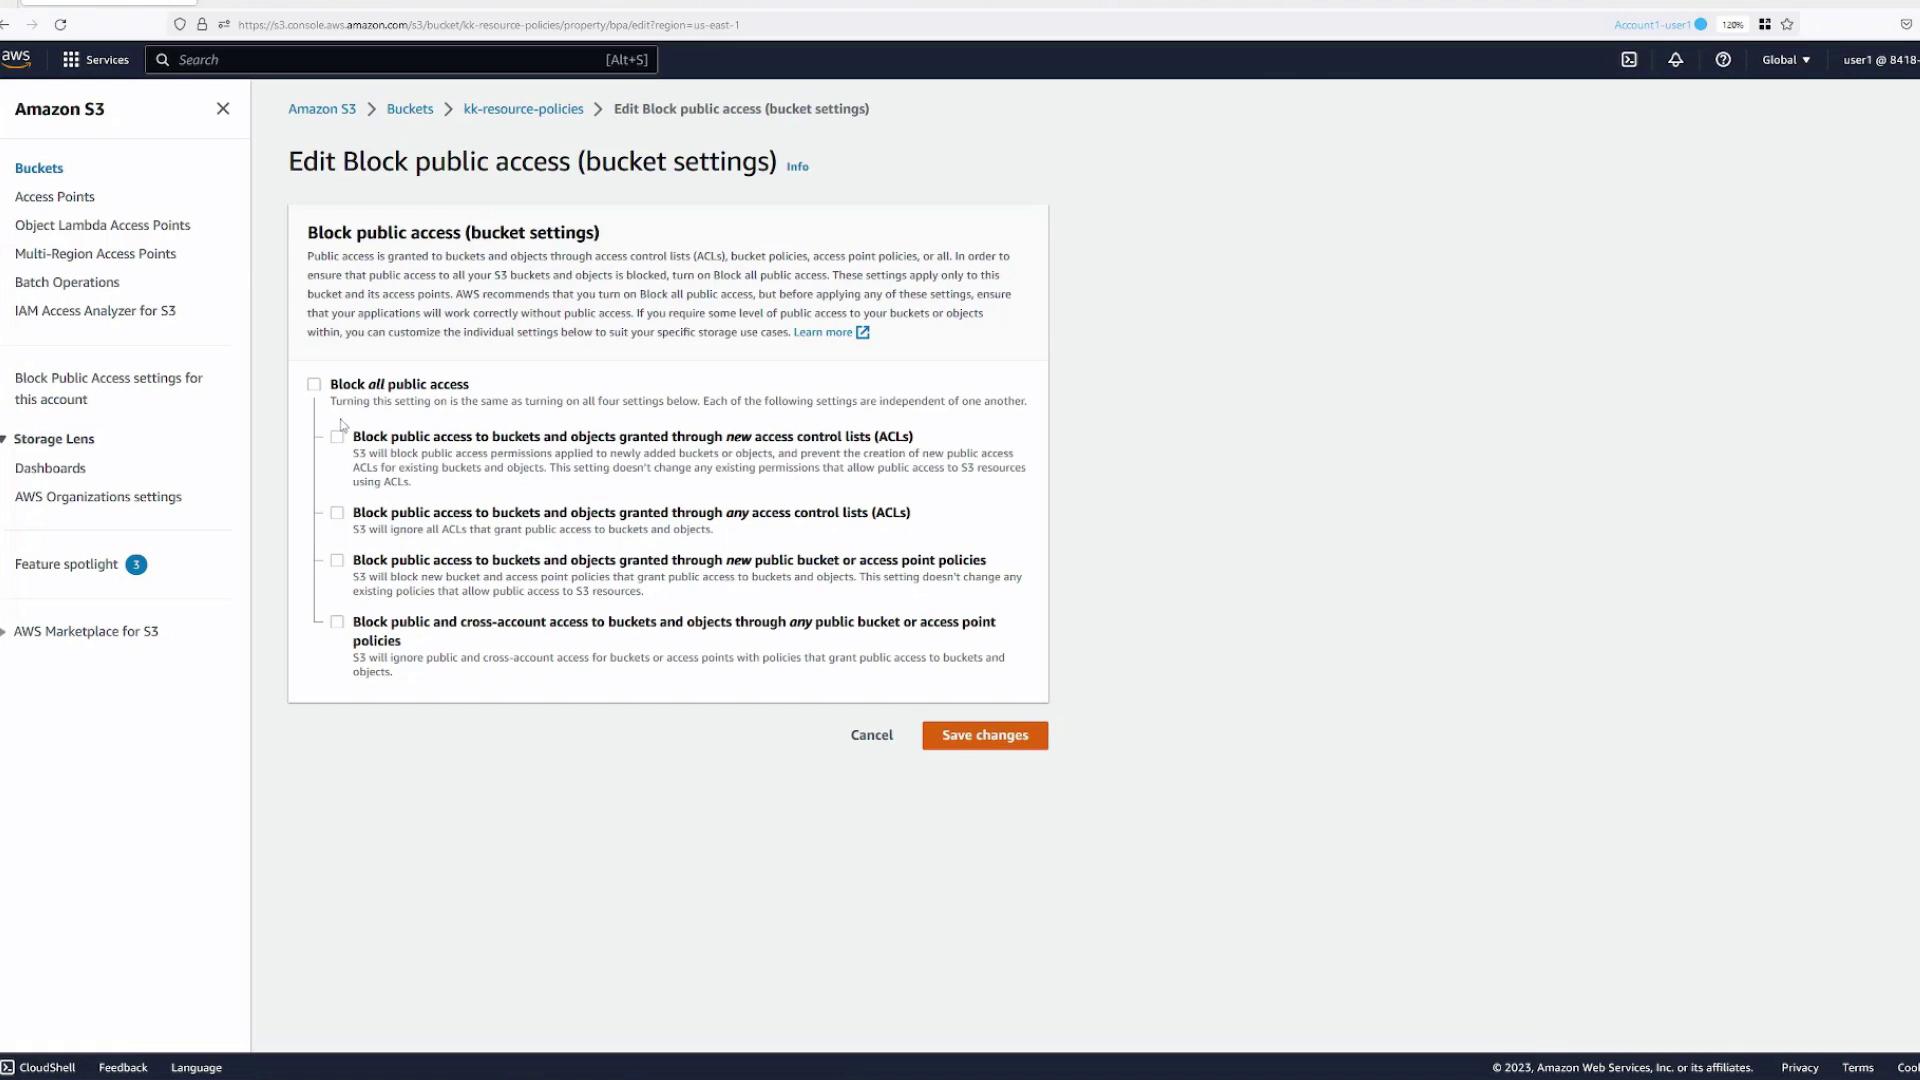
- Navigate to the Block public access settings.
- Disable the relevant settings that prevent public access (either all or selectively as needed).
- Confirm the changes and save the bucket policy again.
media folder. Accessing the URL should display or download the file, confirming that the policy works.
- Verify that an object in the
mediafolder (e.g., an icon or image) can be accessed via its public URL. - Confirm that the file displays or downloads correctly.
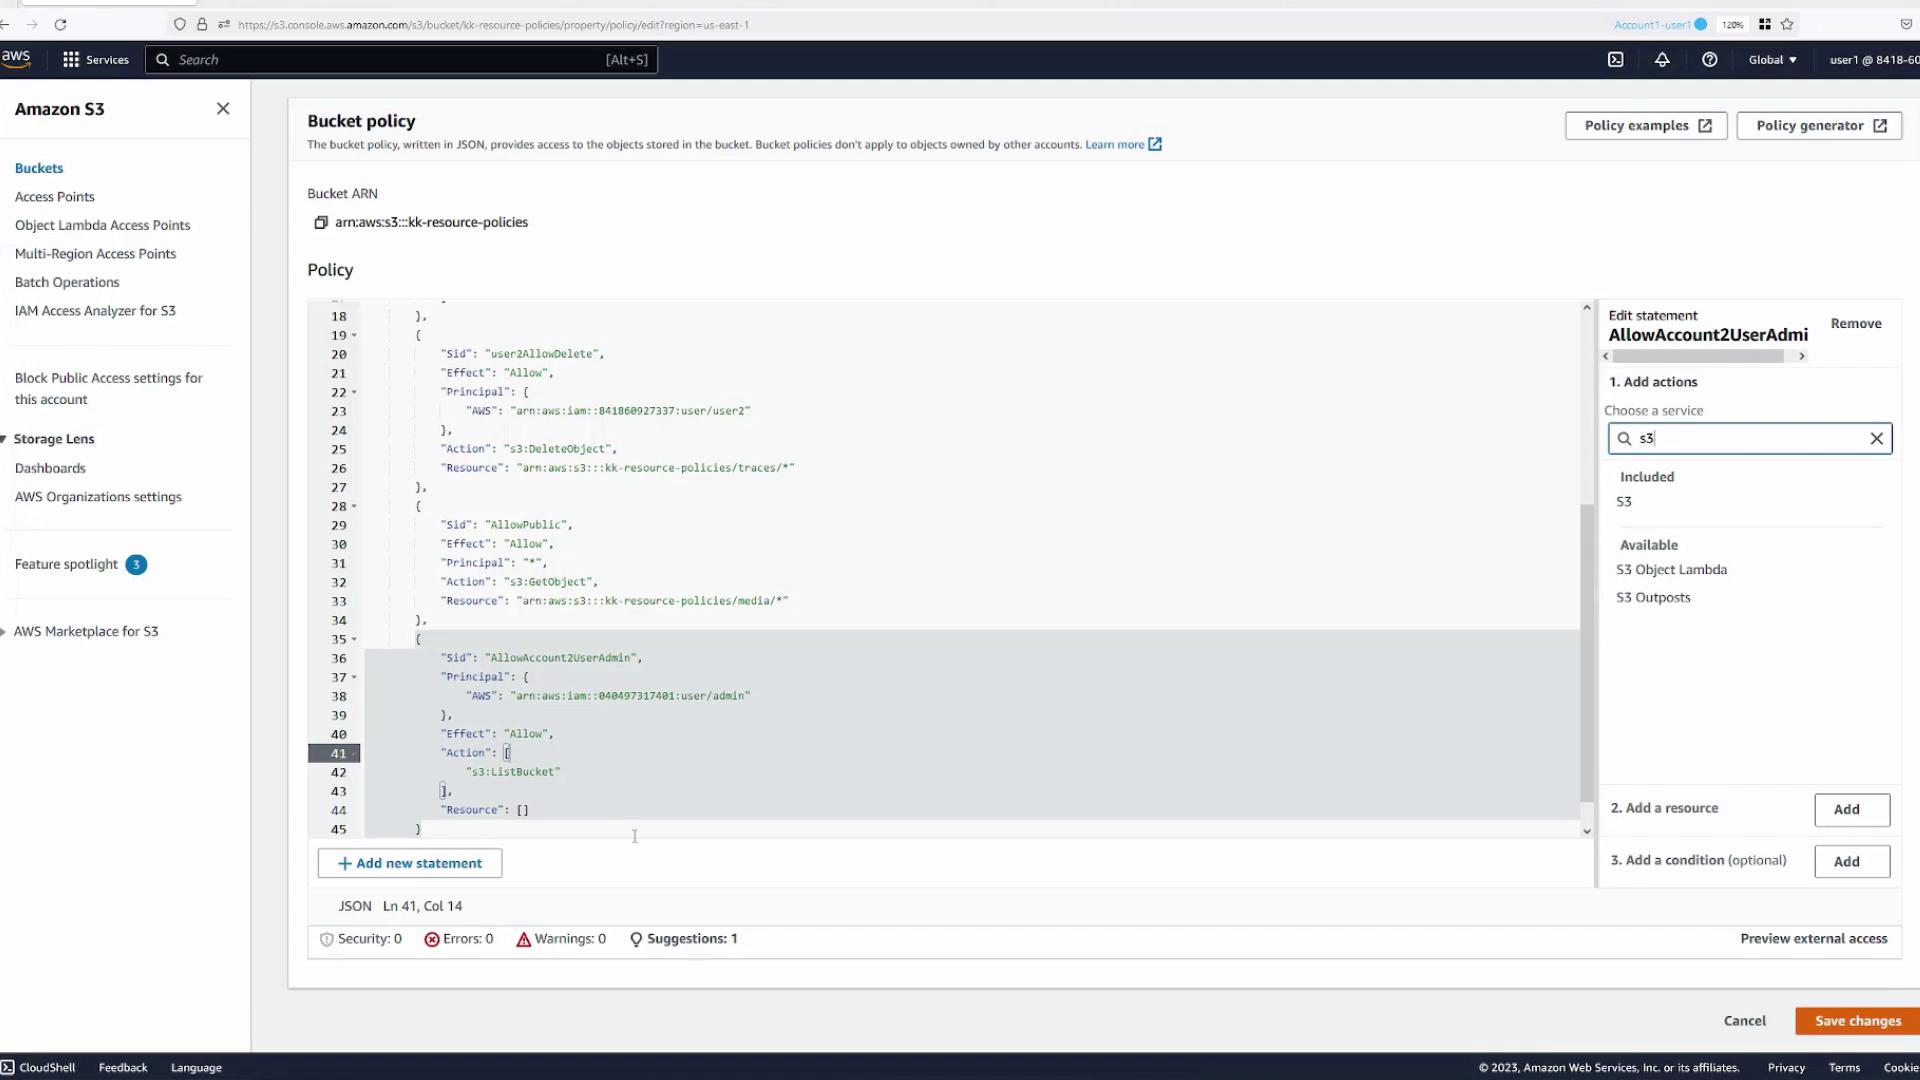
Granting Access to a User in a Different AWS Account
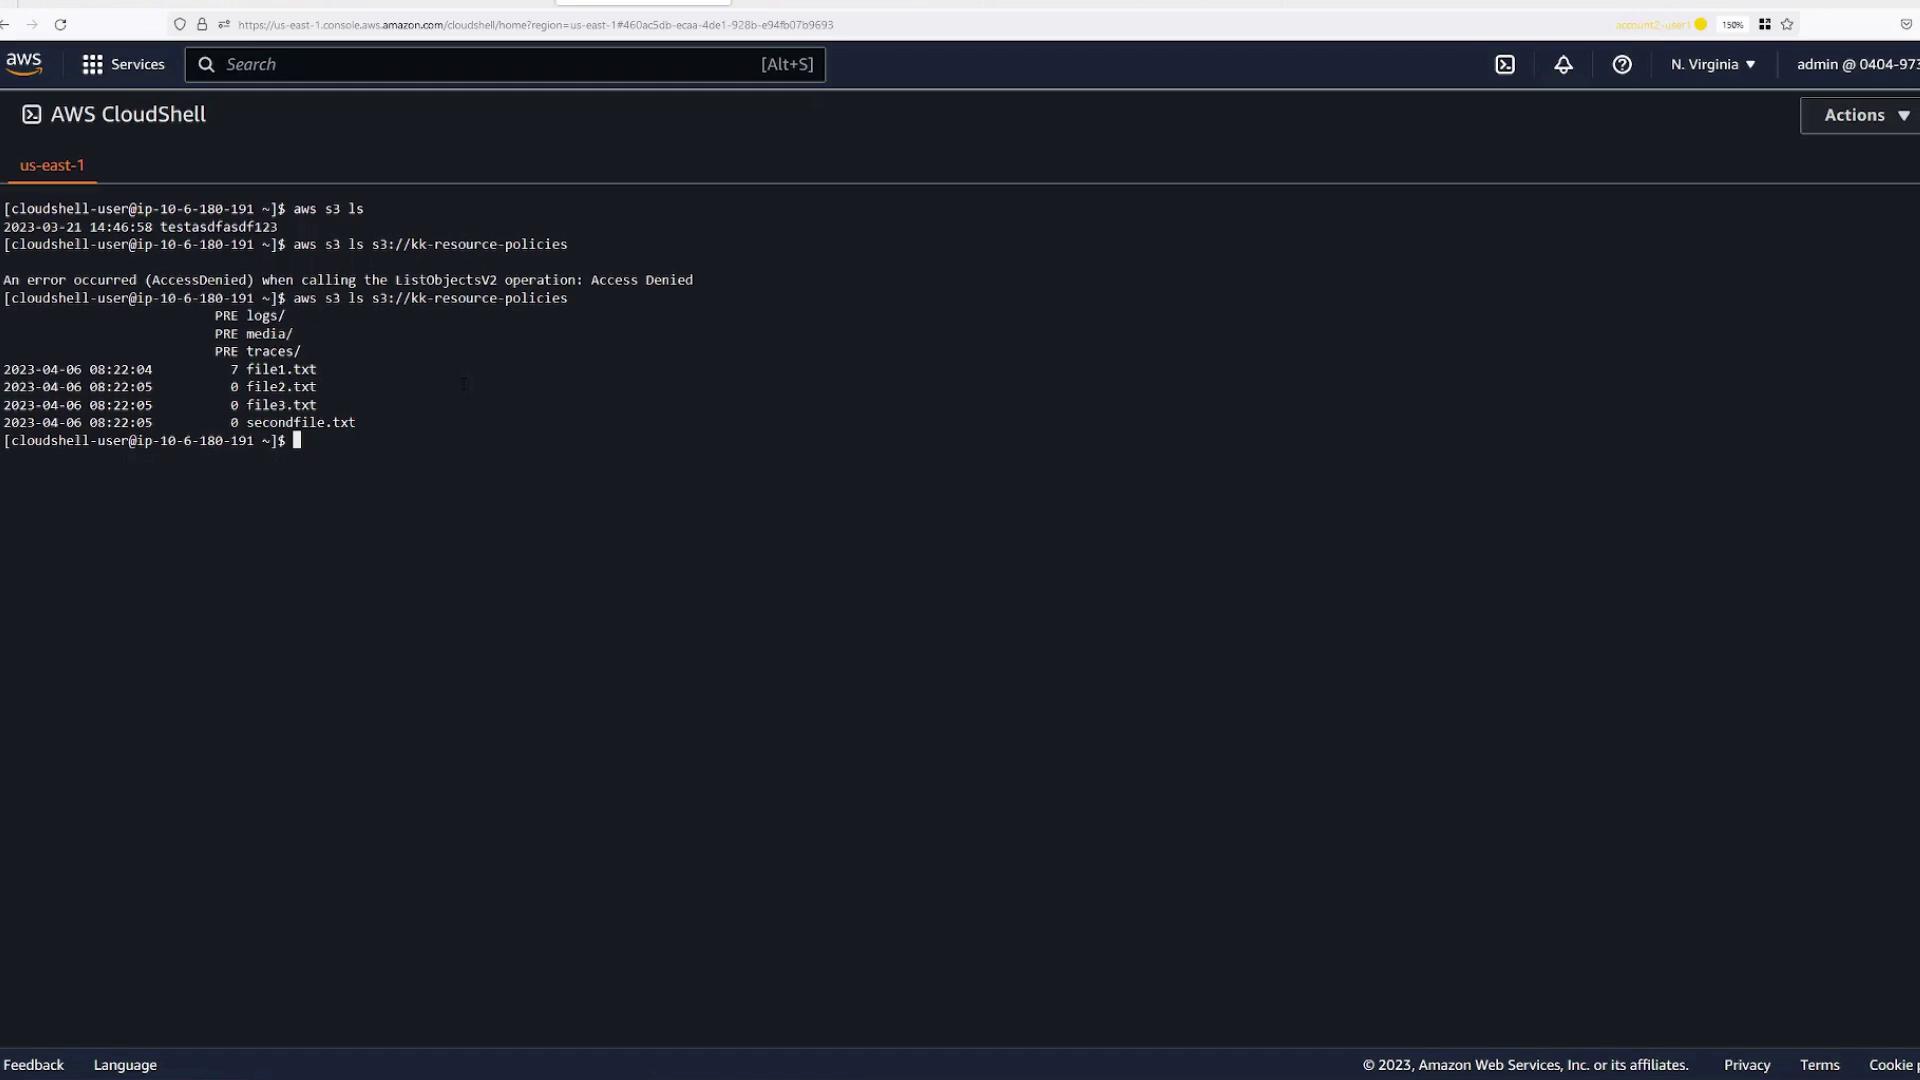
Finally, allow a user from Account Two (Yellow Tab) to access your bucket.- Open AWS CloudShell in Account Two.
- Run the following command to list buckets:
This should result in an “Access Denied” error initially.
- Attempt to list a specific bucket (replace
<bucket-name>with your bucket’s name):You’ll see an “Access Denied” error since no resource policy for external account access has yet been defined.
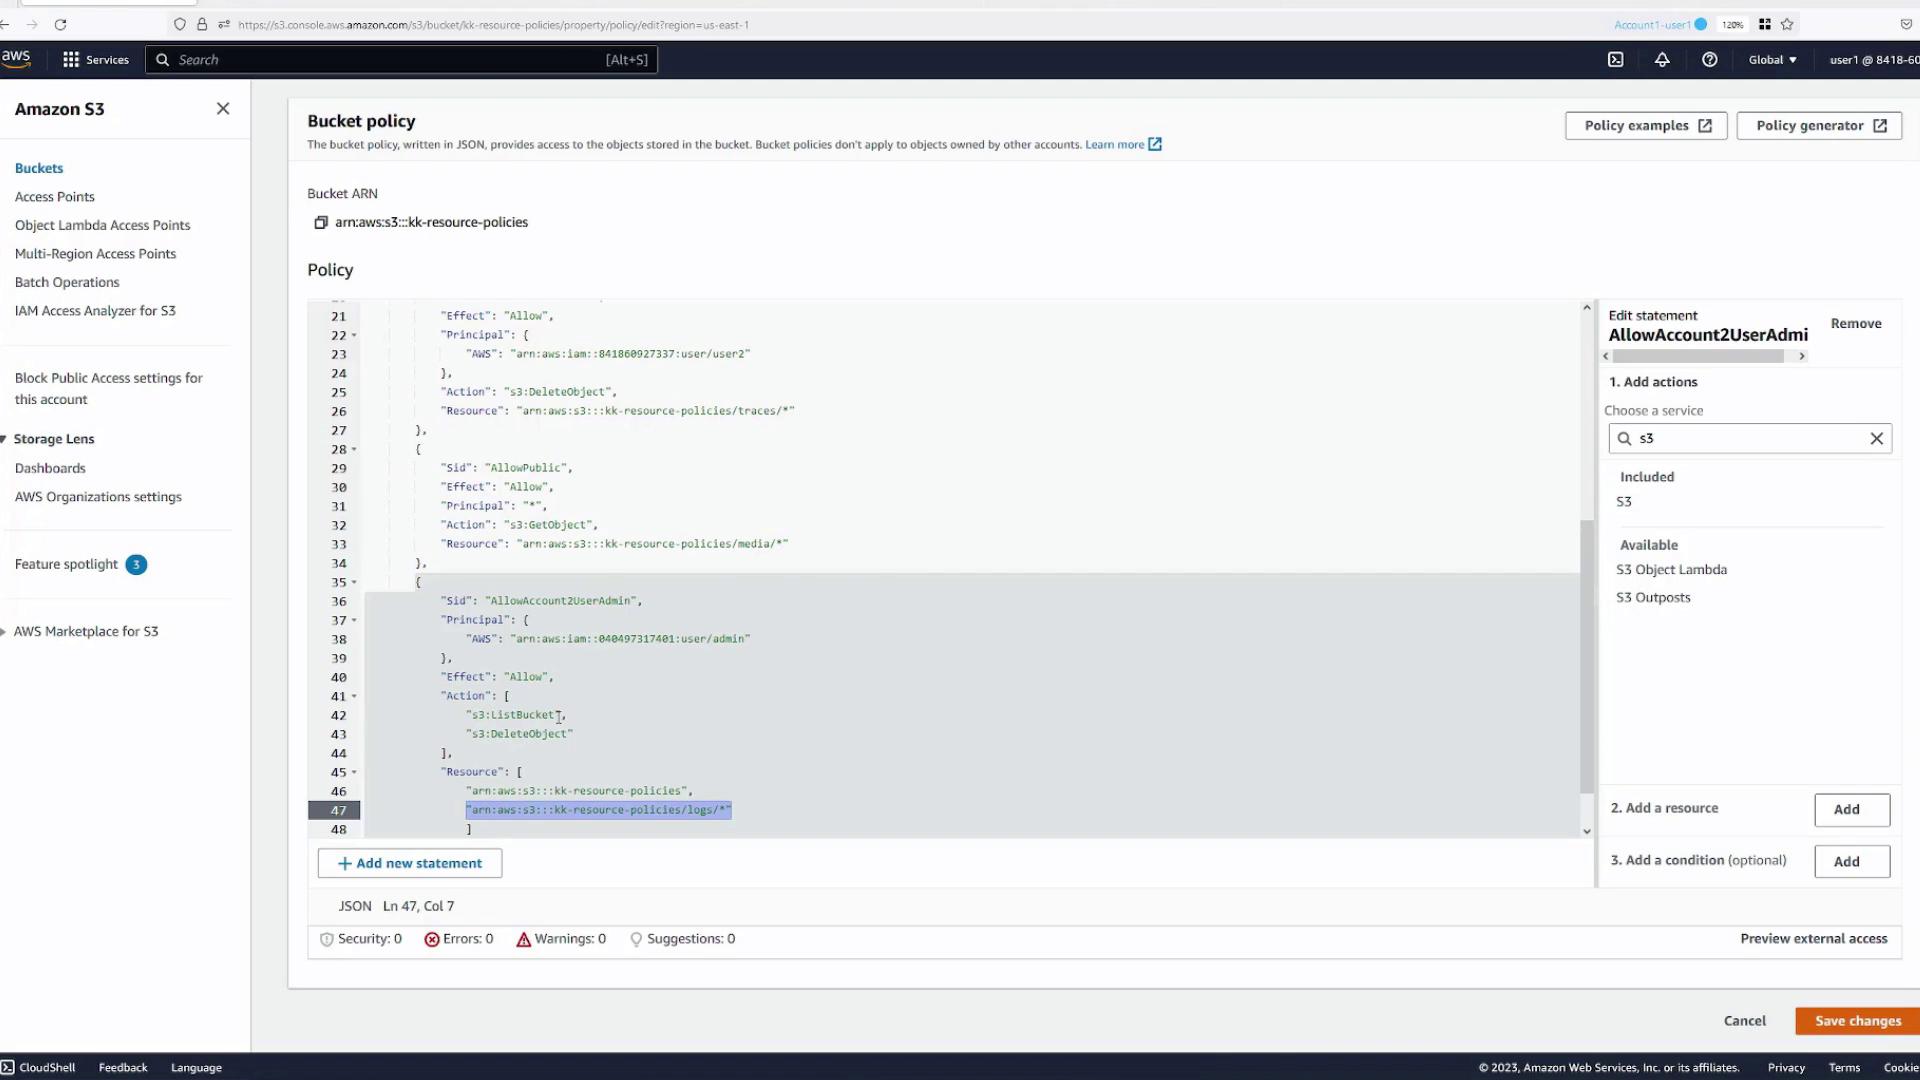
- In the bucket’s Permissions tab, add a statement with the following details:
- Statement Name:
allow-account2-user-admin - Principal: Specify the ARN for the admin user in Account Two (e.g.,
arn:aws:iam::<account2-number>:user/Admin). - Actions: Grant actions such as
s3:ListBucketands3:DeleteObject.- For bucket-level actions like
s3:ListBucket, specify the bucket ARN (e.g.,arn:aws:s3:::kk-resource-policies). - For object-level actions like
s3:DeleteObject, specify the ARN for objects in a specific folder (e.g.,arn:aws:s3:::kk-resource-policies/logs/*).
- For bucket-level actions like
- Statement Name:
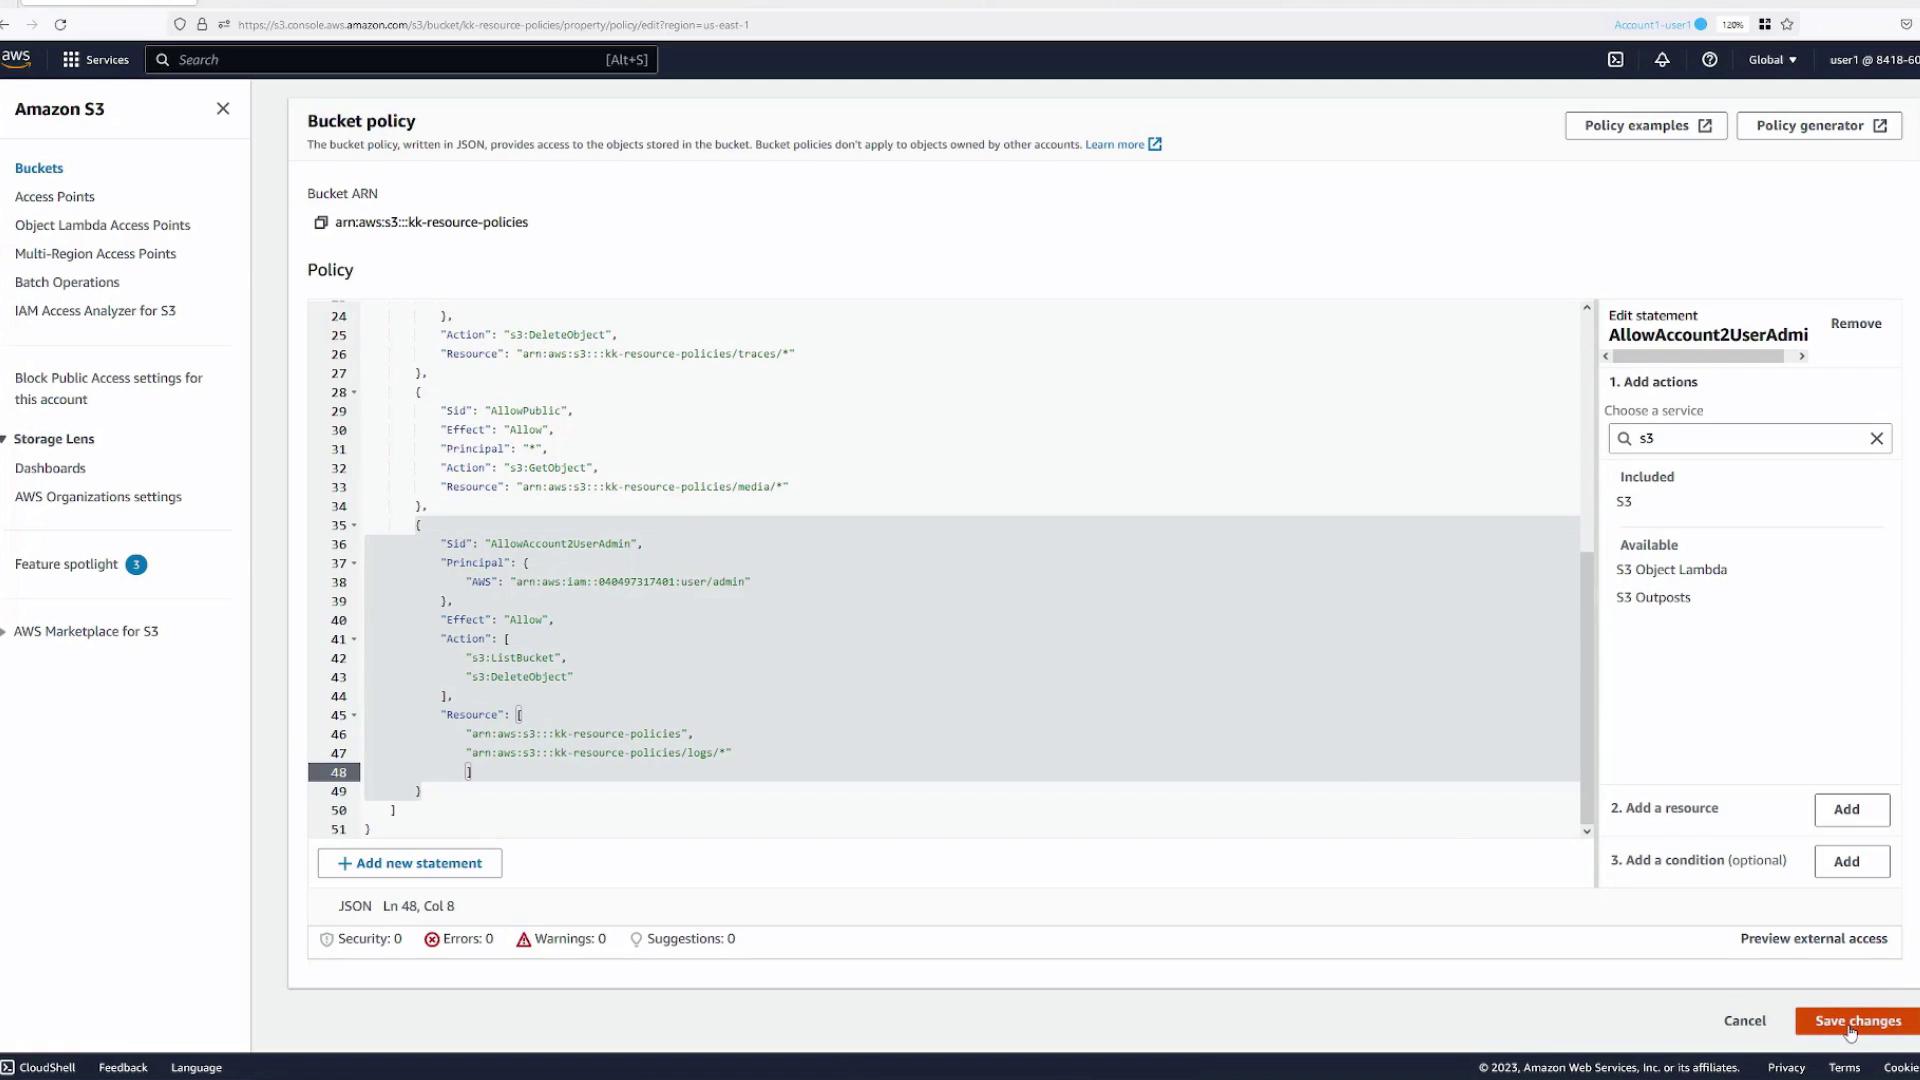
- Save the policy.
- Run
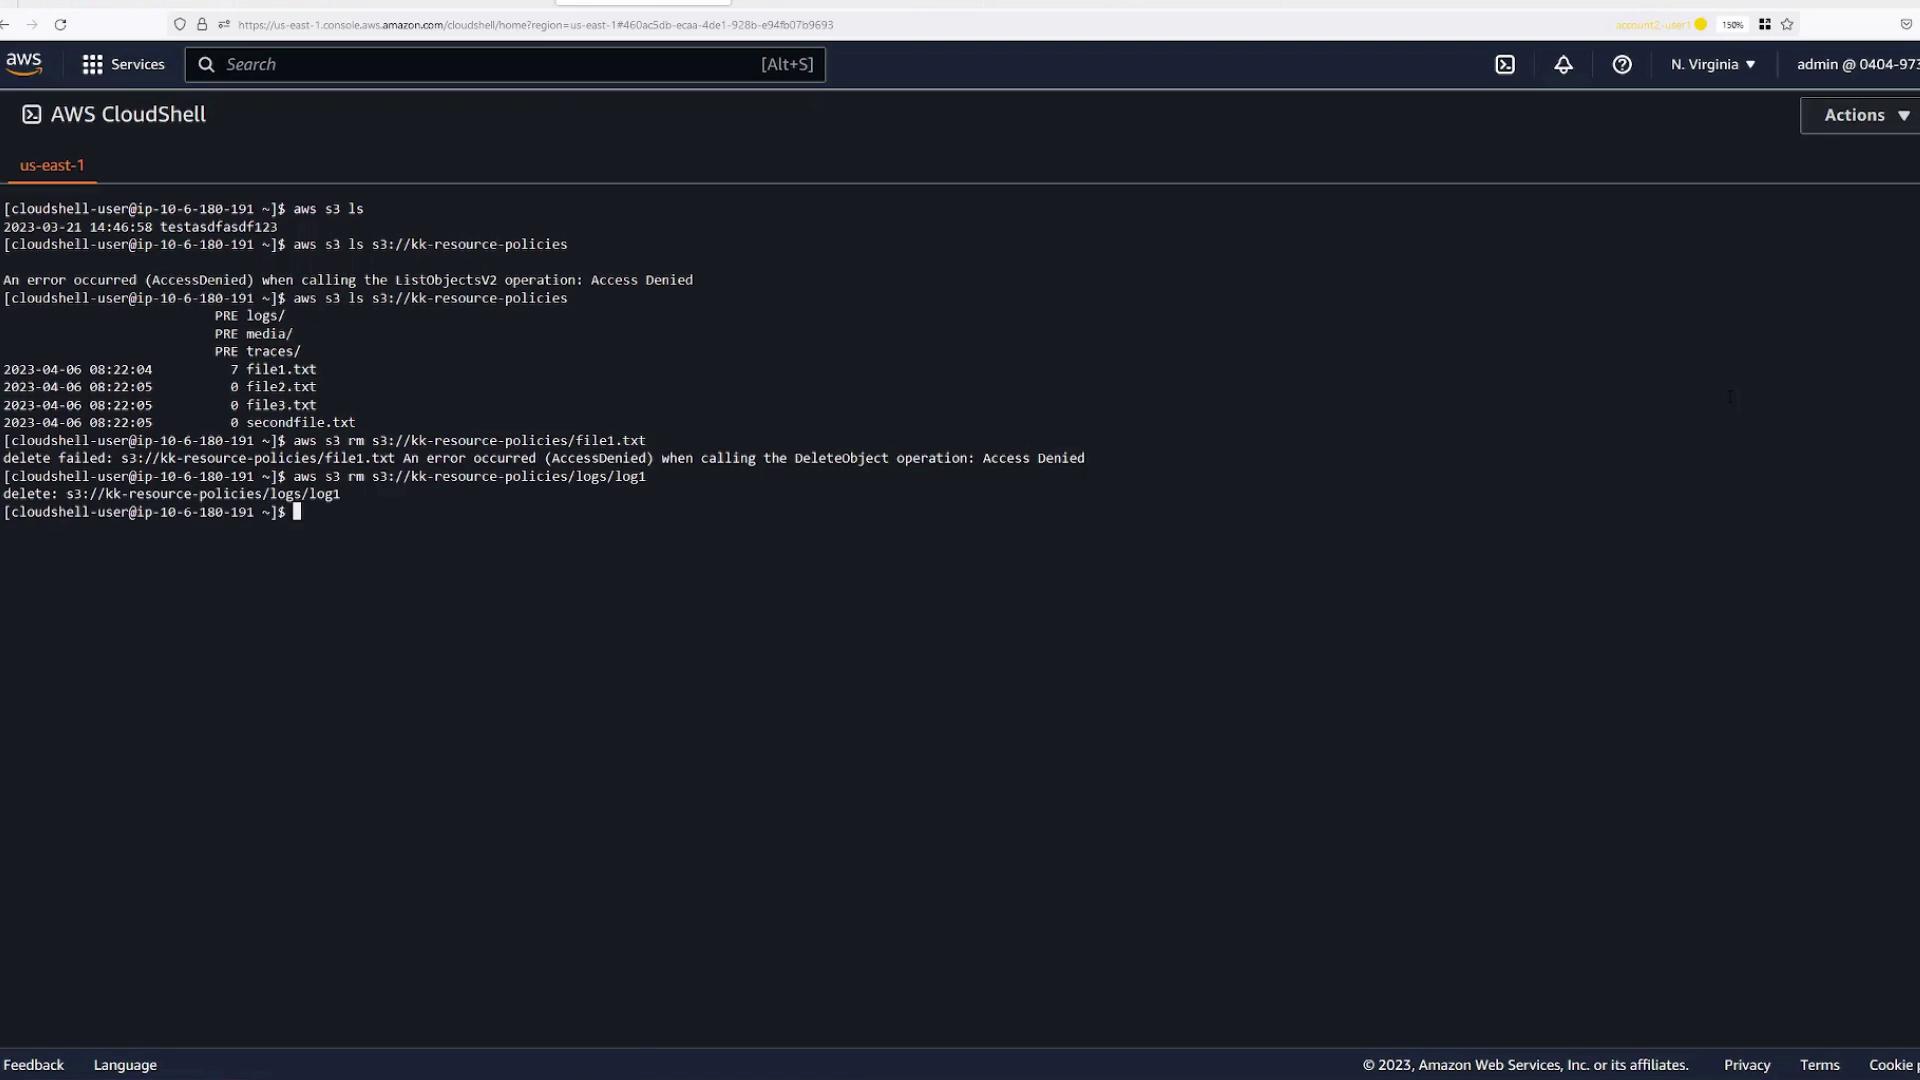
aws s3 lsto confirm the bucket contents are visible. - Attempt to delete an object:
- Deletions in unauthorized folders (like the root) should be blocked.
- Deleting an object in the
logsfolder (e.g.,log1) should succeed.

- Listing the bucket contents now succeeds.
- Attempting to delete an object in a folder without permission (e.g.,
file1.txt) returns an “Access Denied” error. - Deleting an object within the
logsfolder (e.g.,log1) completes successfully.

Conclusion
In this lesson, you explored various scenarios for configuring S3 bucket resource policies. Key takeaways include:- Restricting access to specific folders (e.g.,
logs,traces, andmedia). - Combining IAM policies with resource policies for detailed access control.
- Allowing public access to select parts of the bucket.
- Extending permissions to users from different AWS accounts.