Navigating to the VPC Dashboard
To get started, type “VPC” in the AWS console search bar. This will display a list of related services, including AWS Firewall Manager and VPC Reachability Analyzer.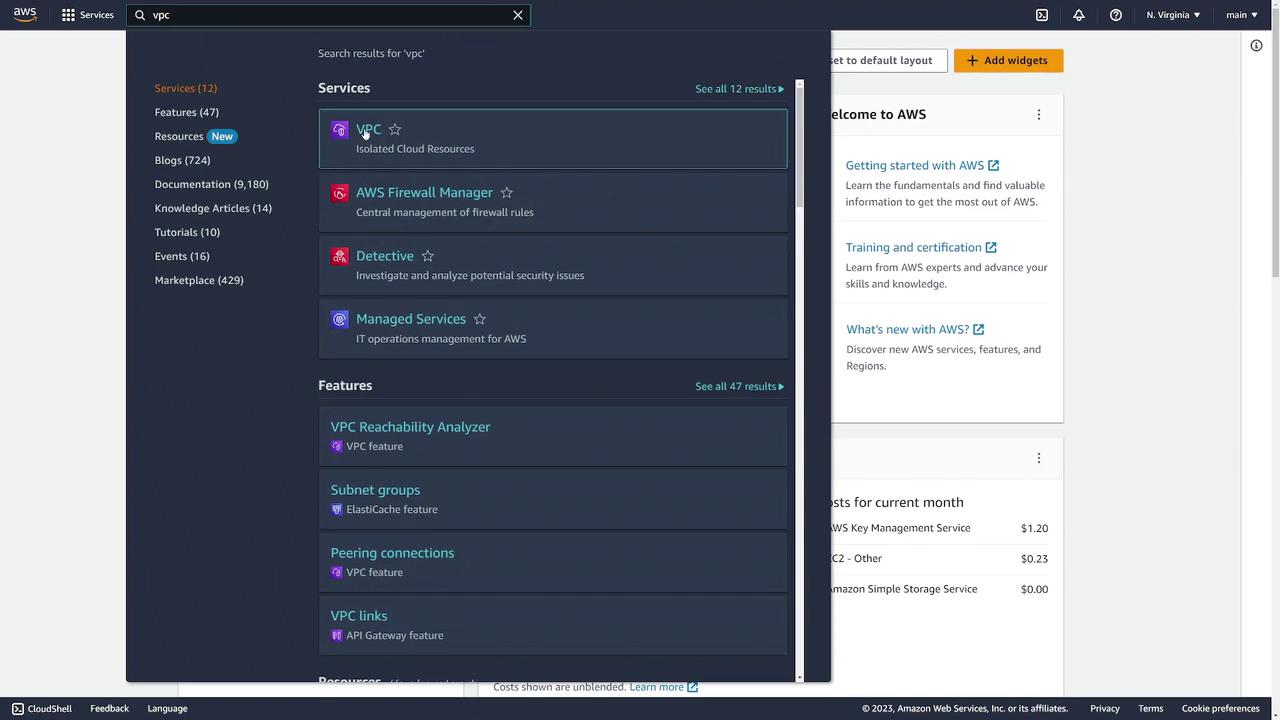
Default VPC Overview
By default, AWS is set to the US East 1 region. In the dashboard, under “resources by region,” you can see one VPC exists in this region—typically the default VPC automatically created for new AWS accounts in every region.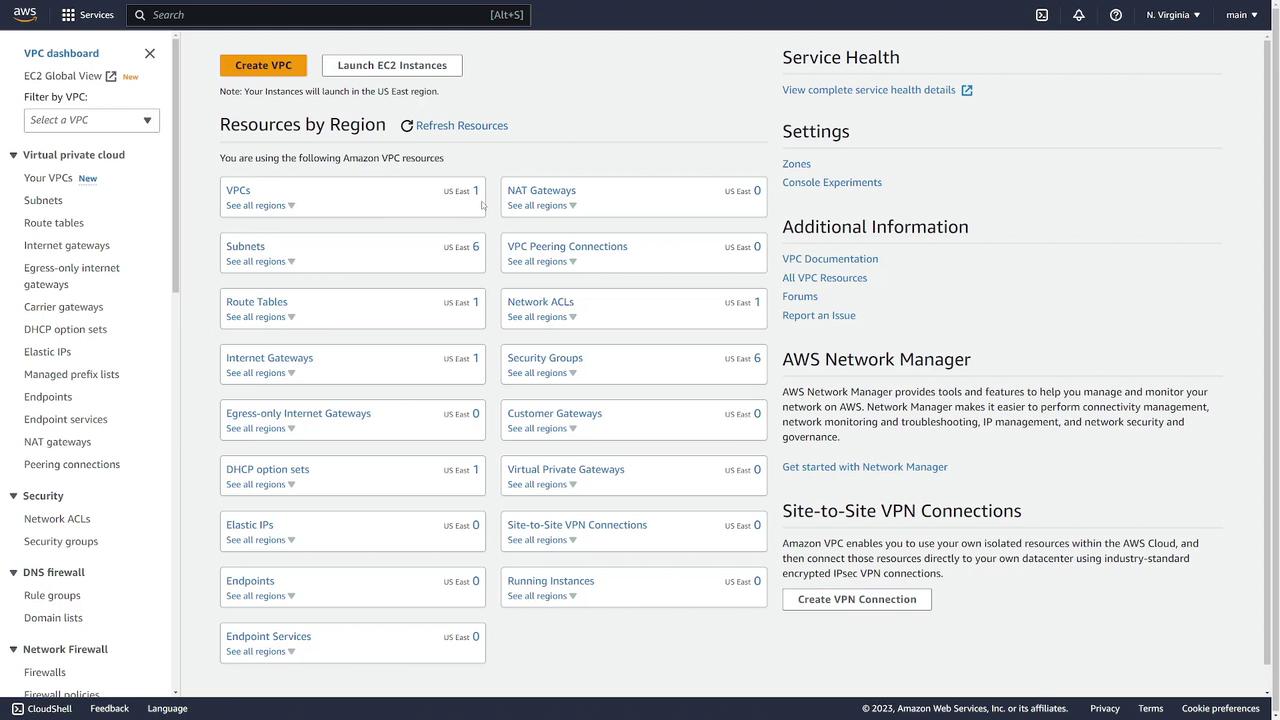
Viewing VPC Details
To inspect the default VPC in the US East 1 region, click on Your VPCs in the left sidebar. In the default VPC list, scroll to the right to view the “default VPC” column marked “Yes.” Key details include:- VPC ID: An associated identification number.
- CIDR Block: For example, 172.31.0.0/16, which defines the available IP address range.
- Resources: References to the DHCP option set, default route table, and default network ACL.

In the route table section, notice that local traffic within the CIDR block is kept internal, while external traffic is routed through the internet gateway. This design ensures secure and efficient traffic management.
Route Tables and Internet Gateways
Next, navigate to the Route Tables section in the left sidebar. In the default VPC, you will see one route table shared by all subnets. This table contains a default route that sends traffic destined for outside the VPC to the internet gateway.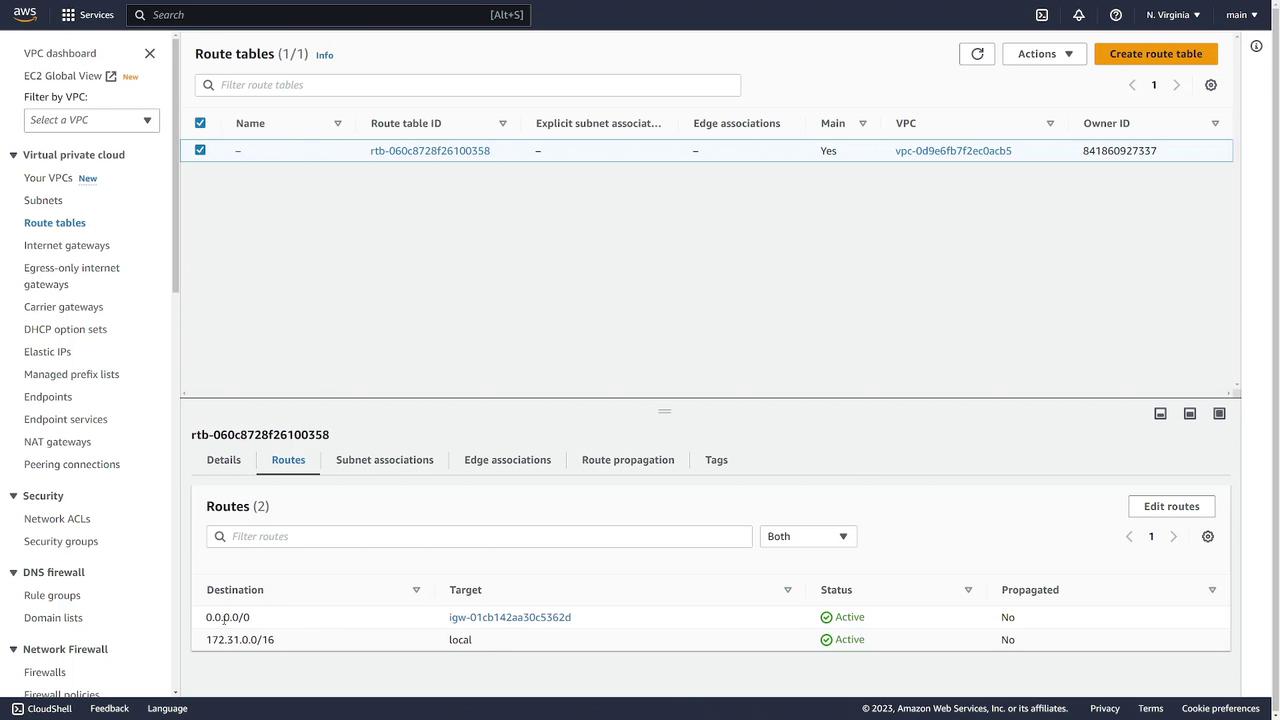
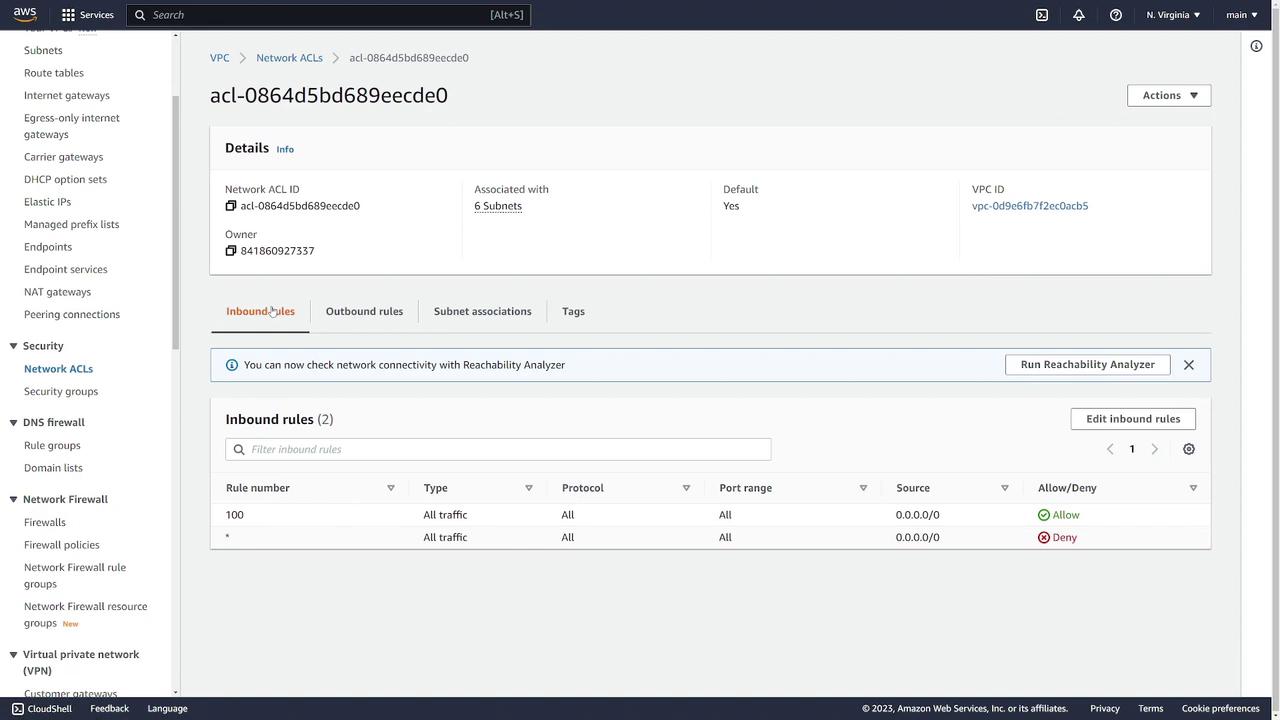
- Network ACLs: Display default inbound and outbound rules that allow all traffic.
- Security Groups: The default security group permits inbound traffic from within the group and allows all outbound traffic. You can review and modify its settings as needed.
Creating a New VPC
After familiarizing yourself with the default networking setup, the next step is to create your custom VPC.- Go to Your VPCs and click Create VPC.
- AWS offers two options:
- Create a VPC only.
- Create a VPC along with subnets and associated resources using the “VPC and more” option.
- An optional name (e.g., “prod”).
- A CIDR block (for example, 192.168.0.0/16, which spans from 192.168.0.0 to 192.168.255.255).
- IPv6 configuration as “No.”
- Any desired tags.
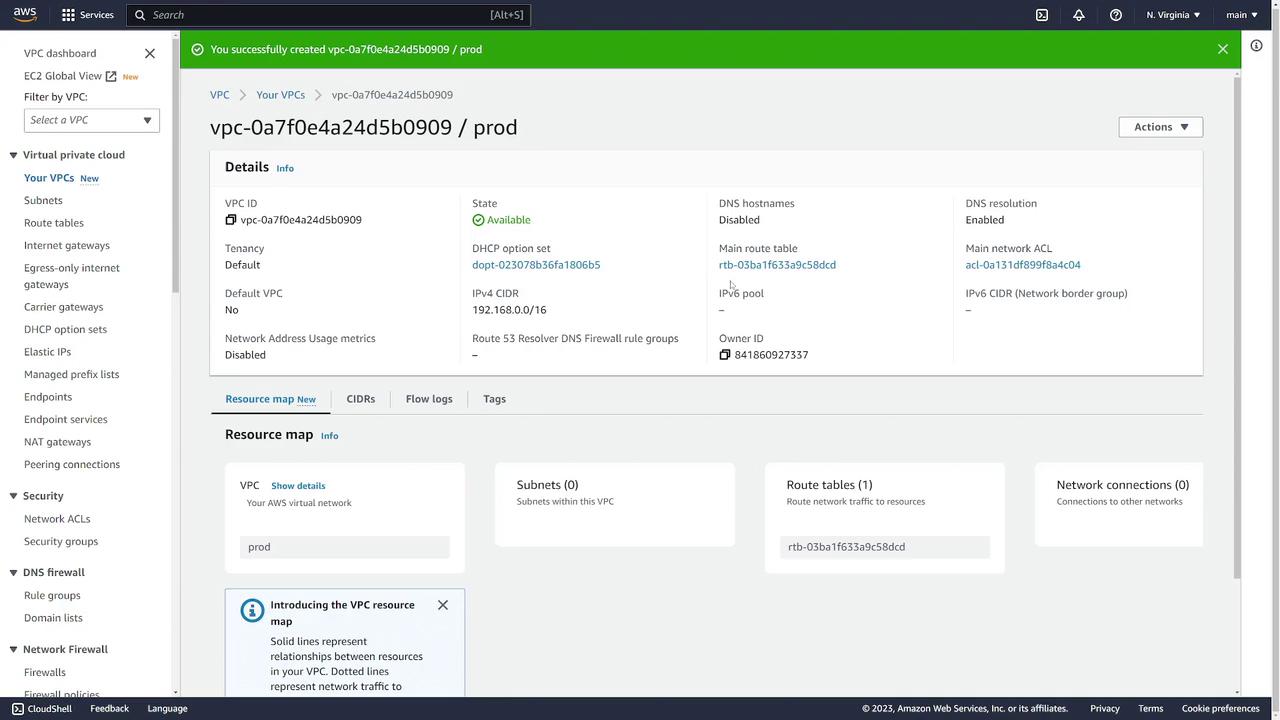
At this stage, only the VPC is created. To host resources like servers, you must also create subnets within your VPC.
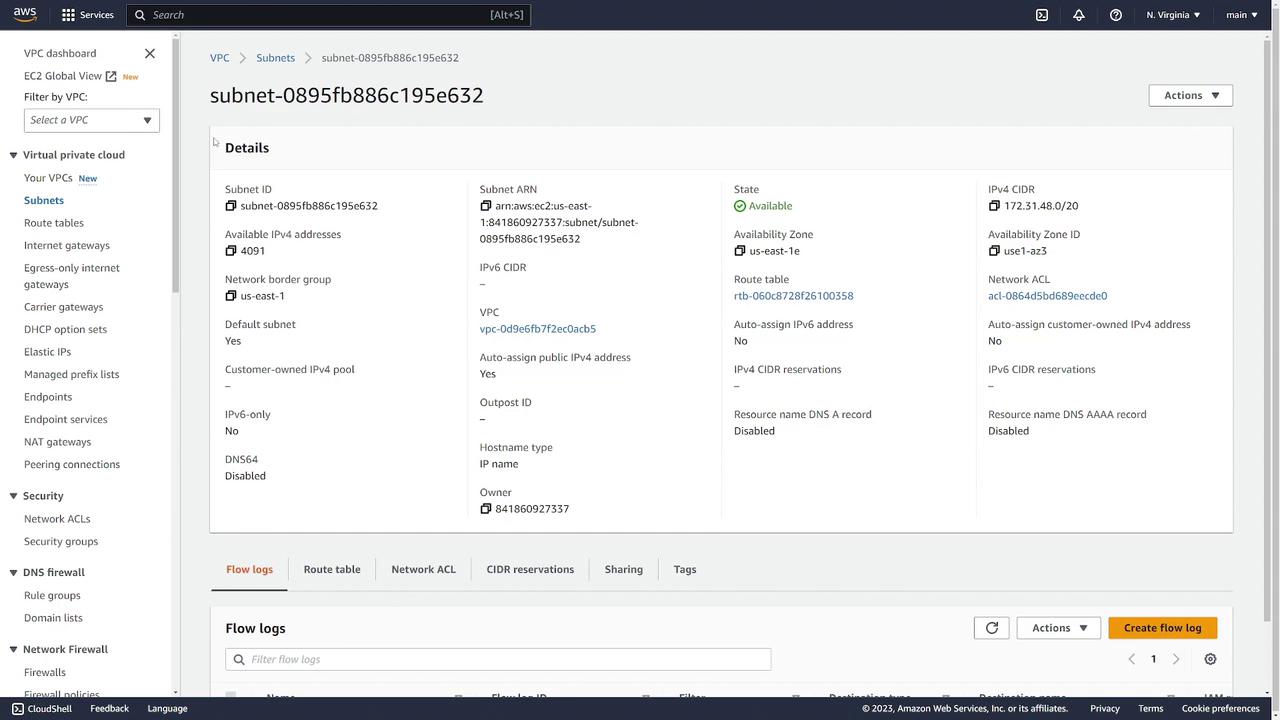
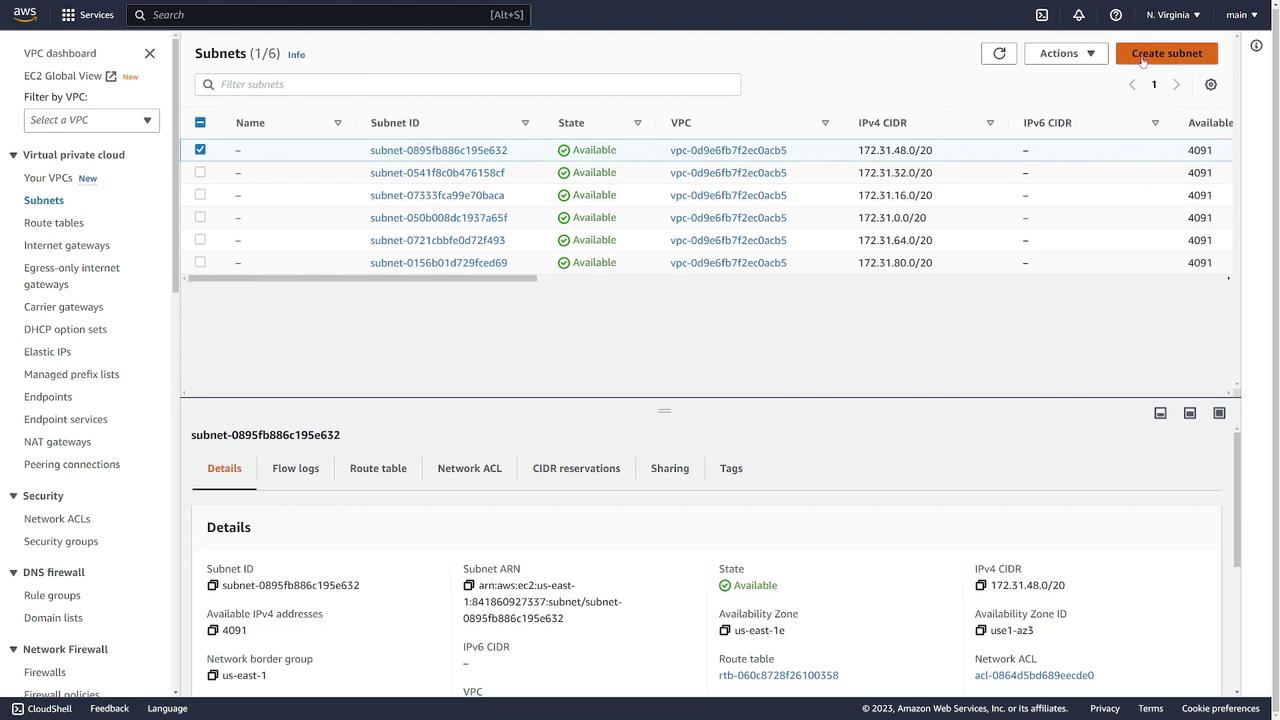
Creating a Subnet
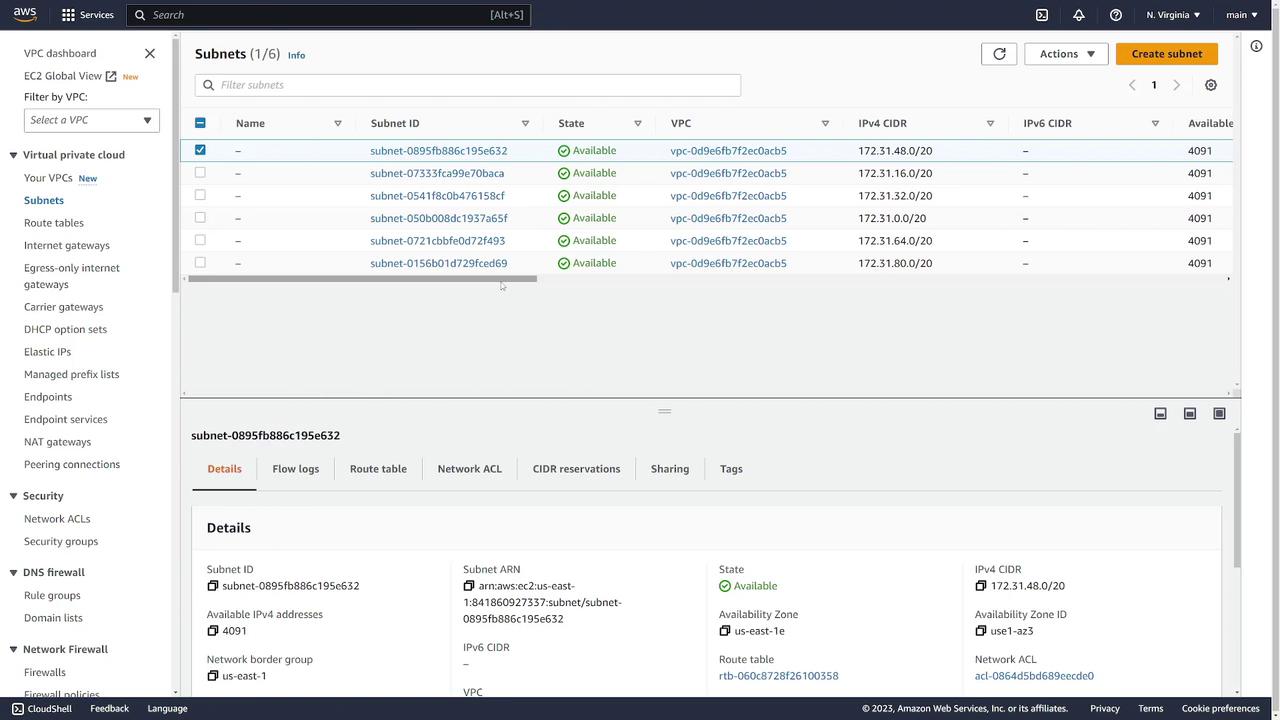
To add a subnet to your “prod” VPC:- Navigate to the Subnets section and click Create Subnet.
- In the creation form:
- Select the VPC “prod”.
- Provide a subnet name (e.g., “subnet one”).
- Choose an availability zone (e.g., US East 1A).
- Specify a CIDR block that falls within your VPC’s range. For example, use 192.168.1.0/24 if your VPC CIDR is 192.168.0.0/16 (using an out-of-range block like 10.0.0.0/24 would trigger an error).
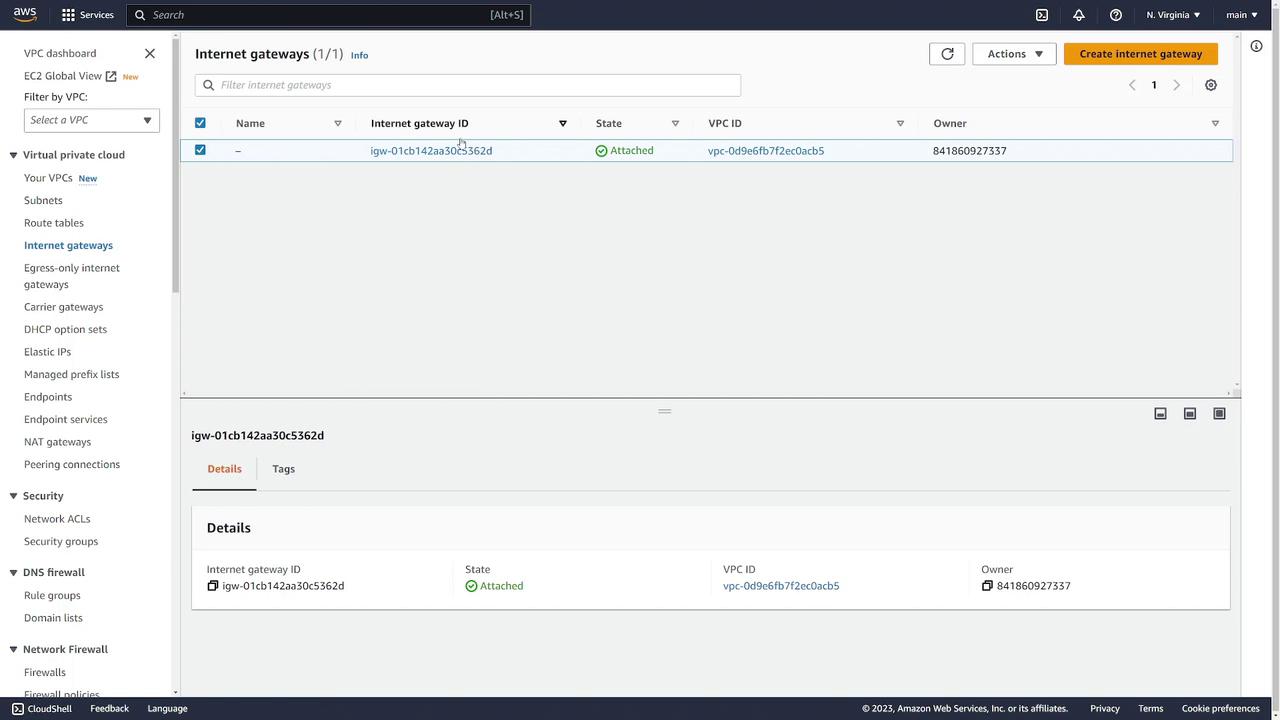
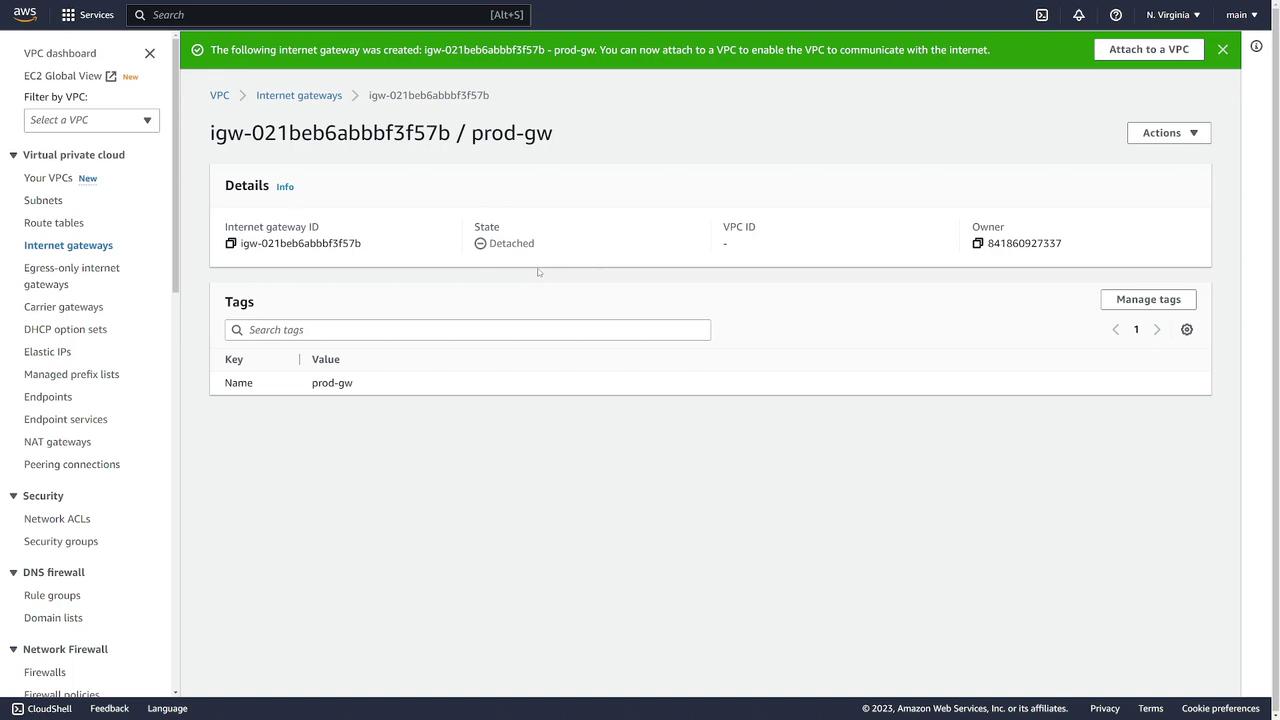
Configuring an Internet Gateway and Route Table
To enable internet connectivity for your custom VPC:- Create an Internet Gateway:
- Navigate to Internet Gateways and click Create Internet Gateway.
- Assign a name (e.g., “prod-gateway”) and create the gateway.
- Initially, it will be detached. To attach it to the “prod” VPC, click Actions and choose Attach to VPC, then select the appropriate VPC.

-
Update the Route Table:
To ensure full internet connectivity, add a default route in the route table with:
- Destination: 0.0.0.0/0
- Target: Your “prod-gateway”
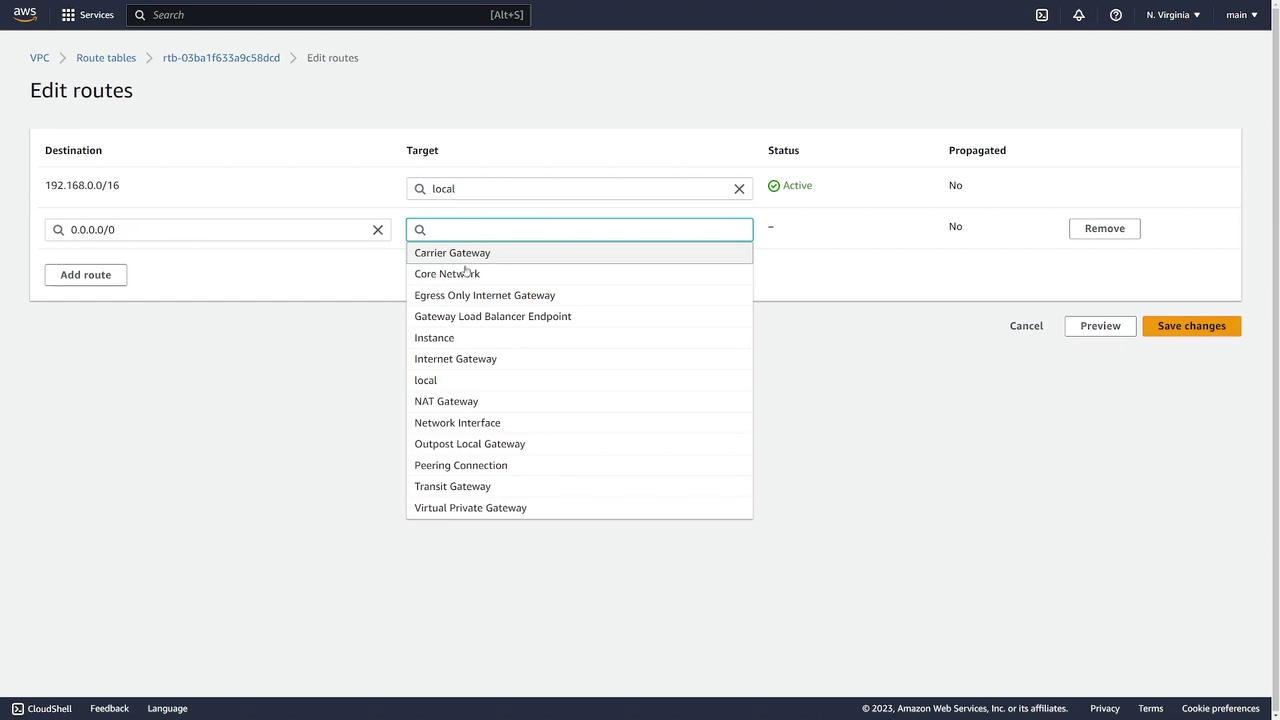
Ensure that the subnet’s route table is updated correctly so external traffic can effectively reach the internet. Failure to do so will leave your instances isolated.
Managing Security Settings
Security is a critical aspect of your network configuration. Here are two primary security components:Security Groups
Security groups control inbound and outbound traffic at the instance level. To create a security group for a web server (e.g., one listening on port 443):- Navigate to Security Groups and click Create Security Group.
- Name the group (e.g., “demo security group”) and assign it to the “prod” VPC.
- Add inbound rules:
- Either use the HTTPS preset or manually create a TCP rule on port 443.
- Set the source to “Anywhere” (0.0.0.0/0) or restrict access based on your requirements.
- Outbound traffic is automatically allowed for established connections because security groups are stateful.
- Click Create Security Group to save your configuration.
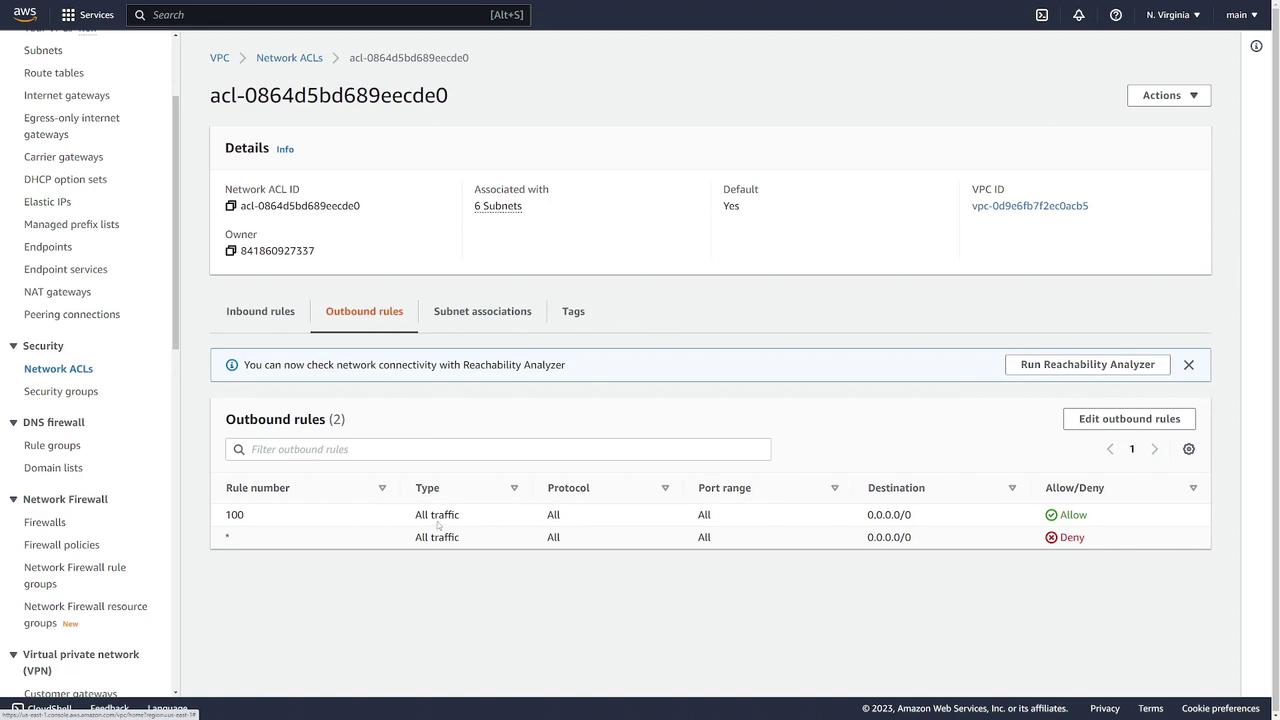
Network ACLs
Network ACLs act as an additional layer of security at the subnet level. To create a network ACL:- Go to Network ACLs and click Create Network ACL.
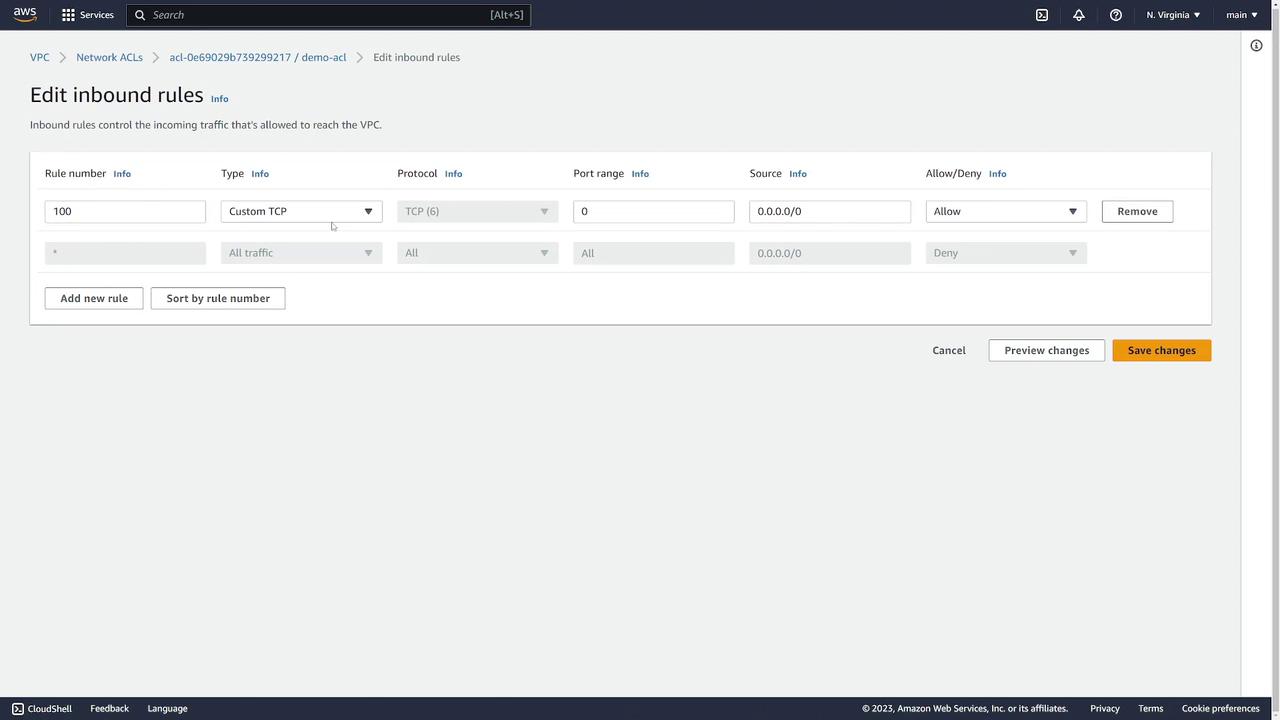
- Name it (e.g., “demo-acl”) and assign it to the “prod” VPC.
- Add intranet and outbound rules. For example, to allow SSH:
- Add an inbound rule with a specific rule number.
- Specify the protocol, port range (22 for SSH), and source IP range.
- Save your changes.
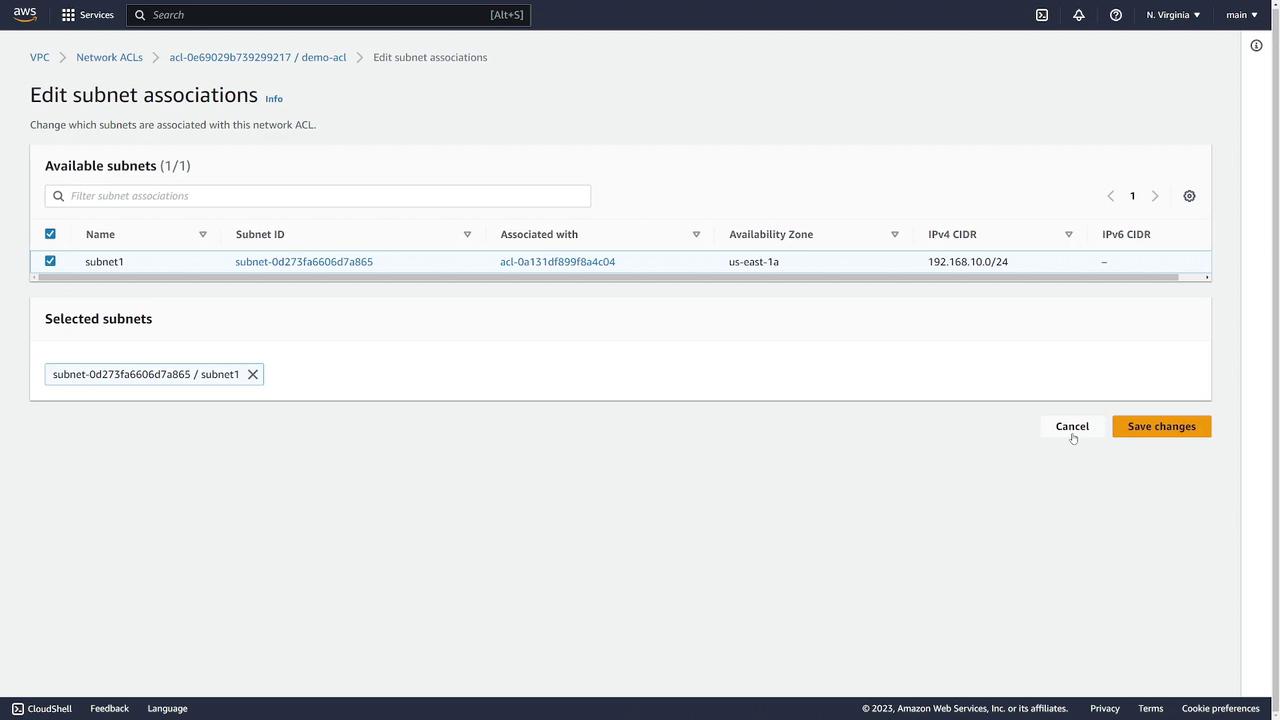
- Modify subnet associations by clicking Edit subnet associations and selecting the appropriate subnets.
Summary
To build and secure your AWS network environment effectively, follow these steps:- Create your VPC.
- Set up subnets within the VPC.
- Configure route tables with proper routes for internet access via an internet gateway.
- Manage security through well-defined security groups and network ACL rules.