RegisterTaking an AWS Exam for the 1st time what to know Demo
This article provides a step-by-step guide for first-time AWS exam registration, covering navigation, exam selection, scheduling, and policies.
Hello, Cloud Practitioners! I’m Michael Forrester, and in this lesson I’ll guide you through the AWS exam registration process. Whether you’re a first-time exam taker or transitioning from AWS exam CLF-C01 to CLF-C02, this step-by-step demo covers everything you need to know.
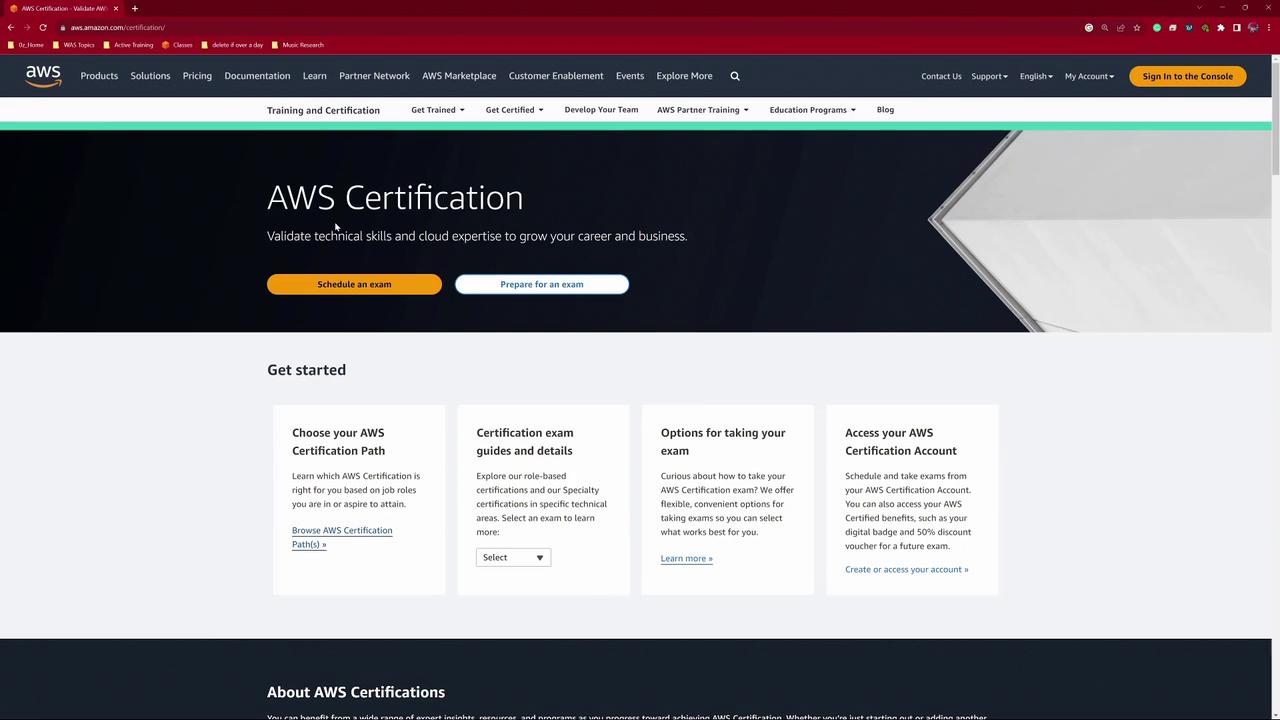
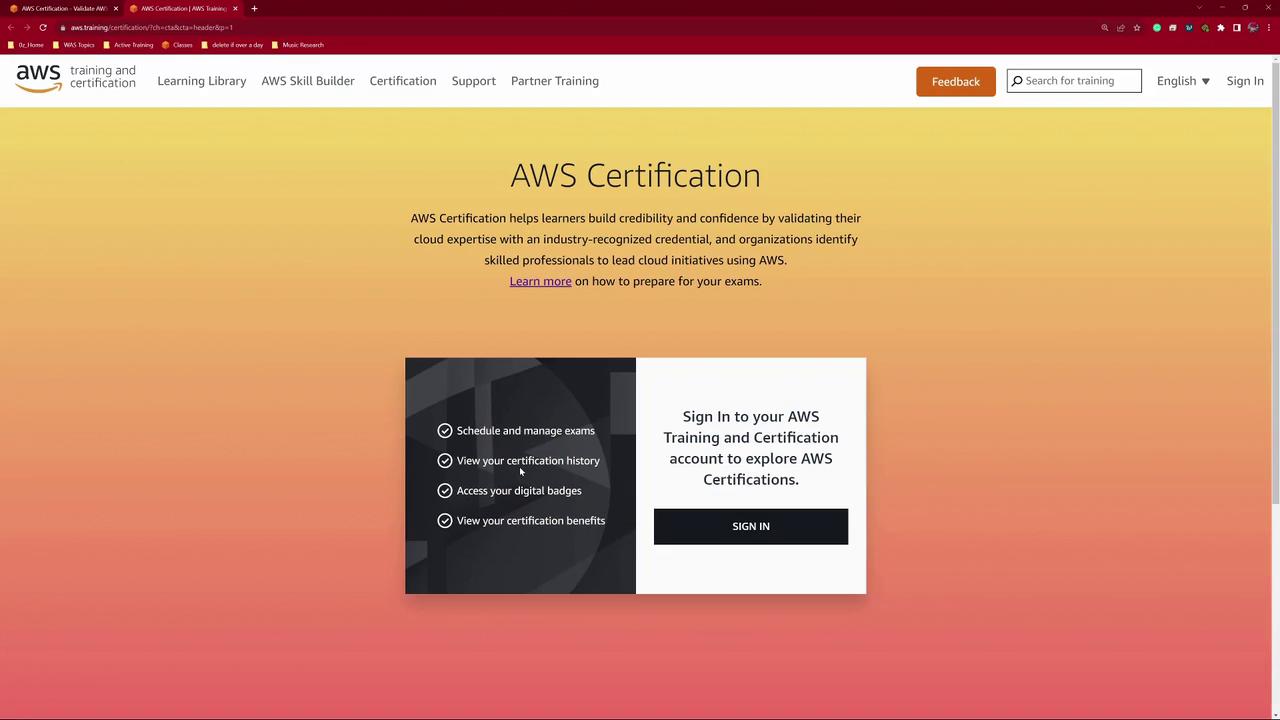
Begin by visiting the AWS Certification homepage. In your browser, search for “AWS certifications” and click on the prominent Schedule an Exam button from the AWS certification list.
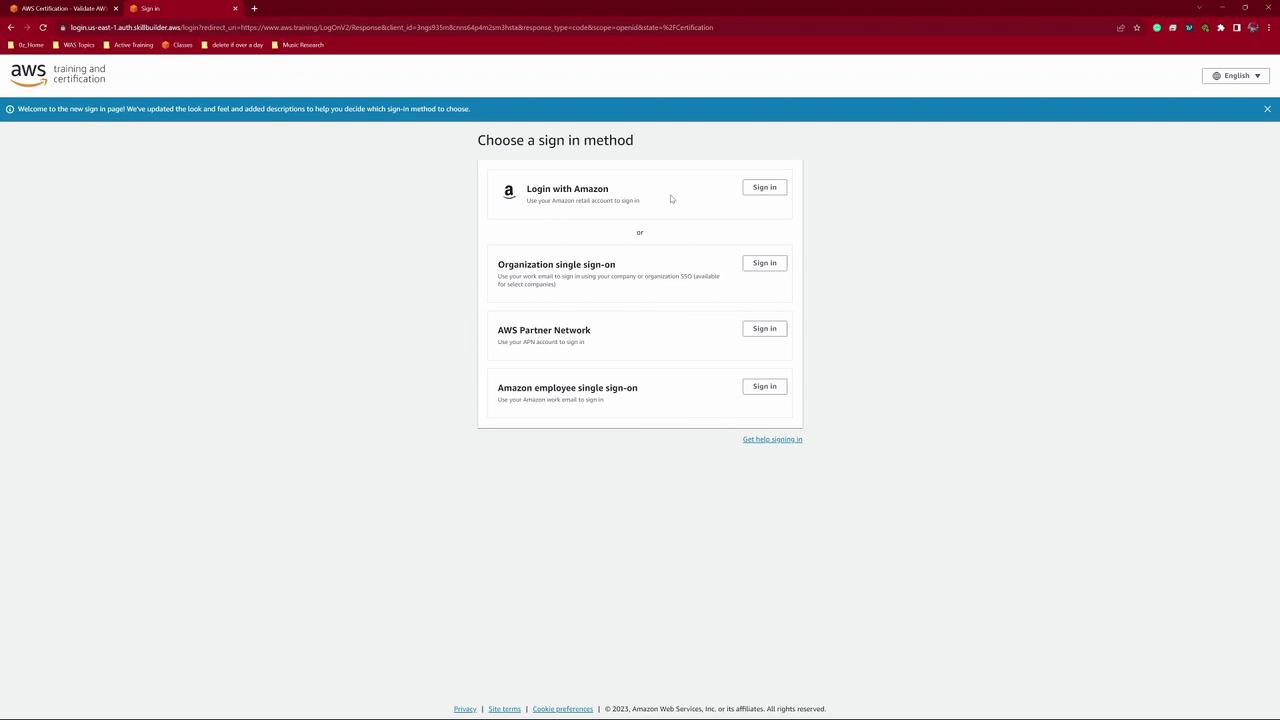
After clicking the button, you’ll be redirected to a sign-in page.
On the sign-in page, choose your preferred login method. You can use your existing Amazon retail account or create a new one. For this demo, select the standard sign-in option.
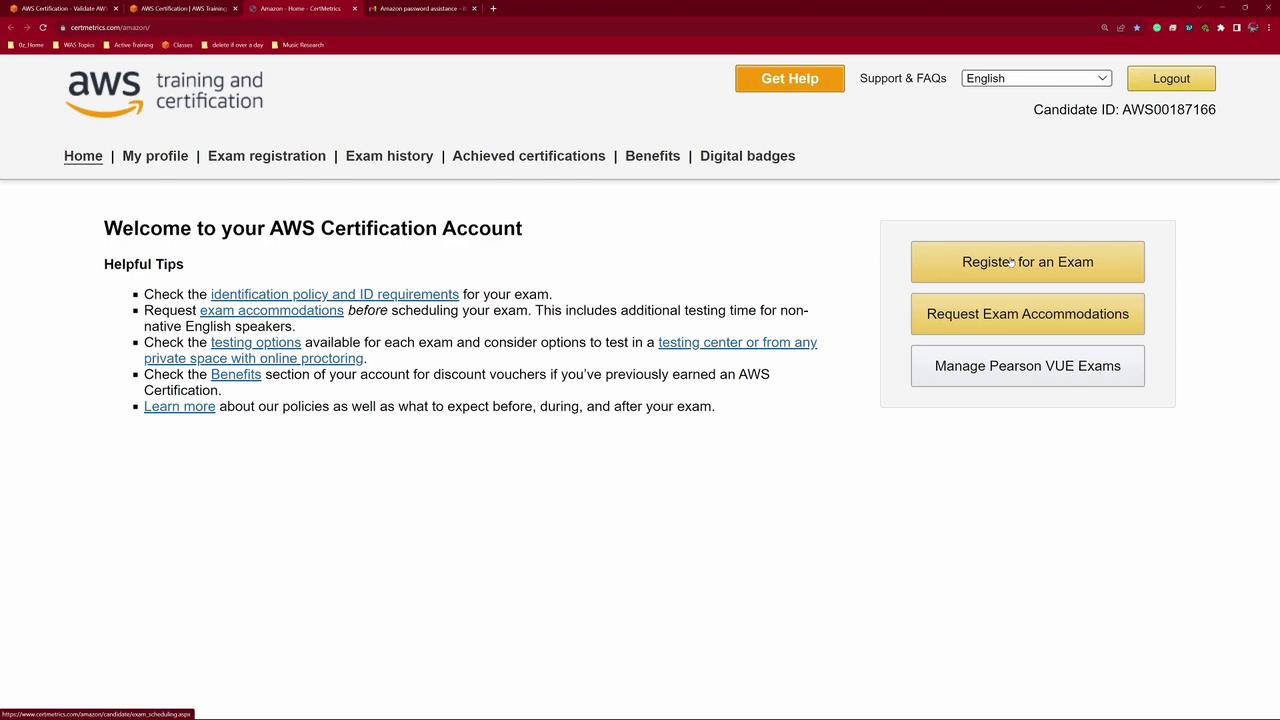
Once you sign in (using your password manager or manually entering your credentials), you’ll receive confirmation that you are logged in. At this point, click Go to Your Account to access your personalized CertMetrics page.
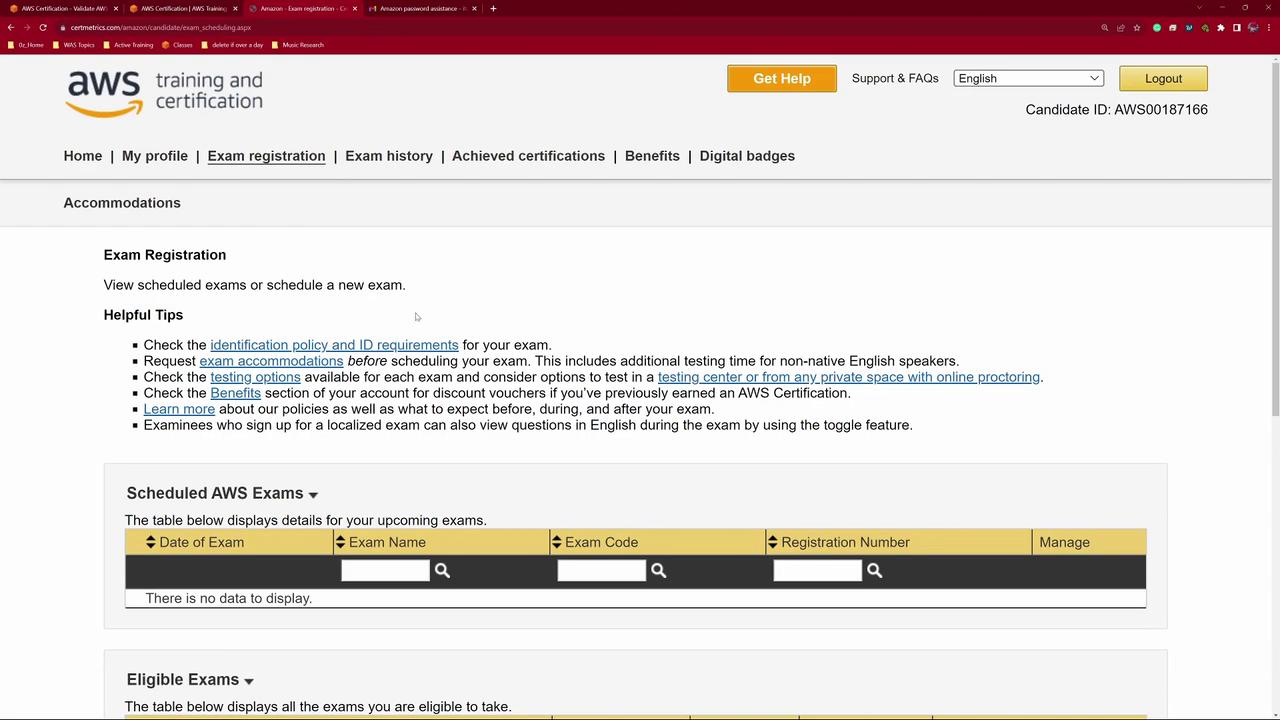
On your account page, you can view your exam history, certifications, benefits, and digital badges. Focus on the Register for an Exam option to begin registration.
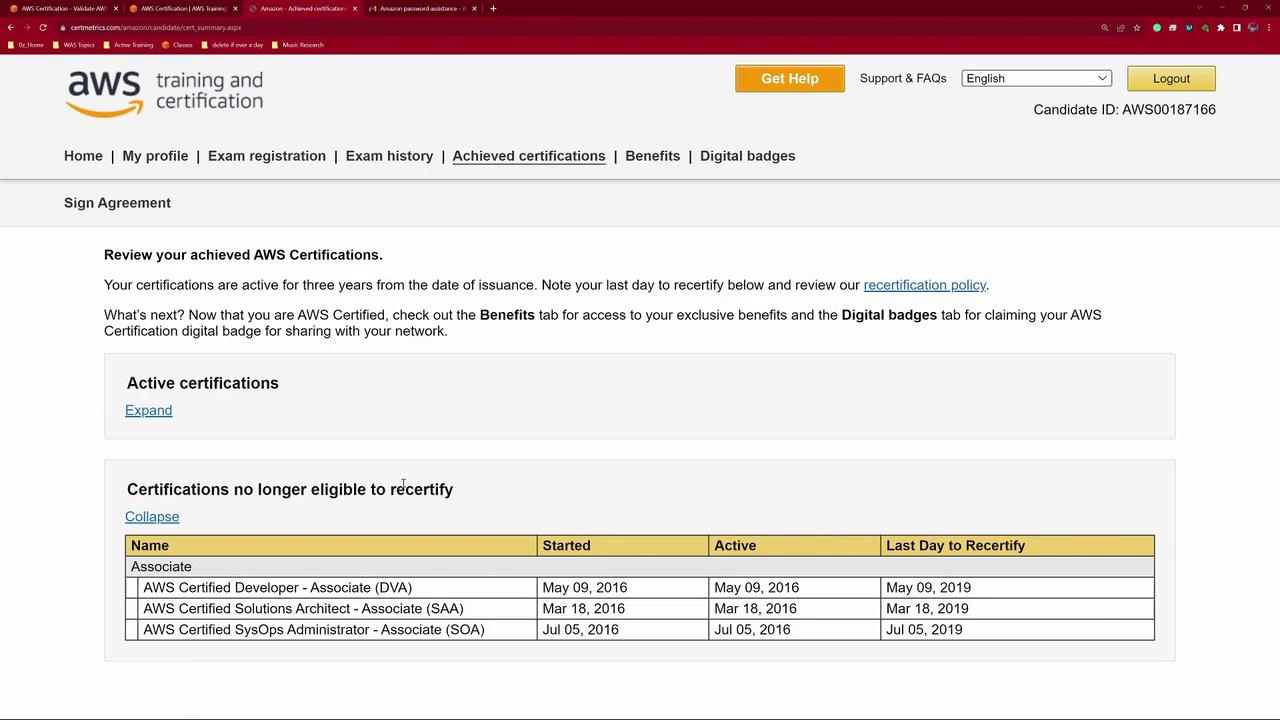
If you already have active certifications, they will be displayed on the page.
Click the Exam Registration option to explore available exams. Make sure to select CLF-C02 (current as of September 19th) unless you are preparing for another version.
You’ll see available exam slots. Since this demo focuses on CLF-C02, choose that exam and click Schedule with Pearson VUE to proceed. This action takes you from the CertMetrics page to the Pearson VUE portal.
Choosing Between Online and Testing Center Options
On the Pearson VUE page, you have the choice to take the exam at a testing center or online. Although testing centers provide an isolated testing environment, many candidates prefer the convenience of the online option.
Before choosing the online exam, ensure:
Your system passes a system test.
You’re not using a work computer with restrictions.
Your exam space is free of personal electronics (e.g., watches and phones).
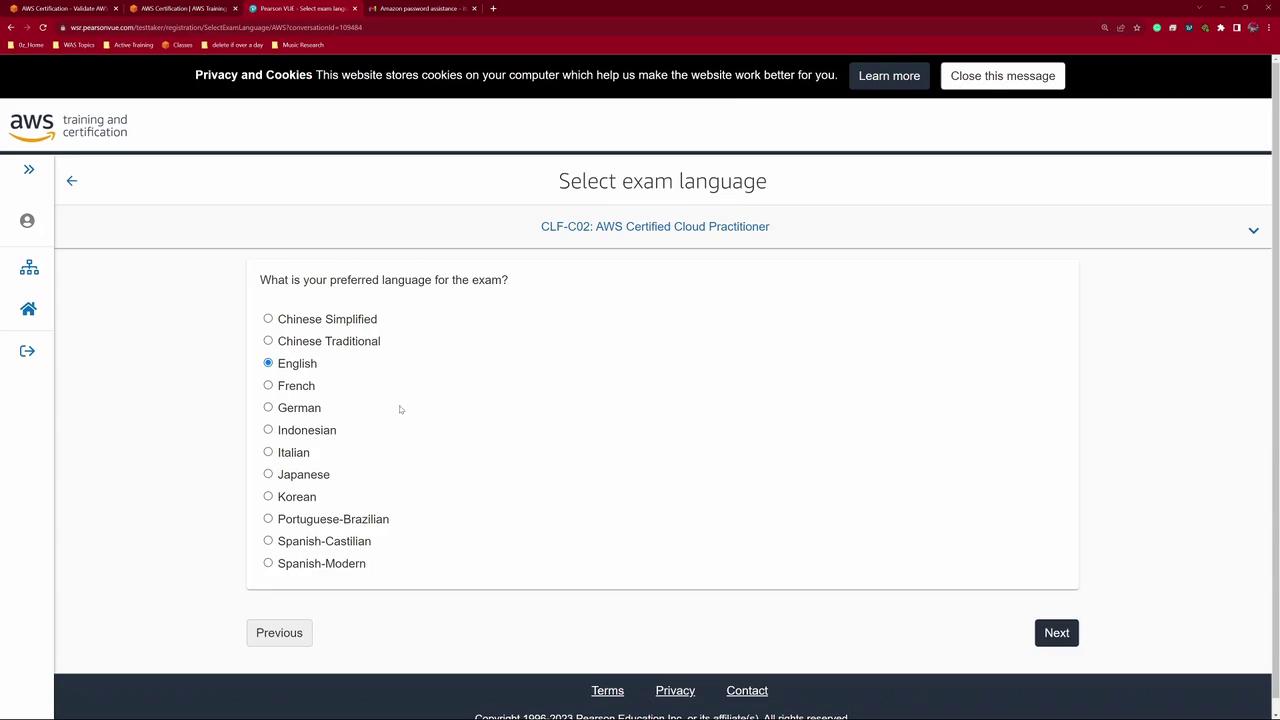
After reviewing the system requirements, click Next and select English as your exam language.
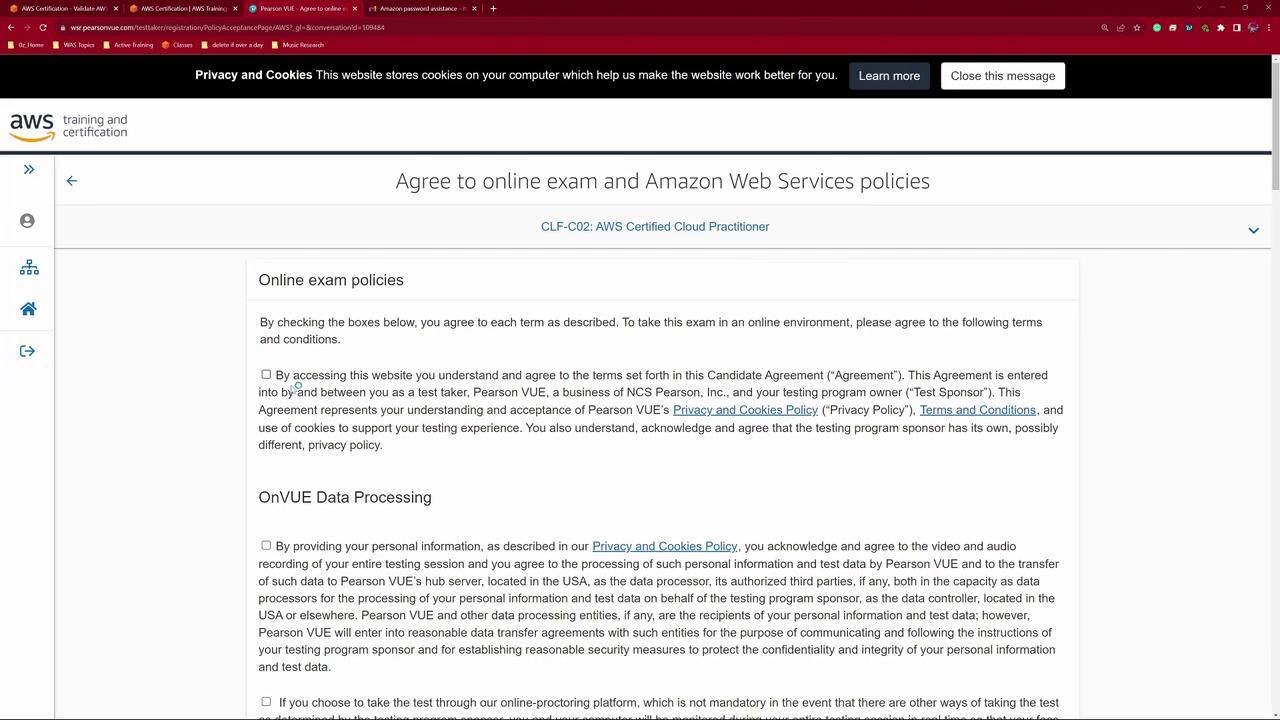
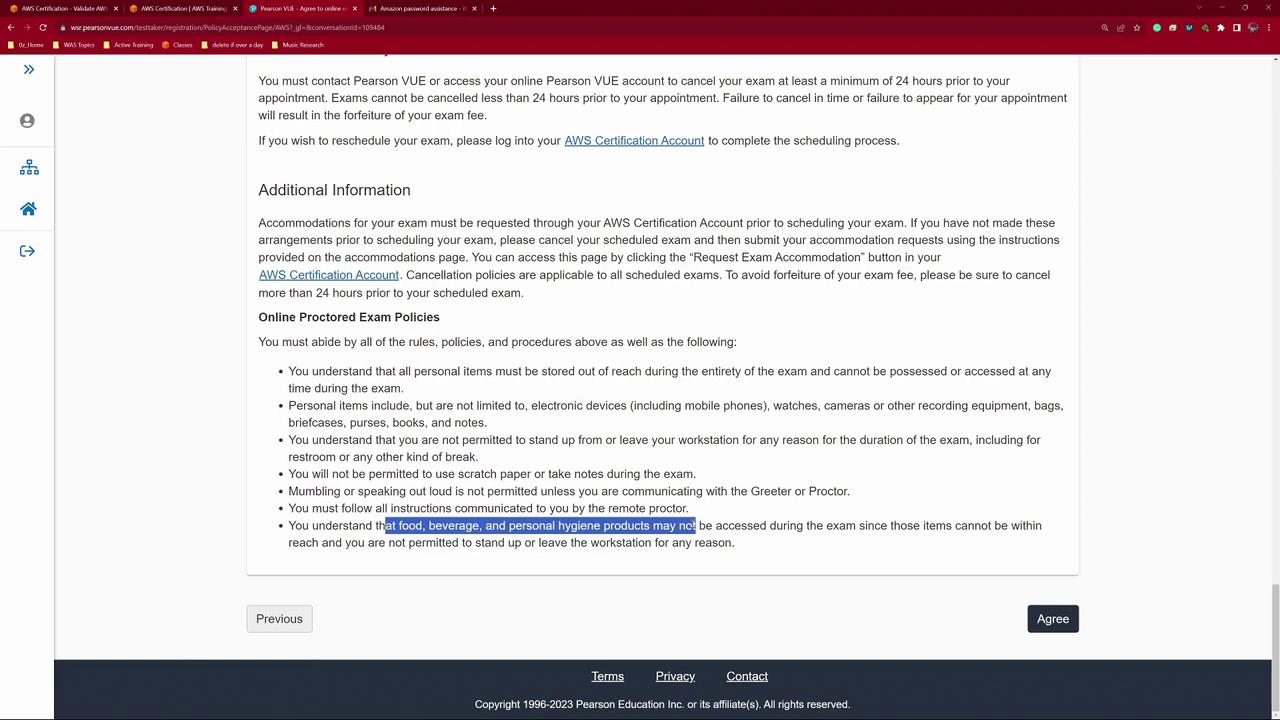
Before finalizing registration, review the online exam policies carefully. You must check the boxes confirming your agreement to data processing policies and acknowledge the limited licensing terms, which include biometric checks like facial recognition and room scanning.
Additional policies include details on third-party data processing and room monitoring:
Review the acceptable forms of photo identification, as outlined below:
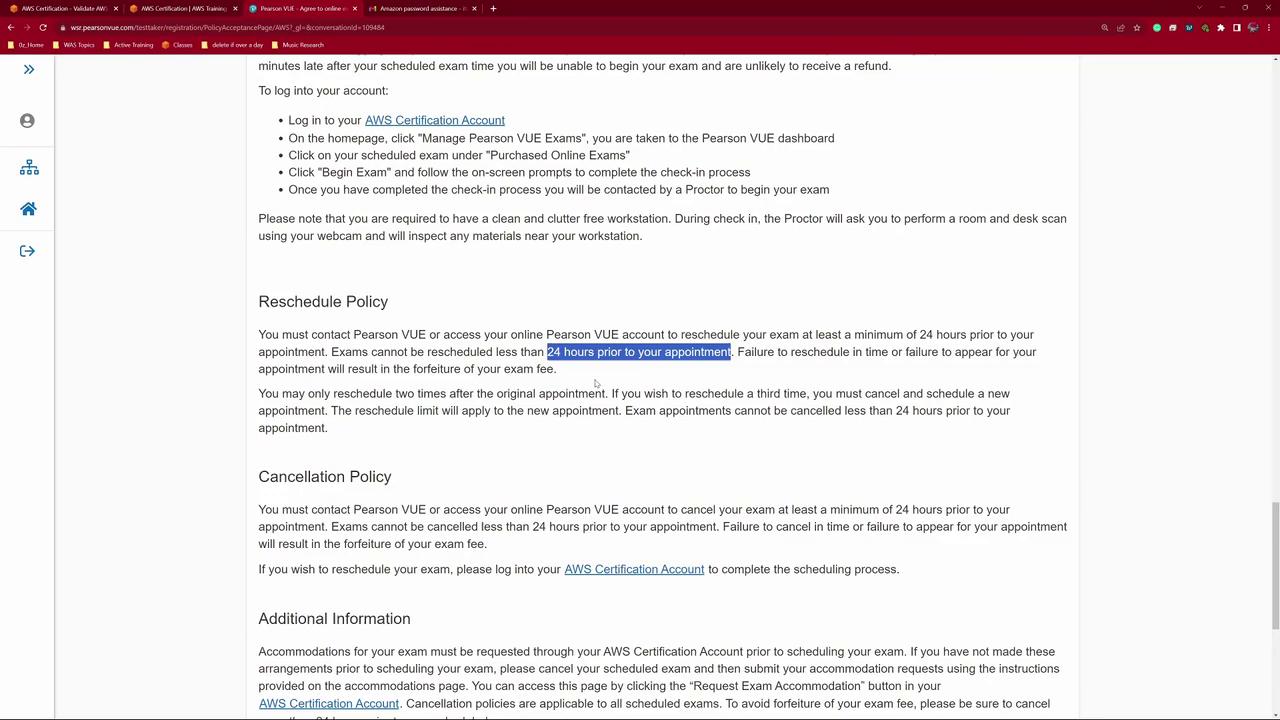
On exam day, be sure to follow the provided instructions. Note that the exam rescheduling policy only permits changes within 24 hours before the scheduled appointment.
Other important exam rules include restrictions on personal items, electronics, movement, and communication during the exam.
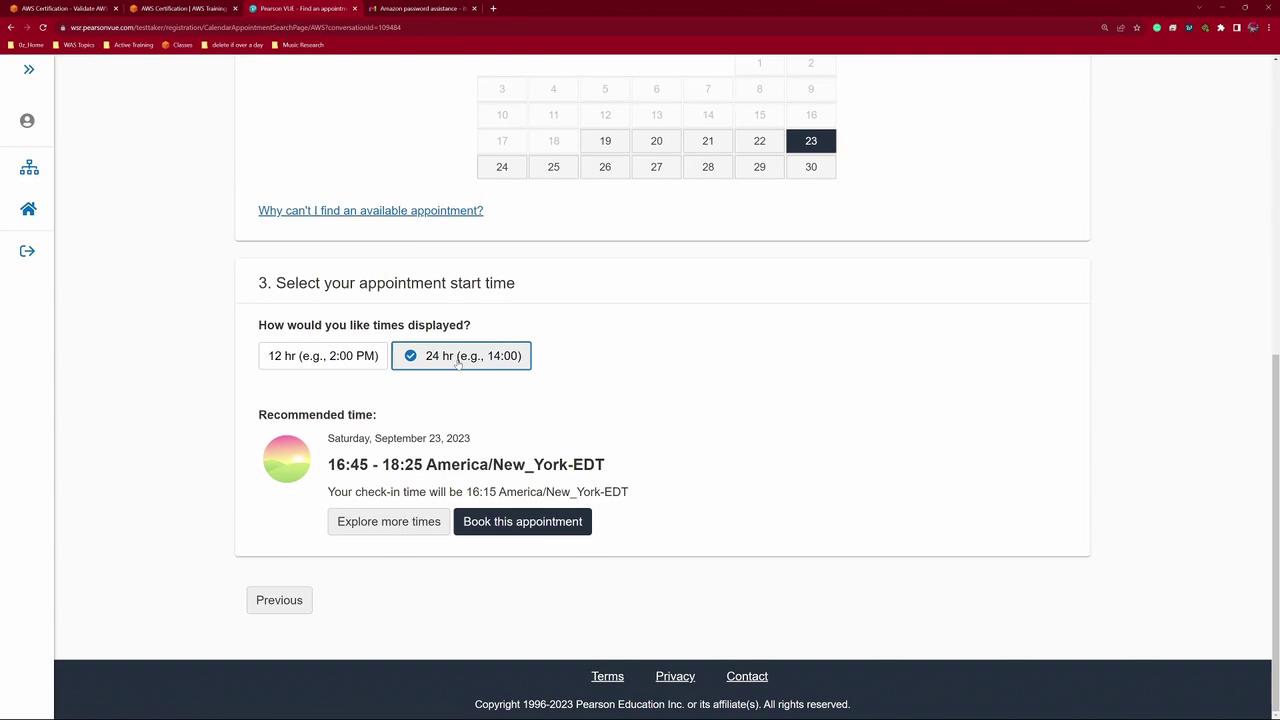
After agreeing to all terms, choose your proctor’s language. Available options typically include English, Japanese, Spanish, and Mandarin (Mainland Chinese). Confirm your time zone and select your preferred appointment date from the calendar; available dates appear in black, while non-available dates are grayed out.
For the demo, we will select a Saturday appointment. It is best to choose a time when you feel most alert—preferably between 9:00 and 10:00 AM.
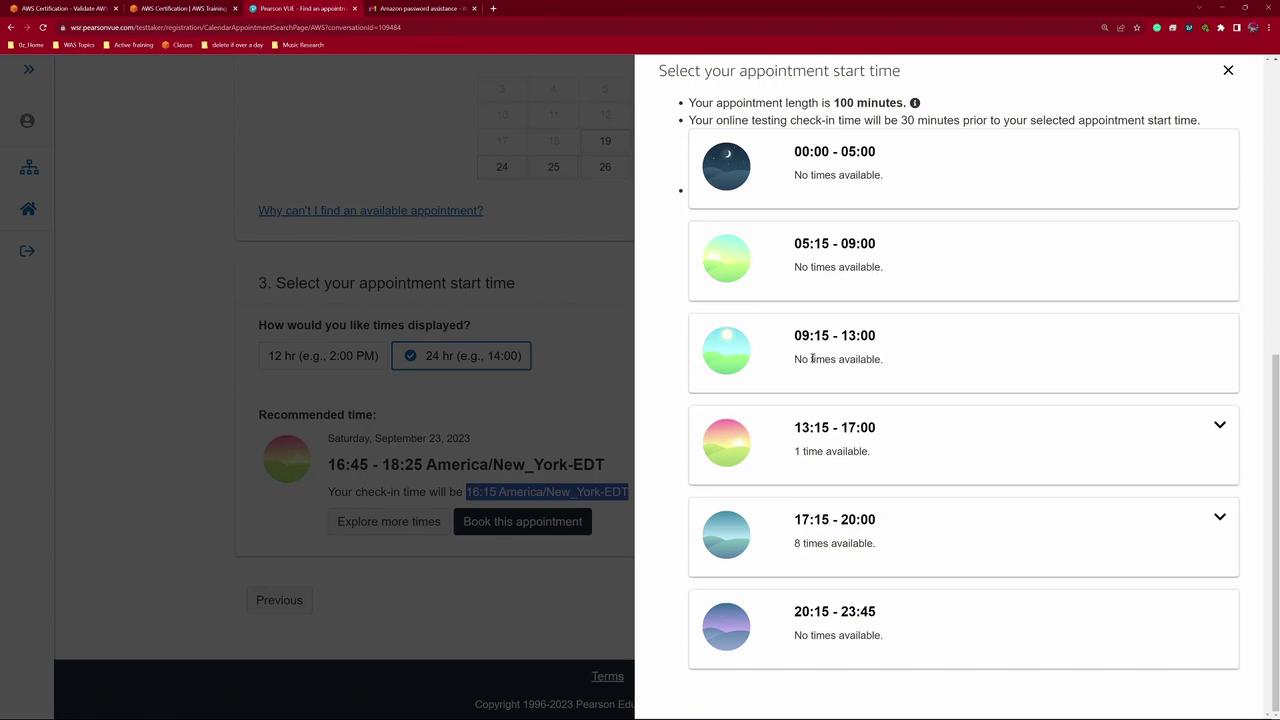
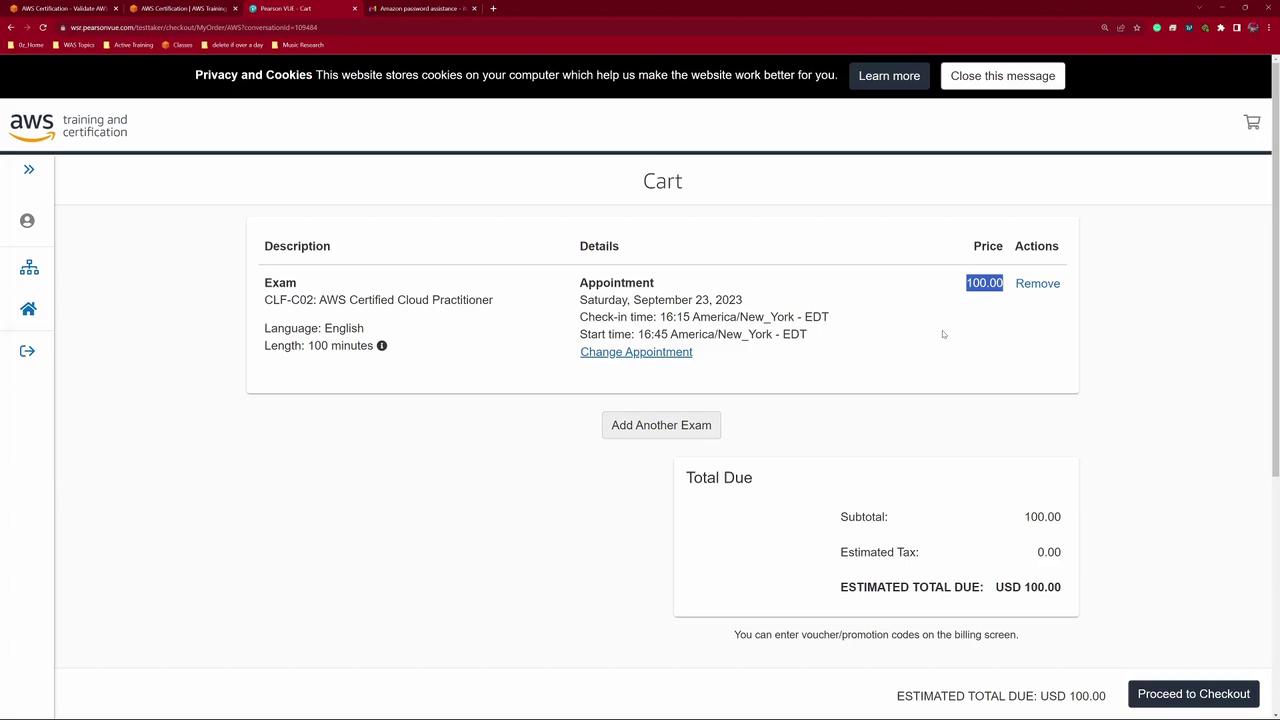
If the initial time suggestion (e.g., 4:15 PM in New York) doesn’t suit your schedule, explore other available options. In this demonstration, we selected a slot at 4:45 PM.
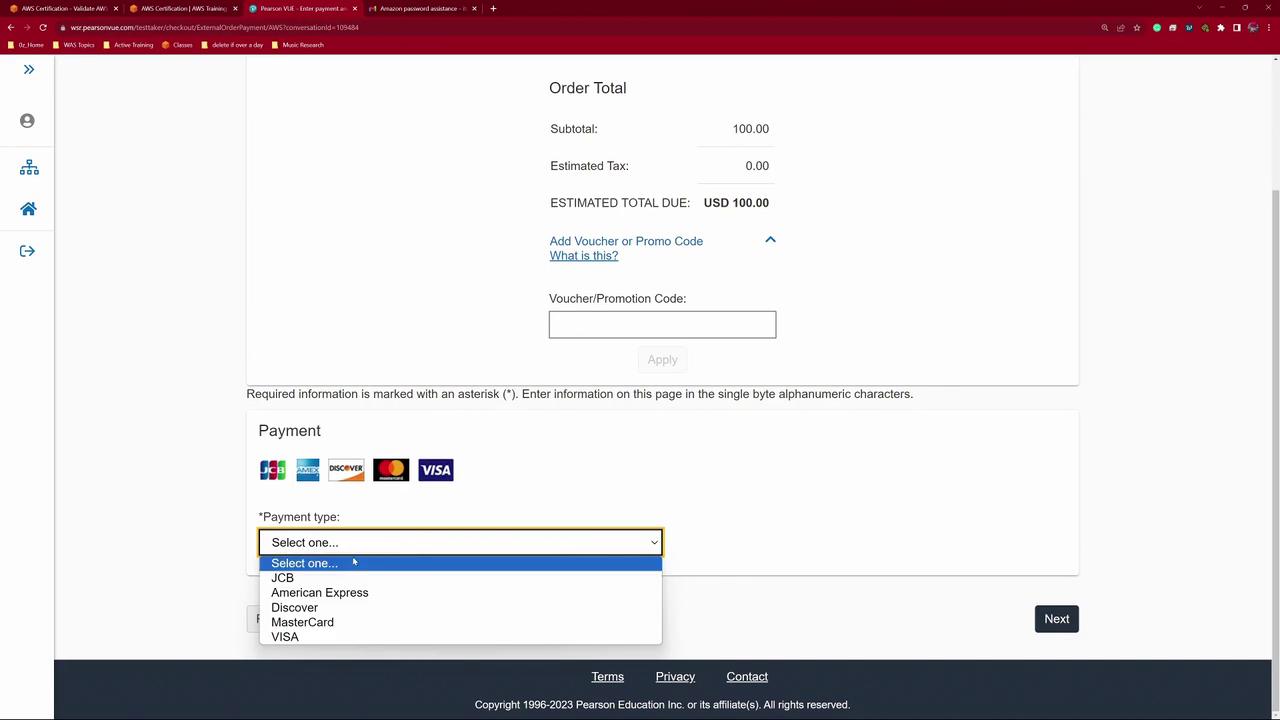
After choosing your preferred slot, click Book Appointment. The system locks the slot temporarily and displays the exam fee ($100 USD). If you have a promo or voucher code, enter it here; otherwise, provide your payment details using major credit or debit cards such as JCB, American Express, Discover, MasterCard, or Visa.
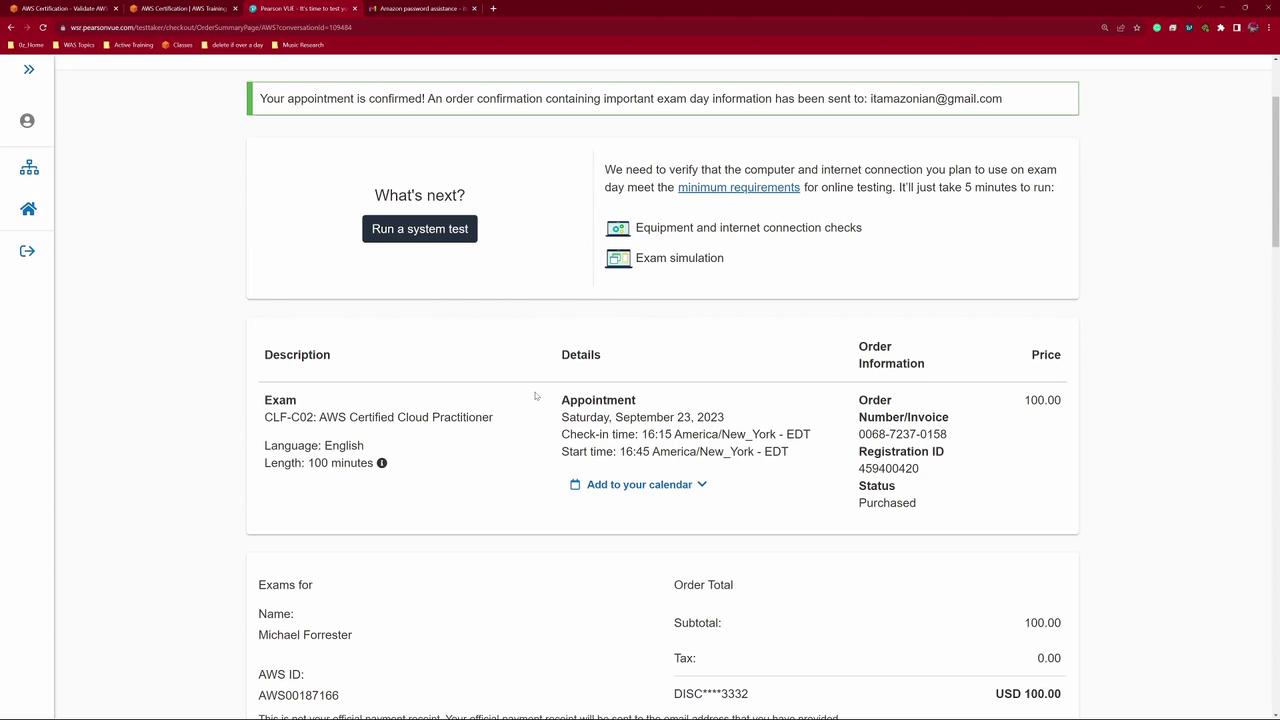
After confirming your details, you will be redirected to the Pearson VUE payment page. In this demo, I used auto-fill for convenience. Once all fields are complete and verified, click Pay. The following page offers a system test option, which is recommended to verify that your setup is ready for the exam.
After completing the registration, make sure to add the exam date to your calendar by clicking Add to Calendar. Pearson VUE will send email confirmations and reminders. Keep in mind that you have a 24-hour window to cancel or reschedule your appointment, and only two rescheduling attempts are allowed before cancellation and refund procedures apply.
Thank you for following this detailed AWS exam registration demo. Good luck on your exam, and I look forward to seeing you in the next lesson.
For additional guidance and to explore more AWS-related topics, check out these resources: